instrument panel TOYOTA PROACE VERSO EV 2021 Owner's Guide
[x] Cancel search | Manufacturer: TOYOTA, Model Year: 2021, Model line: PROACE VERSO EV, Model: TOYOTA PROACE VERSO EV 2021Pages: 360, PDF Size: 68.91 MB
Page 161 of 360
161
Driving
6
NOTIC E
Position N can be used in traffic jams or in a car wash tunnel.
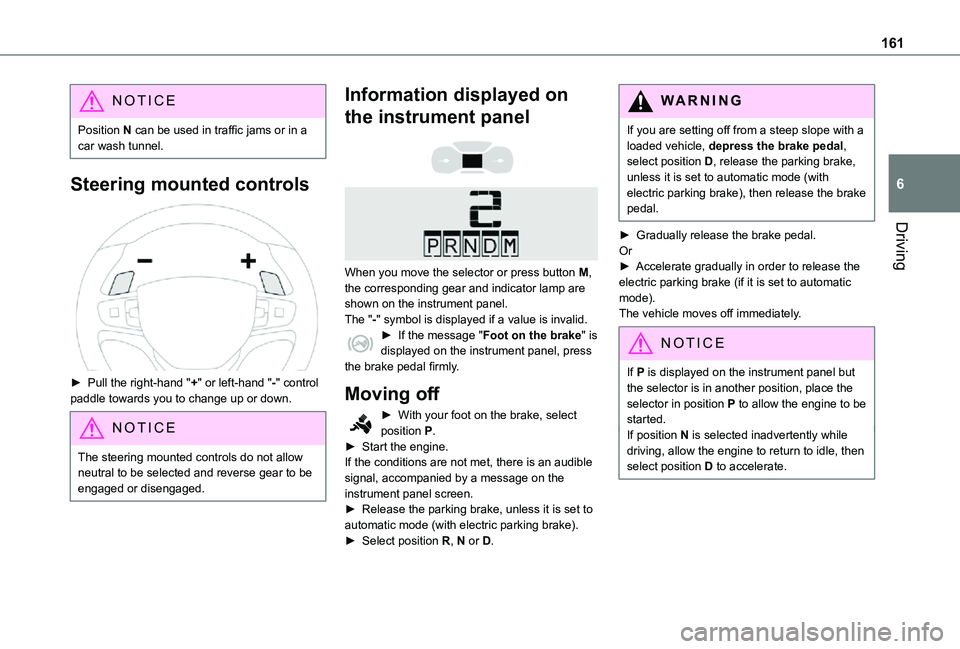
Steering mounted controls
► Pull the right-hand "+" or left-hand "-" control paddle towards you to change up or down.
NOTIC E
The steering mounted controls do not allow neutral to be selected and reverse gear to be engaged or disengaged.
Information displayed on
the instrument panel
When you move the selector or press button M, the corresponding gear and indicator lamp are shown on the instrument panel.The "-" symbol is displayed if a value is invalid.► If the message "Foot on the brake" is displayed on the instrument panel, press the brake pedal firmly.
Moving off
► With your foot on the brake, select position P.► Start the engine.If the conditions are not met, there is an audible signal, accompanied by a message on the instrument panel screen.► Release the parking brake, unless it is set to automatic mode (with electric parking brake).► Select position R, N or D.
WARNI NG
If you are setting off from a steep slope with a loaded vehicle, depress the brake pedal, select position D, release the parking brake, unless it is set to automatic mode (with electric parking brake), then release the brake pedal.
► Gradually release the brake pedal.Or► Accelerate gradually in order to release the electric parking brake (if it is set to automatic mode).The vehicle moves off immediately.
NOTIC E
If P is displayed on the instrument panel but the selector is in another position, place the selector in position P to allow the engine to be started.If position N is selected inadvertently while driving, allow the engine to return to idle, then select position D to accelerate.
Page 162 of 360
162
WARNI NG
When the engine is running at idle with the brakes released, if position R, D or M is selected, the vehicle moves even without the accelerator being pressed.Never leave children inside the vehicle unsupervised.As a safety measure, never leave the vehicle without taking your key or remote control with you, even for a short time.When carrying out maintenance with the engine running, apply the parking brake and select position P.
WARNI NG
With an automatic gearbox, never try to start the engine by pushing the vehicle.
Automatic operation
► Select position D for automatic changing of the gears.The gearbox then operates in auto-adaptive mode, without any intervention on the part of the driver. It continuously selects the most suitable gear according to the driving style, the road profile and the load in the vehicle.For maximum acceleration without touching the selector, press the accelerator fully down (kick-down).
The gearbox changes down automatically or holds the gear selected until the maximum engine speed is reached.When braking, the gearbox changes down automatically to provide effective engine braking.If the accelerator pedal is sharply released, the gearbox will not shift to a higher gear for safety reasons.
WARNI NG
Never select position N while the vehicle is moving.Never select positions P or R unless the vehicle is completely stationary.
Temporary manual control
of gear changes
You can temporarily assume control of gear changing using the "+" et "-” steering-mounted controls. The gear change request will be executed if the engine speed permits. This function allows you to anticipate certain situations, such as overtaking another vehicle or approaching a bend in the road. After a few seconds with no inputs via the control paddles, the gearbox reverts to automatic operation.
Creeping (moving without
using the accelerator)
This function facilitates manoeuvring of the vehicle at low speed (when parking, in traffic jams, etc.).When the engine is at idle, with the parking brake released and gear position D, M or R selected, the vehicle begins to creep forward as soon as you take your foot off the brake pedal (even without pressing the accelerator).
WARNI NG
As a safety precaution, never leave the vehicle with the engine running and the doors closed.
Manual operation
► With the selector in position D, press button M to enable 6- or 8-speed sequential gear changing.The indicator lamp for the button comes on.► Operate the "+" or "-" steering mounted controls. M appears and the engaged gears are shown in succession on the instrument panel.► You can revert to automatic operation at any time by pressing button M again.The indicator lamp for the button goes off.
Page 163 of 360
163
Driving
6
NOTIC E
In manual mode, there is no need to release the accelerator pedal while changing gear.
NOTIC E
It is only possible to change from one gear to another if the vehicle speed and engine
speed permit.
NOTIC E
If the engine speed is too low or too high, the selected gear flashes for a few seconds, then the gear actually engaged is shown.When the vehicle is stationary or moving very slowly, the gearbox automatically selects gear M1.
NOTIC E
To preserve the brakes while descending a steep incline, use engine braking to reduce your speed (change down or select a lower gear).Keeping the brake pedal pressed continuously for long periods can overheat the brakes, with the risk of damaging the braking system or making it inoperative.Only use the brakes when necessary, to slow or stop the vehicle.
NOTIC E
Depending on the road configuration (e.g. mountainous road), manual operation may be preferable.Automatic operation may not always be suitable, and does not enable engine braking.
Invalid value during manual
operation
This symbol is displayed if a gear is not engaged correctly (gear selector between two positions).► Place the selector "correctly" at a position.
Switching off the vehicle
Before switching off the engine, select position P then apply the parking brake to immobilise
the vehicle, unless this is set to automatic mode (with electric parking brake).Check that mode P has been engaged and that the electric parking brake has been applied automatically; if not, apply it manually.The corresponding indicator lamps in the selector and the electric parking brake control lever must be on, as well as those on the instrument panel.
NOTIC E
A point of resistance may be noticed when moving to position P.If the selector is not in position P, when the driver's door is opened or approximately 45 seconds after the ignition is switched off, an audible signal sounds and a message appears.► Return the drive selector to position P; the audible signal stops and the message disappears.
WARNI NG
When positioned on a steep slope with a loaded vehicle, depress the brake pedal, select position P, apply the parking brake, unless it is set to automatic mode (with
electric parking brake), then release the brake pedal.
Page 164 of 360
164
WARNI NG
In all circumstances, ensure that the selector is in position P before leaving your vehicle.
Malfunction
When the ignition is on, a message appears on the instrument panel to indicate a fault with the gearbox.In this case, the gearbox goes into back-up mode and is locked in 3rd gear. You may feel a significant jolt (without risk to the gearbox) when changing from P to R and from N to R.Do not exceed 62 mph (100 km/h), local speed restrictions permitting.Have it checked by any authorized Toyota retailer or Toyota authorized repairer, or any reliable repairer.
WARNI NG
There is a risk of damaging the gearbox:– If the accelerator and brake pedals are depressed simultaneously.– In the event of a battery failure, forcing the selector from position P to another position.
WARNI NG
If your vehicle has an automatic gearbox, do not try to start the engine by pushing the vehicle.
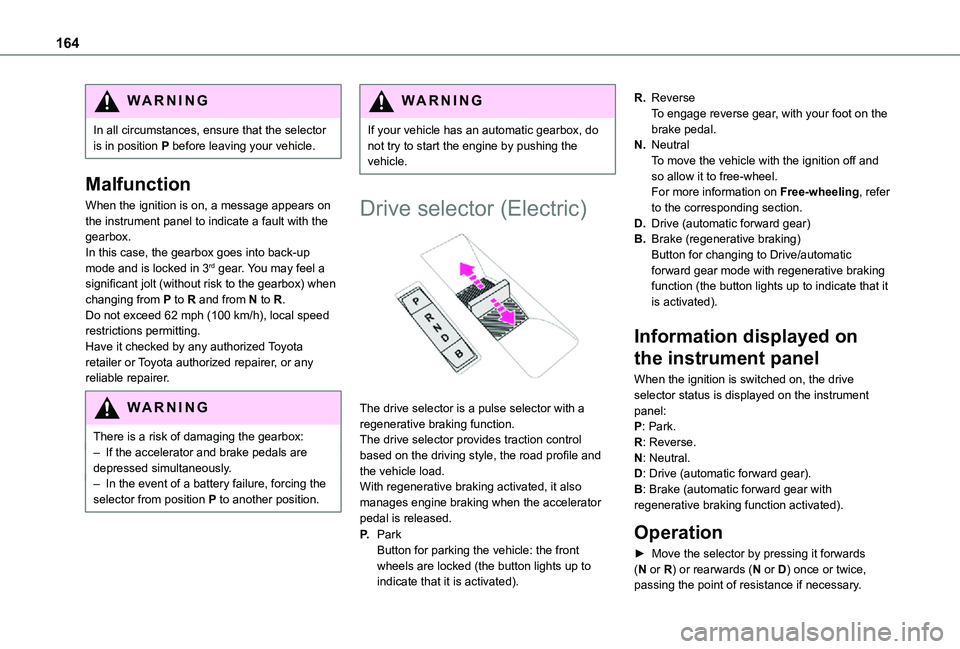
Drive selector (Electric)
The drive selector is a pulse selector with a regenerative braking function.The drive selector provides traction control based on the driving style, the road profile and the vehicle load.With regenerative braking activated, it also manages engine braking when the accelerator pedal is released.
P.ParkButton for parking the vehicle: the front wheels are locked (the button lights up to indicate that it is activated).
R.ReverseTo engage reverse gear, with your foot on the brake pedal.
N.NeutralTo move the vehicle with the ignition off and so allow it to free-wheel.For more information on Free-wheeling, refer to the corresponding section.
D.Drive (automatic forward gear)
B.Brake (regenerative braking)Button for changing to Drive/automatic forward gear mode with regenerative braking function (the button lights up to indicate that it is activated).
Information displayed on
the instrument panel
When the ignition is switched on, the drive selector status is displayed on the instrument panel:P: Park.R: Reverse.
N: Neutral.D: Drive (automatic forward gear).B: Brake (automatic forward gear with regenerative braking function activated).
Operation
► Move the selector by pressing it forwards (N or R) or rearwards (N or D) once or twice, passing the point of resistance if necessary.
Page 165 of 360
165
Driving
6
For example, to change from P to R (with your foot on the brake pedal), either push forwards twice without passing the point of resistance or push just once, passing the point of resistance.
Regenerative braking
With the Brake function and when decelerating
The Brake function emulates engine braking, slowing the vehicle with no need to depress the brake pedal. The vehicle slows more quickly when the driver releases the accelerator pedal.The energy recovered when the accelerator pedal is released is then used to partially recharge the traction battery, thereby increasing the vehicle's driving range.
WARNI NG
The resulting deceleration of the vehicle does not cause the brake lamps to come on.
► From mode D, press button B to activate/deactivate the function (the button lights up when the function is activated).D on the instrument panel is replaced with B.The system status is saved when the ignition is switched off.
WARNI NG
In some situations (e.g. battery full, extreme temperatures), the amount of regenerative braking may be temporarily limited, resulting in less deceleration.The driver must remain alert to traffic conditions and must always be ready to use the brake pedal.
With the brake pedal
When the brake pedal is depressed, the intelligent braking system automatically recovers some of the energy and uses it to recharge the traction battery.This energy recovery also reduces use of the brake pads, thereby limiting their wear.
NOTIC E
The driver may experience a different sensation when depressing the brake pedal compared to a vehicle without regenerative braking.
Driving modes (Electric)
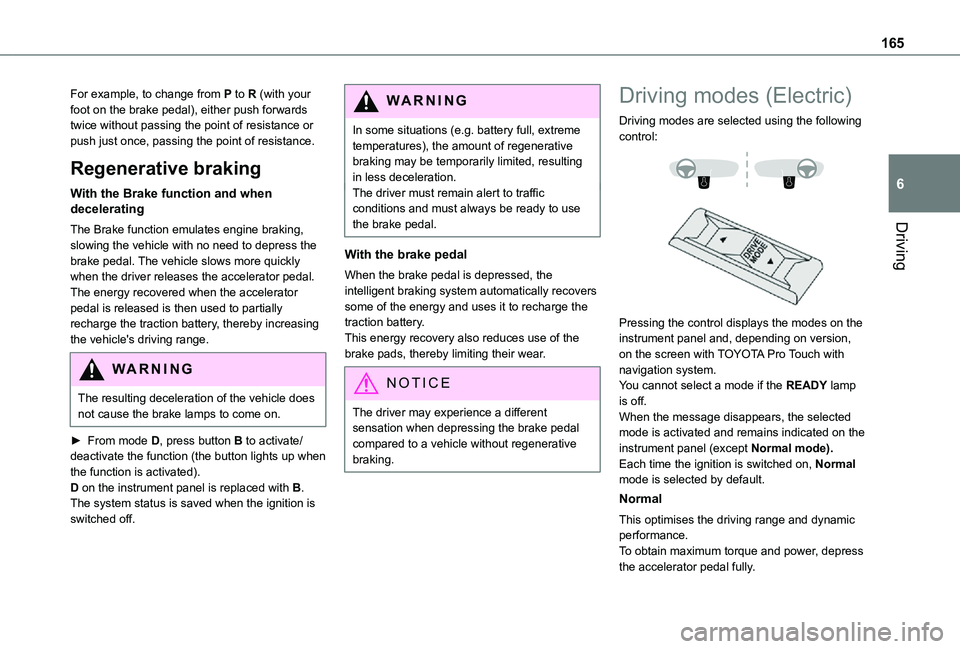
Driving modes are selected using the following control:
Pressing the control displays the modes on the instrument panel and, depending on version, on the screen with TOYOTA Pro Touch with navigation system.You cannot select a mode if the READY lamp is off.When the message disappears, the selected mode is activated and remains indicated on the
instrument panel (except Normal mode).Each time the ignition is switched on, Normal mode is selected by default.
Normal
This optimises the driving range and dynamic performance.To obtain maximum torque and power, depress the accelerator pedal fully.
Page 167 of 360
167
Driving
6
With an automatic gearbox: with the brake pedal depressed or the gear selector in position N, with the vehicle stationary.
Time counter
A time counter adds up the time spent in standby during the journey. It is reset to zero every time the ignition is switched on.
Special cases:
The engine will not go into standby if all of the conditions for operation are not met and in the following cases.– Steep slope (ascending or descending).– Vehicle has not exceeded 10 km/h (6 mph) since the last engine start (with the key or the “START/STOP” button).– Needed to maintain a comfortable temperature in the passenger compartment.– Demisting active.In these cases, this indicator lamp flashes for a few seconds, then goes off.
NOTIC E
After the engine has restarted, STOP mode is not available until the vehicle has reached a speed of 8 km/h (5 mph).
NOTIC E
During parking manoeuvres, STOP mode is not available for a few seconds after coming out of reverse gear or turning the steering wheel.
Restarting the engine (START mode)
The engine automatically restarts as soon as the driver indicates the intention of moving off again.With a manual gearbox: with the clutch pedal fully depressed.With an automatic gearbox:– With the selector in position D or M: with the brake pedal released.– With the selector in position N and the brake pedal released: with the selector at D or M.– With the selector in position P and the brake pedal depressed: with the selector at R, N, D or M.– Reverse gear engaged.
Special cases
The engine will restart automatically if all conditions for operation are met again and in the following case.– With a manual gearbox: vehicle speed exceeds 16 mph (25 km/h) or 2 mph (3 km/h) (depending on the engine).– With an automatic gearbox, vehicle speed exceeds 2 mph (3 km/h).
In this case, this indicator lamp flashes for a few seconds, then goes off.
Malfunctions
Depending on the vehicle’s equipment:In the event of a system malfunction, this warning lamp flashes on the instrument panel.The warning lamp in this button flashes and a message appears, accompanied by an audible signal.Have it checked by any authorized Toyota retailer or Toyota authorized repairer, or any reliable repairer.
The vehicle stalls in STOP mode
All of the instrument panel warning lamps come on if there is a fault.Depending on version, a warning message may also be displayed, prompting you to place the gear selector in position N and depress the brake pedal.► Switch off the ignition then start the engine
again with the key or the "START/STOP" button.
Page 169 of 360
169
Driving
6
► If it is not possible to carry out this check immediately, drive carefully at reduced speed.► In the event of a puncture, use the temporary puncture repair kit or the spare wheel (depending on equipment).
WARNI NG
Driving too slowly may not ensure optimum monitoring.
The alert is not immediately triggered in the event of a sudden loss of pressure or tyre blow-out. This is because analysis of the values read by the wheel's speed sensors can take several minutes.The alert may be delayed at speeds below 25 mph (40 km/h), or when adopting a sporty driving mode.
NOTIC E
The alert is kept active until the system is reinitialised.
Reinitialisation
Reinitialise the system after adjusting one or more tyre pressures and after changing one or more wheels.
WARNI NG
Before reinitialising the system, make sure that the pressures of the four tyres are correct for the conditions of use of the vehicle and
conform to the values written on the tyre pressure label.Check the pressures of the four tyres before performing the reinitialisation.The system does not advise if a pressure is incorrect at the time of reinitialisation.
Without audio system
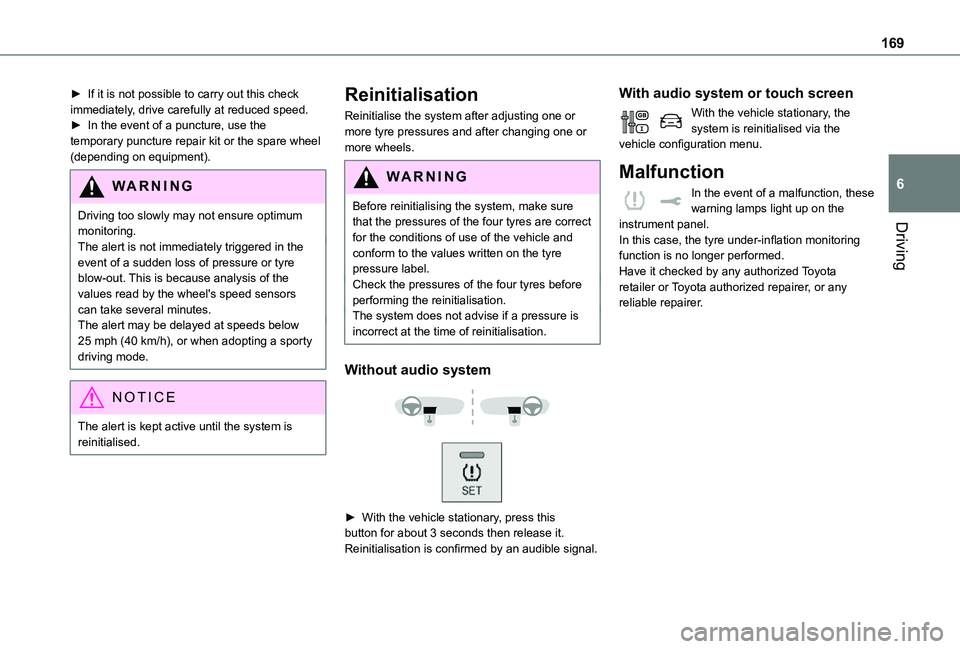
► With the vehicle stationary, press this button for about 3 seconds then release it. Reinitialisation is confirmed by an audible signal.
With audio system or touch screen
With the vehicle stationary, the system is reinitialised via the vehicle configuration menu.
Malfunction
In the event of a malfunction, these warning lamps light up on the instrument panel.In this case, the tyre under-inflation monitoring function is no longer performed.Have it checked by any authorized Toyota retailer or Toyota authorized repairer, or any reliable repairer.
Page 171 of 360
171
Driving
6
NOTIC E
Other camerasThe images from the camera(s) displayed on the touch screen or on the instrument panel may be distorted by the relief.In the presence of areas in shade, or in conditions of bright sunlight or inadequate lighting, the image may be darkened and with lower contrast.Obstacles may appear further away than they actually are.
WARNI NG
SensorsThe operation of the sensors as well as the associated functions may be disturbed by sound interference such as that emitted by noisy vehicles and machinery (e.g. lorries, pneumatic drills), by the accumulation of snow or dead leaves on the road or in the event of damaged bumpers and mirrors.When reverse gear is engaged, an audible signal (long beep) indicates that the sensors may be dirty.A front or rear impact to the vehicle can upset the sensors’ settings, which is not always detected by the system: distance measurements may be distorted.The sensors do not systematically detect obstacles that are too low (pavements, studs) or too thin (trees, posts, wire fences).Certain obstacles located in the sensors’ blind spots may not be detected or may no longer be detected during the manoeuvre.
Certain materials (fabrics) absorb sound waves: pedestrians may not be detected.
NOTIC E
MaintenanceClean the bumpers and door mirrors and the field of vision of the cameras regularly.When washing your vehicle at high pressure, direct the spray from at least 30 cm away from the radar, sensors and cameras.
WARNI NG
MatsThe use of mats not approved by TOYOTA may interfere with the operation of the speed limiter or cruise control.To avoid any risk of jamming the pedals:– Ensure that the mat is secured correctly.– Never fit one mat on top of another.
NOTIC E
Units of speed
Ensure that the units of speed displayed on the instrument panel (km/h or mph) are those for the country you are driving in.If this is not the case, when the vehicle is stationary, set the display to the required units of speed so that it complies with what is authorised locally.In case of doubt, contact any authorized Toyota retailer or Toyota authorized repairer,
or any reliable repairer.
Page 174 of 360
174
Speed Limit Recognition
and Recommendation
WARNI NG
Refer to the General recommendations on the use of driving and manoeuvring aids.
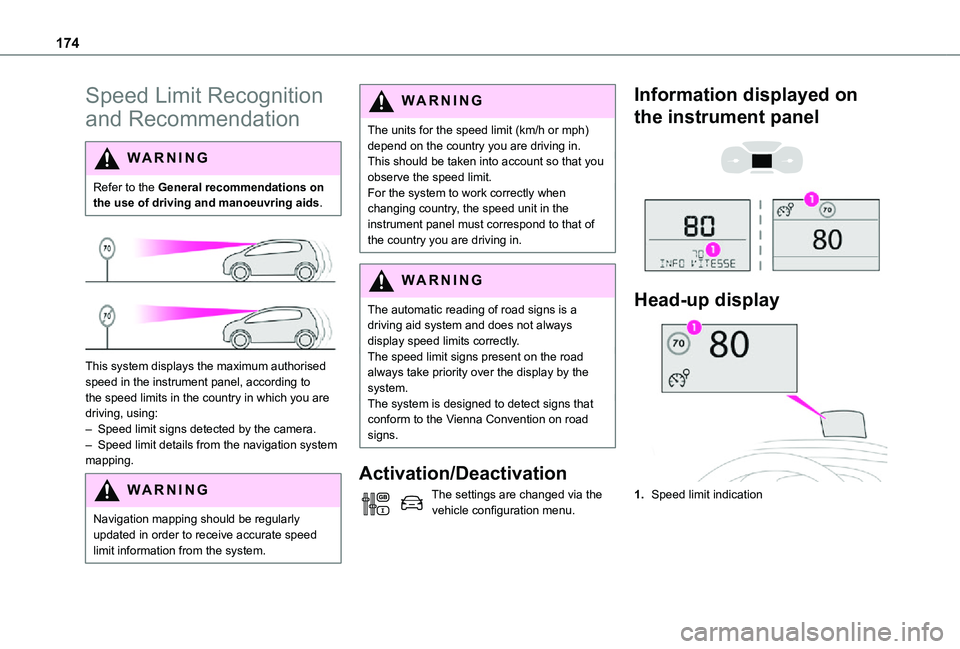
This system displays the maximum authorised speed in the instrument panel, according to the speed limits in the country in which you are driving, using:– Speed limit signs detected by the camera.– Speed limit details from the navigation system mapping.
WARNI NG
Navigation mapping should be regularly updated in order to receive accurate speed
limit information from the system.
WARNI NG
The units for the speed limit (km/h or mph) depend on the country you are driving in.This should be taken into account so that you observe the speed limit.For the system to work correctly when changing country, the speed unit in the instrument panel must correspond to that of the country you are driving in.
WARNI NG
The automatic reading of road signs is a driving aid system and does not always display speed limits correctly.The speed limit signs present on the road always take priority over the display by the system. The system is designed to detect signs that conform to the Vienna Convention on road signs.
Activation/Deactivation
The settings are changed via the vehicle configuration menu.
Information displayed on
the instrument panel
Head-up display
1.Speed limit indication
Page 175 of 360
175
Driving
6
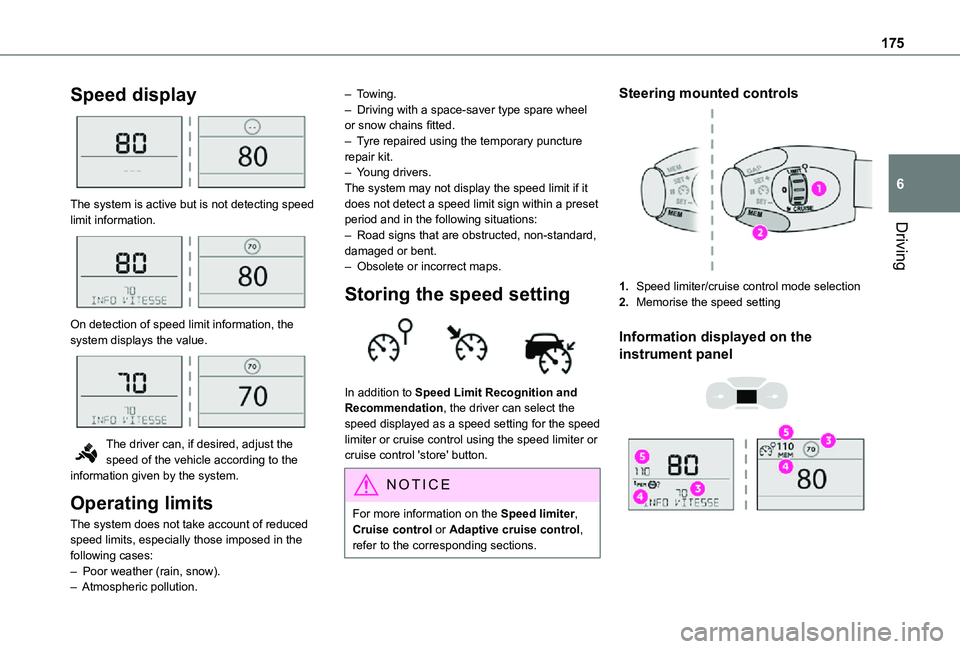
Speed display
The system is active but is not detecting speed limit information.
On detection of speed limit information, the system displays the value.
The driver can, if desired, adjust the speed of the vehicle according to the information given by the system.
Operating limits
The system does not take account of reduced speed limits, especially those imposed in the
following cases:– Poor weather (rain, snow).– Atmospheric pollution.
– Towing.– Driving with a space-saver type spare wheel or snow chains fitted.– Tyre repaired using the temporary puncture repair kit.– Young drivers.The system may not display the speed limit if it does not detect a speed limit sign within a preset period and in the following situations:– Road signs that are obstructed, non-standard, damaged or bent.– Obsolete or incorrect maps.
Storing the speed setting
In addition to Speed Limit Recognition and Recommendation, the driver can select the speed displayed as a speed setting for the speed limiter or cruise control using the speed limiter or
cruise control 'store' button.
NOTIC E
For more information on the Speed limiter, Cruise control or Adaptive cruise control, refer to the corresponding sections.
Steering mounted controls
1.Speed limiter/cruise control mode selection
2.Memorise the speed setting
Information displayed on the
instrument panel