engine TOYOTA RAV4 2019 Accessories, Audio & Navigation (in English)
[x] Cancel search | Manufacturer: TOYOTA, Model Year: 2019, Model line: RAV4, Model: TOYOTA RAV4 2019Pages: 244, PDF Size: 6.8 MB
Page 8 of 244
8
Information for hybrid vehicles is
written in brackets next to the
information for gasoline vehi-
cles.
Example
Turn the engine switch
*1
*2 to ACC or ON.
*1: Vehicles with gasoline engine
*2: Vehicles with hybrid system
Reading this manual
Explains symbols used in
this manual
Symbols in this manual
SymbolsMeanings
WARNING:
Explains something
that, if not obeyed,
could cause death or
serious injury to peo-
ple.
NOTICE:
Explains something
that, if not obeyed,
could cause damage
to or a malfunction in
the vehicle or its
equipment.
Indicates operating or
working procedures.
Follow the steps in
numerical order.
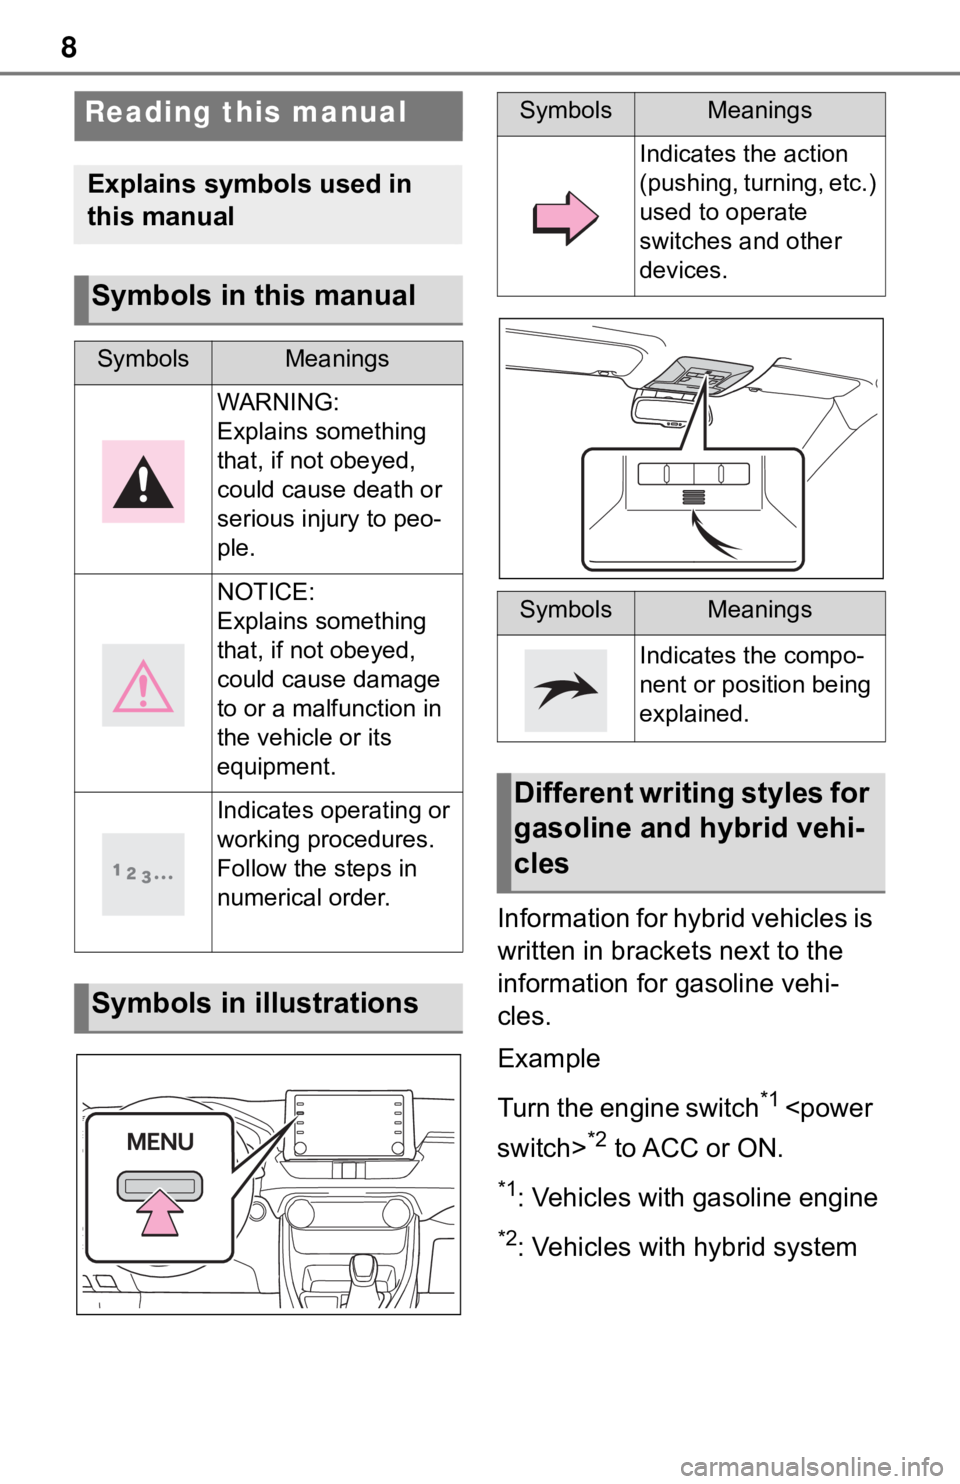
Symbols in illustrations
SymbolsMeanings
Indicates the action
(pushing, turning, etc.)
used to operate
switches and other
devices.
SymbolsMeanings
Indicates the compo-
nent or position being
explained.
Different writing styles for
gasoline and hybrid vehi-
cles
Page 23 of 244
231-2. Navigation operation
1
Quick guide
played on the screen. Select
the item(s) to be deleted.
*: Entune Premium Audio only
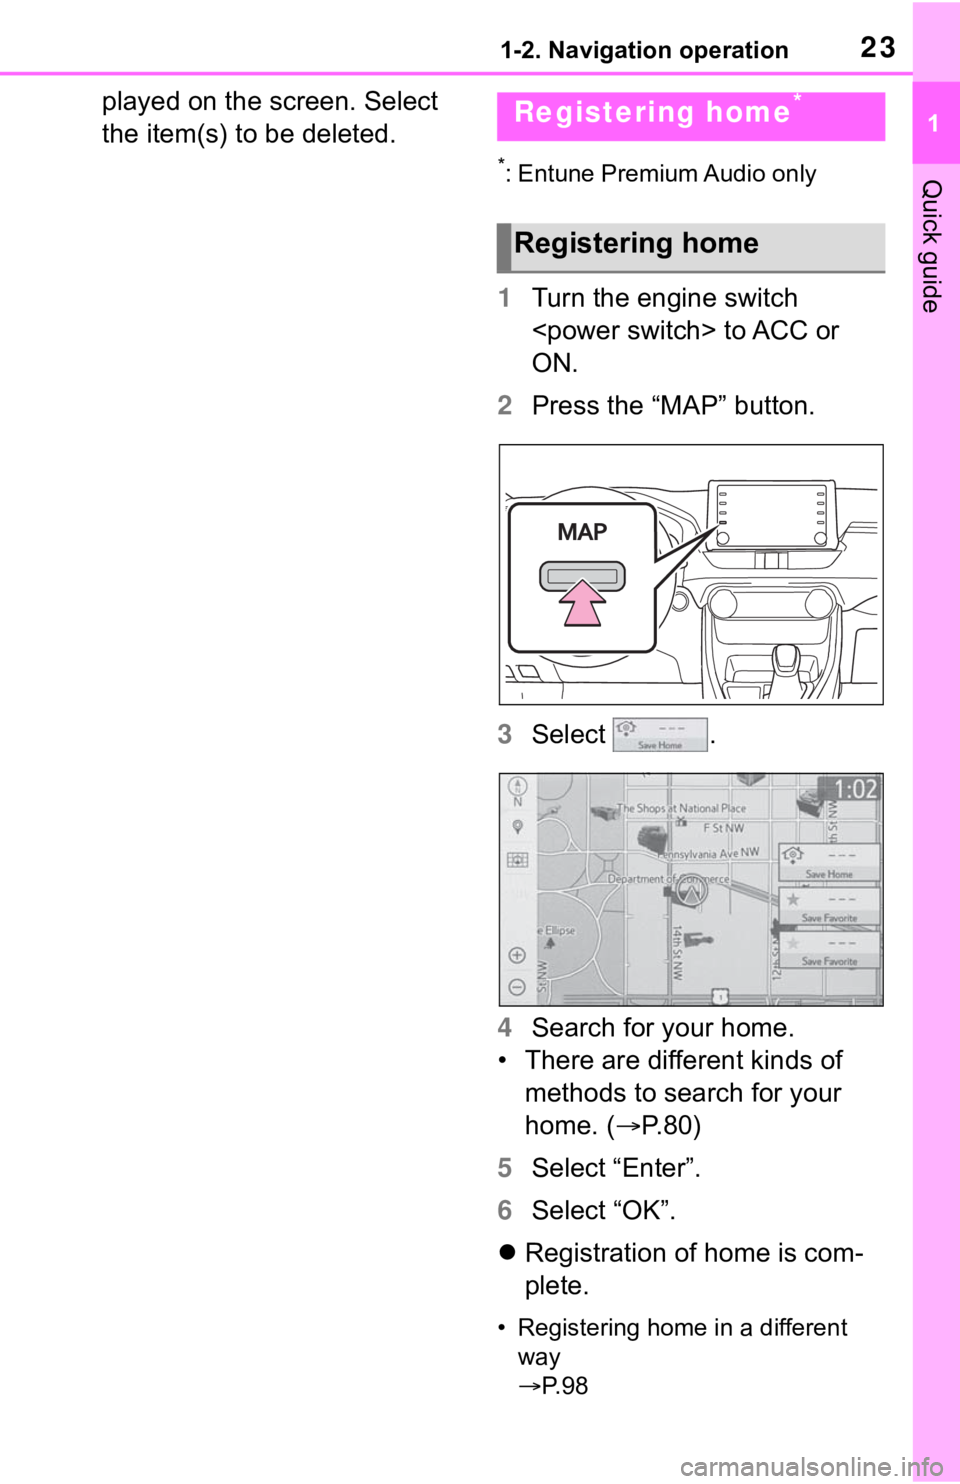
1Turn the engine switch
ON.
2 Press the “MAP” button.
3 Select .
4 Search for your home.
• There are different kinds of methods to search for your
home. ( P.80)
5 Select “Enter”.
6 Select “OK”.
Registration of home is com-
plete.
• Registering home in a different
way
P. 9 8
Registering home*
Registering home
Page 26 of 244
262-1. Basic information before operation
2-1.Basic information before operation
After a few seconds, the caution
screen will be displayed.
After about 5 seconds or select-
ing “Continue”, the caution
screen automatically switches to
the next screen.
*: Entune Premium Audio only
This system reminds users
when to replace certain parts or
components and shows dealer
information (if registered) on the
screen.
When the vehicle reaches a pre-
viously set driving distance or
date specified for a scheduled
maintenance check, the mainte-
nance remainder screen will be
displayed when the system is
turned on.
To prevent this screen from being displayed again, select
“Do Not Tell Me Again”.
To register maintenance infor-
mation: P. 6 2
If is selected, the regis-
tered phone number can be
called.
When system response is
extremely slow, the system can
be restarted.
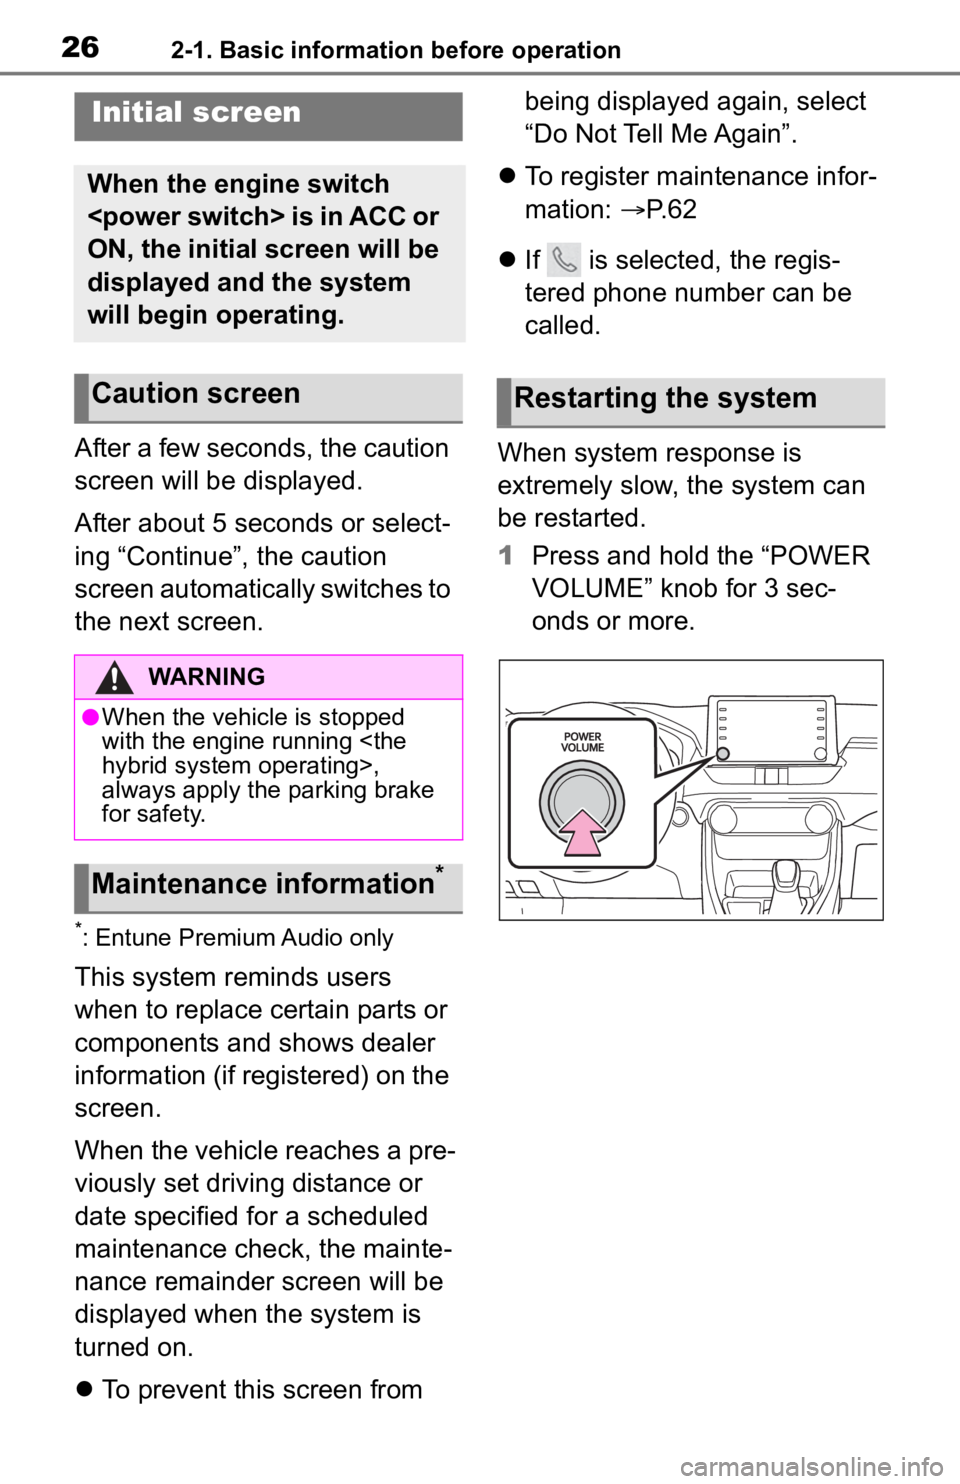
1 Press and hold the “POWER
VOLUME” knob for 3 sec-
onds or more.
Initial screen
When the engine switch
ON, the initial screen will be
displayed and the system
will begin operating.
Caution screen
WARNING
●When the vehicle is stopped
with the engine running
always apply the parking brake
for safety.
Maintenance information*
Restarting the system
Page 29 of 244
292-1. Basic information before operation
2
Basic function
the following, it may not oper-
ate properly:
• Magnetic isolation cards
• Metallic foil, such as the inner packaging of a cigarette box
• Metallic wallets or bags
• Coins
• Discs, such as a CD or DVD
If the operable part of a
capacitive touch screen but-
ton is wiped, it may operate
unintentionally.
If the capacitive touch screen
button is being touched when
the engine switch
ON, the button may not oper-
ate properly. In this case,
remove anything touching the
button, turn the engine switch
turn it to ACC or ON, or
restart the system by press
and hold the “POWER VOL-
UME” knob for 3 seconds or
more.
●Capacitive touch screen button
sensor sensitivity can be adjusted.
( P. 5 6 )
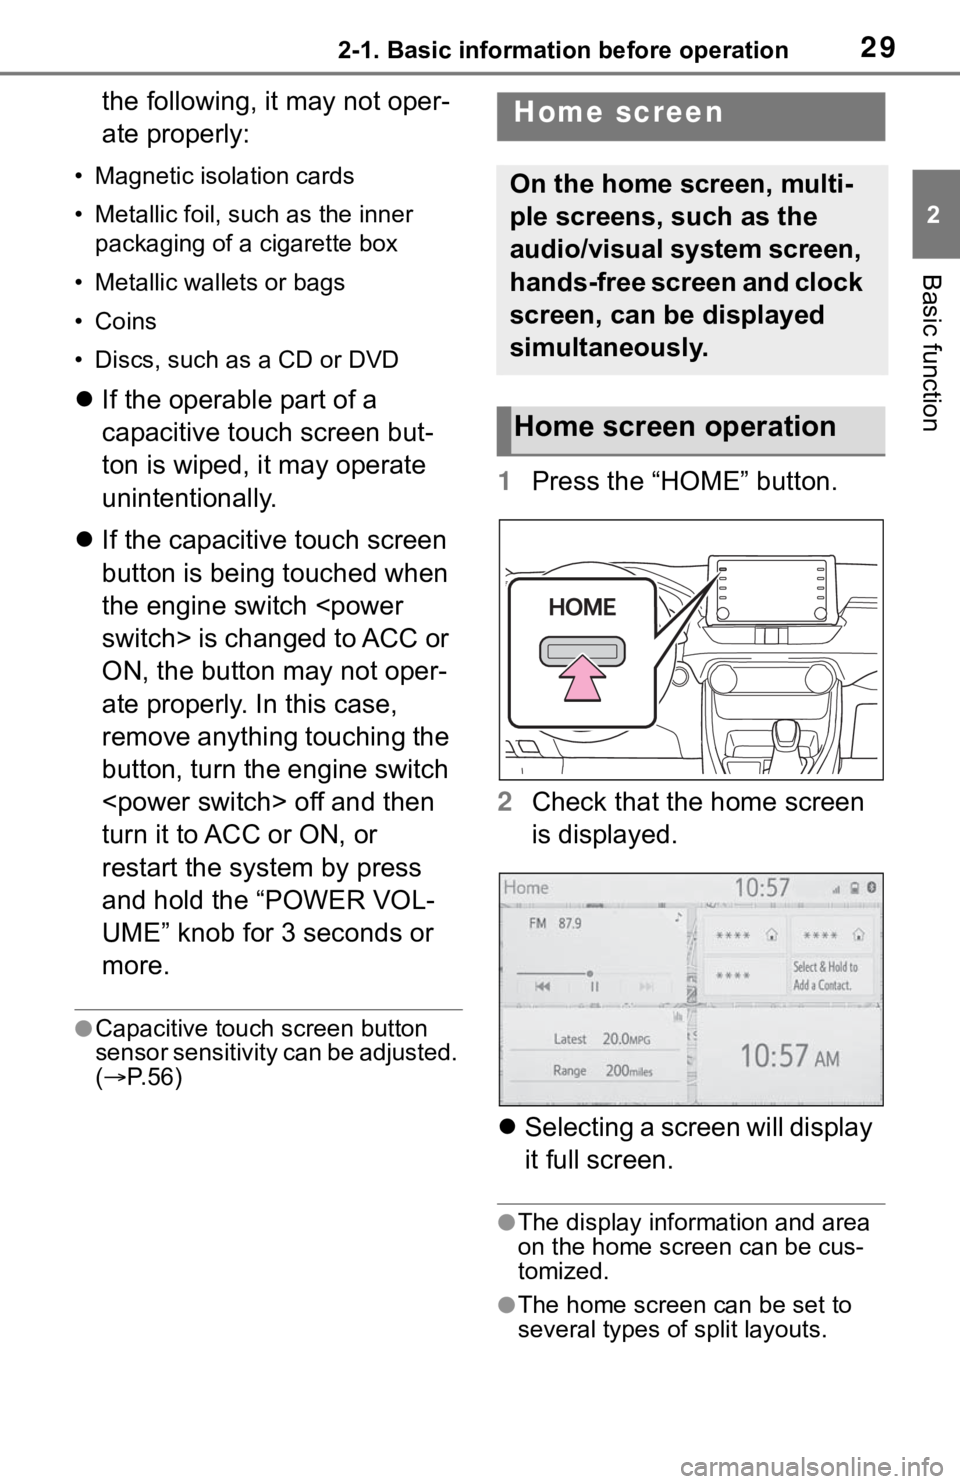
1 Press the “HOME” button.
2 Check that the home screen
is displayed.
Selecting a screen will display
it full screen.
●The display information and area
on the home screen can be cus-
tomized.
●The home screen can be set to
several types of split layouts.
Home screen
On the home screen, multi-
ple screens, such as the
audio/visual system screen,
hands-free screen and clock
screen, can be displayed
simultaneously.
Home screen operation
Page 34 of 244
342-1. Basic information before operation
ton.
Select to turn day mode
on/off. (P.34)
Select to adjust the screen
display. ( P.34)
Select to adjust the camera
display.
●When the screen is viewed
through polarized sunglasses, a
rainbow pattern may appear on
the screen due to optical charac-
teristics of the scr een. If this is dis-
turbing, please operate the screen
without polarized sunglasses.
Depending on the position of the
headlight switch, the screen
changes to day or night mode.
This feature is available when
the headlight is switched on.
1 Select “Day Mode”.
●If the screen is set to day mode
with the headlight switch turned
on, this condition is memorized
even with the engine
The contrast and brightness of
the screen can be adjusted
according to the brightness of
your surroundings.
1 Select “General” or “Cam-
era”.
2 Select the desired item.
“Display (General)” screen
only: Select “<” or “>” to select
the desired display.
• “Contrast”
“+”: Select to strengthen the con-
trast of the screen.
“-”: Select to weaken the contrast of
the screen.
• “Brightness”
“+”: Select to brighten the screen.
“-”: Select to darken the screen.
Changing between day
and night mode
Adjusting the con-
trast/brightness
B
C
D
Page 42 of 244
422-2. Connectivity settings
●Depending on the type of Blue-
tooth® device being connected, it
may be necessary to perform
additional steps on the device.
●When disconnecting a Bluetooth®
device, it is recommended to dis-
connect using the system.
■Connecting a Bluetooth®
device in a different way
(from phone top screen)
P. 1 7 4
■Connecting a Bluetooth®
device in a different way
(from phone setup screen)
P. 1 8 8
■Connecting a Bluetooth®
device in a different way
(from Bluetooth
® audio
screen)
P. 1 3 9
■Auto connection mode
To turn auto connection mode
on, set “Bluetooth Power” to on.
( P.45) Leave the Bluetooth
®
device in a location where the
connection can be established.
When the engine switch
ON, the system searches for
a nearby registered device.
The system will connect with
the registered device that was
last connected, if it is nearby.
When automatic connection
priority is set to on and there
is more than one registered Bluetooth
® phone available,
the system will automatically
connect to the Bluetooth
®
phone with the highest prior-
ity. ( P. 4 5 )
■Connecting manually
When the auto connection has
failed or “Bluetooth Power” is
turned off, it is necessary to con-
nect the Bluetooth
® device man-
ually.
1 Display the Bluetooth
® set-
tings screen. ( P.40)
2 Follow the steps in “Connect-
ing a Bluetooth
® device” from
step 2. ( P.41)
■Reconnecting the Blue-
tooth
® phone
If a Bluetooth
® phone is discon-
nected due to poor reception
from the Bluetooth
® network
when the engine switch
system automatically recon-
nects the Bluetooth
® phone.
Up to 5 Bluetooth
® devices can
be registered.
Bluetooth
® compatible phones
(HFP) and audio players (AVP)
can be registered simultane-
ously.
Registering a Bluetooth®
device
Page 45 of 244
452-2. Connectivity settings
2
Basic function
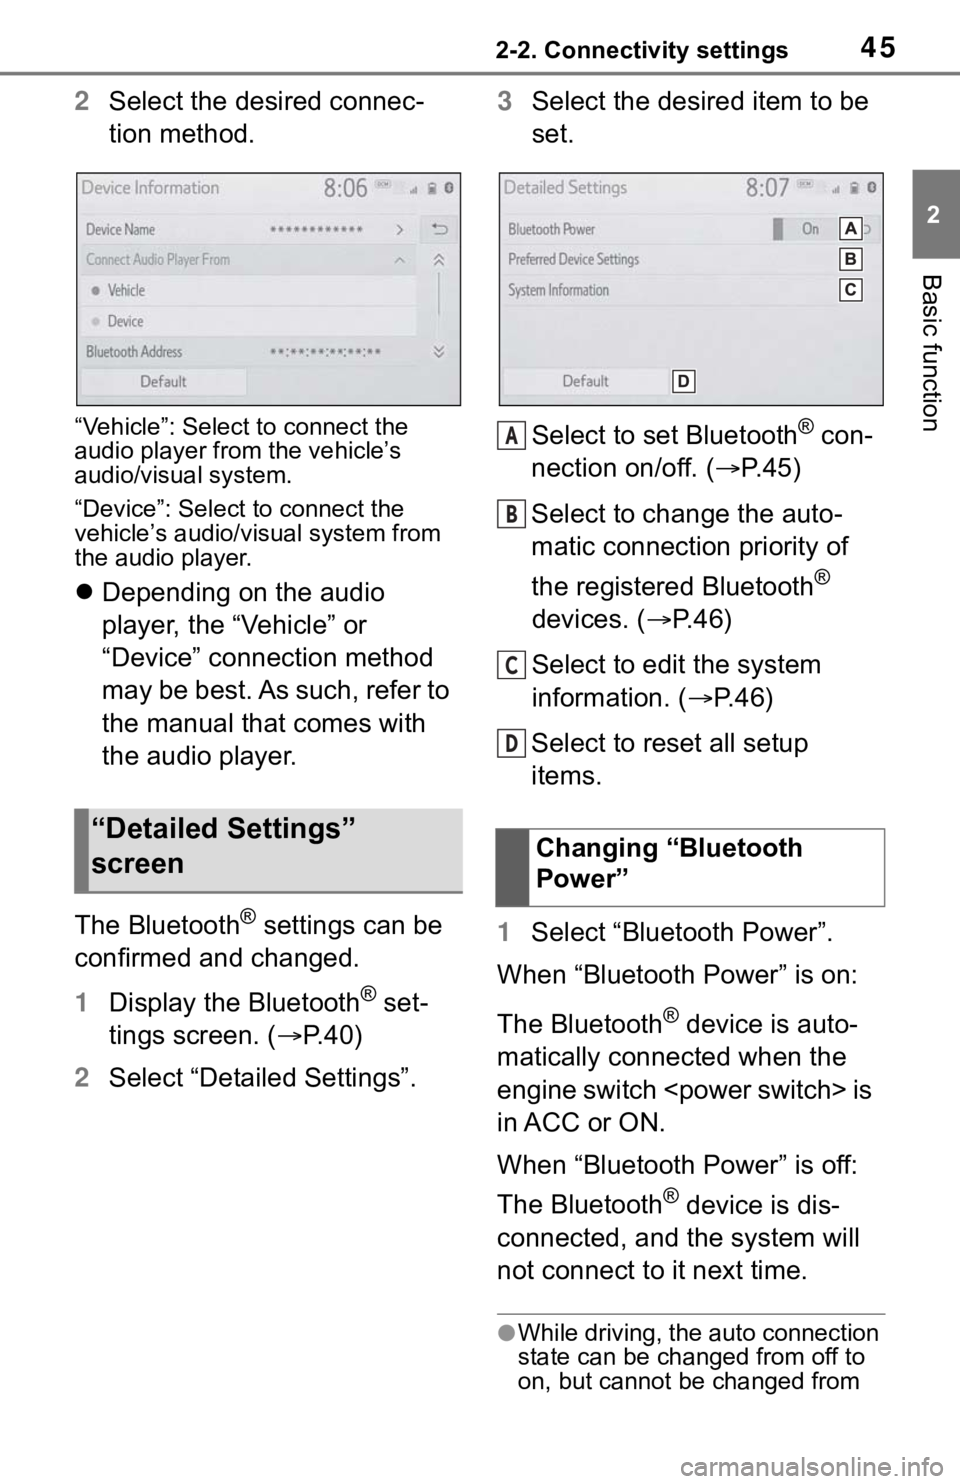
2Select the desired connec-
tion method.
“Vehicle”: Select to connect the
audio player from the vehicle’s
audio/visual system.
“Device”: Select to connect the
vehicle’s audio/visual system from
the audio player.
Depending on the audio
player, the “Vehicle” or
“Device” connection method
may be best. As such, refer to
the manual that comes with
the audio player.
The Bluetooth
® settings can be
confirmed and changed.
1 Display the Bluetooth
® set-
tings screen. ( P. 4 0 )
2 Select “Detailed Settings”. 3
Select the desired item to be
set.
Select to set Bluetooth
® con-
nection on/off. ( P.45)
Select to change the auto-
matic connection priority of
the registered Bluetooth
®
devices. ( P.46)
Select to edit the system
information. ( P.46)
Select to reset all setup
items.
1 Select “Bluetooth Power”.
When “Bluetooth Power” is on:
The Bluetooth
® device is auto-
matically connected when the
engine switch
in ACC or ON.
When “Bluetooth Power” is off:
The Bluetooth
® device is dis-
connected, and the system will
not connect to it next time.
●While driving, the auto connection
state can be changed from off to
on, but cannot be changed from
“Detailed Settings”
screenChanging “Bluetooth
Power”
A
B
C
D
Page 60 of 244
602-3. Other settings
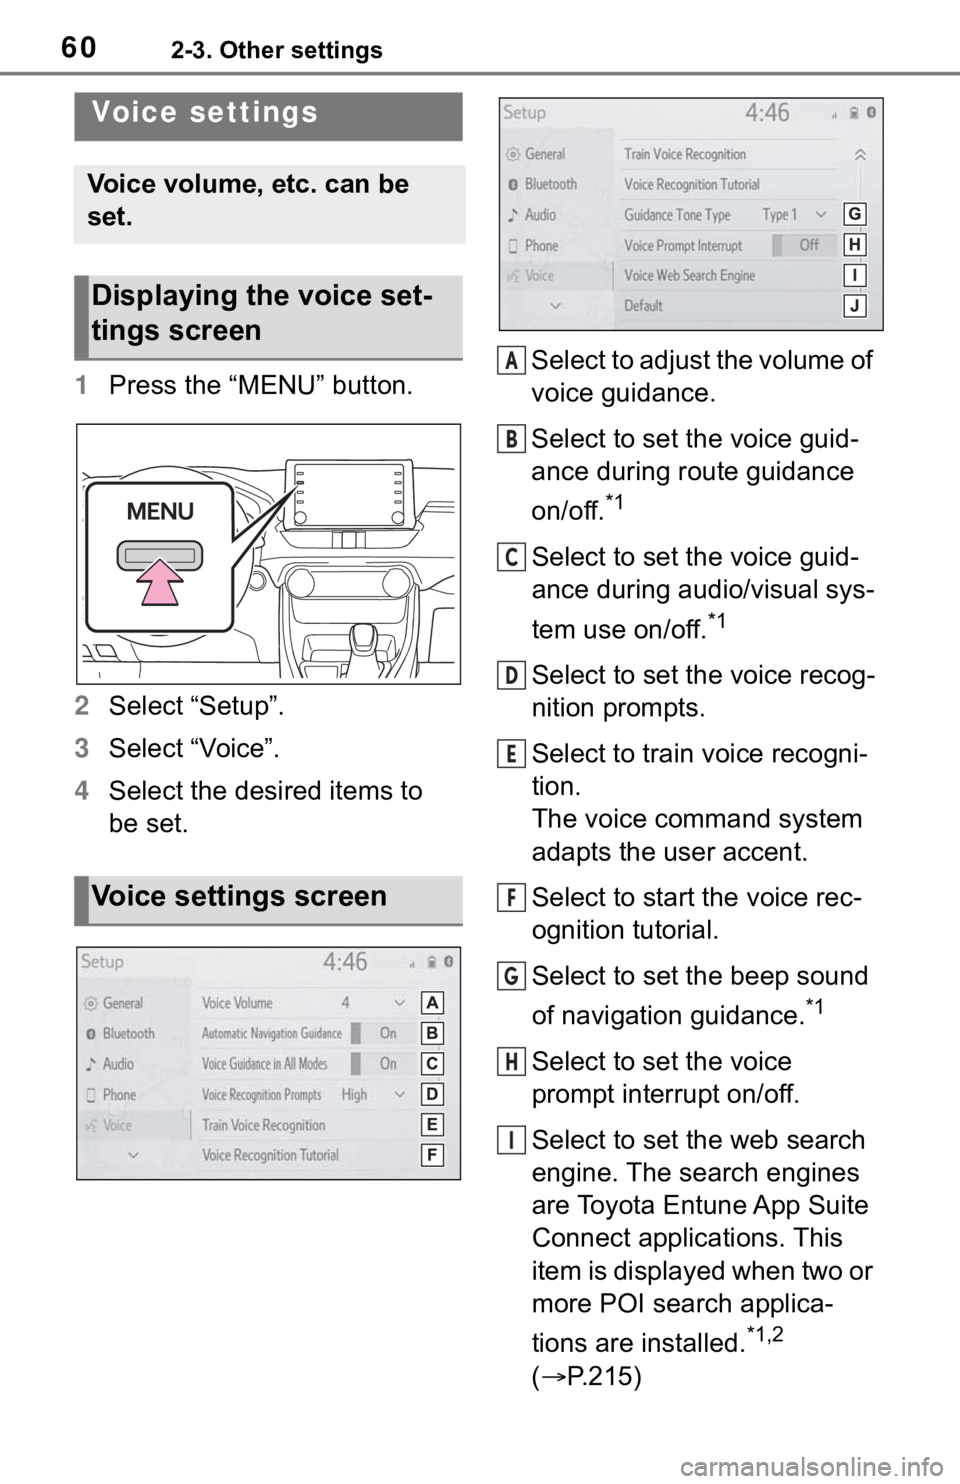
1Press the “MENU” button.
2 Select “Setup”.
3 Select “Voice”.
4 Select the desired items to
be set. Select to adjust the volume of
voice guidance.
Select to set the voice guid-
ance during route guidance
on/off.
*1
Select to set the voice guid-
ance during audio/visual sys-
tem use on/off.
*1
Select to set the voice recog-
nition prompts.
Select to train voice recogni-
tion.
The voice command system
adapts the user accent.
Select to start the voice rec-
ognition tutorial.
Select to set the beep sound
of navigation guidance.
*1
Select to set the voice
prompt interrupt on/off.
Select to set the web search
engine. The search engines
are Toyota Entune App Suite
Connect applications. This
item is displayed when two or
more POI search applica-
tions are installed.
*1,2
( P.215)
Voice settings
Voice volume, etc. can be
set.
Displaying the voice set-
tings screen
Voice settings screen
A
B
C
D
E
F
G
H
I
Page 86 of 244
863-2. Destination search
numbers with different area codes
will be displayed.
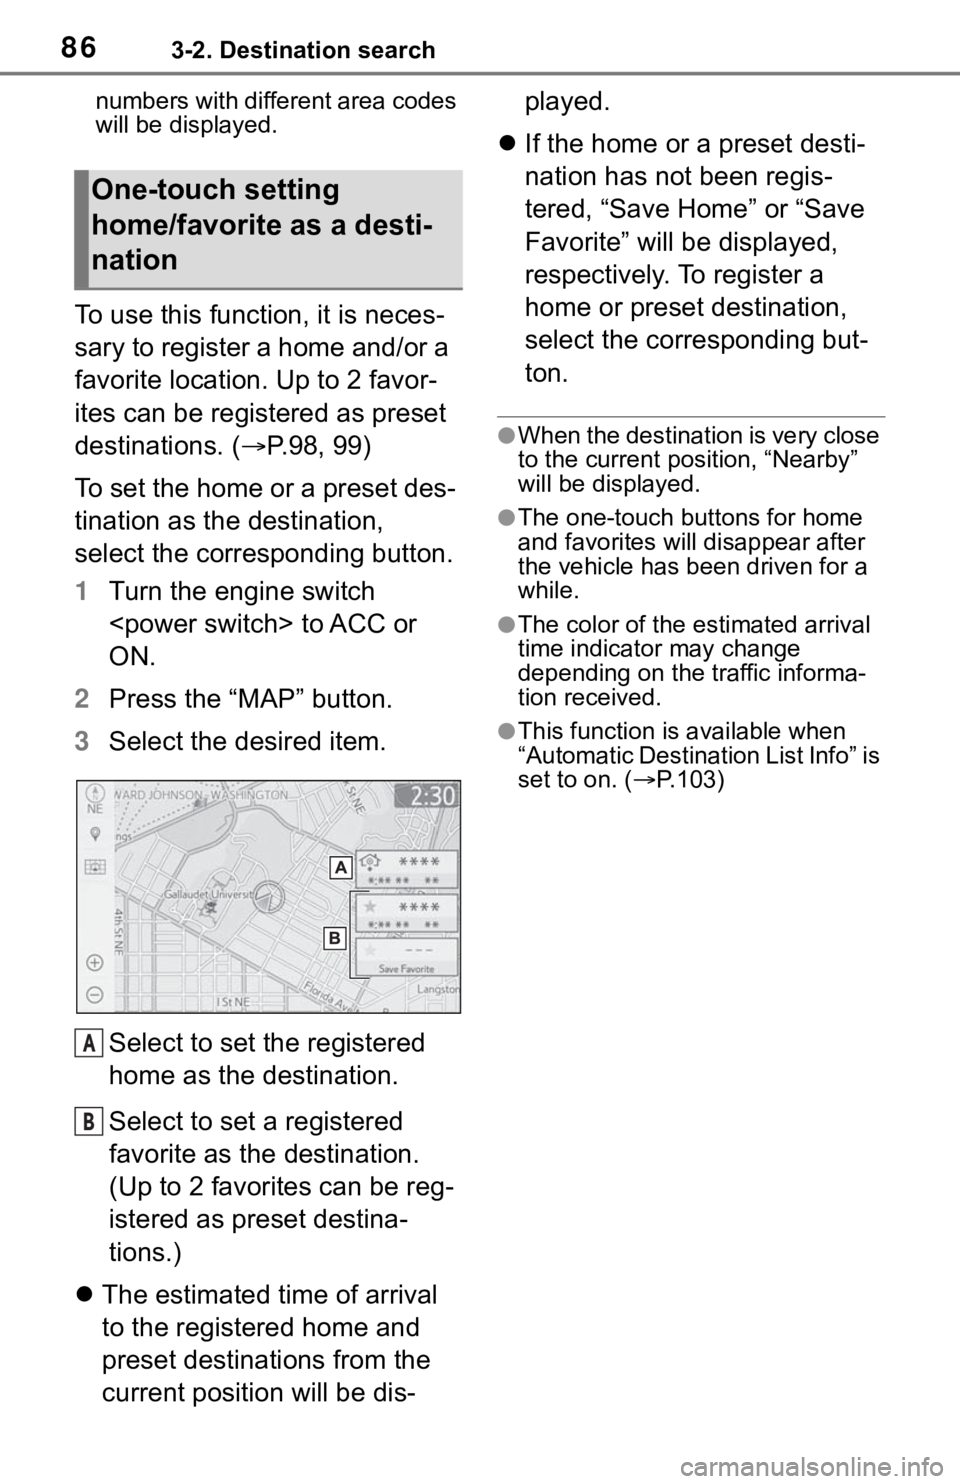
To use this function, it is neces-
sary to register a home and/or a
favorite location. Up to 2 favor-
ites can be registered as preset
destinations. (P.98, 99)
To set the home or a preset des-
tination as the destination,
select the corresponding button.
1 Turn the engine switch
ON.
2 Press the “MAP” button.
3 Select the desired item.
Select to set the registered
home as the destination.
Select to set a registered
favorite as the destination.
(Up to 2 favorites can be reg-
istered as preset destina-
tions.)
The estimated time of arrival
to the registered home and
preset destinations from the
current position will be dis- played.
If the home or a preset desti-
nation has not been regis-
tered, “Save Home” or “Save
Favorite” will be displayed,
respectively. To register a
home or preset destination,
select the corresponding but-
ton.
●When the destination is very close
to the current po sition, “Nearby”
will be displayed.
●The one-touch buttons for home
and favorites will disappear after
the vehicle has been driven for a
while.
●The color of the estimated arrival
time indicator may change
depending on the traffic informa-
tion received.
●This function is available when
“Automatic Destination List Info” is
set to on. ( P.103)
One-touch setting
home/favorite as a desti-
nation
A
B
Page 106 of 244

1063-4. Setup
When driving, the current posi-
tion mark will be automatically
corrected by GPS signals. If
GPS reception is poor due to
location, the current position
mark can be adjusted manually.
1Select “Position/Direction”.
2 Scroll the map to the desired
point ( P.71) and select
“OK”.
3 Select an arrow to adjust the
direction of the current posi-
tion mark and select “OK”.
The tire change calibration func-
tion will be used when replacing
the tires. This function will adjust
miscalculation caused by the
circumference difference
between the old and new tires.
1 Select “Tire Change”.
The message appears and
the quick distance calibration
starts automatically.
●If this procedure is not performed
when the tires are replaced, the
current position mark may be
incorrectly displayed.
*1: Vehicles with hybrid system
*2: This function does not operate outside the cont
iguous United
States (Example: Alaska and
Hawaii).
The system automatically stores
and registers support points
where the driver always deceler-
ates or stops based on pedal
operation and the vehicle speed
of the driver.
The registered points are shown
on the map as icons for use
as predictive deceleration sup-
port points.
After releasing the accelerator
pedal, the engine brake (regen-
eration brake) amount
increases. (regeneration boost
control)
As a result, the battery charge
amount can be increased when
decelerating or stopping the
vehicle contributing to improved
actual fuel economy.
The predictive efficient drive
function can be turned on/off.
( P.103)
The system reads the road and
traffic conditions ahead to opti-
mally control the charging and
discharging of the hybrid battery
according to the actual driving
situation. As a result, actual fuel
Position/Direction calibra-
tion
Tire change calibration
Predictive efficient drive
*1,
2
Predictive deceleration sup-
port
Predictive SOC control