audio TOYOTA RAV4 2020 (in English) User Guide
[x] Cancel search | Manufacturer: TOYOTA, Model Year: 2020, Model line: RAV4, Model: TOYOTA RAV4 2020Pages: 736, PDF Size: 30.79 MB
Page 97 of 736
972-1. Instrument cluster
2
Vehicle status information and indicators
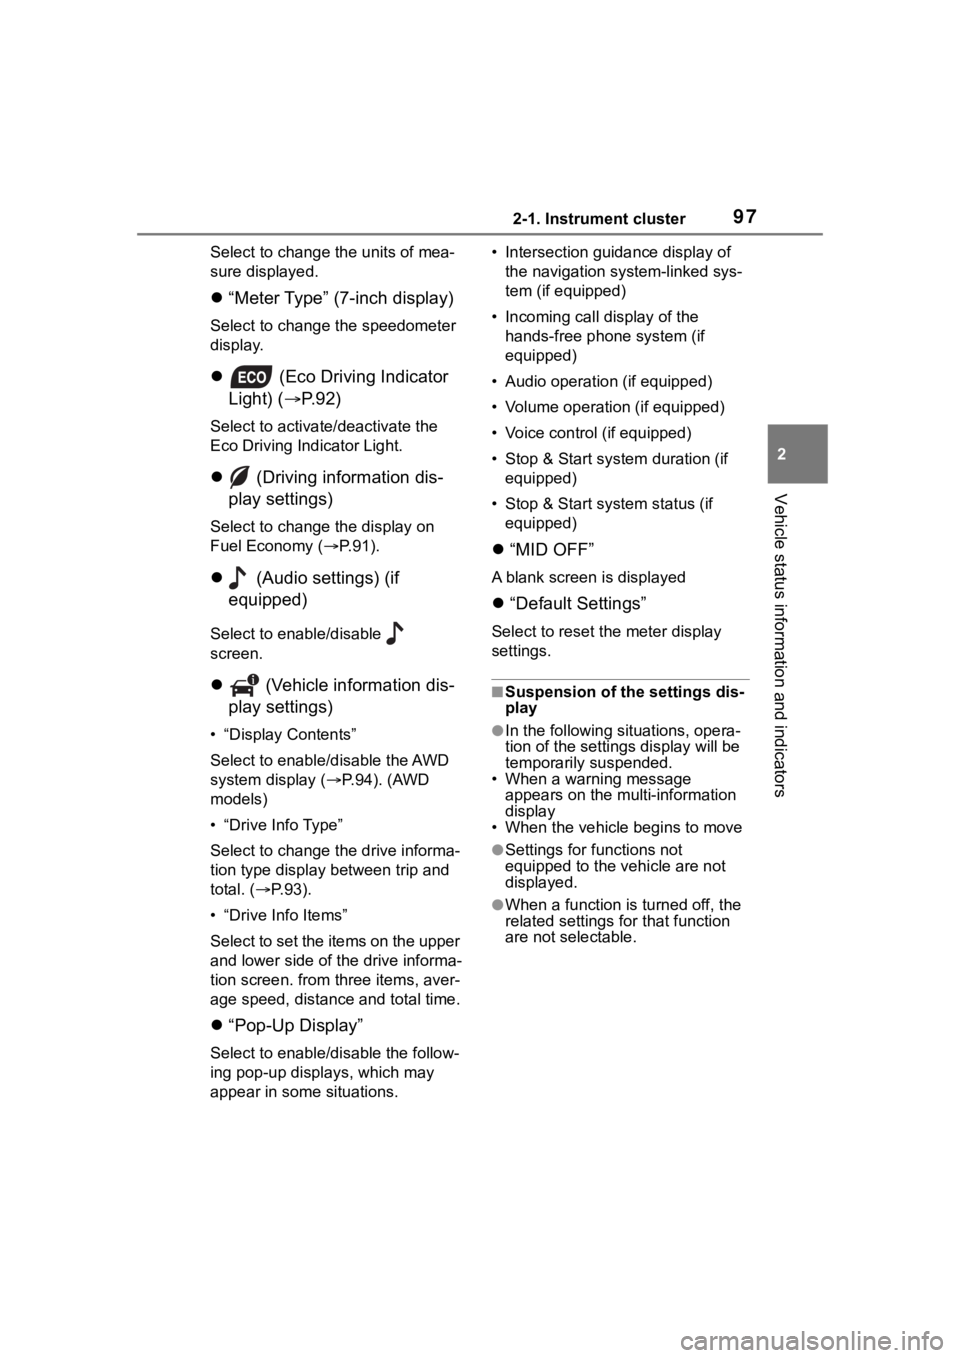
Select to change the units of mea-
sure displayed.
“Meter Type” (7-inch display)
Select to change the speedometer
display.
(Eco Driving Indicator
Light) ( P.92)
Select to activate/deactivate the
Eco Driving Indicator Light.
(Driving information dis-
play settings)
Select to change the display on
Fuel Economy ( P. 9 1 ) .
(Audio settings) (if
equipped)
Select to enable/disable
screen.
(Vehicle information dis-
play settings)
• “Display Contents”
Select to enable/disable the AWD
system display ( P.94). (AWD
models)
• “Drive Info Type”
Select to change the drive informa-
tion type display between trip and
total. ( P. 9 3 ) .
• “Drive Info Items”
Select to set the items on the upper
and lower side of the drive informa-
tion screen. from three items, aver-
age speed, distance and total time.
“Pop-Up Display”
Select to enable/d isable the follow-
ing pop-up displays, which may
appear in some situations. • Intersection guidance display of
the navigation s ystem-linked sys-
tem (if equipped)
• Incoming call display of the hands-free phone system (if
equipped)
• Audio operation (if equipped)
• Volume operation (if equipped)
• Voice control (if equipped)
• Stop & Start system duration (if equipped)
• Stop & Start system status (if equipped)
“MID OFF”
A blank screen is displayed
“Default Settings”
Select to reset the meter display
settings.
■Suspension of the settings dis-
play
●In the following situations, opera-
tion of the settings display will be
temporarily suspended.
• When a warning message appears on the multi-information
display
• When the vehicle begins to move
●Settings for functions not
equipped to the vehicle are not
displayed.
●When a function is turned off, the
related settings for that function
are not selectable.
Page 99 of 736
992-1. Instrument cluster
2
Vehicle status information and indicators
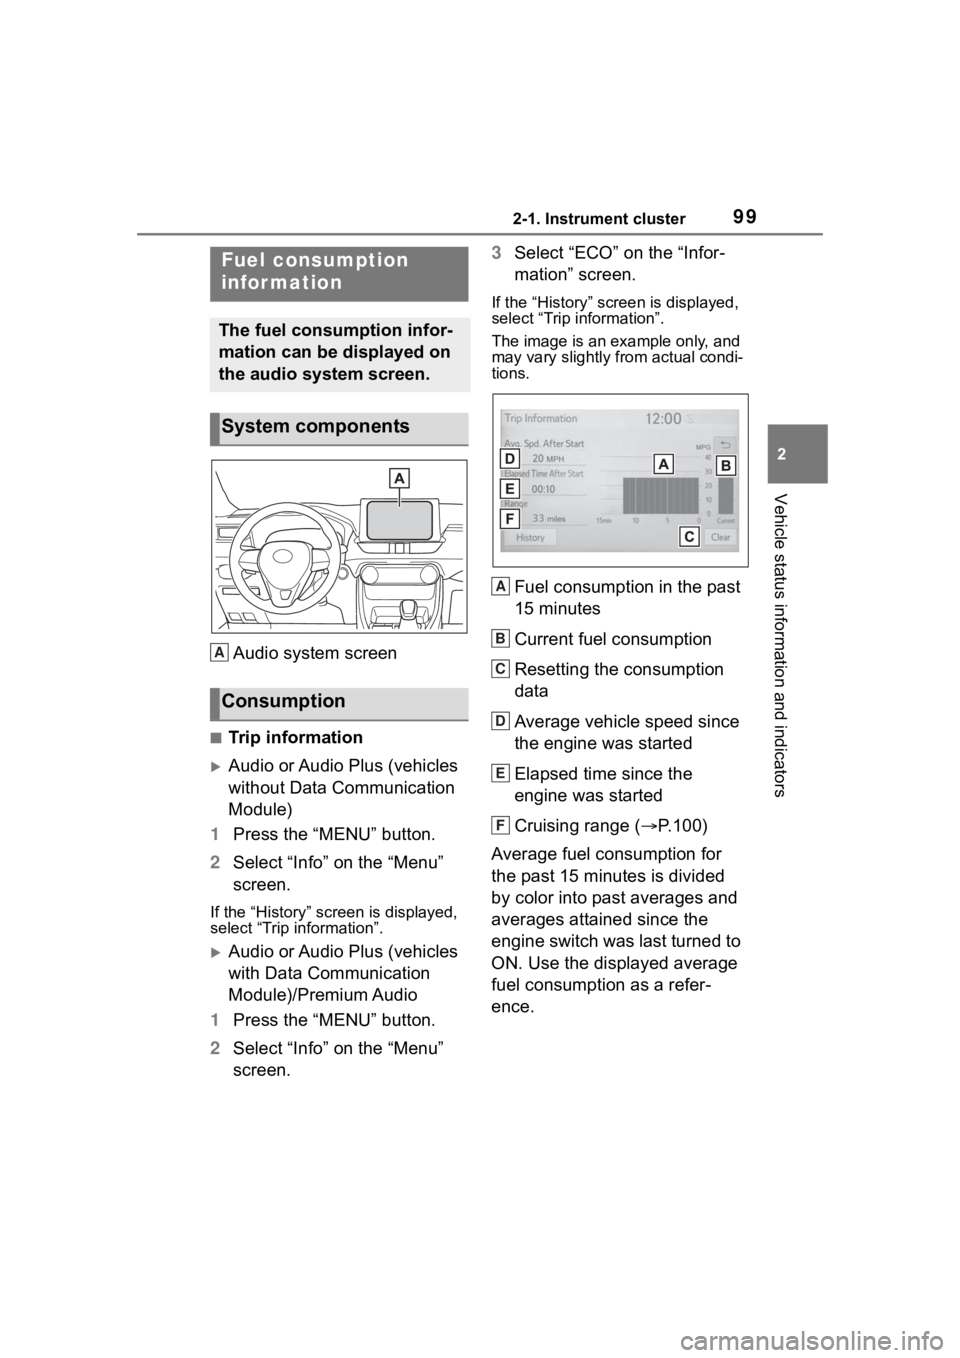
Audio system screen
■Trip information
Audio or Audio Plus (vehicles
without Data Communication
Module)
1 Press the “MENU” button.
2 Select “Info” on the “Menu”
screen.
If the “History” screen is displayed,
select “Trip information”.
Audio or Audio Plus (vehicles
with Data Communication
Module)/Premium Audio
1 Press the “MENU” button.
2 Select “Info” on the “Menu”
screen. 3
Select “ECO” on the “Infor-
mation” screen.
If the “History” screen is displayed,
select “Trip information”.
The image is an example only, and
may vary slightly from actual condi-
tions.
Fuel consumption in the past
15 minutes
Current fuel consumption
Resetting the consumption
data
Average vehicle speed since
the engine was started
Elapsed time since the
engine was started
Cruising range ( P.100)
Average fuel consumption for
the past 15 minutes is divided
by color into past averages and
averages attained since the
engine switch was last turned to
ON. Use the displayed average
fuel consumption as a refer-
ence.
Fuel consumption
infor mation
The fuel consumption infor-
mation can be displayed on
the audio system screen.
System components
Consumption
A
A
B
C
D
E
F
Page 100 of 736
1002-1. Instrument cluster
■History
Audio or Audio Plus (vehicles
without Data Communication
Module)
1 Press the “MENU” button.
2 Select “Info” on the “Menu”
screen.
If the “Trip Information” screen is
displayed, select “History”.
Audio or Audio Plus (vehicles
with Data Communication
Module)/Premium Audio
1 Press the “MENU” button.
2 Select “Info” on the “Menu”
screen.
3 Select “ECO” on the “Infor-
mation” screen.
If the “Trip Information” screen is
displayed, select “History”.
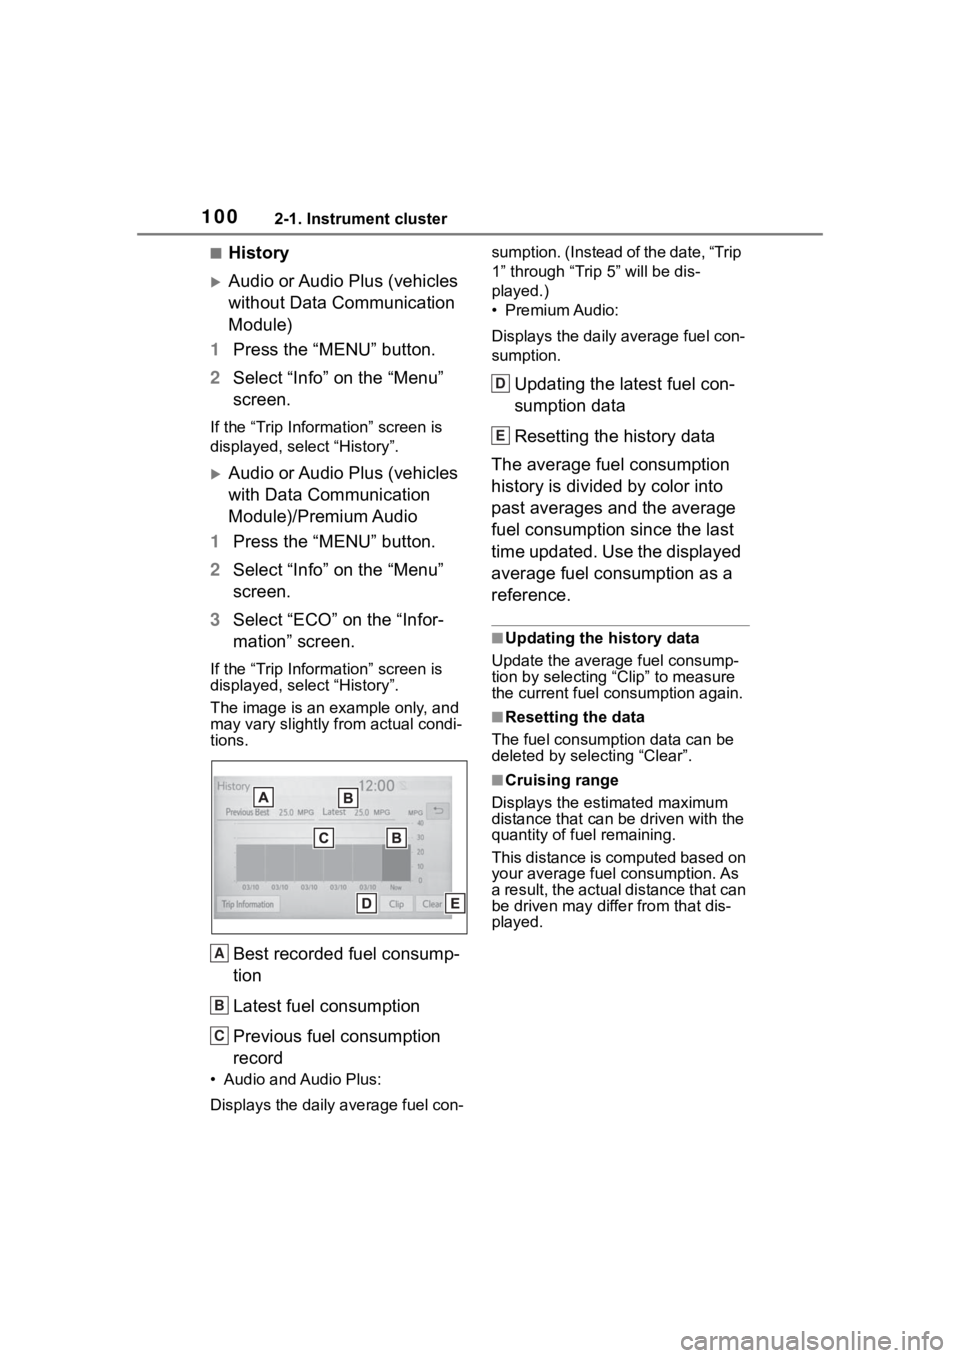
The image is an example only, and
may vary slightly f rom actual condi-
tions.
Best recorded fuel consump-
tion
Latest fuel consumption
Previous fuel consumption
record
• Audio and Audio Plus:
Displays the daily average fuel con- sumption. (Instead of the date, “Trip
1” through “Trip
5” will be dis-
played.)
• Premium Audio:
Displays the daily average fuel con-
sumption.
Updating the latest fuel con-
sumption data
Resetting the history data
The average fuel consumption
history is divided by color into
past averages and the average
fuel consumption since the last
time updated. Use the displayed
average fuel consumption as a
reference.
■Updating the history data
Update the average fuel consump-
tion by selecting “Clip” to measure
the current fuel consumption again.
■Resetting the data
The fuel consumption data can be
deleted by selecting “Clear”.
■Cruising range
Displays the estimated maximum
distance that can be driven with the
quantity of fuel remaining.
This distance is computed based on
your average fuel consumption. As
a result, the actual distance that can
be driven may differ from that dis-
played.
A
B
C
D
E
Page 104 of 736
1043-1. Key information
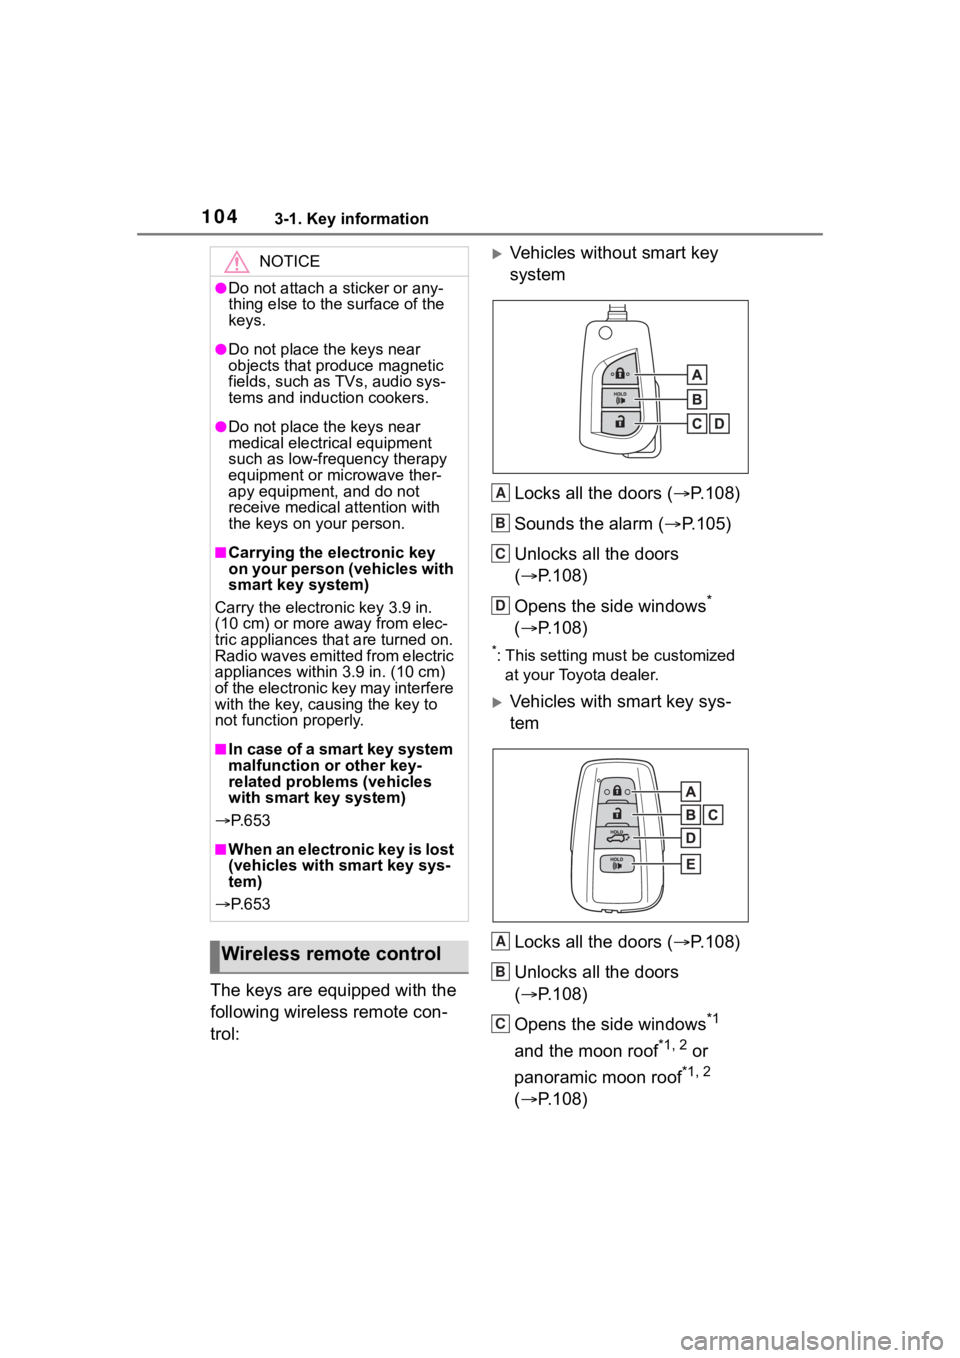
The keys are equipped with the
following wireless remote con-
trol:
Vehicles without smart key
systemLocks all the doors ( P.108)
Sounds the alarm ( P.105)
Unlocks all the doors
( P.108)
Opens the side windows
*
( P.108)
*: This setting must be customized
at your Toyota dealer.
Vehicles with smart key sys-
tem
Locks all the doors ( P.108)
Unlocks all the doors
( P.108)
Opens the side windows
*1
and the moon roof
*1, 2 or
panoramic moon roof
*1, 2
( P.108)
NOTICE
●Do not attach a sticker or any-
thing else to the surface of the
keys.
●Do not place th e keys near
objects that produce magnetic
fields, such as TVs, audio sys-
tems and induction cookers.
●Do not place th e keys near
medical electrical equipment
such as low-frequency therapy
equipment or microwave ther-
apy equipment, and do not
receive medical attention with
the keys on your person.
■Carrying the electronic key
on your person (vehicles with
smart key system)
Carry the electronic key 3.9 in.
(10 cm) or more away from elec-
tric appliances that are turned on.
Radio waves emitted from electric
appliances within 3.9 in. (10 cm)
of the electronic key may interfere
with the key, causing the key to
not function properly.
■In case of a smart key system
malfunction or other key-
related proble ms (vehicles
with smart key system)
P. 6 5 3
■When an electronic key is lost
(vehicles with s mart key sys-
tem)
P. 6 5 3
Wireless remote control
A
B
C
D
A
B
C
Page 130 of 736

1303-2. Opening, closing and locking the doors
tact with, or is covered by the fol-
lowing metallic objects
• Cards to which al uminum foil is
attached
• Cigarette boxes that have alumi- num foil inside
• Metallic wallets or bags
• Coins
• Hand warmers made of metal
• Media such as CDs and DVDs
●When other wireless key (that
emits radio waves) is being used
nearby
●When carrying the electronic key
together with the following devices
that emit radio waves
• Portable radio, cellular phone, cordless phone or other wireless
communication devices
• Another vehicle’s electronic key or a wireless key that emits radio
waves
• Personal computers or personal digital assistants (PDAs)
• Digital audio players
• Portable game systems
●If window tint with a metallic con-
tent or metallic objects are
attached to the rear window
●When the electronic key is placed
near a battery charger or elec-
tronic devices
●When parking in a coin-operated
parking lot (Radio waves used to
detect vehicles may affect the
smart key system.)
■Note for the entry function
●Even when the electronic key is
within the effective range (detec-
tion areas), the system may not
operate properly in the following
cases:
• The electronic key is too close to the window or outside door han-
dle, near the ground, or in a high
place when the doors are locked
or unlocked.
• The electronic key is on the instru- ment panel, luggage cover or
floor, or in the door pockets or
glove box when the engine is started or engine switch modes
are changed.
●Do not leave the electronic key on
top of the instrument panel or near
the door pockets when exiting the
vehicle. Depending on the radio
wave reception conditions, it may
be detected by the antenna out-
side the cabin and the door will
become lockable from the outside,
possibly trapping the electronic
key inside the vehicle.
●As long as the electronic key is
within the effective range, the
doors may be locked or unlocked
by anyone. However, only the
doors detecting the electronic key
can be used to unlock the vehicle.
●Even if the electro
nic key is not
inside the vehicle, it may be possi-
ble to start the engine if the elec-
tronic key is near the window.
●The doors may unlock if a large
amount of water splashes on the
door handle, such as in the rain or
in a car wash when the electronic
key is within the effective range.
(The doors will au tomatically be
locked after approximately 60 sec-
onds if the doors are not opened
and closed.)
●If the wireless remote control is
used to lock the doors when the
electronic key is near the vehicle,
there is a possib ility that the door
may not be unlocked by the entry
function. (Use the wireless remote
control to unlock the doors.)
●Touching the door lock sensor
while wearing gloves may delay or
prevent lock operation. Remove
the gloves and touch the lock sen-
sor again.
●When the lock operation is per-
formed using the lock sensor, rec-
ognition signals will be shown up
to two consecutive times. After
this, no recognition signals will be
given.
●If the door handle becomes wet
while the electronic key is within
Page 194 of 736
1944-2. Driving procedures
as the audio system can be used.
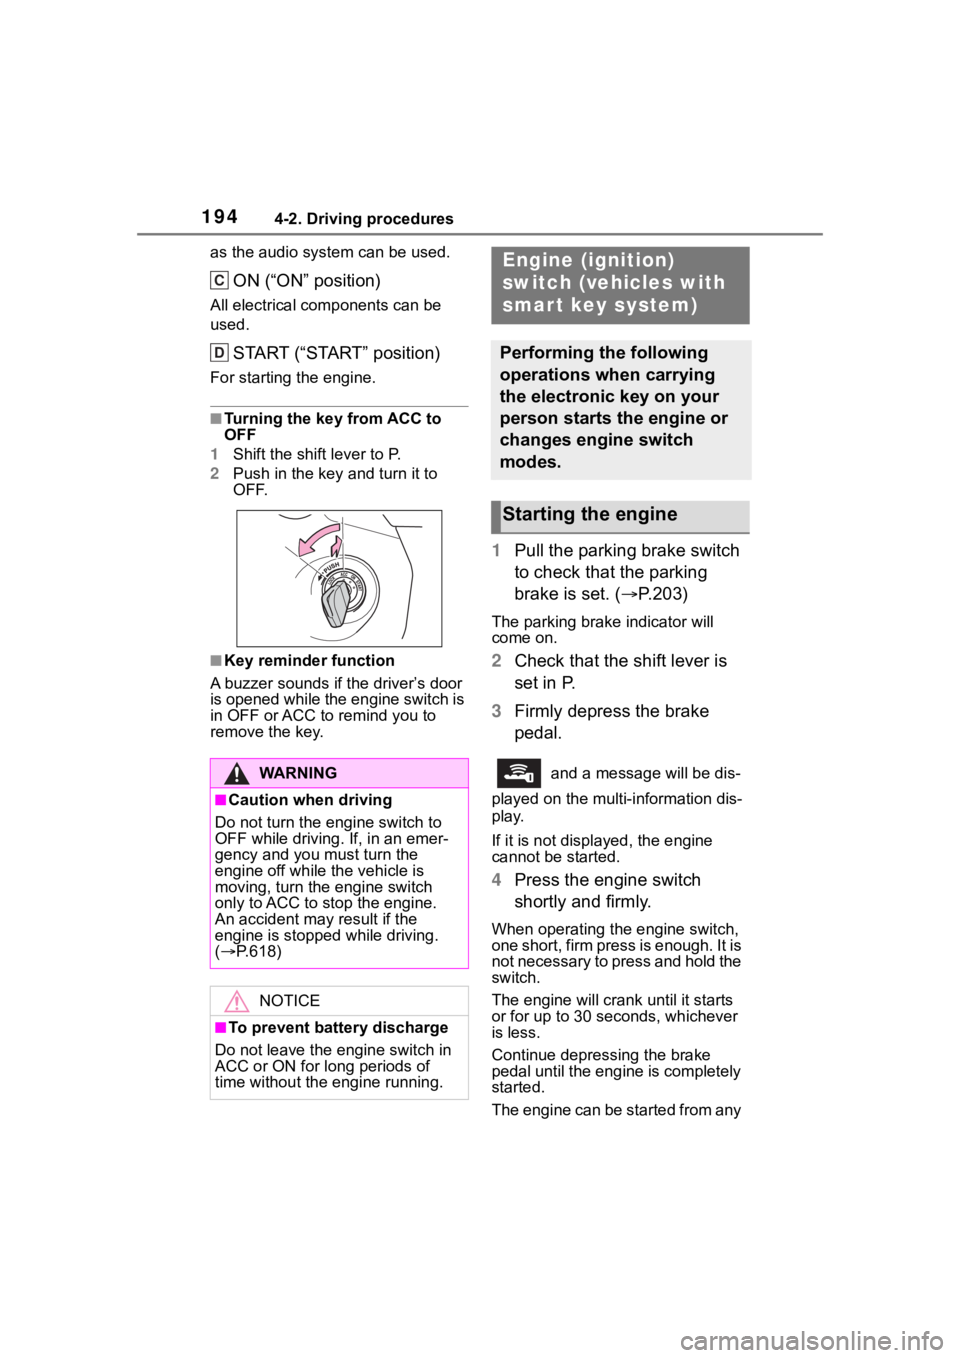
ON (“ON” position)
All electrical components can be
used.
START (“START” position)
For starting the engine.
■Turning the key from ACC to
OFF
1 Shift the shift lever to P.
2 Push in the key and turn it to
OFF.
■Key reminder function
A buzzer sounds if the driver’s door
is opened while the engine switch is
in OFF or ACC to r emind you to
remove the key.
1 Pull the parking brake switch
to check that the parking
brake is set. ( P.203)
The parking brak e indicator will
come on.
2 Check that the shift lever is
set in P.
3 Firmly depress the brake
pedal.
and a message will be dis-
played on the multi-information dis-
play.
If it is not displ ayed, the engine
cannot be started.
4 Press the engine switch
shortly and firmly.
When operating the engine switch,
one short, firm press is enough. It is
not necessary to press and hold the
switch.
The engine will crank until it starts
or for up to 30 seconds, whichever
is less.
Continue depressing the brake
pedal until the engine is completely
started.
The engine can be started from any
WA R N I N G
■Caution when driving
Do not turn the engine switch to
OFF while driving. If, in an emer-
gency and you must turn the
engine off while the vehicle is
moving, turn the engine switch
only to ACC to stop the engine.
An accident may result if the
engine is stopped while driving.
( P.618)
NOTICE
■To prevent battery discharge
Do not leave the engine switch in
ACC or ON for long periods of
time without the engine running.
C
D
Engine (ignition)
switch (vehicles with
smar t key system)
Performing the following
operations when carrying
the electronic key on your
person starts the engine or
changes engine switch
modes.
Starting the engine
Page 198 of 736
1984-2. Driving procedures
Some electrical components such
as the audio system can be used.
“ACCESSORY” will be displayed
on the multi-information display.
3ON
All electrical com ponents can be
used.
“IGNITION ON” will be displayed on
the multi-information display.
*: If the shift lever is in a position other than P when turning off the
engine, the engine switch will be
turned to ACC, not to OFF.
■Auto power off function
If the vehicle is le ft in ACC for more
than 20 minutes or ON (the engine
is not running) for more than an
hour with the shift lever in P, the
engine switch will automatically turn
to OFF. However, this function can-
not entirely prevent battery dis-
charge. Do not leave the vehicle
with the engine switch in ACC or ON
for long periods of time when the
engine is not running.
If the engine is stopped with the
shift lever in a position other than P, the engine switch will not
be turned to OFF but instead be
turned to ACC. Perform the fol-
lowing procedure to turn the
switch to OFF:
1
Check that the parking brake
is set.
2 Shift the shift lever to P.
3 Check that “ACCESSORY” is
displayed on the multi-infor-
mation display and then
press the engine switch
shortly and firmly.
4 Check that “ACCESSORY”
or “IGNITION ON” on the
multi-information display is
off.
NOTICE
■To prevent battery discharge
●Do not leave the engine switch
in ACC or ON for long periods of
time without the engine running.
●If “ACCESSORY” or “IGNITION
ON” is displayed on the multi-
information display, the engine
switch is not in OFF. Exit the
vehicle after turning the engine
switch to OFF.
When stopping the engine
with the shift lever in a
position other than P
NOTICE
■To prevent battery discharge
Do not stop the engine when the
shift lever is in a position other
than P. If the engine is stopped in
another shift lever position, the
engine switch will not be turned to
OFF but instead be turned to
ACC. If the vehicle is left in ACC,
battery dischar ge may occur.
Page 245 of 736
2454-5. Using the driving support systems
4
Driving
■Temporary cancelation of func-
tions
●When operation conditions are no
longer met, a function may be
temporarily canceled. However,
when the operation conditions are
met again, operation of the func-
tion is automatically restored.
( P.243)
●If the operation conditions
( P.243) are no longer met while
the lane centering function is
operating, the buzzer may sound
to indicate that the function has
been temporarily canceled.
■Steering assist function/lane
centering function
●Depending on the vehicle speed,
lane departure situation, road con-
ditions, etc., the driver may not
feel the function is operating or
the function may not operate at
all.
●The steering control of the func-
tion is overridden by the driver’s
steering wheel operation.
●Do not attempt to test the opera-
tion of the steering assist function.
■Lane departure alert function
●The warning buzzer may be diffi-
cult to hear due to external noise,
audio playback, etc.
●If the edge of the course* is not
clear or straight, the lane depar-
ture alert function may not oper-
ate.
●Vehicles with Blind Spot Monitor: It
may not be possible for the sys-
tem to determine i f there is a dan-
ger of a collision with a vehicle in
an adjacent lane.
●Do not attempt to test the opera-
tion of the lane departure alert
function.
*: Boundary between asphalt and
the side of the road, such as
grass, soil, or a curb
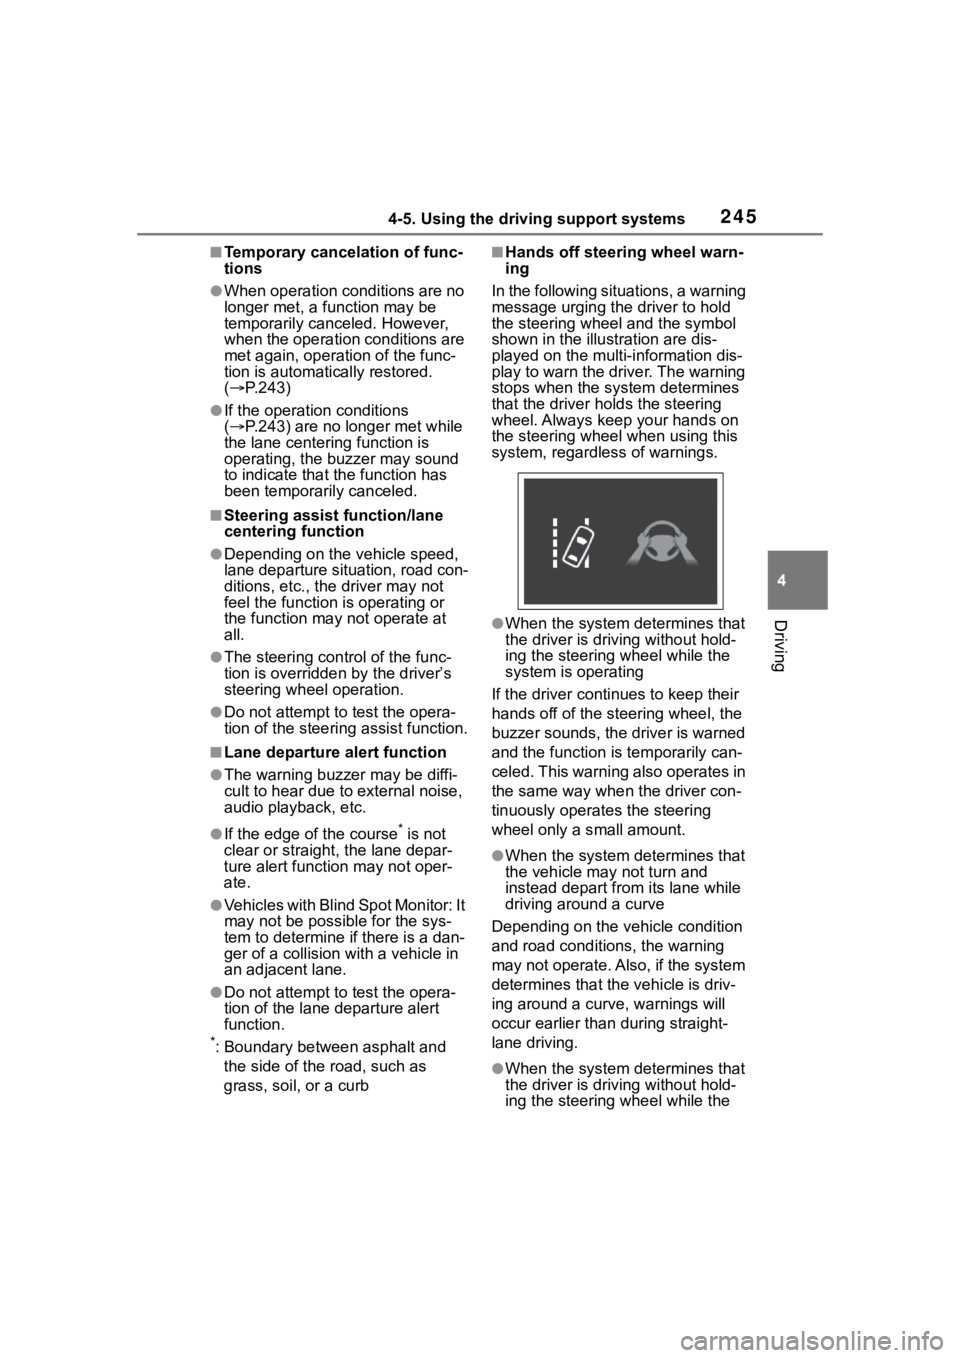
■Hands off steering wheel warn-
ing
In the following situations, a warning
message urging the driver to hold
the steering wheel and the symbol
shown in the illust ration are dis-
played on the multi-information dis-
play to warn the driver. The warning
stops when the sys tem determines
that the driver holds the steering
wheel. Always keep your hands on
the steering wheel when using this
system, regardless of warnings.
●When the system determines that
the driver is driving without hold-
ing the steering wheel while the
system is operating
If the driver continues to keep their
hands off of the steering wheel, the
buzzer sounds, the driver is warned
and the function is temporarily can-
celed. This warning also operates in
the same way when the driver con-
tinuously operates the steering
wheel only a s mall amount.
●When the system determines that
the vehicle may not turn and
instead depart from its lane while
driving around a curve
Depending on the vehicle condition
and road conditions, the warning
may not operate. Also, if the system
determines that the vehicle is driv-
ing around a curve, warnings will
occur earlier than during straight-
lane driving.
●When the system determines that
the driver is driving without hold-
ing the steering wheel while the
Page 262 of 736
2624-5. Using the driving support systems
The BSM function and the
RCTA function can be
enabled/disabled on the
screen of the multi-information
display. (P. 9 4 )
■Outside rear view mirror indica-
tors visibility
In strong sunlight, the outside rear
view mirror indicato r may be difficult
to see.
■Hearing the RCTA buzzer
The RCTA buzzer may be difficult to
hear over loud noises such as high
audio volume.
■When “Blind Spot Monitor
Unavailable” or “Rear Cross
Traffic Alert Unavailable” is
shown on the multi-information
display
The sensor voltage has become abnormal, or water, snow, mud, etc.,
may be built up in th
e vicinity of the
sensor area of the rear bumper.
( P.263)
Removing the water, snow, mud,
etc., from the vicini ty of the sensor
area should return it to normal.
Also, the sensor may not function
normally when used in extremely
hot or cold weather.
■When “Blind Spot Monitor Sys-
tem Malfunction Visit Your
Dealer” or “Rear Cross Traffic
Alert Malfunction Visit Your
Dealer” is shown on the multi-
information display
There may be a sensor malfunction
or misaligned. Have the vehicle
inspected at a Toyota dealer.
■Customization
Some functions can be customized.
( P. 9 4 )
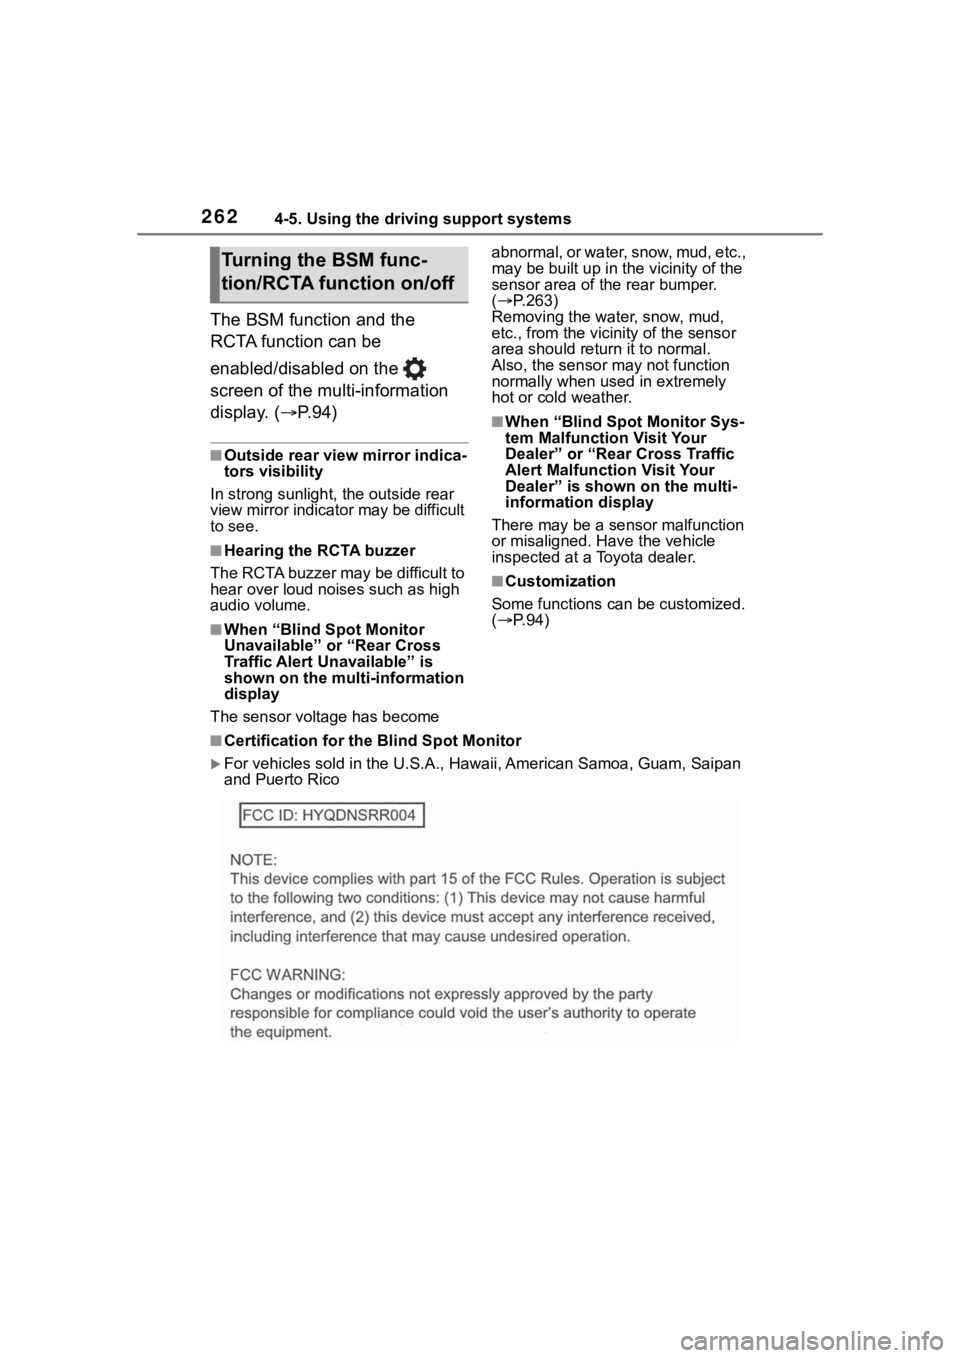
■Certification for the Blind Spot Monitor
For vehicles sold in t he U.S.A., Hawaii, Ame rican Samoa, Guam, Saipan
and Puerto Rico
Turning the BSM func-
tion/RCTA function on/off
Page 270 of 736
2704-5. Using the driving support systems
*: If equipped
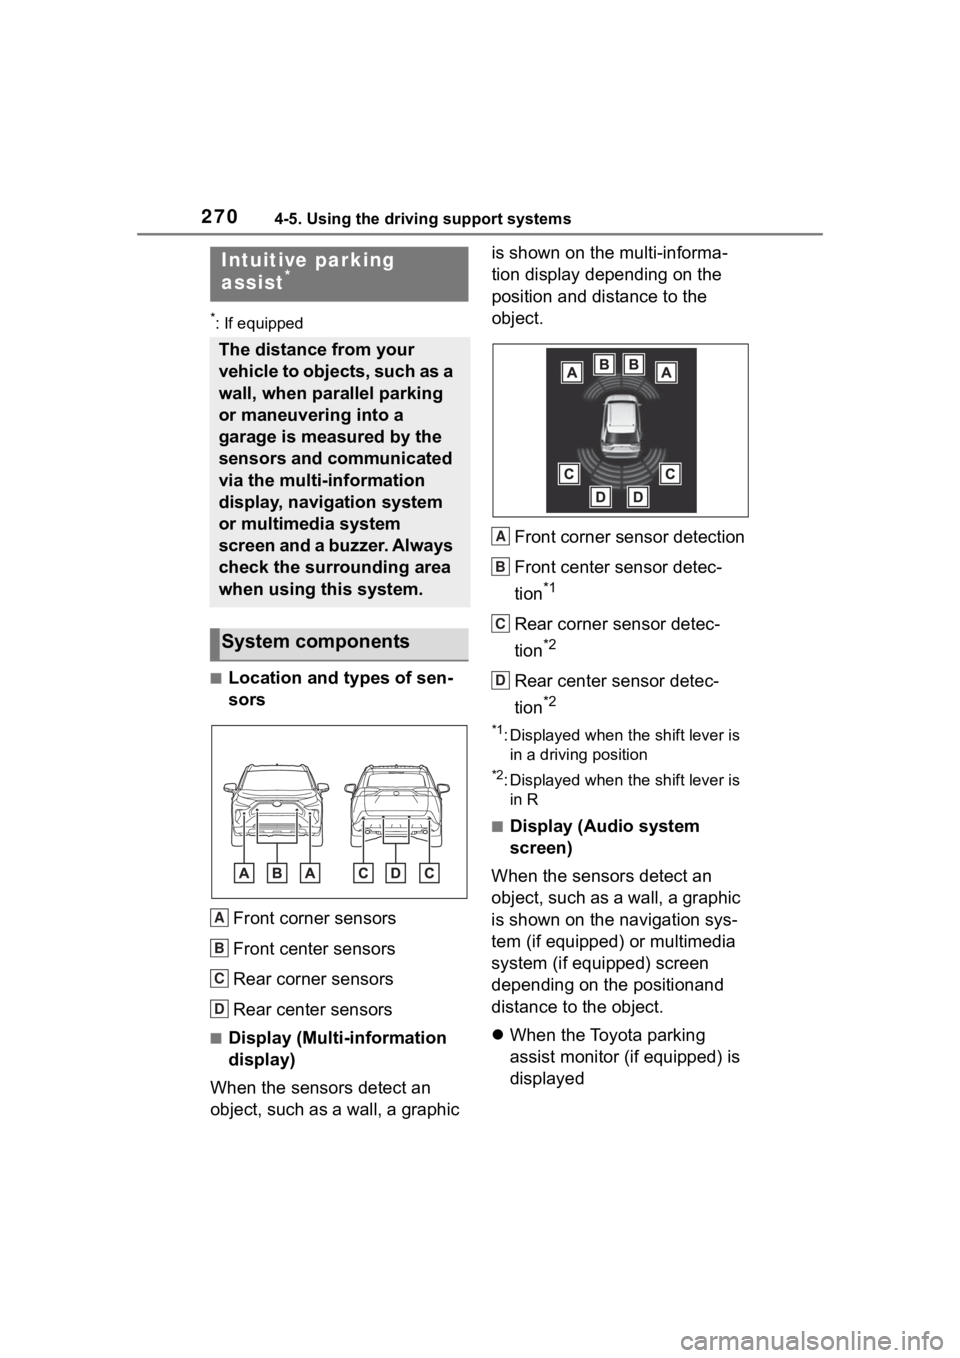
■Location and types of sen-
sorsFront corner sensors
Front center sensors
Rear corner sensors
Rear center sensors
■Display (Multi-information
display)
When the sensors detect an
object, such as a wall, a graphic is shown on the multi-informa-
tion display depending on the
position and distance to the
object.
Front corner sensor detection
Front center sensor detec-
tion
*1
Rear corner sensor detec-
tion
*2
Rear center sensor detec-
tion
*2
*1: Displayed when the shift lever is in a driving position
*2: Displayed when the shift lever is in R
■Display (Audio system
screen)
When the sensors detect an
object, such as a wall, a graphic
is shown on the navigation sys-
tem (if equipped) or multimedia
system (if equipped) screen
depending on the positionand
distance to the object.
When the Toyota parking
assist monitor (if equipped) is
displayed
Intuitive parking
assist*
The distance from your
vehicle to objects, such as a
wall, when parallel parking
or maneuvering into a
garage is measured by the
sensors and communicated
via the multi-information
display, navigation system
or multimedia system
screen and a buzzer. Always
check the surrounding area
when using this system.
System components
A
B
C
D
A
B
C
D