check engine light TOYOTA RAV4 2020 (in English) Owner's Manual
[x] Cancel search | Manufacturer: TOYOTA, Model Year: 2020, Model line: RAV4, Model: TOYOTA RAV4 2020Pages: 736, PDF Size: 30.79 MB
Page 219 of 736
2194-3. Operating the lights and wipers
4
Driving
*2: For Canada
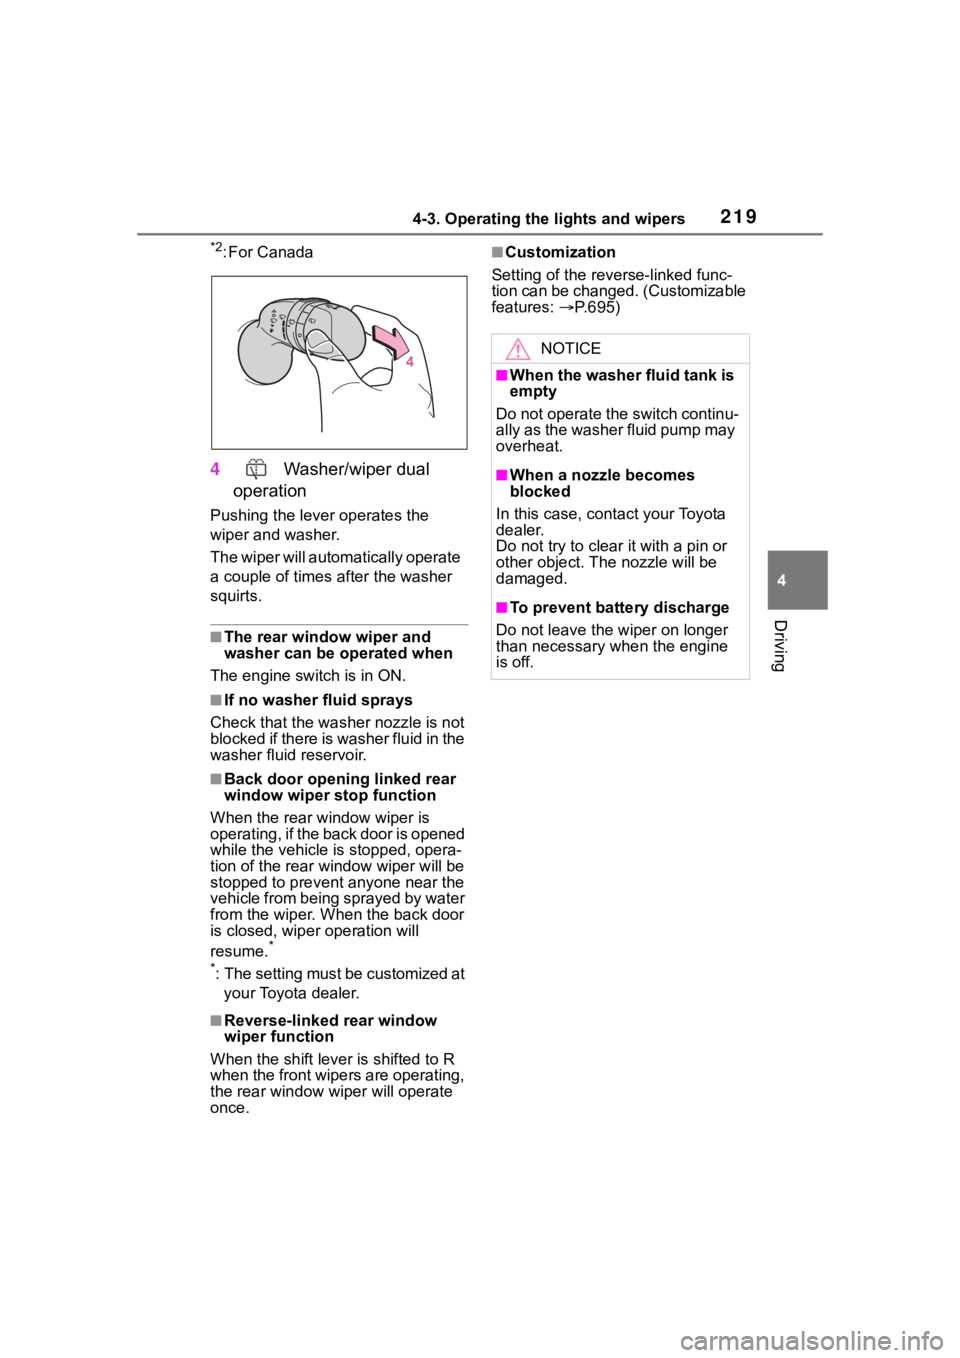
4 Washer/wiper dual
operation
Pushing the lever operates the
wiper and washer.
The wiper will automatically operate
a couple of times after the washer
squirts.
■The rear window wiper and
washer can be operated when
The engine switch is in ON.
■If no washer fluid sprays
Check that the washer nozzle is not
blocked if there is washer fluid in the
washer fluid reservoir.
■Back door opening linked rear
window wiper stop function
When the rear w indow wiper is
operating, if the back door is opened
while the vehicle is stopped, opera-
tion of the rear window wiper will be
stopped to prevent anyone near the
vehicle from being sprayed by water
from the wiper. When the back door
is closed, wiper operation will
resume.
*
*
: The setting must be customized at your Toyota dealer.
■Reverse-linked rear window
wiper function
When the shift lever is shifted to R
when the front wipers are operating,
the rear window wiper will operate
once.
■Customization
Setting of the reverse-linked func-
tion can be changed. (Customizable
features: P.695)
NOTICE
■When the washer fluid tank is
empty
Do not operate the switch continu-
ally as the washer fluid pump may
overheat.
■When a nozzle becomes
blocked
In this case, contact your Toyota
dealer.
Do not try to clear it with a pin or
other object. The nozzle will be
damaged.
■To prevent battery discharge
Do not leave the wiper on longer
than necessary w hen the engine
is off.
Page 221 of 736
2214-4. Refueling
4
Driving
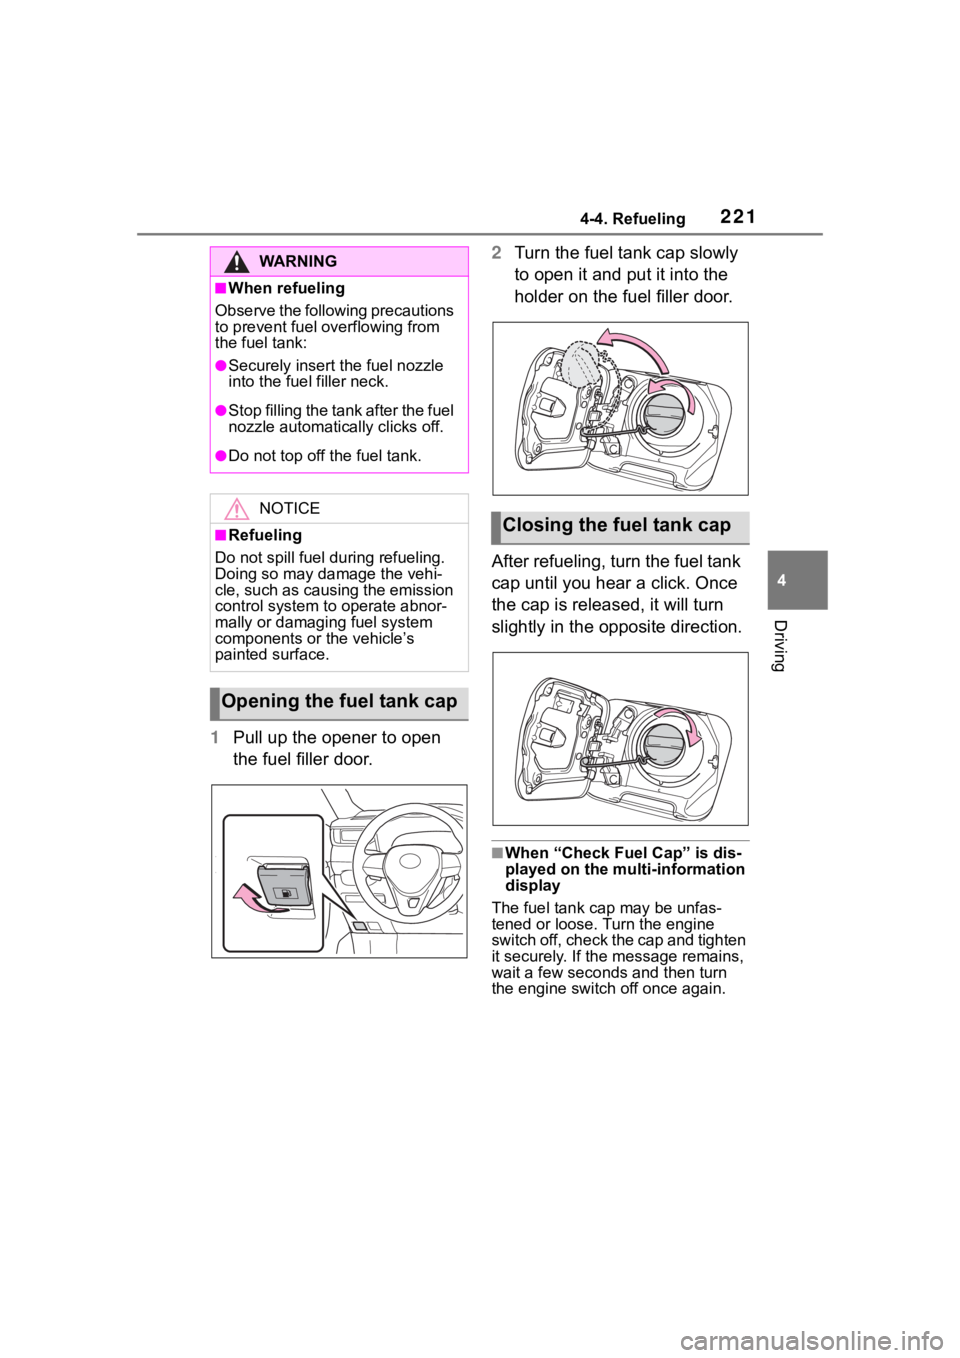
1Pull up the opener to open
the fuel filler door. 2
Turn the fuel tank cap slowly
to open it and put it into the
holder on the fuel filler door.
After refueling, turn the fuel tank
cap until you hear a click. Once
the cap is released, it will turn
slightly in the opposite direction.
■When “Check Fuel Cap” is dis-
played on the multi-information
display
The fuel tank ca p may be unfas-
tened or loose. Turn the engine
switch off, check the cap and tighten
it securely. If the message remains,
wait a few seconds and then turn
the engine switch off once again.
WA R N I N G
■When refueling
Observe the following precautions
to prevent fuel overflowing from
the fuel tank:
●Securely insert the fuel nozzle
into the fuel filler neck.
●Stop filling the tank after the fuel
nozzle automatically clicks off.
●Do not top off the fuel tank.
NOTICE
■Refueling
Do not spill fuel during refueling.
Doing so may damage the vehi-
cle, such as causing the emission
control system to operate abnor-
mally or damaging fuel system
components or the vehicle’s
painted surface.
Opening the fuel tank cap
Closing the fuel tank cap
Page 359 of 736
3594-5. Using the driving support systems
4
Driving
operation. The indicator will flash
during operation, and then go off
when the system is fully off.
■When the downhill assist con-
trol system is operated continu-
ously
This may cause the brake actuator
to overheat. In this case, the down-
hill assist control system will stop
operating, a buzze r will sound and
the downhill assist control system
indicator will start flashing. Refrain
from using the s ystem until the
downhill assist control system indi-
cator stays on. (T he vehicle can be
driven normally during this time.)
■Sounds and vibrations caused
by the downhill assist control
system
●A sound may be heard from the
engine compartment when the
engine is started or just after the
vehicle begins to move. This
sound does not indicate that a
malfunction has occurred in down-
hill assist control system.
●Either of the following conditions
may occur when the downhill
assist control system is operating.
None of these are indicators that a
malfunction has occurred.
• Vibrations may be felt through the
vehicle body and steering.
• A motor sound may be heard after the vehicle comes to a stop.
■System malfunction
In the following ca ses, have your
vehicle checked by your Toyota
dealer.
●The downhill assist control system
indicator does not come on when
the engine switch is turned to ON.
●The downhill assist control system
indicator does not come on when
the “DAC” switch is pressed.
●The slip indicator light comes on.
WA R N I N G
■The system may not operate
on the following surfaces,
which may lead to an acci-
dent causing death or serious
injury
●Slippery surfaces such as wet
or muddy roads
●Icy surface
●Unpaved roads
Page 557 of 736
557
7
7
Maintenance and care
Maintenance and care
7-1. Maintenance and careCleaning and protecting the vehicle exterior .......... 558
Cleaning and protecting the vehicle interior ........... 561
7-2. Maintenance Maintenance requirements.................................. 564
General maintenance.. 565
Emission inspection and maintenance (I/M) pro-
grams ........................ 568
7-3. Do-it-yourself mainte- nance
Do-it-yourself service pre- cautions ..................... 569
Hood ........................... 571
Positioning a floor jack 572
Engine compartment ... 574
Tires ............................ 581
Tire inflation pressure.. 595
Wheels ......... ...............597
Air conditioning filter .... 599
Wiper insert replacement .................................. 601
Wireless remote con- trol/electronic key battery.................................. 604
Checking and replacing fuses.......................... 607
Light bulbs................... 609
Page 565 of 736
5657-2. Maintenance
7
Maintenance and care
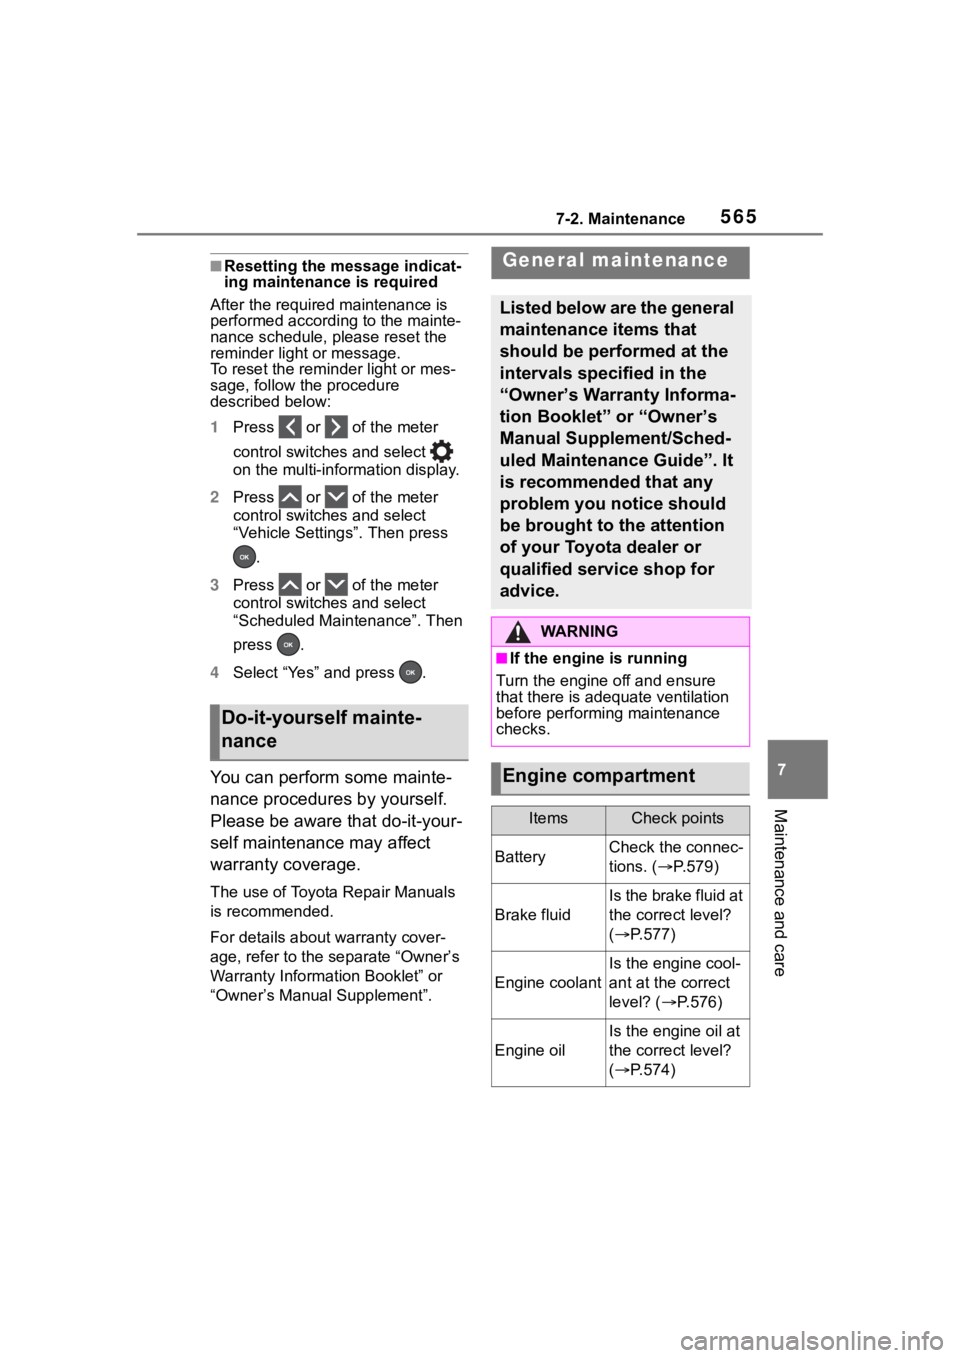
■Resetting the message indicat-
ing maintenance is required
After the required maintenance is
performed according to the mainte-
nance schedule, please reset the
reminder light or message.
To reset the remin der light or mes-
sage, follow the procedure
described below:
1 Press or of the meter
control switches and select
on the multi-information display.
2 Press or of the meter
control switches and select
“Vehicle Settings”. Then press
.
3 Press or of the meter
control switches and select
“Scheduled Maintenance”. Then
press .
4 Select “Yes” and press .
You can perform some mainte-
nance procedures by yourself.
Please be aware that do-it-your-
self maintenance may affect
warranty coverage.
The use of Toyota Repair Manuals
is recommended.
For details about warranty cover-
age, refer to the separate “Owner’s
Warranty Information Booklet” or
“Owner’s Manual Supplement”.
Do-it-yourself mainte-
nance
General maintenance
Listed below are the general
maintenance items that
should be performed at the
intervals specified in the
“Owner’s Warranty Informa-
tion Booklet” or “Owner’s
Manual Supplement/Sched-
uled Maintenance Guide”. It
is recommended that any
problem you notice should
be brought to the attention
of your Toyota dealer or
qualified service shop for
advice.
WA R N I N G
■If the engine is running
Turn the engine off and ensure
that there is adequate ventilation
before performing maintenance
checks.
Engine compartment
ItemsCheck points
BatteryCheck the connec-
tions. ( P.579)
Brake fluid
Is the brake fluid at
the correct level?
( P.577)
Engine coolant
Is the engine cool-
ant at the correct
level? ( P.576)
Engine oil
Is the engine oil at
the correct level?
( P.574)
Page 579 of 736

5797-3. Do-it-yourself maintenance
7
Maintenance and care
Check the battery as follows.
■Battery exterior
Make sure that the battery termi-
nals are not corroded and that
there are no loose connections,
cracks, or loose clamps.
Terminals
Hold-down clamp
■Before recharging
When recharging, t he battery pro-
duces hydrogen ga s which is flam-
mable and explosive. Therefore,
observe the following precautions
before recharging:
●If recharging wi th the battery
installed on the vehicle, be sure to
disconnect the ground cable.
●Make sure the power switch on
the charger is off when connecting
and disconnecting the charger cables to the battery.
■After recharging/reconnecting
the battery (vehicles with smart
key system)
The engine may not start. Follow the
procedure below to initialize the sys-
tem.
1 Shift the shift lever to P.
2 Open and close any of the doors.
3 Restart the engine.
●Unlocking the doors using the
smart key system may not be pos-
sible immediately after reconnect-
ing the battery. If this happens,
use the wireless remote control or
the mechanical key to lock/unlock
the doors.
●Start the engine with the engine
switch in ACC. T he engine may
not start with th e engine switch
turned off. However, the engine
will operate normally from the sec-
ond attempt.
●The engine switch mode is
recorded by the vehicle. If the bat-
tery is disconnected and recon-
nected, the vehi cle will return the
engine switch mode to the status it
was in before the battery was dis-
connected. Make sure to turn off
the engine switch before discon-
necting the battery. Take extra
care when connecting the battery
if the engine switch mode prior to
the battery being disconnected is
unknown.
If the engine will no t start even after
multiple attempts, contact your Toy-
ota dealer.
NOTICE
■If the fluid level is low or high
It is normal for the brake fluid level
to go down slightly as the brake
pads wear out or when the fluid
level in the accumulator is high.
If the reservoir needs frequent
refilling, there ma y be a serious
problem.
Checking the battery
A
B
Page 584 of 736
5847-3. Do-it-yourself maintenance
Your vehicle is equipped with a
tire pressure warning system
that uses tire pressure warning
valves and transmitters to detect
low tire inflation pressure before
serious problems arise.
If the tire pressure drops
below a predetermined level,
the driver is warned a screen
display
* and by a warning
light. ( P.634)
*: Vehicles with tire inflation pres-
sure display function only
Vehicles with tire inflation
pressure display function
only: The tire pressure
detected by the tire pressure
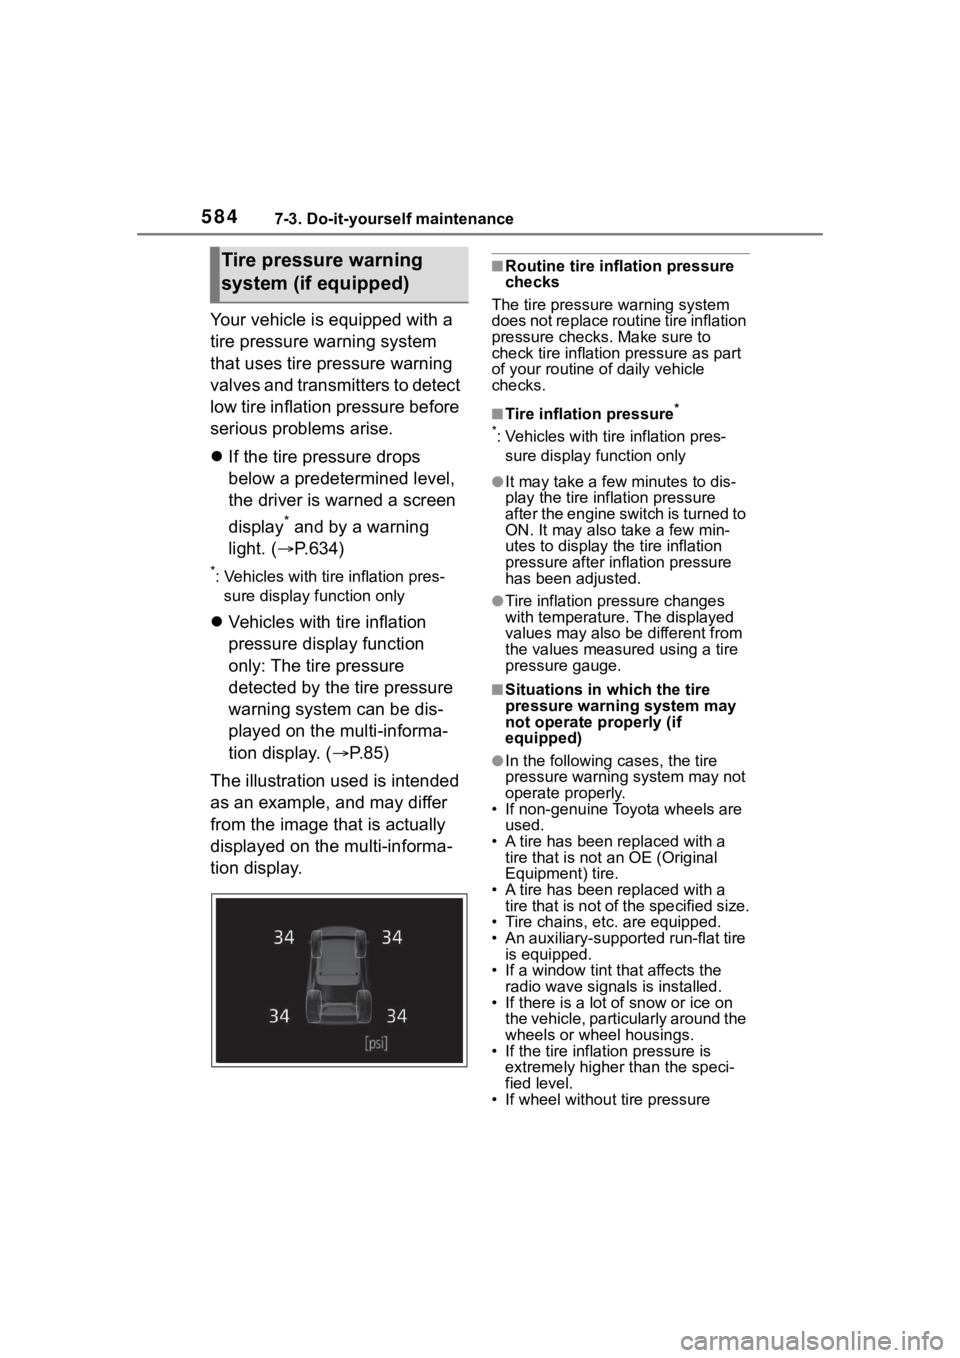
warning system can be dis-
played on the multi-informa-
tion display. ( P. 8 5 )
The illustration used is intended
as an example, and may differ
from the image that is actually
displayed on the multi-informa-
tion display.
■Routine tire inflation pressure
checks
The tire pressure warning system
does not replace routine tire inflation
pressure checks . Make sure to
check tire inflation pressure as part
of your routine o f daily vehicle
checks.
■Tire inflation pressure*
*
: Vehicles with tire inflation pres- sure display function only
●It may take a few minutes to dis-
play the tire inflation pressure
after the engine switch is turned to
ON. It may also take a few min-
utes to display the tire inflation
pressure after infl ation pressure
has been adjusted.
●Tire inflation pressure changes
with temperature. The displayed
values may also be different from
the values measured using a tire
pressure gauge.
■Situations in which the tire
pressure warning system may
not operate properly (if
equipped)
●In the following cases, the tire
pressure warning system may not
operate properly.
• If non-genuine Toyota wheels are used.
• A tire has been replaced with a
tire that is not an OE (Original
Equipment) tire.
• A tire has been replaced with a
tire that is not of the specified size.
• Tire chains, etc. are equipped.
• An auxiliary-support ed run-flat tire
is equipped.
• If a window tint that affects the radio wave signals is installed.
• If there is a lot of snow or ice on the vehicle, particularly around the
wheels or wheel housings.
• If the tire inflation pressure is extremely higher than the speci-
fied level.
• If wheel withou t tire pressure
Tire pressure warning
system (if equipped)
Page 609 of 736
6097-3. Do-it-yourself maintenance
7
Maintenance and care
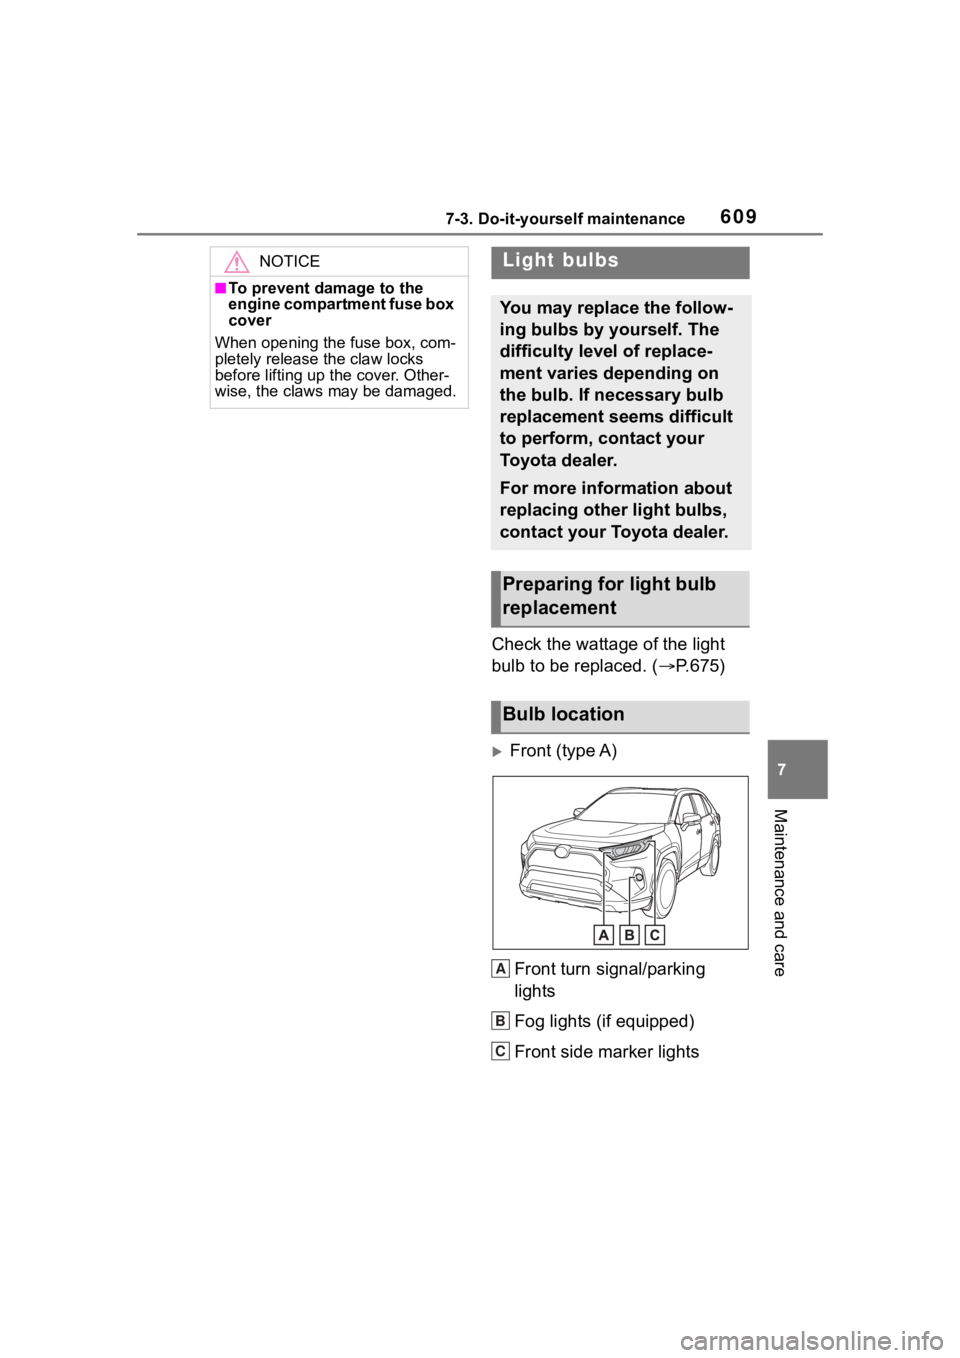
Check the wattage of the light
bulb to be replaced. (P.675)
Front (type A)
Front turn signal/parking
lights
Fog lights (if equipped)
Front side marker lights
NOTICE
■To prevent damage to the
engine compartment fuse box
cover
When opening the fuse box, com-
pletely release the claw locks
before lifting up the cover. Other-
wise, the claws may be damaged.
Light bulbs
You may replace the follow-
ing bulbs by yourself. The
difficulty level of replace-
ment varies depending on
the bulb. If necessary bulb
replacement seems difficult
to perform, contact your
Toyota dealer.
For more information about
replacing other light bulbs,
contact your Toyota dealer.
Preparing for light bulb
replacement
Bulb location
A
B
C
Page 636 of 736

6368-2. Steps to take in an emergency
seat.
●If a cushion is placed on the seat,
the sensor may not detect a pas-
senger, and the warning light may
not operate properly.
■SRS warning light
This warning light system monitors
the airbag sensor assembly, front
impact sensors, side impact sensors
(front door), side impact sensors
(front), side impact sensors (rear),
driver’s seat position sensor,
driver’s seat belt buckle switch, front
passenger occupant classification
system (ECU and sensors), “AIR
BAG ON” indicator light, “AIR BAG
OFF” indicator light, front passen-
ger’s seat belt buc kle switch, seat
belt pretensioners and force limiters,
airbags, interconnecting wiring and
power sources. ( P. 3 4 )
■If the malfunction indicator
lamp comes on while driving
First check the following:
●Is the fuel t ank empty?
If it is, fill the fu el tank immediately.
●Is the fuel tank cap loose?
If it is, tighten it securely.
The light will go o ff after several
driving trips.
If the light does not go off even after
several trips, contact your Toyota
dealer as soon as possible.
■Electric power steering system
warning light (warning buzzer)
When the battery charge becomes
insufficient or the voltage temporar-
ily drops, the electric power steering
system warning light may come on
and the warning buzzer may sound.
■When the tire pressure warning
light comes on (vehicles with
tire pressure warning system)
Inspect the tires to check if a tire is
punctured.
If a tire is punctured: P.642 If none of the tires are punctured:
Turn the engine switch to OFF then
turn it to ON. Check
if the tire pres-
sure warning light comes on or
blinks.
If the tire pressur e warning light
blinks for approximately 1 minute
then stays on
There may be a malfunction in the
tire pressure warning system. Have
the vehicle inspected by your Toyota
dealer immediately.
If the tire pressur e warning light
comes on
1 After the temperature of the tires
has lowered sufficiently, check
the inflation pressure of each tire
and adjust them to the specified
level.
2 If the warning light does not turn
off even after several minutes
have elapsed, check that the
inflation pressure of each tire is
at the specified level and perform
initialization. ( P.590)
■The tire pressure warning light
may come on due to natural
causes (vehicles with tire pres-
sure warning system)
The tire pressure warning light may
come on due to natural causes such
as natural air leaks and tire inflation
pressure changes caused by tem-
perature. In this ca se, adjusting the
tire inflation pressure will turn off the
warning ligh t (after a few minutes).
■When a tire is replaced with a
compact spare tire (vehicles
with tire pressure warning sys-
tem)
The compact spare tire is not
equipped with a tire pressure warn-
ing valve and tran smitter. If a tire
goes flat, the tire pressure warning
light will not turn off even though the
flat tire has been replaced with the
spare tire. Replac e the spare tire
with the standard tire and adjust the
tire inflation pressure. The tire pres-
Page 640 of 736

6408-2. Steps to take in an emergency
sumable.
■If a message that indicates the
need for visiting your Toyota
dealer is displayed
The system or part shown on the
multi-information di splay is malfunc-
tioning. Have the vehicle inspected
by your Toyota dealer immediately.
■If a message that indicates the
need for referring to Owner’s
Manual is displayed
●If “Engine Coolant Temp High” is
shown, follow the instructions
( P.659).
●If the following messages are
shown, there may be a malfunc-
tion.
Immediately stop t he vehicle in a
safe place and co ntact your Toy-
ota dealer. Continuing to drive the
vehicle may be dangerous.
• “Charging System Malfunction”
• “High Transmission Fluid Temp”
• “Smart Key System Malfunction”
●If the following messages are
shown, there may be a malfunc-
tion.
Immediately have the vehicle
inspected by you r Toyota dealer.
• “Oil Pressure Low”
•“Braking Power Low”
■If “Shift to P when Parked” is
shown
Message is displayed when the
driver’s door is opened without turn-
ing the engine switch to OFF with
the shift lever in any position other
than P.
Shift the shift lever to P.
■If “Auto Power OFF to Conserve
Battery” is shown
Power was turned off due to the
automatic power off function.
Next time when starting the engine,
increase the engin e speed slightly
and maintain that level for approxi-
mately 5 minutes to recharge the
battery.
■If “Engine Oil Level Low Add or
Replace” is displayed
The engine oil le vel may be low.
Check the level o f the engine oil,
and add engine oil if necessary. This
message may be displayed if the
vehicle is stopped on a slope. Move
the vehicle to a l evel surface and
check if the message disappears.
■If “Maintenance Required
Soon” is shown
Indicates that all maintenance
according to the driven distance on
the maintenance schedule
* should
be performed soon.
Comes on approximately 4500
miles (7200 km) after the message
has been reset.
If necessary, perform maintenance.
Please reset the m essage after the
maintenance is performed.
( P.565)
*: Refer to the separate “Scheduled
Maintenance Guide” or “Owner’
Manual Supplement” for the main-
tenance interval applicable to your
vehicle.
■If “Maintenance Required Visit
Your Dealer” is shown
Indicates that all maintenance is
required to correspond to the driven
distance on the maintenance sched-
ule
*.
Comes on approximately 5000
miles (8000 km) after the message
has been reset. (The indicator will
not work properly unless the mes-
sage has been reset.)
Perform the necessary mainte-
nance. Please reset the message
after the maintenance is performed.
( P.565)
*: Refer to the separate “Scheduled
Maintenance Guide” or “Owner’
Manual Supplement” for the main-
tenance interval applicable to your
vehicle.