warning light TOYOTA RAV4 2022 Repair Manual
[x] Cancel search | Manufacturer: TOYOTA, Model Year: 2022, Model line: RAV4, Model: TOYOTA RAV4 2022Pages: 748, PDF Size: 22.93 MB
Page 350 of 748
3504-5. Using the driving support systems
■Rock & Dirt mode
Suitable for driving on bumpy
roads, such as on unpaved for-
est roads.
■Normal mode
Suitable for normal driving. Use
Normal mode when not driving
off-road.
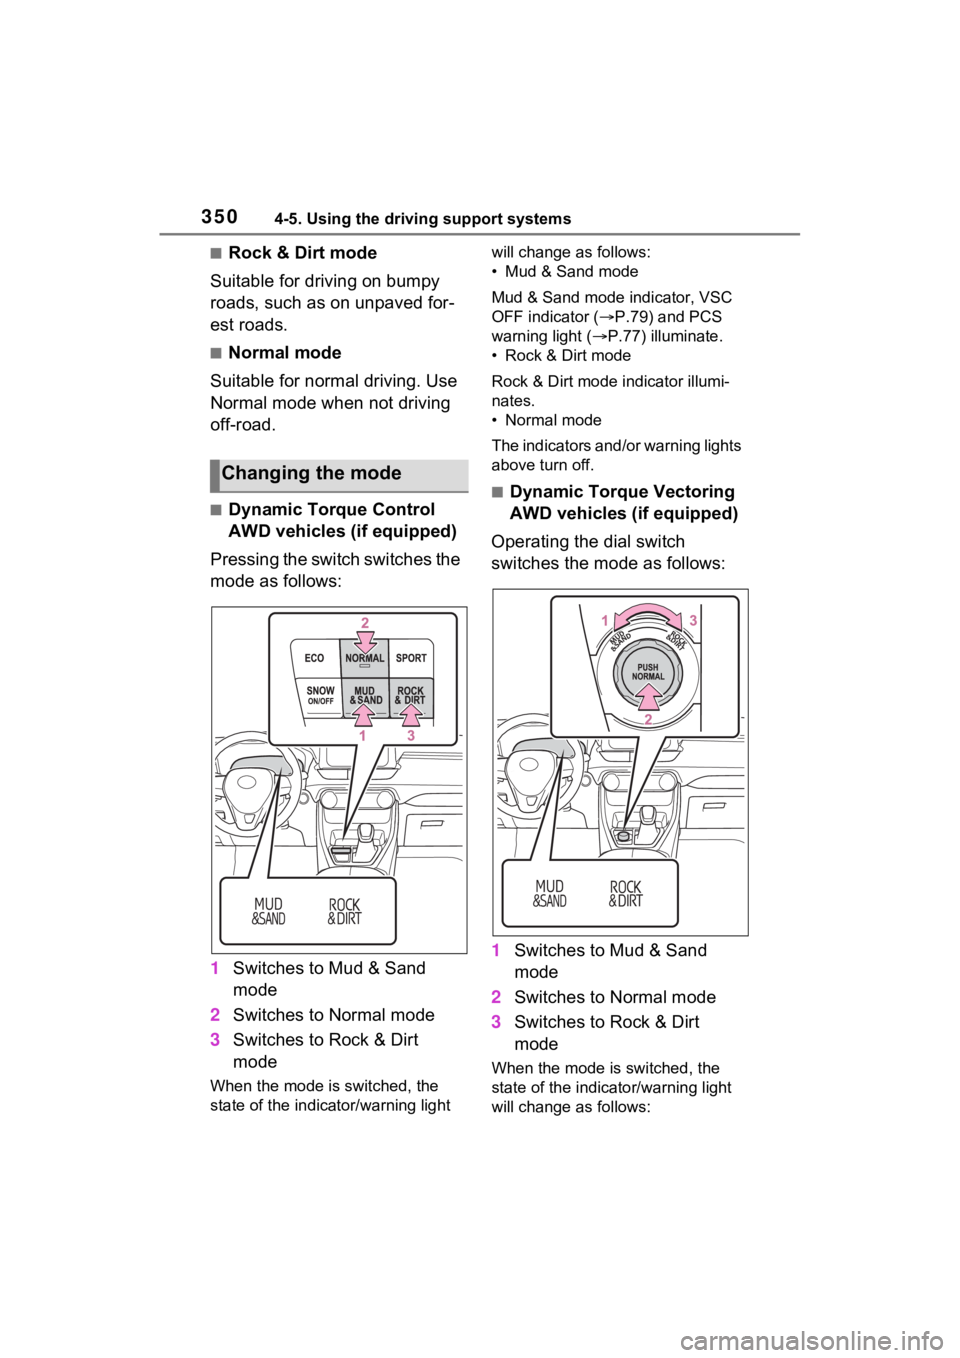
■Dynamic Torque Control
AWD vehicles (if equipped)
Pressing the switch switches the
mode as follows:
1 Switches to Mud & Sand
mode
2 Switches to Normal mode
3 Switches to Rock & Dirt
mode
When the mode is switched, the
state of the indica tor/warning light will change a
s follows:
• Mud & Sand mode
Mud & Sand mode indicator, VSC
OFF indicator ( P.79) and PCS
warning light ( P.77) illuminate.
• Rock & Dirt mode
Rock & Dirt mode indicator illumi-
nates.
• Normal mode
The indicators and /or warning lights
above turn off.
■Dynamic Torque Vectoring
AWD vehicles (if equipped)
Operating the dial switch
switches the mode as follows:
1 Switches to Mud & Sand
mode
2 Switches to Normal mode
3 Switches to Rock & Dirt
mode
When the mode is switched, the
state of the indicator/warning light
will change a s follows:
Changing the mode
Page 351 of 748
3514-5. Using the driving support systems
4
Driving
• Mud & Sand mode
Mud & Sand mode indicator, VSC
OFF indicator (P.79) and PCS
warning light ( P.77) illuminate.
•Rock & Dirt mode
Rock & Dirt mode indicator illumi-
nates.
•Normal mode
The indicators and/or warning lights
above turn off.
■Multi-terrain Select
●Multi-terrain Sele ct is intended for
use when driving on rough roads.
Drive in Normal mode during nor-
mal driving.
●The Mud & Sand and Rock & Dirt
modes control the vehicle so that
it can maximize the drive force
and improve the drive force on
rough roads. As a result, fuel effi-
ciency may diminish when com-
pared to driving in Normal mode.
■When Multi-terrain Select brake
control is operating
The slip indicator flashes when
Multi-terrain Selec t brake control is
operating.
■AWD control for Mud & Sand
and Rock & Dirt modes
If the vehicle s peed exceeds the
speeds listed below, the same level
of AWD control for Normal mode is
performed, even if Mud & Sand or
Rock & Dirt mode is selected.
●Mud & Sand mode: Vehicle speed
is approximately 25 mph (40
km/h) or more
●Rock & Dirt mode: Vehicle speed
is approximately 16 mph (25
km/h) or more
If the vehicle speed drops below the
above speeds, the system automati-
cally returns to the AWD control for
each mode.
■When “Traction Control Turned
OFF” is displaye d on the multi-
information display
Multi-terrain Select brake control is
temporarily stopped due to overheat
of the brakes.
Stop the vehicle in a safe location
as soon as possible and wait until
the message disappears from the
multi-informat ion display.
■When the system switches to
Normal mode automatically
In the following situ ations, the sys-
tem switches to N ormal mode auto-
matically:
●When the driving mode is
changed ( P.347)
●When the engine switch is turned
off
■Sounds and vibrations when
driving in Mud & Sand or Rock
& Dirt mode
Any of the following conditions may
occur when Multi-terrain Select is
operating. None of these indicates
that a malfunction has occurred:
●Vibrations may be felt throughout
the vehicle or steering wheel
●Sounds may be heard from the
engine compartment
■When the slip indicator illumi-
nates
The system may be malfunctioning.
Have the vehicle inspected by your
Toyota dealer immediately.
■When the indicator for each
mode does no t illuminate
The system may be malfunctioning
if the indicator does not illuminate
when selecting the mode other than
Normal mode. Have the vehicle
inspected by your Toyota dealer
immediately.
Page 353 of 748
3534-5. Using the driving support systems
4
Driving
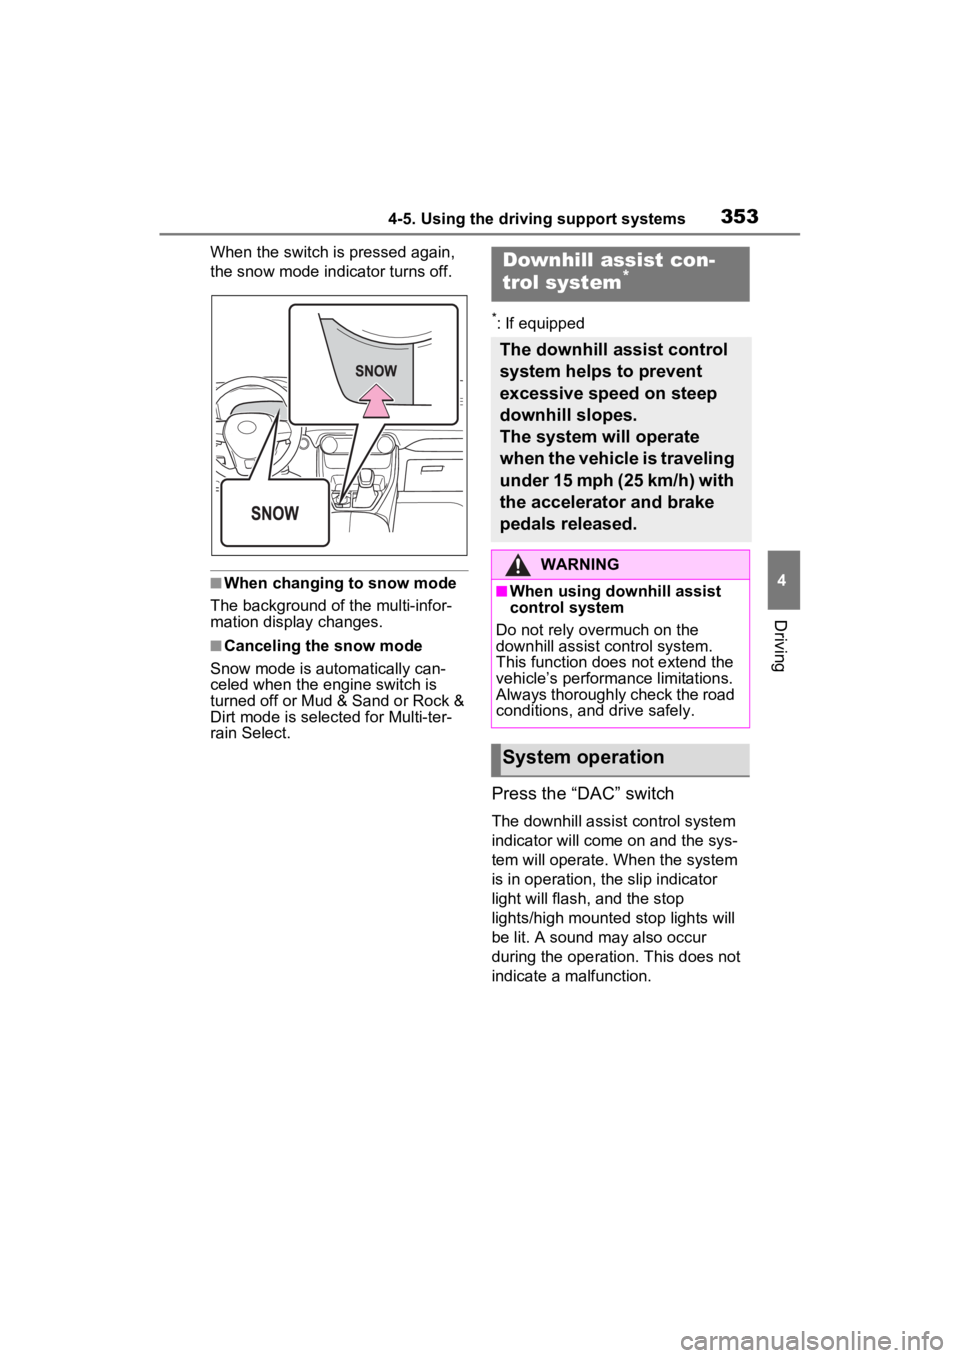
When the switch is pressed again,
the snow mode indicator turns off.
■When changing to snow mode
The background of the multi-infor-
mation display changes.
■Canceling the snow mode
Snow mode is automatically can-
celed when the engine switch is
turned off or Mud & Sand or Rock &
Dirt mode is selec ted for Multi-ter-
rain Select.
*: If equipped
Press the “DAC” switch
The downhill assist control system
indicator will come on and the sys-
tem will operate. When the system
is in operation, the slip indicator
light will flash, and the stop
lights/high mounted stop lights will
be lit. A sound may also occur
during the operati on. This does not
indicate a malfunction.
Downhill assist con-
trol system*
The downhill assist control
system helps to prevent
excessive speed on steep
downhill slopes.
The system will operate
when the vehicle is traveling
under 15 mph (25 km/h) with
the accelerator and brake
pedals released.
WARNING
■When using downhill assist
control system
Do not rely overmuch on the
downhill assist control system.
This function does not extend the
vehicle’s performance limitations.
Always thoroughly check the road
conditions, and drive safely.
System operation
Page 357 of 748
3574-5. Using the driving support systems
4
Driving
detects a collision and the sys-
tem operates, the brakes and
brake lights are automatically
controlled to reduce the vehicle
speed and help reduce the pos-
sibility of further damage due to
a secondary collision.
■When the TRAC/VSC/Multi-ter-
rain Select/Trailer Sway Con-
trol systems are operating
The slip indicator light will flash
while the TRAC/VSC/Multi-terrain
Select/Trailer Sway Control systems
are operating.
■Disabling the TRAC system
If the vehicle gets stuck in mud, dirt
or snow, the TRAC system may
reduce power from the engine to the
wheels.
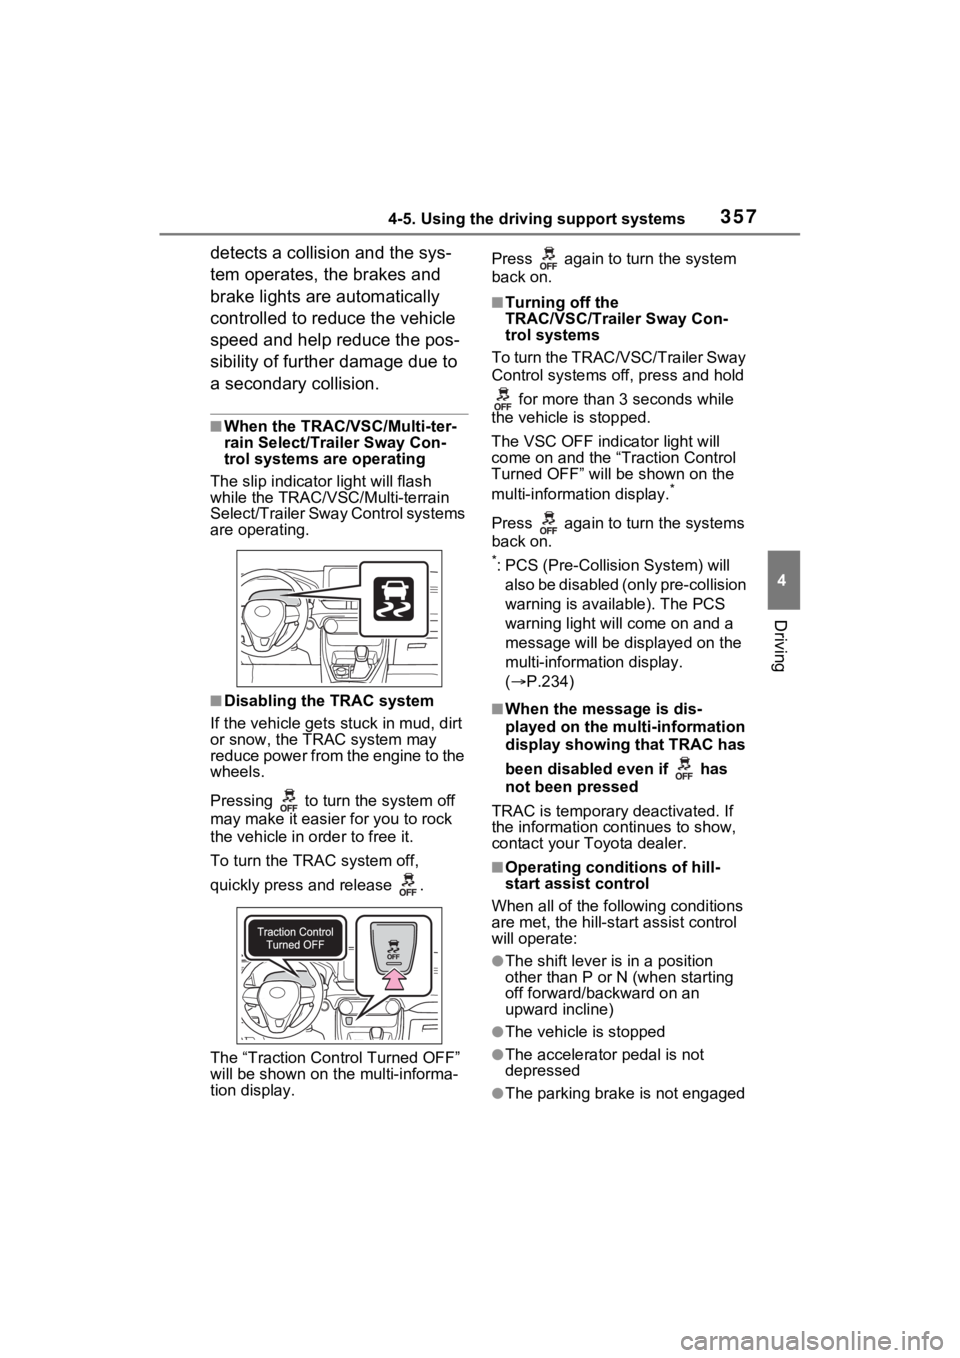
Pressing to turn the system off
may make it easier for you to rock
the vehicle in order to free it.
To turn the TRAC system off,
quickly press and release .
The “Traction Control Turned OFF”
will be shown on the multi-informa-
tion display. Press again to turn the system
back on.
■Turning off the
TRAC/VSC/Trailer Sway Con-
trol systems
To turn the TRAC/VSC/Trailer Sway
Control systems of f, press and hold
for more than 3 seconds while
the vehicle is stopped.
The VSC OFF indicator light will
come on and the “Traction Control
Turned OFF” will be shown on the
multi-informat ion display.
*
Press again to turn the systems
back on.
*: PCS (Pre-Collision System) will
also be disabled (only pre-collision
warning is available). The PCS
warning light will come on and a
message will be disp layed on the
multi-information display.
( P.234)
■When the message is dis-
played on the multi-information
display showing that TRAC has
been disabled even if has
not been pressed
TRAC is temporary deactivated. If
the information continues to show,
contact your Toyota dealer.
■Operating conditions of hill-
start assist control
When all of the fo llowing conditions
are met, the hill-star t assist control
will operate:
●The shift lever is in a position
other than P or N (when starting
off forward/backward on an
upward incline)
●The vehicle is stopped
●The accelerator pedal is not
depressed
●The parking brake is not engaged
Page 360 of 748
3604-5. Using the driving support systems
WARNING
■TRAC/VSC may not operate
effectively when
Directional control and power may
not be achievable while driving on
slippery road surfaces, even if the
TRAC/VSC system is operating.
Drive the vehicle carefully in con-
ditions where stability and power
may be lost.
■Active Cornering Assist does
not operate effectively when
●Do not overly rely on Active
Cornering Assist. Active Corner-
ing Assist may not operate
effectively when accelerating
down slopes or driving on slip-
pery road surfaces.
●When Active Cornering Assist
frequently operates, Active Cor-
nering Assist may temporarily
stop operating to ensure proper
operation of the brakes, TRAC
and VSC.
■Hill-start assist control does
not operate effectively when
●Do not overly rely on hill-start
assist control. Hill-start assist
control may not operate effec-
tively on steep inclines and
roads covered with ice.
●Unlike the parking brake, hill-
start assist control is not
intended to hold the vehicle sta-
tionary for an extended period
of time. Do not attempt to use
hill-start assist control to hold
the vehicle on an incline, as
doing so may lead to an acci-
dent.
■When the TRAC/VSC/Trailer
Sway Control is activated
The slip indicator light flashes.
Always drive carefully. Reckless
driving may cause an accident.
Exercise particular care when the
indicator light flashes.
■When the TRAC/VSC/Trailer
Sway Control systems are
turned off
Be especially careful and drive at
a speed appropriate to the road
conditions. As these are the sys-
tems to help ensure vehicle stabil-
ity and driving force, do not turn
the TRAC/VSC/Tra iler Sway Con-
trol systems off unless necessary.
Trailer Sway Control is part of the
VSC system and will not operate
if VSC is turned off or experiences
a malfunction.
■Dynamic Torque Vectoring
AWD system (if equipped)
The cornering performance of the
newly developed AWD system
has been improved. However, do
not overly rely on the system and
drive with caution.
■Replacing tires
Make sure that all tires are of the
specified size, brand, tread pat-
tern and total load capacity. In
addition, make sure that the tires
are inflated to the recommended
tire inflation p ressure level.
The ABS, TRAC, Trailer Sway
Control and VSC systems will not
function correctly if different tires
are installed on the vehicle.
Contact your Toyota dealer for
further information when replacing
tires or wheels.
■Handling of tires and the sus-
pension
Using tires with any kind of prob-
lem or modifying the suspension
will affect the driving assist sys-
tems, and may cause a system to
malfunction.
Page 523 of 748
5236-1. Using the air conditioning system and defogger
6
Interior features
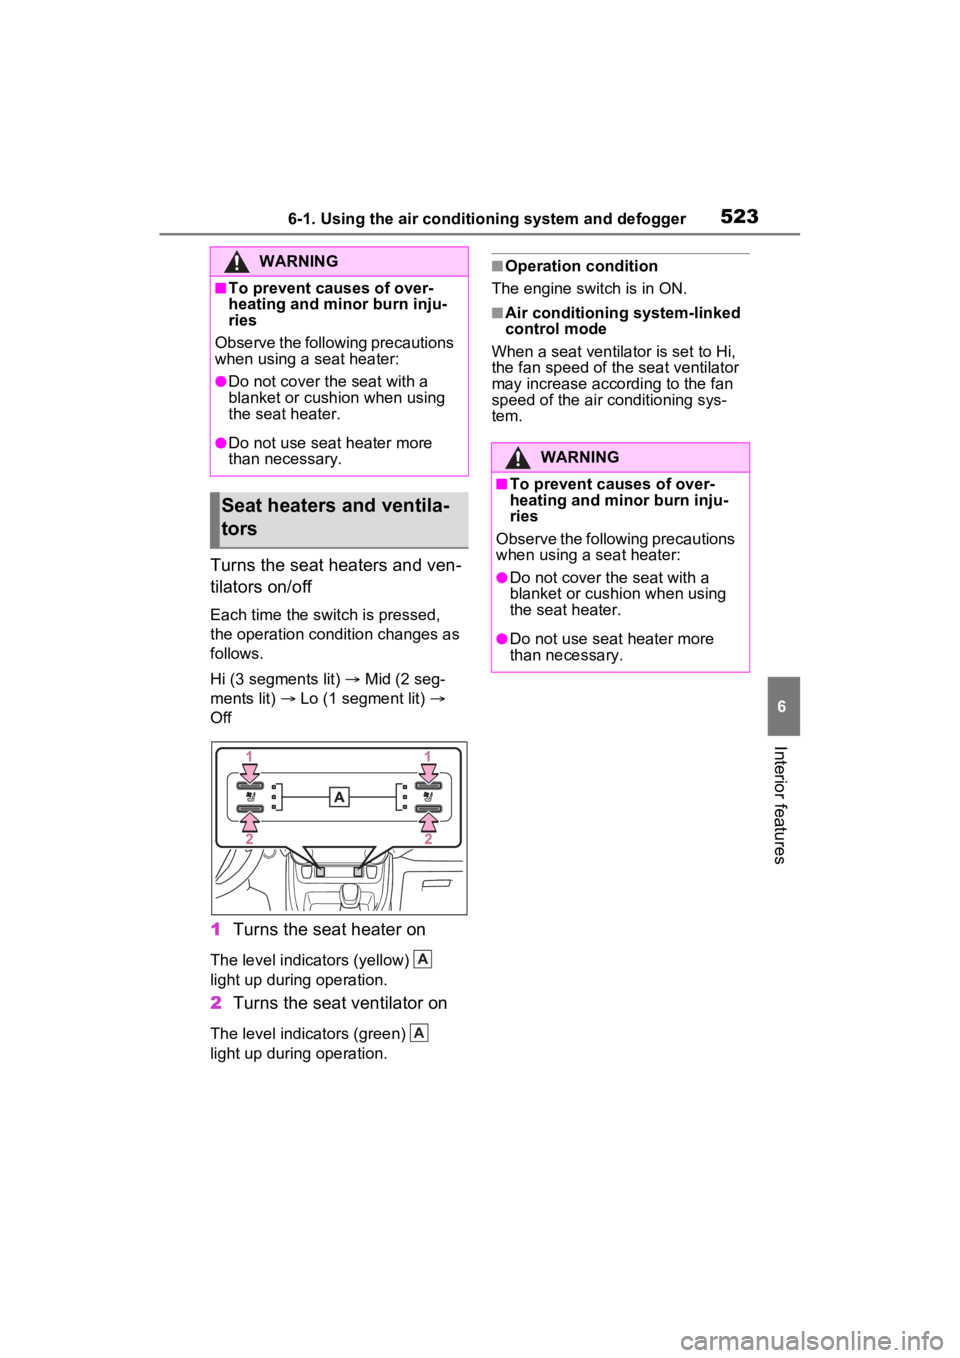
Turns the seat heaters and ven-
tilators on/off
Each time the switch is pressed,
the operation condition changes as
follows.
Hi (3 segments lit) Mid (2 seg-
ments lit) Lo (1 segment lit)
Off
1 Turns the seat heater on
The level indicators (yellow)
light up during operation.
2Turns the seat ventilator on
The level indicators (green)
light up during operation.
■Operation condition
The engine switch is in ON.
■Air conditioning system-linked
control mode
When a seat ventilator is set to Hi,
the fan speed of the seat ventilator
may increase according to the fan
speed of the air conditioning sys-
tem.
WARNING
■To prevent causes of over-
heating and minor burn inju-
ries
Observe the following precautions
when using a seat heater:
●Do not cover the seat with a
blanket or cushion when using
the seat heater.
●Do not use seat heater more
than necessary.
Seat heaters and ventila-
tors
A
A
WARNING
■To prevent causes of over-
heating and minor burn inju-
ries
Observe the following precautions
when using a seat heater:
●Do not cover the seat with a
blanket or cushion when using
the seat heater.
●Do not use seat heater more
than necessary.
Page 543 of 748
5436-4. Using the other interior features
6
Interior features
■Important points of the wireless
charger
●If the electronic key cannot be
detected within the vehicle inte-
rior, charging cannot be done.
When the door is opened and
closed, charging may be tempo-
rarily suspended.
●When charging, the wireless
charging device and portable
device will get warmer, however
this is not a malfunction.
When a portable device gets
warm while charging, charging
may stop due to the protection
function on the portable device
side. In this case, when the tem-
perature of the portable device
drops significantly, charge again.
The fan may start operating to lower
the temperature inside the wireless
charger, however this is not a mal-
function.
■Operation sounds
A buzzing noise may be heard when
pressing the power supply switch to
turn the power supply on, when
turning the engine switch to ACC or
ON while the wireless charger
power supply is on, or when detect-
ing a portable device. However, this
is not a malfunction.
WARNING
■Caution while driving
When charging a portable device,
for safety reasons, the driver
should not operate the main part
of the portable device while driv-
ing.
■Caution while in motion
Do not charge lightweight devices
such as wireless headphones
while in motion. These devices
are very light and may be ejected
from the charging tray, which may
lead to unforeseen accidents.
■Caution regarding interfer-
ence with electronic devices
People with implantable cardiac
pacemakers, cardiac resynchroni-
zation therapy-pacemakers or
implantable cardio verters, as well
as any other electrical medical
device, should consult their physi-
cian about the usage of the wire-
less charger.
■To prevent malfunctions or
burns
Observe the following precau-
tions. Failure to do so may result
in a equipment failure and dam-
age, catch fire, bur ns due to over-
heat or electric shock.
●Do not insert any metallic
objects between the charge
area and the portable device
while charging
●Do not attach a n aluminum
sticker or other metallic object to
the charge area
●Do not attach a n aluminum
sticker or other metallic object to
the side of the portable device
(or to its case or cover) that
touches the charge area
●Do not use the ch arging tray as
a small storage space
●Do not subject to a strong force
or impact
●Do not disassemb le, modify or
remove
●Do not charge devices other
than specified portable devices
●Keep away from magnetic items
●Do not charge devices if the
charge area is covered in dust
●Do not cover with a cloth or sim-
ilar material
Page 546 of 748
5466-4. Using the other interior features
*: If equipped
■HomeLink® programming pro-
cedure
The programming procedures can
also be found at the following URL.
Website: www.homelink.com/toyota
For support, contact customer sup-
port at the following.
Help Line: 1-800-355-3515
The HomeLink® wireless control
system in your vehicle has 3
buttons which can be pro-
grammed to operate 3 different
devices. Refer to the program-
ming methods on the following
pages to determine the method
which is appropriate for the
device.
WARNING
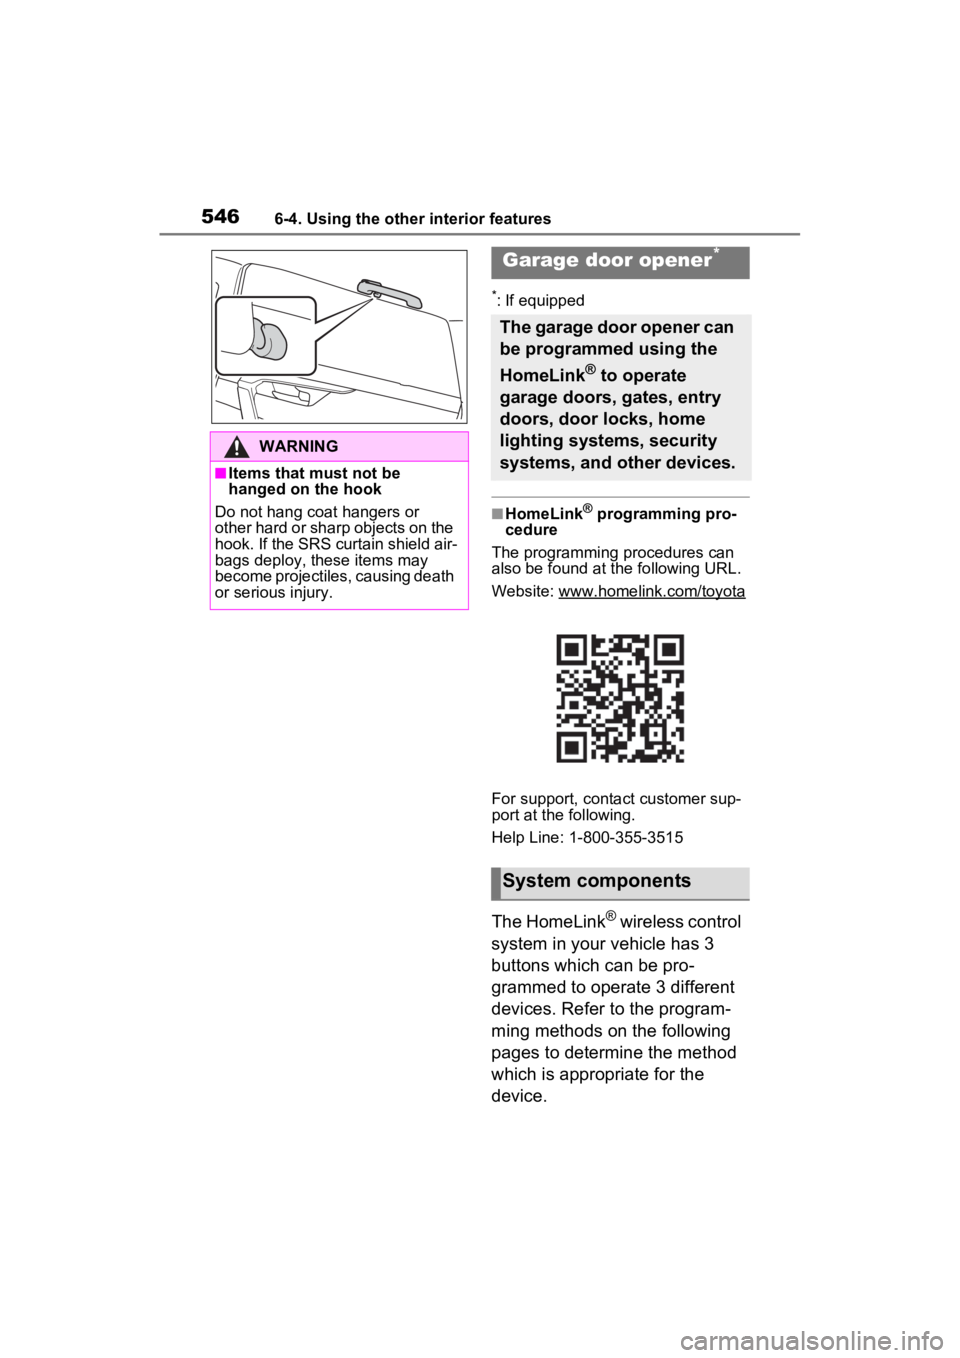
■Items that must not be
hanged on the hook
Do not hang coat hangers or
other hard or sharp objects on the
hook. If the SRS curtain shield air-
bags deploy, these items may
become projectiles, causing death
or serious injury.
Garage door opener*
The garage door opener can
be programmed using the
HomeLink
® to operate
garage doors, gates, entry
doors, door locks, home
lighting systems, security
systems, and other devices.
System components
Page 547 of 748
5476-4. Using the other interior features
6
Interior features
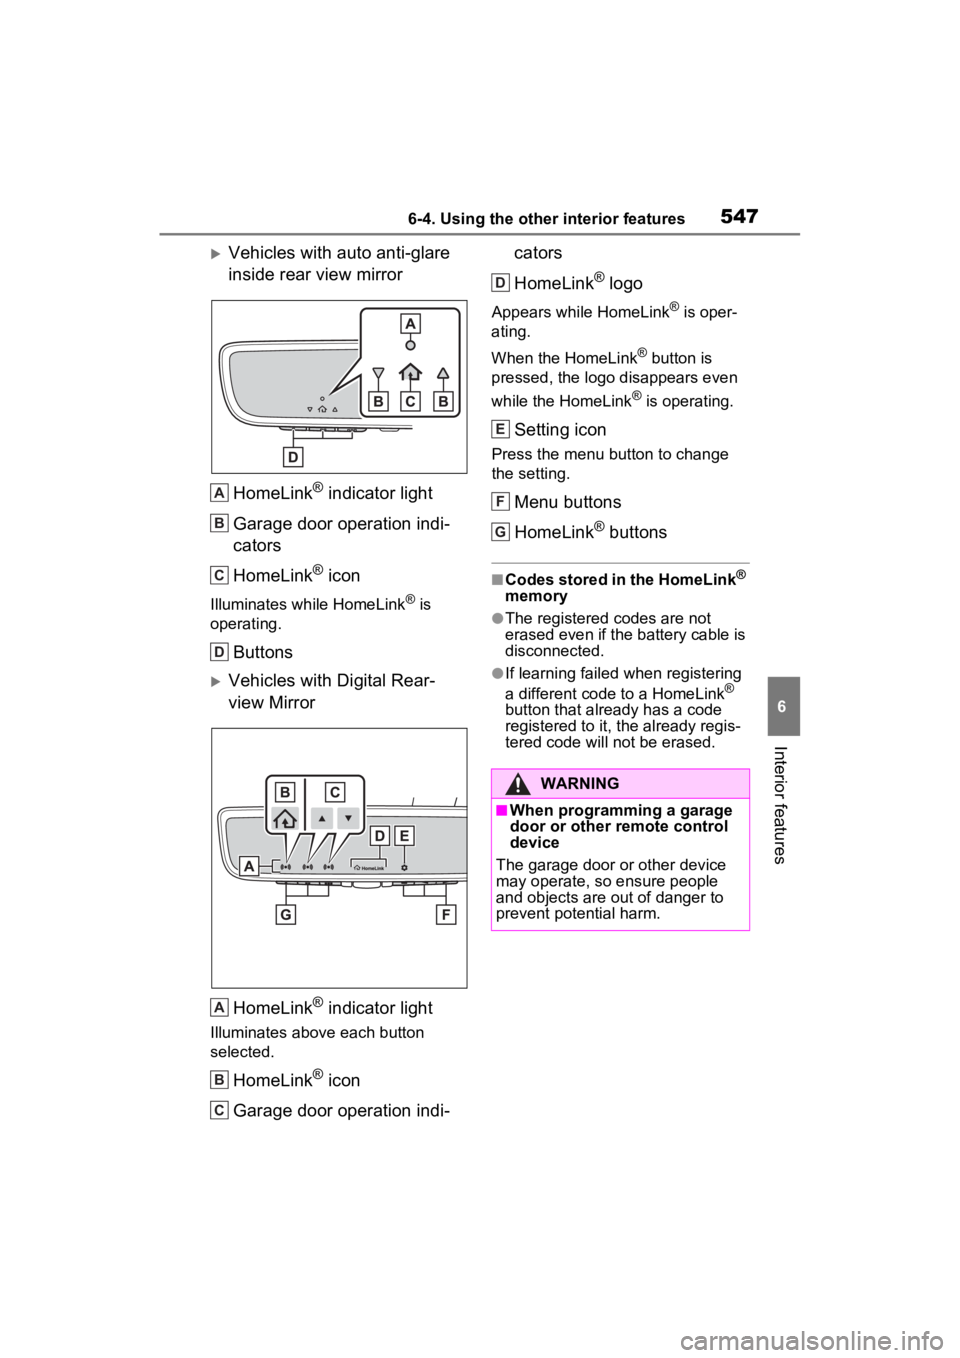
Vehicles with auto anti-glare
inside rear view mirrorHomeLink
® indicator light
Garage door operation indi-
cators
HomeLink
® icon
Illuminates while HomeLink® is
operating.
Buttons
Vehicles with Digital Rear-
view Mirror
HomeLink
® indicator light
Illuminates above each button
selected.
HomeLink® icon
Garage door operation indi- cators
HomeLink
® logo
Appears while HomeLink® is oper-
ating.
When the HomeLink
® button is
pressed, the logo disappears even
while the HomeLink
® is operating.
Setting icon
Press the menu button to change
the setting.
Menu buttons
HomeLink
® buttons
■Codes stored in the HomeLink®
memory
●The registered codes are not
erased even if the battery cable is
disconnected.
●If learning failed when registering
a different code to a HomeLink®
button that already has a code
registered to it, the already regis-
tered code will not be erased.
A
B
C
D
A
B
C
WARNING
■When programming a garage
door or other remote control
device
The garage door or other device
may operate, so ensure people
and objects are out of danger to
prevent potential harm.
D
E
F
G
Page 548 of 748
5486-4. Using the other interior features
■Before programming
HomeLink
®
During programming, it is pos-
sible that garage doors,
gates, or other devices may
operate. For this reason,
make sure that people and
objects are clear of the
garage door or other devices
to prevent injury or other
potential harm.
It is recommended that a new
battery be placed in the
remote control transmitter for
successful programming.
Garage door opener motors
manufactured after 1995 may
be equipped with rolling code
protection. If this is the case, you may need a stepladder or
other sturdy, safe device to
reach the “Learn” or “Smart”
button on the garage door
opener motor.
■Programming HomeLink®
Steps
2 through 4 must be per-
formed within 60 seconds, oth-
erwise the HomeLink
® indicator
light will stop flashing and pro-
gramming will not be success-
fully completed.
1 Vehicles with Digital Rear-
view Mirror: Press the
HomeLink
® button or menu
button
When the HomeLink® button is
pressed:
Homelink
® Training Tutorial will be
displayed to assist you program-
ming the HomeLink
®.
When Homelink
® Training Tutorial
is displayed, follow the instructions
displayed.
When the menu button is pressed:
Press the menu button and
select the “Set U p >”. Homelink
®
Training Tutorial will be displayed
to assist you programming the
HomeLink
®.
When Homelink
® Training Tutorial
is displayed, follow the instructions
displayed.
2 Press and release the
HomeLink
® button you want
to program and check that
the HomeLink
® indicator light
flashes (orange).
WARNING
■Conforming to federal safety
standards
Do not use the HomeLink
® com-
patible transceiver with any
garage door opener or device that
lacks safety stop and reverse fea-
tures as required by federal safety
standards.
This includes any garage door
that cannot detect an interfering
object. A door or device without
these features increases the risk
of death or se rious injury.
■When operating or program-
ming HomeLink®
Never allow a child to operate or
play with the HomeLink® buttons.
Programming HomeLink®