bulb TOYOTA RAV4 HYBRID 2020 Owners Manual (in English)
[x] Cancel search | Manufacturer: TOYOTA, Model Year: 2020, Model line: RAV4 HYBRID, Model: TOYOTA RAV4 HYBRID 2020Pages: 748, PDF Size: 30.6 MB
Page 1 of 748
1
2
3
4
5
6
7
8
9
10
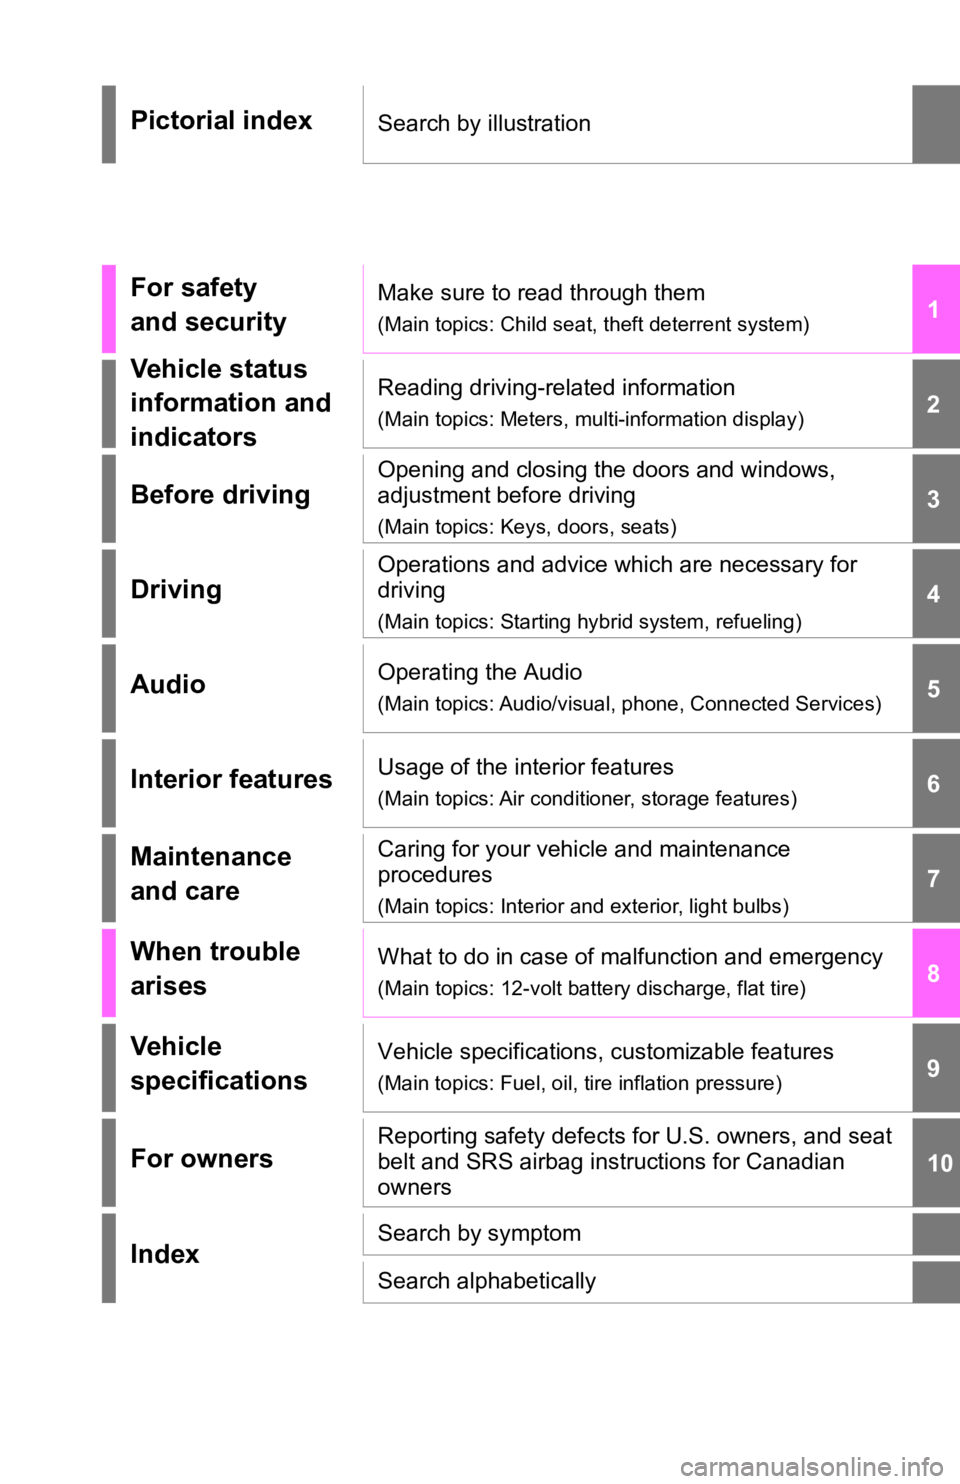
Pictorial indexSearch by illustration
For safety
and securityMake sure to read through them
(Main topics: Child seat, theft deterrent system)
Vehicle status
information and
indicatorsReading driving-related information
(Main topics: Meters, multi-information display)
Before driving
Opening and closing the doors and windows,
adjustment before driving
(Main topics: Keys, doors, seats)
Driving
Operations and advice which are necessary for
driving
(Main topics: Starting hybrid system, refueling)
AudioOperating the Audio
(Main topics: Audio/visual, phone, Connected Services)
Interior featuresUsage of the interior features
(Main topics: Air conditioner, storage features)
Maintenance
and careCaring for your vehicle and maintenance
procedures
(Main topics: Interior and exterior, light bulbs)
When trouble
arisesWhat to do in case of malfunction and emergency
(Main topics: 12-volt battery discharge, flat tire)
Vehicle
specificationsVehicle specifications, customizable features
(Main topics: Fuel, oil, tire inflation pressure)
For ownersReporting safety defects for U.S. owners, and seat
belt and SRS airbag instructions for Canadian
owners
IndexSearch by symptom
Search alphabetically
Page 5 of 748
5TABLE OF CONTENTS
1
2
3
4
5
6
7
8
9
10
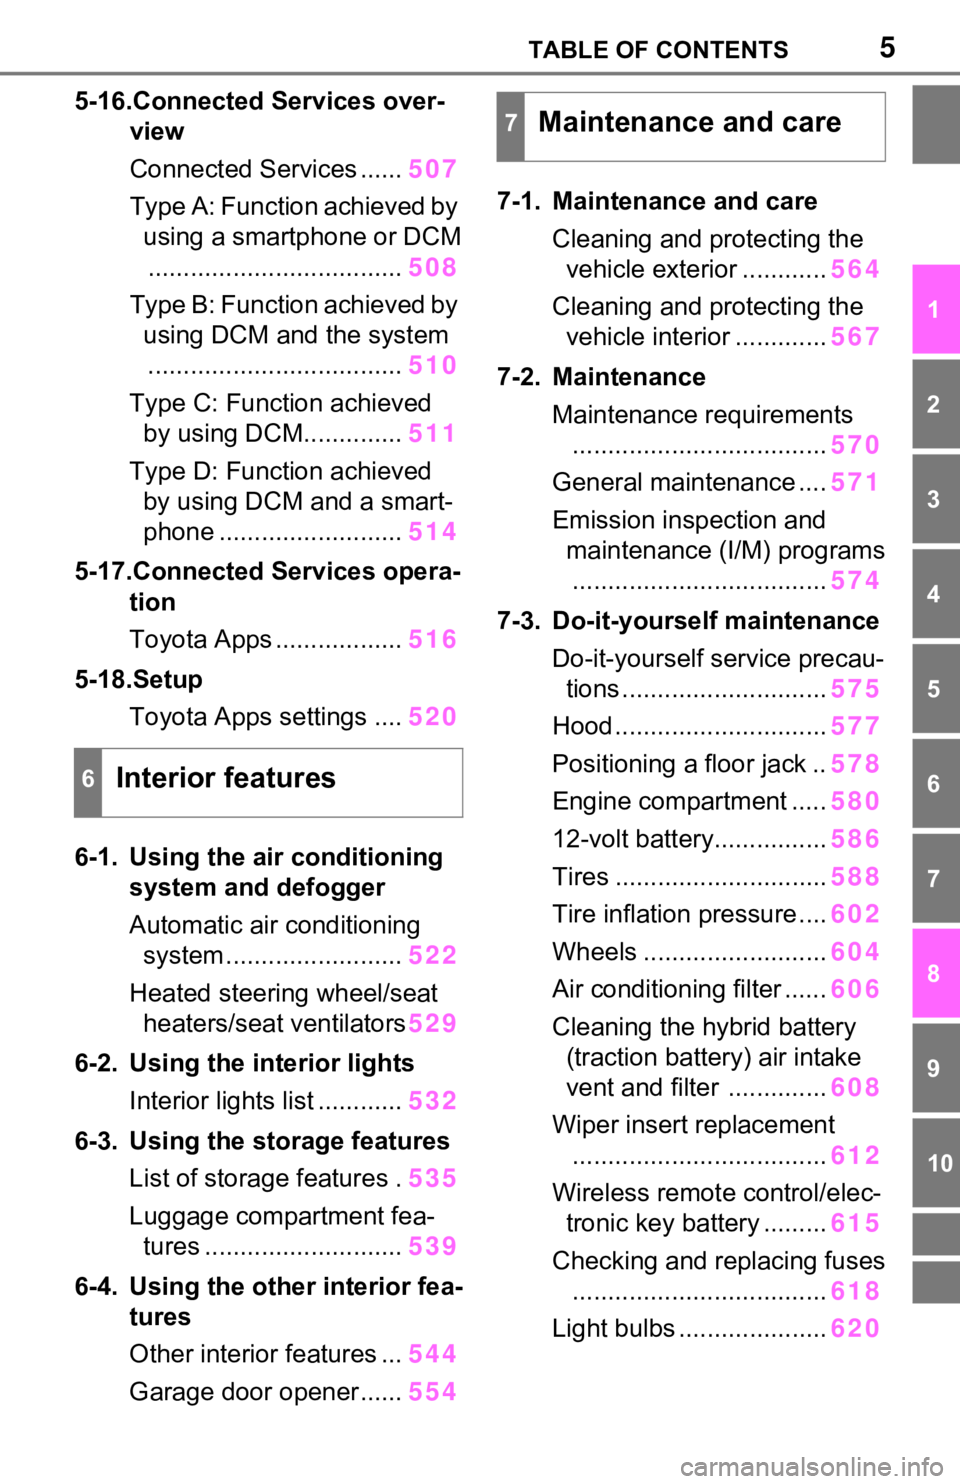
5-16.Connected Services over-view
Connected Services ...... 507
Type A: Function achieved by using a smartphone or DCM
.................................... 508
Type B: Function achieved by using DCM and the system
.................................... 510
Type C: Function achieved by using DCM.............. 511
Type D: Function achieved by using DCM and a smart-
phone .......................... 514
5-17.Connected Services opera- tion
Toyota Apps .................. 516
5-18.Setup Toyota Apps settings .... 520
6-1. Using the air conditioning
system and defogger
Automatic air conditioning
system ......................... 522
Heated steering wheel/seat heaters/seat ventilators 529
6-2. Using the interior lights Interior lights list ............ 532
6-3. Using the storage features List of storage features . 535
Luggage compartment fea- tures ............................ 539
6-4. Using the other interior fea- tures
Other interior features ... 544
Garage door opener...... 5547-1. Maintenance and care
Cleaning and protecting the vehicle exterior ............ 564
Cleaning and protecting the vehicle interior ............. 567
7-2. Maintenance Maintenance requirements.................................... 570
General maintenance .... 571
Emission inspection and maintenance (I/M) programs
.................................... 574
7-3. Do-it-yourself maintenance Do-it-yourself service precau-tions ............................. 575
Hood .............................. 577
Positioning a floor jack .. 578
Engine compartment ..... 580
12-volt battery................ 586
Tires .............................. 588
Tire inflation pressure .... 602
Wheels .......................... 604
Air conditioning filter ...... 606
Cleaning the hybrid battery (traction battery) air intake
vent and filter .............. 608
Wiper insert replacement .................................... 612
Wireless remote control/elec- tronic key battery ......... 615
Checking and replacing fuses .................................... 618
Light bulbs ..................... 620
6Interior features
7Maintenance and care
Page 17 of 748
17Pictorial index
Precautions against winter season ......................................P.378
To prevent freezing (windshield wiper de-icer)
*...................P.527
Precautions against car wash
(Rain-sensing windshield wipers)
*.......................................P.565
Replacing the wiper insert .................................... ...............P.612
Fuel filler door ............................................... .....................P.241
Refueling method ............................................... ..................P.241
Fuel type/fuel tan k capacity .................................................P.679
Tires ....................................................................................P.588
Tire size/inflation pressure ................................... ................P.684
Winter tires/tire chain ........................................ ...................P.378
Checking/rotation/tire pressure warning system
*.................P.588
Coping with flat tires......................................... ....................P.652
Hood ....................................................................................P.577
Opening ........................................................ .......................P.577
Engine oil ..................................................... ........................P.680
Coping with overheat ........................................... ................P.671
Warning messages ..............................................................P.648
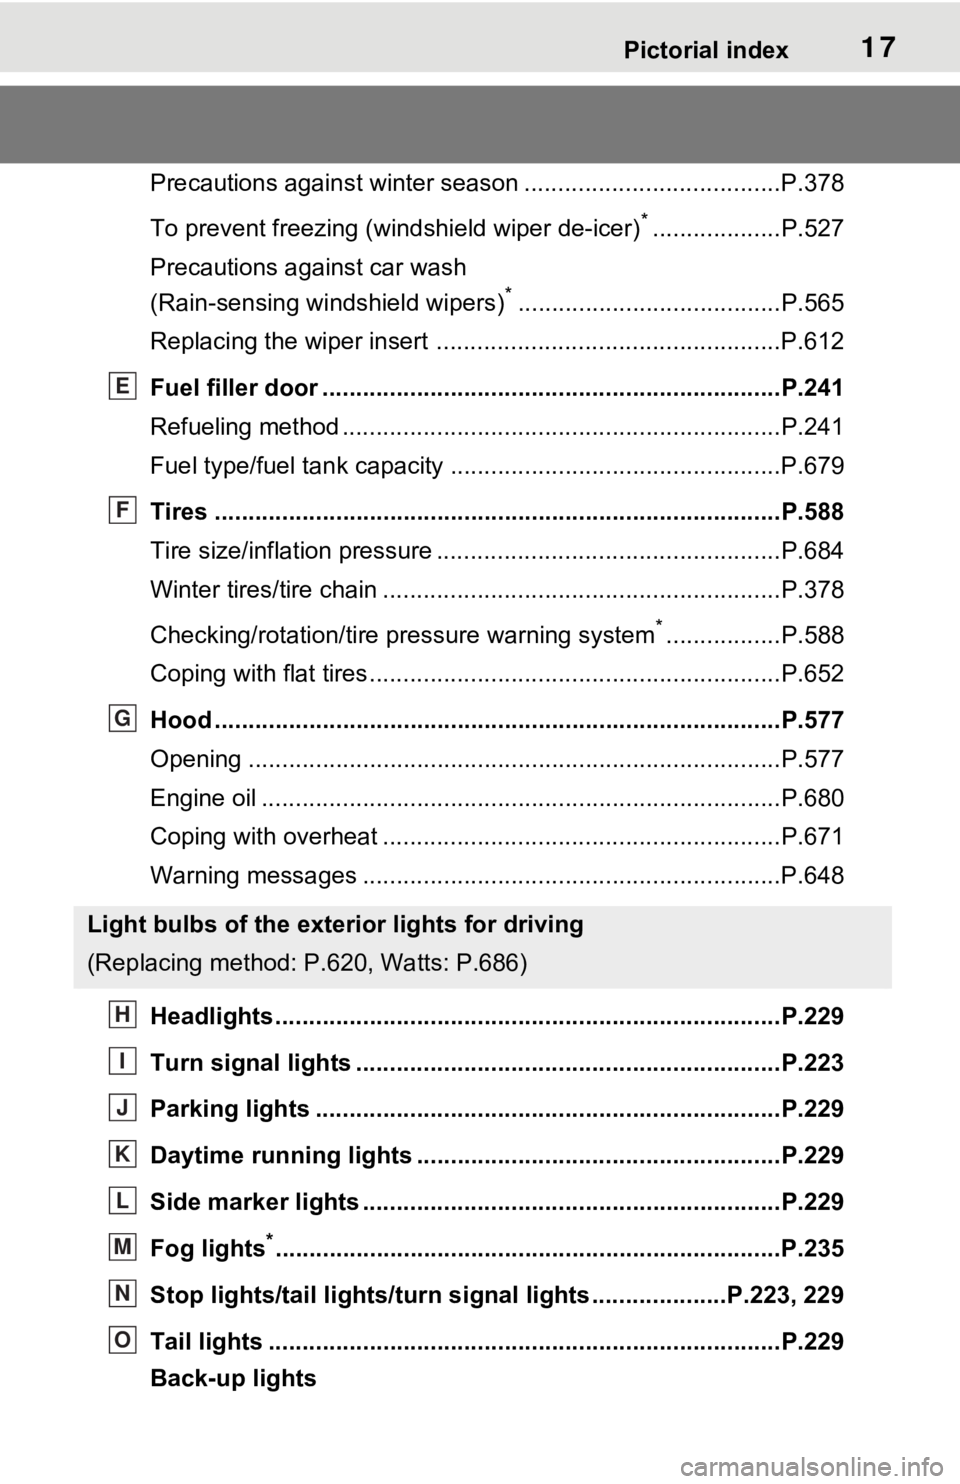
Headlights..................................................... ......................P.229
Turn signal lights ...............................................................P.223
Parking lights .....................................................................P.229
Daytime running lights .. ....................................................P.229
Side marker lights ............................................. .................P.229
Fog lights
*............................................................... ............P.235
Stop lights/tail lights/turn s ignal lights ....................P.223, 229
Tail lights .................................................... ........................P.229
Back-up lights
Light bulbs of the exterior lights for driving
(Replacing method: P .620, Watts: P.686)
E
F
G
H
I
J
K
L
M
N
O
Page 223 of 748
2234-2. Driving procedures
4
Driving
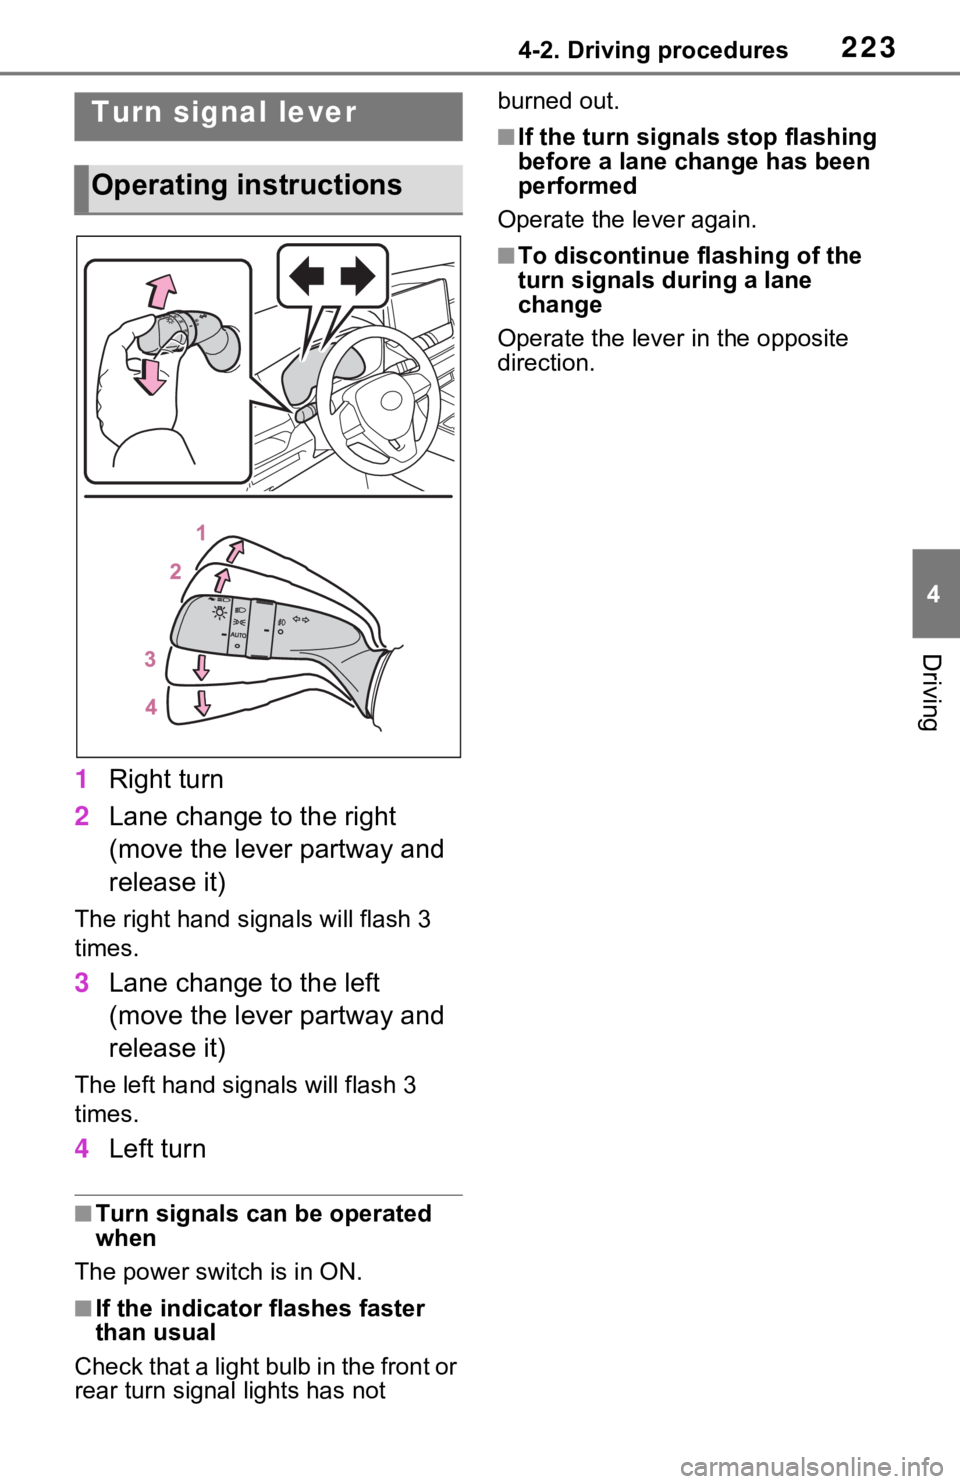
1Right turn
2 Lane change to the right
(move the lever partway and
release it)
The right hand signals will flash 3
times.
3Lane change to the left
(move the lever partway and
release it)
The left hand signals will flash 3
times.
4Left turn
■Turn signals can be operated
when
The power swit ch is in ON.
■If the indicator flashes faster
than usual
Check that a light bulb in the front or
rear turn signal lights has not burned out.
■If the turn signals stop flashing
before a lane change has been
performed
Operate the lever again.
■To discontinue flashing of the
turn signals during a lane
change
Operate the lever in the opposite
direction.
Turn signal lever
Operating instructions
Page 563 of 748
563
7
7
Maintenance and care
Maintenance and care
7-1. Maintenance and careCleaning and protecting the vehicle exterior .......... 564
Cleaning and protecting the vehicle interior ........... 567
7-2. Maintenance Maintenance requirements.................................. 570
General maintenance.. 571
Emission inspection and maintenance (I/M) pro-
grams ........................ 574
7-3. Do-it-yourself mainte- nance
Do-it-yourself service pre- cautions ..................... 575
Hood ........................... 577
Positioning a floor jack 578
Engine compartment ... 580
12-volt battery ............. 586
Tires ............................ 588
Tire inflation pressure . 602
Wheels ......... ...............604
Air conditioning filter .... 606
Cleaning the hybrid battery (traction battery) air intake
vent and filter ............ 608
Wiper insert replacement .................................. 612
Wireless remote con- trol/electronic key battery.................................. 615Checking and replacing
fuses .......................... 618
Light bulbs ................... 620
Page 576 of 748
5767-3. Do-it-yourself maintenance
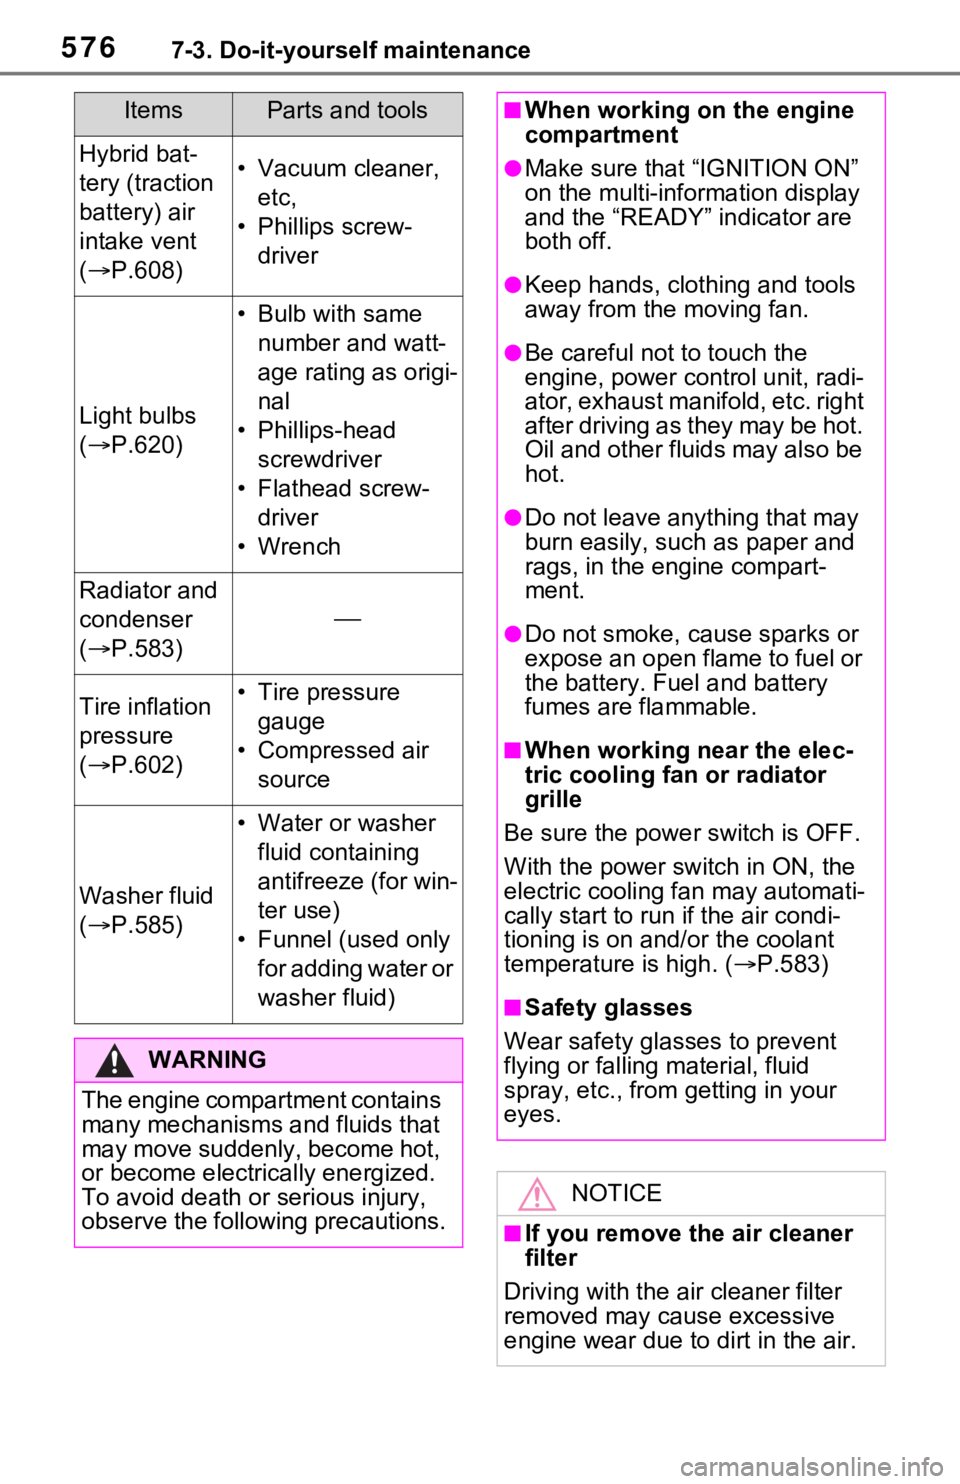
Hybrid bat-
tery (traction
battery) air
intake vent
( P.608)• Vacuum cleaner,
etc,
• Phillips screw- driver
Light bulbs
( P.620)
• Bulb with same
number and watt-
age rating as origi-
nal
• Phillips-head screwdriver
• Flathead screw- driver
•Wrench
Radiator and
condenser
( P.583)
Tire inflation
pressure
( P.602)• Tire pressure
gauge
• Compressed air source
Washer fluid
( P.585)
• Water or washer
fluid containing
antifreeze (for win-
ter use)
• Funnel (used only for adding water or
washer fluid)
WARNING
The engine compartment contains
many mechanisms and fluids that
may move suddenly, become hot,
or become electrically energized.
To avoid death or serious injury,
observe the following precautions.
ItemsParts and tools■When working on the engine
compartment
●Make sure that “IGNITION ON”
on the multi-information display
and the “READY” indicator are
both off.
●Keep hands, clothing and tools
away from the moving fan.
●Be careful not to touch the
engine, power control unit, radi-
ator, exhaust manifold, etc. right
after driving as they may be hot.
Oil and other fluids may also be
hot.
●Do not leave anything that may
burn easily, such as paper and
rags, in the engine compart-
ment.
●Do not smoke, c ause sparks or
expose an open flame to fuel or
the battery. Fuel and battery
fumes are flammable.
■When working near the elec-
tric cooling fan or radiator
grille
Be sure the power switch is OFF.
With the power switch in ON, the
electric cooling fa n may automati-
cally start to run if the air condi-
tioning is on and/or the coolant
temperature is high. ( P.583)
■Safety glasses
Wear safety gla sses to prevent
flying or falling material, fluid
spray, etc., from getting in your
eyes.
NOTICE
■If you remove the air cleaner
filter
Driving with the ai r cleaner filter
removed may cause excessive
engine wear due to dirt in the air.
Page 619 of 748
6197-3. Do-it-yourself maintenance
7
Maintenance and care
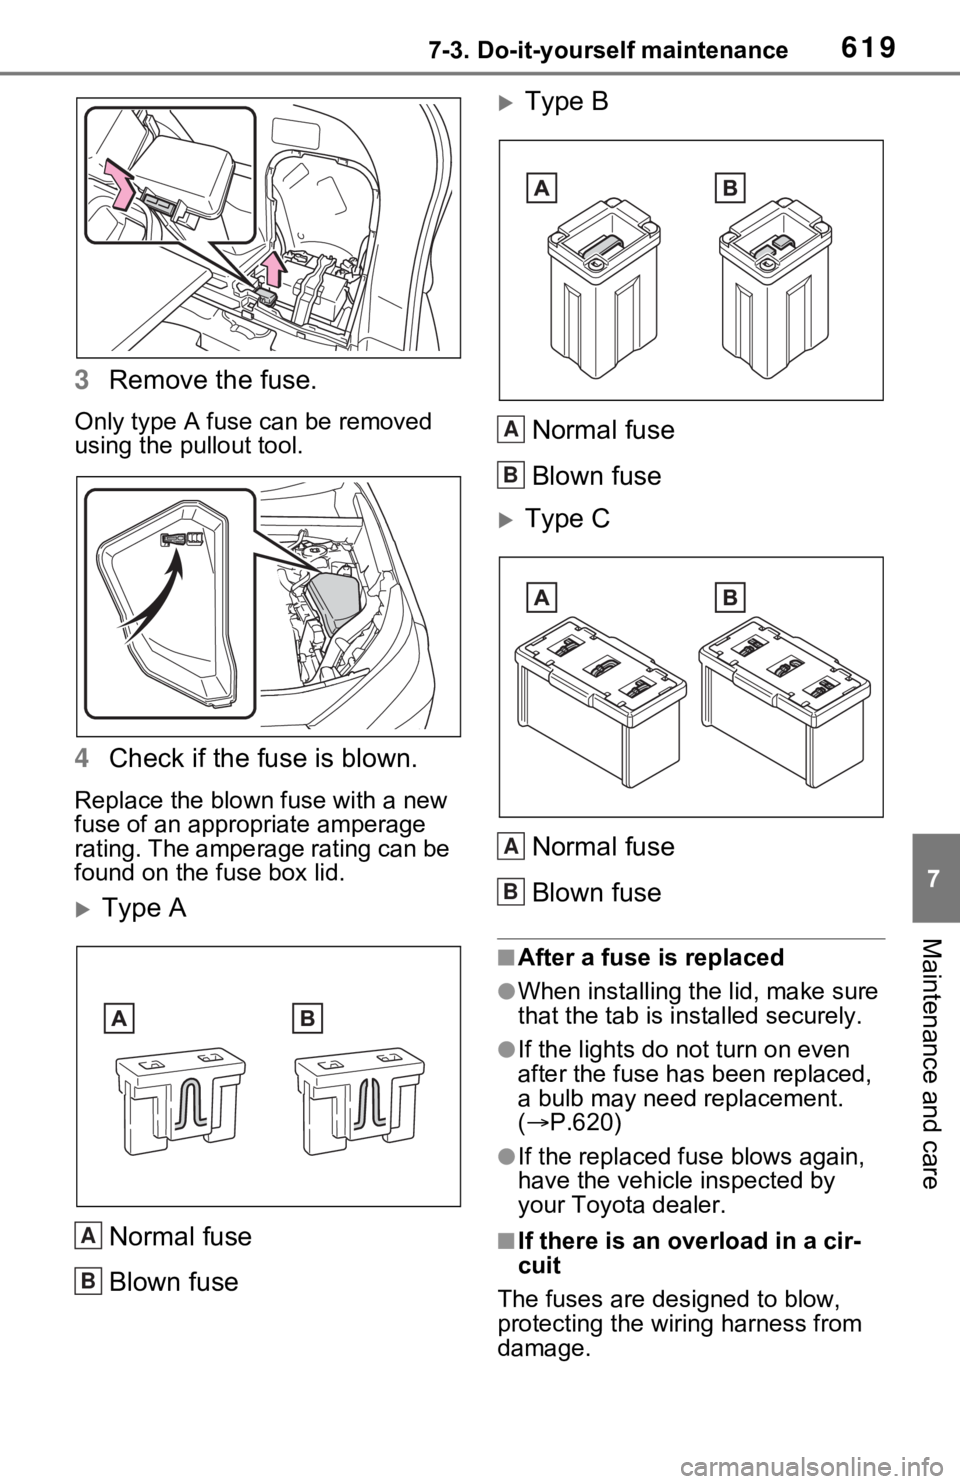
3Remove the fuse.
Only type A fuse can be removed
using the pullout tool.
4Check if the fuse is blown.
Replace the blown fuse with a new
fuse of an appropriate amperage
rating. The amperage rating can be
found on the fuse box lid.
Type A
Normal fuse
Blown fuse
Type BNormal fuse
Blown fuse
Type CNormal fuse
Blown fuse
■After a fuse is replaced
●When installing the lid, make sure
that the tab is ins talled securely.
●If the lights do not turn on even
after the fuse has been replaced,
a bulb may need replacement.
( P.620)
●If the replaced fuse blows again,
have the vehicle inspected by
your Toyota dealer.
■If there is an ove rload in a cir-
cuit
The fuses are designed to blow,
protecting the wiring harness from
damage.A
B
A
B
A
B
Page 620 of 748
6207-3. Do-it-yourself maintenance
Check the wattage of the light
bulb to be replaced. ( P.686)
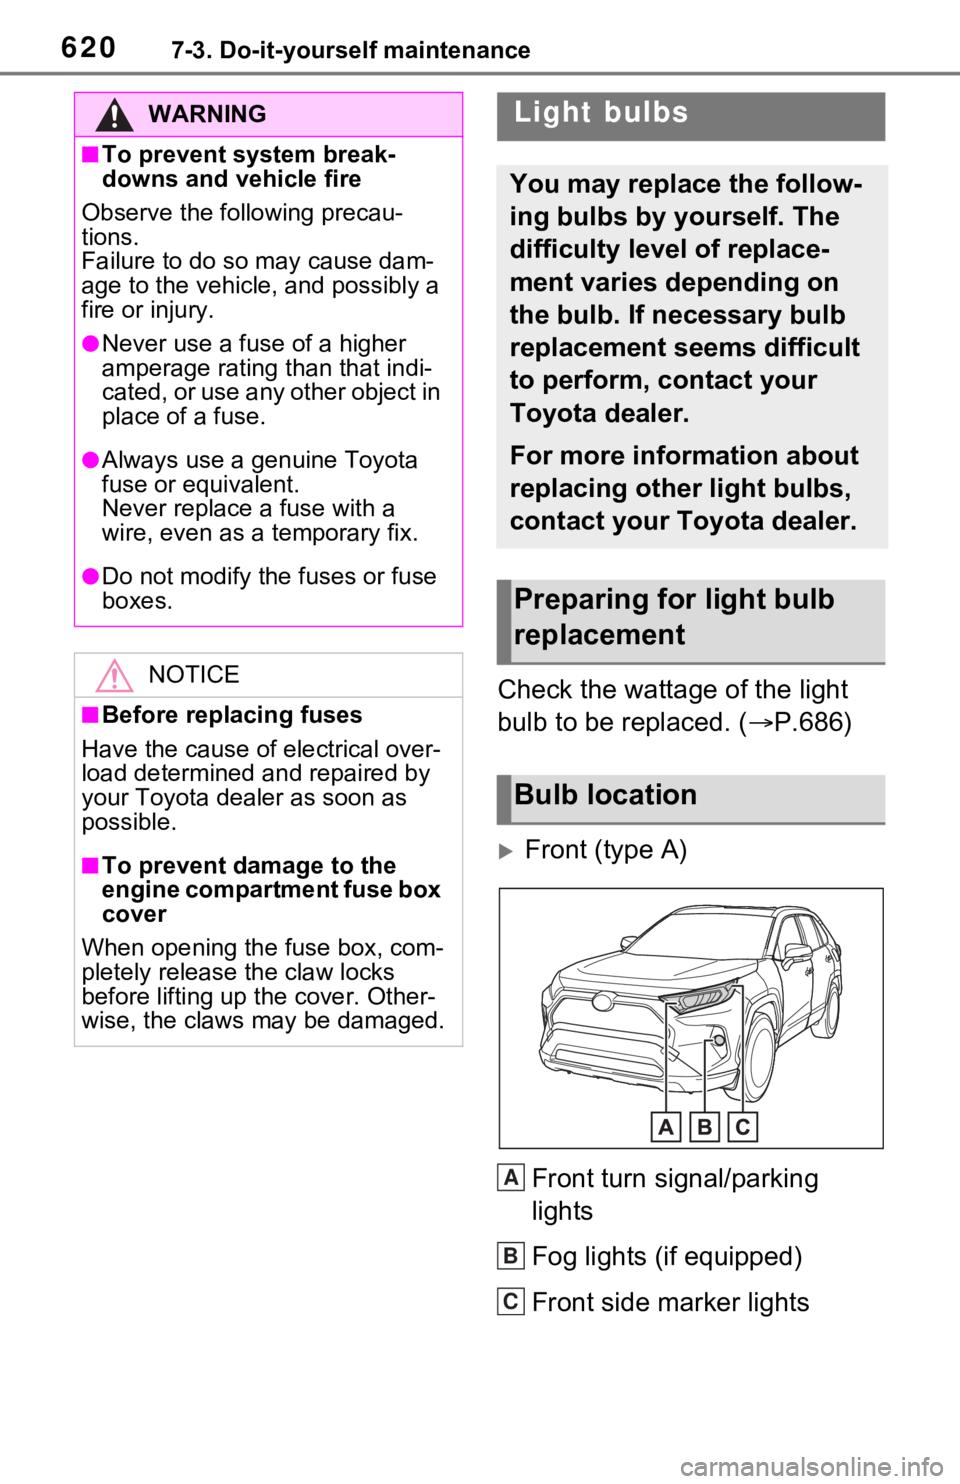
Front (type A)
Front turn signal/parking
lights
Fog lights (if equipped)
Front side marker lights
WARNING
■To prevent system break-
downs and vehicle fire
Observe the following precau-
tions.
Failure to do so may cause dam-
age to the vehicle, and possibly a
fire or injury.
●Never use a fuse of a higher
amperage rating than that indi-
cated, or use any other object in
place of a fuse.
●Always use a genuine Toyota
fuse or equivalent.
Never replace a fuse with a
wire, even as a temporary fix.
●Do not modify the fuses or fuse
boxes.
NOTICE
■Before replacing fuses
Have the cause of electrical over-
load determined and repaired by
your Toyota dealer as soon as
possible.
■To prevent damage to the
engine compartment fuse box
cover
When opening the fuse box, com-
pletely release the claw locks
before lifting up the cover. Other-
wise, the claws may be damaged.
Light bulbs
You may replace the follow-
ing bulbs by yourself. The
difficulty level of replace-
ment varies depending on
the bulb. If necessary bulb
replacement seems difficult
to perform, contact your
Toyota dealer.
For more information about
replacing other light bulbs,
contact your Toyota dealer.
Preparing for light bulb
replacement
Bulb location
A
B
C
Page 622 of 748
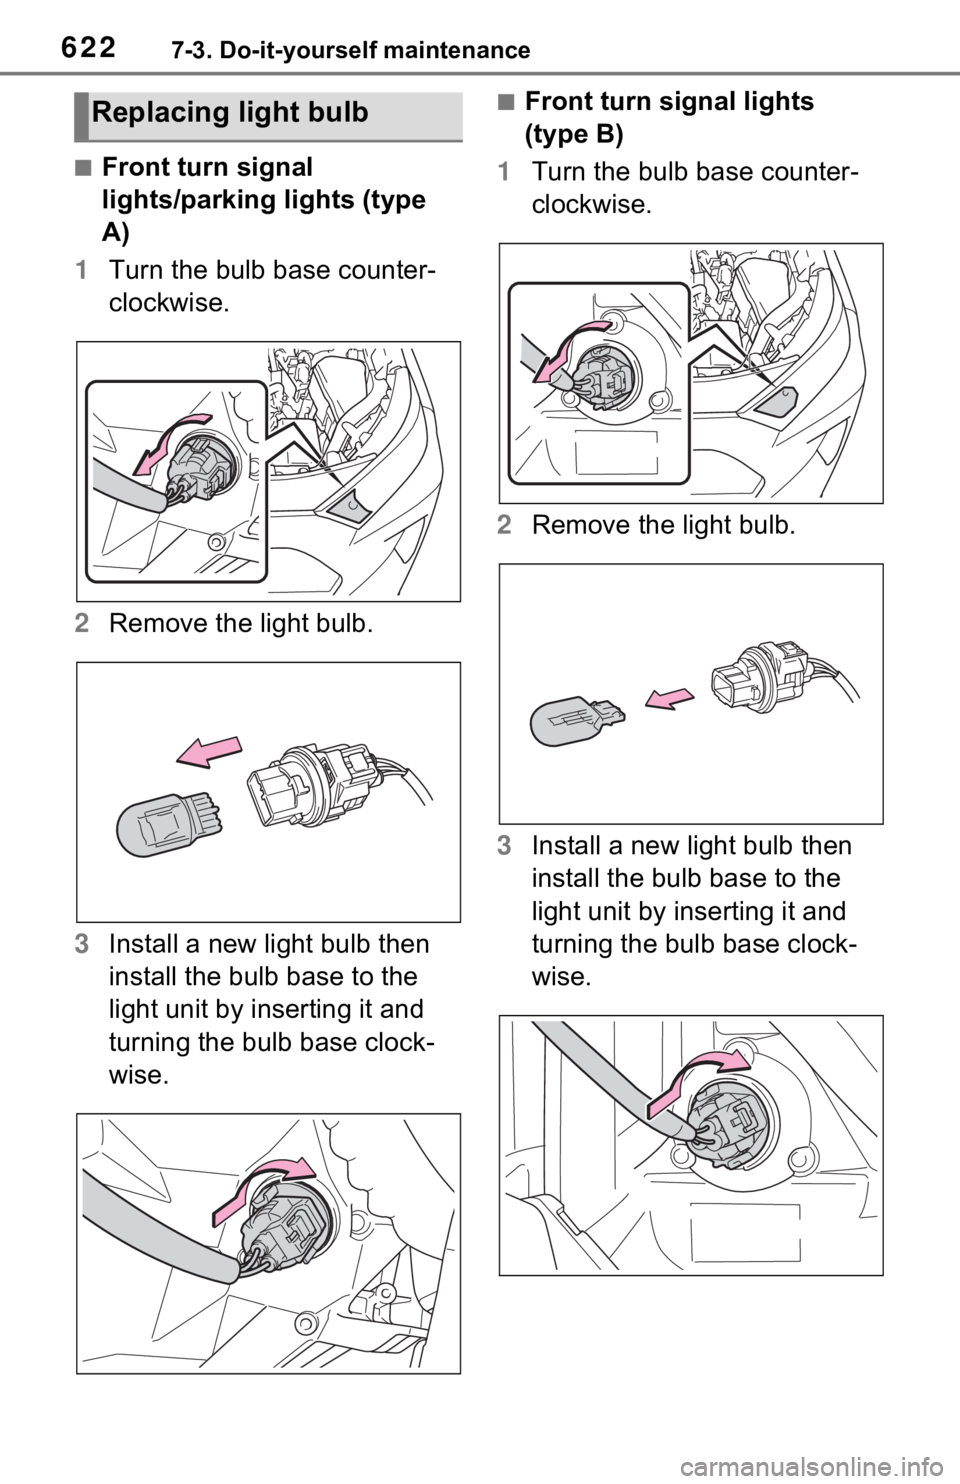
6227-3. Do-it-yourself maintenance
■Front turn signal
lights/parking lights (type
A)
1 Turn the bulb base counter-
clockwise.
2 Remove the light bulb.
3 Install a new light bulb then
install the bulb base to the
light unit by inserting it and
turning the bulb base clock-
wise.
■Front turn signal lights
(type B)
1 Turn the bulb base counter-
clockwise.
2 Remove the light bulb.
3 Install a new light bulb then
install the bulb base to the
light unit by inserting it and
turning the bulb base clock-
wise.Replacing light bulb
Page 623 of 748
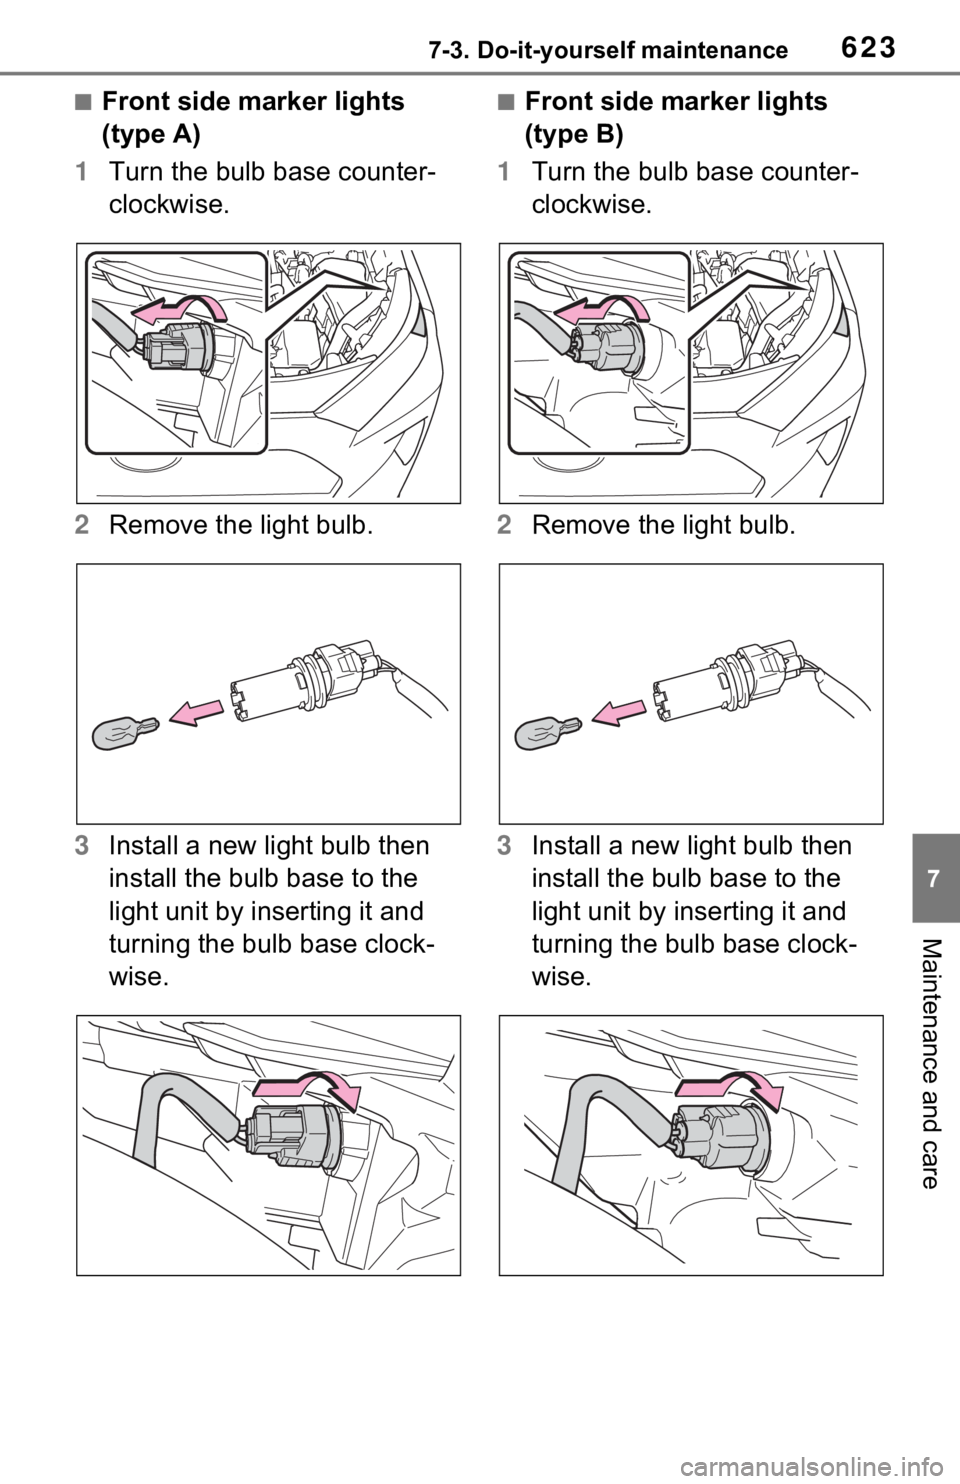
6237-3. Do-it-yourself maintenance
7
Maintenance and care
■Front side marker lights
(type A)
1 Turn the bulb base counter-
clockwise.
2 Remove the light bulb.
3 Install a new light bulb then
install the bulb base to the
light unit by inserting it and
turning the bulb base clock-
wise.■Front side marker lights
(type B)
1 Turn the bulb base counter-
clockwise.
2 Remove the light bulb.
3 Install a new light bulb then
install the bulb base to the
light unit by inserting it and
turning the bulb base clock-
wise.