door lock TOYOTA RAV4 PRIME 2021 Owners Manual
[x] Cancel search | Manufacturer: TOYOTA, Model Year: 2021, Model line: RAV4 PRIME, Model: TOYOTA RAV4 PRIME 2021Pages: 618, PDF Size: 24.18 MB
Page 2 of 618
2TABLE OF CONTENTS
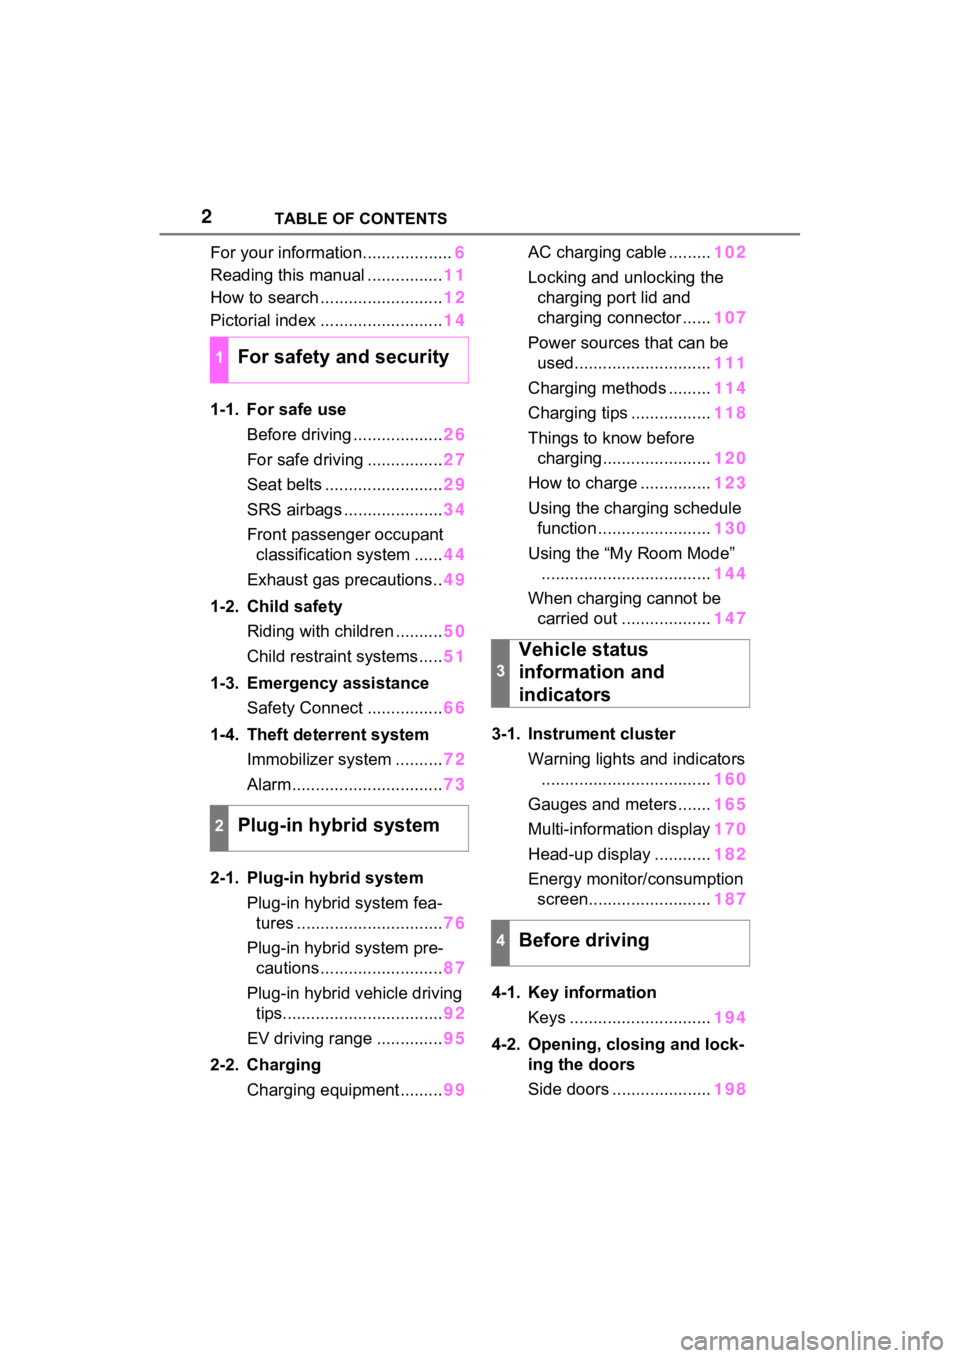
For your information...................6
Reading this manual ................ 11
How to search .......................... 12
Pictorial index .......................... 14
1-1. For safe use Before driving ................... 26
For safe driving ................ 27
Seat belts ......................... 29
SRS airbags ..................... 34
Front passenger occupant classification system ...... 44
Exhaust gas precautions.. 49
1-2. Child safety Riding with children .......... 50
Child restraint systems..... 51
1-3. Emergency assistance Safety Connect ................ 66
1-4. Theft deterrent system Immobilizer system .......... 72
Alarm................................ 73
2-1. Plug-in hybrid system Plug-in hybrid system fea-tures ............................... 76
Plug-in hybrid system pre- cautions .......................... 87
Plug-in hybrid vehicle driving tips.................................. 92
EV driving range .............. 95
2-2. Charging Charging equipment......... 99AC charging cable .........
102
Locking and unlocking the charging port lid and
charging connector ...... 107
Power sources that can be used............................. 111
Charging methods ......... 114
Charging tips ................. 118
Things to know before charging....................... 120
How to charge ............... 123
Using the charging schedule function ........................ 130
Using the “My Room Mode” .................................... 144
When charging cannot be carried out ................... 147
3-1. Instrument cluster Warning lights and indicators.................................... 160
Gauges and meters ....... 165
Multi-information display 170
Head-up display ............ 182
Energy monitor/ consumption
screen.......................... 187
4-1. Key information Keys .............................. 194
4-2. Opening, closing and lock- ing the doors
Side doors ..................... 198
1For safety and security
2Plug-in hybrid system
3
Vehicle status
information and
indicators
4Before driving
Page 14 of 618
14Pictorial index
Pictorial index
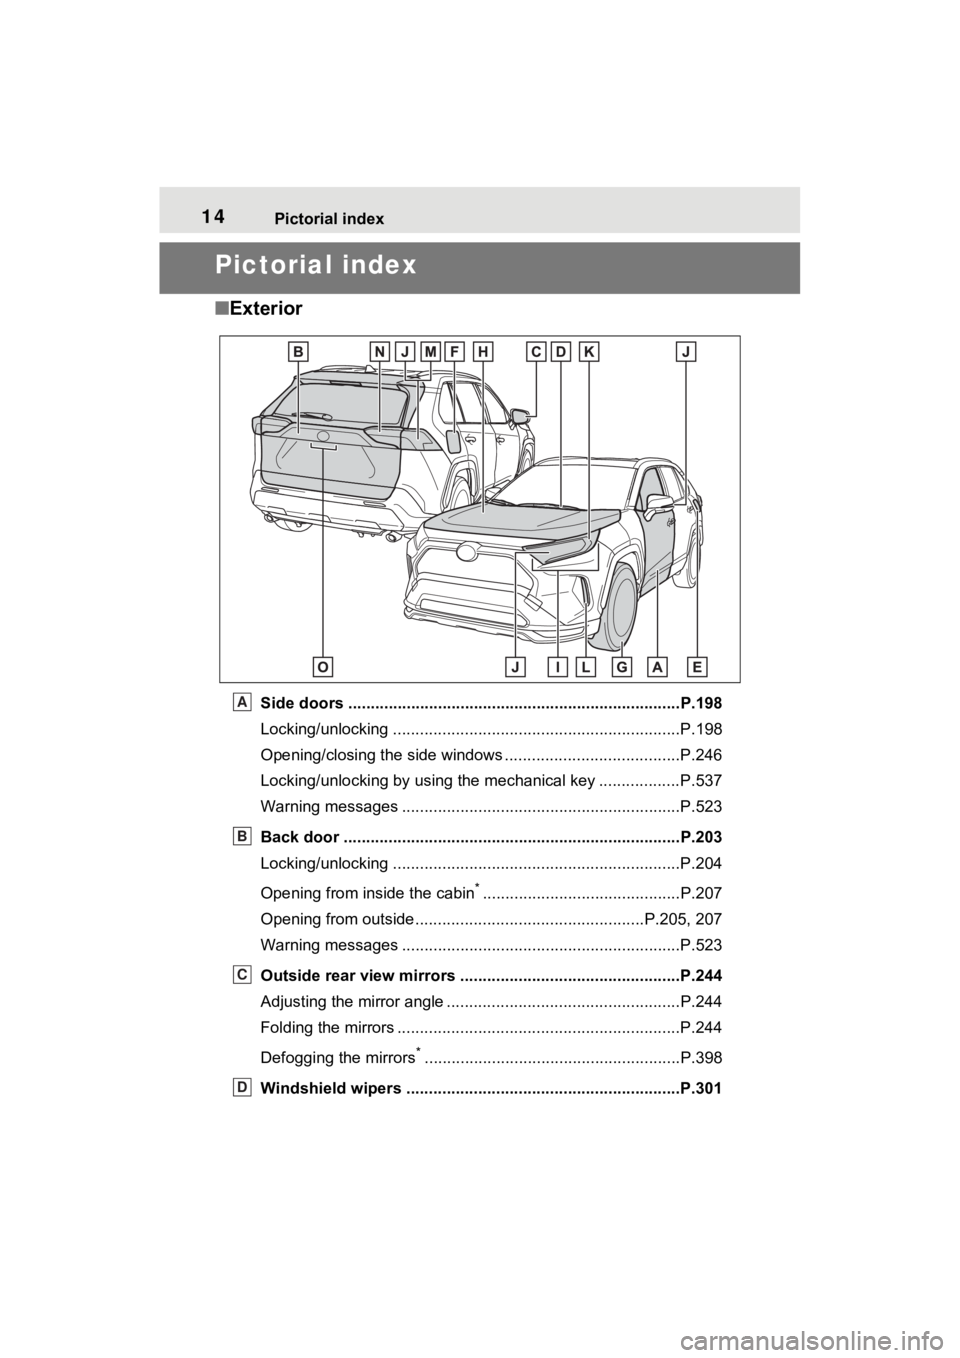
■Exterior
Side doors ......... ................................. ................................P.198
Locking/unlocking ................................................................P.198
Opening/closing the side windows ............................... ........P.246
Locking/unlocking by using the mechanical key .................. P.537
Warning messages ..............................................................P.523
Back door ...................................................... .....................P.203
Locking/unlocking ................................................................P.204
Opening from inside the cabin
*............................................P.207
Opening from outside........................................... ........P.205, 207
Warning messages ..............................................................P.523
Outside rear view mirrors .................................................P.244
Adjusting the mirror angle ..................................... ...............P.244
Folding the mirrors ...............................................................P.244
Defogging the mirrors
*.........................................................P.398
Windshield wipers .............................................. ...............P.301
A
B
C
D
Page 18 of 618

18Pictorial index
Energy monitor.....................................................................P.187
When the warning messages are displayed ........................ P.523
Turn signal lever ................................................................P.289
Headlight switch ................................................................P.295
Headlights/parking lights/tail lig hts/license plate lights/daytime run-
ning lights/LED accessory lights
*1........................................P.295
Windshield wiper and washer switch ..............................P.301
Rear window wiper and washer switch ...........................P.304
Usage.......................................................... .................P.301, 304
Adding washer fluid ..............................................................P.465
Warning messages ..............................................................P.523
Emergency flasher switch ....................................... ..........P.504
Hood lock release lever ........................................ .............P.457
Tilt and telescopic steering lock release lever ................P.232
Adjustment ..................................................... ......................P.232
Air conditioning system ............................. .......................P.396
Usage.......................................................... .........................P.396
Rear window defogger ........................................... ..............P.398
Audio
*1, 2
Audio Plus*1, 2
Premium Audio*1, 2
Fuel filler door opener swi tch ...........................................P.307
*1: If equipped
*2: Refer to “NAVIGATION AND MULTIMEDIA SYSTEM OWNER’S MAN-
UAL”.
E
F
G
H
I
J
K
L
Page 19 of 618
19Pictorial index
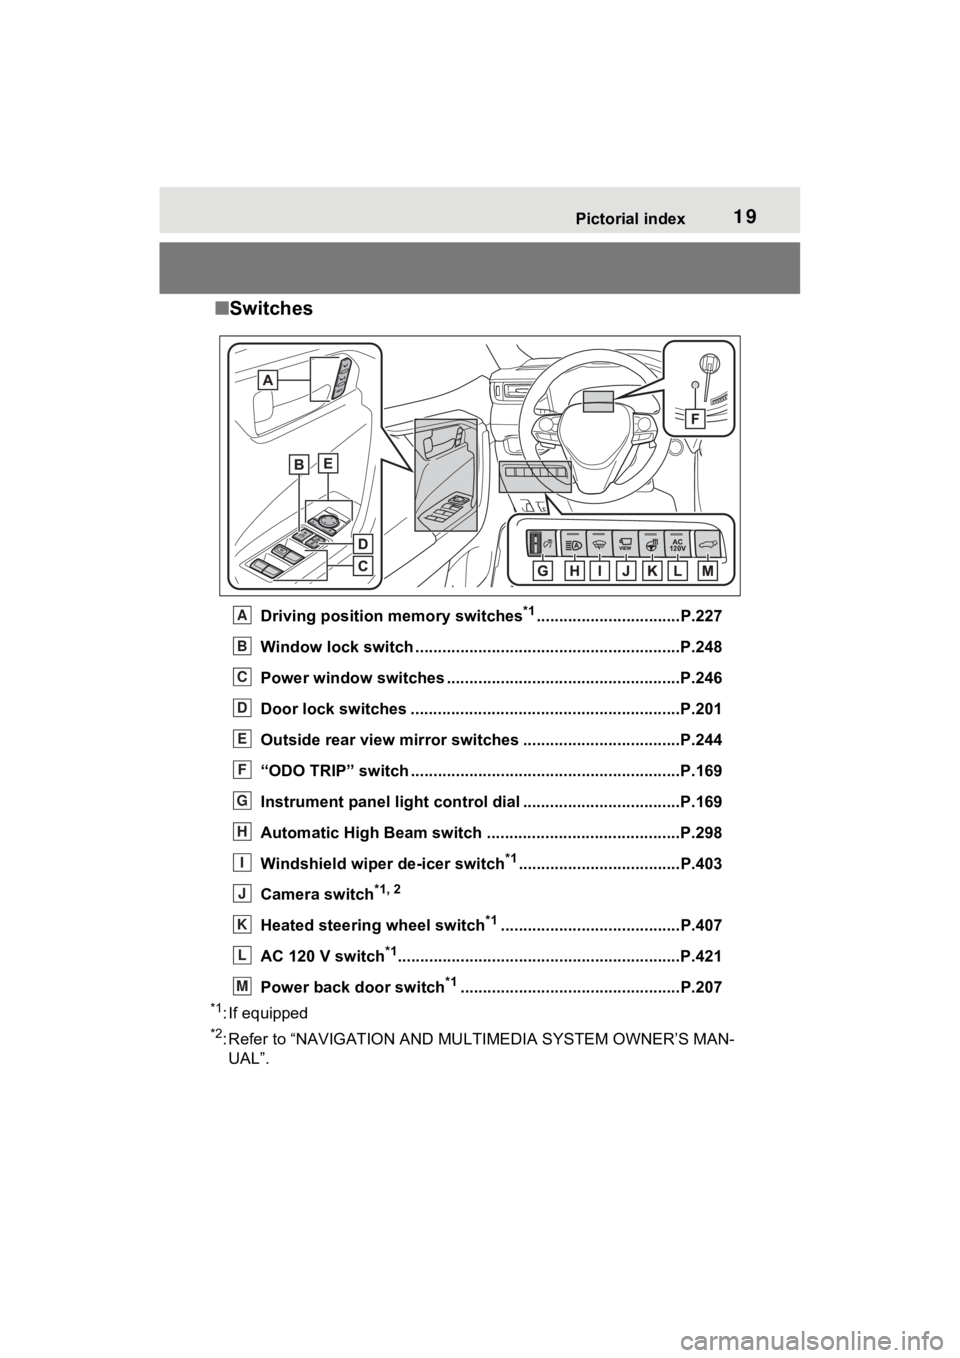
■Switches
Driving position memory switches*1................................P.227
Window lock switch ............................................. ..............P.248
Power window switches ....... .............................................P.246
Door lock switches ............................................................P.201
Outside rear view mirror swi tches ...................................P.244
“ODO TRIP” switch ............................................................P.169
Instrument panel light cont rol dial ...................................P.169
Automatic High Beam switch ..................................... ......P.298
Windshield wiper de-icer switch
*1....................................P.403
Camera switch
*1, 2
Heated steering wheel switch*1........................................P.407
AC 120 V switch
*1............................................................... P.421
Power back door switch
*1.................................................P.207
*1: If equipped
*2: Refer to “NAVIGATI ON AND MULTIMEDIA SYSTEM OWNER’S MAN-
UAL”.
A
B
C
D
E
F
G
H
I
J
K
L
M
Page 50 of 618
501-2. Child safety
1-2.Child safety
Riding with children
Observe the following pre-
cautions when children are
in the vehicle.
Use a child restraint system
appropriate for the child,
until the child becomes
large enough to properly
wear the vehicle’s seat belt.
It is recommended that chil-
dren sit in the rear seats to
avoid accidental contact
with the shift lever, wiper
switch, etc.
Use the rear door child-pro-
tector lock or the window
lock switch to avoid children
opening the door while driv-
ing or operating the power
window accidentally.
( P.202, 248)
Do not let small children
operate equipment which
may catch or pinch body
parts, such as the power
window, hood, back door,
seats, etc.
WARNING
■When children are in the vehi-
cle
Never leave children unattended
in the vehicle, and never allow
children to have or use the key.
Children may be able to start the
vehicle or shift the vehicle into
neutral. There is also a danger
that children ma y injure them-
selves by playing with the side
windows, the moon roof (if
equipped), the panoramic moon
roof (if equipped) or other features
of the vehicle. In addition, heat
build-up or extremely cold tem-
peratures inside the vehicle can
be fatal to children.
Page 55 of 618
551-2. Child safety
1
For safety and security
A child restraint system for a
small child or baby must itself be
properly restrained on the seat
with the lap portion of the
lap/shoulder belt.
■Installing child restraint
system using a seat belt
(child restraint lock func-
tion belt)
Install the child restraint system
in accordance to the operation
WARNING
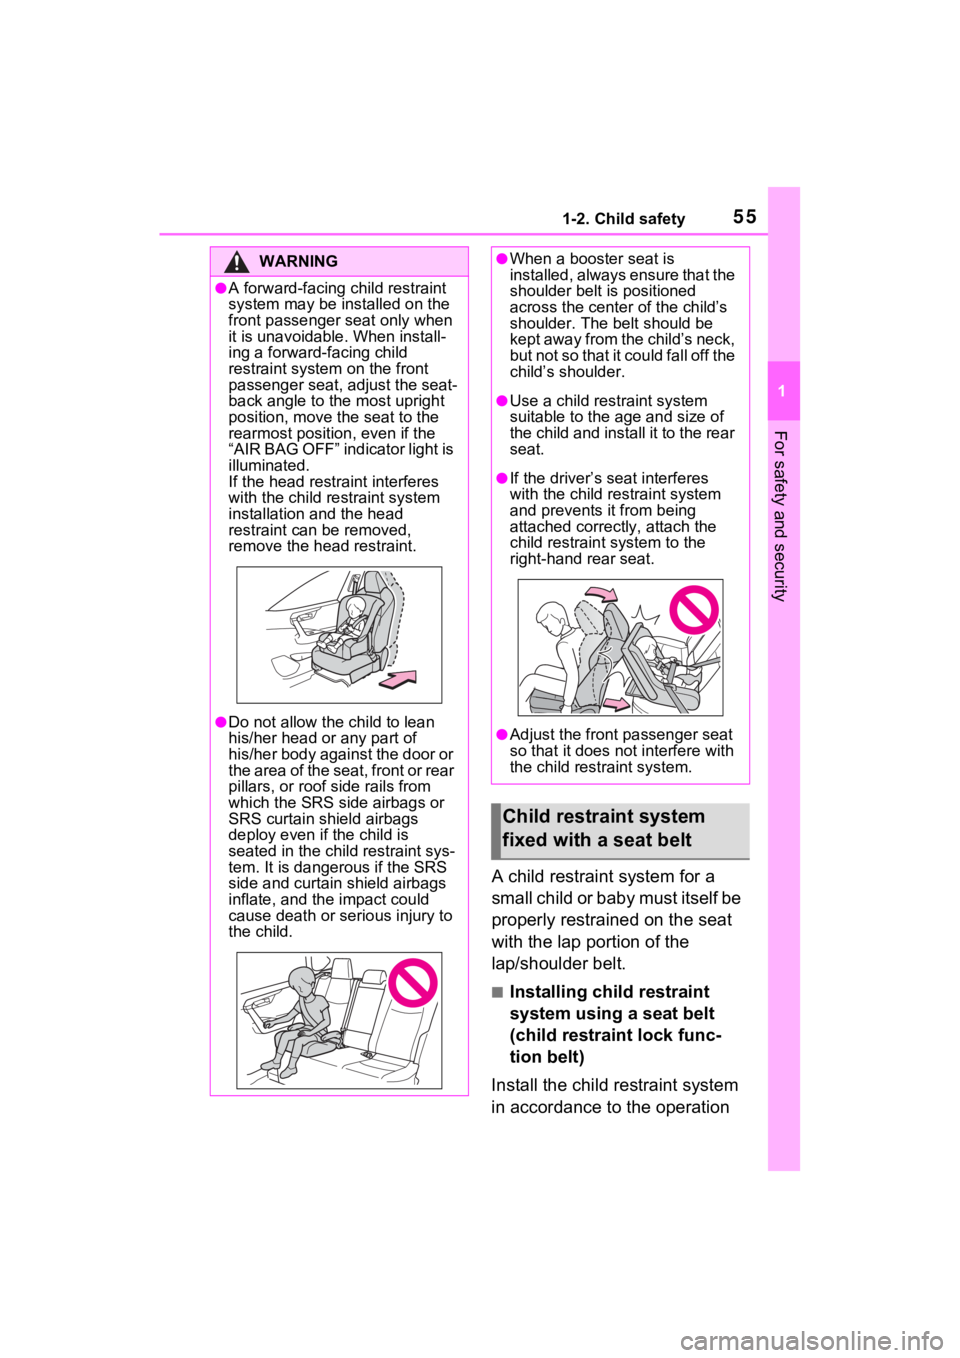
●A forward-facing c hild restraint
system may be installed on the
front passenger seat only when
it is unavoidable. When install-
ing a forward-facing child
restraint system on the front
passenger seat, adjust the seat-
back angle to the most upright
position, move the seat to the
rearmost position, even if the
“AIR BAG OFF” indicator light is
illuminated.
If the head restraint interferes
with the child restraint system
installation and the head
restraint can be removed,
remove the head restraint.
●Do not allow the child to lean
his/her head or any part of
his/her body against the door or
the area of the seat, front or rear
pillars, or roof side rails from
which the SRS side airbags or
SRS curtain shield airbags
deploy even if the child is
seated in the child restraint sys-
tem. It is dangerous if the SRS
side and curtain shield airbags
inflate, and the impact could
cause death or serious injury to
the child.
●When a booster seat is
installed, always ensure that the
shoulder belt is positioned
across the center of the child’s
shoulder. The belt should be
kept away from the child’s neck,
but not so that it could fall off the
child’s shoulder.
●Use a child restraint system
suitable to the age and size of
the child and install it to the rear
seat.
●If the driver’s seat interferes
with the child restraint system
and prevents it from being
attached correctly, attach the
child restraint system to the
right-hand rear seat.
●Adjust the front passenger seat
so that it does not interfere with
the child restraint system.
Child restraint system
fixed with a seat belt
Page 73 of 618
731-4. Theft deterrent system
1
For safety and security
*: If equipped
■Items to check before lock-
ing the vehicle
To prevent unexpected trigger-
ing of the alarm and vehicle
theft, make sure of the following:
Nobody is in the vehicle.
The side windows and moon
roof (if equipped) or pan-
oramic moon roof (if
equipped) are closed before
the alarm is set.
No valuables or other per-
sonal items are left in the
vehicle.
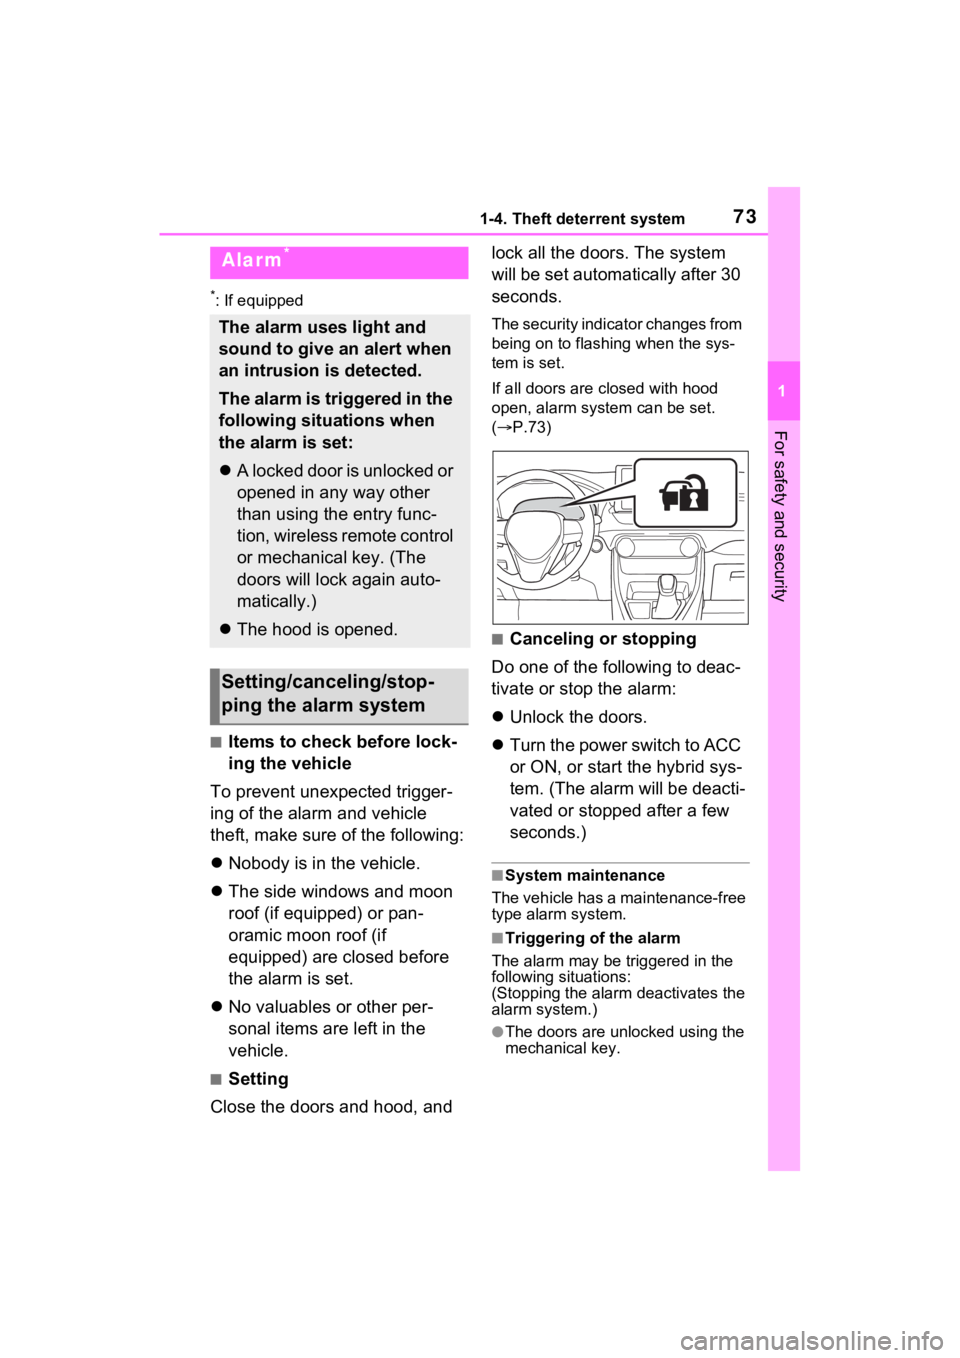
■Setting
Close the doors and hood, and lock all the doors. The system
will be set automatically after 30
seconds.
The security indicator changes from
being on to flashing when the sys-
tem is set.
If all doors are closed with hood
open, alarm system can be set.
(
P.73)
■Canceling or stopping
Do one of the following to deac-
tivate or stop the alarm:
Unlock the doors.
Turn the power switch to ACC
or ON, or start the hybrid sys-
tem. (The alarm will be deacti-
vated or stopped after a few
seconds.)
■System maintenance
The vehicle has a maintenance-free
type alarm system.
■Triggering of the alarm
The alarm may be triggered in the
following situations:
(Stopping the alarm deactivates the
alarm system.)
●The doors are unlocked using the
mechanical key.
Alarm*
The alarm uses light and
sound to give an alert when
an intrusion is detected.
The alarm is triggered in the
following situations when
the alarm is set:
A locked door is unlocked or
opened in any way other
than using the entry func-
tion, wireless remote control
or mechanical key. (The
doors will lock again auto-
matically.)
The hood is opened.
Setting/canceling/stop-
ping the alarm system
Page 74 of 618
741-4. Theft deterrent system
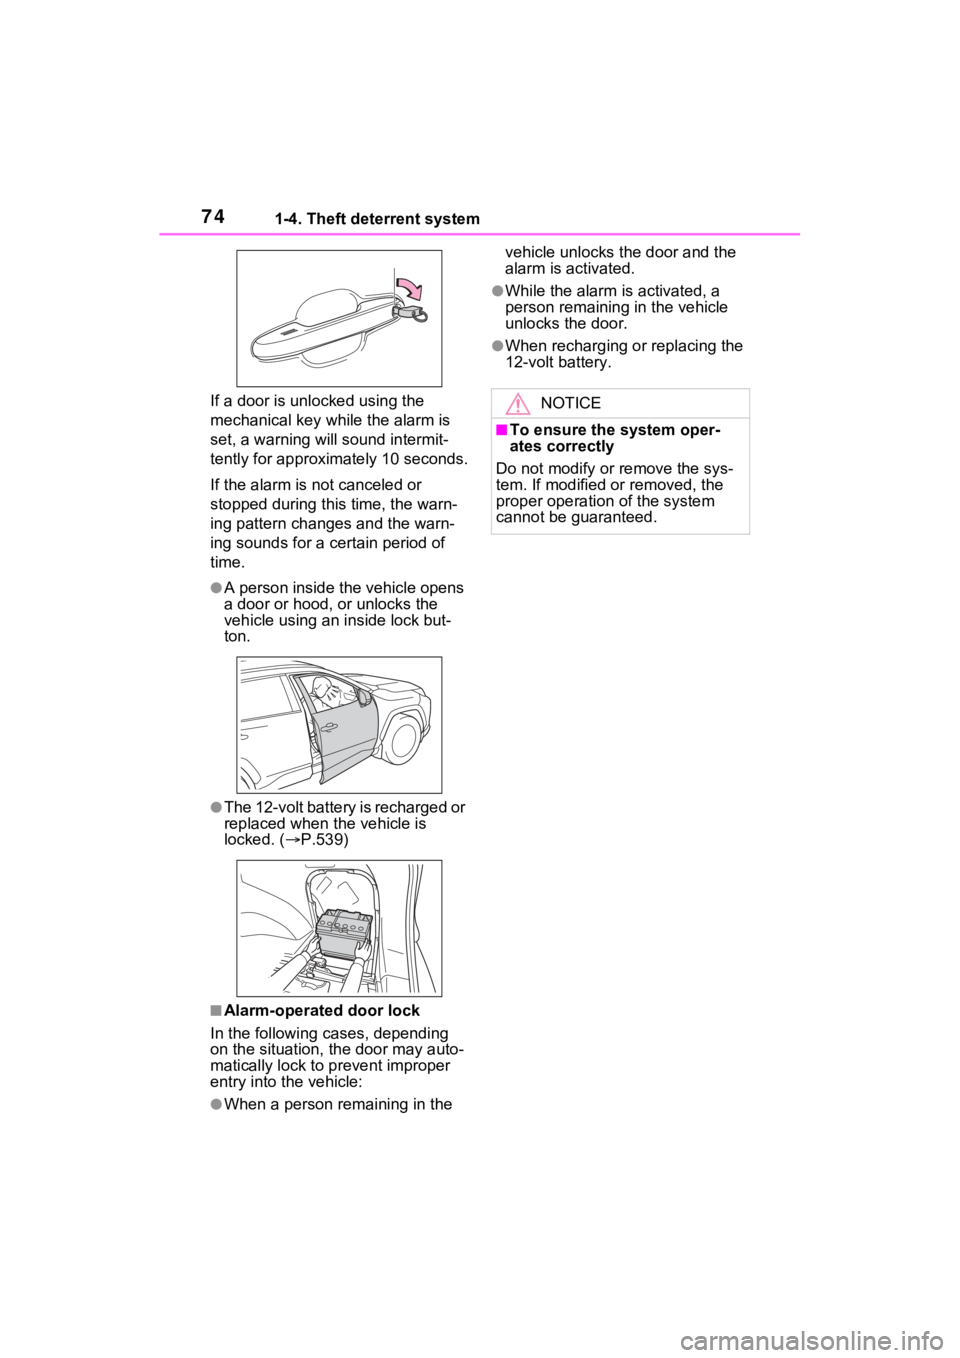
If a door is unlocked using the
mechanical key while the alarm is
set, a warning will sound intermit-
tently for approximately 10 seconds.
If the alarm is not canceled or
stopped during this time, the warn-
ing pattern change s and the warn-
ing sounds for a certain period of
time.
●A person inside the vehicle opens
a door or hood, or unlocks the
vehicle using an inside lock but-
ton.
●The 12-volt battery is recharged or
replaced when the vehicle is
locked. ( P.539)
■Alarm-operated door lock
In the following cases, depending
on the situation, th e door may auto-
matically lock to p revent improper
entry into the vehicle:
●When a person remaining in the vehicle unlocks the door and the
alarm is activated.
●While the alarm i
s activated, a
person remaining in the vehicle
unlocks the door.
●When recharging or replacing the
12-volt battery.
NOTICE
■To ensure the system oper-
ates correctly
Do not modify or remove the sys-
tem. If modified or removed, the
proper operation of the system
cannot be guaranteed.
Page 100 of 618
1002-2. Charging
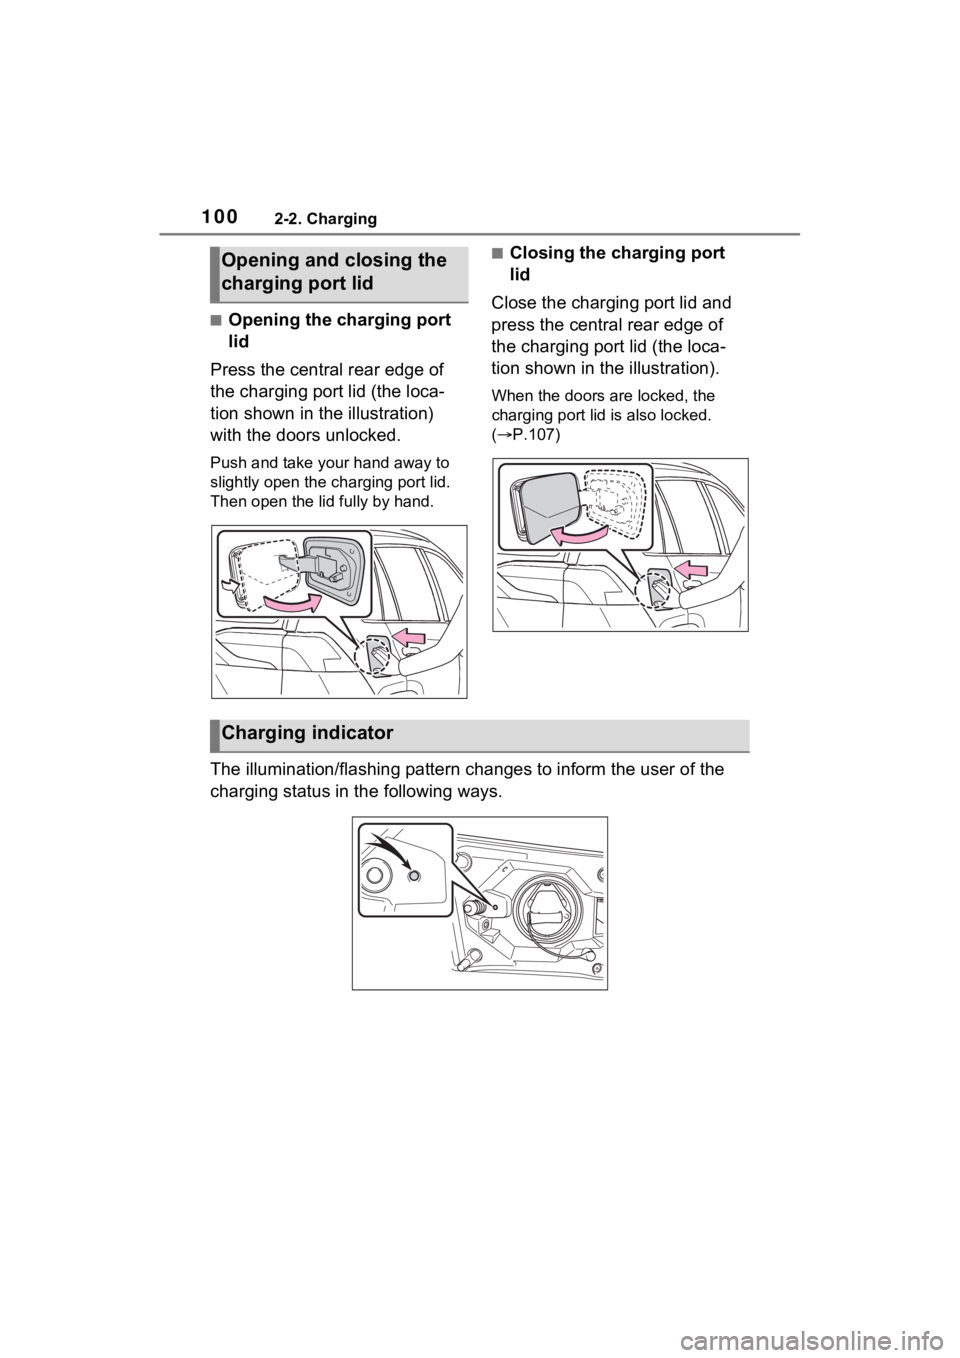
■Opening the charging port
lid
Press the central rear edge of
the charging port lid (the loca-
tion shown in the illustration)
with the doors unlocked.
Push and take your hand away to
slightly open the c harging port lid.
Then open the lid fully by hand.
■Closing the charging port
lid
Close the charging port lid and
press the central rear edge of
the charging port lid (the loca-
tion shown in the illustration).
When the doors are locked, the
charging port lid is also locked.
( P.107)
The illumination/flashing pattern changes to inform the user of the
charging status in the following ways.
Opening and closing the
charging port lid
Charging indicator
Page 107 of 618
1072-2. Charging
2
Plug-in hybrid system
■Unlocking the charging port
lid
1 Unlock the doors using the
smart key system or wireless
remote control.
2 Press the central rear edge
of the charging port lid (the
WARNING
●The plug can be securely
inserted into the outlet.
●The plug does not get extremely
hot during use.
●The tip of the plug has not been
deformed.
●The plug is not dirtied by dust
etc.
Remove the plug from the outlet
before inspecting it. If any abnor-
malities are fo und in the AC
charging cable as a result of the
inspection, immediately stop use
and consult your Toyota dealer.
■Maintaining the AC charging
cable
When the AC charging cable is
dirty, first remove the dirt with a
hard, wringed cloth, and then
wipe the cable with a dry cloth.
However, never wash it with
water. If the AC charging cable is
washed with water , fire or electric
shock may occur during charging,
possibly resulting in death or seri-
ous injury.
■When not using the AC
charging cable for a long time
Remove the plug from the outlet.
Dust could accumulate on the
plug or in the outlet, possibly
causing overheating which could
lead to a fire.
Also, keep the ca ble in a place
free from moisture.
Locking an d unlock-
ing the charging port
lid and cha rging con-
nector
The charging port lid and
charging connector can be
locked/unlocked by the fol-
lowing procedures.
Using the smart key sys-
tem
*: P.198
Using the wireless remote
control
*: P.196
*: If the smart key system or the
wireless remote control does
not operate properly, use the
mechanical key. ( P.537)
Locking and unlocking
the charging port lid