bluetooth TOYOTA SIENNA 2018 Accessories, Audio & Navigation (in English)
[x] Cancel search | Manufacturer: TOYOTA, Model Year: 2018, Model line: SIENNA, Model: TOYOTA SIENNA 2018Pages: 435, PDF Size: 11.83 MB
Page 303 of 435
303
1. PHONE OPERATION (HANDS-FREE SYSTEM FOR CELLULAR PHONES)
SIENNA_Navi+MM_OM08021U_(U)
17.08.16 10:05
PHONE
7
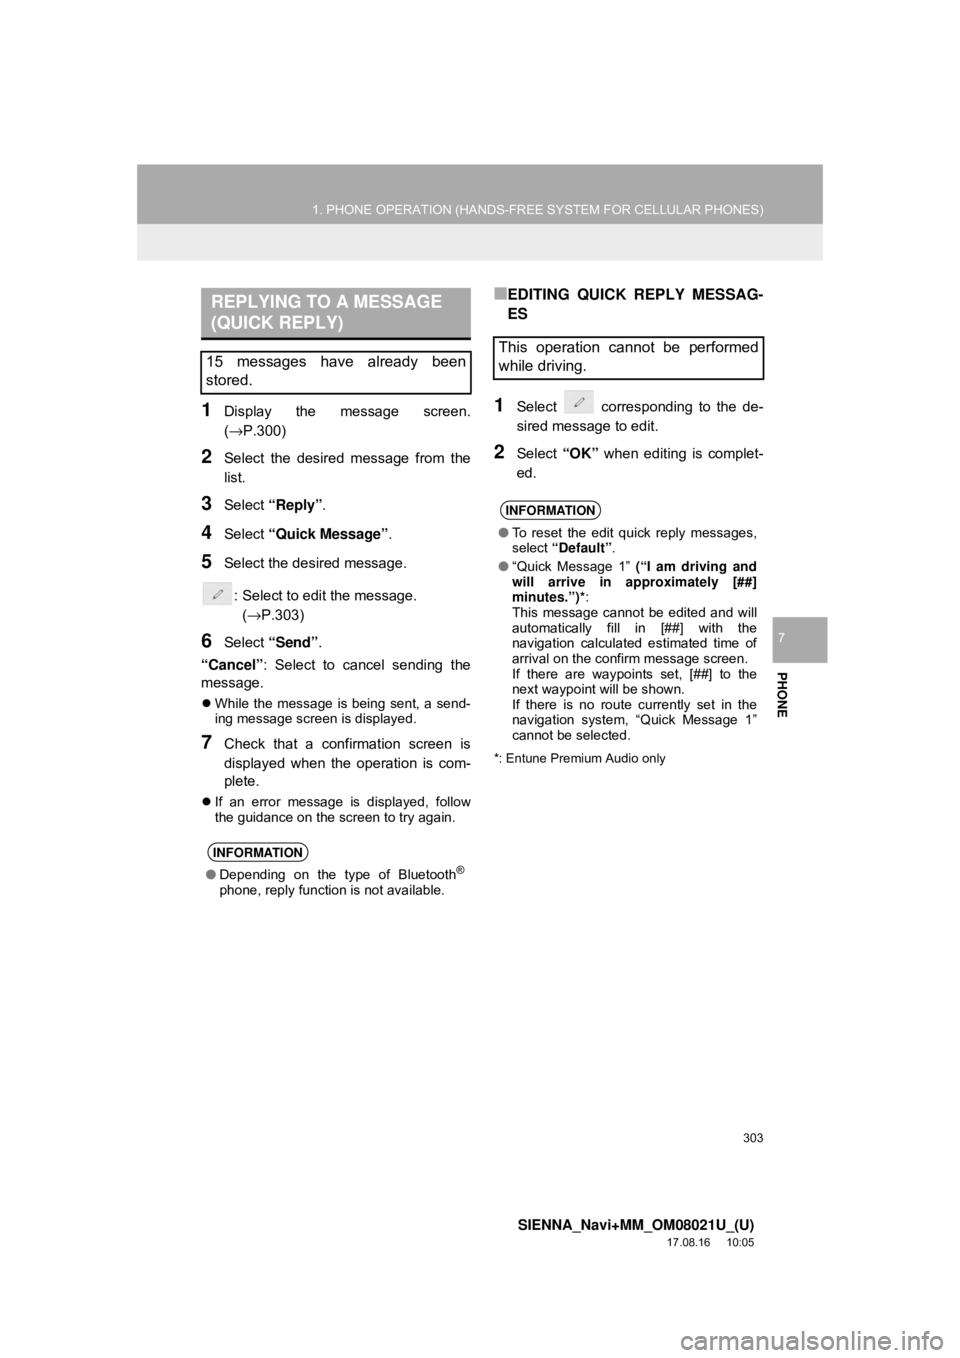
1Display the message screen.
(→P.300)
2Select the desired message from the
list.
3Select “Reply”.
4Select “Quick Message” .
5Select the desired message.
: Select to edit the message.(→P.303)
6Select “Send” .
“Cancel” : Select to cancel sending the
message.
While the message is being sent, a send-
ing message screen is displayed.
7Check that a confirmation screen is
displayed when the operation is com-
plete.
If an error message is displayed, follow
the guidance on the screen to try again.
■EDITING QUICK REPLY MESSAG-
ES
1Select corresponding to the de-
sired message to edit.
2Select “OK” when editing is complet-
ed.
*: Entune Premium Audio only
REPLYING TO A MESSAGE
(QUICK REPLY)
15 messages have already been
stored.
INFORMATION
● Depending on the type of Bluetooth®
phone, reply function is not available.
This operation cannot be performed
while driving.
INFORMATION
●To reset the edit quick reply messages,
select “Default” .
● “Quick Message 1” (“I am driving and
will arrive in approximately [##]
minutes.”)* :
This message cannot be edited and will
automatically fill in [##] with the
navigation calculated estimated time of
arrival on the confirm message screen.
If there are waypoints set, [##] to the
next waypoint will be shown.
If there is no route currently set in the
navigation system, “Quick Message 1”
cannot be selected.
Page 305 of 435
305
SIENNA_Navi+MM_OM08021U_(U)
17.08.16 10:05
PHONE
7
2. SETUP
1. PHONE SETTINGS
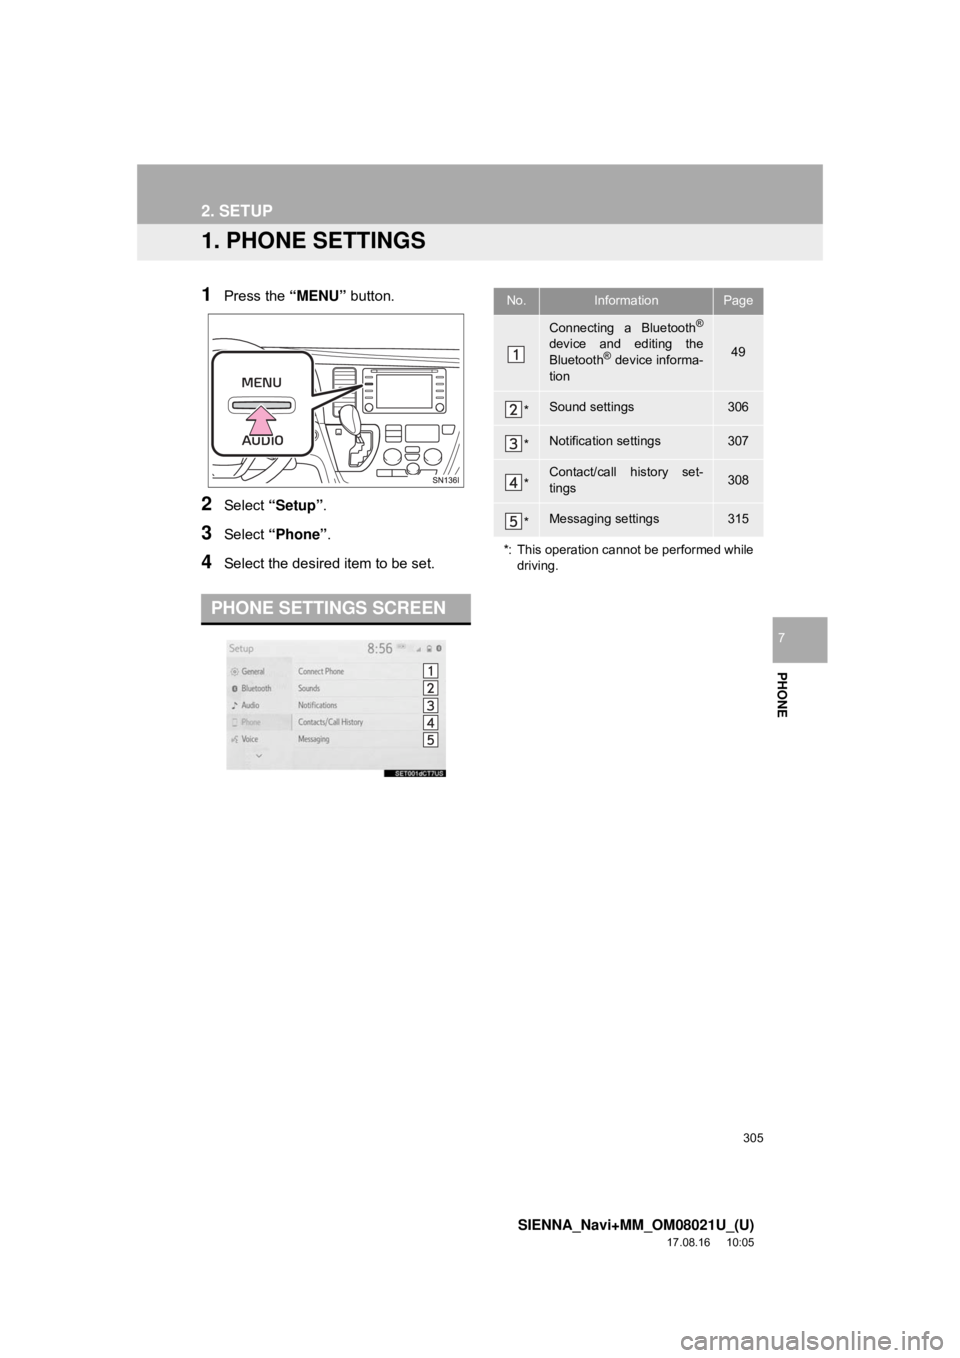
1Press the “MENU” button.
2Select “Setup” .
3Select “Phone” .
4Select the desired item to be set.
PHONE SETTINGS SCREEN
No.InformationPage
Connecting a Bluetooth®
device and editing the
Bluetooth® device informa-
tion49
*Sound settings306
*Notification settings307
*Contact/call history set-
tings308
*Messaging settings315
*: This operation cannot be performed while driving.
Page 308 of 435
308
2. SETUP
SIENNA_Navi+MM_OM08021U_(U)
17.08.16 10:05
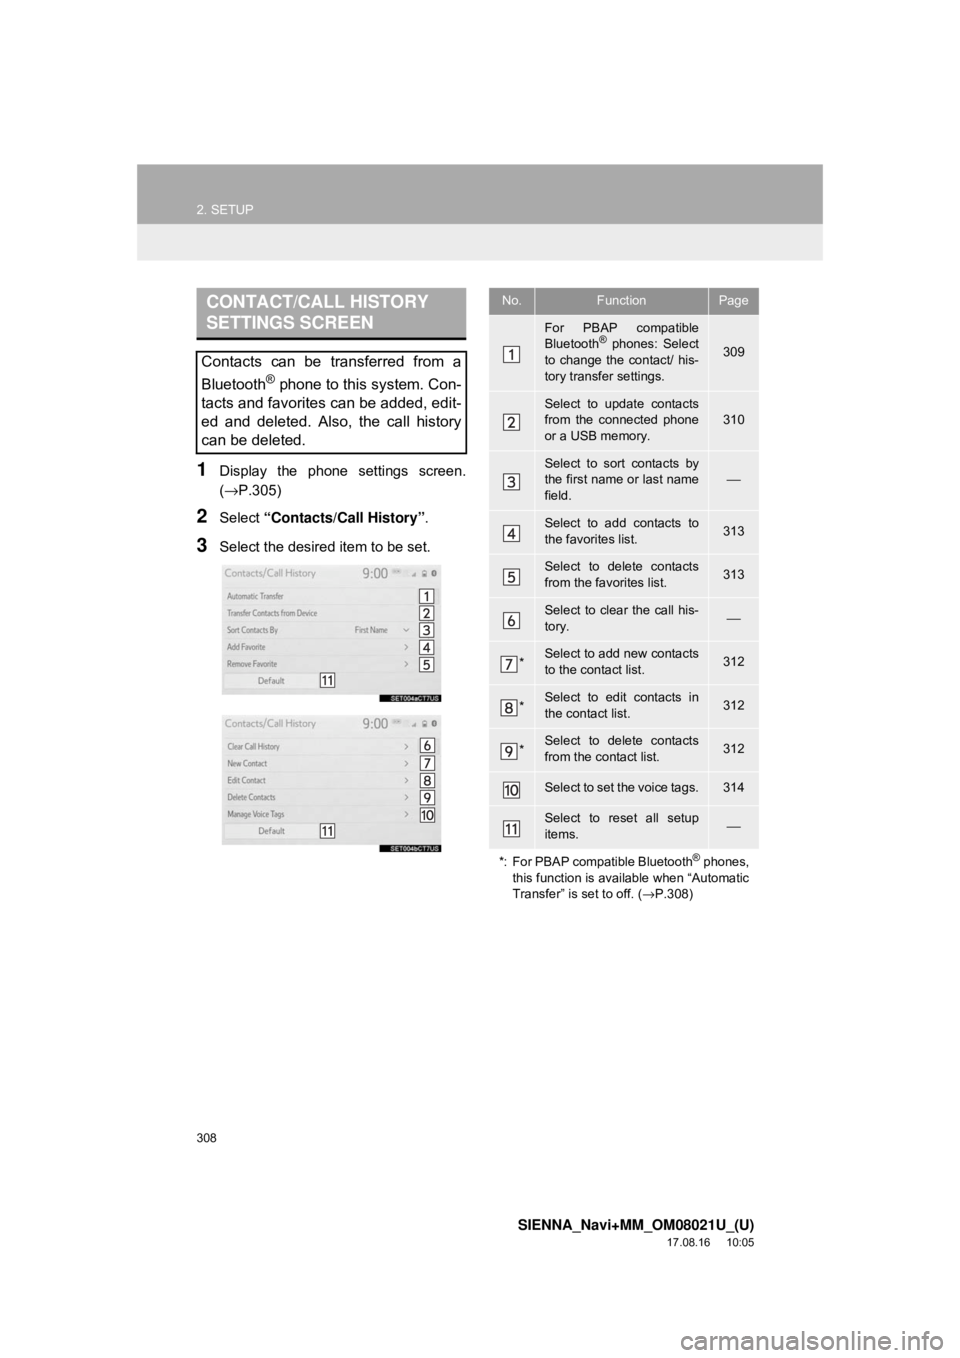
1Display the phone settings screen.
(→P.305)
2Select “Contacts/Call History” .
3Select the desired item to be set.
CONTACT/CALL HISTORY
SETTINGS SCREEN
Contacts can be transferred from a
Bluetooth
® phone to this system. Con-
tacts and favorites can be added, edit-
ed and deleted. Also, the call history
can be deleted.
No.FunctionPage
For PBAP compatible
Bluetooth® phones: Select
to change the contact/ his-
tory transfer settings.309
Select to update contacts
from the connected phone
or a USB memory.
310
Select to sort contacts by
the first name or last name
field.⎯
Select to add contacts to
the favorites list. 313
Select to delete contacts
from the favorites list. 313
Select to clear the call his-
tory.⎯
*Select to add new contacts
to the contact list.312
*Select to edit contacts in
the contact list.312
*Select to delete contacts
from the contact list.312
Select to set the voice tags.314
Select to reset all setup
items.⎯
*: For PBAP compatible Bluetooth
® phones,
this function is available when “Automatic
Transfer” is set to off. ( →P.308)
Page 309 of 435
309
2. SETUP
SIENNA_Navi+MM_OM08021U_(U)
17.08.16 10:05
PHONE
7
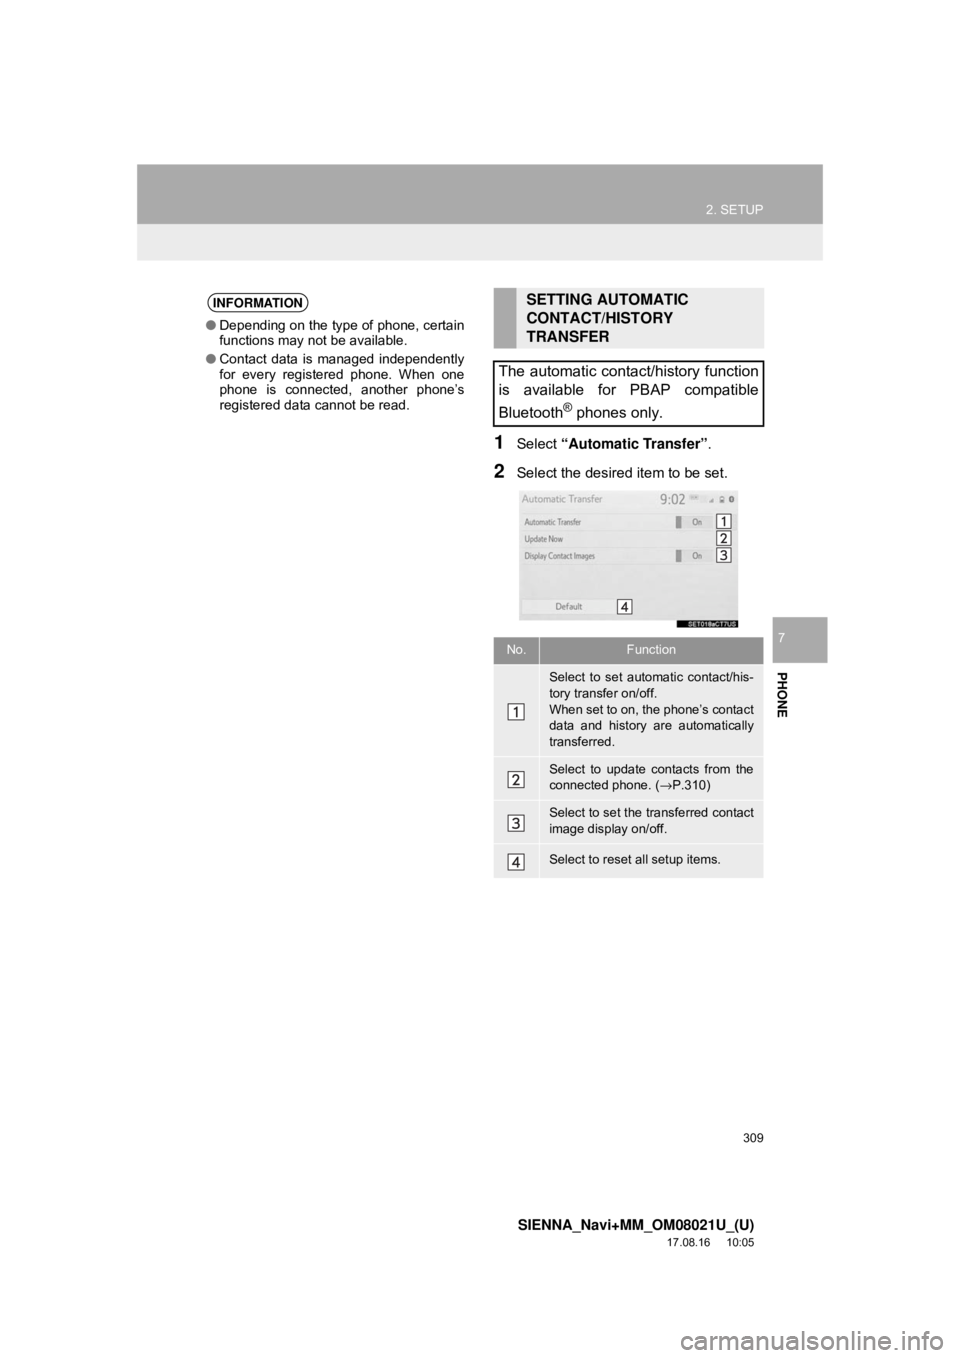
1Select “Automatic Transfer” .
2Select the desired item to be set.
INFORMATION
●Depending on the type of phone, certain
functions may not be available.
● Contact data is managed independently
for every registered phone. When one
phone is connected, another phone’s
registered data cannot be read.
SETTING AUTOMATIC
CONTACT/HISTORY
TRANSFER
The automatic contact/history function
is available for PBAP compatible
Bluetooth
® phones only.
No.Function
Select to set automatic contact/his-
tory transfer on/off.
When set to on, the phone’s contact
data and history are automatically
transferred.
Select to update contacts from the
connected phone. ( →P.310)
Select to set the transferred contact
image display on/off.
Select to reset all setup items.
Page 310 of 435
310
2. SETUP
SIENNA_Navi+MM_OM08021U_(U)
17.08.16 10:05
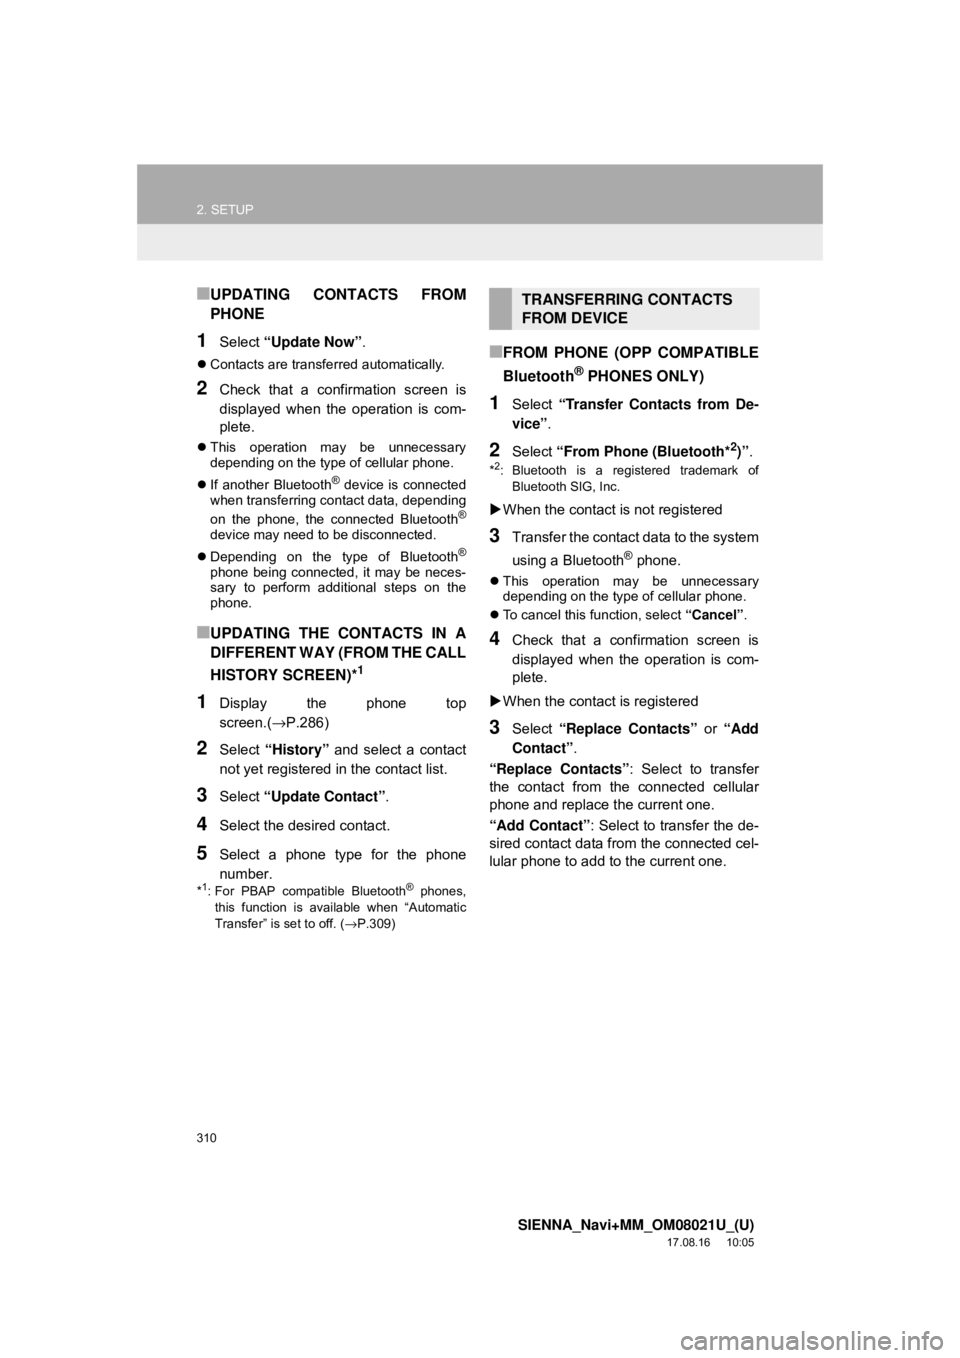
■UPDATING CONTACTS FROM
PHONE
1Select “Update Now” .
Contacts are transferred automatically.
2Check that a confirmation screen is
displayed when the operation is com-
plete.
This operation may be unnecessary
depending on the type of cellular phone.
If another Bluetooth
® device is connected
when transferring contact data, depending
on the phone, the connected Bluetooth
®
device may need to be disconnected.
Depending on the type of Bluetooth
®
phone being connected, it may be neces-
sary to perform additional steps on the
phone.
■UPDATING THE CONTACTS IN A
DIFFERENT WAY (FROM THE CALL
HISTORY SCREEN)*
1
1Display the phone top
screen.( →P.286)
2Select “History” and select a contact
not yet registered in the contact list.
3Select “Update Contact” .
4Select the desired contact.
5Select a phone type for the phone
number.
*1: For PBAP compatible Bluetooth® phones,
this function is available when “Automatic
Transfer” is set to off. ( →P.309)
■FROM PHONE (OPP COMPATIBLE
Bluetooth
® PHONES ONLY)
1Select “Transfer Contacts from De-
vice” .
2Select “From Phone (Bluetooth*2)”.
*2: Bluetooth is a registered trademark of
Bluetooth SIG, Inc.
When the contact is not registered
3Transfer the contact data to the system
using a Bluetooth
® phone.
This operation may be unnecessary
depending on the type of cellular phone.
To cancel this function, select “Cancel”.
4Check that a confirmation screen is
displayed when the operation is com-
plete.
When the contact is registered
3Select “Replace Contacts” or “Add
Contact” .
“Replace Contacts” : Select to transfer
the contact from the connected cellular
phone and replace the current one.
“Add Contact” : Select to transfer the de-
sired contact data from the connected cel-
lular phone to add to the current one.
TRANSFERRING CONTACTS
FROM DEVICE
Page 311 of 435
311
2. SETUP
SIENNA_Navi+MM_OM08021U_(U)
17.08.16 10:05
PHONE
7
4Transfer the contact data to the system
using a Bluetooth
® phone.
This operation may be unnecessary
depending on the type of cellular phone.
To cancel this function, select “Cancel”.
5Check that a confirmation screen is
displayed when the operation is com-
plete.
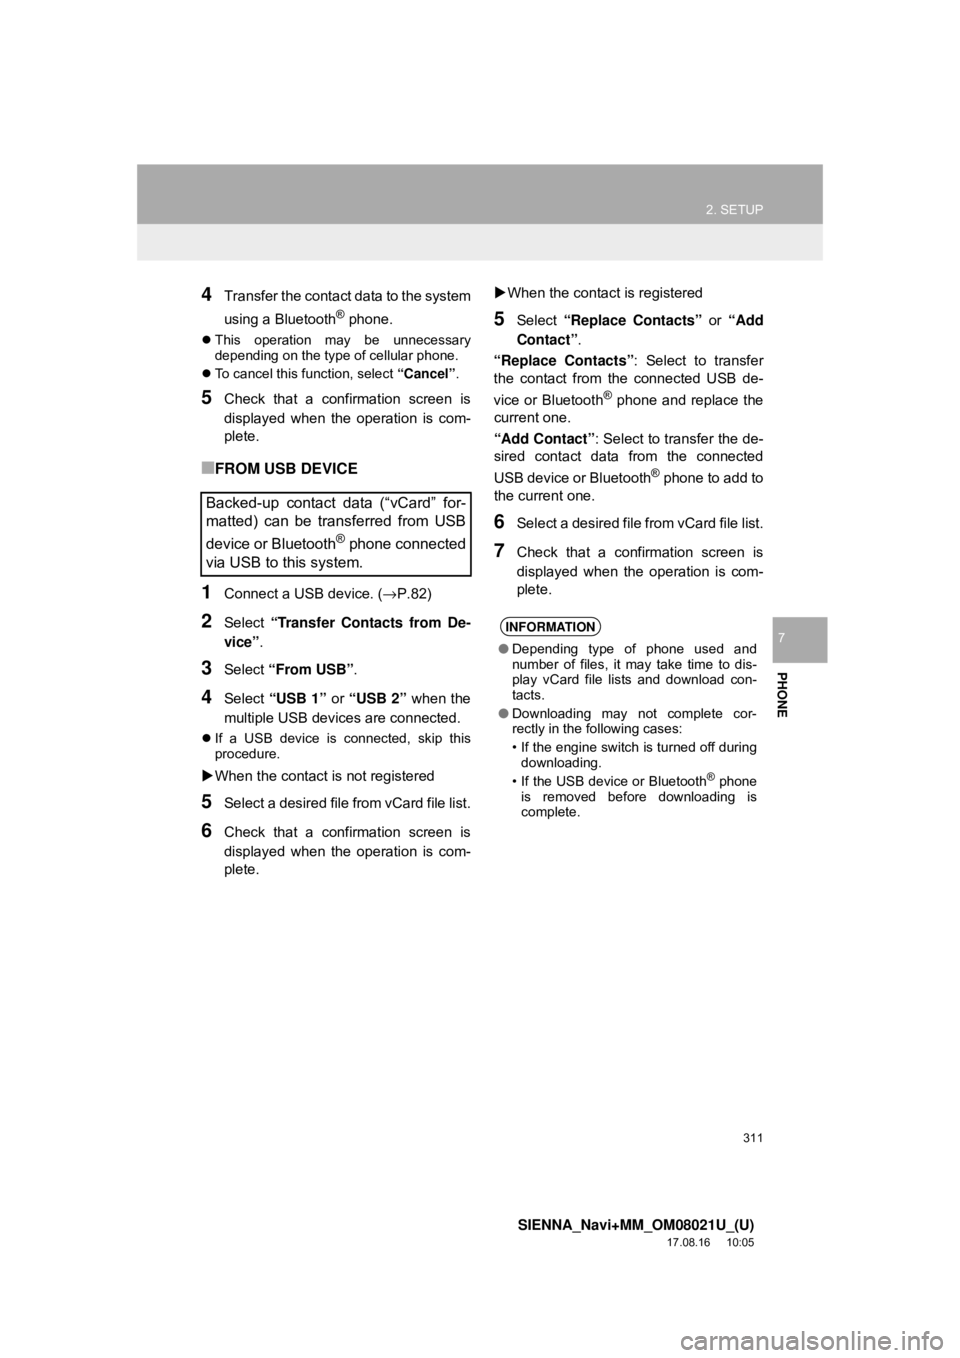
■FROM USB DEVICE
1Connect a USB device. ( →P.82)
2Select “Transfer Contacts from De-
vice” .
3Select “From USB” .
4Select “USB 1” or “USB 2” when the
multiple USB devices are connected.
If a USB device is connected, skip this
procedure.
When the contact is not registered
5Select a desired file from vCard file list.
6Check that a confirmation screen is
displayed when the operation is com-
plete.
When the contact is registered
5Select “Replace Contacts” or “Add
Contact” .
“Replace Contacts” : Select to transfer
the contact from the connected USB de-
vice or Bluetooth
® phone and replace the
current one.
“Add Contact” : Select to transfer the de-
sired contact data from the connected
USB device or Bluetooth
® phone to add to
the current one.
6Select a desired file from vCard file list.
7Check that a confirmation screen is
displayed when the operation is com-
plete.
Backed-up contact data (“vCard” for-
matted) can be transferred from USB
device or Bluetooth
® phone connected
via USB to this system.
INFORMATION
● Depending type of phone used and
number of files, it may take time to dis-
play vCard file lists and download con-
tacts.
● Downloading may not complete cor-
rectly in the following cases:
• If the engine switch is turned off during
downloading.
• If the USB device or Bluetooth
® phone
is removed before downloading is
complete.
Page 312 of 435
312
2. SETUP
SIENNA_Navi+MM_OM08021U_(U)
17.08.16 10:05
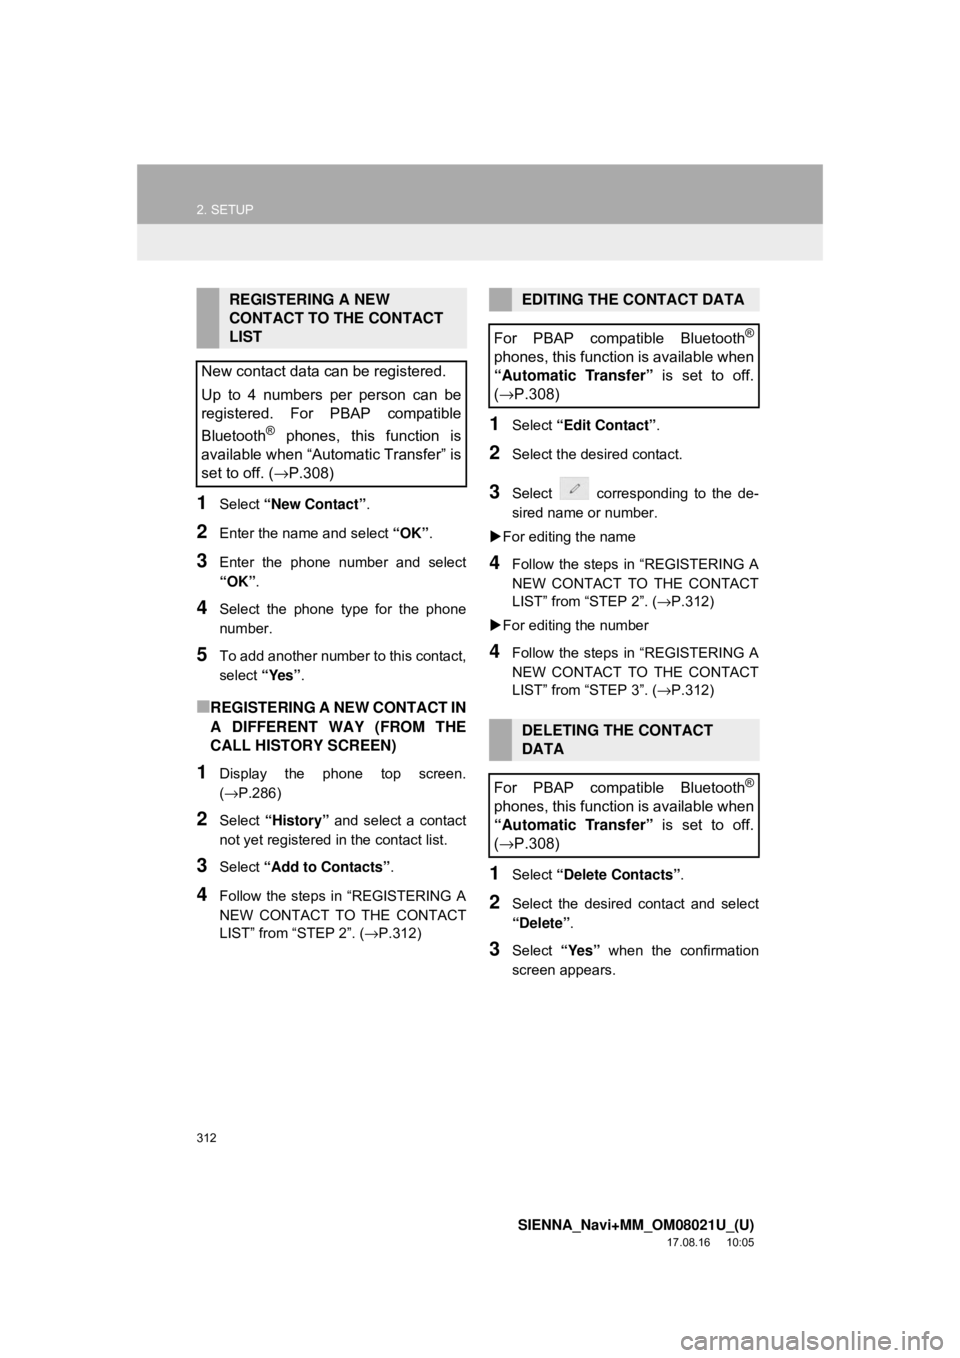
1Select “New Contact” .
2Enter the name and select “OK”.
3Enter the phone number and select
“OK”.
4Select the phone type for the phone
number.
5To add another number to this contact,
select “Yes”.
■REGISTERING A NEW CONTACT IN
A DIFFERENT WAY (FROM THE
CALL HISTORY SCREEN)
1Display the phone top screen.
(→P.286)
2Select “History” and select a contact
not yet registered in the contact list.
3Select “Add to Contacts” .
4Follow the steps in “REGISTERING A
NEW CONTACT TO THE CONTACT
LIST” from “STEP 2”. ( →P.312)
1Select “Edit Contact”.
2Select the desired contact.
3Select corresponding to the de-
sired name or number.
For editing the name
4Follow the steps in “REGISTERING A
NEW CONTACT TO THE CONTACT
LIST” from “STEP 2”. ( →P.312)
For editing the number
4Follow the steps in “REGISTERING A
NEW CONTACT TO THE CONTACT
LIST” from “STEP 3”. ( →P.312)
1Select “Delete Contacts” .
2Select the desired contact and select
“Delete”.
3Select “Yes” when the confirmation
screen appears.
REGISTERING A NEW
CONTACT TO THE CONTACT
LIST
New contact data can be registered.
Up to 4 numbers per person can be
registered. For PBAP compatible
Bluetooth
® phones, this function is
available when “Automatic Transfer” is
set to off. (→P.308)
EDITING THE CONTACT DATA
For PBAP compatible Bluetooth
®
phones, this function is available when
“Automatic Transfer” is set to off.
( →P.308)
DELETING THE CONTACT
DATA
For PBAP compatible Bluetooth
®
phones, this function is available when
“Automatic Transfer” is set to off.
( →P.308)
Page 317 of 435
317
SIENNA_Navi+MM_OM08021U_(U)
17.08.16 10:05
PHONE
7
3. WHAT TO DO IF...
1. TROUBLESHOOTING
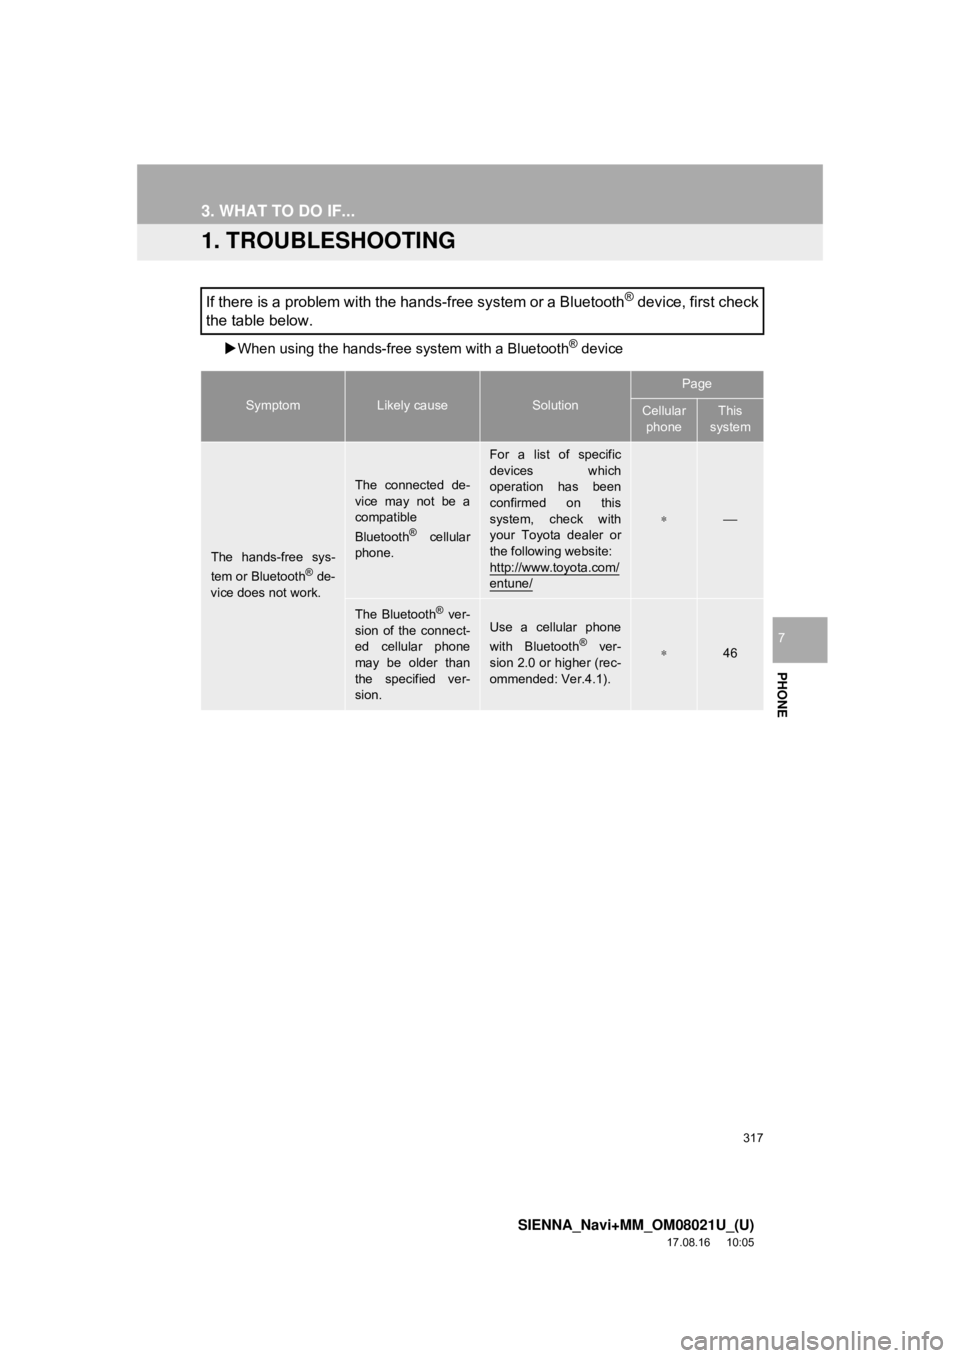
When using the hands-free system with a Bluetooth® device
If there is a problem with the hands-free system or a Bluetooth® device, first check
the table below.
SymptomLikely causeSolution
Page
Cellular
phoneThis
system
The hands-free sys-
tem or Bluetooth® de-
vice does not work.
The connected de-
vice may not be a
compatible
Bluetooth
® cellular
phone.
For a list of specific
devices which
operation has been
confirmed on this
system, check with
your Toyota dealer or
the following website:
http://www.toyota.com/
entune/
∗⎯
The Bluetooth® ver-
sion of the connect-
ed cellular phone
may be older than
the specified ver-
sion.Use a cellular phone
with Bluetooth® ver-
sion 2.0 or higher (rec-
ommended: Ver.4.1).∗46
Page 318 of 435
318
3. WHAT TO DO IF...
SIENNA_Navi+MM_OM08021U_(U)
17.08.16 10:05
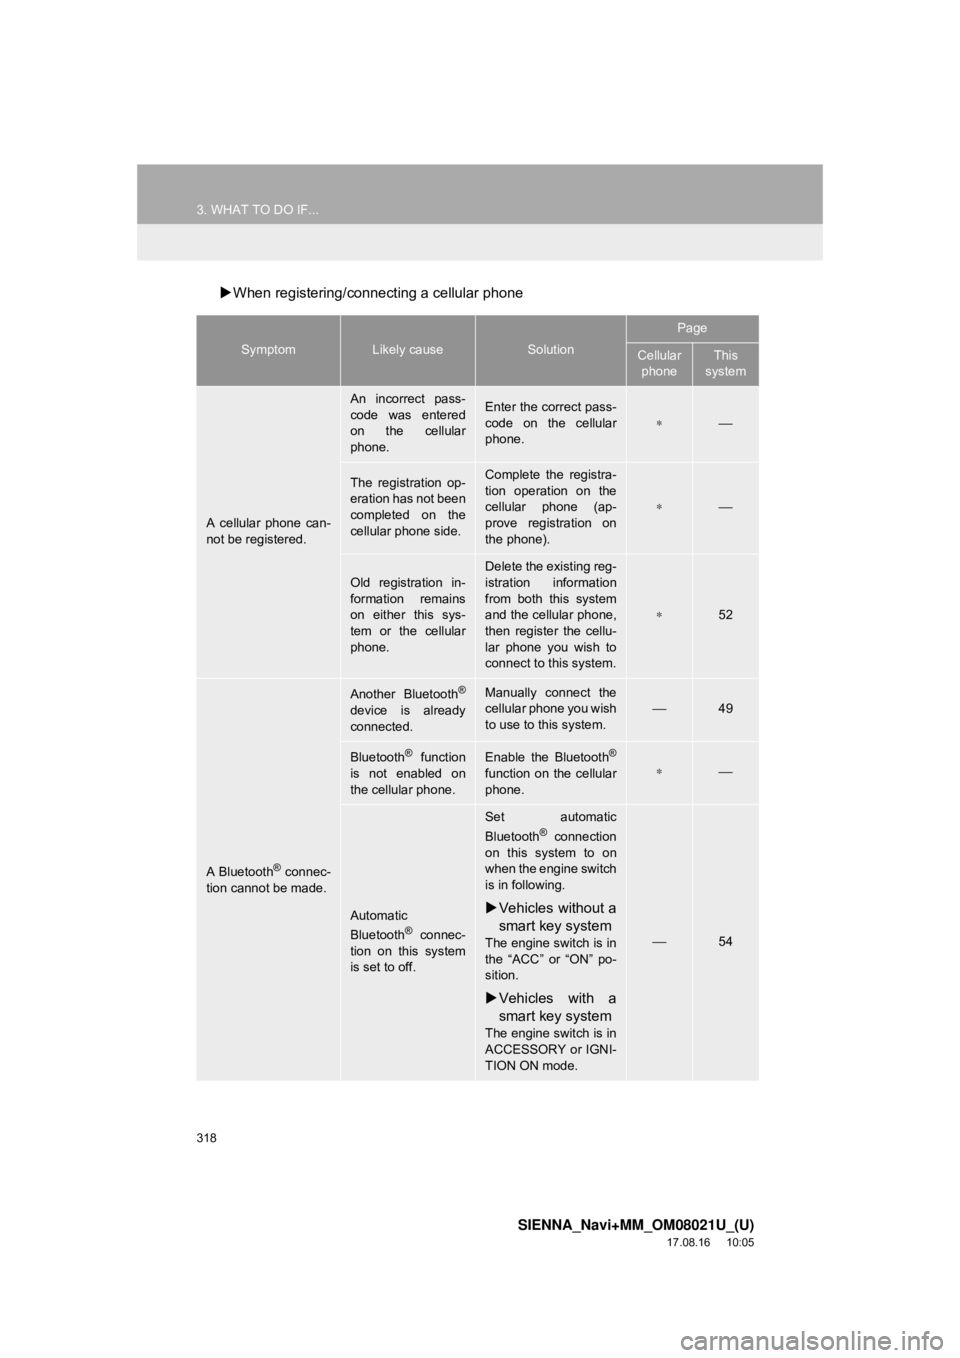
When registering/connecting a cellular phone
SymptomLikely causeSolution
Page
Cellular
phoneThis
system
A cellular phone can-
not be registered.
An incorrect pass-
code was entered
on the cellular
phone.Enter the correct pass-
code on the cellular
phone.
∗⎯
The registration op-
eration has not been
completed on the
cellular phone side.Complete the registra-
tion operation on the
cellular phone (ap-
prove registration on
the phone).
∗⎯
Old registration in-
formation remains
on either this sys-
tem or the cellular
phone.
Delete the existing reg-
istration information
from both this system
and the cellular phone,
then register the cellu-
lar phone you wish to
connect to this system.
∗52
A Bluetooth® connec-
tion cannot be made.
Another Bluetooth®
device is already
connected.
Manually connect the
cellular phone you wish
to use to this system.
⎯49
Bluetooth® function
is not enabled on
the cellular phone.Enable the Bluetooth®
function on the cellular
phone.∗⎯
Automatic
Bluetooth® connec-
tion on this system
is set to off.
Set automatic
Bluetooth® connection
on this system to on
when the engine switch
is in following.
Vehicles without a
smart key system
The engine switch is in
the “ACC” or “ON” po-
sition.
Vehicles with a
smart key system
The engine switch is in
ACCESSORY or IGNI-
TION ON mode.
⎯54
Page 319 of 435
319
3. WHAT TO DO IF...
SIENNA_Navi+MM_OM08021U_(U)
17.08.16 10:05
PHONE
7
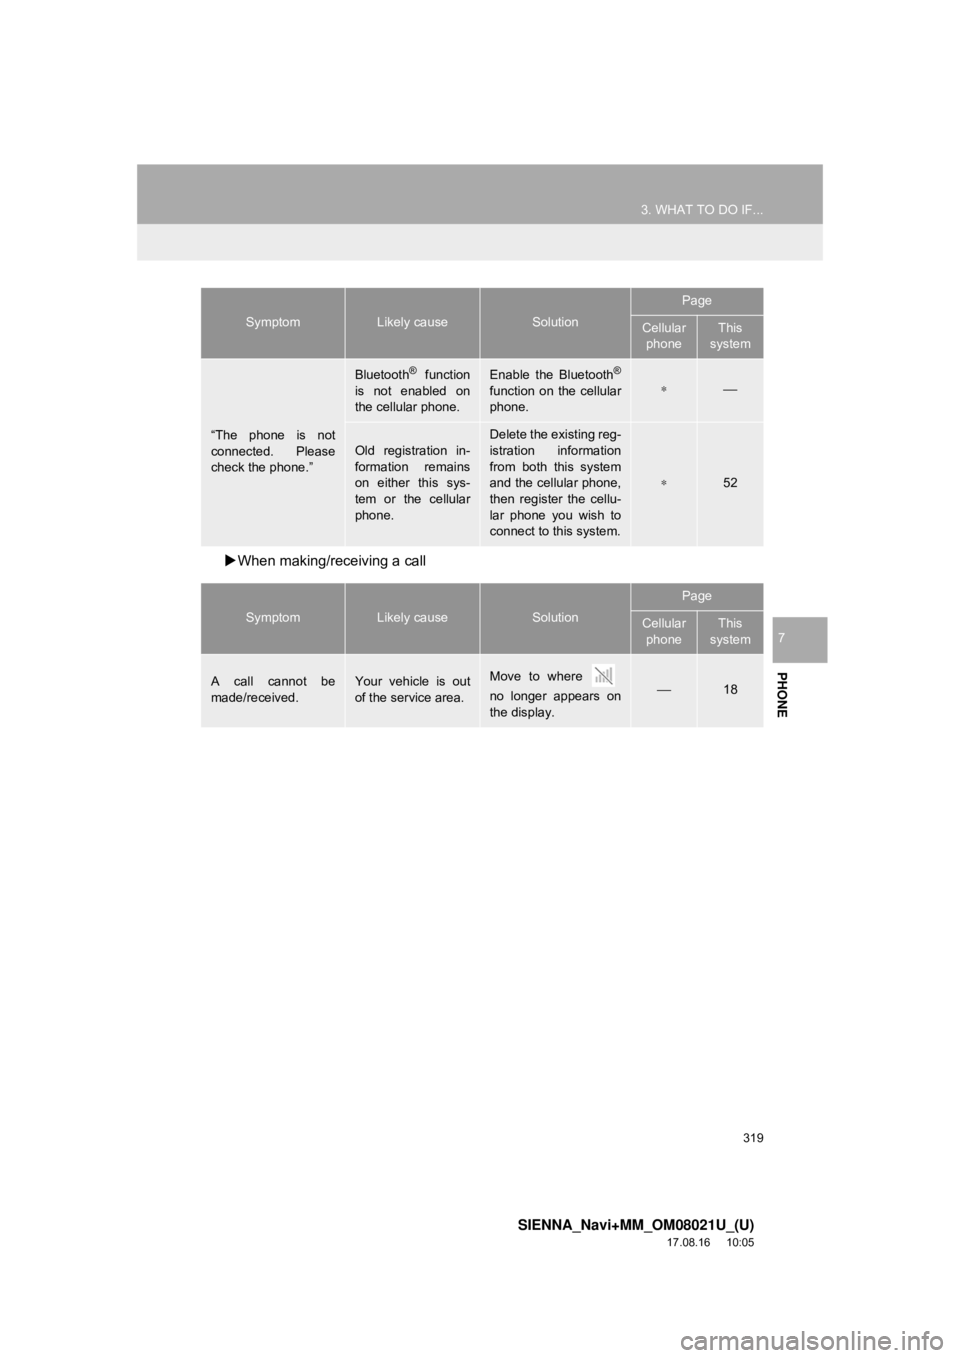
When making/receiving a call
“The phone is not
connected. Please
check the phone.”
Bluetooth® function
is not enabled on
the cellular phone.Enable the Bluetooth®
function on the cellular
phone.∗⎯
Old registration in-
formation remains
on either this sys-
tem or the cellular
phone.Delete the existing reg-
istration information
from both this system
and the cellular phone,
then register the cellu-
lar phone you wish to
connect to this system.
∗52
SymptomLikely causeSolution
Page
Cellular phoneThis
system
A call cannot be
made/received.Your vehicle is out
of the service area.Move to where
no longer appears on
the display.⎯18
SymptomLikely causeSolution
Page
Cellular phoneThis
system