change time TOYOTA SIENNA HYBRID 2021 (in English) Owner's Manual
[x] Cancel search | Manufacturer: TOYOTA, Model Year: 2021, Model line: SIENNA HYBRID, Model: TOYOTA SIENNA HYBRID 2021Pages: 601, PDF Size: 32.07 MB
Page 236 of 601
2354-2. Driving procedures
4
Driving
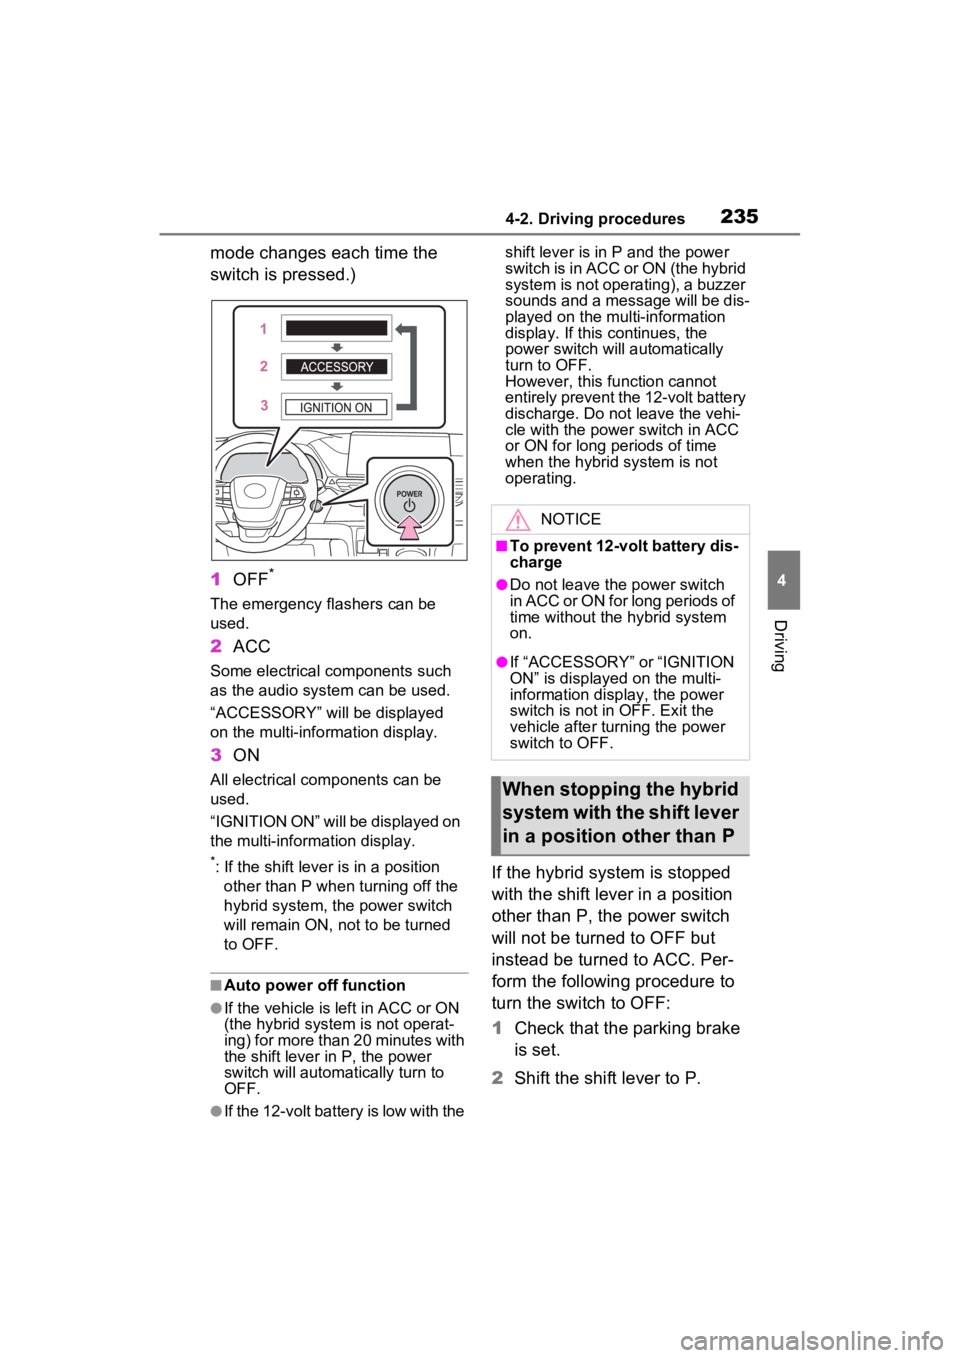
mode changes each time the
switch is pressed.)
1OFF
*
The emergency flashers can be
used.
2ACC
Some electrical components such
as the audio system can be used.
“ACCESSORY” will be displayed
on the multi-info rmation display.
3ON
All electrical com ponents can be
used.
“IGNITION ON” will be displayed on
the multi-inform ation display.
*: If the shift lever is in a position
other than P when turning off the
hybrid system, the power switch
will remain ON, not to be turned
to OFF.
■Auto power off function
●If the vehicle is left in ACC or ON
(the hybrid system is not operat-
ing) for more than 20 minutes with
the shift lever in P, the power
switch will automatically turn to
OFF.
●If the 12-volt battery is low with the shift lever is in P and the power
switch is in ACC or ON (the hybrid
system is not operating), a buzzer
sounds and a message will be dis-
played on the multi-information
display. If this continues, the
power switch will automatically
turn to OFF.
However, this function cannot
entirely prevent the 12-volt battery
discharge. Do not leave the vehi-
cle with the power switch in ACC
or ON for long periods of time
when the hybrid system is not
operating.
If the hybrid system is stopped
with the shift lever in a position
other than P, the power switch
will not be turned to OFF but
instead be turned to ACC. Per-
form the following procedure to
turn the switch to OFF:
1
Check that the parking brake
is set.
2 Shift the shift lever to P.
NOTICE
■To prevent 12-volt battery dis-
charge
●Do not leave the power switch
in ACC or ON for long periods of
time without the hybrid system
on.
●If “ACCESSORY” or “IGNITION
ON” is displayed on the multi-
information display, the power
switch is not in OFF. Exit the
vehicle after turning the power
switch to OFF.
When stopping the hybrid
system with the shift lever
in a position other than P
Page 243 of 601

2424-2. Driving procedures
The turn signal lever can be
used to show the following
intentions of the driver.
1Right turn
2 Lane change to the right
(move the lever partway and
release it)
The right hand signals will flash 3
times.
3Lane change to the left
(move the lever partway and
release it)
The left hand signals will flash 3
times.
4Left turn
■Turn signals can be operated
when
The power swit ch is in ON.
■If the indicator flashes faster
than usual
Check that a light bulb in the front or
rear turn signal lights has not
burned out.
■If the turn signals stop flashing
before a lane change has been
performed
Operate the lever again.
■To discontinue flashing of the
turn signals during a lane
change
Operate the lever in the opposite
direction.
Turn signal lever
Operating instructions
Page 250 of 601
2494-3. Operating the lights and wipers
4
Driving
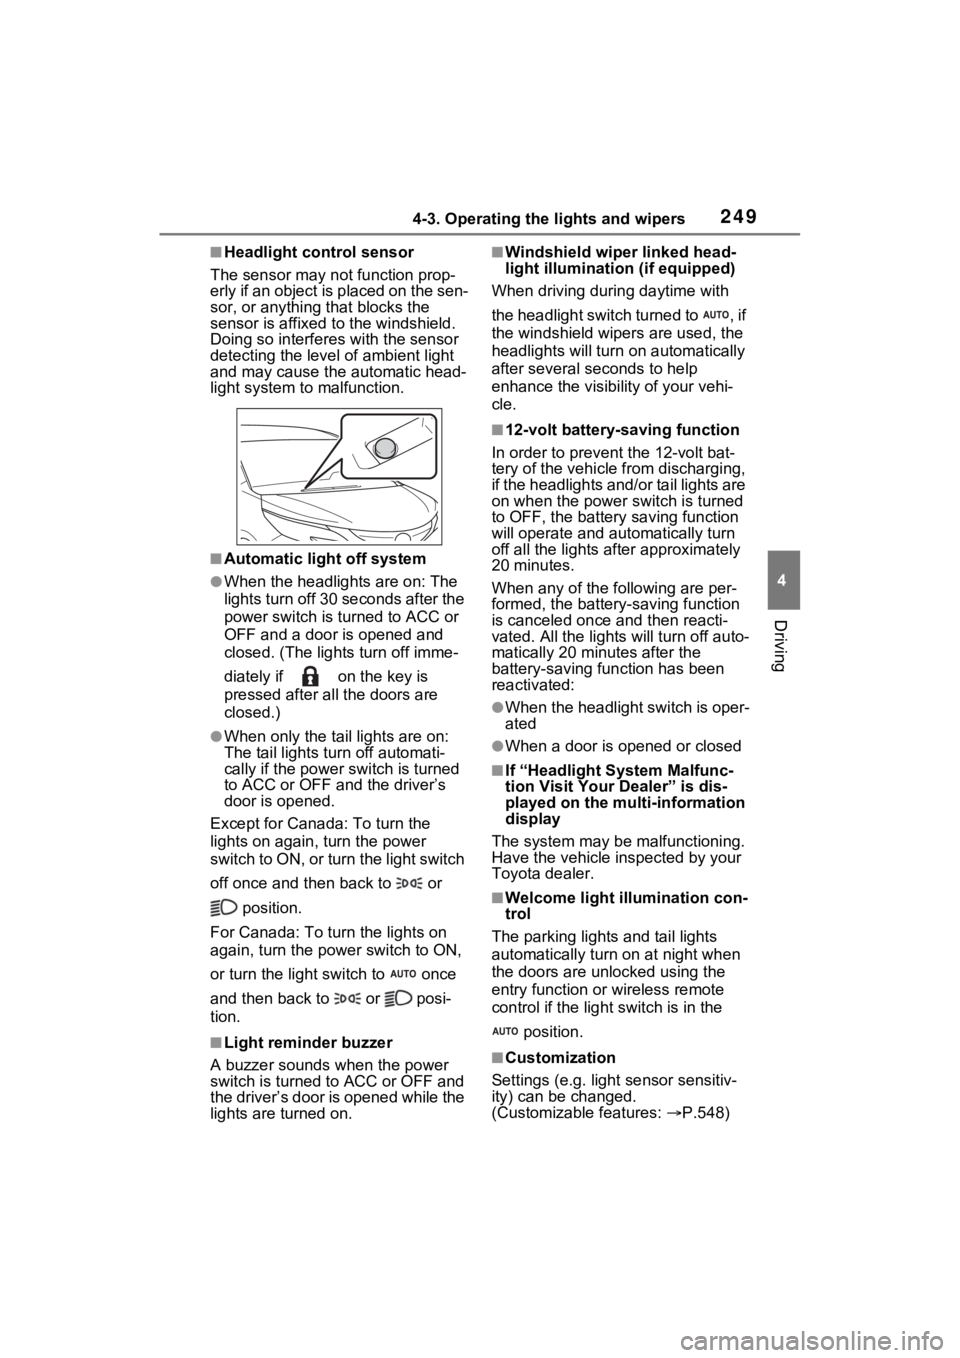
■Headlight control sensor
The sensor may not function prop-
erly if an object is placed on the sen-
sor, or anything that blocks the
sensor is affixed to the windshield.
Doing so interfere s with the sensor
detecting the level of ambient light
and may cause the automatic head-
light system to malfunction.
■Automatic light off system
●When the headlights are on: The
lights turn off 30 seconds after the
power switch is turned to ACC or
OFF and a door is opened and
closed. (The lights turn off imme-
diately if on the key is
pressed after all the doors are
closed.)
●When only the tail lights are on:
The tail lights turn off automati-
cally if the power switch is turned
to ACC or OFF and the driver’s
door is opened.
Except for Canada: To turn the
lights on again, turn the power
switch to ON, or turn the light switch
off once and the n back to or
position.
For Canada: To turn the lights on
again, turn the power switch to ON,
or turn the light s witch to once
and then back to or posi-
tion.
■Light reminder buzzer
A buzzer sounds when the power
switch is turned to ACC or OFF and
the driver’s door is opened while the
lights are turned on.
■Windshield wiper linked head-
light illumination (if equipped)
When driving during daytime with
the headlight switch turned to , if
the windshield wipers are used, the
headlights will turn o n automatically
after several se conds to help
enhance the visibility of your vehi-
cle.
■12-volt battery-saving function
In order to prevent the 12-volt bat-
tery of the vehicle from discharging,
if the headlights and/or tail lights are
on when the power switch is turned
to OFF, the battery saving function
will operate and au tomatically turn
off all the lights af ter approximately
20 minutes.
When any of the following are per-
formed, the battery-saving function
is canceled once and then reacti-
vated. All the light s will turn off auto-
matically 20 minutes after the
battery-saving function has been
reactivated:
●When the headlight switch is oper-
ated
●When a door is opened or closed
■If “Headlight System Malfunc-
tion Visit Your Dealer” is dis-
played on the multi-information
display
The system may be malfunctioning.
Have the vehicle inspected by your
Toyota dealer.
■Welcome light illumination con-
trol
The parking lights and tail lights
automatically turn on at night when
the doors are un locked using the
entry function or wireless remote
control if the light switch is in the
position.
■Customization
Settings (e.g. light sensor sensitiv-
ity) can be changed.
(Customizable features: P.548)
Page 253 of 601
2524-3. Operating the lights and wipers
fog, mist, ice, dirt, etc.
• The windshield is cracked or dam- aged
• The front camera is deformed or
dirty
• When the temperature of the front
camera is extremely high
• Surrounding brightness levels are equal to those of h eadlights, tail
lights or fog lights
• When headlights or tail lights of vehicles ahead are turned off,
dirty, changing color, or not aimed
properly
• When the vehicle is hit by water,
snow, dust, etc. fr om a preceding
vehicle
• When driving thr ough an area of
intermittently changing brightness
and darkness
• When frequently and repeatedly
driving ascending/descending
roads, or roads with rough, bumpy
or uneven surfaces (such as
stone-paved roads, gravel roads,
etc.)
• When frequently and repeatedly
taking curves or driving on a wind-
ing road
• There is a highly reflective object
ahead of the vehicle, such as a
sign or mirror
• The back of a vehicle ahead is
highly reflective, such as a con-
tainer on a truck
• The vehicle’s headlights are dam-
aged or dirty, or are not aimed
properly
• The vehicle is listing or titling due
to a flat tire, a trailer being towed,
etc.
• The high beam and low beam are
repeatedly being switched
between in an abnormal manner
• The driver believes that the high
beam may be causing problems
or distress to other drivers or
pedestrians nearby
■Temporarily lowering sensor
sensitivity
The sensitivity of the sensor can be
temporarily lowered. 1
Turn the power s witch off while
the following conditions are met.
●The headlight switch is in or
position.
●The headlight switch lever is in the
original position.
●Automatic High Beam switch is
on.
2 Turn the power switch to ON.
3 Within 60 seconds after step 2,
repeat pushing the headlight
switch lever to the high beam
position then pulling it to the orig-
inal position quickly 10 times,
then leave the lever in the origi-
nal position.
4 If the sensitivity is changed, the
Automatic High Beam indicator
turns on and off 3 times.
■Switching to the high
beams
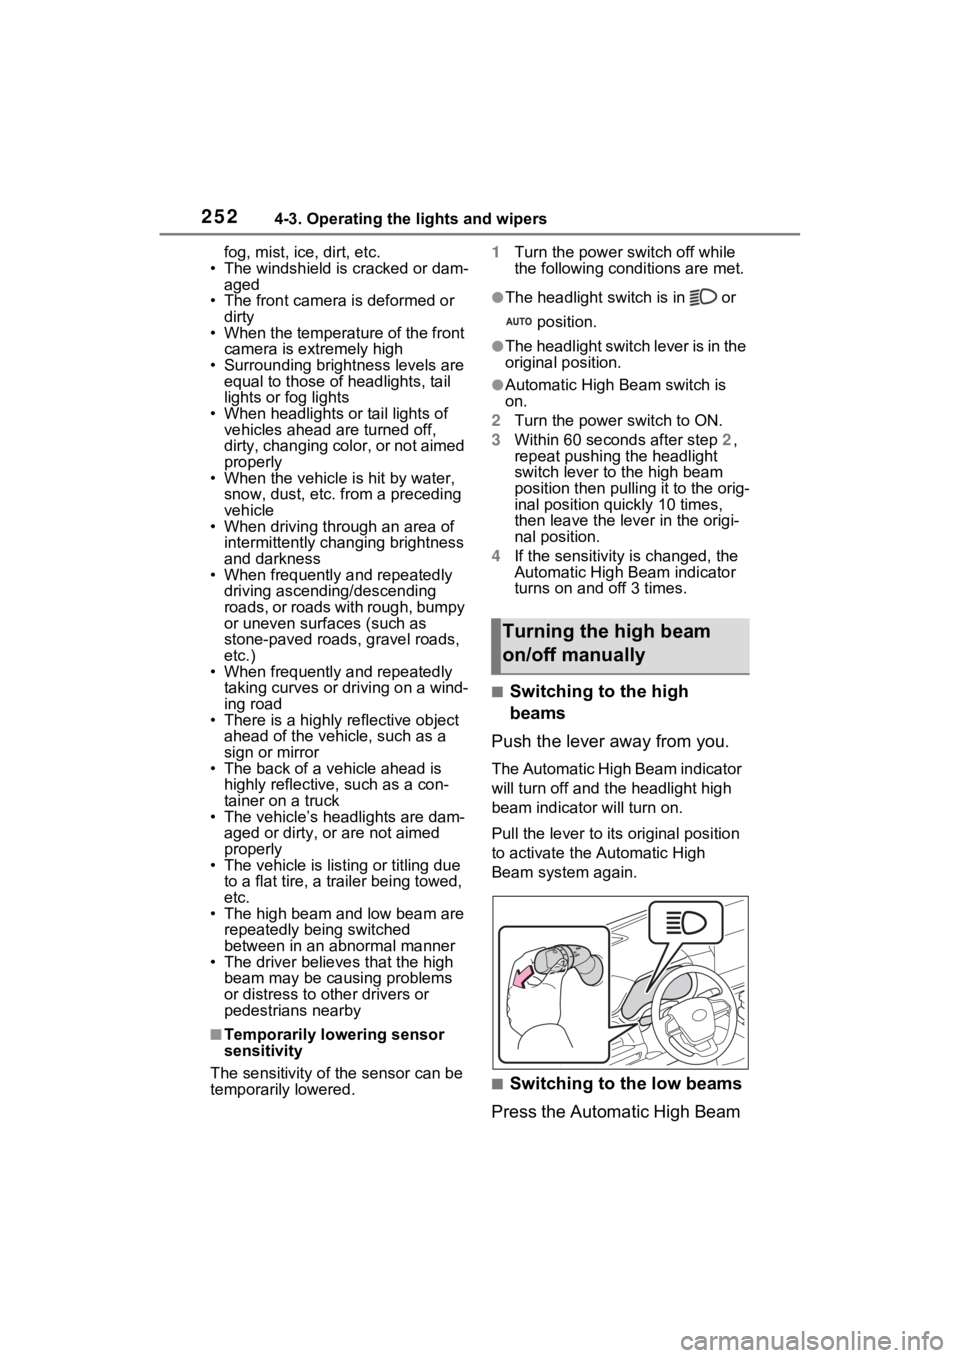
Push the lever away from you.
The Automatic High Beam indicator
will turn off and the headlight high
beam indicator will turn on.
Pull the lever to its original position
to activate the Automatic High
Beam system again.
■Switching to the low beams
Press the Automatic High Beam
Turning the high beam
on/off manually
Page 257 of 601
2564-3. Operating the lights and wipers
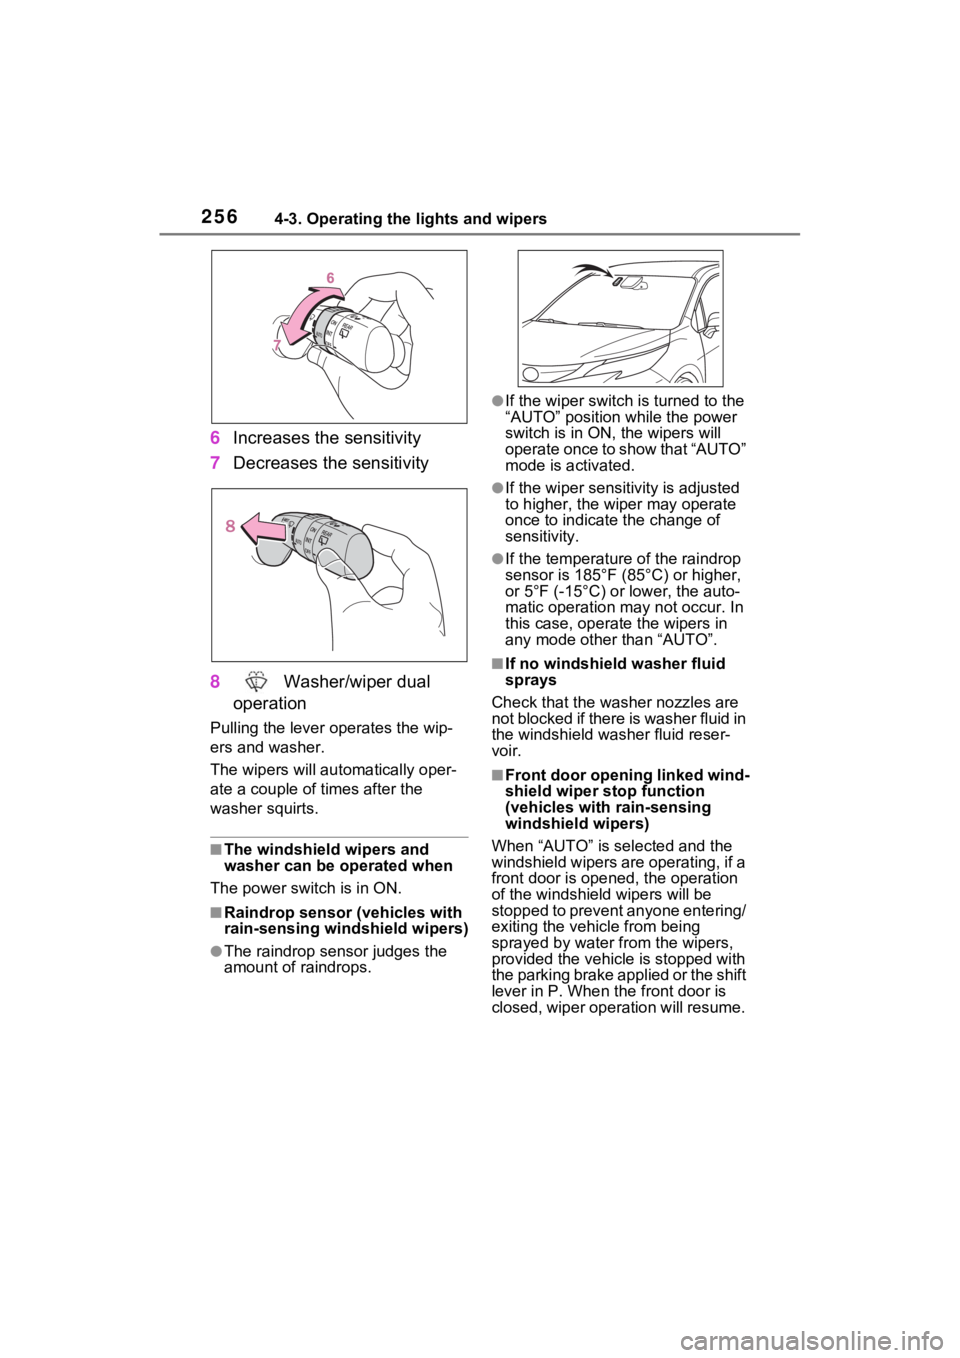
6Increases the sensitivity
7 Decreases the sensitivity
8 Washer/wiper dual
operation
Pulling the lever o perates the wip-
ers and washer.
The wipers will au tomatically oper-
ate a couple of times after the
washer squirts.
■The windshield wipers and
washer can be operated when
The power swit ch is in ON.
■Raindrop sensor (vehicles with
rain-sensing windshield wipers)
●The raindrop sensor judges the
amount of raindrops.
●If the wiper switch i s turned to the
“AUTO” position while the power
switch is in ON, the wipers will
operate once to show that “AUTO”
mode is activated.
●If the wiper sensitivity is adjusted
to higher, the wiper may operate
once to indicate the change of
sensitivity.
●If the temperature of the raindrop
sensor is 185°F (85°C) or higher,
or 5°F (-15°C) or lower, the auto-
matic operation ma y not occur. In
this case, operate the wipers in
any mode other than “AUTO”.
■If no windshield washer fluid
sprays
Check that the washer nozzles are
not blocked if there is washer fluid in
the windshield washer fluid reser-
voir.
■Front door opening linked wind-
shield wiper stop function
(vehicles with rain-sensing
windshield wipers)
When “AUTO” is selected and the
windshield wipers are operating, if a
front door is open ed, the operation
of the windshield wipers will be
stopped to prevent anyone entering/
exiting the vehicle from being
sprayed by water f rom the wipers,
provided the vehicle is stopped with
the parking brake applied or the shift
lever in P. When t he front door is
closed, wiper operation will resume.
Page 259 of 601
2584-3. Operating the lights and wipers
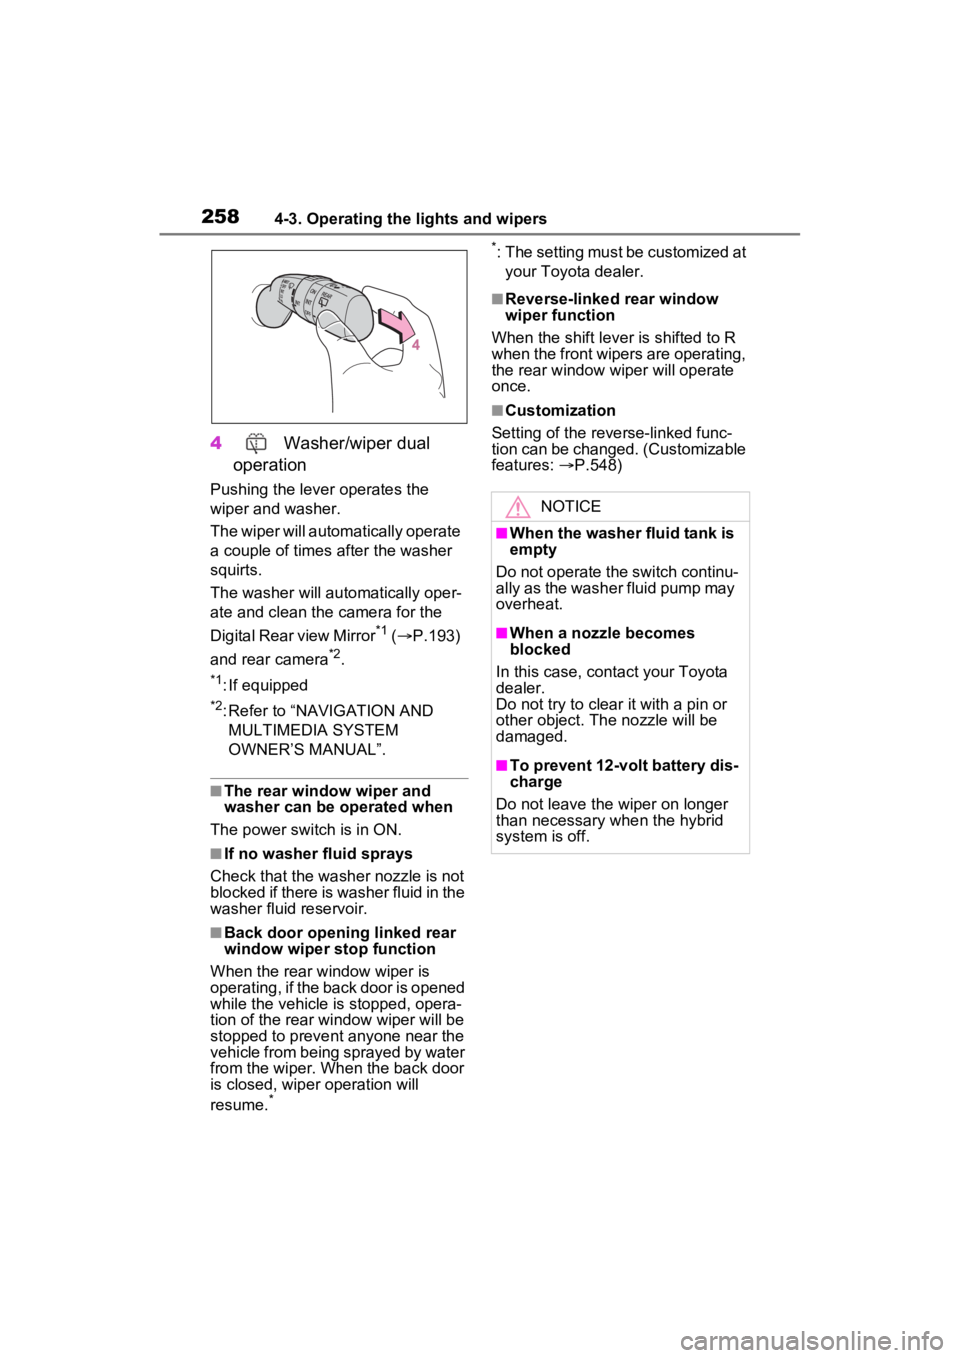
4 Washer/wiper dual
operation
Pushing the lever operates the
wiper and washer.
The wiper will automatically operate
a couple of times after the washer
squirts.
The washer will automatically oper-
ate and clean the camera for the
Digital Rear view Mirror
*1 ( P.193)
and rear camera
*2.
*1: If equipped
*2: Refer to “NAVIGATION AND MULTIMEDIA SYSTEM
OWNER’S MANUAL”.
■The rear window wiper and
washer can be operated when
The power swit ch is in ON.
■If no washer fluid sprays
Check that the washer nozzle is not
blocked if there is washer fluid in the
washer fluid reservoir.
■Back door opening linked rear
window wiper stop function
When the rear w indow wiper is
operating, if the back door is opened
while the vehicle is stopped, opera-
tion of the rear window wiper will be
stopped to prevent anyone near the
vehicle from being sprayed by water
from the wiper. When the back door
is closed, wiper operation will
resume.
* *
: The setting must be customized at
your Toyota dealer.
■Reverse-linked rear window
wiper function
When the shift lever is shifted to R
when the front wipers are operating,
the rear window wiper will operate
once.
■Customization
Setting of the reverse-linked func-
tion can be changed. (Customizable
features: P.548)
NOTICE
■When the washer fluid tank is
empty
Do not operate the switch continu-
ally as the washer fluid pump may
overheat.
■When a nozzle becomes
blocked
In this case, contact your Toyota
dealer.
Do not try to clear it with a pin or
other object. The nozzle will be
damaged.
■To prevent 12-volt battery dis-
charge
Do not leave the wiper on longer
than necessary when the hybrid
system is off.
Page 266 of 601
2654-5. Using the driving support systems
4
Driving
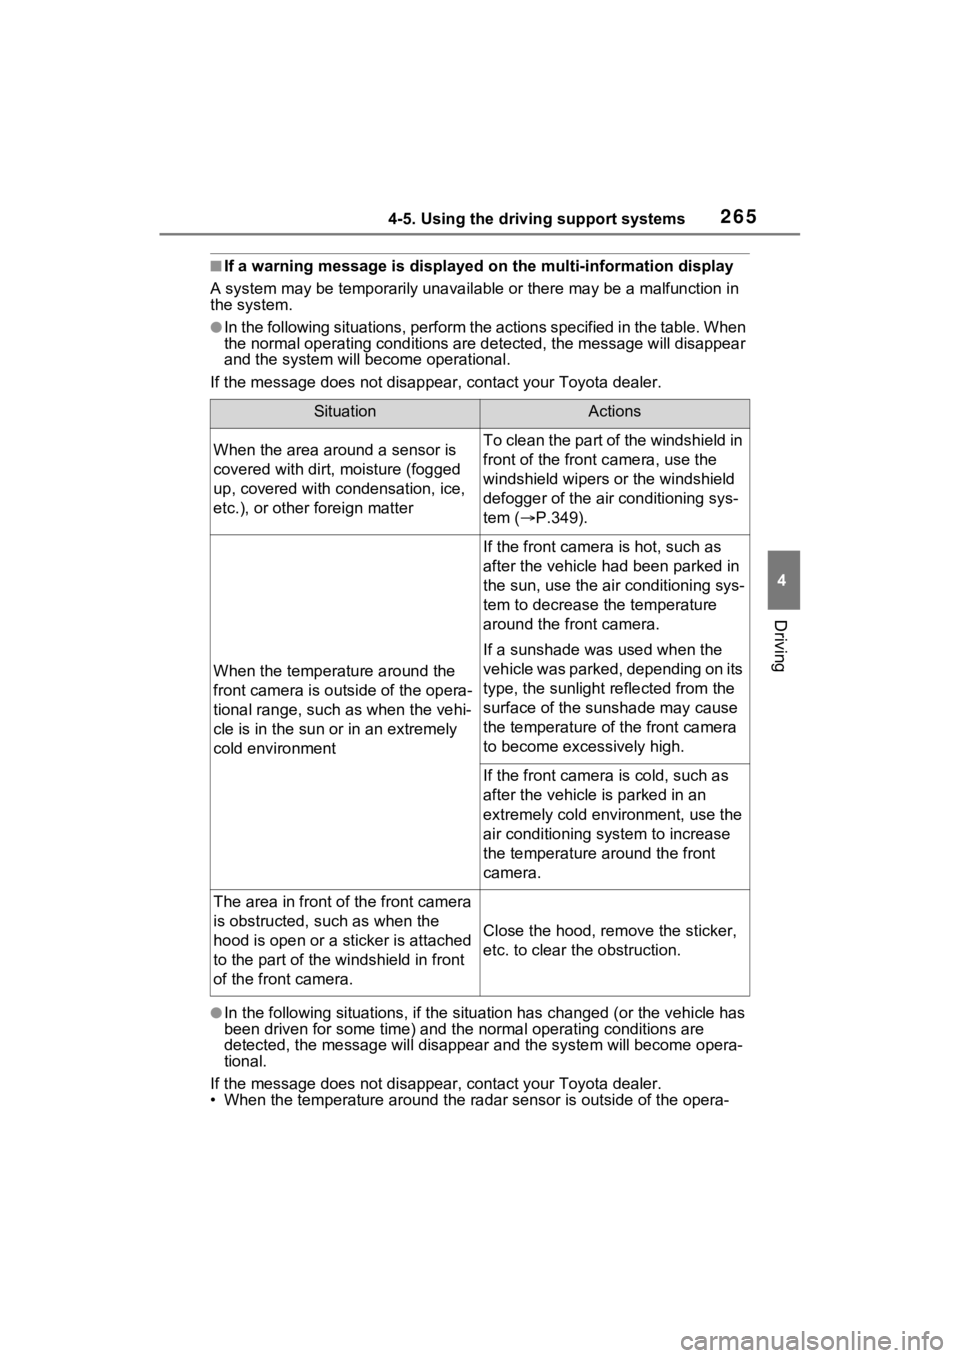
■If a warning message is displayed on the multi-information display
A system may be temporarily unava ilable or there may be a malfunction in
the system.
●In the following situations, perform the actions specified in t he table. When
the normal operating conditions are detected, the message will disappear
and the system will be come operational.
If the message does not disapp ear, contact your Toyota dealer.
●In the following situations, if the situation has changed (or the vehicle has
been driven for some time) and the normal operating conditions are
detected, the message will disappear and the system will become opera-
tional.
If the message does not disapp ear, contact your Toyota dealer.
• When the temperature around the radar sensor is outside of the opera-
SituationActions
When the area around a sensor is
covered with dirt, moisture (fogged
up, covered with condensation, ice,
etc.), or other foreign matterTo clean the part of the windshield in
front of the front c amera, use the
windshield wipers or the windshield
defogger of the air conditioning sys-
tem ( P.349).
When the temperature around the
front camera is outside of the opera-
tional range, such as when the vehi-
cle is in the sun or in an extremely
cold environment
If the front camera is hot, such as
after the vehicle had been parked in
the sun, use the air conditioning sys-
tem to decrease the temperature
around the front camera.
If a sunshade was used when the
vehicle was parked, depending on its
type, the sunlight reflected from the
surface of the sunshade may cause
the temperature of the front camera
to become excessively high.
If the front camera is cold, such as
after the vehicle is parked in an
extremely cold environment, use the
air conditioning system to increase
the temperature around the front
camera.
The area in front o f the front camera
is obstructed, such as when the
hood is open or a sticker is attached
to the part of the win dshield in front
of the front camera.
Close the hood, rem ove the sticker,
etc. to clear the obstruction.
Page 270 of 601
2694-5. Using the driving support systems
4
Driving
■Enabling/disabling the pre-
collision system
The pre-collision system can be
enabled/disabled on the
screen ( P.112) of the multi-
information display.
The system is automatically
enabled each time the power
switch is turned to ON.
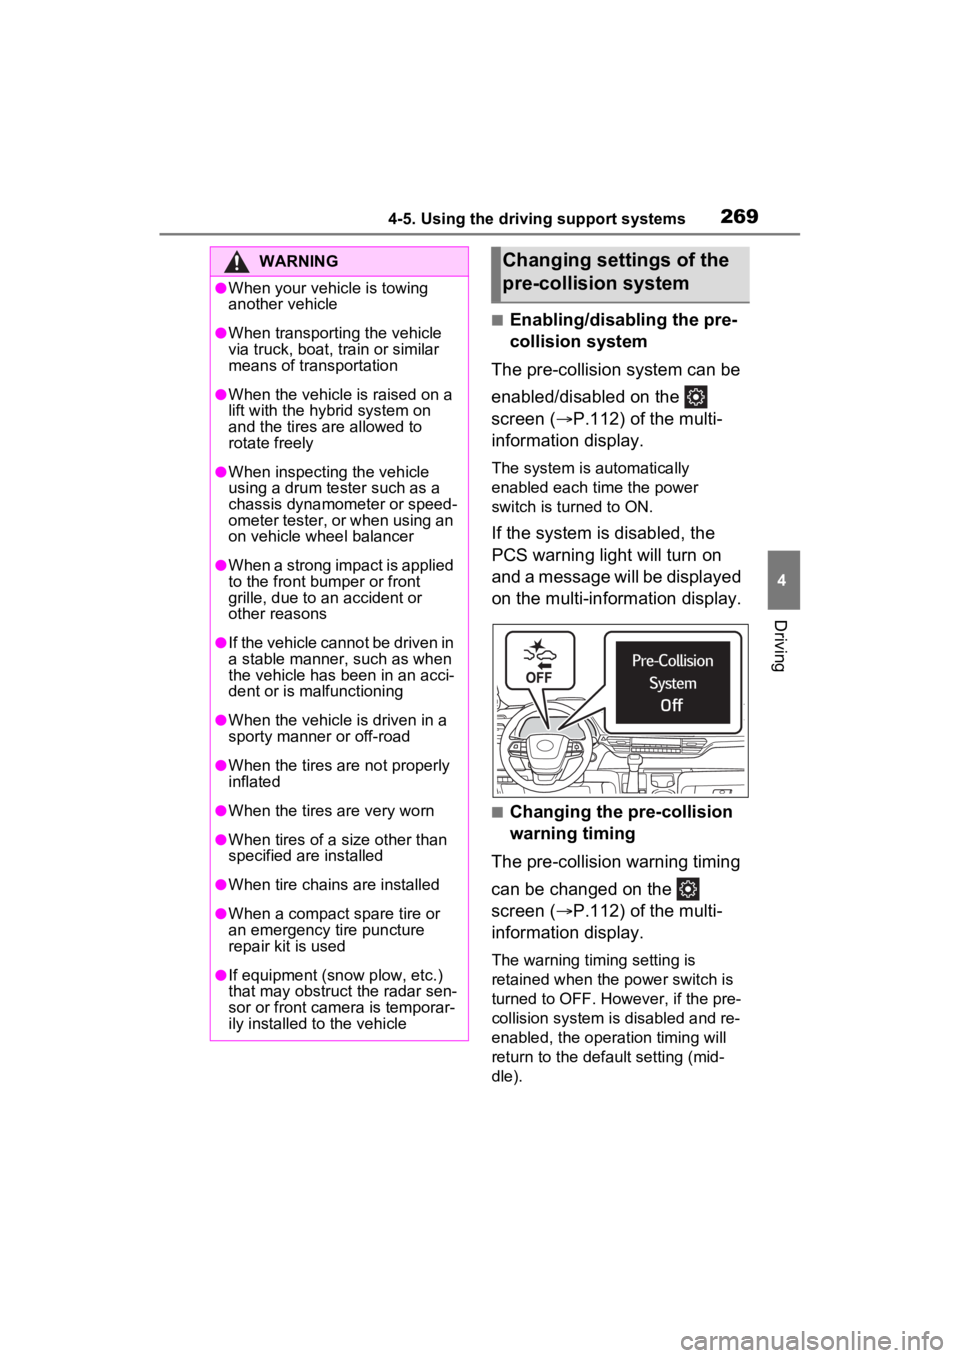
If the system is disabled, the
PCS warning light will turn on
and a message will be displayed
on the multi-information display.
■Changing the pre-collision
warning timing
The pre-collision warning timing
can be changed on the
screen ( P.112) of the multi-
information display.
The warning timing setting is
retained when the power switch is
turned to OFF. However, if the pre-
collision system is disabled and re-
enabled, the operation timing will
return to the default setting (mid-
dle).
WARNING
●When your vehicle is towing
another vehicle
●When transporting the vehicle
via truck, boat, train or similar
means of transportation
●When the vehicle is raised on a
lift with the hybrid system on
and the tires are allowed to
rotate freely
●When inspecting the vehicle
using a drum tester such as a
chassis dynamometer or speed-
ometer tester, or when using an
on vehicle wheel balancer
●When a strong impact is applied
to the front bumper or front
grille, due to a n accident or
other reasons
●If the vehicle cannot be driven in
a stable manner, such as when
the vehicle has been in an acci-
dent or is malfunctioning
●When the vehicle is driven in a
sporty manner or off-road
●When the tires are not properly
inflated
●When the tires are very worn
●When tires of a size other than
specified are installed
●When tire chains are installed
●When a compact spare tire or
an emergency tire puncture
repair kit is used
●If equipment (snow plow, etc.)
that may obstruct the radar sen-
sor or front camera is temporar-
ily installed to the vehicle
Changing settings of the
pre-collision system
Page 275 of 601
2744-5. Using the driving support systems
such as heavy rain, fog, snow or a
sandstorm
• When driving through steam or
smoke
• When the surrounding area is dim, such as at dawn or dusk, or while
at night or in a t unnel, making a
detectable object appear to be
nearly the same color as its sur-
roundings
• When driving in a place where the surrounding brightness changes
suddenly, such as at the entrance
or exit of a tunnel
• After the hybrid system has
started the vehicle has not been
driven for a certain amount of time
• While making a left/right turn and
for a few seconds after making a
left/right turn
• While driving on a curve and for a
few seconds after driving on a
curve
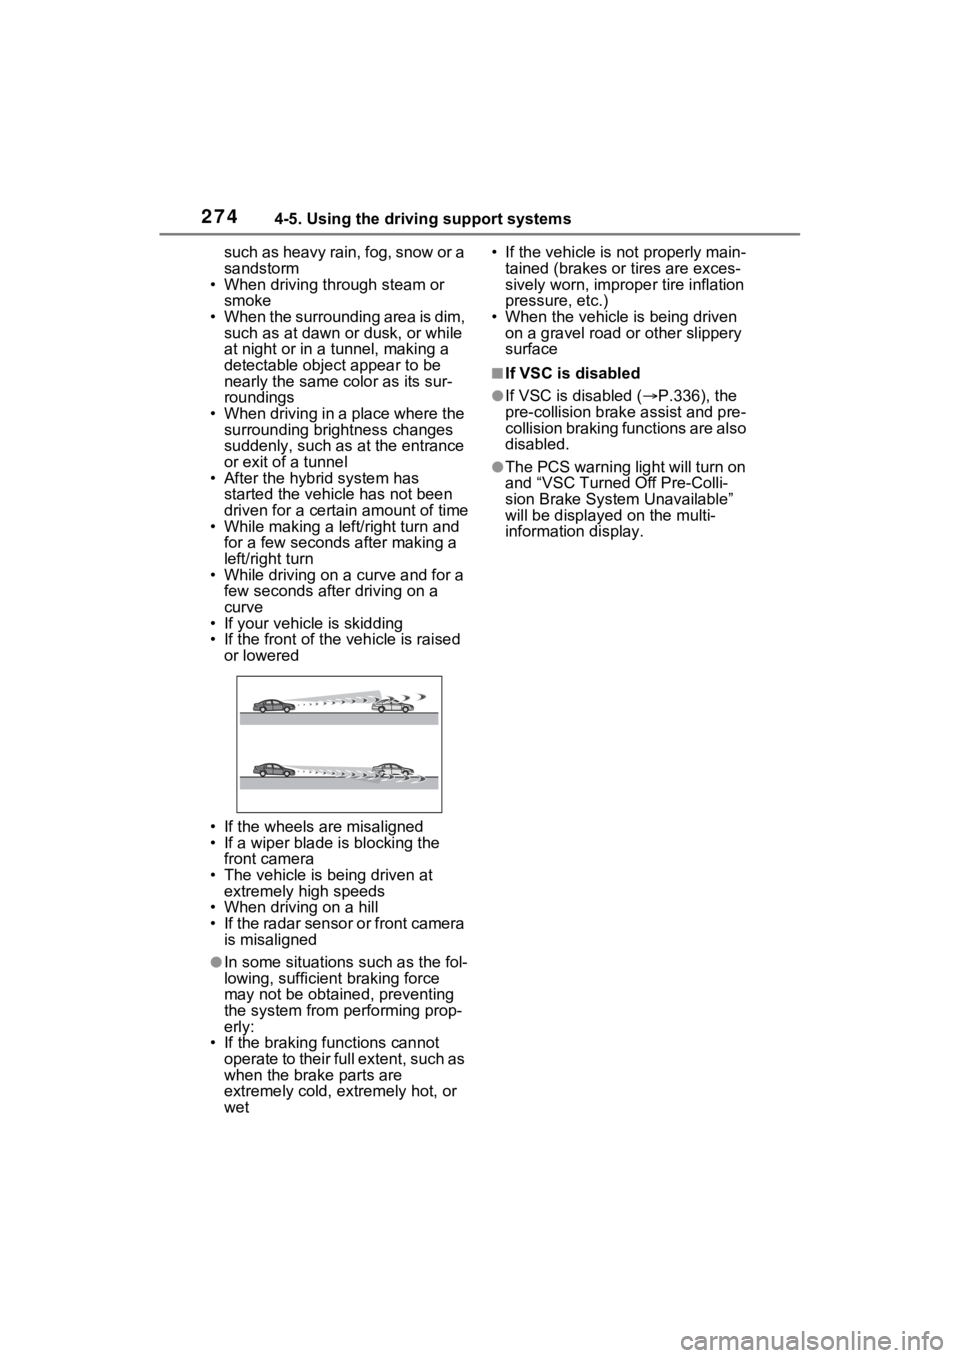
• If your vehicle is skidding
• If the front of the vehicle is raised
or lowered
• If the wheels are misaligned
• If a wiper blade is blocking the front camera
• The vehicle is being driven at extremely high speeds
• When driving on a hill
• If the radar sensor or front camera
is misaligned
●In some situations such as the fol-
lowing, sufficien t braking force
may not be obtained, preventing
the system from performing prop-
erly:
• If the braking functions cannot operate to their full extent, such as
when the brake parts are
extremely cold, extremely hot, or
wet • If the vehicle is not properly main-
tained (brakes or tires are exces-
sively worn, imprope r tire inflation
pressure, etc.)
• When the vehicle is being driven on a gravel road or other slippery
surface
■If VSC is disabled
●If VSC is disabled ( P.336), the
pre-collision brak e assist and pre-
collision braking functions are also
disabled.
●The PCS warning light will turn on
and “VSC Turned Off Pre-Colli-
sion Brake System Unavailable”
will be displayed on the multi-
information display.
Page 288 of 601
2874-5. Using the driving support systems
4
Driving
nizes a do not enter sign and
determines that your vehicle
has entered a no-entry area,
the displayed sign will flash
and a buzzer will sound.
Depending on the situation, a
notification function may not
operate properly.
■Setting procedure
P.112
■Automatic turn-off of RSA sign
display
In the following si tuations, a dis-
played speed limit sign and/or do
not enter sign will stop being dis-
played automatically:
●No sign has been recognized for a
certain distance.
●The road changes due to a left or
right turn, etc.
In the following si tuations, stop and
yield signs will stop being displayed
automatically:
●The system determines that your
vehicle has passed the sign.
●The road changes due to a left or
right turn, etc.
■Conditions in which the func-
tion may not operate or detect
correctly
In the following situations, RSA
does not operate normally and may
not recognize signs, display the
incorrect sign, etc. However, this
does not indicate a malfunction.
●The front camera is misaligned
due to a strong impact being
applied to the sensor, etc.
●D i r t , s n o w , s t i c k e r s , e t c . a r e o n t h e
windshield near the front camera.
●In inclement weather such as
heavy rain, fog, snow or sand
storms.
●Light from an oncoming vehicle, the sun, etc. ente
rs the front cam-
era.
●The sign is dirty, faded, tilted or
bent.
●The contrast of electronic sign is
low.
●All or part of the sign is hidden by
the leaves of a tree, a pole, etc.
●The sign is only visible to the front
camera for a short amount of time.
●The driving scene (turning, lane
change, etc.) is judged incorrectly.
●If a sign not appropriate for the
currently traveled lane, but the
sign exists directly after a freeway
branches, or in an adjacent lane
just before merging.
●Stickers are attached to the rear
of the preceding vehicle.
●A sign resembling a system com-
patible sign is recognized.
●Side road speed signs may be
detected and displayed (if posi-
tioned in sight of the front camera)
while the vehicle i s traveling on
the main road.
●Roundabout exit road speed signs
may be detected and displayed (if
positioned in si ght of the front
camera) while t raveling on a
roundabout.
●The front of the vehicle is raised or
lowered due to the carried load.
●The surrounding brightness is not
sufficient or changes suddenly.
●When a sign inte nded for trucks,
etc. is recognized.
●The speed information displayed
on the meter and on the naviga-
tion system may be different due
to the navigation system using
map data.
■Speed limit sign display
If the power switch was last turned
off while a speed limit sign was dis-
played on the multi-information dis-
play, the same sign displays again