tow TOYOTA SUPRA 2023 Owners Manual
[x] Cancel search | Manufacturer: TOYOTA, Model Year: 2023, Model line: SUPRA, Model: TOYOTA SUPRA 2023Pages: 372, PDF Size: 6.32 MB
Page 18 of 372
182-1. QUICK REFERENCE
2-1.QUICK REFERENCE
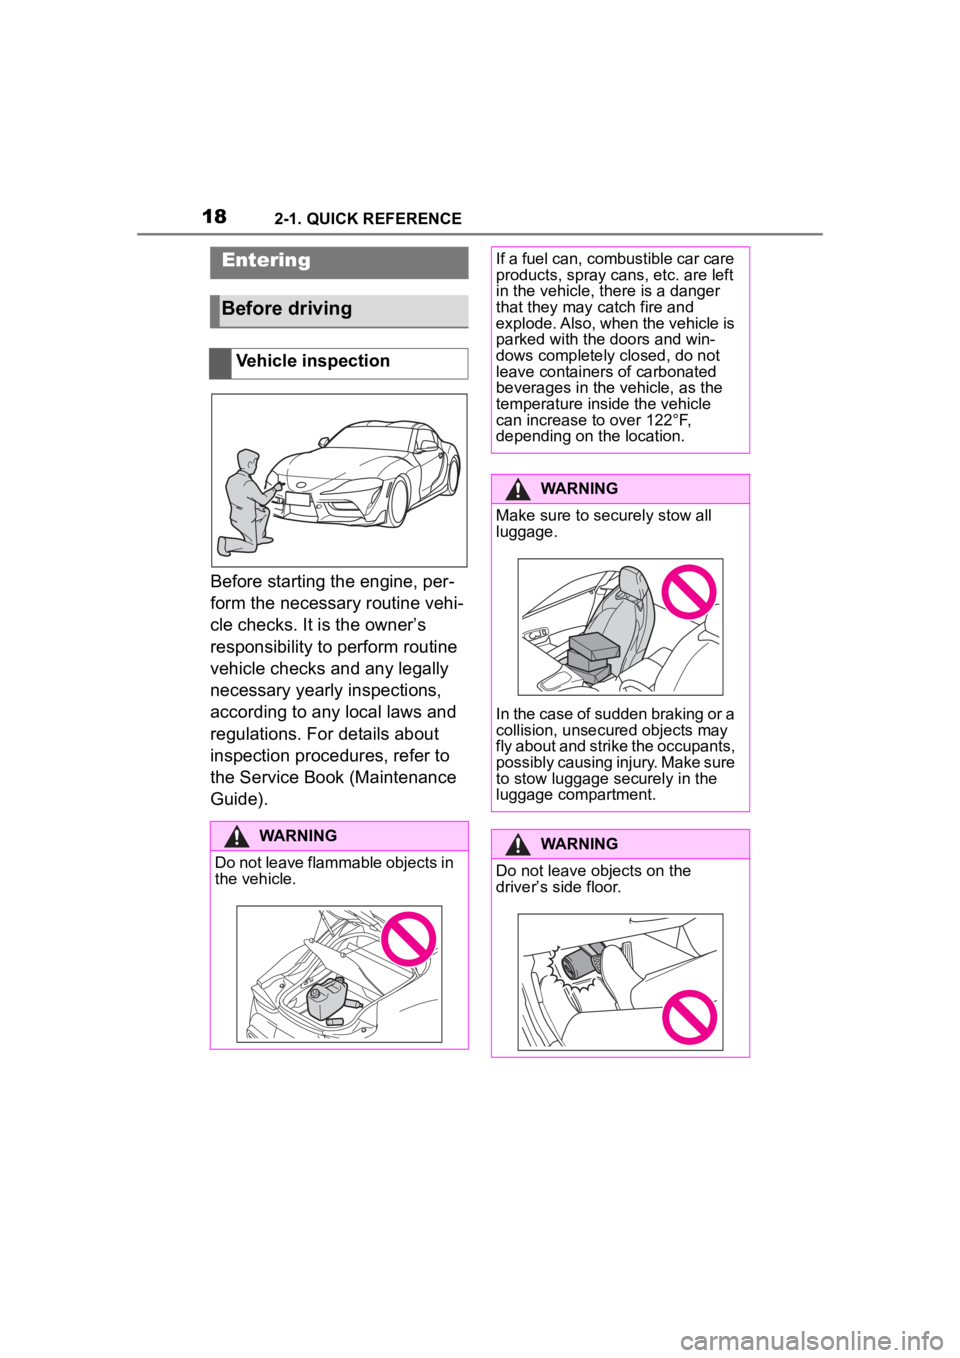
Before starting the engine, per-
form the necessary routine vehi-
cle checks. It is the owner’s
responsibility to perform routine
vehicle checks and any legally
necessary yearly inspections,
according to any local laws and
regulations. For details about
inspection procedures, refer to
the Service Book (Maintenance
Guide).
Entering
Before driving
Vehicle inspection
WARNING
Do not leave flammable objects in
the vehicle.
If a fuel can, combustible car care
products, spray cans, etc. are left
in the vehicle, there is a danger
that they may catch fire and
explode. Also, when the vehicle is
parked with the doors and win-
dows completely closed, do not
leave containers of carbonated
beverages in the vehicle, as the
temperature inside the vehicle
can increase to over 122°F,
depending on the location.
WARNING
Make sure to securely stow all
luggage.
In the case of sudden braking or a
collision, unsecured objects may
fly about and strike the occupants,
possibly causing injury. Make sure
to stow luggage securely in the
luggage compartment.
WARNING
Do not leave objects on the
driver�
Page 32 of 372
322-1. QUICK REFERENCE
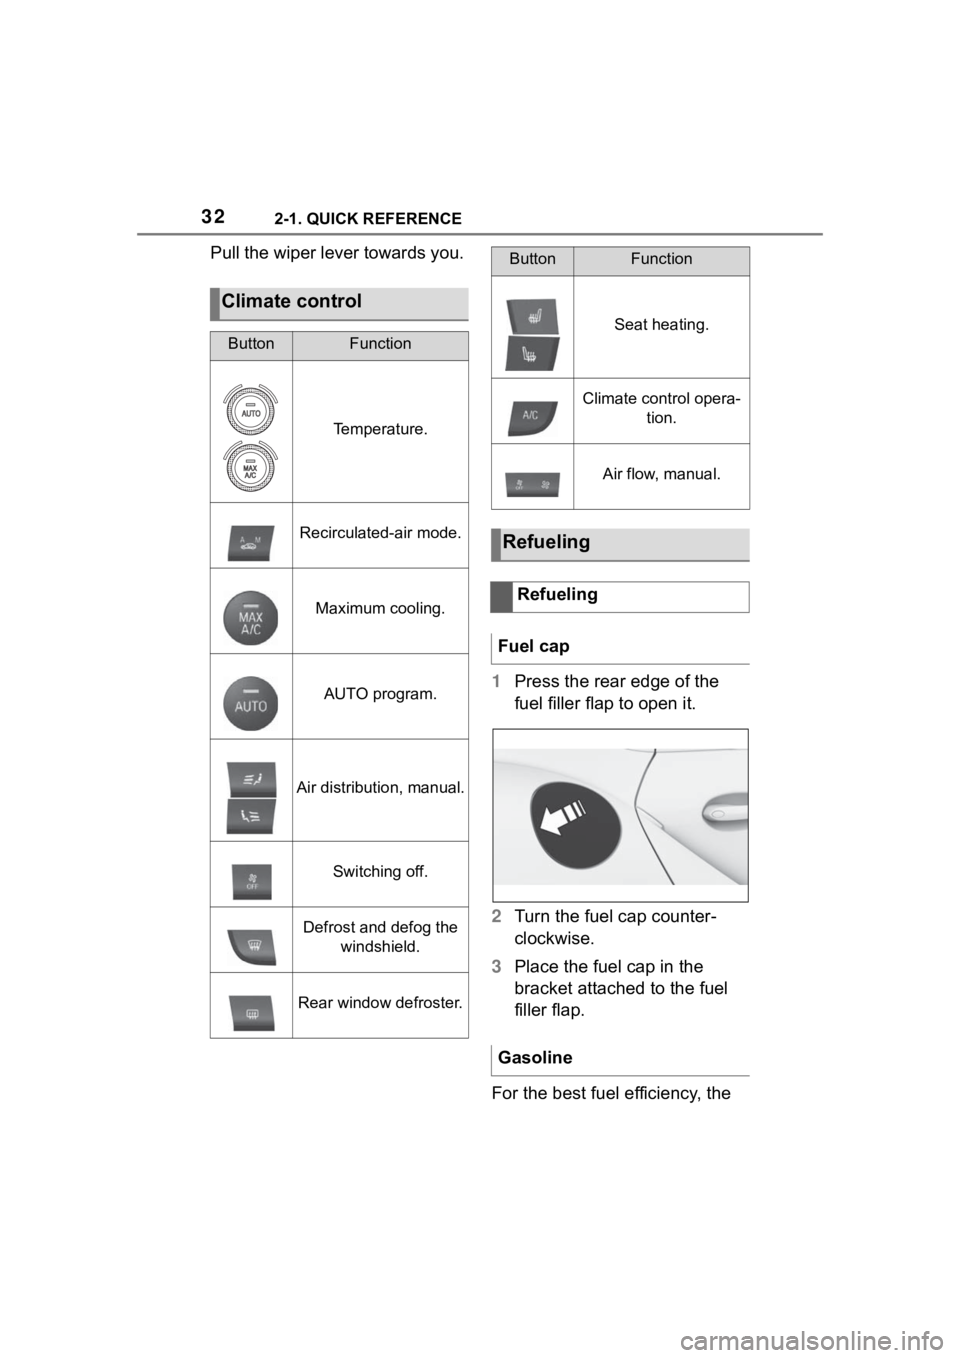
Pull the wiper lever towards you.1Press the rear edge of the
fuel filler flap to open it.
2 Turn the fuel cap counter-
clockwise.
3 Place the fuel cap in the
bracket attached to the fuel
filler flap.
For the best fuel efficiency, the
Climate control
ButtonFunction
Temperature.
Recirculated-air mode.
Maximum cooling.
AUTO program.
Air distribution, manual.
Switching off.
Defrost and defog the windshield.
Rear window defroster.
Seat heating.
Climate control opera- tion.
Air flow, manual.
Refueling
Refueling
Fuel cap
Gasoline
ButtonFunction
Page 43 of 372
433-1. CONTROLS
3
CONTROLS
depressions or in tight curves.
• When the camera field of view is covered, for instance by a
fogged up windshield or
labels.
• When the camera lens is dirty or damaged.
• When driving toward bright lights or strong reflections,
e.g., because of a setting sun.
• When it is dark outside.
• Camera behind the wind- shield: if the camera has over-
heated and been temporarily
switched off due to exces-
sively high temperatures.
• Camera behind the wind- shield: during calibration of
the camera immediately after
vehicle delivery.
If applicable, a Check Control
message is displayed if the sys-
tem fails.
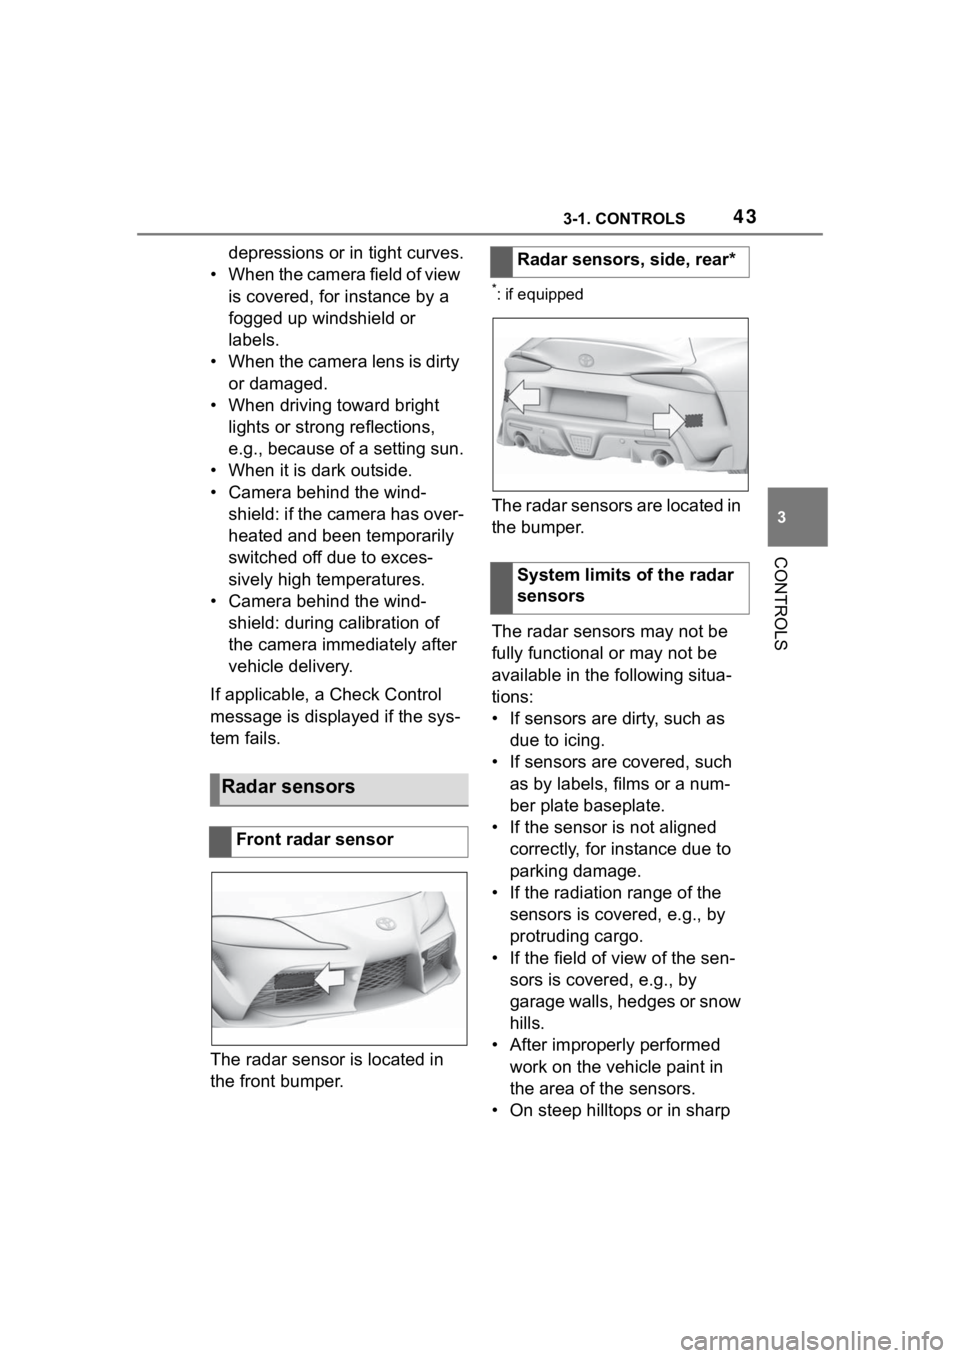
The radar sensor is located in
the front bumper.
*: if equipped
The radar sensors are located in
the bumper.
The radar sensors may not be
fully functional or may not be
available in the following situa-
tions:
• If sensors are dirty, such as due to icing.
• If sensors are covered, such as by labels, films or a num-
ber plate baseplate.
• If the sensor is not aligned correctly, for instance due to
parking damage.
• If the radiation range of the sensors is covered, e.g., by
protruding cargo.
• If the field of view of the sen- sors is covered, e.g., by
garage walls, hedges or snow
hills.
• After improperly performed work on the vehicle paint in
the area of the sensors.
• On steep hilltops or in sharp
Radar sensors
Front radar sensor
Radar sensors, side, rear*
System limits of the radar
sensors
Page 44 of 372
443-1. CONTROLS
dips in the road.
If applicable, a Check Control
message is displayed if the sys-
tem fails.
*: if equipped
The detection of objects with
ultrasound measurements can
run into physical limits, e.g., in
the following situations:
• In case of dirty sensors.
• In case of covered sensors, such as due to labels.
• If the sensor is not aligned correctly, for instance due to
parking damage.
• After improperly performed work on the vehicle paint in
the area of the sensors.
• For small children and ani- mals.
• For persons with certain cloth- ing, for instance coats.
• In case of external interfer- ence of the ultrasound, for
instance from passing vehi- cles, loud machines or other
ultrasonic sources.
• Under certain weather condi- tions, e.g., high relative
humidity, wet conditions,
snowfall, cold, extreme heat,
or strong wind.
• With tow bars and trailer cou- plings of other vehicles.
• With thin or wedge-shaped objects.
• With moving objects.
• With elevated, protruding objects such as ledges.
• With objects with corners, edges, and smooth surfaces.
• With objects with a fine sur- face structure such as fences.
• For objects with porous sur- faces.
• With small and low objects, for instance boxes.
• With soft obstacles or obsta- cles covered in foam material.
• With plants and bushes.
• In automatic car washes.
• On uneven surfaces, such as speed bumps.
• Due to heavy exhaust.
• Cargo that extends beyond the perimeter of the vehicle is
not taken into account by the
ultrasonic sensors.
If applicable, a Check Control
message is displayed if the sys-
tem fails.
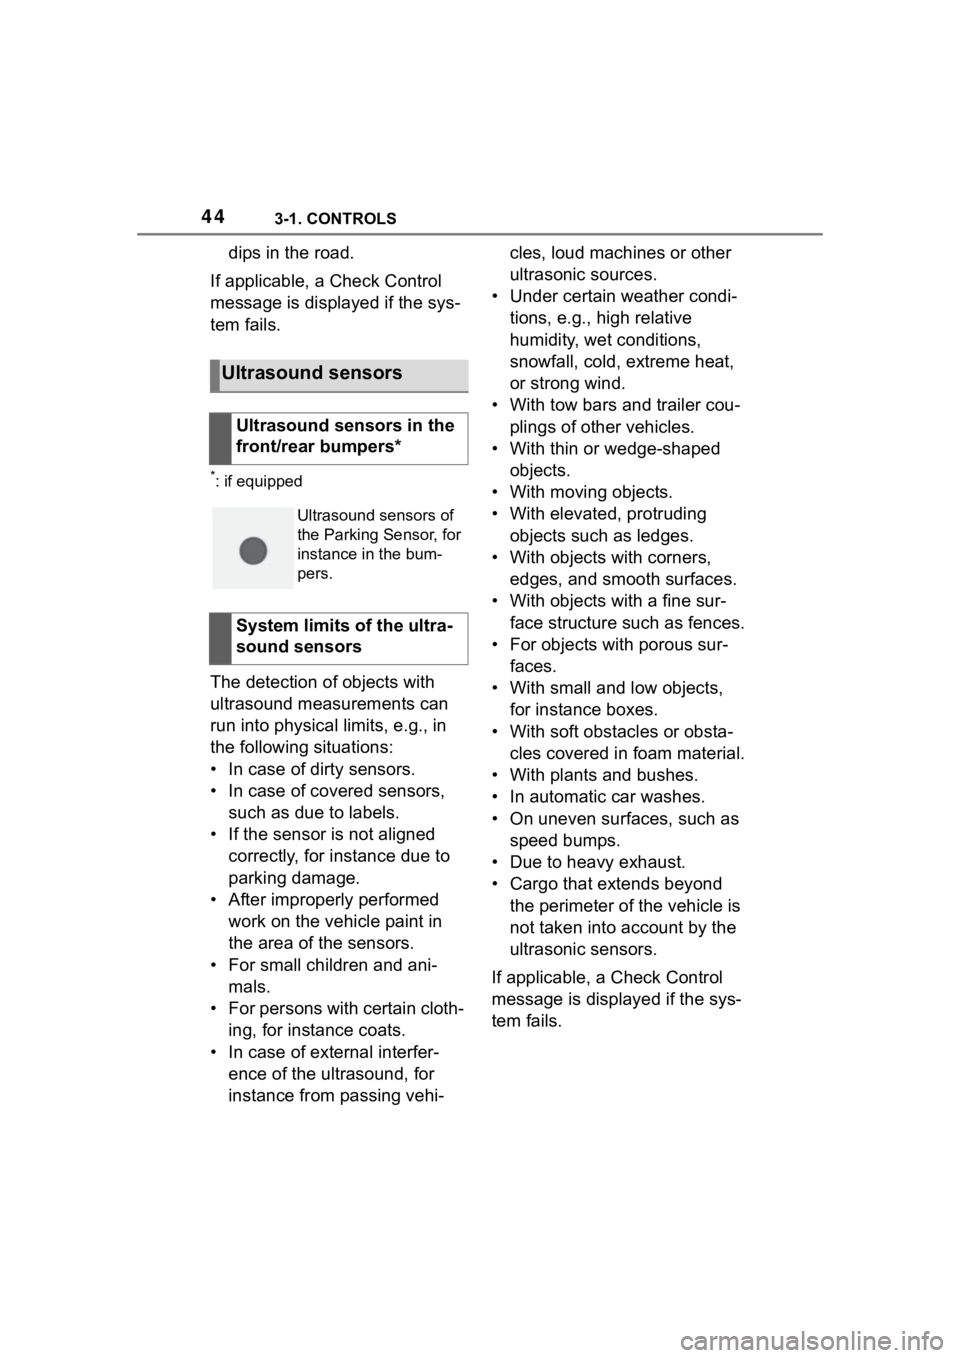
Ultrasound sensors
Ultrasound sensors in the
front/rear bumpers*
Ultrasound sensors of
the Parking Sensor, for
instance in the bum-
pers.
System limits of the ultra-
sound sensors
Page 85 of 372
853-1. CONTROLS
3
CONTROLS
the following circumstances:
• The battery of the vehicle key is discharged. For replacing
the battery, refer to page 84.
• Interference of the radio con- nection from transmission
towers or other equipment
with high transmitting power.
• Shielding of the remote con- trol due to metal objects.
Do not transport the remote control
together with metal objects.
• Interference of the radio con-nection from mobile phones
or other electronic devices in
direct proximity to the remote
control.
Do not transport the remote control
together with elec tronic devices.
• Interference of radio transmis-
sion by a charging process of
mobile devices, for instance
charging of a mobile phone.
• The remote control is in direct proximity of the wireless
charging tray.
Place the remote control down at a
different location.
In the case of interference, the
vehicle can be unlocked and
locked from the outside with the
integrated key, refer to page 86. It is not possible to switch on the
drive-ready state if the remote
control has not been detected.
Proceed as follows in this case:
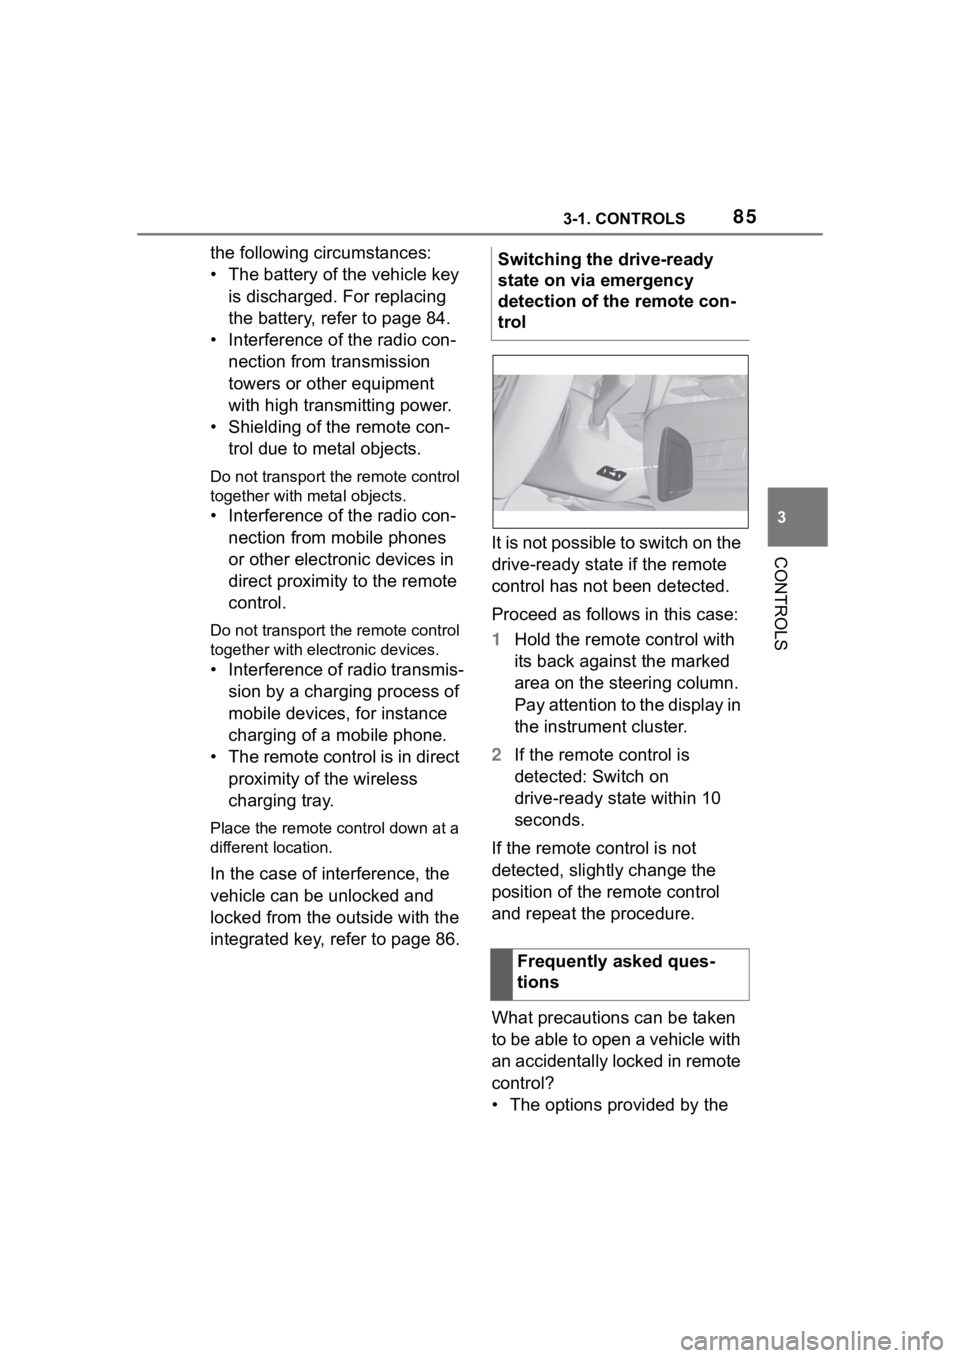
1
Hold the remote control with
its back against the marked
area on the steering column.
Pay attention to the display in
the instrument cluster.
2 If the remote control is
detected: Switch on
drive-ready state within 10
seconds.
If the remote control is not
detected, slightly change the
position of the remote control
and repeat the procedure.
What precautions can be taken
to be able to open a vehicle with
an accidentally locked in remote
control?
• The options provided by the Switching the drive-ready
state on via emergency
detection of the remote con-
trol
Frequently asked ques-
tions
Page 95 of 372
953-1. CONTROLS
3
CONTROLS
3"Doors/Key"
4 "Turn off after door opening"
Opening the front doors establishes
the idle state, refer to page 45.
The alarm system issues a
visual and acoustic signal when
someone attempts to open the
locked vehicle incorrectly.
When the vehicle is locked, the
vehicle alarm system reacts to
the following changes:
• Opening a door, the hood or
the trunk lid.
• Movements in the car's inte- rior.
• Changes in the vehicle tilt, e. g., during attempts at stealing
a wheel or when towing the
vehicle.
• Disconnected battery voltage.
• Improper use of the socket for OBD Onboard Diagnosis.
• Locking the vehicle while a device is connected to the
socket for the OBD Onboard-
Diagnosis. For socket for the
OBD Onboard Diagnosis,
refer to page 309.
The alarm system signals the
following changes visually and
acoustically:
• Acoustic alarm: Depending on local regulations, the acoustic
alarm may be suppressed.
• Visual alarm: By flashing of the hazard warning system
and headlights, where
required.
Do not modify the system to
ensure function of the alarm
system.
When you unlock and lock the
vehicle, either with the remote
control or with Comfort entry, the
alarm system is switched off and
on at the same time.
The alarm system is triggered
when a door is opened if the
door was unlocked using the
integrated key in the door lock.
Switching off the alarm, refer to
page 97.
The trunk lid can be opened
even when the alarm system is
switched on.
After the trunk lid is closed, it is
locked and monitored again pro-
vided the doors are locked. The
hazard warning system flashes
Alarm system
Concept
General information
Switching on/off
Opening the doors with
the alarm system switched
on
Opening the trunk lid with
the alarm system switched
on
Page 96 of 372
963-1. CONTROLS
once.
You can trigger the alarm sys-
tem if you find yourself in a dan-
gerous situation.
To switch off the alarm: press
any button.
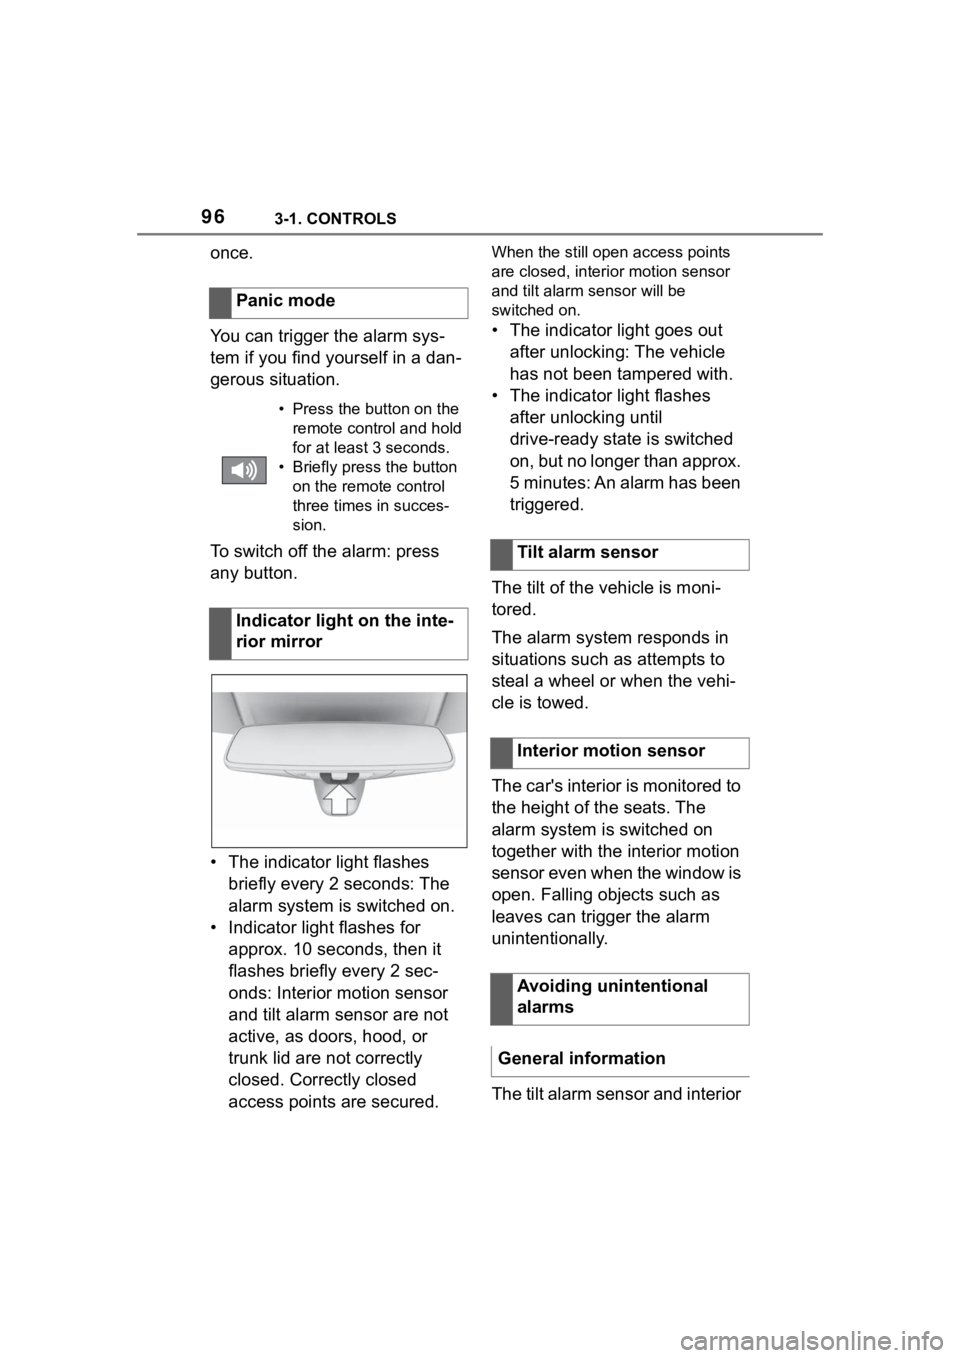
• The indicator light flashes briefly every 2 seconds: The
alarm system is switched on.
• Indicator light flashes for approx. 10 seconds, then it
flashes briefly every 2 sec-
onds: Interior motion sensor
and tilt alarm sensor are not
active, as doors, hood, or
trunk lid are not correctly
closed. Correctly closed
access points are secured.When the still open access points
are closed, interior motion sensor
and tilt alarm sensor will be
switched on.
• The indicator light goes out after unlocking: The vehicle
has not been tampered with.
• The indicator light flashes after unlocking until
drive-ready state is switched
on, but no longer than approx.
5 minutes: An alarm has been
triggered.
The tilt of the vehicle is moni-
tored.
The alarm system responds in
situations such as attempts to
steal a wheel or when the vehi-
cle is towed.
The car's interior is monitored to
the height of the seats. The
alarm system is switched on
together with the interior motion
sensor even when the window is
open. Falling objects such as
leaves can trigger the alarm
unintentionally.
The tilt alarm sensor and interior
Panic mode
• Press the button on the
remote control and hold
for at least 3 seconds.
• Briefly press the button on the remote control
three times in succes-
sion.
Indicator light on the inte-
rior mirror
Tilt alarm sensor
Interior motion sensor
Avoiding unintentional
alarms
General information
Page 135 of 372
1353-1. CONTROLS
3
CONTROLSElectronically unlock the trans-
mission lock to maneuver vehi-
cle from a danger area.
Unlocking is possible, if the
starter can spin the engine.
Before unlocking the transmis-
sion lock, set the parking brake
to prevent the vehicle from roll-
ing away.
1Press and hold down brake
pedal.
2 Press the Start/Stop button.
The starter must audibly
start. Hold the Start/Stop but-
ton pressed.
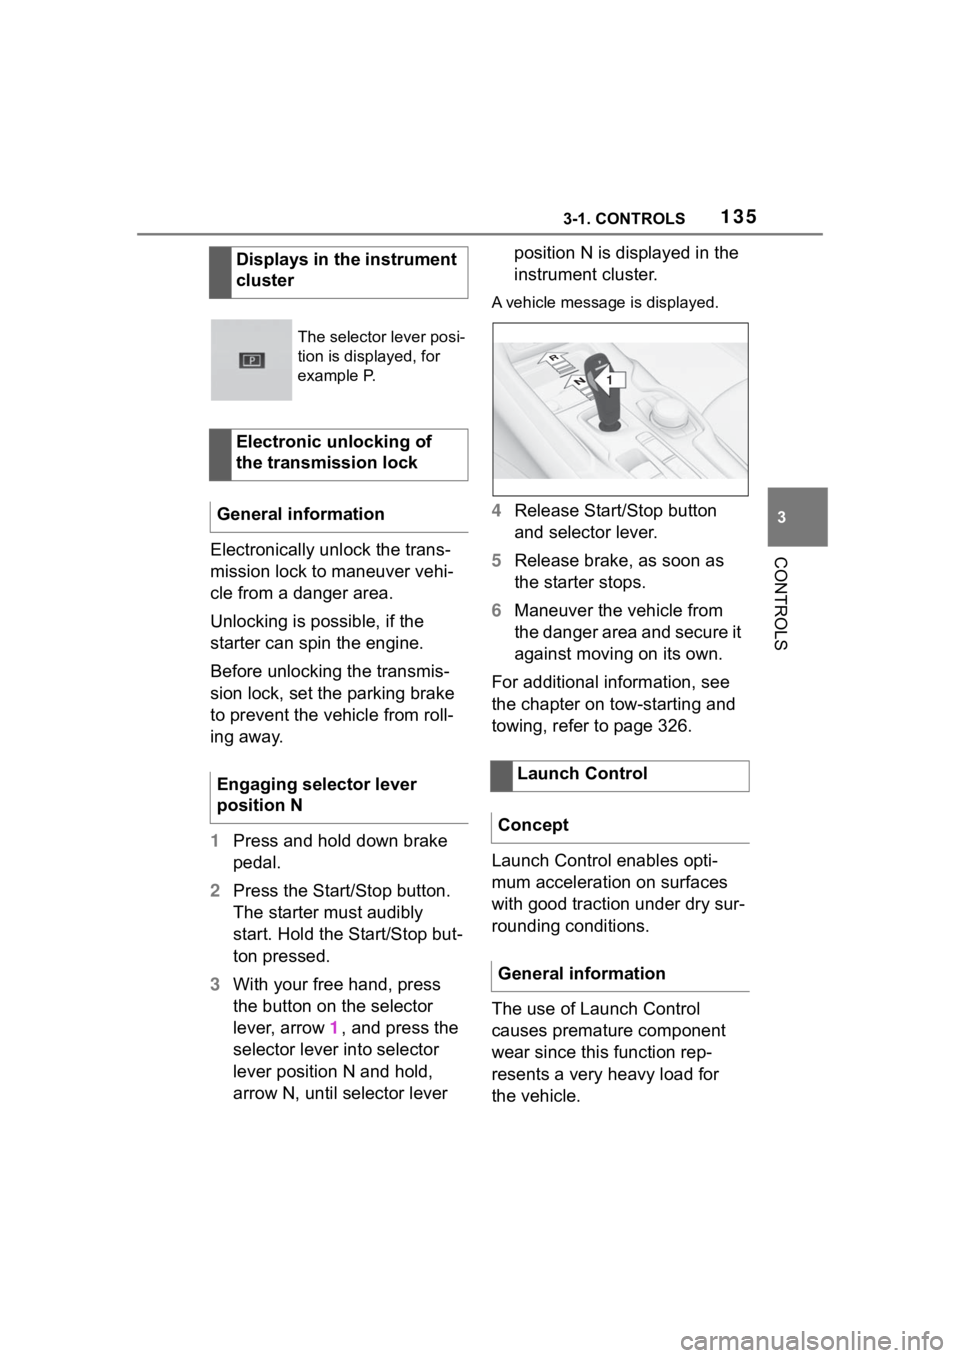
3 With your free hand, press
the button on the selector
lever, arrow 1, and press the
selector lever into selector
lever position N and hold,
arrow N, until selector lever position N is displayed in the
instrument cluster.
A vehicle messag
e is displayed.
4Release Start/Stop button
and selector lever.
5 Release brake, as soon as
the starter stops.
6 Maneuver the vehicle from
the danger area and secure it
against moving on its own.
For additional information, see
the chapter on tow-starting and
towing, refer to page 326.
Launch Control enables opti-
mum acceleration on surfaces
with good traction under dry sur-
rounding conditions.
The use of Launch Control
causes premature component
wear since this function rep-
resents a very heavy load for
the vehicle.
Displays in the instrument
cluster
The selector lever posi-
tion is displayed, for
example P.
Electronic unlocking of
the transmission lock
General information
Engaging selector lever
position N
Launch Control
Concept
General information
1
R
N
Page 160 of 372
1603-1. CONTROLS
4"Daytime running lamps"
The Automatic high-beam
detects other traffic participants
early on and automatically
switches the high beams on or
off depending on the traffic situ-
ation.
The Automatic high-beam
ensures that the high beams are
switched on, whenever the traf-
fic situation allows. In the low
speed range, the high beams
are not switched on by the sys-
tem.
The system responds to light
from oncoming traffic and traffic
driving ahead of you, and to
ambient lighting, for instance in
towns and cities.
The high beams can be
switched on and off manually at
any time.
1 Press the button on the
light switch element.
The LED in the button lights up.
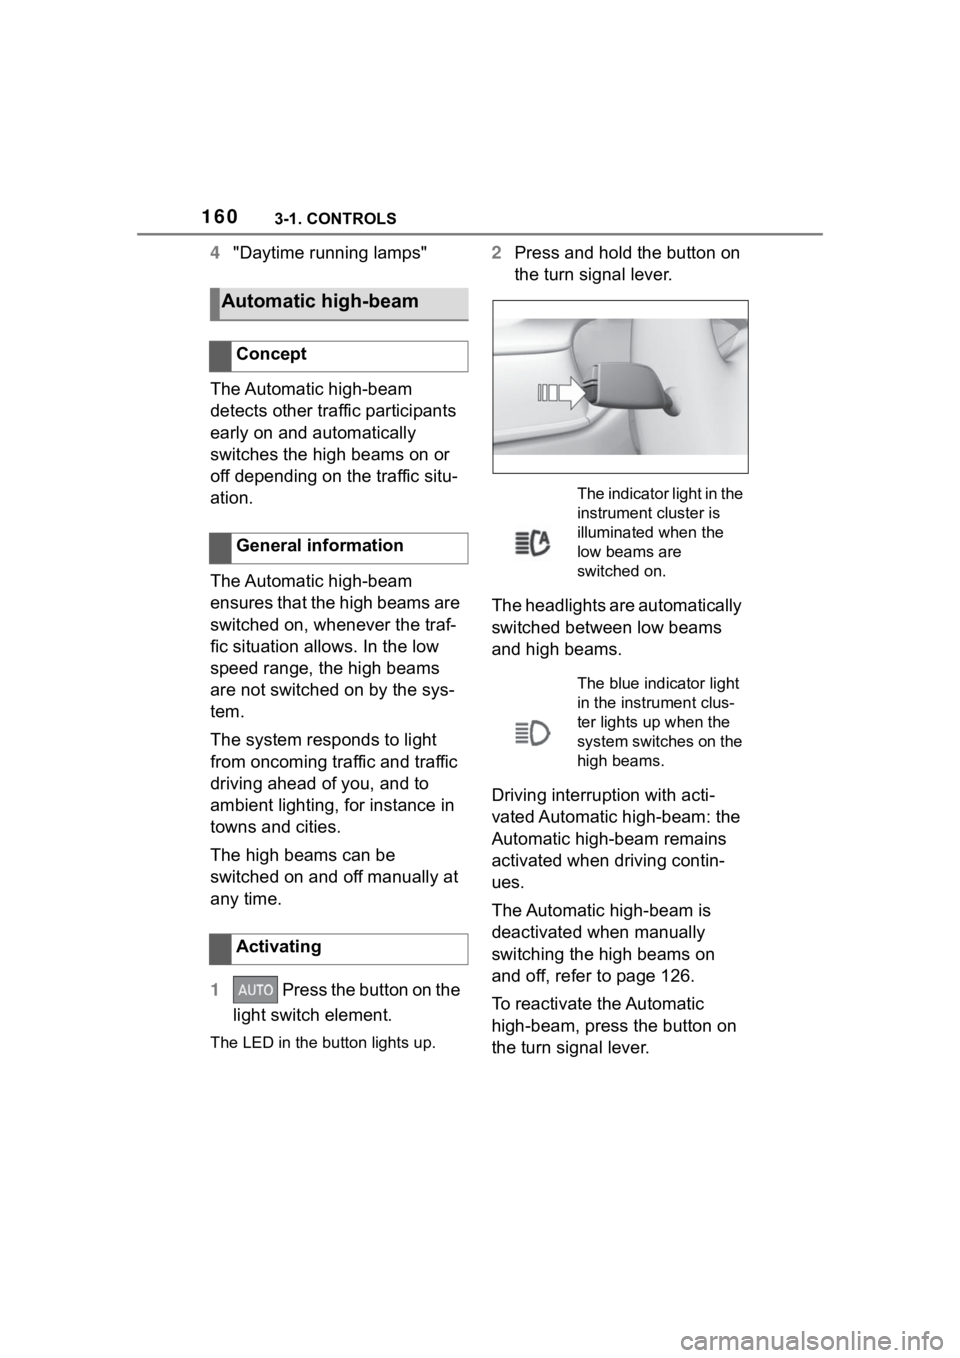
2 Press and hold the button on
the turn signal lever.
The headlights are automatically
switched between low beams
and high beams.
Driving interruption with acti-
vated Automatic high-beam: the
Automatic high-beam remains
activated when driving contin-
ues.
The Automatic high-beam is
deactivated when manually
switching the high beams on
and off, refer to page 126.
To reactivate the Automatic
high-beam, press the button on
the turn signal lever.
Automatic high-beam
Concept
General information
Activating
The indicator light in the
instrument cluster is
illuminated when the
low beams are
switched on.
The blue indicator light
in the instrument clus-
ter lights up when the
system switches on the
high beams.
Page 162 of 372
1623-1. CONTROLS
mal crossings.
In tight curves, on hilltops or
in depressions, in crossing
traffic or half-obscured
oncoming traffic on highways.
In poorly-lit towns and cities
or in the presence of highly
reflective signs.
When the windshield in front
of the interior mirror is fogged
over, dirty or covered with
stickers, etc.
The parking lights or low beams
must be switched on to adjust
the brightness.
Depending on the equipment
version, interior lights, footwell
lights and door entry lighting are
automatically controlled. To switch off permanently: press
the button and hold for approx. 3
seconds.
Instrument lighting
Functional requirement
Settings
Adjust the brightness
with the thumbwheel.
Interior lights
General information
Overview
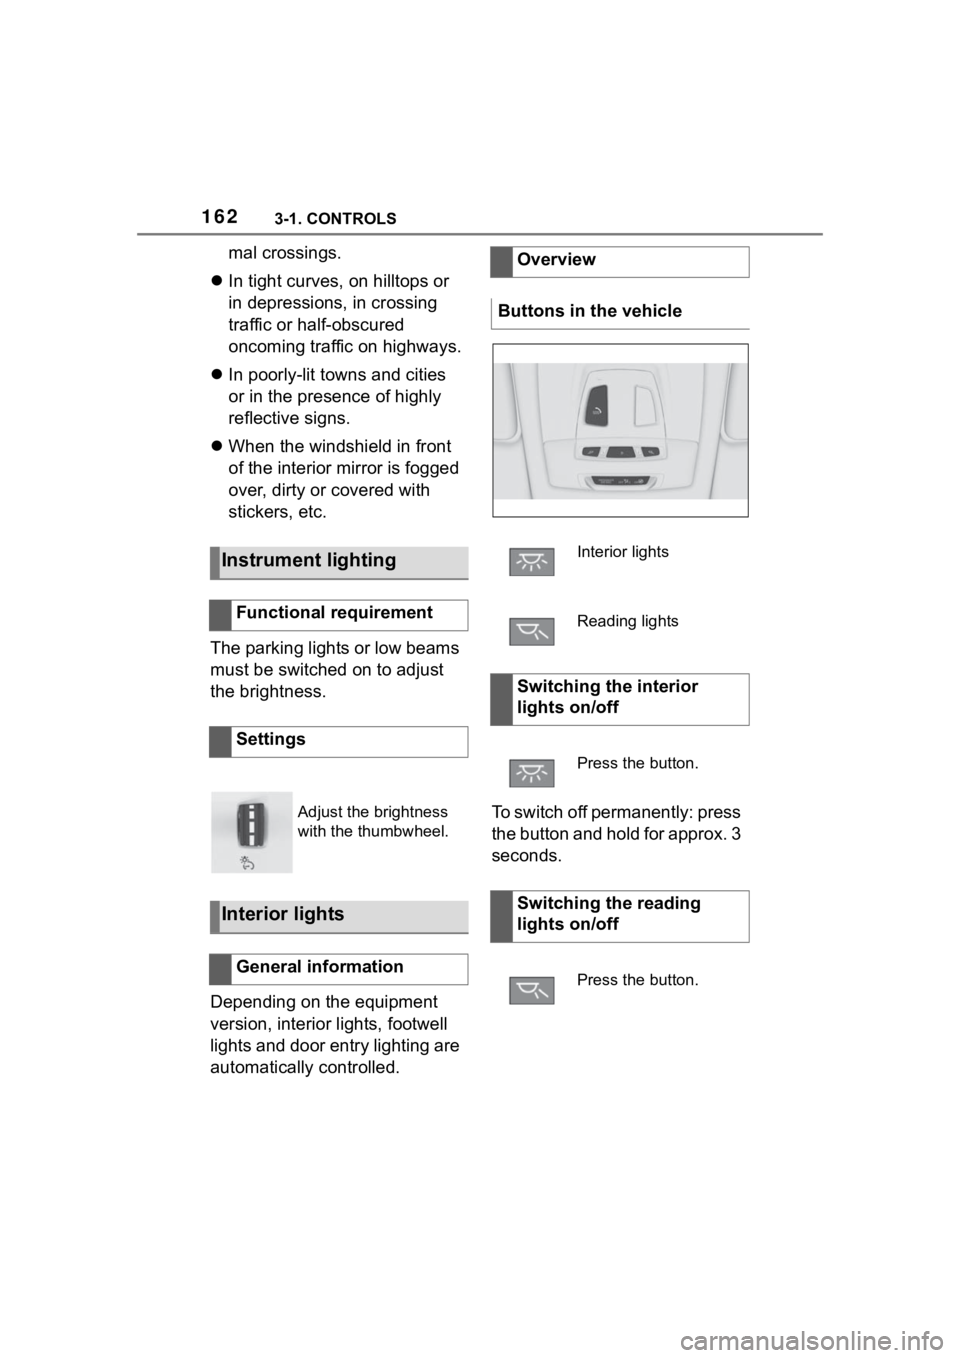
Buttons in the vehicle
Interior lights
Reading lights
Switching the interior
lights on/off
Press the button.
Switching the reading
lights on/off
Press the button.