lights TOYOTA SUPRA 2023 Owner's Manual
[x] Cancel search | Manufacturer: TOYOTA, Model Year: 2023, Model line: SUPRA, Model: TOYOTA SUPRA 2023Pages: 372, PDF Size: 6.32 MB
Page 116 of 372
1163-1. CONTROLS
Before installing a child restraint
system in the front passenger
seat, make sure that the front,
knee and side airbags on the
front passenger side are deacti-
vated.
Deactivate the front-seat pas-
senger airbags automatically,
refer to page 175.
After installing a child restraint
system, move the front passen-
ger seat as far back as it will go
and, if possible, bring it up to
medium height. This seat posi-
tion and height ensure the best
possible position for the belt and
offers optimal protection in the
event of an accident.
If the upper anchor of the safety
belt is located in front of the belt
guide of the child seat, move the
front passenger seat carefully
Safety information
WARNING
The protective effect of child
restraint systems and their fasten-
ing systems which have been
damaged or exposed to an acci-
dent can be limited or lost. A child
cannot be properly restrained in
the event of an a
ccident or brak-
ing and evasive maneuvers.
There is a risk o f injuries or dan-
ger to life. Do not use child
restraint systems which have
been damaged or e xposed to an
accident. If a child restraint sys-
tem and its fastening system has
been damaged or e xposed to an
accident, have these systems
checked and replaced by your
Toyota dealer.
WARNING
The stability of the child restraint
system is limited or compromised
with incorrect seat adjustment or
improper installati on of the child
seat. There is a risk of injuries or
danger to life. Make sure that the
child restraint system fits securely
against the backrest. If possible,
adjust the backr est tilt for all
affected backrests and correctly
adjust the seats. Make sure that
seats and backrests are securely
engaged or locked.
On the front passenger
seat
Deactivating airbags
WARNING
Active front-sea t passenger air-
bags can injure a child in a child
restraint system when the airbags
are activated. Ther e is a risk of
injury. Make sure that the
front-seat passenger airbags are
deactivated and that the PAS-
SENGER AIRBAG OFF indicator
light lights up.
Seat position and height
Page 119 of 372
1193-1. CONTROLS
3
CONTROLS
This chapter describes all stan-
dard, country-specific and
optional features offered with
the series. It also describes fea-
tures and functions that are not
necessarily available in your
vehicle, e.g., due to the selected
options or country versions. This
also applies to safety-related
functions and systems. When
using these functions and sys-
tems, the applicable laws and
regulations must be observed.
Manual transmission: the driver-
eady state is switched on when
you depress the clutch pedal
while pressing the Start/Stop
button.
Automatic transmission?the
drive-ready state is switched on
when you depress the brake
pedal while pressing the
Start/Stop button.
Pressing the Start/Stop button
again switches drive-ready state back off and standby state, refer
to page 45, is switched back on.
1
Switch on drive-ready state.
2 Apply drive mode.
3 Release the parking brake.
4 Drive away.
The Auto Start/Stop function
helps save fuel. The system
switches off the engine during a
stop, for instance in traffic jam or
at traffic lights. Drive-ready state
remains switched on. The
engine starts automatically for
driving off.
After each engine start using the
Start/Stop button, the Auto
Start/Stop function is ready. The
function is activated from
speeds of approx. 3 mph/5
km/h.
Depending on the selected driv-
ing mode, refer to page 136, the
system is automatically acti-
vated or deactivated.
Driving
Vehicle features and
options
Start/Stop button
Concept
Pressing the Start/Stop
button switches
drive-ready state on or
off, refer to page 45.
Driving away
Auto Start/Stop function
Concept
General information
Page 121 of 372

1213-1. CONTROLS
3
CONTROLS
required level.
Where there is a risk of win-
dow condensation when the
automatic air conditioning is
switched on.
Engine or other parts not at
operating temperature.
Engine cooling is required.
The wheels are at a sharp
angle or the steering wheel is
being turned.
Vehicle battery is heavily dis-
charged.
At higher elevations.
The hood is unlocked.
The parking assistant is acti-
vated.
Stop-and-go traffic.
Selector lever position in N or
R.
After driving in reverse.
Use of fuel with high ethanol
content.
Manual transmission
The engine starts automatically
under the following precondi-
tions:
By releasing th e clutch pedal.
Automatic transmission
The engine starts automatically under the following precondi-
tions:
By releasing the brake pedal.
After the engine starts, acceler-
ate as usual.
After the engine switches off
automatically, it will not start
again automatically if any one of
the following conditions are met:
The driver's safety belt is
unbuckled and the driver's
door is open.
The hood was unlocked.
Some indicator lights light up for
a varied length of time.
The engine can only be started
via the Start/Stop button.
Even if driving off was not
intended, the deactivated
engine starts up automatically in
the following situations:
Excessive warming of the
car's interior when the air con-
ditioning is switched on.
Excessive cooling of the car's
interior when the heating is
switched on.
Where there is a risk of win-
dow condensation when the
Starting the engine
Functional requirements
Driving off
Safety mode
System limits
Page 124 of 372
1243-1. CONTROLS
■General information
To use as emergency brake
while driving:
Pull the switch and hold it. The
vehicle brakes hard while the
switch is being pulled.
A vehicle message is displayed.
If the vehicle is slowed down to
a speed of approx. 2 mph/3
km/h the parking brake is set.
1 Switch on drive-ready state.
2 Manual transmission:
press the switch while the
brake pedal is pressed.
Automatic transmission:
WARNING
Unattended children or animals in
the vehicle can cause the vehicle
to move and endanger them-
selves and traffic, for instance due
to the following actions:
●Pressing the Start/Stop button.
●Releasing the parking brake.
●Opening and closing the doors
or windows.
●Engaging selector lever position
N.
●Using vehicle equipment.
There is a risk of accidents or inju-
ries. Do not leave children or ani-
mals unattended in the vehicle.
Take the remote control with you
when exiting and lock the vehicle.
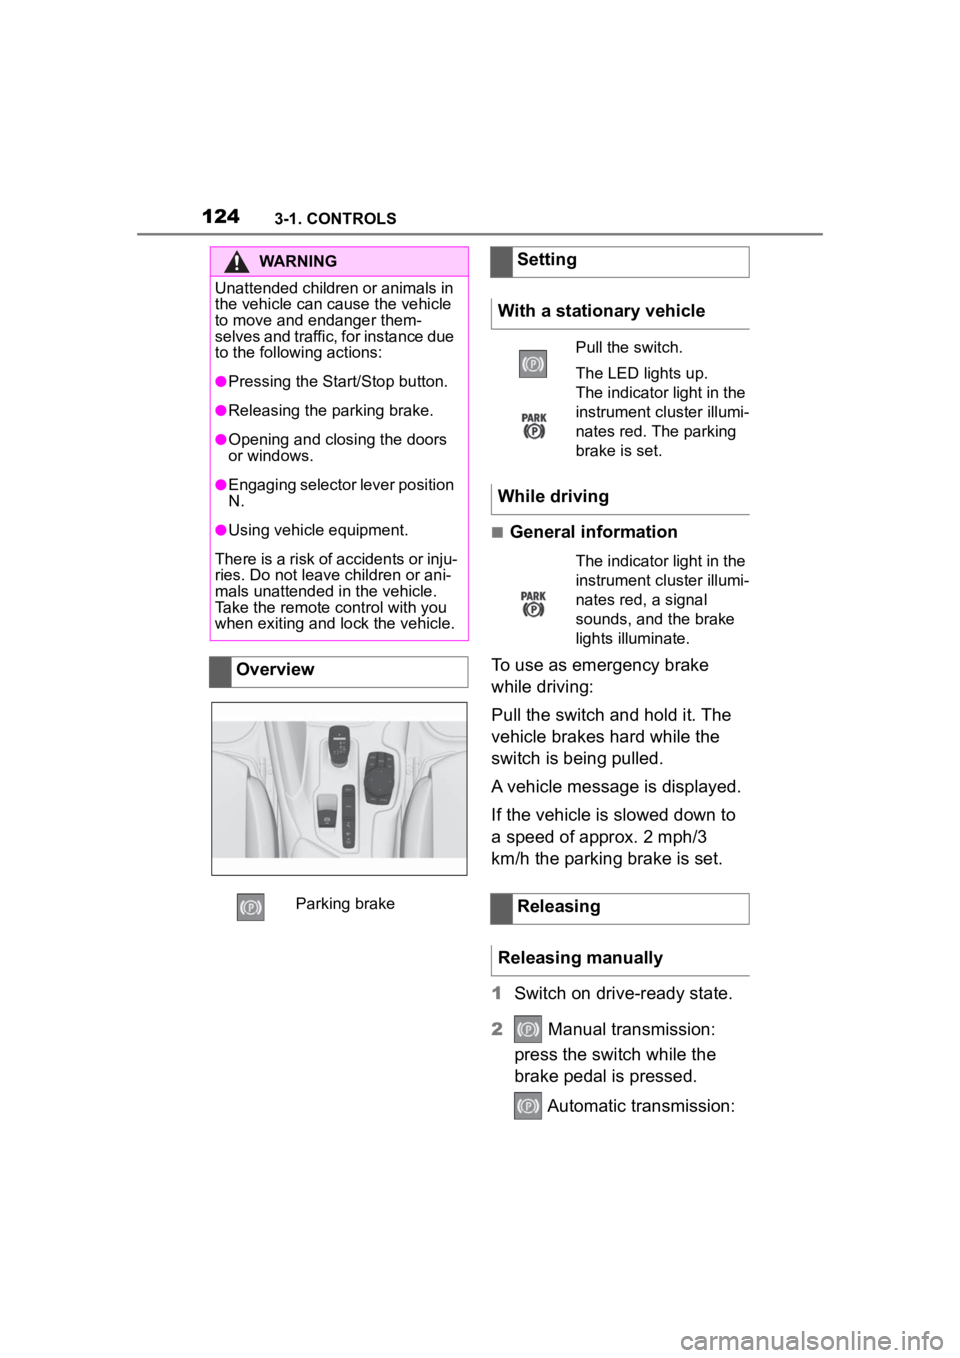
Overview
Parking brake
Setting
With a stationary vehicle
Pull the switch.
The LED lights up.
The indicator light in the
instrument cluster illumi-
nates red. The parking
brake is set.
While driving
The indicator light in the
instrument cluster illumi-
nates red, a signal
sounds, and the brake
lights illuminate.
Releasing
Releasing manually
Page 125 of 372
1253-1. CONTROLS
3
CONTROLS
press the switch while the
brake is pressed or selector
lever position P is set.
The LED and indicator light go out.
The parking brake is released.
The parking brake is released
automatically when you drive
away.
The LED and indicator light go
out.
In the event of a failure or mal-
function of the parking brake:
Secure the vehicle against roll-
ing away, for instance with a
wheel chock, after existing the
vehicle.
To reestablish parking brake
functionality after a power fail-
ure:
1Switch on standby state.
2 Pull the switch while
stepping on the brake pedal
or selector lever position P is
set and then push.
This process may take a few
seconds. Any sounds associ-
ated with this are normal. When driving and during opera-
tion of the turn signals or hazard
warning system, do not fold in
the exterior mirrors, so that the
signal lights on the exterior mir-
ror are easy to see.
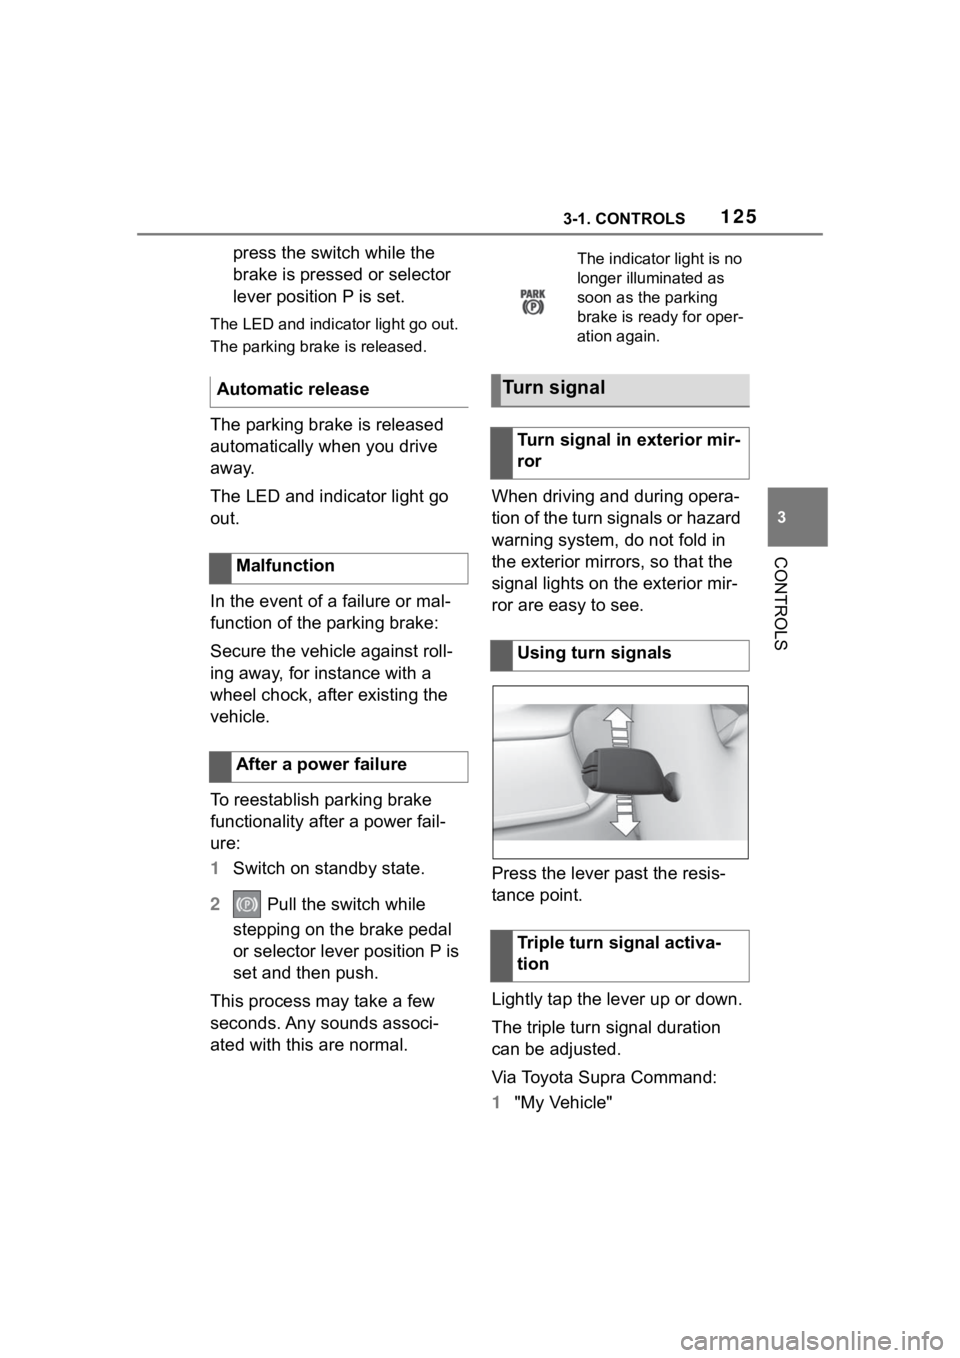
Press the lever past the resis-
tance point.
Lightly tap the lever up or down.
The triple turn signal duration
can be adjusted.
Via Toyota Supra Command:
1
"My Vehicle"
Automatic release
Malfunction
After a power failure
The indicator light is no
longer illuminated as
soon as the parking
brake is ready for oper-
ation again.
Turn signal
Turn signal in exterior mir-
ror
Using turn signals
Triple turn signal activa-
tion
Page 139 of 372
1393-1. CONTROLS
3
CONTROLS
In some areas of the instrument
cluster, various assistance sys-
tems, for example the cruise
control, can be displayed. The
displays may vary depending on
the equipment version and
country variant.
The display can be changed for
sport mode.
The driving mode will change to
sport mode.
The vehicle messages system
monitors functions in the vehicle
and notifies you of malfunctions
in the monitored systems.
A vehicle messages message is
displayed as a combination of
indicator or warning lights and SMS text messages in the
instrument cluster and, if appli-
cable, in the Head-up Display.
In addition, an acoustic signal
may sound and an SMS text
message may appear on the
Control Display.
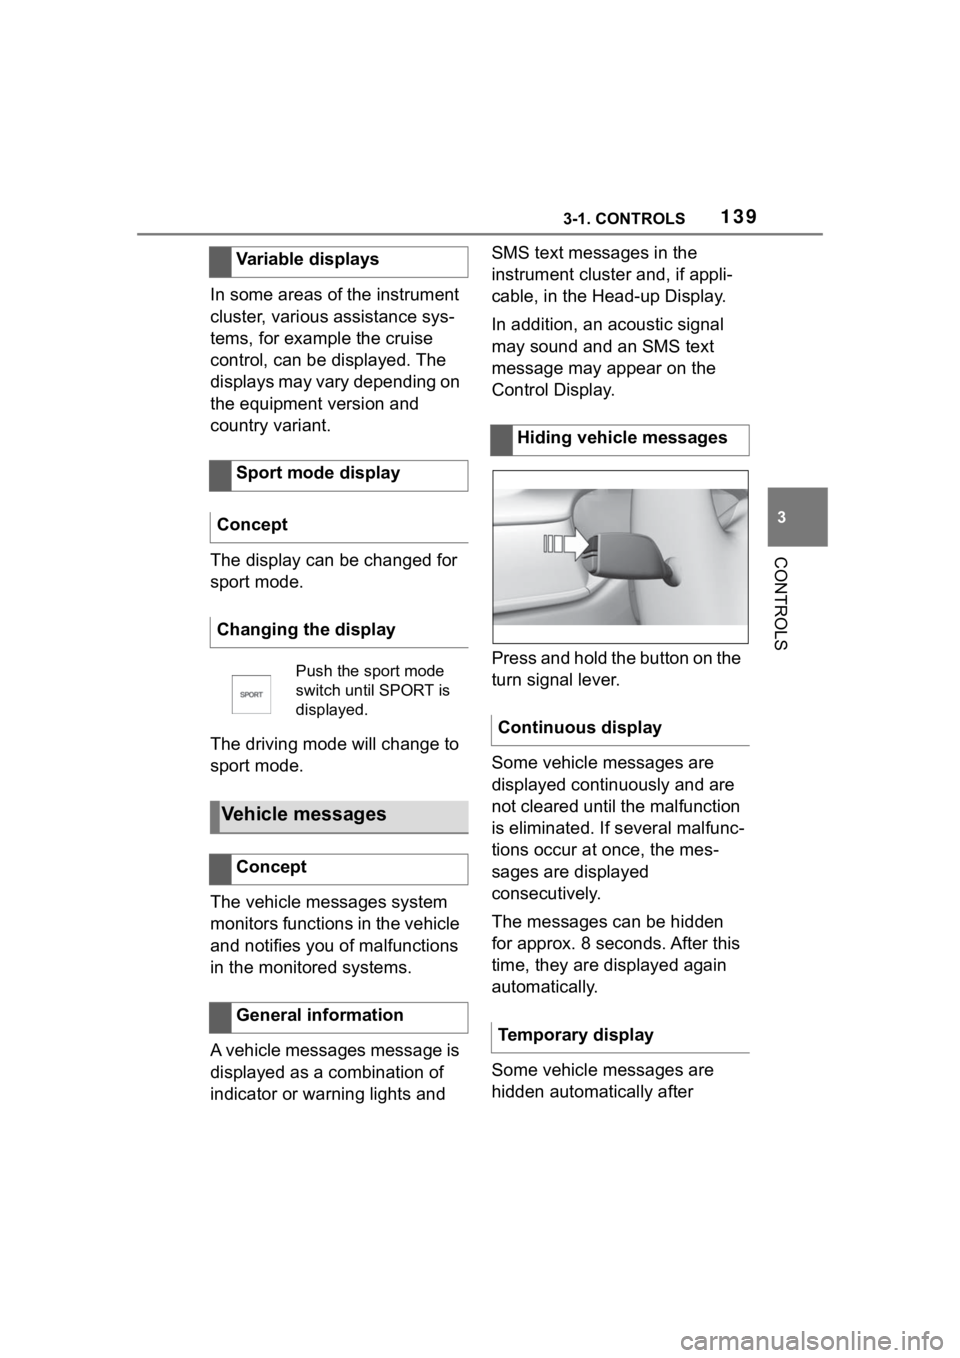
Press and hold the button on the
turn signal lever.
Some vehicle messages are
displayed continuously and are
not cleared until the malfunction
is eliminated. If s
everal malfunc-
tions occur at once, the mes-
sages are displayed
consecutively.
The messages can be hidden
for approx. 8 seconds. After this
time, they are displayed again
automatically.
Some vehicle messages are
hidden automatically after
Variable displays
Sport mode display
Concept
Changing the display
Push the sport mode
switch until SPORT is
displayed.
Vehicle messages
Concept
General information
Hiding vehicle messages
Continuous display
Temporary display
Page 140 of 372
1403-1. CONTROLS
approx. 20 seconds. The vehicle
messages are stored and can
be displayed again later.
Via Toyota Supra Command:
1"My vehicle"
2 "Vehicle status"
3 "Vehicle messages"
4 Select the SMS text mes-
sage.
SMS text messages in combina-
tion with a symbol in the instru-
ment cluster explain a vehicle
message and the meaning of
the indicator/warning lights.
Additional information, such as
the reason for an error or mal-
function or the required action,
can be called up via vehicle
messages.
With urgent messages the added text will be automatically
displayed on the Control Dis-
play.
Depending on the vehicle mes-
sage, further help can be
selected.
Via Toyota Supra Command:
1
"My vehicle"
2 "Vehicle status"
3 "Vehicle messages"
4 Select the desired text mes-
sage.
5 Select desired setting
Certain messages displayed
while driving are displayed
again after drive-ready state is
switched off.
Indicator/warning lights in the
instrument cluster display the
status of some functions in the
vehicle and indicate when a
malfunction is present in the
monitored systems.
The indicator/warning lights can
light up in a variety of combina-
tions and colors.
Displaying stored vehicle
messages
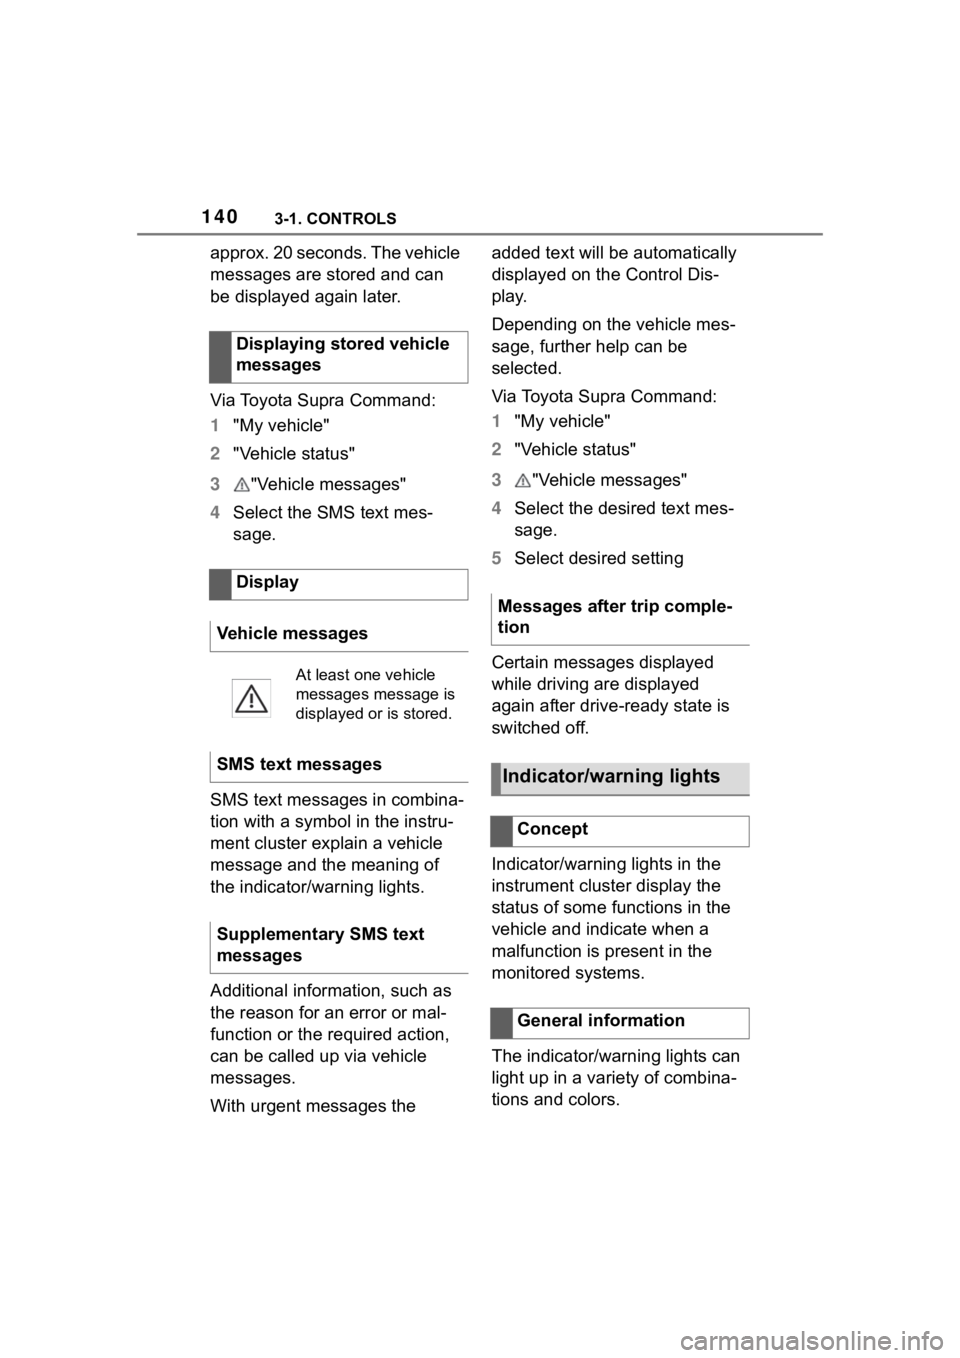
Display
Vehicle messages
At least one vehicle
messages message is
displayed or is stored.
SMS text messages
Supplementary SMS text
messages
Messages after trip comple-
tion
Indicator/warning lights
Concept
General information
Page 141 of 372
1413-1. CONTROLS
3
CONTROLS
Several of the lights are
checked for proper functioning
and light up temporarily when
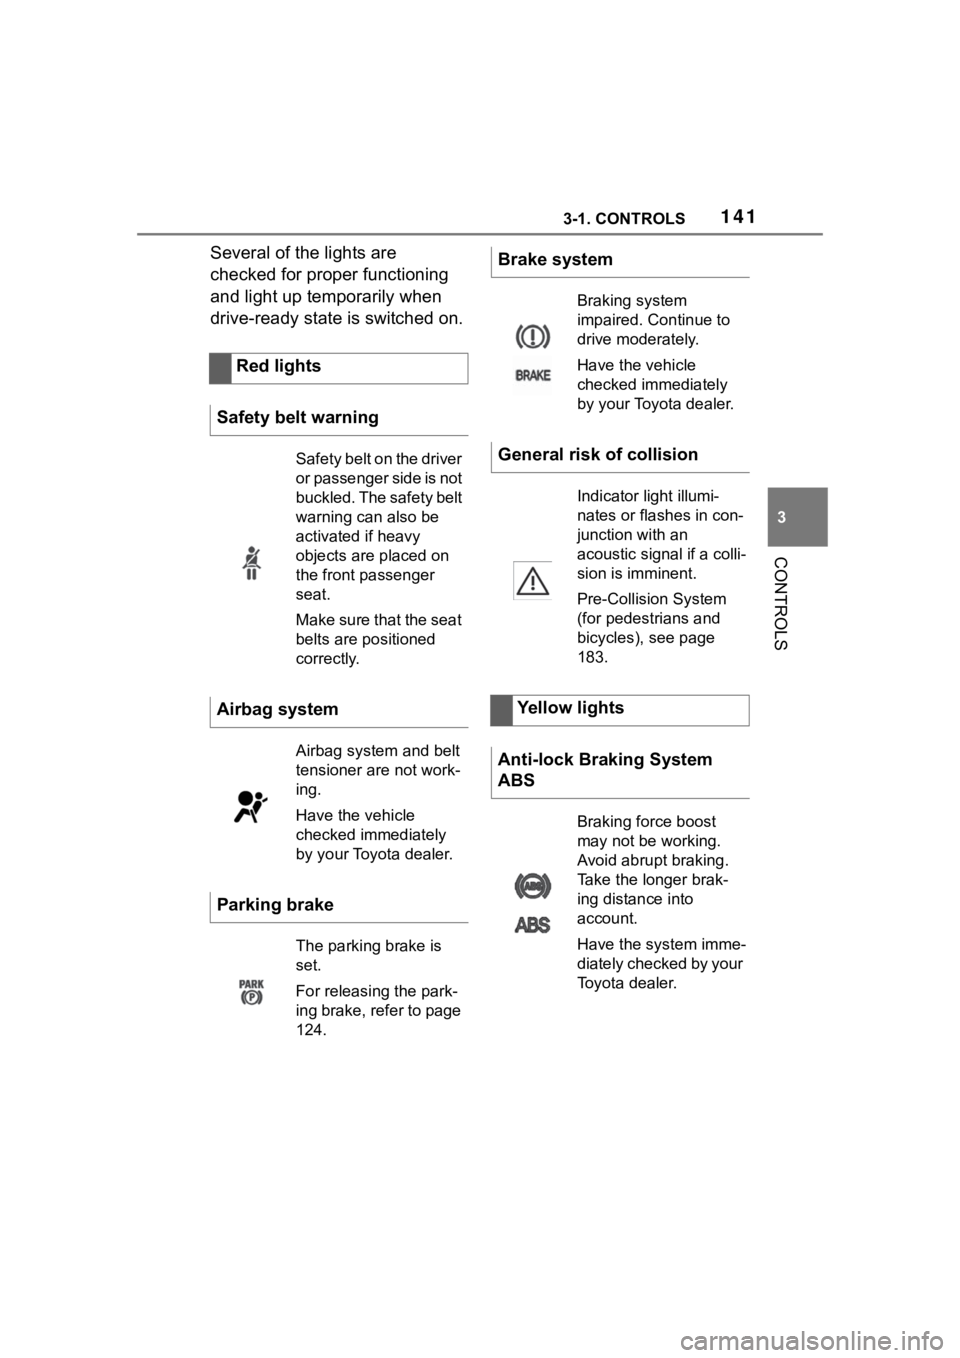
drive-ready state is switched on.Red lights
Safety belt warning
Safety belt on the driver
or passenger side is not
buckled. The safety belt
warning can also be
activated if heavy
objects are placed on
the front passenger
seat.
Make sure that the seat
belts are positioned
correctly.
Airbag system
Airbag system and belt
tensioner are not work-
ing.
Have the vehicle
checked immediately
by your Toyota dealer.
Parking brake
The parking brake is
set.
For releasing the park-
ing brake, refer to page
124.
Brake system
Braking system
impaired. Continue to
drive moderately.
Have the vehicle
checked immediately
by your Toyota dealer.
General risk of collision
Indicator light illumi-
nates or flashes in con-
junction with an
acoustic signal if a colli-
sion is imminent.
Pre-Collision System
(for pedestrians and
bicycles), see page
183.
Yellow lights
Anti-lock Braking System
ABS
Braking force boost
may not be working.
Avoid abrupt braking.
Take the longer brak-
ing distance into
account.
Have the system imme-
diately checked by your
Toyota dealer.
Page 142 of 372
1423-1. CONTROLS
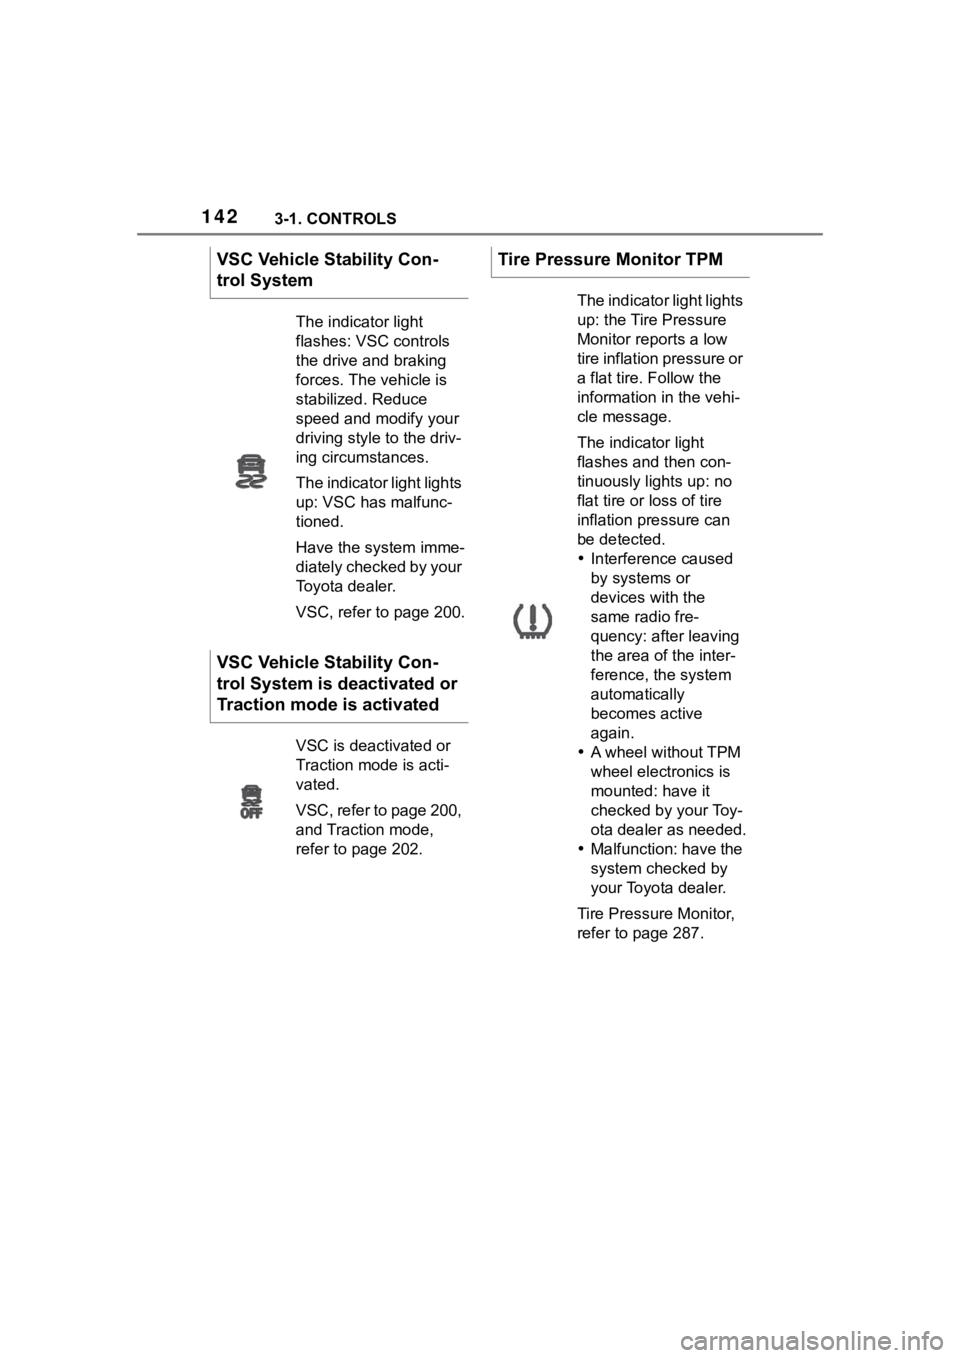
VSC Vehicle Stability Con-
trol System
The indicator light
flashes: VSC controls
the drive and braking
forces. The vehicle is
stabilized. Reduce
speed and modify your
driving style to the driv-
ing circumstances.
The indicator light lights
up: VSC has malfunc-
tioned.
Have the system imme-
diately checked by your
Toyota dealer.
VSC, refer to page 200.
VSC Vehicle Stability Con-
trol System is deactivated or
Traction mode is activated
VSC is deactivated or
Traction mode is acti-
vated.
VSC, refer to page 200,
and Traction mode,
refer to page 202.
Tire Pressure Monitor TPM
The indicator light lights
up: the Tire Pressure
Monitor reports a low
tire inflation pressure or
a flat tire. Follow the
information in the vehi-
cle message.
The indicator light
flashes and then con-
tinuously lights up: no
flat tire or loss of tire
inflation pressure can
be detected.
Interference caused
by systems or
devices with the
same radio fre-
quency: after leaving
the area of the inter-
ference, the system
automatically
becomes active
again.
A wheel without TPM
wheel electronics is
mounted: have it
checked by your Toy-
ota dealer as needed.
Malfunction: have the
system checked by
your Toyota dealer.
Tire Pressure Monitor,
refer to page 287.
Page 143 of 372
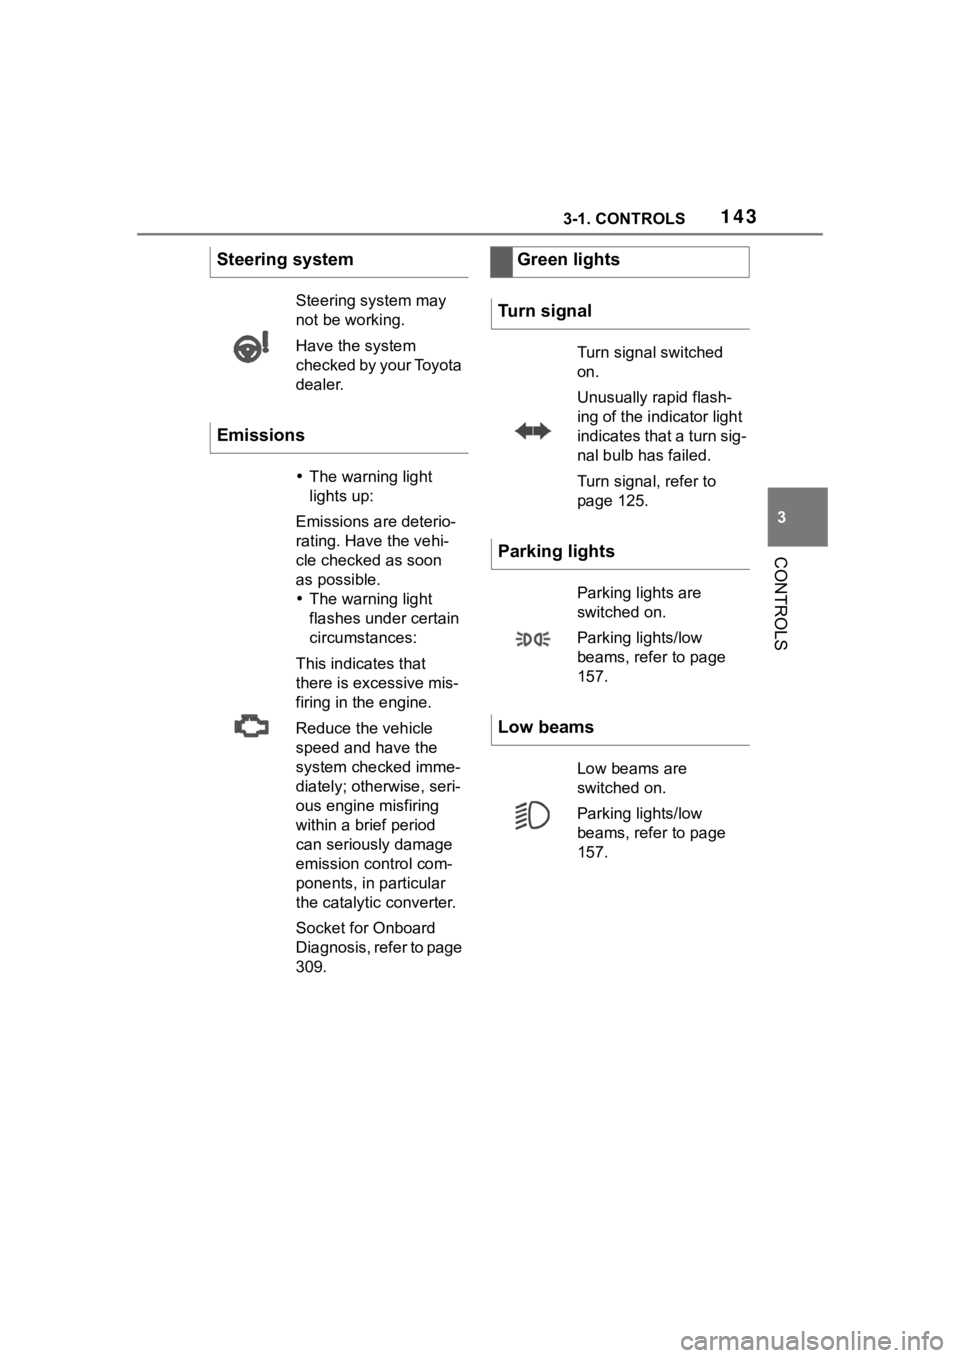
1433-1. CONTROLS
3
CONTROLS
Steering system
Steering system may
not be working.
Have the system
checked by your Toyota
dealer.
Emissions
The warning light
lights up:
Emissions are deterio-
rating. Have the vehi-
cle checked as soon
as possible.
The warning light
flashes under certain
circumstances:
This indicates that
there is excessive mis-
firing in the engine.
Reduce the vehicle
speed and have the
system checked imme-
diately; otherwise, seri-
ous engine misfiring
within a brief period
can seriously damage
emission control com-
ponents, in particular
the catalytic converter.
Socket for Onboard
Diagnosis, refer to page
309.
Green lights
Turn signal
Turn signal switched
on.
Unusually rapid flash-
ing of the indicator light
indicates that a turn sig-
nal bulb has failed.
Turn signal, refer to
page 125.
Parking lights
Parking lights are
switched on.
Parking lights/low
beams, refer to page
157.
Low beams
Low beams are
switched on.
Parking lights/low
beams, refer to page
157.