display VAUXHALL ADAM 2014.5 User Guide
[x] Cancel search | Manufacturer: VAUXHALL, Model Year: 2014.5, Model line: ADAM, Model: VAUXHALL ADAM 2014.5Pages: 217, PDF Size: 6.68 MB
Page 77 of 217
Instruments and controls75
Set date format
To switch between the available
options, repeatedly press the
MENU-TUNE knob.
RDS clock synchronization The RDS signal of most VHF
transmitters automatically sets the
time. RDS time synchronisation can
take a few minutes. Some
transmitters do not send a correct
time signal. In such cases, it is
recommended to switch off the
automatic time synchronisation.
To switch between the options On
and Off, repeatedly press the
MENU-TUNE knob.
Colour-Info Display
Press the ; button and then select
the Settings screen button.
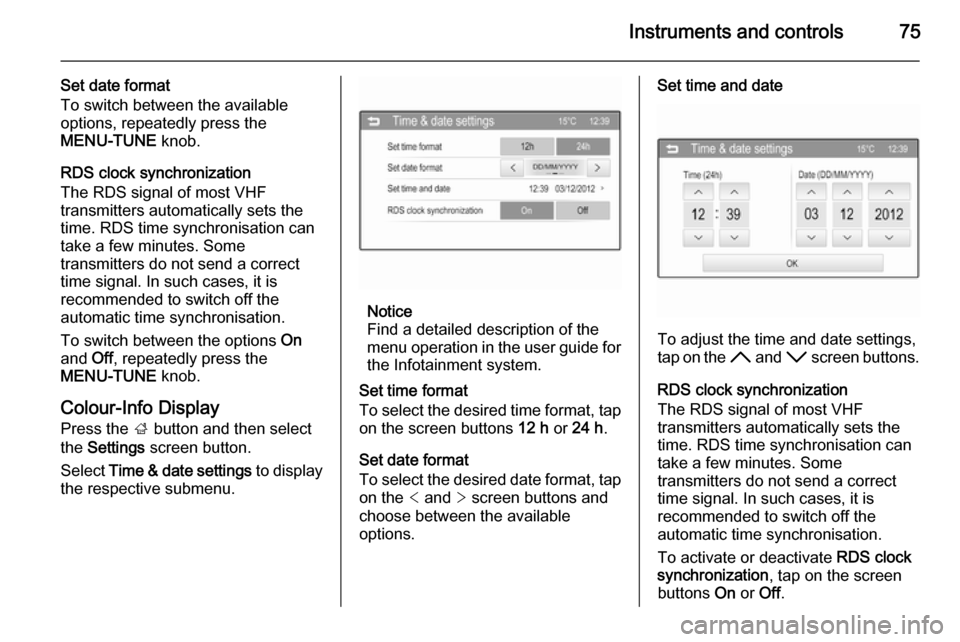
Select Time & date settings to display
the respective submenu.
Notice
Find a detailed description of the
menu operation in the user guide for
the Infotainment system.
Set time format
To select the desired time format, tap on the screen buttons 12 h or 24 h .
Set date format To select the desired date format, tap
on the < and > screen buttons and
choose between the available
options.
Set time and date
To adjust the time and date settings,
tap on the H and I screen buttons.
RDS clock synchronization
The RDS signal of most VHF
transmitters automatically sets the
time. RDS time synchronisation can take a few minutes. Some
transmitters do not send a correct
time signal. In such cases, it is
recommended to switch off the
automatic time synchronisation.
To activate or deactivate RDS clock
synchronization , tap on the screen
buttons On or Off.
Page 79 of 217
Instruments and controls77Warning lights, gauges
and indicators
Instrument cluster
The needles of the instruments briefly
rotate to the end position when the
ignition is switched on.
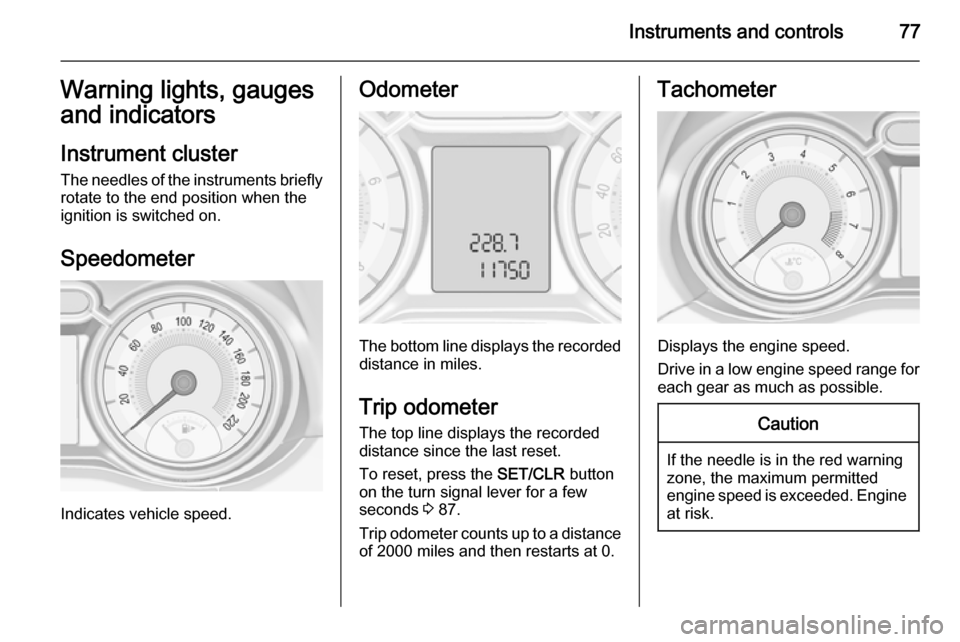
Speedometer
Indicates vehicle speed.
Odometer
The bottom line displays the recorded distance in miles.
Trip odometer The top line displays the recorded
distance since the last reset.
To reset, press the SET/CLR button
on the turn signal lever for a few
seconds 3 87.
Trip odometer counts up to a distance
of 2000 miles and then restarts at 0.
Tachometer
Displays the engine speed.
Drive in a low engine speed range for each gear as much as possible.
Caution
If the needle is in the red warning
zone, the maximum permitted
engine speed is exceeded. Engine at risk.
Page 80 of 217
78Instruments and controlsFuel gauge
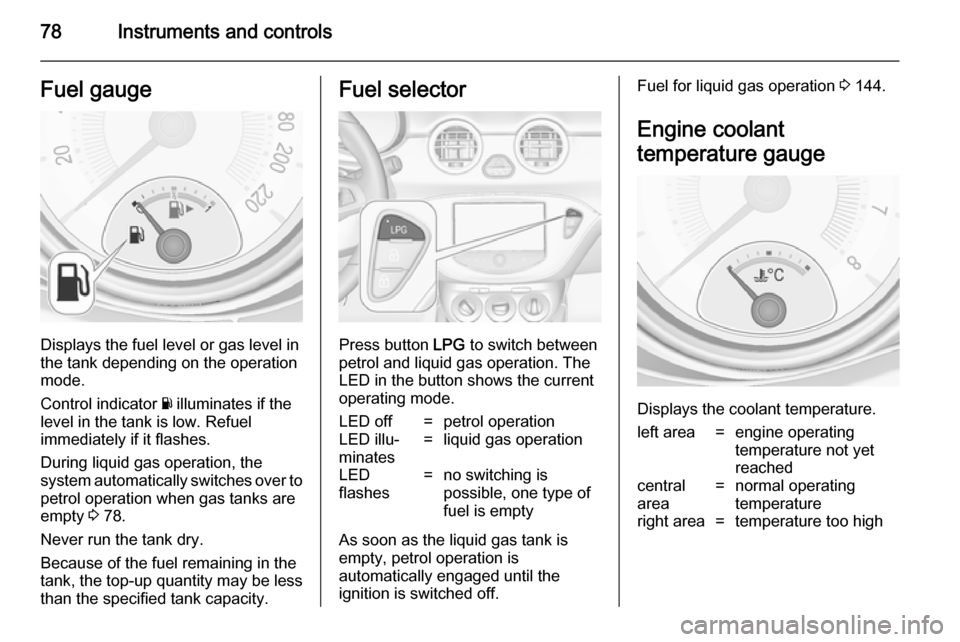
Displays the fuel level or gas level in
the tank depending on the operation
mode.
Control indicator Y illuminates if the
level in the tank is low. Refuel
immediately if it flashes.
During liquid gas operation, the
system automatically switches over to
petrol operation when gas tanks are
empty 3 78.
Never run the tank dry.
Because of the fuel remaining in the
tank, the top-up quantity may be less
than the specified tank capacity.
Fuel selector
Press button LPG to switch between
petrol and liquid gas operation. The
LED in the button shows the current
operating mode.
LED off=petrol operationLED illu‐
minates=liquid gas operationLED
flashes=no switching is
possible, one type of
fuel is empty
As soon as the liquid gas tank is
empty, petrol operation is
automatically engaged until the
ignition is switched off.
Fuel for liquid gas operation 3 144.
Engine coolant
temperature gauge
Displays the coolant temperature.
left area=engine operating
temperature not yet
reachedcentral
area=normal operating
temperatureright area=temperature too high
Page 81 of 217
Instruments and controls79Caution
If engine coolant temperature is
too high, stop vehicle, switch off
engine. Danger to engine. Check
coolant level.
Service display
The engine oil life system lets you
know when to change the engine oil
and filter. Based on driving
conditions, the interval at which an
engine oil and filter change will be
indicated can vary considerably.
In the Uplevel-Display, the remaining
oil life duration is displayed in the
Vehicle Information Menu s.
In the Midlevel-Display, the remaining
engine oil life duration is displayed by
the control indicator I, therefore the
ignition must be switched on, with the engine off.
The menu and function can be
selected via the buttons on the turn signal lever.
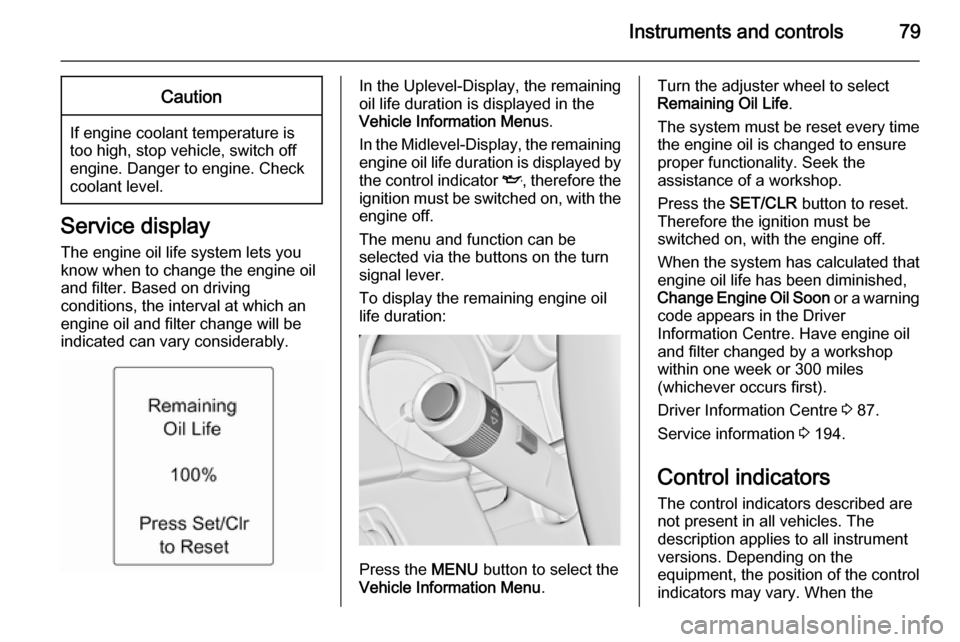
To display the remaining engine oil
life duration:
Press the MENU button to select the
Vehicle Information Menu .
Turn the adjuster wheel to select
Remaining Oil Life .
The system must be reset every time
the engine oil is changed to ensure
proper functionality. Seek the
assistance of a workshop.
Press the SET/CLR button to reset.
Therefore the ignition must be
switched on, with the engine off.
When the system has calculated that
engine oil life has been diminished,
Change Engine Oil Soon or a warning
code appears in the Driver
Information Centre. Have engine oil
and filter changed by a workshop
within one week or 300 miles
(whichever occurs first).
Driver Information Centre 3 87.
Service information 3 194.
Control indicators The control indicators described are
not present in all vehicles. The
description applies to all instrument
versions. Depending on the
equipment, the position of the control
indicators may vary. When the
Page 86 of 217

84Instruments and controls
Flashes when the engine isrunning
Fault that could lead to catalytic
converter damage. Ease up on the
accelerator until the flashing stops.
Seek the assistance of a workshop
immediately.
Service vehicle soon g illuminates yellow.
Additionally a warning message or a
warning code is displayed.
The vehicle needs a service.
Seek the assistance of a workshop.
Vehicle messages 3 93.
Brake and clutch system R illuminates red.
The brake and clutch fluid level is too low 3 154.9 Warning
Stop. Do not continue your
journey. Consult a workshop.
Illuminates after the ignition is
switched on if the manual parking
brake is applied 3 126.
Operate pedal - illuminates or flashes yellow.
Illuminates
Clutch pedal needs to be depressed
to start the engine in Autostop mode.
Stop-start system 3 121.
Flashes
Clutch pedal needs to be depressed
for a main start of the engine 3 16,
3 120.
On some versions the operate pedal
message is indicated in the Driver
Information Display 3 93.
Antilock brake system
(ABS) u illuminates yellow.Illuminates for a few seconds after the
ignition is switched on. The system is ready for operation when the control
indicator extinguishes.
If the control indicator does not go out after a few seconds, or if it illuminates while driving, there is a fault in the
ABS. The brake system remains
operational but without ABS
regulation.
Antilock brake system 3 125.
Upshift
[ illuminates green as control
indicator, or is shown as a symbol in
the Driver Information Centre with
Uplevel-Display, when upshifting is
recommended for fuel saving
reasons.
On some versions gear shift
indication is popped up as full page in the Driver Information Centre.
EcoFlex drive assistant 3 96.
Power steering c illuminates yellow.
Page 89 of 217
Instruments and controls87
Illuminates green
Cruise control is active.
Cruise control 3 130.
Door open h illuminates red.
A door or the tailgate is open.Information displays
Driver Information Centre The Driver Information Centre (DIC)
is located in the instrument cluster
between speedometer and
tachometer. It is available as
Midlevel-Display or Uplevel-Display.
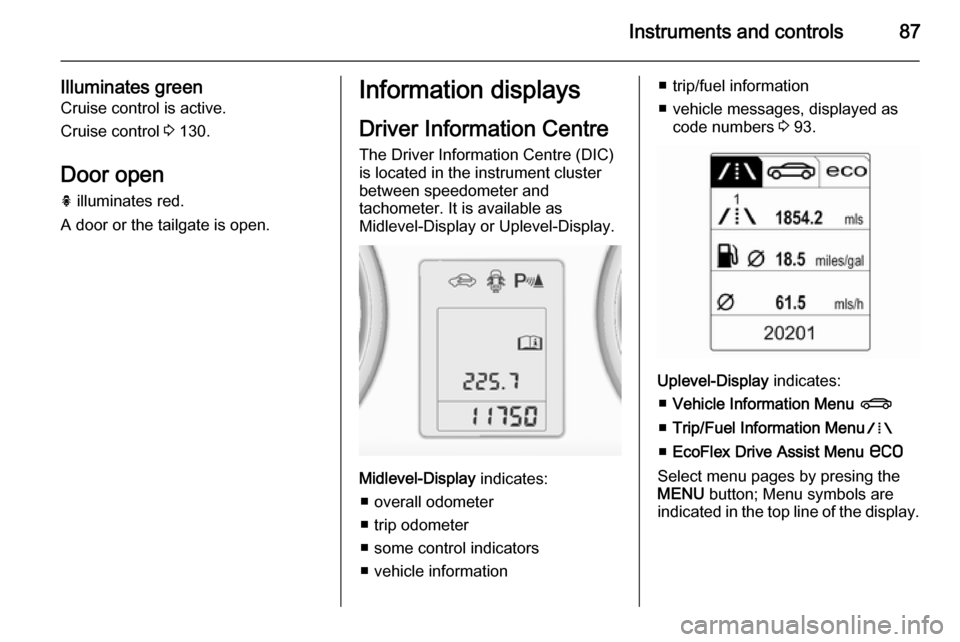
Midlevel-Display indicates:
■ overall odometer
■ trip odometer
■ some control indicators
■ vehicle information
■ trip/fuel information
■ vehicle messages, displayed as code numbers 3 93.
Uplevel-Display indicates:
■ Vehicle Information Menu X
■ Trip/Fuel Information Menu W
■ EcoFlex Drive Assist Menu s
Select menu pages by presing the
MENU button; Menu symbols are
indicated in the top line of the display.
Page 90 of 217
88Instruments and controls
Some of the displayed functions differ
when the vehicle is being driven or at
a standstill. Some functions are only
available when the vehicle is being
driven.
Vehicle personalisation 3 98.
Memorised settings 3 20.
Selecting menus and functions
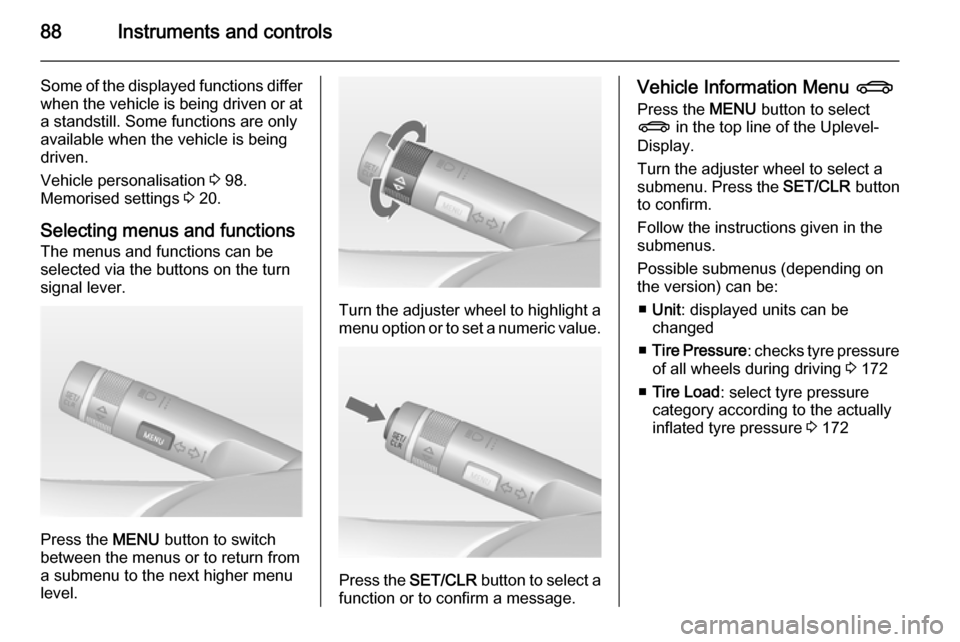
The menus and functions can be
selected via the buttons on the turn
signal lever.
Press the MENU button to switch
between the menus or to return from
a submenu to the next higher menu
level.
Turn the adjuster wheel to highlight a
menu option or to set a numeric value.
Press the SET/CLR button to select a
function or to confirm a message.
Vehicle Information Menu X
Press the MENU button to select
X in the top line of the Uplevel-
Display.
Turn the adjuster wheel to select a
submenu. Press the SET/CLR button
to confirm.
Follow the instructions given in the
submenus.
Possible submenus (depending on the version) can be:
■ Unit : displayed units can be
changed
■ Tire Pressure : checks tyre pressure
of all wheels during driving 3 172
■ Tire Load : select tyre pressure
category according to the actually
inflated tyre pressure 3 172
Page 91 of 217
Instruments and controls89
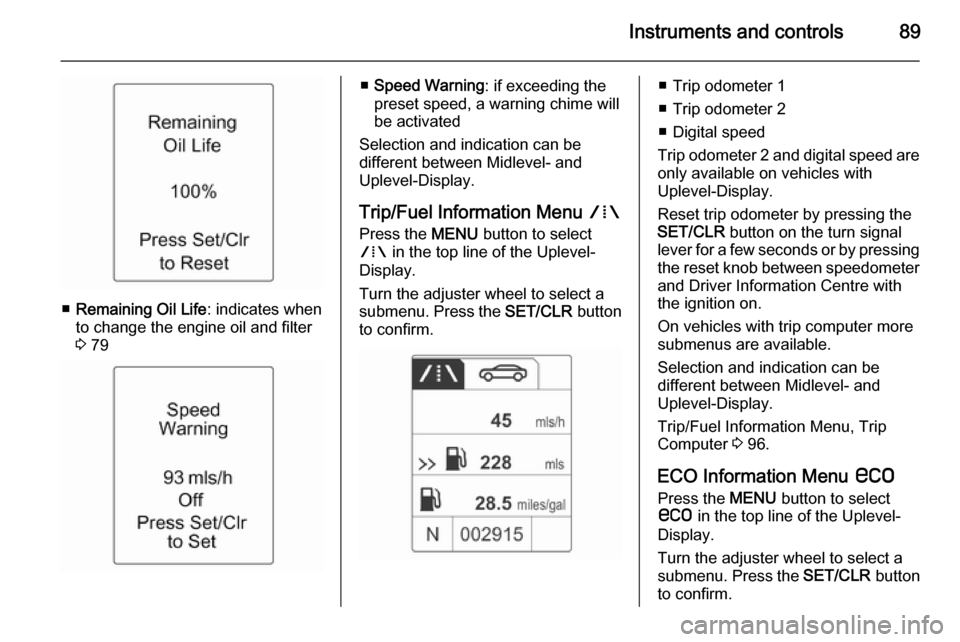
■Remaining Oil Life : indicates when
to change the engine oil and filter
3 79
■ Speed Warning : if exceeding the
preset speed, a warning chime will
be activated
Selection and indication can be
different between Midlevel- and
Uplevel-Display.
Trip/Fuel Information Menu W
Press the MENU button to select
W in the top line of the Uplevel-
Display.
Turn the adjuster wheel to select a
submenu. Press the SET/CLR button
to confirm.■ Trip odometer 1
■ Trip odometer 2
■ Digital speed
Trip odometer 2 and digital speed are
only available on vehicles with
Uplevel-Display.
Reset trip odometer by pressing the
SET/CLR button on the turn signal
lever for a few seconds or by pressing the reset knob between speedometer
and Driver Information Centre with
the ignition on.
On vehicles with trip computer more
submenus are available.
Selection and indication can be
different between Midlevel- and
Uplevel-Display.
Trip/Fuel Information Menu, Trip
Computer 3 96.
ECO Information Menu s
Press the MENU button to select
s in the top line of the Uplevel-
Display.
Turn the adjuster wheel to select a
submenu. Press the SET/CLR button
to confirm.
Page 92 of 217

90Instruments and controls
Submenus are:
■Shift indication : Current gear is
indicated inside an arrow. The
figure above recommends
upshifting for fuel saving reasons.
Eco index display : The current fuel
consumption is indicated on a segment display. For economical
driving, adapt your driving style to
keep the filled segments within the
Eco area. The more segments are
filled, the higher the fuel
consumption. Simultaneously the
current consumption value is
indicated.
■ Top Consumers : List of top comfort
consumers currently switched on is displayed in descending order. Fuel
saving potential is indicated. A
switched-off consumer disappears from the list and the consumption
value will be updated.■ Economy Trend : Displays the
average consumption development
over a distance of 50 miles. Filled
segments display the consumption
in 5 mile steps and shows the effect of topography or driving behaviour
on fuel consumption.
Page 93 of 217
Instruments and controls91Graphic-Info-Display,
Colour-Info-Display
Depending on the vehicle
configuration the vehicle has a
■ Graphic-Info-Display
or
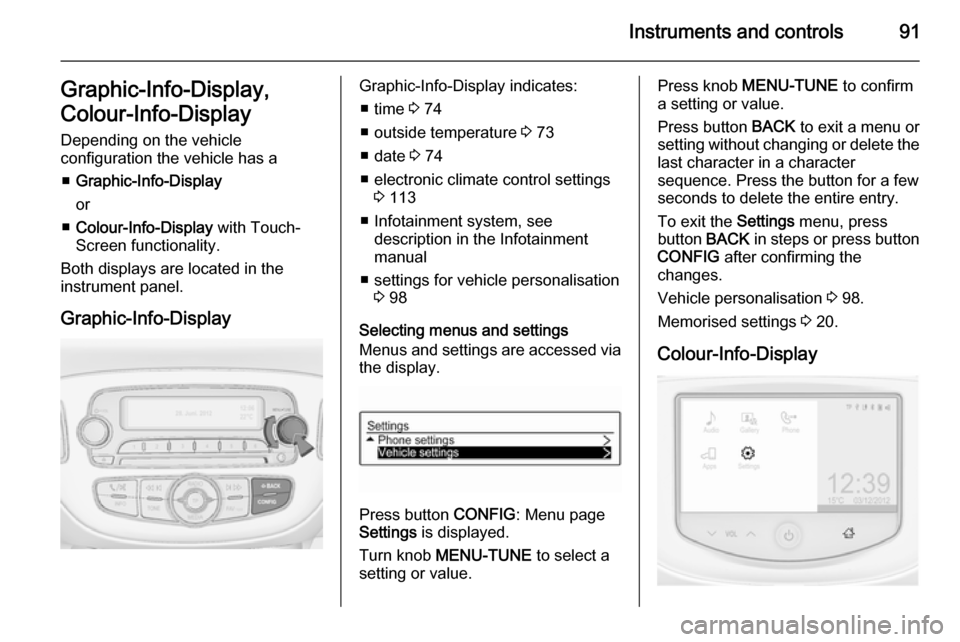
■ Colour-Info-Display with Touch-
Screen functionality.
Both displays are located in the
instrument panel.
Graphic-Info-DisplayGraphic-Info-Display indicates: ■ time 3 74
■ outside temperature 3 73
■ date 3 74
■ electronic climate control settings 3 113
■ Infotainment system, see description in the Infotainment
manual
■ settings for vehicle personalisation 3 98
Selecting menus and settings
Menus and settings are accessed via the display.
Press button CONFIG: Menu page
Settings is displayed.
Turn knob MENU-TUNE to select a
setting or value.
Press knob MENU-TUNE to confirm
a setting or value.
Press button BACK to exit a menu or
setting without changing or delete the last character in a character
sequence. Press the button for a few
seconds to delete the entire entry.
To exit the Settings menu, press
button BACK in steps or press button
CONFIG after confirming the
changes.
Vehicle personalisation 3 98.
Memorised settings 3 20.
Colour-Info-Display