light VAUXHALL ANTARA 2014 Owner's Guide
[x] Cancel search | Manufacturer: VAUXHALL, Model Year: 2014, Model line: ANTARA, Model: VAUXHALL ANTARA 2014Pages: 217, PDF Size: 5.94 MB
Page 110 of 217

108LightingTurn and lane-change
signalslever up=right turn signallever down=left turn signal
If the lever is moved past the
resistance point, the turn signal is
switched on constantly.
When the steering wheel is turned
back, the turn signal is automatically
deactivated. This will not happen
when making a minor steering
manoeuvre such as lane changing.
For three flashes, e.g. when changing
lanes, press the lever until resistance is felt and then release. Move the
lever to the resistance point and hold
for longer indication.
The volume of the turn signal audible
warning is dependent upon vehicle
speed.
Switch the turn signal off manually by moving the lever to its original
position.
Control indicators O 3 83.
Front fog lightsOperated with the > button. Control
indicator > illuminates in the
instrument cluster when the front fog
lights are switched on.
The front fog lights can only be
switched on when both the ignition
and low beam/high beam or sidelights are on.
Light switch in position AUTO:
switching on front fog lights will switch
on low beam and sidelights
automatically.
Follow the regulations of the country
in which you are driving when using
front fog lights.
Page 111 of 217

Lighting109Rear fog lights
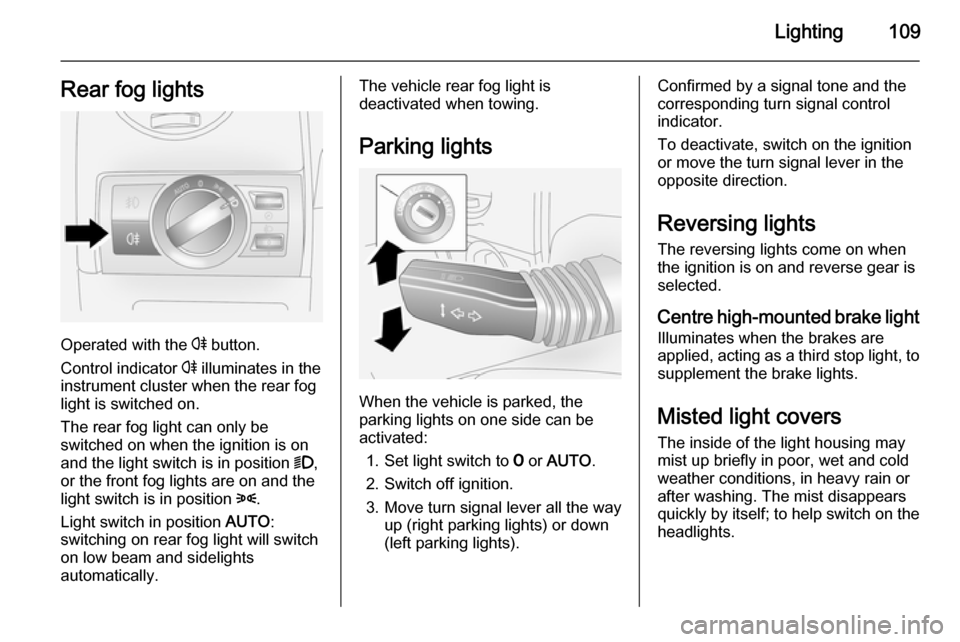
Operated with the r button.
Control indicator r illuminates in the
instrument cluster when the rear fog light is switched on.
The rear fog light can only be
switched on when the ignition is on
and the light switch is in position 9,
or the front fog lights are on and the
light switch is in position 8.
Light switch in position AUTO:
switching on rear fog light will switch
on low beam and sidelights
automatically.
The vehicle rear fog light is
deactivated when towing.
Parking lights
When the vehicle is parked, the
parking lights on one side can be
activated:
1. Set light switch to 7 or AUTO .
2. Switch off ignition.
3. Move turn signal lever all the way up (right parking lights) or down
(left parking lights).
Confirmed by a signal tone and the
corresponding turn signal control
indicator.
To deactivate, switch on the ignition or move the turn signal lever in the
opposite direction.
Reversing lights The reversing lights come on when
the ignition is on and reverse gear is
selected.
Centre high-mounted brake light
Illuminates when the brakes are
applied, acting as a third stop light, to supplement the brake lights.
Misted light covers The inside of the light housing may
mist up briefly in poor, wet and cold weather conditions, in heavy rain or
after washing. The mist disappears
quickly by itself; to help switch on the
headlights.
Page 112 of 217

110LightingInterior lightingInstrument panel
illumination control
Brightness of the following lights can
be adjusted when the exterior lights
are on:
■ Instrument panel illumination
■ Info-Display
■ Illuminated switches and operation elements.
Turn thumb wheel k to the right or left
until the desired brightness is
obtained.
If driver's door is opened or q is
pressed on the remote control,
instrument panel illuminates
automatically for 30 seconds until
ignition switch is turned to position ACC .
Display mode 3 93.
Interior lights
During entry and exit of the vehicle,
the front and rear courtesy lights
automatically switch on and then off
after a delay.
Notice
In the event of an accident with airbag deployment the courtesy
lights are turned on automatically.Front courtesy light
Front and rear reading lights and the
load compartment lights function as
courtesy lights and illuminate when
the doors or the tailgate are opened.
If the doors or tailgate remain open, the lights stay illuminated for
10 minutes. Once all doors and the tailgate are closed, the courtesy lights dim gradually after 10 seconds.
By pressing button d in the roof
lining, both the front and rear reading lights illuminate. Press again to turn
off.
Page 113 of 217

Lighting111
Courtesy lights can be turned off
immediately by pressing button K.
Ignition switch illumination
Illuminates when you open a door.
Switch off immediately by pressing button K in the roof lining.
Glovebox illumination
Illuminates when the glovebox is
opened.
Load compartment lighting
Illuminates when a door or the tailgate
is opened.
Reading lights
Front reading lights
Operated with the L and M
buttons.
Avoid using front reading lights while
driving in the dark, as they can reduce driver visibility.
Page 114 of 217

112Lighting
Rear reading lights
Left and right rear reading lights are
individually operable. Press to
activate and deactivate.
Sunvisor lights
Illuminates when the vanity mirror
cover is opened 3 31.
Lighting features
Entry lighting
Welcome lighting Depending upon outside light
conditions, when unlocking the
vehicle with the remote control the
hazard warning lights flash twice and
the exterior and interior lights
illuminate for 20 seconds. This
function facilitates locating the vehicle
when it is dark.
Exit lighting The low beam and reversing lights
illuminate for 30 seconds after the
driver exits the vehicle and closes the
door.Switching on
1. Switch off ignition.
2. Remove ignition key.
3. Open driver's door.
4. Pull turn signal lever.
5. Close driver's door.
If the driver's door is not closed the
lights switch off after two minutes.
Exit lighting can be deactivated by
inserting the key in the ignition switch or by pulling the turn signal lever
again while the driver's door is open.
Page 115 of 217

Lighting113Battery discharge
protection
To prevent the battery from becoming discharged, the exterior lights turn off automatically 10 minutes after the
ignition is switched off.
Battery discharge protection will not
work if the lights are turned on
10 minutes after the ignition has been
switched off; the key cannot be
removed from the ignition switch until the battery is recharged.
Page 117 of 217

Climate control115
Demisting and defrosting■ Set the air distribution switch to l
or J
■ Set temperature control to warmest
level
■ Set fan to highest level
■ Close centre air vents
■ Open side air vents and direct them
towards the door windows
Heated rear window Ü 3 31.
Air conditioning system In addition to the heating and
ventilation system, the air
conditioning system has controls for:n=cooling4=air recirculationÜ=demisting and defrosting
Heated seats ß 3 38.
Cooling n
Press button
n to switch on cooling.
Activation is indicated by the LED in
the button. Cooling is only functional
when the engine is running and
climate control fan is switched on.
Press button n again to switch off
cooling.
The air conditioning system cools and
dehumidifies (dries) as soon as the
outside temperature is slightly above
freezing point. Therefore
condensation may form and drip from under the vehicle.
If no cooling or drying is required,
switch the cooling system off to save
fuel. Activated cooling might inhibit
autostops.
Air recirculation system 4
Press button 4 to activate air
recirculation mode. Activation is
indicated by the LED in the button.
Press button 4 again to deactivate
recirculation mode.9 Warning
The exchange of fresh air is
reduced in air recirculation mode.
In operation without cooling the air humidity increases, so the
windows may mist up from inside.
The quality of the passenger
compartment air deteriorates,
which may cause the vehicle
occupants to feel drowsy.
In warm and very humid ambient air conditions, the windscreen might mist
up from outside, when cold air is
Page 119 of 217

Climate control117
■ Fan speed
■ Temperature on front passenger sideAUTO=Automatic modet=Automatic air recirculationV=Demisting and defrosting
Cooling A/C, Air recirculation 4
3 115.
Notice
Do not cover the interior
temperature sensor (located beside
the fan switch) or the sunlight sensor
(located in front of the windscreen
defroster vents) as this could cause the system to malfunction.
Heated rear window RÜ 3 31,
Heated seats ß 3 38.
Automatic mode AUTO
Basic setting for maximum comfort:
■ Press AUTO button; cooling A/C is
switched on and the air distribution
and fan speed are regulated
automatically.
■ Open all air vents.
■ Set the preselected temperatures for driver's side and front
passenger's side using the left and
right rotary knobs.
Notice
All air vents are actuated
automatically in Automatic mode.
The air vents should therefore
always be open.
Temperature preselection
Recommended comfort setting is
22 °C. Intermediate settings are
possible.
Press SYNC button to automatically
adjust front passenger's side
temperature to match current driver's
side temperature. Activation is
indicated by the LED in the button.
If temperature settings are different
between driver's side and front
passenger's side, LED in SYNC
button extinguishes.
Manual settings
Page 126 of 217

124Driving and operating
30 seconds. If engine does not start,
wait 10 seconds before repeating starting procedure.
Ensure the engine oil is of the correct
viscosity, the correct fuel is used,
vehicle services are performed
regularly and the battery is sufficiently charged.
Overrun cut-off The fuel supply is automatically cut-
off during overrun, i.e. when the
vehicle is driven with a gear engaged but accelerator is released.Stop-start system
The stop-start system helps to save
fuel and to reduce the exhaust
emissions. When conditions allow, it
switches off the engine as soon as the
vehicle is at a low speed or at a
standstill, e.g. at a traffic light or in a
traffic jam. It starts the engine
automatically as soon as the clutch is
depressed. A vehicle battery sensor
ensures that an Autostop is only
performed if the vehicle battery is
sufficiently charged for a restart.
Activation
The stop-start system is available as
soon as the engine is started, the
vehicle starts-off and the conditions
as stated below in this section are
fulfilled.Deactivation
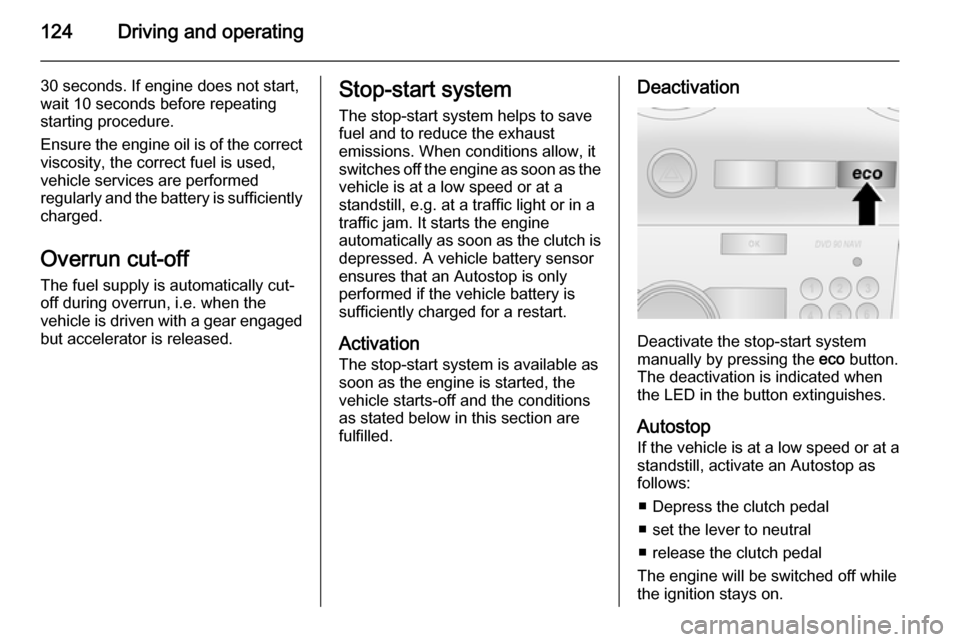
Deactivate the stop-start system
manually by pressing the eco button.
The deactivation is indicated when
the LED in the button extinguishes.
Autostop
If the vehicle is at a low speed or at a
standstill, activate an Autostop as
follows:
■ Depress the clutch pedal
■ set the lever to neutral
■ release the clutch pedal
The engine will be switched off while
the ignition stays on.
Page 129 of 217

Driving and operating127Engine exhaust9Danger
Engine exhaust gases contain
poisonous carbon monoxide,
which is colourless and odourless and could be fatal if inhaled.
If exhaust gases enter the interior
of the vehicle, open the windows.
Have the cause of the fault
rectified by a workshop.
Avoid driving with an open load
compartment, otherwise exhaust
gases could enter the vehicle.
Malfunction indicator light 3 84.
Diesel particle filter
The diesel particle filter system filters
harmful soot particles out of the
exhaust gases. The system includes
a self-cleaning function that runs
automatically during driving without
any notification.
The filter is cleaned by periodically
burning off the soot particles at high
temperature. This process takes
place automatically under set driving
conditions and may take more than
15 minutes. Autostop is not available
and fuel consumption may be higher
during this period. The emission of
smells and smoke during this process is normal.
Under certain driving conditions, e.g.
short distances, the system cannot
clean itself automatically.
If cleaning of the filter is required and previous driving conditions did not
enable automatic cleaning, it will be
indicated by control indicator %
3 87.
% illuminates, accompanied by a
warning chime, when diesel particle
filter is full. Start cleaning process as
soon as possible.
% flashes when diesel particle filter
has reached the maximum filling level. Start cleaning process
immediately to avoid damage to the
engine. A warning chime sounds every 3 minutes until the cleaning
process is complete.
Cleaning process
To activate the cleaning process,
continue driving, keeping engine
speed above 2000 revolutions per
minute. Shift down if necessary.
Diesel particle filter cleaning is then
started.
If control indicator Z illuminates
additionally in the instrument cluster
when the engine is running, there