VAUXHALL ANTARA 2015 Owners Manual
Manufacturer: VAUXHALL, Model Year: 2015, Model line: ANTARA, Model: VAUXHALL ANTARA 2015Pages: 223, PDF Size: 6.07 MB
Page 91 of 223
Instruments and controls89Tyre pressure monitoring
system
w illuminates or flashes yellow.
Illuminates Tyre pressure loss. Stop immediately
and check tyre pressure.
A corresponding message also
appears on the Info-Display 3 92.
Flashes Fault in system or tyre without
pressure sensor mounted ( e.g. spare
wheel). After approx. one minute the
control indicator illuminates
continuously. A corresponding
message also appears on the Info-
Display.
Consult a workshop.
Tyre pressure monitoring system
3 178.
Engine oil pressure
I illuminates red.Illuminates when the ignition is
switched on and extinguishes shortly
after the engine starts. If it does not
illuminate, seek the assistance of a
workshop.
Illuminates when the engine is runningCaution
Engine lubrication may be
interrupted. This may result in
damage to the engine and/or
locking of the drive wheels.
1. Depress clutch.
2. Select neutral gear, set selector lever to N.
3. Move out of the flow of traffic as quickly as possible without
impeding other vehicles.
4. Switch off ignition.
9 Warning
When the engine is off,
considerably more force is needed
to brake and steer. During an
Autostop the brake servo unit will still be operational.
Do not remove key until vehicle is stationary, otherwise the steeringwheel lock could engage
unexpectedly.
Check oil level before seeking the
assistance of a workshop 3 154.
Change engine oil
C illuminates yellow.
When the engine is started, C
illuminates briefly. If it does not
illuminate, seek the assistance of a
workshop.
The engine oil life monitor lets you know when to change the oil. Control
indicator C illuminates to indicate
that engine oil life has been
diminished and the oil needs
changing.
Page 92 of 223

90Instruments and controls
Based on driving conditions, the
interval at which an oil change will be indicated can vary considerably.
Change oil within 600 miles. Engine
power may be decreased.
Once the engine oil has been
changed 3 154, the engine oil life
monitor needs to be reset. Seek the assistance of a workshop.
Low engine oil level S illuminates yellow.
When the ignition is switched on, S
illuminates briefly. If it does not
illuminate, seek the assistance of a
workshop.
Illuminates during driving Oil level is low: top up oil to specified
level 3 154.
Fuel economy mode
s illuminates green.
Illuminates when fuel ecomony mode is switched on 3 132.Low fuel
Y illuminates yellow.
When the engine is started, Y
illuminates briefly. If it does not
illuminate, seek the assistance of a workshop.
Illuminates during driving when fuel
level in tank is too low. Refuel
immediately 3 146.
Never run the tank dry. Erratic fuel
supply can cause catalytic converter
to overheat 3 129.
Diesel engines: if the tank has been
run dry, bleed the fuel system 3 161.
Fuel tank capacity 3 209.
Catalytic converter 3 129.
Drain fuel filter U illuminates yellow.
Illuminates when water level in diesel
fuel filter exceeds a specified level.
Residual water in the diesel fuel filter
must be drained 3 160. Seek the
assistance of a workshop as soon as
possible.Immobiliser
d illuminates red.
When the engine is started, d
illuminates briefly. If it does not
illuminate, seek the assistance of a workshop.
Illuminates to indicate a fault in the
immobiliser system. The engine
cannot be started.
Electronic immobiliser 3 27.
Reduced engine power
# illuminates yellow.
Illuminates in conjunction with control
indicator g, the vehicle needs a
service. Move out of the flow of traffic as quickly as possible without
impeding other vehicles, stop the
engine and restart after 10 seconds.
The engine power is limited. Consult
a workshop.
Apply footbrake - illuminates yellow.
Page 93 of 223

Instruments and controls91
Brake pedal needs to be depressed
to release the electrical parking brake
3 137.
Clutch pedal needs to be depressed
to restart the engine.
Stop-start system 3 125.
High beam C illuminates blue.
Illuminated when high beam is on and during headlight flash 3 107.
Automatic headlight
levelling system
q illuminates yellow
Illuminates during driving to indicate a fault that requires immediate
attention. Seek the assistance of a
workshop as soon as possible.
Automatic headlight range
adjustment 3 107.
Fog light
> illuminates green.Illuminates when the front fog lights
are switched on 3 109.
Rear fog light
r illuminates yellow.
Illuminates when the rear fog light is
switched on 3 110.
Cruise control
m illuminates yellow or green.
Illuminates yellow
The system is ready for operation.
Illuminates green
A certain speed is stored.
Cruise control 3 141.
Speed warning
à illuminates yellow.
In vehicles equipped with the
overspeed warning light, when
vehicle speed exceeds 75 mph,
control indicator à flashes,accompanied by a warning chime, to
warn the driver to reduce speed as
appropriate.
Trailer indicator á illuminates green.
Illuminates when a trailer is
connected to the vehicle 3 147.
Bonnet open
/ illuminates red.
Illuminates when the bonnet is open.
Stop-start system 3 125.
Door open ( illuminates red.
Illuminates when a door is open or not
securely latched.
Tailgate open
1 illuminates red.
Illuminates when tailgate is open or
not securely latched 3 23.
Page 94 of 223
92Instruments and controlsAnti-theft alarm system
a illuminates yellow.
Illuminates when alarm system
monitoring of the passenger
compartment and vehicle inclination
has been switched off with button
a in the roof lining.
Anti-theft alarm system 3 25.Information displays
Board-Info-Display
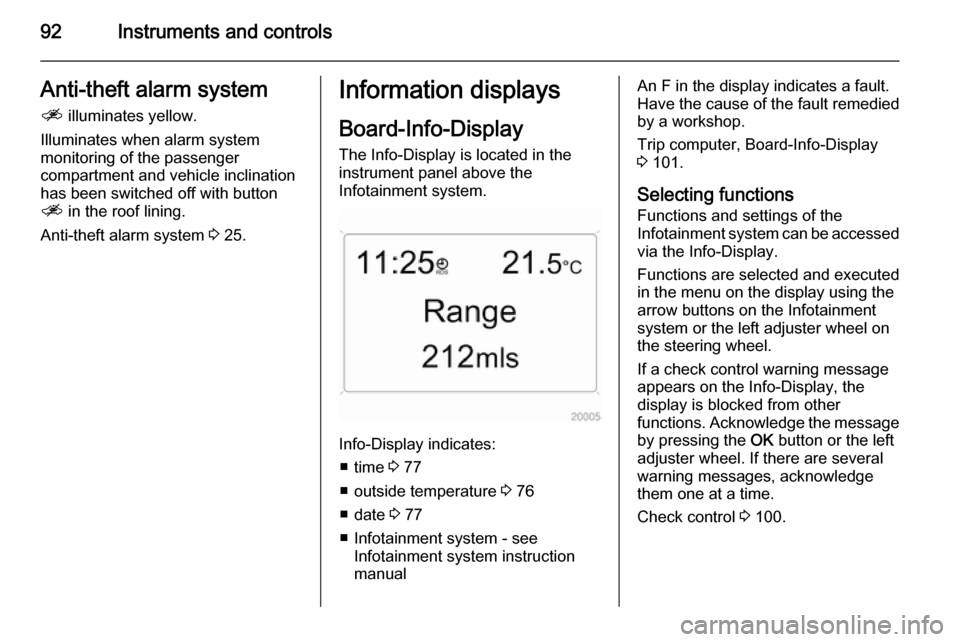
The Info-Display is located in the
instrument panel above the
Infotainment system.
Info-Display indicates:
■ time 3 77
■ outside temperature 3 76
■ date 3 77
■ Infotainment system - see Infotainment system instruction
manual
An F in the display indicates a fault.
Have the cause of the fault remedied by a workshop.
Trip computer, Board-Info-Display
3 101.
Selecting functions
Functions and settings of the
Infotainment system can be accessed via the Info-Display.
Functions are selected and executed
in the menu on the display using the
arrow buttons on the Infotainment
system or the left adjuster wheel on
the steering wheel.
If a check control warning message
appears on the Info-Display, the
display is blocked from other
functions. Acknowledge the message
by pressing the OK button or the left
adjuster wheel. If there are several
warning messages, acknowledge
them one at a time.
Check control 3 100.
Page 95 of 223
Instruments and controls93
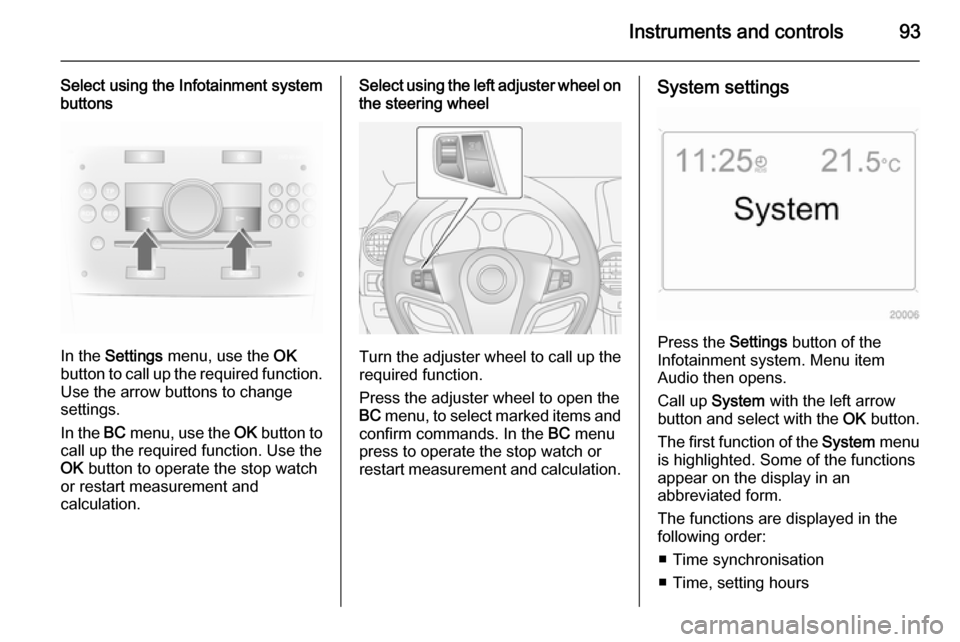
Select using the Infotainment system
buttons
In the Settings menu, use the OK
button to call up the required function.
Use the arrow buttons to change
settings.
In the BC menu, use the OK button to
call up the required function. Use the
OK button to operate the stop watch
or restart measurement and
calculation.
Select using the left adjuster wheel on the steering wheel
Turn the adjuster wheel to call up the
required function.
Press the adjuster wheel to open the
BC menu, to select marked items and
confirm commands. In the BC menu
press to operate the stop watch or
restart measurement and calculation.
System settings
Press the Settings button of the
Infotainment system. Menu item
Audio then opens.
Call up System with the left arrow
button and select with the OK button.
The first function of the System menu
is highlighted. Some of the functions
appear on the display in an
abbreviated form.
The functions are displayed in the
following order:
■ Time synchronisation
■ Time, setting hours
Page 96 of 223
94Instruments and controls
■ Time, setting minutes
■ Date, setting day
■ Date, setting month
■ Date, setting year
■ Ignition logic
■ Language selection
■ Setting units of measure
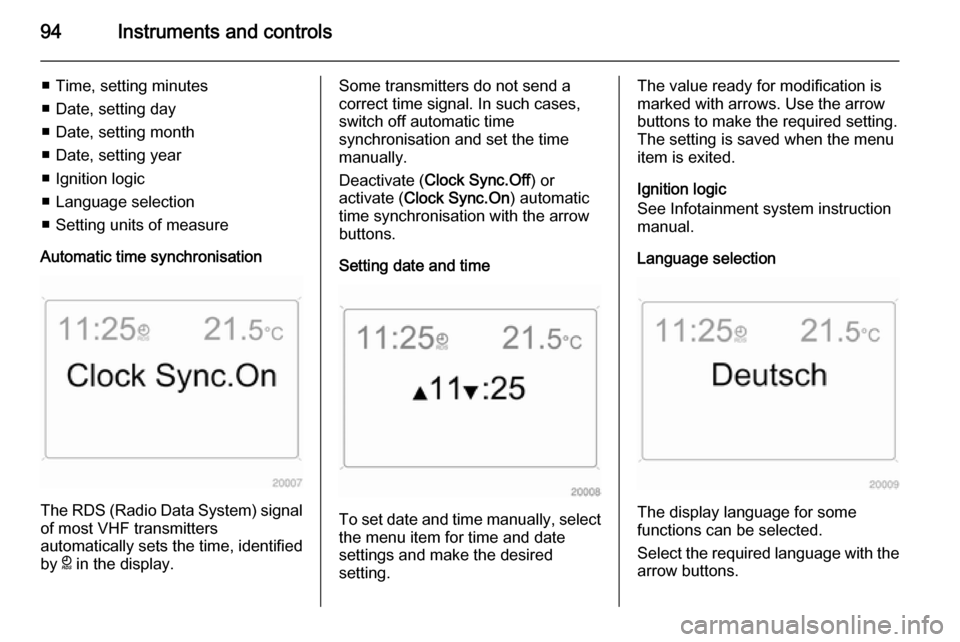
Automatic time synchronisation
The RDS (Radio Data System) signal of most VHF transmitters
automatically sets the time, identified
by } in the display.
Some transmitters do not send a
correct time signal. In such cases,
switch off automatic time
synchronisation and set the time
manually.
Deactivate ( Clock Sync.Off ) or
activate ( Clock Sync.On ) automatic
time synchronisation with the arrow
buttons.
Setting date and time
To set date and time manually, select
the menu item for time and date
settings and make the desired
setting.
The value ready for modification is
marked with arrows. Use the arrow
buttons to make the required setting.
The setting is saved when the menu item is exited.
Ignition logic
See Infotainment system instruction
manual.
Language selection
The display language for some
functions can be selected.
Select the required language with the
arrow buttons.
Page 97 of 223
Instruments and controls95
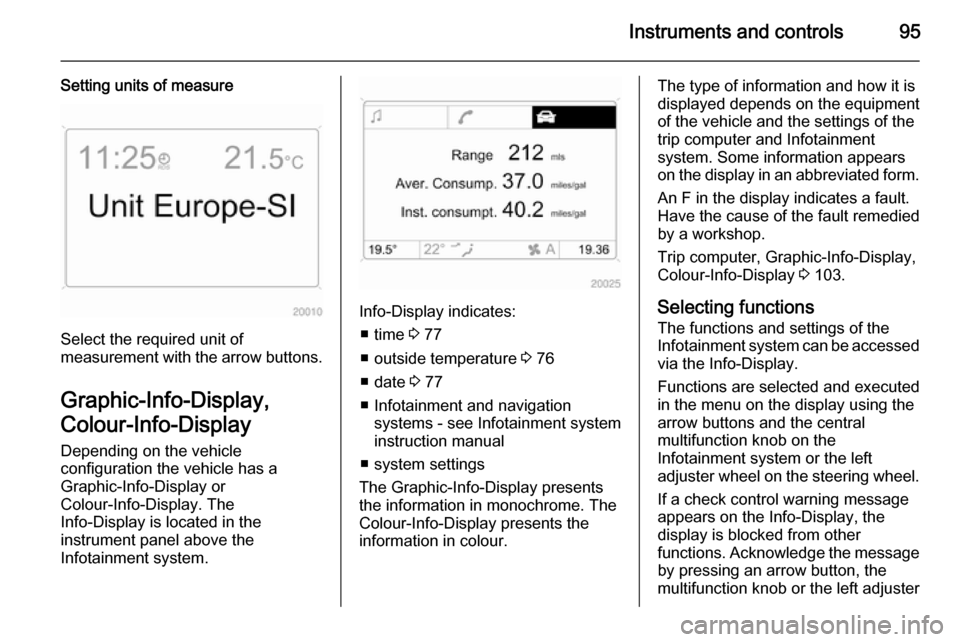
Setting units of measure
Select the required unit of
measurement with the arrow buttons.
Graphic-Info-Display,
Colour-Info-Display Depending on the vehicle
configuration the vehicle has a
Graphic-Info-Display or
Colour-Info-Display. The
Info-Display is located in the
instrument panel above the
Infotainment system.
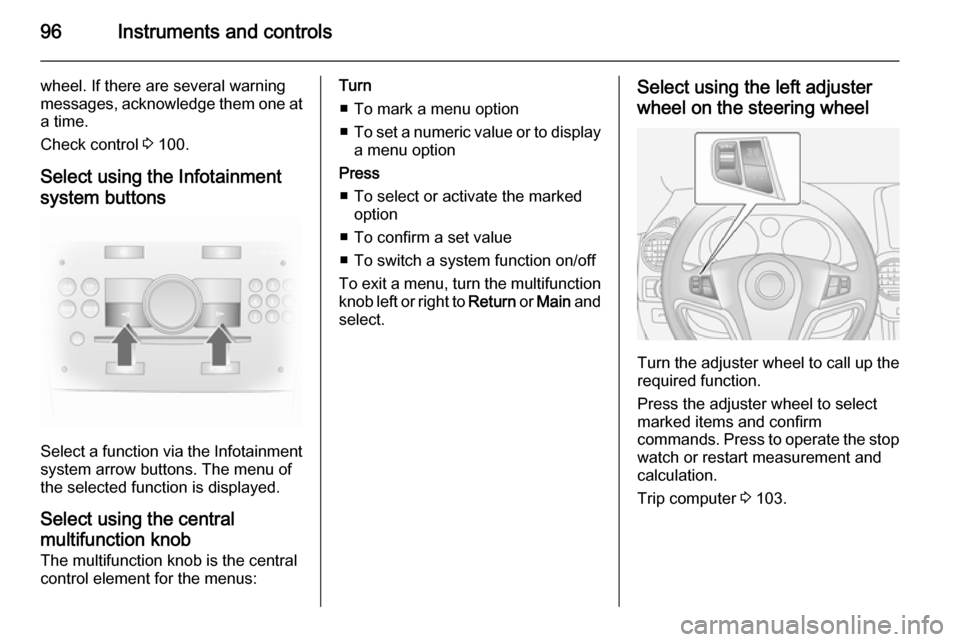
Info-Display indicates:
■ time 3 77
■ outside temperature 3 76
■ date 3 77
■ Infotainment and navigation systems - see Infotainment systeminstruction manual
■ system settings
The Graphic-Info-Display presents
the information in monochrome. The
Colour-Info-Display presents the
information in colour.
The type of information and how it is
displayed depends on the equipment
of the vehicle and the settings of the
trip computer and Infotainment
system. Some information appears
on the display in an abbreviated form.
An F in the display indicates a fault.
Have the cause of the fault remedied
by a workshop.
Trip computer, Graphic-Info-Display,
Colour-Info-Display 3 103.
Selecting functions
The functions and settings of the
Infotainment system can be accessed
via the Info-Display.
Functions are selected and executed
in the menu on the display using the
arrow buttons and the central
multifunction knob on the
Infotainment system or the left
adjuster wheel on the steering wheel.
If a check control warning message
appears on the Info-Display, the
display is blocked from other
functions. Acknowledge the message by pressing an arrow button, the
multifunction knob or the left adjuster
Page 98 of 223
96Instruments and controls
wheel. If there are several warning
messages, acknowledge them one at a time.
Check control 3 100.
Select using the Infotainment system buttons
Select a function via the Infotainment
system arrow buttons. The menu of
the selected function is displayed.
Select using the central
multifunction knob The multifunction knob is the central
control element for the menus:
Turn
■ To mark a menu option
■ To set a numeric value or to display
a menu option
Press ■ To select or activate the marked option
■ To confirm a set value
■ To switch a system function on/off
To exit a menu, turn the multifunction knob left or right to Return or Main and
select.Select using the left adjuster
wheel on the steering wheel
Turn the adjuster wheel to call up the required function.
Press the adjuster wheel to select
marked items and confirm
commands. Press to operate the stop
watch or restart measurement and
calculation.
Trip computer 3 103.
Page 99 of 223
Instruments and controls97
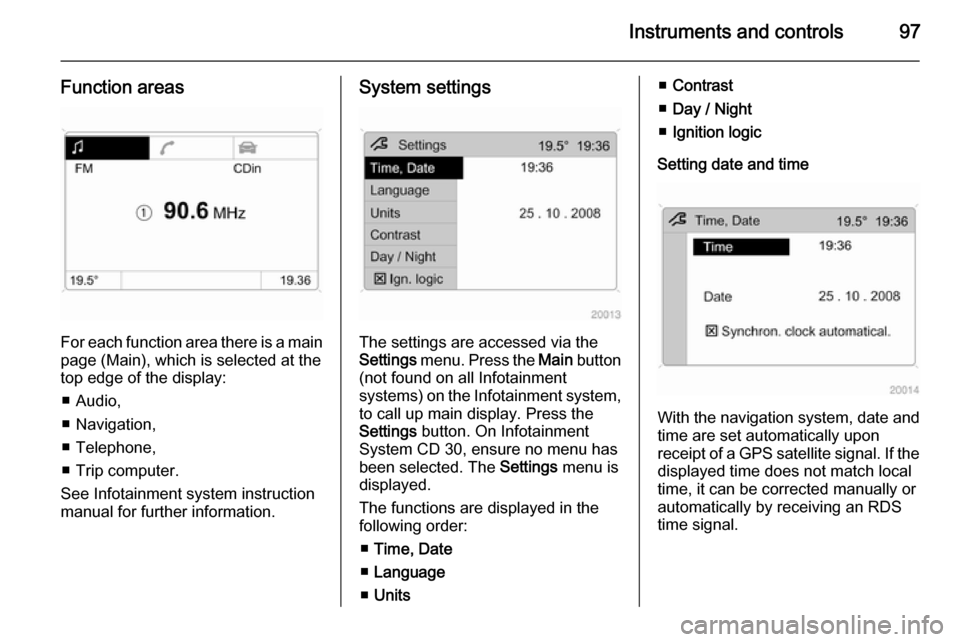
Function areas
For each function area there is a main
page (Main), which is selected at the
top edge of the display:
■ Audio,
■ Navigation,
■ Telephone,
■ Trip computer.
See Infotainment system instruction
manual for further information.
System settings
The settings are accessed via the
Settings menu. Press the Main button
(not found on all Infotainment
systems) on the Infotainment system,
to call up main display. Press the
Settings button. On Infotainment
System CD 30, ensure no menu has
been selected. The Settings menu is
displayed.
The functions are displayed in the
following order:
■ Time, Date
■ Language
■ Units
■Contrast
■ Day / Night
■ Ignition logic
Setting date and time
With the navigation system, date and
time are set automatically upon
receipt of a GPS satellite signal. If the
displayed time does not match local
time, it can be corrected manually or
automatically by receiving an RDS
time signal.
Page 100 of 223
98Instruments and controls
Some RDS transmitters do not send
a correct time signal. In such cases,
switch off automatic time
synchronisation and set the time
manually.
To set date and time manually, select
menu item Time, Date from the
Settings menu. The menu is
displayed. Select the menu items
required and make the desired
setting.
To correct time with the help of RDS,
select menu item Synchron. clock
automatical. from the Time, Date
menu. The box in front of Synchron.
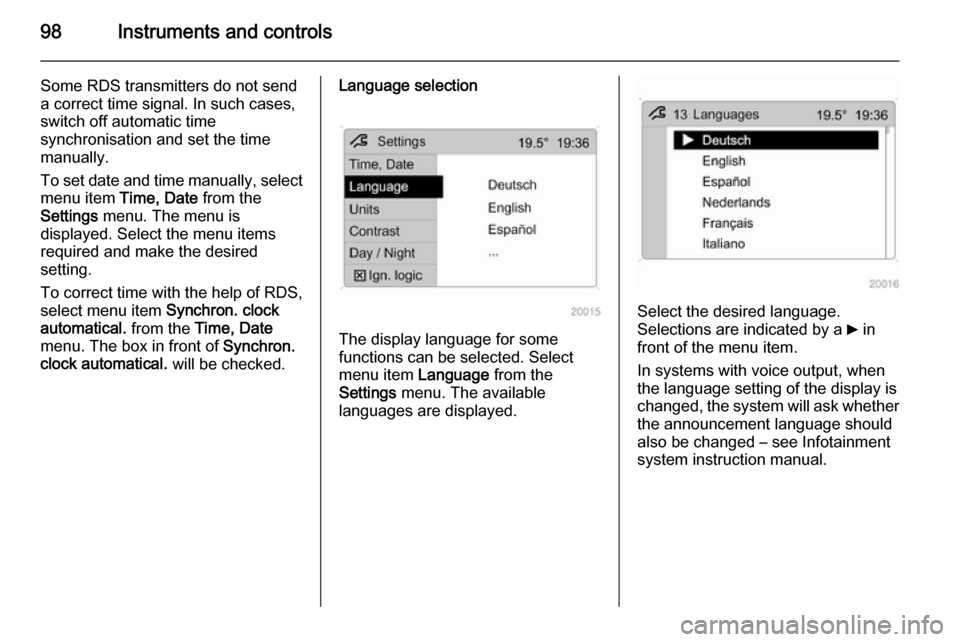
clock automatical. will be checked.Language selection
The display language for some
functions can be selected. Select
menu item Language from the
Settings menu. The available
languages are displayed.
Select the desired language.
Selections are indicated by a 6 in
front of the menu item.
In systems with voice output, when
the language setting of the display is
changed, the system will ask whether the announcement language should
also be changed – see Infotainment
system instruction manual.