audio VAUXHALL MOKKA 2014 Infotainment system
[x] Cancel search | Manufacturer: VAUXHALL, Model Year: 2014, Model line: MOKKA, Model: VAUXHALL MOKKA 2014Pages: 221, PDF Size: 4.66 MB
Page 21 of 221
Basic operation21
Adjusting the Chime VolumeWhen operating the controls in thevehicle, beeping sounds confirm your
actions. The volume of the beeping
sounds may be adjusted.
Press the CONFIG button and then
select the Vehicle Settings menu
item.
Select Comfort and Convenience and
then Chime Volume to display the
respective submenu. Select Normal
or High .
Adjusting the Navigation
Volume Press the CONFIG button and then
select the Navigation Settings menu
item.
Select the Navigation Volume menu
item. The respective submenu is
displayed.
To adjust the volume of the
announcements, select
Announcement and then adjust the
setting as desired.To adjust the volume of the audio
source possibly playing in the
background, select Background and
then adjust the setting as desired.
Select Volume Test to get an audio
example of the settings.
Notice
While an announcement is given
out, the volume may simply be
adjusted using the m knob.
System settings
Various Infotainment system settings
may be adjusted via the Config
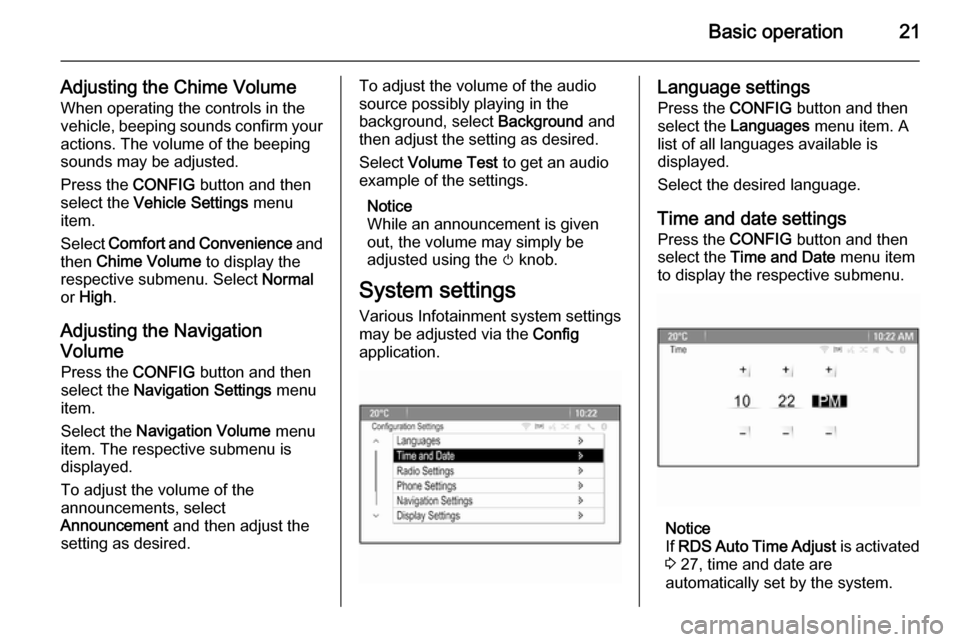
application.Language settings
Press the CONFIG button and then
select the Languages menu item. A
list of all languages available is
displayed.
Select the desired language.
Time and date settings
Press the CONFIG button and then
select the Time and Date menu item
to display the respective submenu.
Notice
If RDS Auto Time Adjust is activated
3 27, time and date are
automatically set by the system.
Page 24 of 221

24RadioRadioUsage.......................................... 24
Station search .............................. 24
Autostore lists .............................. 25
Favourite lists ............................... 26
Radio data system (RDS) ............27
Digital audio broadcasting ...........29Usage
Activating radio
Press the ; button and then select
the AM, FM or DAB icon.
The station last selected is played.
Notice
When an audio source is already
active, you may toggle between the
different audio sources by
repeatedly pressing the SRCE
button.
Station search
Automatic station search
Briefly press the t or v buttons to
play the next station in the station
memory.
Manual station search
Press and hold the t or v buttons.
Release the button when the required
frequency has almost been reached
on the frequency display.Manual station tuning
In the FM and DAB waveband, press
the multifunction knob to open the
respective menu and then select
Manual tuning . The frequency
currently active is displayed at the
bottom of the screen.
Turn the multifunction knob to reach
the desired frequency.
In the AM waveband, turn the
multifunction knob to adjust the
frequency.
Station lists In the FM and DAB waveband, turn
the multifunction knob to display the
station list.
In the AM waveband, press the
multifunction knob to display the respective waveband menu.
Select AM Station List .
A list of all receivable stations of the
relevant waveband and in the current
reception area is displayed.
Page 29 of 221

Radio29
If you wish the time and date settingsto be updated automatically, activate
the RDS Auto Time Adjust menu item.
If you wish to set time and date
manually, deactivate the RDS Auto
Time Adjust menu item.
Digital audio broadcasting Digital audio broadcasting (DAB) is
an innovative and universal
broadcast system.
General information ■ DAB stations are indicated by the programme name instead of the
broadcasting frequency.
■ With DAB, several radio programmes (services) can be
broadcasted on a single frequency
(ensemble).
■ Besides high-quality digital audio services, DAB is also able to
transmit programme-associated
data and a multitude of other data
services including travel and traffic
information.■ As long as a given DAB receiver can pick up the signal sent out by a
broadcasting station (even if the signal is very weak), sound
reproduction is ensured.
■ There is no fading (weakening of the sound) that is typical of AM or
FM reception. The DAB signal is
reproduced at a constant volume.
■ Interference caused by stations that are on nearby frequencies (aphenomenon that is typical of AM
and FM reception) does not occur
with DAB.
If the DAB signal is too weak to be
picked up by the receiver, the
system switches over to the same
programme on another DAB or FM
station.
■ If the DAB signal is reflected by natural obstacles or buildings, the
reception quality of DAB is
improved, whereas AM or FM
reception is considerably impaired
in such cases.
■ When DAB reception is enabled, the FM tuner of the Infotainment
system remains active in thebackground and continually
searches for the best receivable FM stations. If TP 3 27 is activated,
traffic announcements of the FM
station which is currently best
received are issued. Deactivate TP,
if DAB reception should not be
interrupted by FM traffic
announcements.
DAB announcements
Besides their music programmes, lots of DAB stations also broadcast
announcements of various
categories.
While being in the DAB main menu,
press the multifunction knob to open
the DAB menu and then select
Announcements .
If you activate some or all categories, the currently received DAB service is
interrupted when an announcement
of these categories is made.
Activate the desired categories.
Page 30 of 221
30CD PlayerCD PlayerGeneral information.....................30
Usage .......................................... 31General information
Important information about
audio CDs and MP3/WMA CDs The Infotainment system's CD player
can play audio CDs and MP3/WMA
CDs.Caution
Under no circumstances place
DVDs, single-CDs with a diameter
of 8 cm or shaped CDs in the audio
player.
You must not put any stickers on
CDs. These discs can get jammed
in the CD drive and ruin the drive.
An expensive replacement of the
device will then be necessary.
File formats
Audio CDs
The following CD formats can be
used: CD-ROM Mode 1 and Mode 2;
CD-ROM XA Mode 2, Form 1 and
Form 2.
MP3 CDs
The following file formats can be
used: ISO9660 Level 1, Level 2,
(Romeo, Joliet).
MP3 and WMA files written in any
format other than listed above may
not play correctly, and their file names and folder names may not be
displayed correctly.
The following restrictions apply for the
data stored on an MP3/WMA CD:
Number of tracks: max. 999.
Number of folders: max. 255.
Folder structure depth:
max. 64 levels (recommended:
max. 8 levels).
Number of playlists: max. 15.
Number of songs per playlist:
max. 255.
Applicable playlist
extensions: .m3u, .pls, .asx, .wpl.
Page 31 of 221
CD Player31UsageStarting CD playback
Push the CD with the labelled side
facing upwards into the CD slot until it is pulled in.
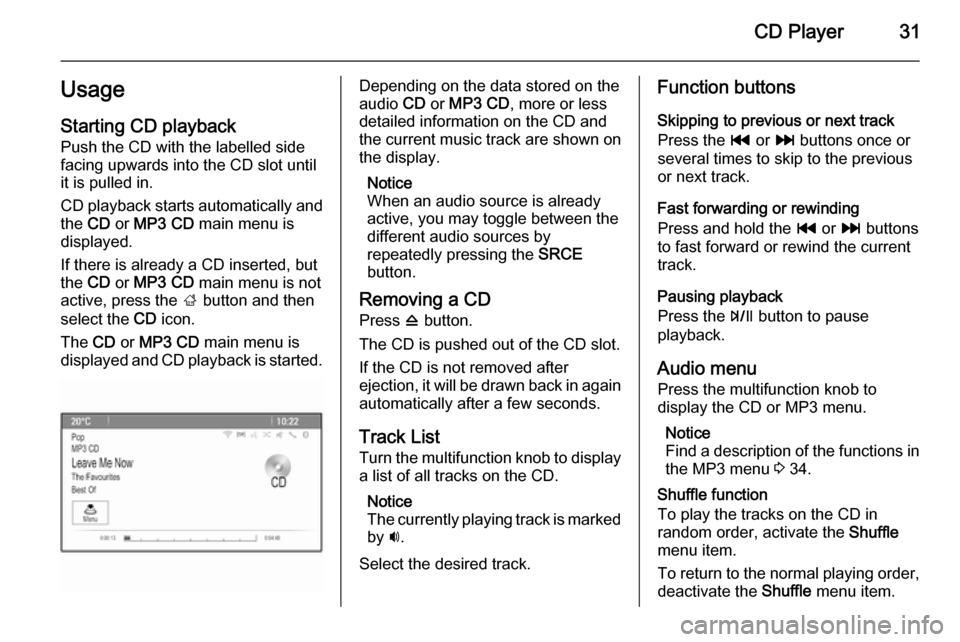
CD playback starts automatically and the CD or MP3 CD main menu is
displayed.
If there is already a CD inserted, but the CD or MP3 CD main menu is not
active, press the ; button and then
select the CD icon.
The CD or MP3 CD main menu is
displayed and CD playback is started.Depending on the data stored on the
audio CD or MP3 CD , more or less
detailed information on the CD and
the current music track are shown on
the display.
Notice
When an audio source is already
active, you may toggle between the
different audio sources by
repeatedly pressing the SRCE
button.
Removing a CD Press d button.
The CD is pushed out of the CD slot. If the CD is not removed after
ejection, it will be drawn back in again automatically after a few seconds.
Track List
Turn the multifunction knob to display a list of all tracks on the CD.
Notice
The currently playing track is marked
by i.
Select the desired track.Function buttons
Skipping to previous or next track
Press the t or v buttons once or
several times to skip to the previous
or next track.
Fast forwarding or rewinding
Press and hold the t or v buttons
to fast forward or rewind the current
track.
Pausing playback
Press the T button to pause
playback.
Audio menu
Press the multifunction knob to
display the CD or MP3 menu.
Notice
Find a description of the functions in the MP3 menu 3 34.
Shuffle function
To play the tracks on the CD in
random order, activate the Shuffle
menu item.
To return to the normal playing order,
deactivate the Shuffle menu item.
Page 32 of 221

32External devicesExternal devicesGeneral information.....................32
Playing audio ............................... 34
Displaying pictures ....................... 35
Using apps ................................... 36General information
Sockets for the connection of external
devices are located in the centre
console hidden behind a cover.
Notice
The sockets must always be kept
clean and dry.
AUX input It is possible to connect e.g. an iPod,
Smartphone or another auxiliary
device to the AUX input. The
Infotainment system can play music
files contained in auxiliary devices.
When connected to the AUX input,
the audio signal of the auxiliary device
is transmitted via the speakers of the
Infotainment system.
The volume can be adjusted via the Infotainment system. All other control functions must be operated via the
auxiliary device.
Connecting a device
To connect the auxiliary device to the
AUX input socket of the Infotainment
system, use the following cable:
3-pole for audio source.To disconnect the AUX device, select
another function and then remove the AUX device.
USB port An MP3 player, USB device, iPod or
Smartphone can be connected to the
USB port. The Infotainment system
can play music files or display
pictures contained in auxiliary
devices.
When connected to the USB port, the devices mentioned above can be
operated via the controls and menus
of the Infotainment system.
Notice
Not all MP3 player, USB drive, iPod
models or Smartphones are
supported by the Infotainment
system.
Connecting/disconnecting a device
Connect the device to the USB port.
For the iPod, use the appropriate
connection cable.
Page 33 of 221
External devices33
Notice
If a non-readable USB device or
iPod is connected, a corresponding
error message will appear and the
Infotainment system will
automatically switch to the previous
function.
To disconnect the USB device or
iPod, select another function and then remove the USB storage device.Caution
Avoid disconnecting the device
during playback. This may
damage the device or the
Infotainment system.
Bluetooth
Bluetooth enabled audio sources
(e.g. music mobile phones, MP3
players featuring Bluetooth, etc.),
which support the Bluetooth music profiles A2DP and AVRCP can be
connected wirelessly to the
Infotainment system.
The Infotainment system can play
music files contained in Bluetooth
devices, e.g. iPod or Smartphone.
Connecting a device
Find a detailed description on the Bluetooth connection 3 62.
File formats
Audio files
Only devices formatted in the FAT32,
NTFS and HFS+ file systems are supported.
Notice
Some files may not be played
properly. This might be due to a
different recording format or the
condition of the file.
Files from online shops to which
Digital Rights Management (DRM)
has been applied cannot be played.
The playable audio file formats
are .mp3, .wma, .aac, .m4a and .aif.
When playing a file with ID3 tag
information, the Infotainment system
can display information, e.g. on the track title and artist.Picture files
The displayable picture file formats
are .jpg, .jpeg, .bmp, .png and .gif.
The files must have a maximum size of 2048 pixels in widths and
2048 pixels in heights (4MP).
Gracenote The Gracenote database contains
information on media data currently available on the market.
When connecting external devices,
the tracks or files are recognised by
the Gracenote function.
If the Gracenote normalisation
function is activated, spelling
mistakes in MP3 tag data are
automatically corrected. Due to this,
media search results may be
improved.
Press the CONFIG button and then
select the Radio Settings menu item.
Select Gracenote Options to display
the respective submenu.
Activate the Gracenote normalisation
function.
Page 34 of 221
34External devicesPlaying audioStarting playbackIf not connected, connect the device
3 32.
Press the ; button and then select
the USB , AUX or Bluetooth icon.
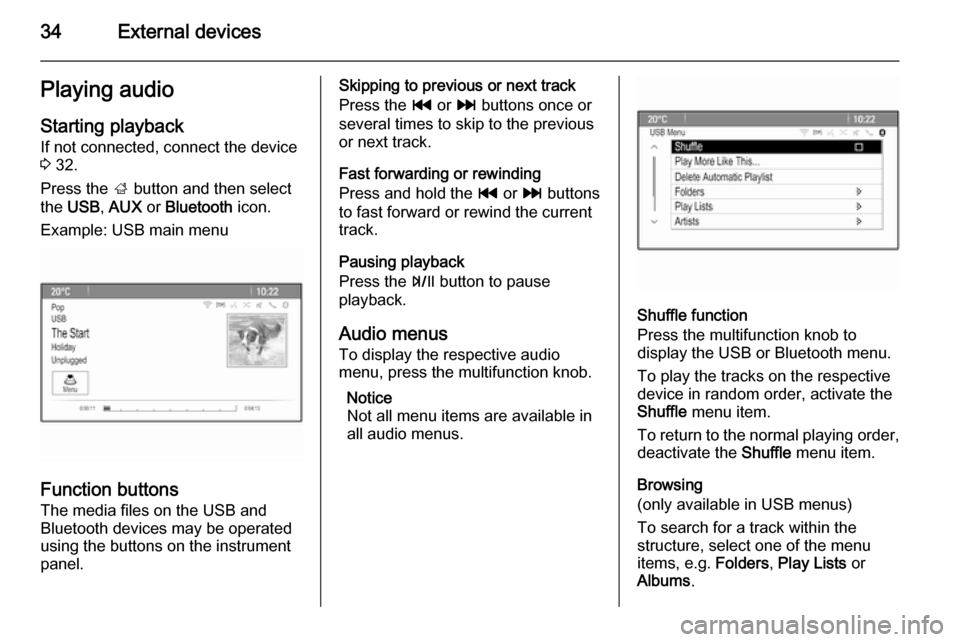
Example: USB main menu
Function buttons The media files on the USB and
Bluetooth devices may be operated
using the buttons on the instrument
panel.
Skipping to previous or next track
Press the t or v buttons once or
several times to skip to the previous
or next track.
Fast forwarding or rewinding
Press and hold the t or v buttons
to fast forward or rewind the current
track.
Pausing playback
Press the T button to pause
playback.
Audio menus To display the respective audio
menu, press the multifunction knob.
Notice
Not all menu items are available in
all audio menus.
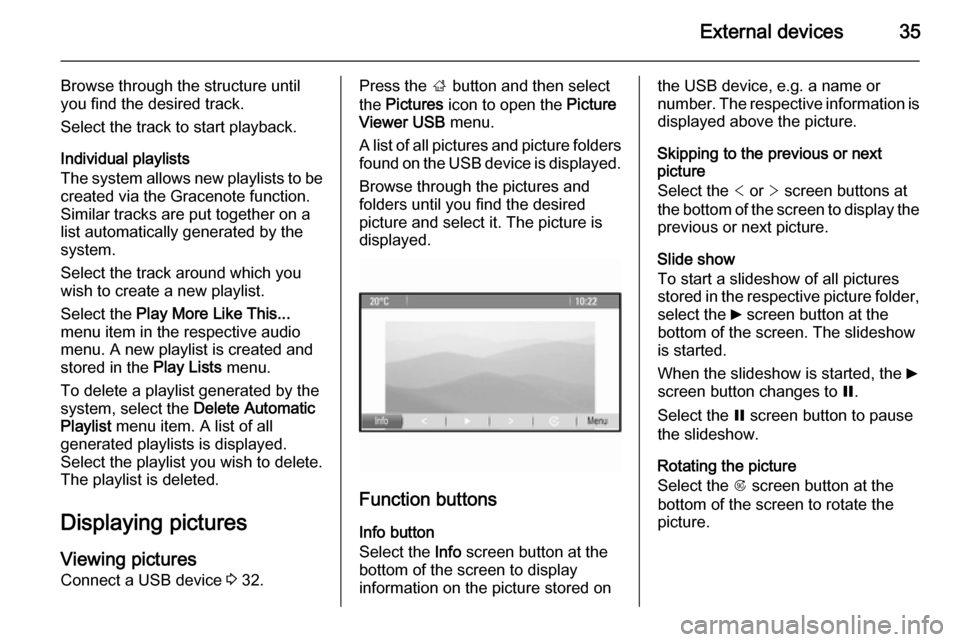
Shuffle function
Press the multifunction knob to
display the USB or Bluetooth menu.
To play the tracks on the respective
device in random order, activate the
Shuffle menu item.
To return to the normal playing order,
deactivate the Shuffle menu item.
Browsing
(only available in USB menus)
To search for a track within the
structure, select one of the menu
items, e.g. Folders, Play Lists or
Albums .
Page 35 of 221
External devices35
Browse through the structure until
you find the desired track.
Select the track to start playback.
Individual playlists
The system allows new playlists to be
created via the Gracenote function.
Similar tracks are put together on a
list automatically generated by the
system.
Select the track around which you
wish to create a new playlist.
Select the Play More Like This...
menu item in the respective audio
menu. A new playlist is created and stored in the Play Lists menu.
To delete a playlist generated by the
system, select the Delete Automatic
Playlist menu item. A list of all
generated playlists is displayed.
Select the playlist you wish to delete.
The playlist is deleted.
Displaying pictures Viewing picturesConnect a USB device 3 32.Press the ; button and then select
the Pictures icon to open the Picture
Viewer USB menu.
A list of all pictures and picture folders
found on the USB device is displayed.
Browse through the pictures and
folders until you find the desired
picture and select it. The picture is
displayed.
Function buttons
Info button
Select the Info screen button at the
bottom of the screen to display
information on the picture stored on
the USB device, e.g. a name or
number. The respective information is
displayed above the picture.
Skipping to the previous or next
picture
Select the < or > screen buttons at
the bottom of the screen to display the previous or next picture.
Slide show
To start a slideshow of all pictures
stored in the respective picture folder,
select the 6 screen button at the
bottom of the screen. The slideshow
is started.
When the slideshow is started, the 6
screen button changes to Q.
Select the Q screen button to pause
the slideshow.
Rotating the picture
Select the R screen button at the
bottom of the screen to rotate the
picture.
Page 39 of 221
Navigation39
Route guidance is provided by voice
commands and a direction arrow, as
well as with the aid of a multi-colour
map display.
Usage
Information on the map display
To display the map around the current location, you may optionally:
■ Press the NAV button.
■ Press the ; button and then select
the Navigation icon.
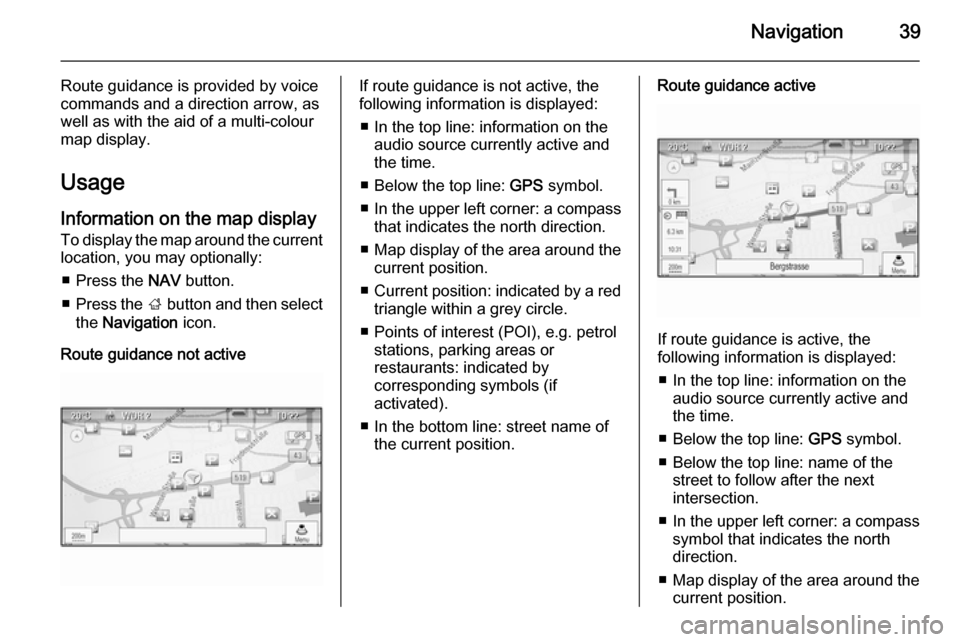
Route guidance not activeIf route guidance is not active, the
following information is displayed:
■ In the top line: information on the audio source currently active and
the time.
■ Below the top line: GPS symbol.
■ In the upper left corner: a compass
that indicates the north direction.
■ Map display of the area around the
current position.
■ Current position: indicated by a red
triangle within a grey circle.
■ Points of interest (POI), e.g. petrol stations, parking areas or
restaurants: indicated by
corresponding symbols (if
activated).
■ In the bottom line: street name of the current position.Route guidance active
If route guidance is active, the
following information is displayed:
■ In the top line: information on the audio source currently active and
the time.
■ Below the top line: GPS symbol.
■ Below the top line: name of the street to follow after the next
intersection.
■ In the upper left corner: a compass
symbol that indicates the north
direction.
■ Map display of the area around the
current position.