VAUXHALL MOVANO_B 2014 Owner's Manual
MOVANO_B 2014
VAUXHALL
VAUXHALL
https://www.carmanualsonline.info/img/38/19551/w960_19551-0.png
VAUXHALL MOVANO_B 2014 Owner's Manual
Trending: set clock, height, coolant capacity, ECO mode, service interval, manual transmission, jump start terminals
Page 141 of 201
Vehicle care139Diesel fuel system
bleeding
If the fuel tank has been run dry, it will be necessary to air vent or bleed the
diesel fuel system.
Fill the tank with fuel and proceed as
follows:
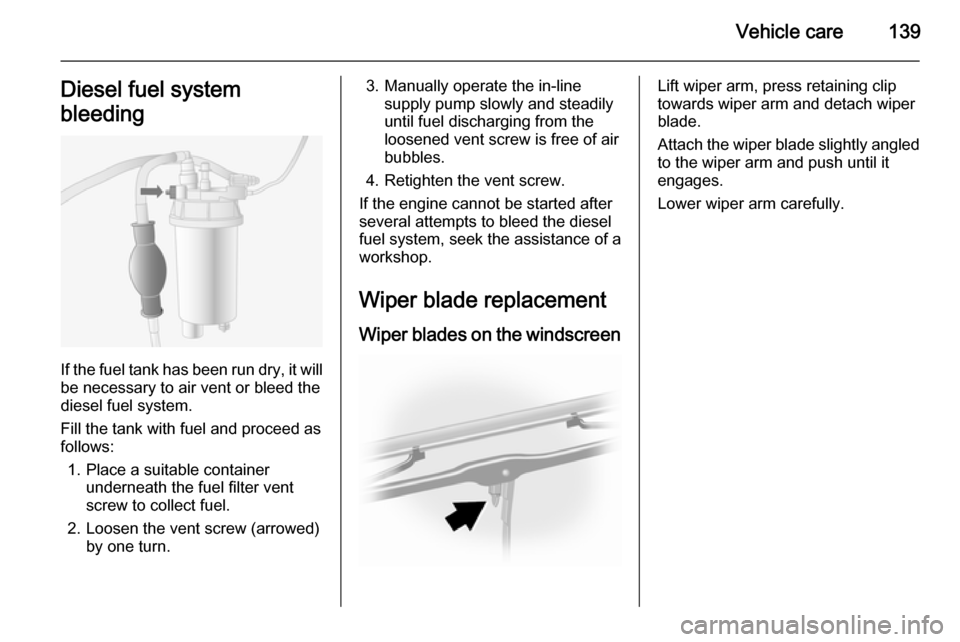
1. Place a suitable container underneath the fuel filter vent
screw to collect fuel.
2. Loosen the vent screw (arrowed) by one turn.
3. Manually operate the in-line supply pump slowly and steadily
until fuel discharging from the
loosened vent screw is free of air
bubbles.
4. Retighten the vent screw.
If the engine cannot be started after
several attempts to bleed the diesel
fuel system, seek the assistance of a
workshop.
Wiper blade replacement Wiper blades on the windscreenLift wiper arm, press retaining clip
towards wiper arm and detach wiper
blade.
Attach the wiper blade slightly angled
to the wiper arm and push until it
engages.
Lower wiper arm carefully.
Page 142 of 201
140Vehicle careBulb replacement
Switch off the ignition and turn off the relevant switch or close the doors.
Only hold a new bulb at the base. Do
not touch the bulb glass with bare
hands.
Use only the same bulb type for
replacement.
Bulb checkAfter a bulb replacement, switch on
the ignition, operate and check the
lights.Headlights
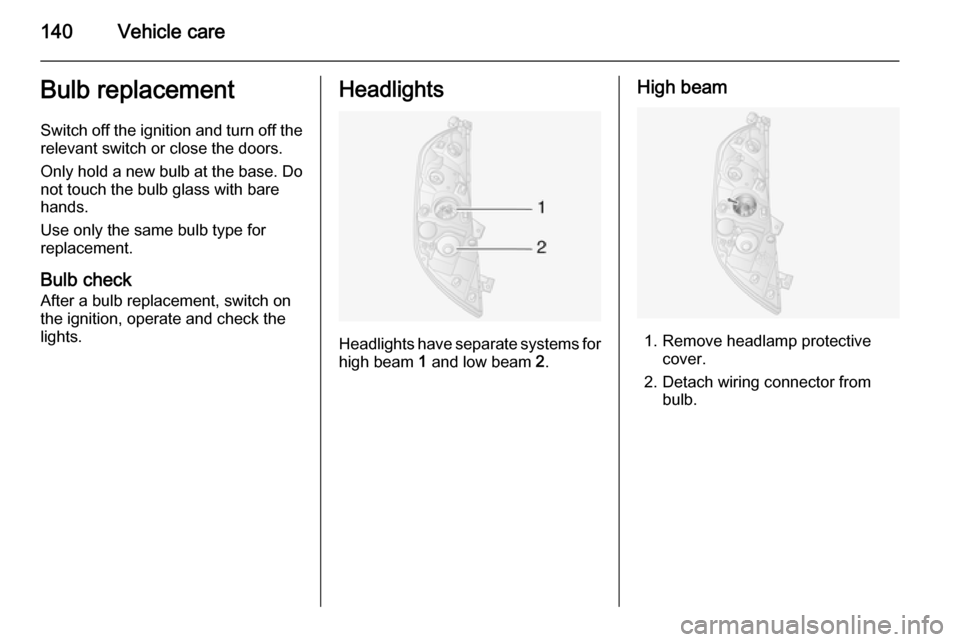
Headlights have separate systems for high beam 1 and low beam 2.
High beam
1. Remove headlamp protective
cover.
2. Detach wiring connector from bulb.
Page 143 of 201
Vehicle care141
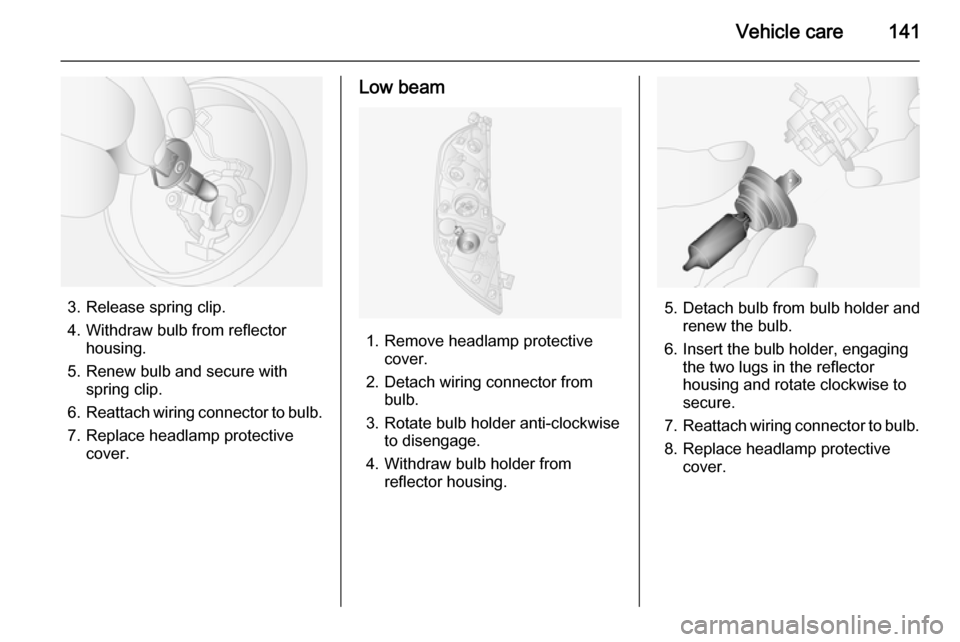
3. Release spring clip.
4. Withdraw bulb from reflector housing.
5. Renew bulb and secure with spring clip.
6. Reattach wiring connector to bulb.
7. Replace headlamp protective cover.
Low beam
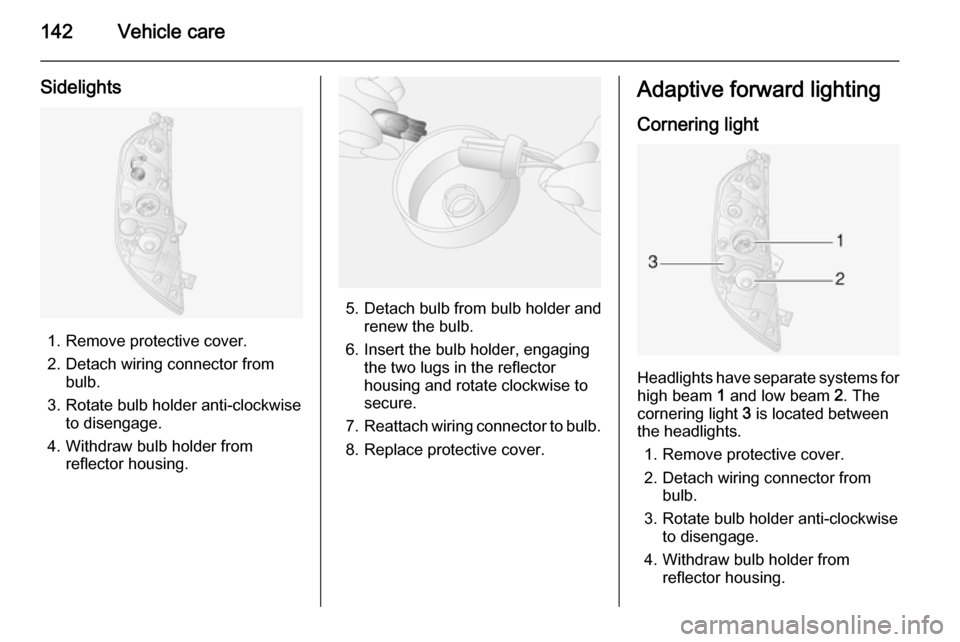
1. Remove headlamp protective cover.
2. Detach wiring connector from bulb.
3. Rotate bulb holder anti-clockwise to disengage.
4. Withdraw bulb holder from reflector housing.
5. Detach bulb from bulb holder andrenew the bulb.
6. Insert the bulb holder, engaging the two lugs in the reflectorhousing and rotate clockwise to
secure.
7. Reattach wiring connector to bulb.
8. Replace headlamp protective cover.
Page 144 of 201
142Vehicle care
Sidelights
1. Remove protective cover.
2. Detach wiring connector from bulb.
3. Rotate bulb holder anti-clockwise to disengage.
4. Withdraw bulb holder from reflector housing.
5. Detach bulb from bulb holder andrenew the bulb.
6. Insert the bulb holder, engaging the two lugs in the reflectorhousing and rotate clockwise to
secure.
7. Reattach wiring connector to bulb.
8. Replace protective cover.
Adaptive forward lighting
Cornering light
Headlights have separate systems forhigh beam 1 and low beam 2. The
cornering light 3 is located between
the headlights.
1. Remove protective cover.
2. Detach wiring connector from bulb.
3. Rotate bulb holder anti-clockwise to disengage.
4. Withdraw bulb holder from reflector housing.
Page 145 of 201
Vehicle care143
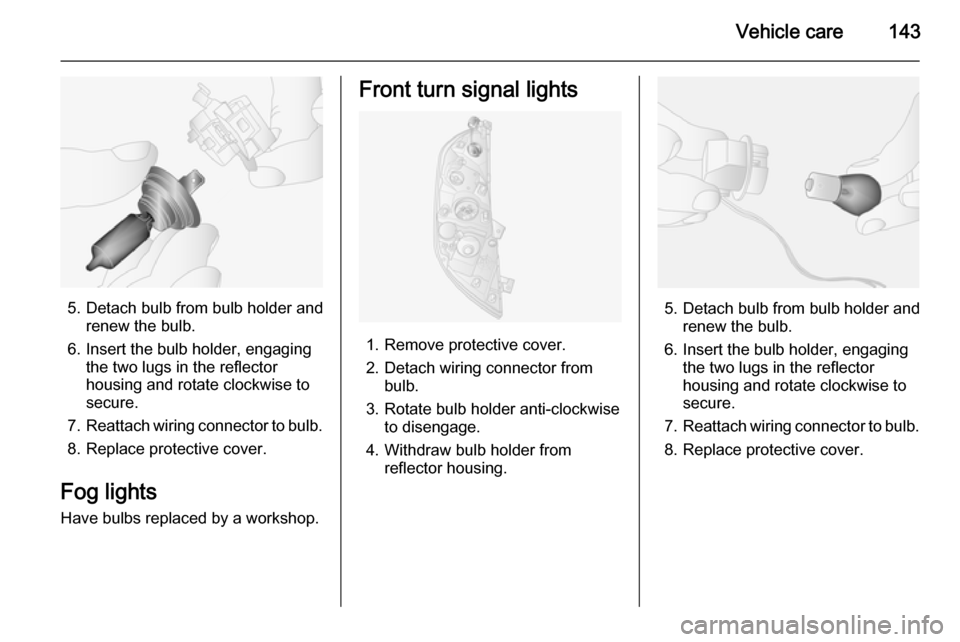
5. Detach bulb from bulb holder andrenew the bulb.
6. Insert the bulb holder, engaging the two lugs in the reflectorhousing and rotate clockwise to
secure.
7. Reattach wiring connector to bulb.
8. Replace protective cover.
Fog lights Have bulbs replaced by a workshop.
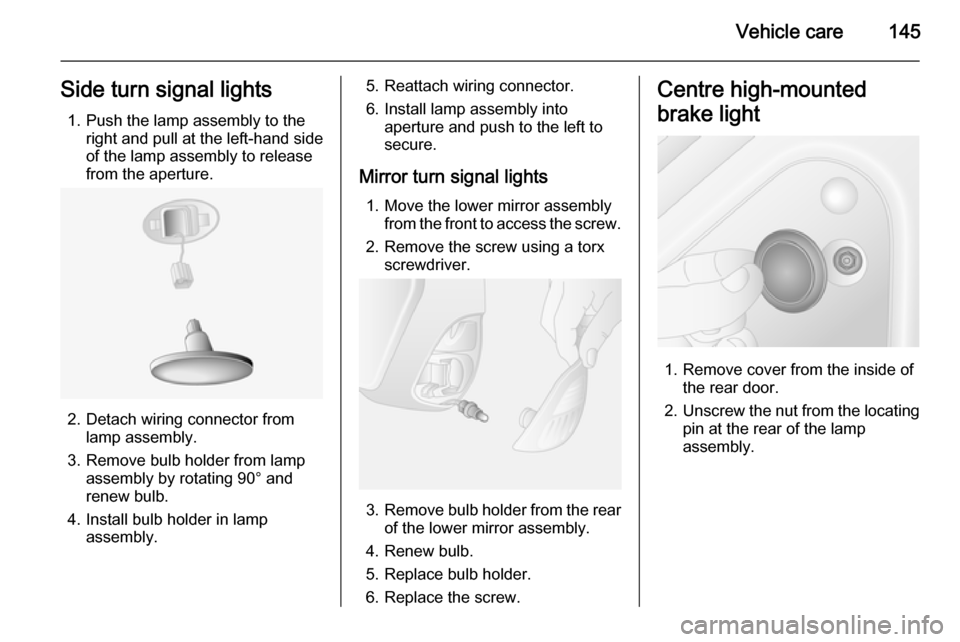
Front turn signal lights
1. Remove protective cover.
2. Detach wiring connector from bulb.
3. Rotate bulb holder anti-clockwise to disengage.
4. Withdraw bulb holder from reflector housing.
5. Detach bulb from bulb holder andrenew the bulb.
6. Insert the bulb holder, engaging the two lugs in the reflectorhousing and rotate clockwise to
secure.
7. Reattach wiring connector to bulb.
8. Replace protective cover.
Page 146 of 201
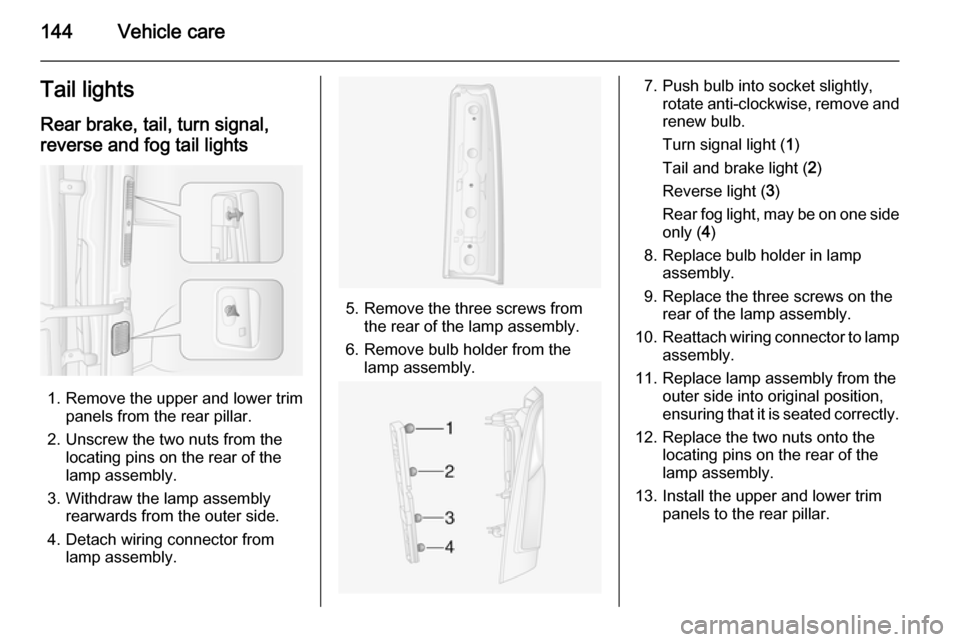
144Vehicle careTail lightsRear brake, tail, turn signal,reverse and fog tail lights
1. Remove the upper and lower trim panels from the rear pillar.
2. Unscrew the two nuts from the locating pins on the rear of the
lamp assembly.
3. Withdraw the lamp assembly rearwards from the outer side.
4. Detach wiring connector from lamp assembly.
5. Remove the three screws from the rear of the lamp assembly.
6. Remove bulb holder from the lamp assembly.
7. Push bulb into socket slightly, rotate anti-clockwise, remove and
renew bulb.
Turn signal light ( 1)
Tail and brake light ( 2)
Reverse light ( 3)
Rear fog light, may be on one side only ( 4)
8. Replace bulb holder in lamp assembly.
9. Replace the three screws on the rear of the lamp assembly.
10. Reattach wiring connector to lamp
assembly.
11. Replace lamp assembly from the outer side into original position,
ensuring that it is seated correctly.
12. Replace the two nuts onto the locating pins on the rear of the
lamp assembly.
13. Install the upper and lower trim panels to the rear pillar.
Page 147 of 201
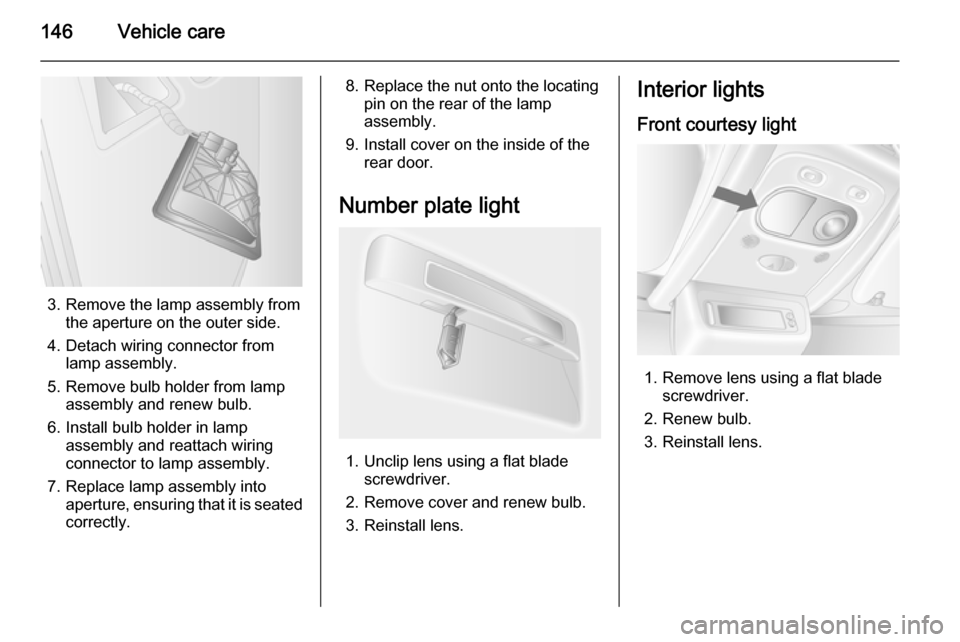
Vehicle care145Side turn signal lights1. Push the lamp assembly to the right and pull at the left-hand sideof the lamp assembly to release
from the aperture.
2. Detach wiring connector from lamp assembly.
3. Remove bulb holder from lamp assembly by rotating 90° and
renew bulb.
4. Install bulb holder in lamp assembly.
5. Reattach wiring connector.
6. Install lamp assembly into aperture and push to the left to
secure.
Mirror turn signal lights 1. Move the lower mirror assembly from the front to access the screw.
2. Remove the screw using a torx screwdriver.
3. Remove bulb holder from the rear
of the lower mirror assembly.
4. Renew bulb.
5. Replace bulb holder.
6. Replace the screw.
Centre high-mounted
brake light
1. Remove cover from the inside of the rear door.
2. Unscrew the nut from the locating
pin at the rear of the lamp
assembly.
Page 148 of 201
146Vehicle care
3. Remove the lamp assembly fromthe aperture on the outer side.
4. Detach wiring connector from lamp assembly.
5. Remove bulb holder from lamp assembly and renew bulb.
6. Install bulb holder in lamp assembly and reattach wiring
connector to lamp assembly.
7. Replace lamp assembly into aperture, ensuring that it is seated
correctly.
8. Replace the nut onto the locating pin on the rear of the lamp
assembly.
9. Install cover on the inside of the rear door.
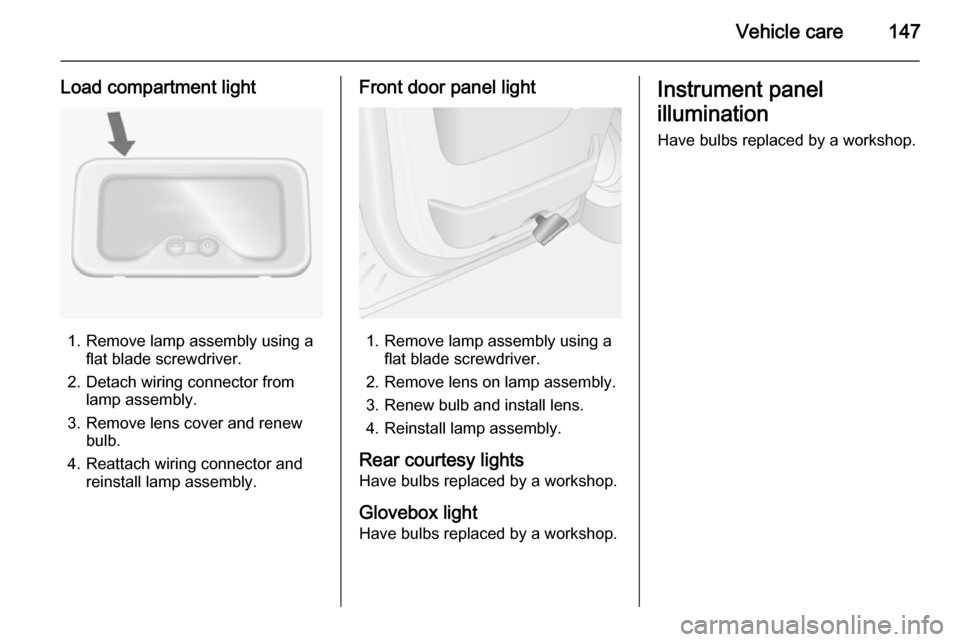
Number plate light
1. Unclip lens using a flat blade screwdriver.
2. Remove cover and renew bulb.
3. Reinstall lens.
Interior lights
Front courtesy light
1. Remove lens using a flat blade screwdriver.
2. Renew bulb.
3. Reinstall lens.
Page 149 of 201
Vehicle care147
Load compartment light
1. Remove lamp assembly using aflat blade screwdriver.
2. Detach wiring connector from lamp assembly.
3. Remove lens cover and renew bulb.
4. Reattach wiring connector and reinstall lamp assembly.
Front door panel light
1. Remove lamp assembly using aflat blade screwdriver.
2. Remove lens on lamp assembly.
3. Renew bulb and install lens. 4. Reinstall lamp assembly.
Rear courtesy lights
Have bulbs replaced by a workshop.
Glovebox light
Have bulbs replaced by a workshop.
Instrument panel
illumination Have bulbs replaced by a workshop.
Page 150 of 201
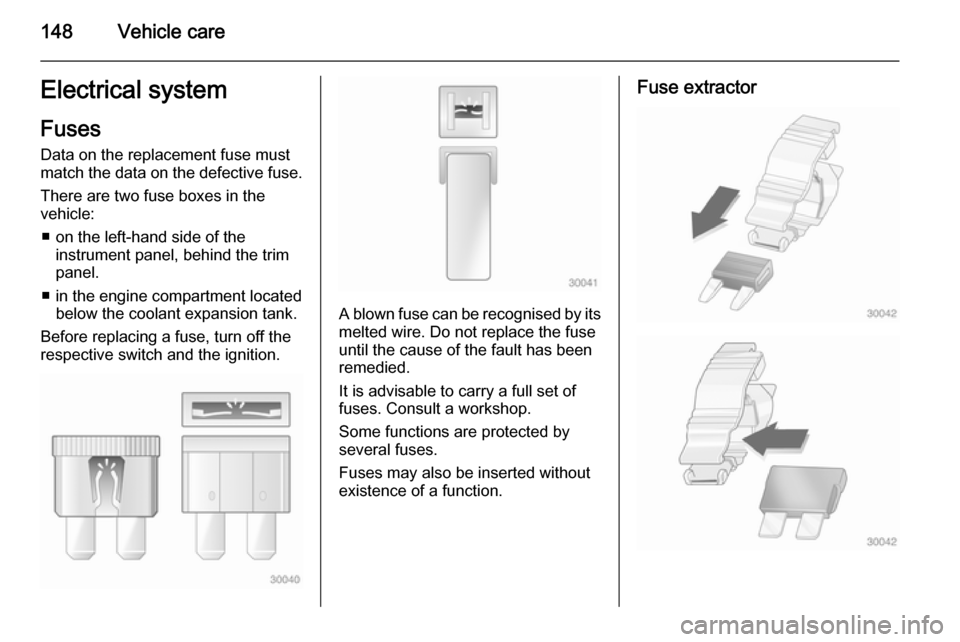
148Vehicle careElectrical systemFuses
Data on the replacement fuse must
match the data on the defective fuse.
There are two fuse boxes in the
vehicle:
■ on the left-hand side of the instrument panel, behind the trim
panel.
■ in the engine compartment located below the coolant expansion tank.
Before replacing a fuse, turn off the
respective switch and the ignition.
A blown fuse can be recognised by its melted wire. Do not replace the fuse
until the cause of the fault has been
remedied.
It is advisable to carry a full set of
fuses. Consult a workshop.
Some functions are protected by
several fuses.
Fuses may also be inserted without
existence of a function.
Fuse extractor
Trending: winter tyres, ECU, gearbox, bonnet, fuses, check transmission fluid, automatic transmission fluid
