VAUXHALL MOVANO_B 2018.5 Manual Online
Manufacturer: VAUXHALL, Model Year: 2018.5, Model line: MOVANO_B, Model: VAUXHALL MOVANO_B 2018.5Pages: 269, PDF Size: 6.41 MB
Page 81 of 269
Storage79
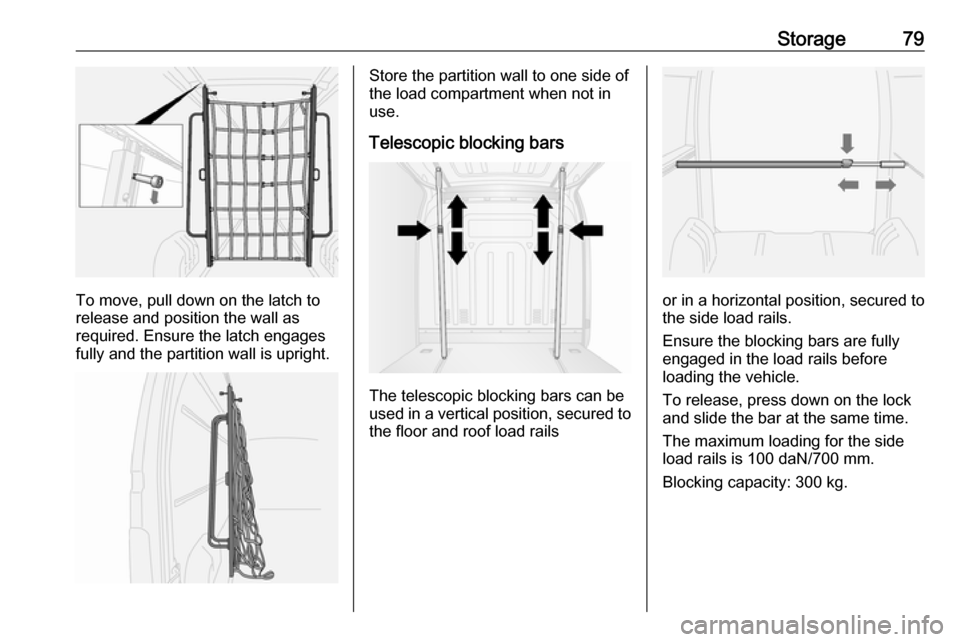
To move, pull down on the latch to
release and position the wall as
required. Ensure the latch engages fully and the partition wall is upright.
Store the partition wall to one side of
the load compartment when not in
use.
Telescopic blocking bars
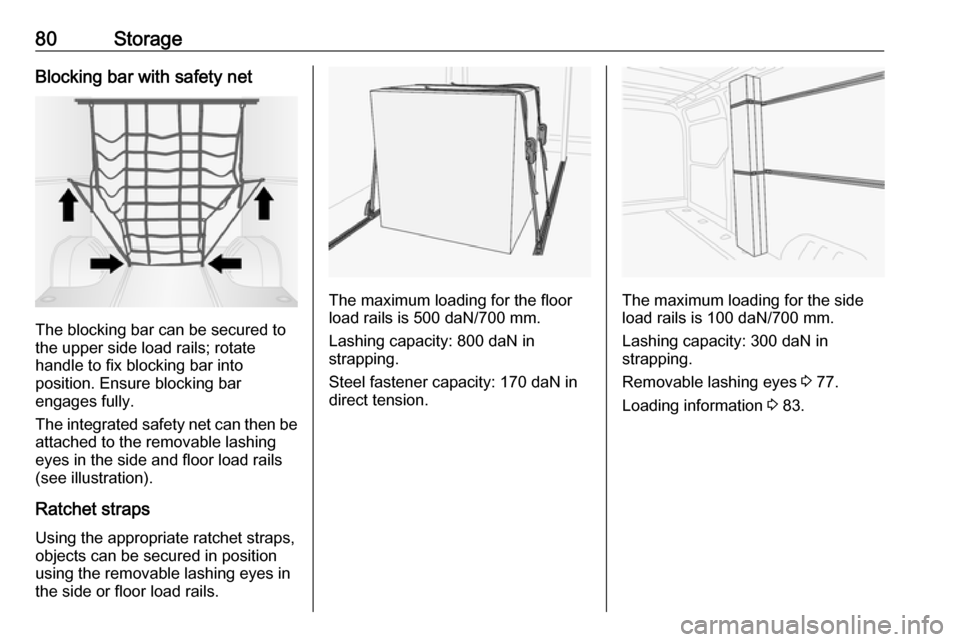
The telescopic blocking bars can be
used in a vertical position, secured to the floor and roof load rails
or in a horizontal position, secured to
the side load rails.
Ensure the blocking bars are fully
engaged in the load rails before
loading the vehicle.
To release, press down on the lock
and slide the bar at the same time.
The maximum loading for the side
load rails is 100 daN/700 mm.
Blocking capacity: 300 kg.
Page 82 of 269
80StorageBlocking bar with safety net
The blocking bar can be secured to
the upper side load rails; rotate
handle to fix blocking bar into
position. Ensure blocking bar
engages fully.
The integrated safety net can then be attached to the removable lashing
eyes in the side and floor load rails
(see illustration).
Ratchet straps Using the appropriate ratchet straps,
objects can be secured in position
using the removable lashing eyes in
the side or floor load rails.
The maximum loading for the floor
load rails is 500 daN/700 mm.
Lashing capacity: 800 daN instrapping.
Steel fastener capacity: 170 daN in
direct tension.The maximum loading for the side
load rails is 100 daN/700 mm.
Lashing capacity: 300 daN in strapping.
Removable lashing eyes 3 77.
Loading information 3 83.
Page 83 of 269
Storage81Safety net
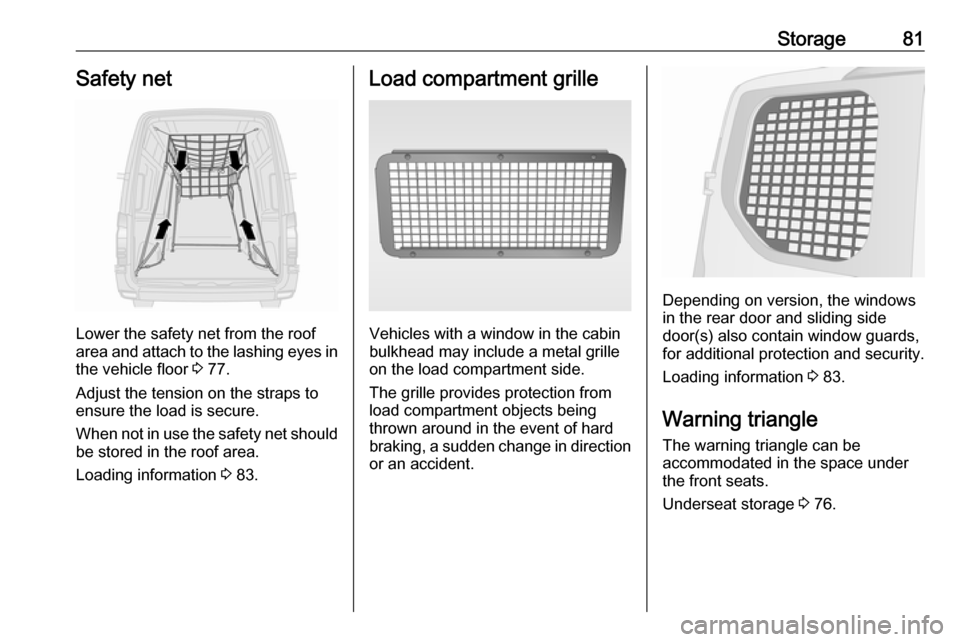
Lower the safety net from the roof
area and attach to the lashing eyes in the vehicle floor 3 77.
Adjust the tension on the straps to
ensure the load is secure.
When not in use the safety net should be stored in the roof area.
Loading information 3 83.
Load compartment grille
Vehicles with a window in the cabin
bulkhead may include a metal grille
on the load compartment side.
The grille provides protection from
load compartment objects being
thrown around in the event of hard
braking, a sudden change in direction or an accident.
Depending on version, the windows
in the rear door and sliding side
door(s) also contain window guards,
for additional protection and security.
Loading information 3 83.
Warning triangle The warning triangle can be
accommodated in the space under
the front seats.
Underseat storage 3 76.
Page 84 of 269
82StorageFirst aid kit
As a visible indication of the presence
of a first aid kit, a label may be located on the overhead console 3 76.
The first aid kit can be accommodated
in the space under the front seats.
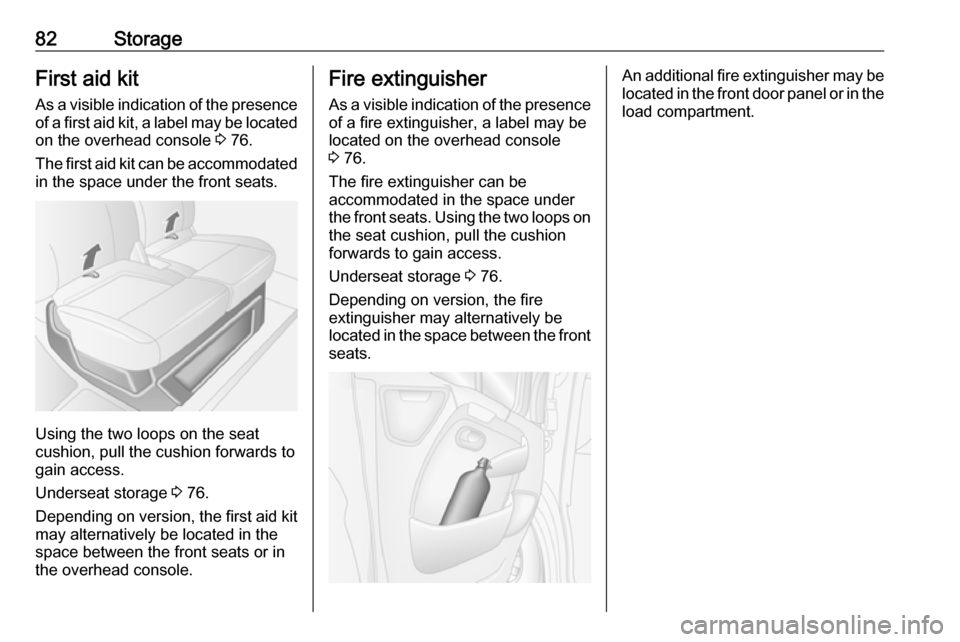
Using the two loops on the seat
cushion, pull the cushion forwards to
gain access.
Underseat storage 3 76.
Depending on version, the first aid kit may alternatively be located in the
space between the front seats or in
the overhead console.
Fire extinguisher
As a visible indication of the presence
of a fire extinguisher, a label may be
located on the overhead console
3 76.
The fire extinguisher can be
accommodated in the space under
the front seats. Using the two loops on the seat cushion, pull the cushion
forwards to gain access.
Underseat storage 3 76.
Depending on version, the fire
extinguisher may alternatively be
located in the space between the front
seats.An additional fire extinguisher may be
located in the front door panel or in the load compartment.
Page 85 of 269

Storage83Roof rack system
Roof rack For safety reasons and to avoiddamage to the roof, the vehicle
approved roof rack system is
recommended.
Follow the installation instructions
and remove the roof rack when not in
use.Loading information
● Heavy objects in the load compartment should be evenlydistributed and placed as far
forward as possible. If objects
can be stacked, the heavier
objects should be placed at the
bottom.
● Secure objects with lashing straps attached to lashing eyes
3 77.
● Secure objects into position or prevent loads from sliding
excessively by attaching optional cargo management features to
the load rails using removable
lashing eyes.
Cargo management system
3 78.
● Secure loose objects in load compartment to prevent them
from sliding.
● The load must not obstruct the operation of the pedals, parking
brake and gear selector lever, orhinder the freedom of movement of the driver. Do not place any
unsecured objects in the interior.
● Do not drive with an open load compartment. In addition, the
number plate is only
distinguishable and illuminated correctly if the doors are closed.9 Warning
Always make sure that the load in
the vehicle is securely stowed.
Otherwise objects can be thrown
around inside the vehicle and
cause personal injury or damage
to the load or vehicle.
● The payload is the difference between the permitted gross
vehicle weight (see identification
plate 3 228) and the EC kerb
weight.
To calculate the payload, enter
the data for your vehicle in the
Weights table at the front of this
manual.
The EC kerb weight includes
weights for the driver (68 kg),
Page 86 of 269

84Storageluggage (7 kg) and all fluids (fuel
tank 90% full).
Optional equipment and
accessories increase the kerb
weight.
● Driving with a roof load increases
the sensitivity of the vehicle to
cross-winds and has a
detrimental effect on vehicle
handling due to the vehicle's
higher centre of gravity.
Distribute the load evenly and secure it properly with retaining
straps. Adjust the tyre pressure
and vehicle speed according to
the load conditions. Check and
retighten the straps frequently.
Do not drive faster than 75 mph.
● The permissible roof load (which includes the weight of the roof
rack) is 200 kg for standard roof
variants. The roof load is the combined weight of the roof rack
and the load.
Page 87 of 269

Instruments and controls85Instruments and
controlsControls ....................................... 86
Steering wheel adjustment ........86
Steering wheel controls .............86
Horn ........................................... 86
Steering column controls ...........86
Windscreen wiper and washer ..87
Outside temperature ..................88
Clock ......................................... 89
Power outlets ............................. 89
Cigarette lighter ......................... 91
Ashtrays .................................... 91
Warning lights, gauges and indi‐ cators ........................................... 91
Instrument cluster ......................91
Speedometer ............................. 91
Odometer .................................. 92
Trip odometer ............................ 92
Tachometer ............................... 92
Fuel gauge ................................ 93
AdBlue gauge ............................ 93
Engine coolant temperature gauge ....................................... 93
Engine oil level monitor .............94
Service display .......................... 94Transmission display .................95
Control indicators ......................95
Turn lights .................................. 98
Seat belt reminder .....................98
Airbag and belt tensioners .........98
Airbag deactivation ....................98
Charging system .......................99
Malfunction indicator light ..........99
Service vehicle soon .................99
Stop engine ............................. 100
Brake system ........................... 100
Antilock brake system (ABS) ...100
Upshift ..................................... 100
Lane departure warning ..........101
Electronic Stability Program ....101
Electronic Stability Program off ........................................... 101
Engine coolant temperature ....101
Preheating ............................... 101
AdBlue ..................................... 101
Tyre pressure monitoring system .................................... 102
Engine oil pressure ..................102
Low fuel ................................... 102
Drain fuel filter ......................... 103
Stop-start system ....................103
Exterior light ............................ 103
Low beam ................................ 103
High beam ............................... 103
High beam assist .....................103Fog light................................... 103
Rear fog light ........................... 103
Cruise control .......................... 103
Active emergency braking .......103
Speed limiter ........................... 104
Tachograph ............................. 104
Door open ................................ 104
Displays ..................................... 104
Driver Information Centre ........104
Info Display .............................. 105
Vehicle messages ......................105
Warning chimes .......................106
Trip computer ............................. 107
Tachograph ................................ 109
Page 88 of 269
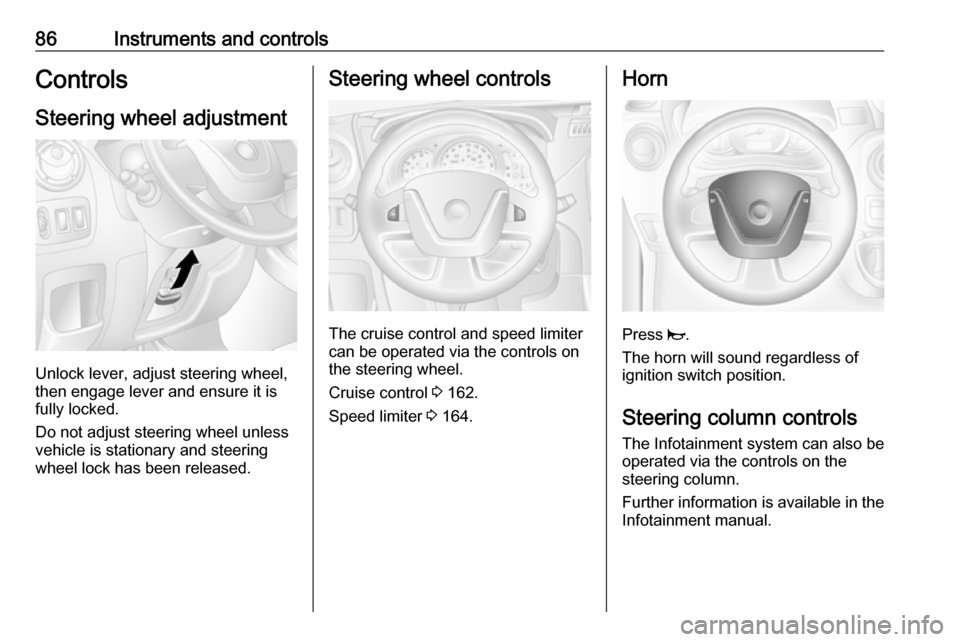
86Instruments and controlsControlsSteering wheel adjustment
Unlock lever, adjust steering wheel,
then engage lever and ensure it is fully locked.
Do not adjust steering wheel unless
vehicle is stationary and steering
wheel lock has been released.
Steering wheel controls
The cruise control and speed limiter
can be operated via the controls on
the steering wheel.
Cruise control 3 162.
Speed limiter 3 164.
Horn
Press j.
The horn will sound regardless of
ignition switch position.
Steering column controls The Infotainment system can also be
operated via the controls on the
steering column.
Further information is available in the
Infotainment manual.
Page 89 of 269
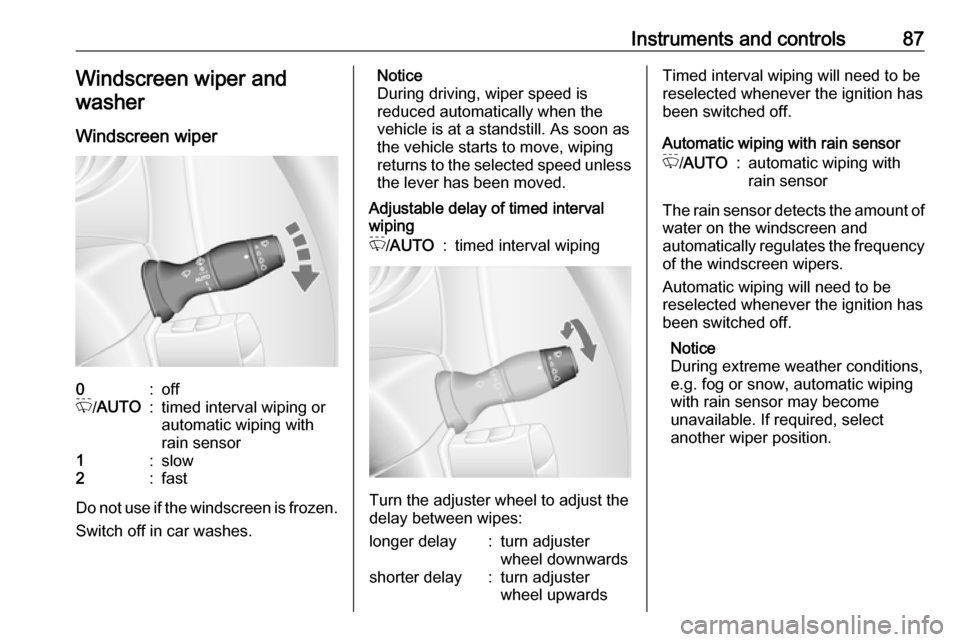
Instruments and controls87Windscreen wiper and
washer
Windscreen wiper0:offP /AUTO:timed interval wiping or
automatic wiping with
rain sensor1:slow2:fast
Do not use if the windscreen is frozen.
Switch off in car washes.
Notice
During driving, wiper speed is
reduced automatically when the
vehicle is at a standstill. As soon as
the vehicle starts to move, wiping
returns to the selected speed unless the lever has been moved.
Adjustable delay of timed interval
wipingP /AUTO:timed interval wiping
Turn the adjuster wheel to adjust the
delay between wipes:
longer delay:turn adjuster
wheel downwardsshorter delay:turn adjuster
wheel upwardsTimed interval wiping will need to be
reselected whenever the ignition has
been switched off.
Automatic wiping with rain sensorP /AUTO:automatic wiping with
rain sensor
The rain sensor detects the amount of water on the windscreen and
automatically regulates the frequency
of the windscreen wipers.
Automatic wiping will need to be
reselected whenever the ignition has
been switched off.
Notice
During extreme weather conditions,
e.g. fog or snow, automatic wiping
with rain sensor may become
unavailable. If required, select
another wiper position.
Page 90 of 269
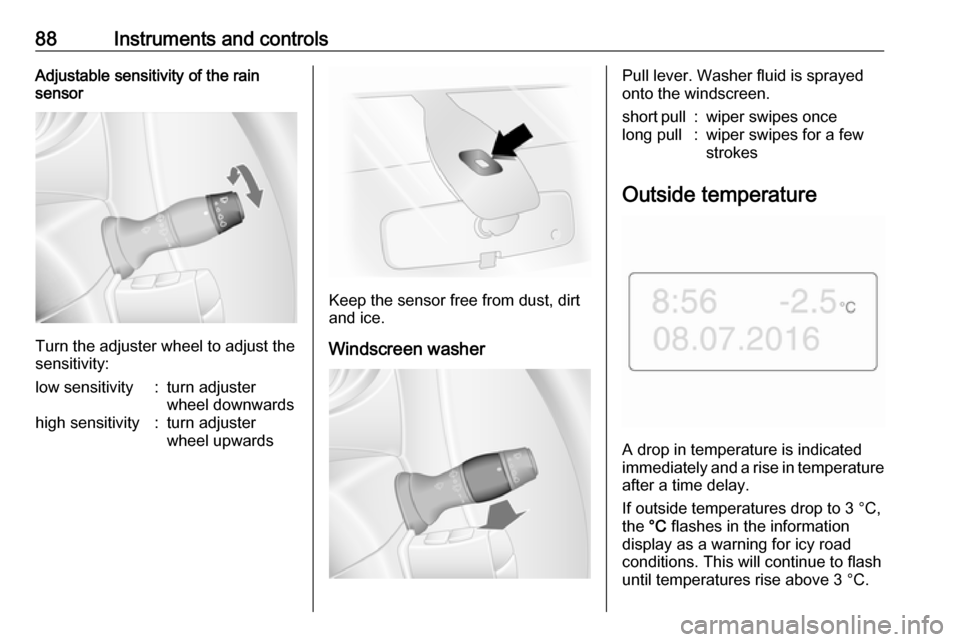
88Instruments and controlsAdjustable sensitivity of the rain
sensor
Turn the adjuster wheel to adjust the
sensitivity:
low sensitivity:turn adjuster
wheel downwardshigh sensitivity:turn adjuster
wheel upwards
Keep the sensor free from dust, dirt
and ice.
Windscreen washer
Pull lever. Washer fluid is sprayed
onto the windscreen.short pull:wiper swipes oncelong pull:wiper swipes for a few
strokes
Outside temperature
A drop in temperature is indicated
immediately and a rise in temperature
after a time delay.
If outside temperatures drop to 3 °C, the °C flashes in the information
display as a warning for icy road
conditions. This will continue to flash until temperatures rise above 3 °C.