mirror controls VOLKSWAGEN GOLF 1993 1H / 3.G Owners Manual
[x] Cancel search | Manufacturer: VOLKSWAGEN, Model Year: 1993, Model line: GOLF, Model: VOLKSWAGEN GOLF 1993 1H / 3.GPages: 156, PDF Size: 6.36 MB
Page 7 of 156

Downloaded from www.Manualslib.com manuals search engine __CONTROLS AND EQUIPMENT
Page
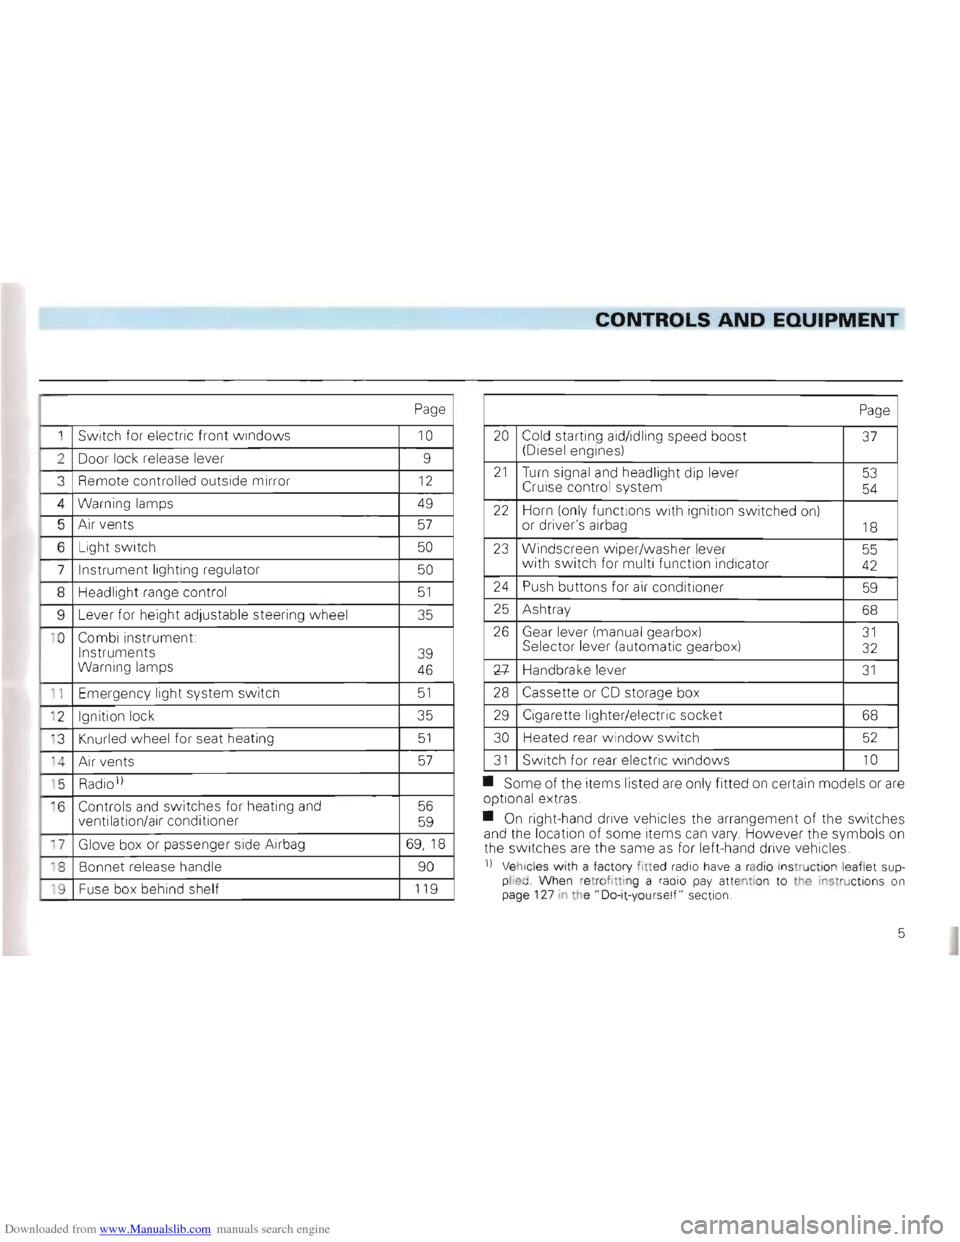
1 Switch for electric front windows 10
2 Door lock release lever 9
3
Remote controlled outside mirror 12
4 Warning lamps 49
5 Air vents 57
6 Light switch 50
7 Instrument lighting regulator 50
8 Headlig ht range control 51
9 Lever for heig ht adjustable steeri ng w heel 35
1 0
Combi instrument:
Instruments
Warning lamps
39
46
1 1 Emer gency light system switch 51
' 2 Ignition lock 35
' 3
Knurled wheel for seat heating 51
'4 A ir ve nts 57
' 5 Radio 1)
·6 Controls and switches for heating and
ventilation/air conditioner 56
59
17 Glove box or passenger side Airbag 69,1 8
18 Bonnet release handle 90
'9 Fuse box behind shelf 119
Page
20 Cold starting aid/idling speed boost (Diesel engines) 37
21 Turn signal and headlight dip lever
Cruise control system 53
54
22 Horn (on ly functions with ign ition switched on)
or driver's airbag 18
23 Windscreen w iper/washer lever
w ith switch for multi function indica tor 55 42
24 Push buttons for air conditi oner 59
25 Ash tray 68
26 Gear lever (manua l ge arbox) Sel ector lever (automa tic gea rbox) 31 32
Xl-Handbrake leve r 31
28 Cassette or CD storage box
29 Cigarette lighter/elec tric soc ket 68
30
Heated rear windo w switch 52
31 Switch for rear electric w indows 10
• Some of the items listed are only fitted on certain models or are op tional extras .
• On right-hand drive vehicles the
arrangement of the switches
and the location of some items can vary. However the symbo ls on
th e switc hes are the same as for left-hand drive vehic les.
n Vehicl es with a facto ry fitted radio have a rad io ins truction le aflet supplied Whe n re trof ittin g a radio pay atte ntion to the instructions on
page 127 in the" Do-it-yours elf " sect ion.
5
Page 14 of 156

Downloaded from www.Manualslib.com manuals search engine CONTROLS AND EQUIPMENT
Mirrors
Adjusting mirrors
The rear view mirrors should always be ad
j u sted properly before moving off so that
good vision to the rear
is obtained.
Anti-dazzle inside mirror
The leve r on the lower edge of the mirror
s hou ld be pointing to the rear when the
basic setting is made.
To set the anti-dazzle position, push lever
forwards .
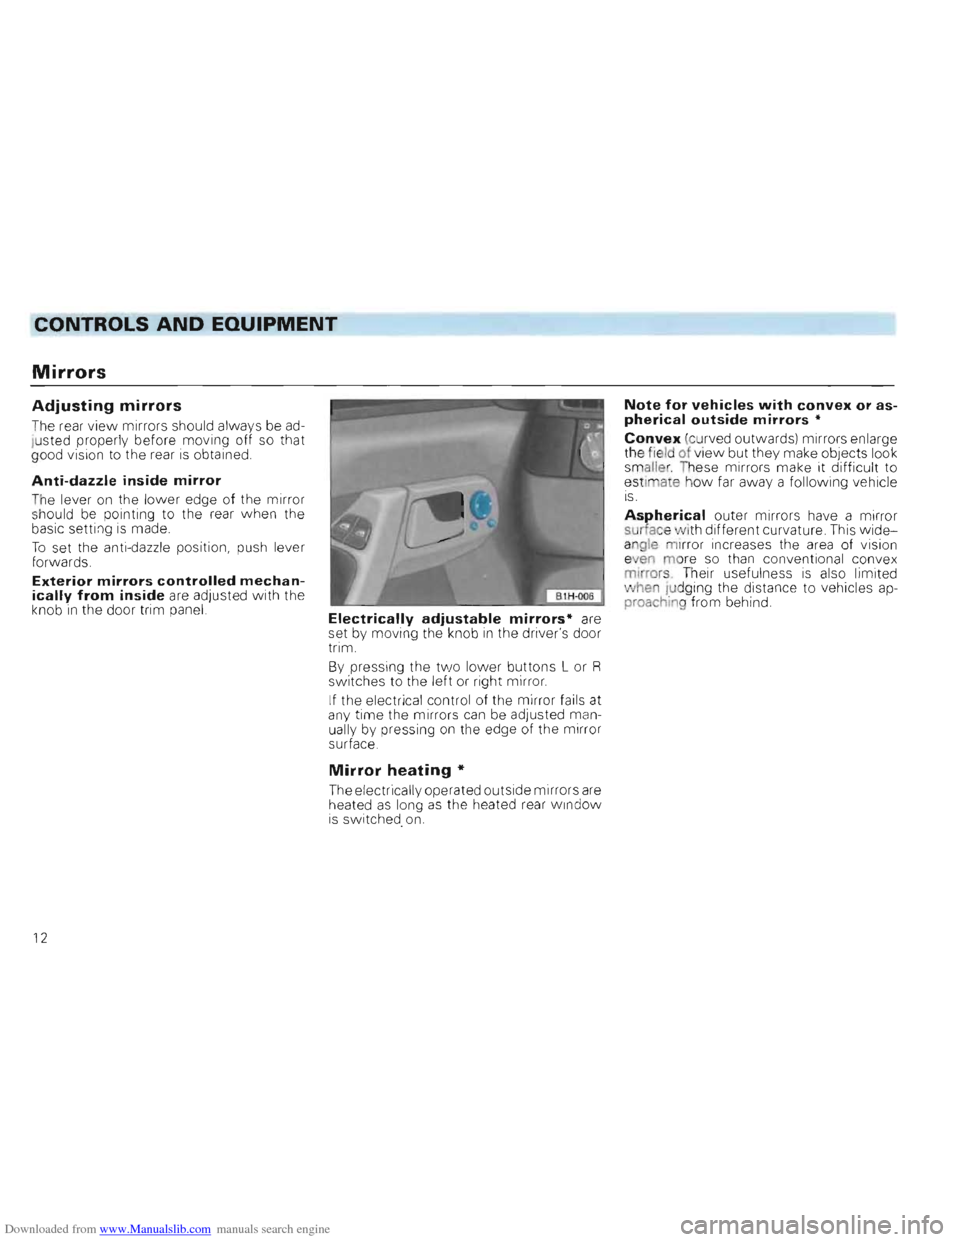
Exterior mirrors controlled mechanically from inside are adjusted wi th the
knob in the door trim panel. Electrically adjustable mirrors· are
set by moving the knob in the driver's door
trim .
B y pressing the
two lower buttons L or R switche s to the left or right mirror.
I f the electrical
contro l of the mirror fails at
any time the mirrors can be adjusted man
uall y by pressing on the edge of the mirror
surface.
Mirror heating *
The electrically operated outside mirrors are heated as long as the heated rear Wi ndow is switched. on.
Note for vehicles with convex or aspherical outside mirrors •
Convex (curved outwa rds) mirrors enlarge
th e field of view but they make objects look
sm aller. These mirrors make it difficult to
e stimate h
ow far away a following veh icle IS .
Aspherical outer mirrors have a mirror
surface vlfith different curvature. This wideangle mirror increases the area of vis ion e en more so than conventional convex
mirrors . The ir usef ulness is also li mi ted
" hen Judging the distan ce to vehicles ap
proaching from behind.
12
Page 54 of 156

Downloaded from www.Manualslib.com manuals search engine CONTROLS AND EQUIPMENT
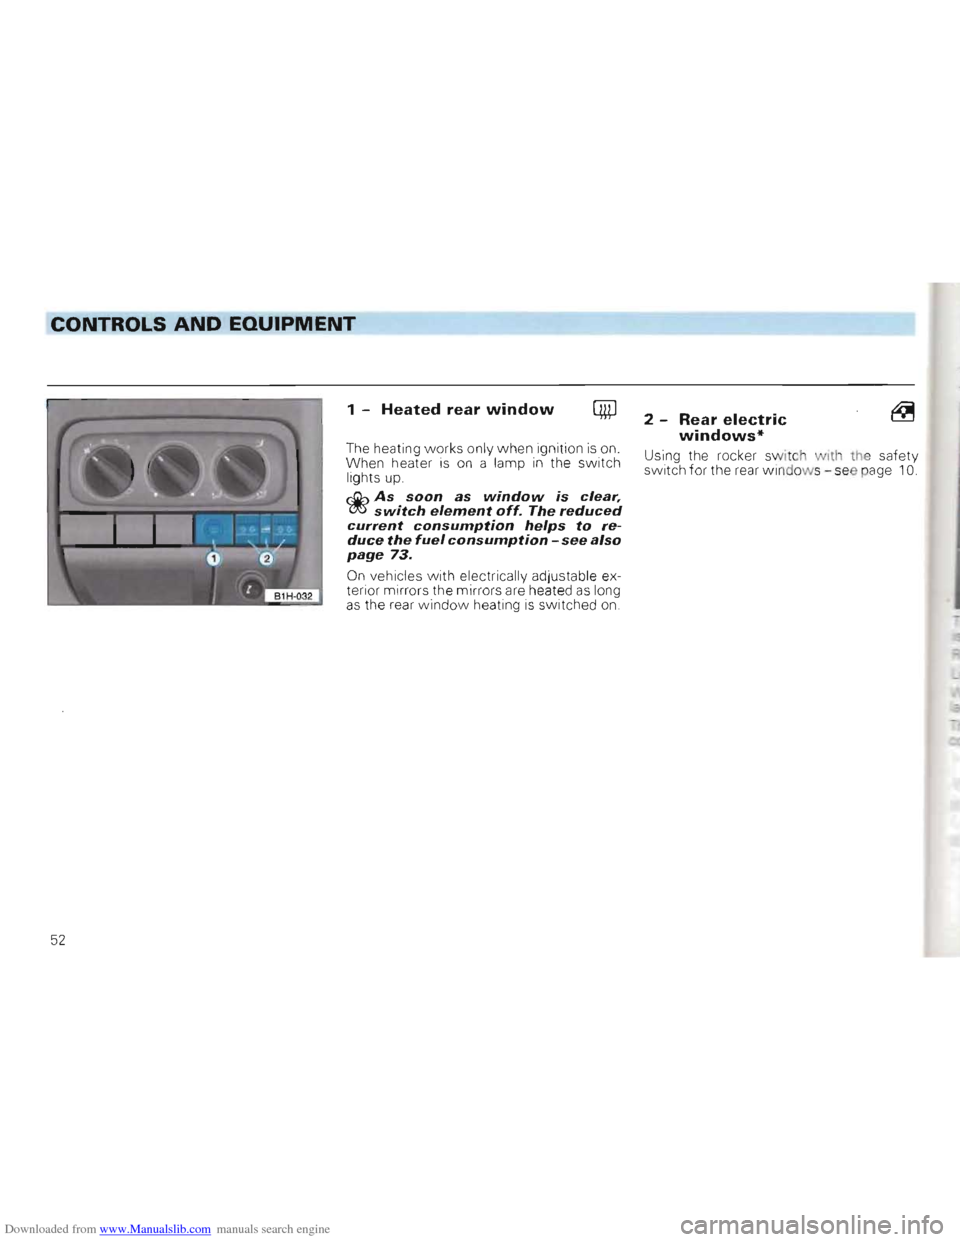
1 -Heated rear window
The heatin g works only when ign it io n i s on.
W hen heate r i s on a lamp in the switch ligh ts up.
~As soon as window is clear, ~switch element off. The reduced current consumption helps to reduce the fuel consumption -see also page 73.
On veh ic les with electrically adjustable ex
terio r m irrors the mirrors are heated as long as the rear w indow heating is switched on.
2 -Rear electric windows·
Using the rocker switch with the safety
switch for th e rear window s -see page 10.
52
Page 68 of 156

Downloaded from www.Manualslib.com manuals search engine CONTROLS AND EQUIPMENT
Sun visors
• Turn crank opening protective cap to the
right.
•
Take crank out of retainer, insert in the
opening and close sliding roof.
• Replace crank
in the retainer and turn
protective cap over the crank opening.
•
Insert cover lugs in the roof trim. Then
using a sc rewdriver (out of the vehicle tools)
s
lide headlining trim over the cover retain
ing strip . Slide cover to rear slight ly.
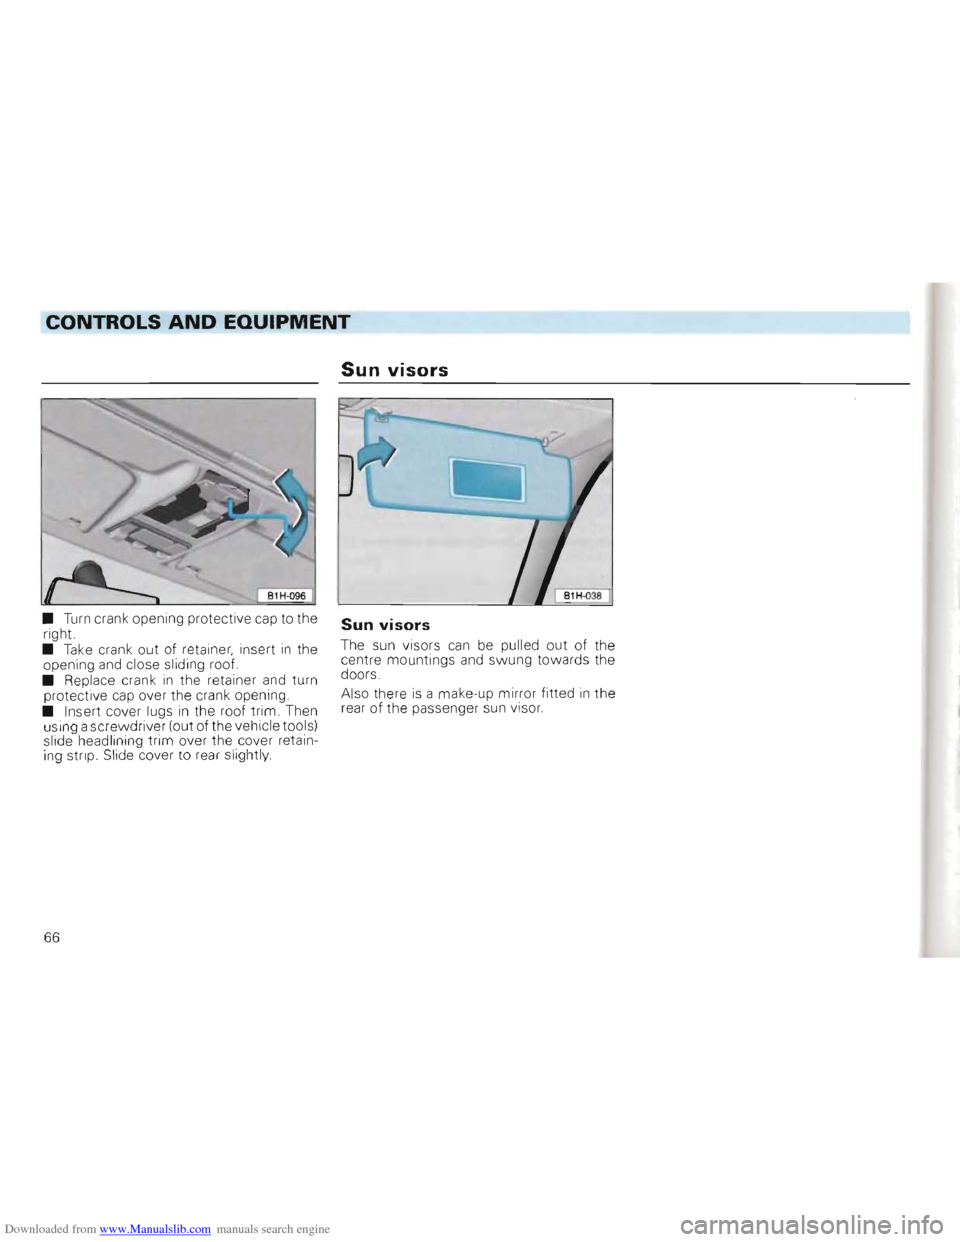
Sun visors
The sun visors can be pulled out of the
centre mountings and swung towards the
doors.
Also there
is a make-up mirror fitted in the
rear of the passenger sun visor.
66