VOLVO S60 2007 Manual PDF
Manufacturer: VOLVO, Model Year: 2007, Model line: S60, Model: VOLVO S60 2007Pages: 200, PDF Size: 4.03 MB
Page 71 of 200
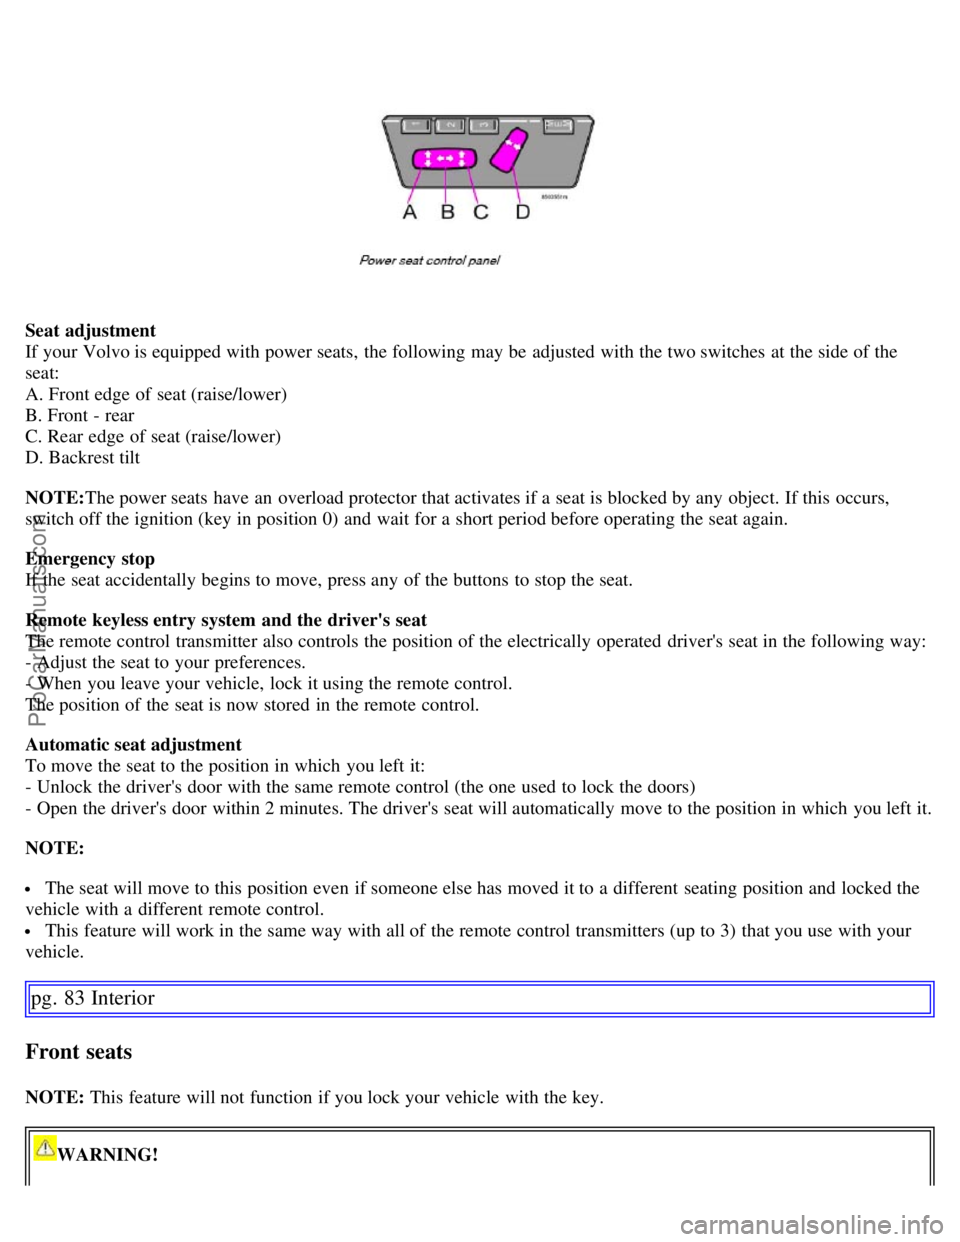
Seat adjustment
If your Volvo is equipped with power seats, the following may be adjusted with the two switches at the side of the
seat:
A. Front edge of seat (raise/lower)
B. Front - rear
C. Rear edge of seat (raise/lower)
D. Backrest tilt
NOTE:The power seats have an overload protector that activates if a seat is blocked by any object. If this occurs,
switch off the ignition (key in position 0) and wait for a short period before operating the seat again.
Emergency stop
If the seat accidentally begins to move, press any of the buttons to stop the seat.
Remote keyless entry system and the driver's seat
The remote control transmitter also controls the position of the electrically operated driver's seat in the following way:
- Adjust the seat to your preferences.
- When you leave your vehicle, lock it using the remote control.
The position of the seat is now stored in the remote control.
Automatic seat adjustment
To move the seat to the position in which you left it:
- Unlock the driver's door with the same remote control (the one used to lock the doors)
- Open the driver's door within 2 minutes. The driver's seat will automatically move to the position in which you left it.
NOTE:
The seat will move to this position even if someone else has moved it to a different seating position and locked the
vehicle with a different remote control.
This feature will work in the same way with all of the remote control transmitters (up to 3) that you use with your
vehicle.
pg. 83 Interior
Front seats
NOTE: This feature will not function if you lock your vehicle with the key.
WARNING!
ProCarManuals.com
Page 72 of 200
Because the driver's seat can be adjusted with the ignition off, children should never be left unattended in the
vehicle.
Movement of the seat can be STOPPED at any time by pressing any button on the power seat control panel.
Do not adjust the seat while driving. The seat should be adjusted so that the brake pedal can be depressed fully. In
addition, position the seat as far rearward as comfort and control allow.
The seat rails on the floor must not be obstructed in any way when the seat is in motion.
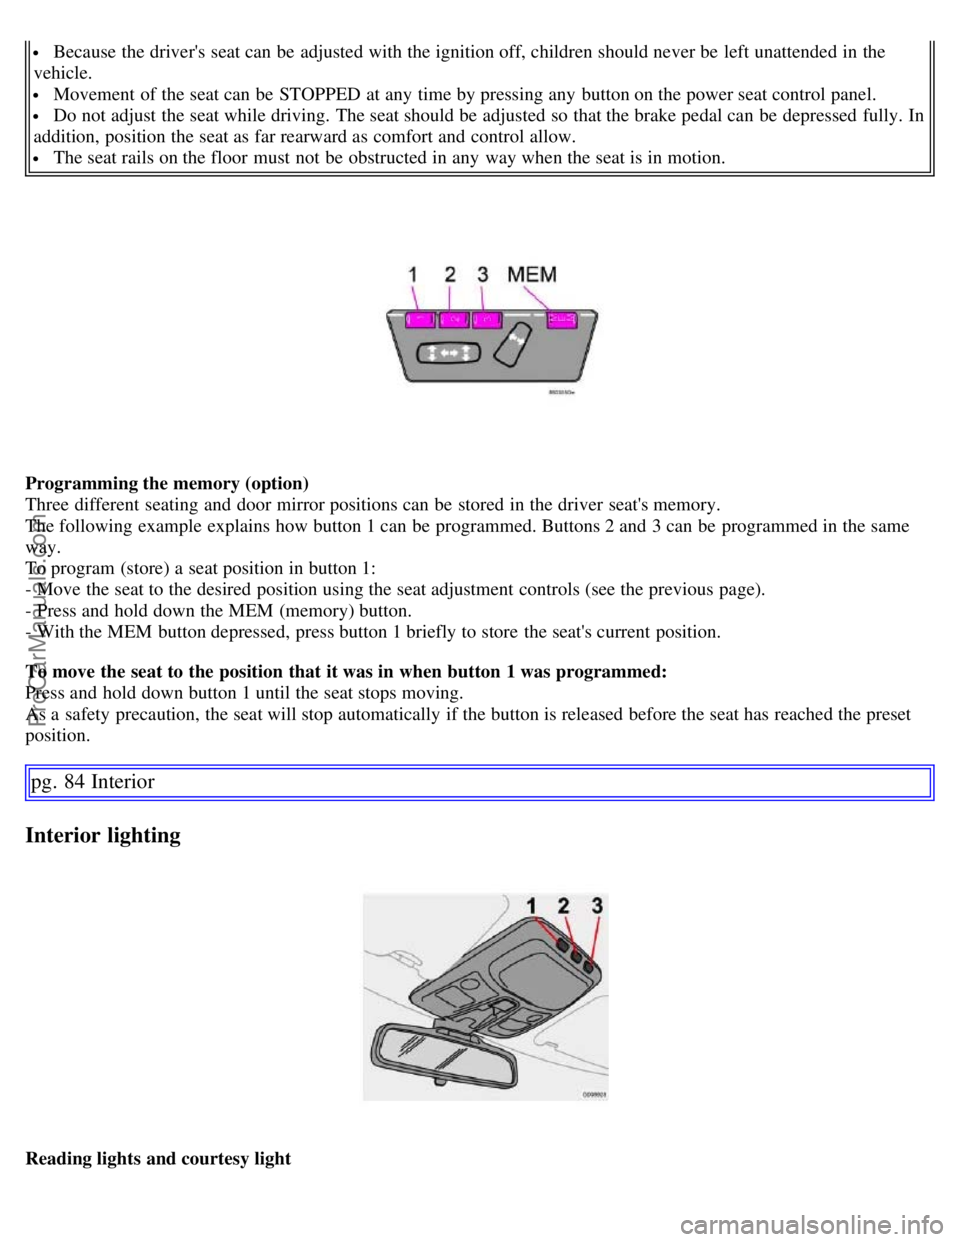
Programming the memory (option)
Three different seating and door mirror positions can be stored in the driver seat's memory.
The following example explains how button 1 can be programmed. Buttons 2 and 3 can be programmed in the same
way.
To program (store) a seat position in button 1:
- Move the seat to the desired position using the seat adjustment controls (see the previous page).
- Press and hold down the MEM (memory) button.
- With the MEM button depressed, press button 1 briefly to store the seat's current position.
To move the seat to the position that it was in when button 1 was programmed:
Press and hold down button 1 until the seat stops moving.
As a safety precaution, the seat will stop automatically if the button is released before the seat has reached the preset
position.
pg. 84 Interior
Interior lighting
Reading lights and courtesy light
ProCarManuals.com
Page 73 of 200
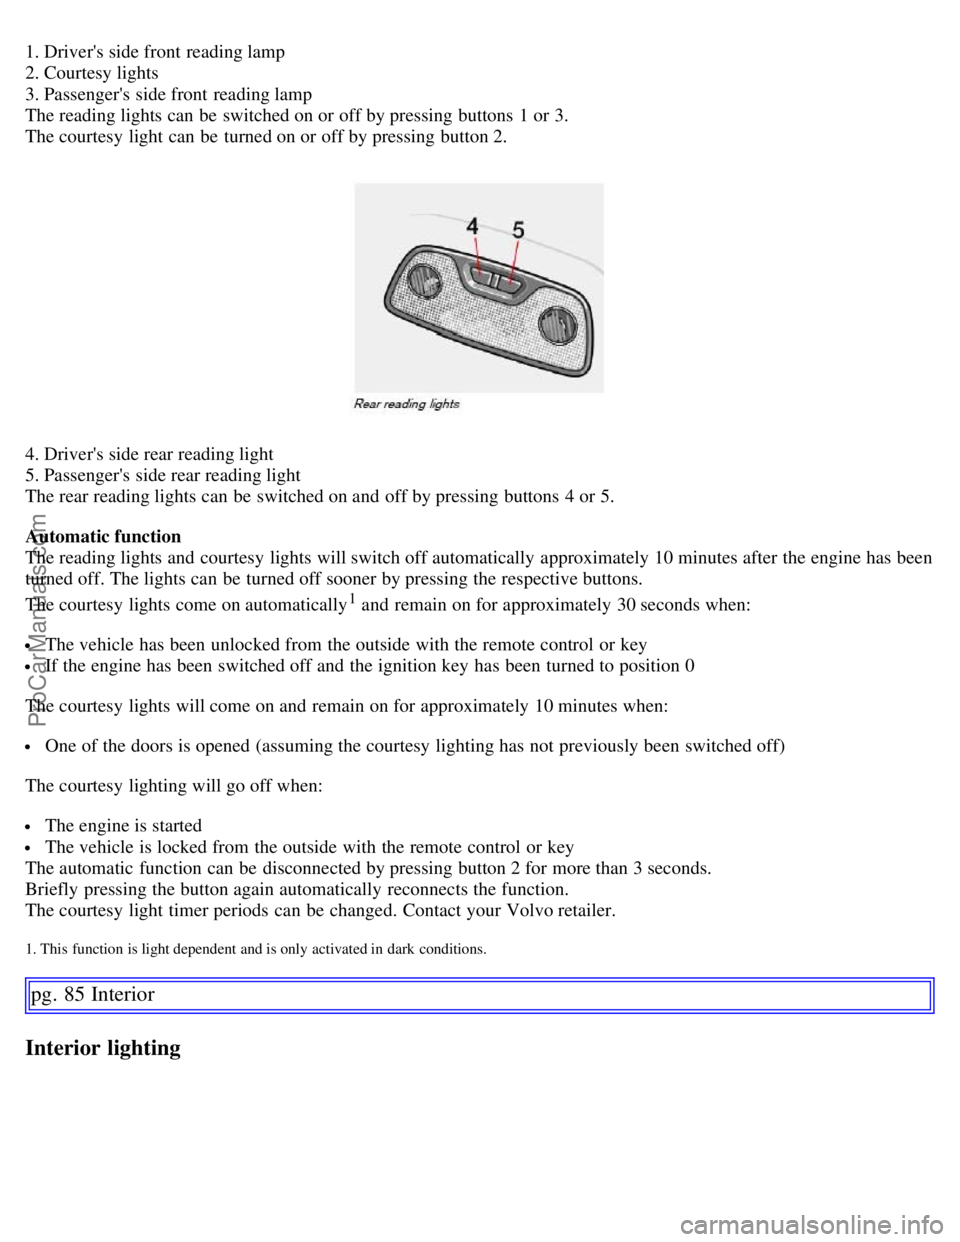
1. Driver's side front reading lamp
2. Courtesy lights
3. Passenger's side front reading lamp
The reading lights can be switched on or off by pressing buttons 1 or 3.
The courtesy light can be turned on or off by pressing button 2.
4. Driver's side rear reading light
5. Passenger's side rear reading light
The rear reading lights can be switched on and off by pressing buttons 4 or 5.
Automatic function
The reading lights and courtesy lights will switch off automatically approximately 10 minutes after the engine has been
turned off. The lights can be turned off sooner by pressing the respective buttons.
The courtesy lights come on automatically
1 and remain on for approximately 30 seconds when:
The vehicle has been unlocked from the outside with the remote control or key
If the engine has been switched off and the ignition key has been turned to position 0
The courtesy lights will come on and remain on for approximately 10 minutes when:
One of the doors is opened (assuming the courtesy lighting has not previously been switched off)
The courtesy lighting will go off when:
The engine is started
The vehicle is locked from the outside with the remote control or key
The automatic function can be disconnected by pressing button 2 for more than 3 seconds.
Briefly pressing the button again automatically reconnects the function.
The courtesy light timer periods can be changed. Contact your Volvo retailer.
1. This function is light dependent and is only activated in dark conditions.
pg. 85 Interior
Interior lighting
ProCarManuals.com
Page 74 of 200
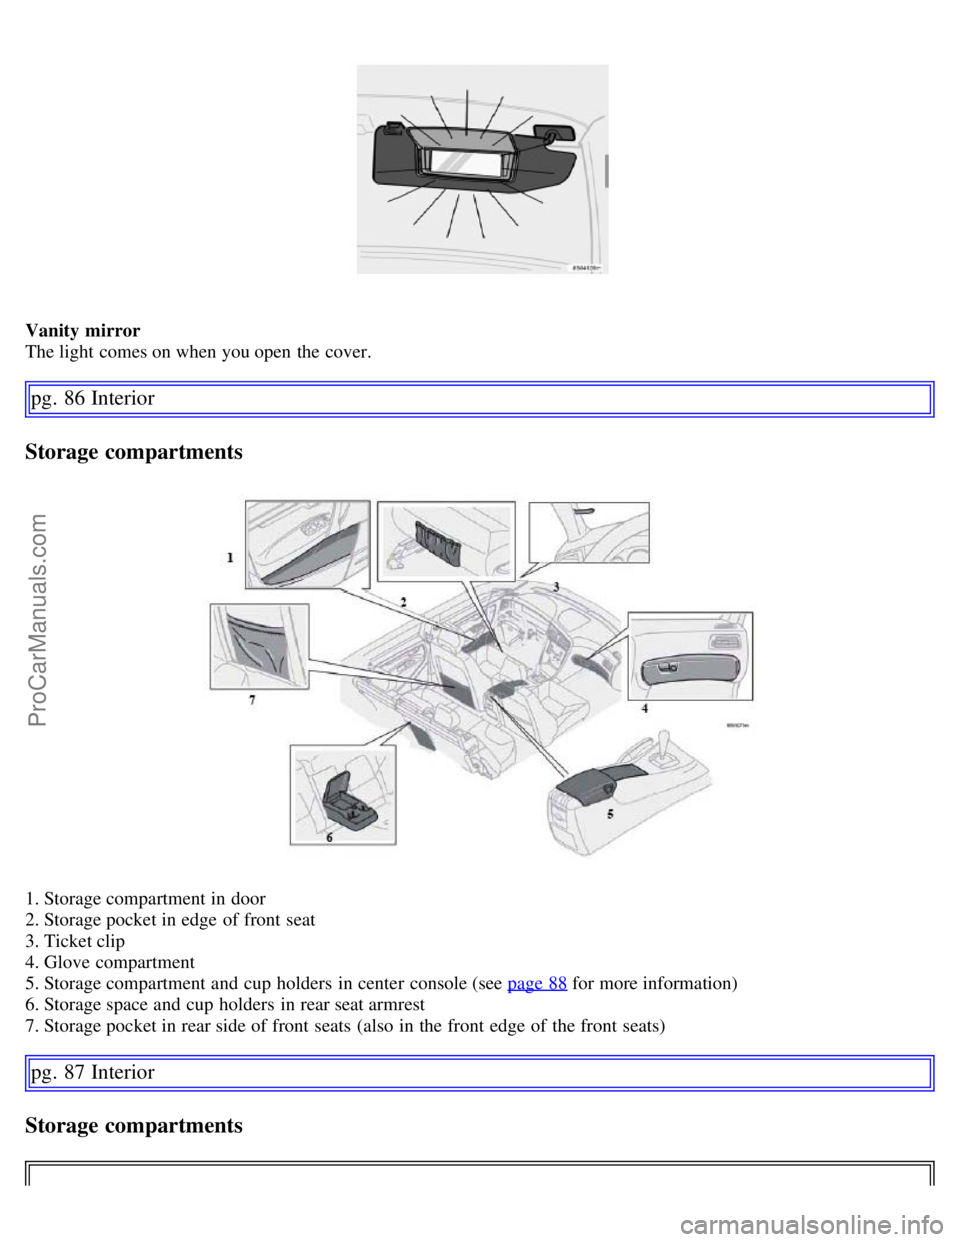
Vanity mirror
The light comes on when you open the cover.
pg. 86 Interior
Storage compartments
1. Storage compartment in door
2. Storage pocket in edge of front seat
3. Ticket clip
4. Glove compartment
5. Storage compartment and cup holders in center console (see page 88
for more information)
6. Storage space and cup holders in rear seat armrest
7. Storage pocket in rear side of front seats (also in the front edge of the front seats)
pg. 87 Interior
Storage compartments
ProCarManuals.com
Page 75 of 200
WARNING!
Packages on the rear window shelf can obscure vision and may become dangerous projectiles in the event of a
sudden stop or an accident.
Anchor any heavy objects to help prevent them from moving during sudden stops.
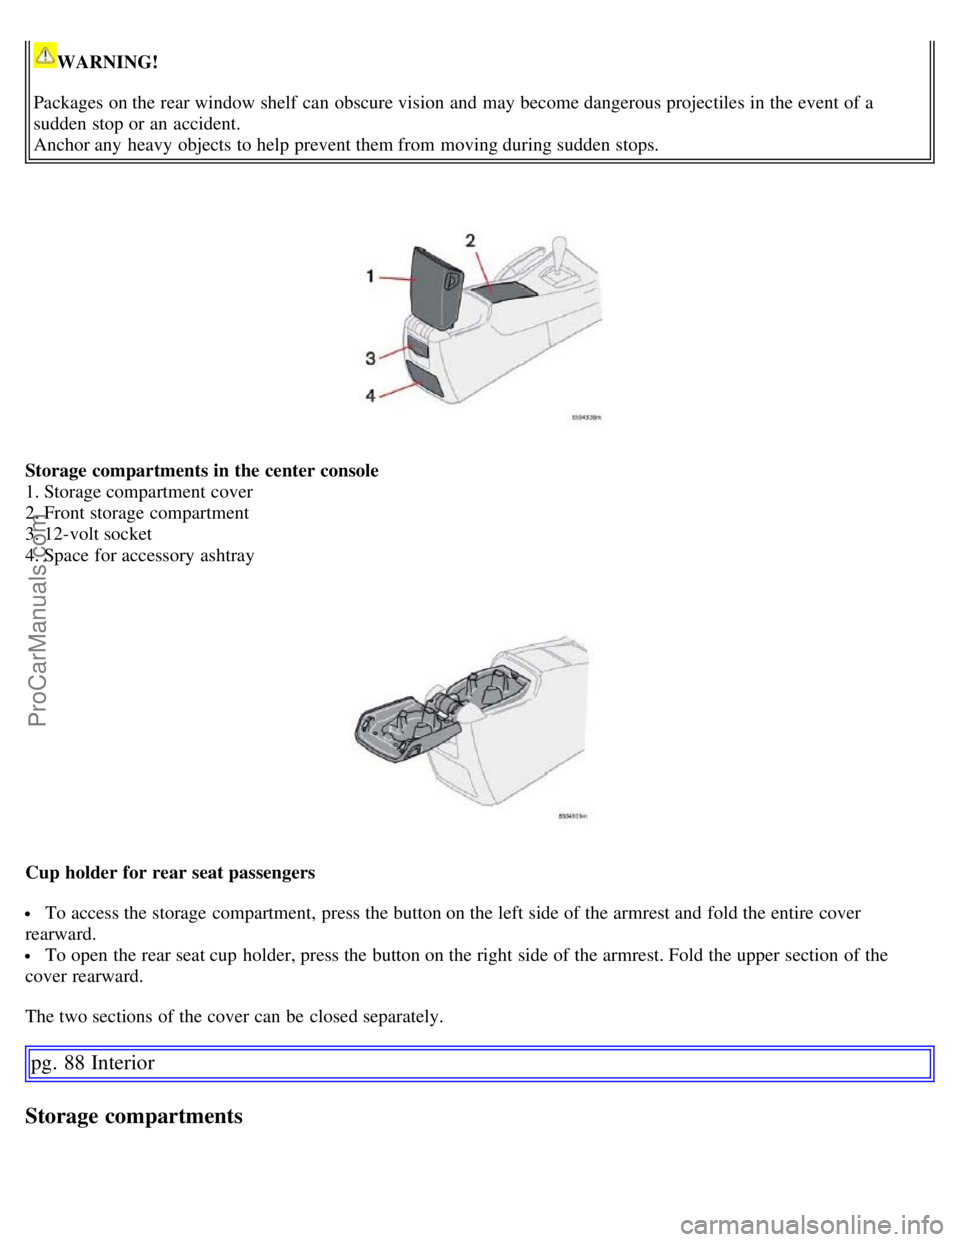
Storage compartments in the center console
1. Storage compartment cover
2. Front storage compartment
3. 12-volt socket
4. Space for accessory ashtray
Cup holder for rear seat passengers
To access the storage compartment, press the button on the left side of the armrest and fold the entire cover
rearward.
To open the rear seat cup holder, press the button on the right side of the armrest. Fold the upper section of the
cover rearward.
The two sections of the cover can be closed separately.
pg. 88 Interior
Storage compartments
ProCarManuals.com
Page 76 of 200
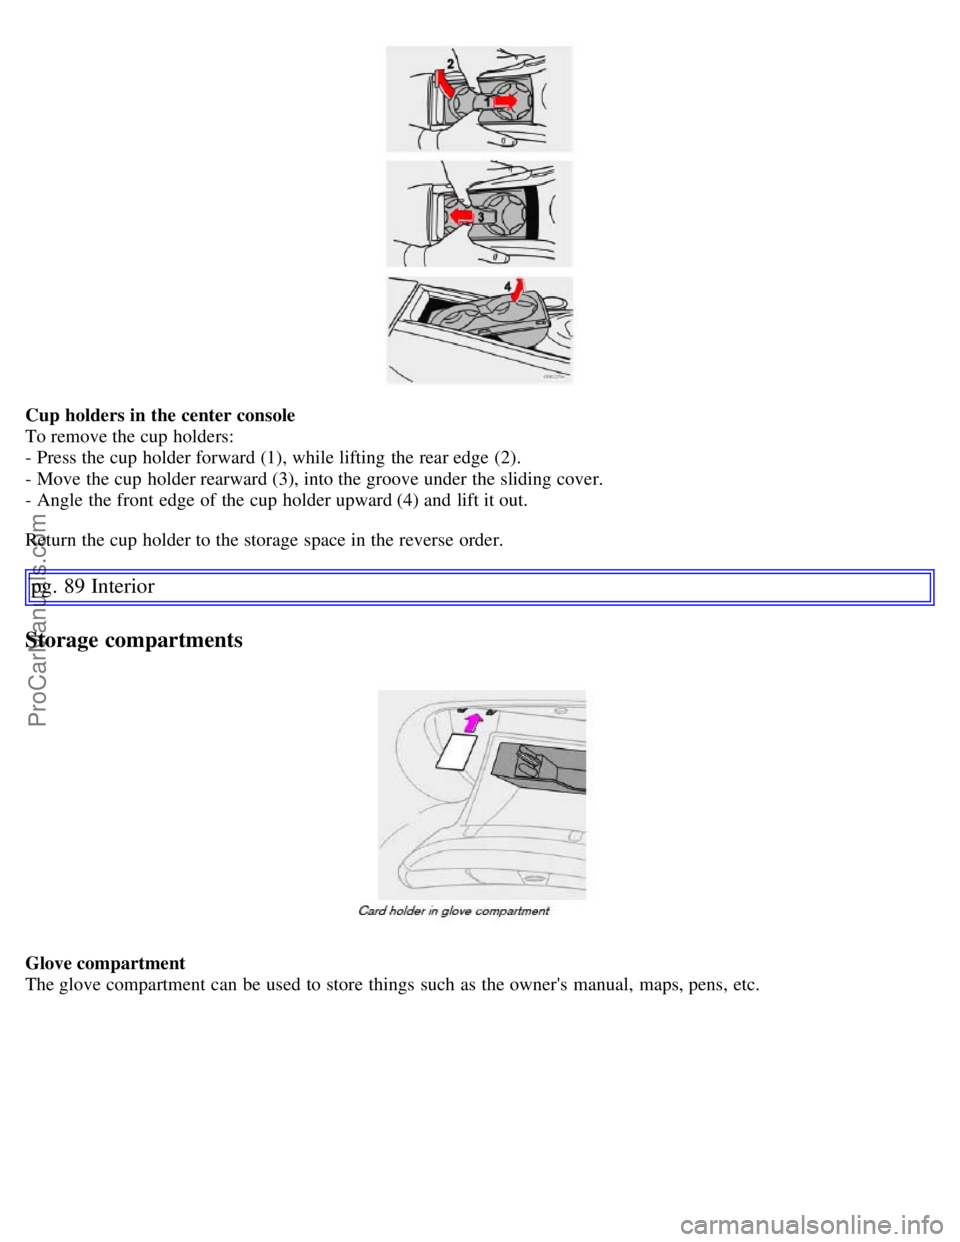
Cup holders in the center console
To remove the cup holders:
- Press the cup holder forward (1), while lifting the rear edge (2).
- Move the cup holder rearward (3), into the groove under the sliding cover.
- Angle the front edge of the cup holder upward (4) and lift it out.
Return the cup holder to the storage space in the reverse order.
pg. 89 Interior
Storage compartments
Glove compartment
The glove compartment can be used to store things such as the owner's manual, maps, pens, etc.
ProCarManuals.com
Page 77 of 200
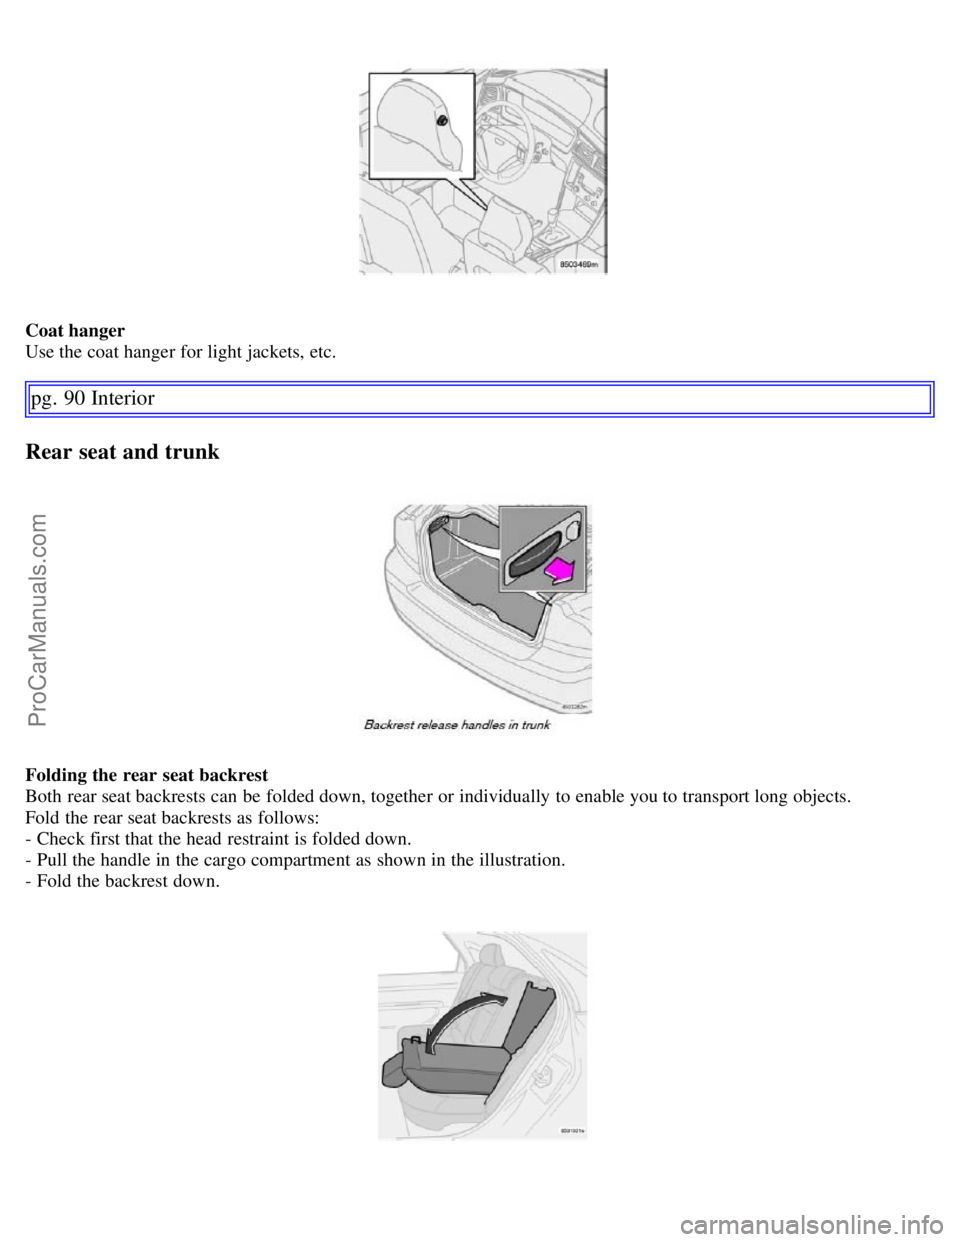
Coat hanger
Use the coat hanger for light jackets, etc.
pg. 90 Interior
Rear seat and trunk
Folding the rear seat backrest
Both rear seat backrests can be folded down, together or individually to enable you to transport long objects.
Fold the rear seat backrests as follows:
- Check first that the head restraint is folded down.
- Pull the handle in the cargo compartment as shown in the illustration.
- Fold the backrest down.
ProCarManuals.com
Page 78 of 200
WARNING!
Keep vehicle doors and the luggage compartment locked and keep keys out of a child's reach. Unsupervised
children could lock themselves in an open trunk and risk injury. Children should be taught not to play in vehicles.
On hot days, the temperature in the trunk or vehicle interior can rise very quickly. Exposure of people to these
high temperatures for even a short period of time can cause heat-related injury or death. Small children are
particularly at risk.
WARNING!
When the backrest is returned to the upright position, check that it is properly locked in place. Return the head
restraints to the upright position.
Long loads should always be securely anchored to help avoid injury in the event of a sudden stop.
Always turn the engine off and apply the parking brake when loading/ unloading the vehicle.
Place the transmission in the (P)ark position (automatic transmission) to help prevent inadvertent movement of the
gear selector.
The vehicle features a 60/40 split fold-downs rear seat. This function is performed by handles inside the trunk,
and also provides a means for children and adults to enter the passenger compartment in the event they become
locked inside the trunk.
Adults are advised to familiarize themselves with the operation and location of the release handles.
To fold down the rear seats from inside the trunk, pull the release control handles located on either side of the
trunk.
pg. 91 Interior
Rear seat and trunk
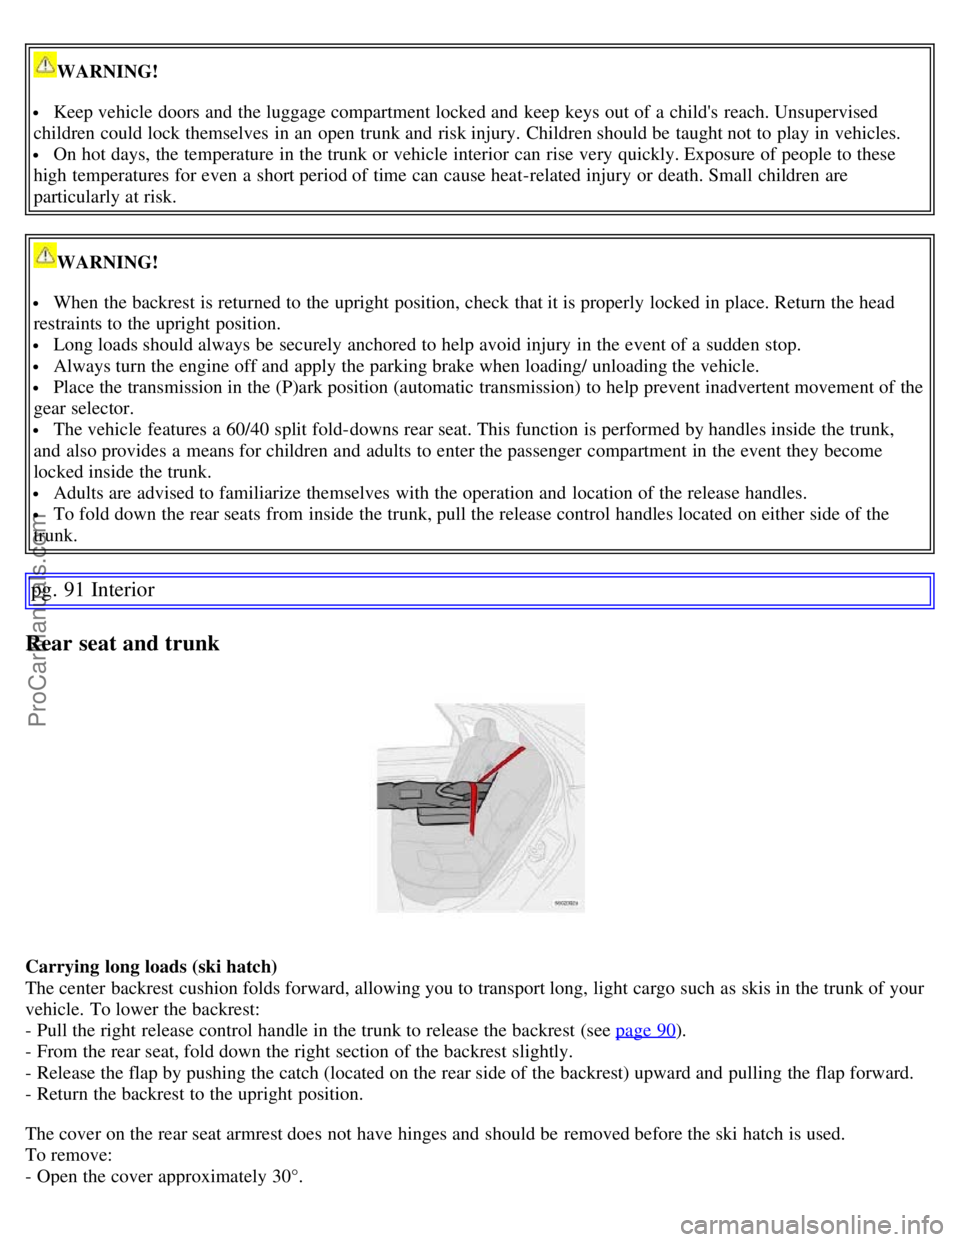
Carrying long loads (ski hatch)
The center backrest cushion folds forward, allowing you to transport long, light cargo such as skis in the trunk of your
vehicle. To lower the backrest:
- Pull the right release control handle in the trunk to release the backrest (see page 90
).
- From the rear seat, fold down the right section of the backrest slightly.
- Release the flap by pushing the catch (located on the rear side of the backrest) upward and pulling the flap forward.
- Return the backrest to the upright position.
The cover on the rear seat armrest does not have hinges and should be removed before the ski hatch is used.
To remove:
- Open the cover approximately 30°.
ProCarManuals.com
Page 79 of 200
- Pull it straight up.
To put in place:
- Press the cover into the groove behind the upholstery.
- Close the cover.
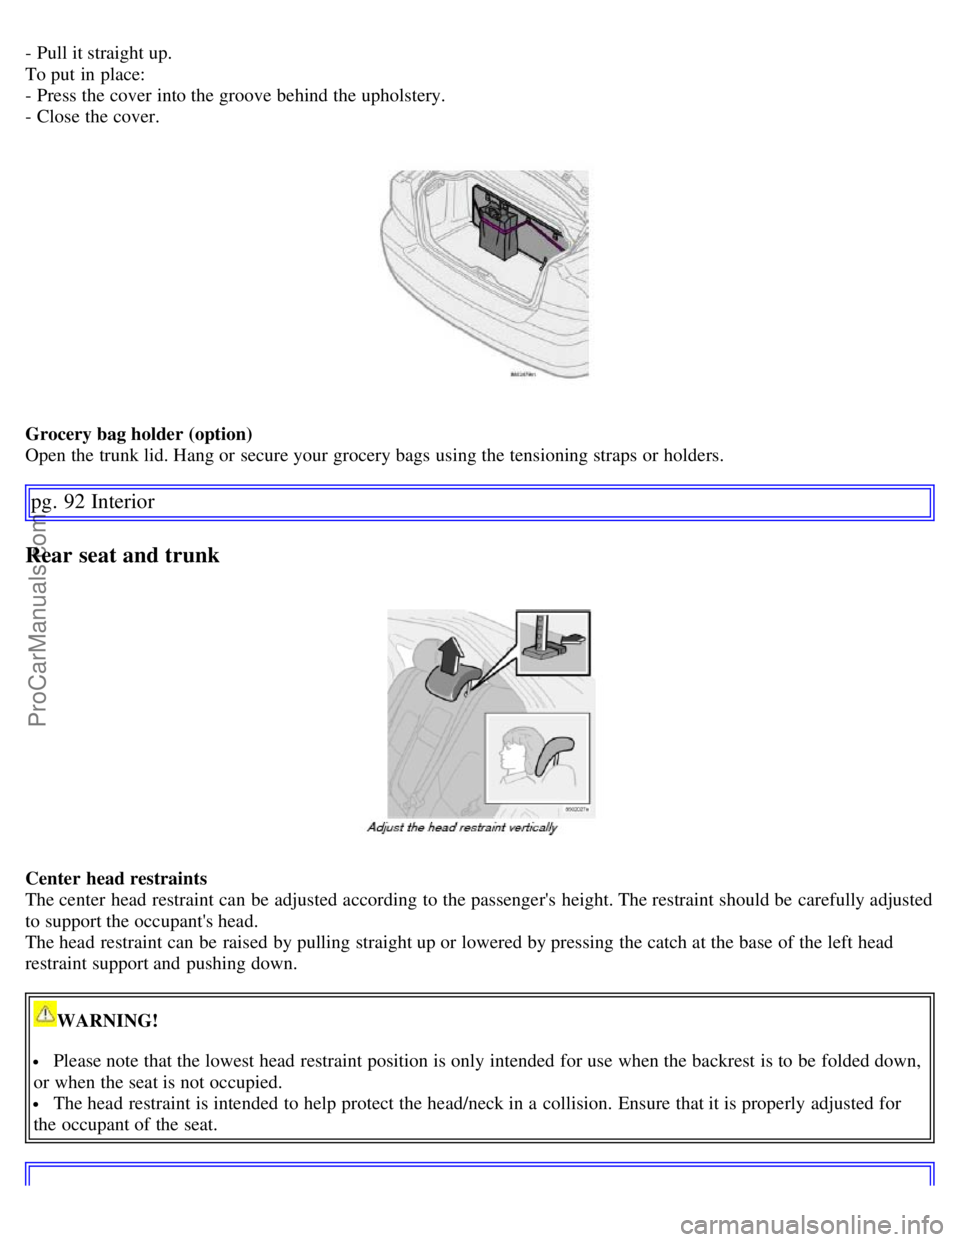
Grocery bag holder (option)
Open the trunk lid. Hang or secure your grocery bags using the tensioning straps or holders.
pg. 92 Interior
Rear seat and trunk
Center head restraints
The center head restraint can be adjusted according to the passenger's height. The restraint should be carefully adjusted
to support the occupant's head.
The head restraint can be raised by pulling straight up or lowered by pressing the catch at the base of the left head
restraint support and pushing down.
WARNING!
Please note that the lowest head restraint position is only intended for use when the backrest is to be folded down,
or when the seat is not occupied.
The head restraint is intended to help protect the head/neck in a collision. Ensure that it is properly adjusted for
the occupant of the seat.
ProCarManuals.com
Page 80 of 200
pg. 93 Interior
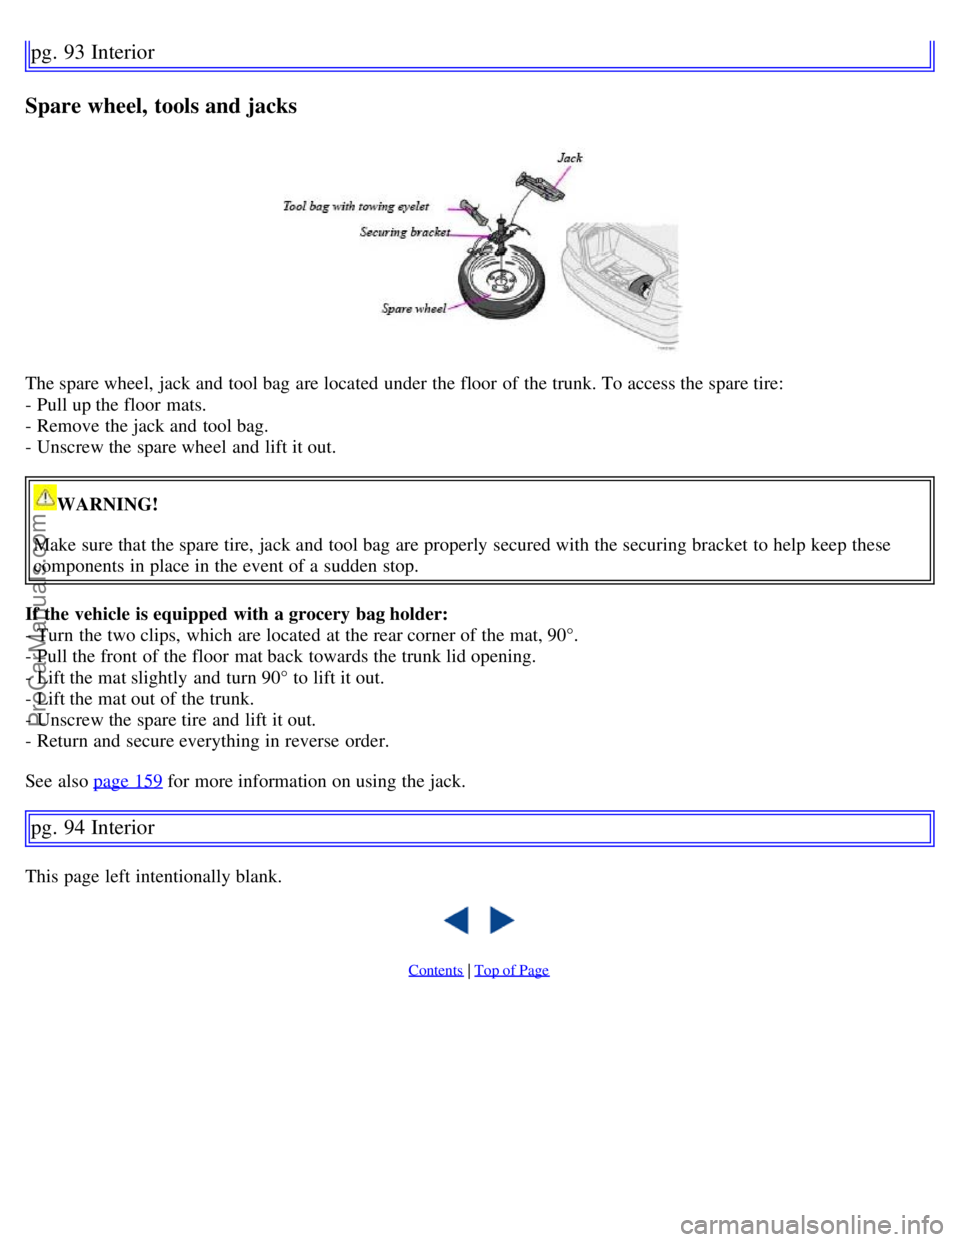
Spare wheel, tools and jacks
The spare wheel, jack and tool bag are located under the floor of the trunk. To access the spare tire:
- Pull up the floor mats.
- Remove the jack and tool bag.
- Unscrew the spare wheel and lift it out.
WARNING!
Make sure that the spare tire, jack and tool bag are properly secured with the securing bracket to help keep these
components in place in the event of a sudden stop.
If the vehicle is equipped with a grocery bag holder:
- Turn the two clips, which are located at the rear corner of the mat, 90°.
- Pull the front of the floor mat back towards the trunk lid opening.
- Lift the mat slightly and turn 90° to lift it out.
- Lift the mat out of the trunk.
- Unscrew the spare tire and lift it out.
- Return and secure everything in reverse order.
See also page 159
for more information on using the jack.
pg. 94 Interior
This page left intentionally blank.
Contents | Top of Page
ProCarManuals.com