VOLVO S60 2008 Manual Online
Manufacturer: VOLVO, Model Year: 2008, Model line: S60, Model: VOLVO S60 2008Pages: 230, PDF Size: 5.33 MB
Page 81 of 230
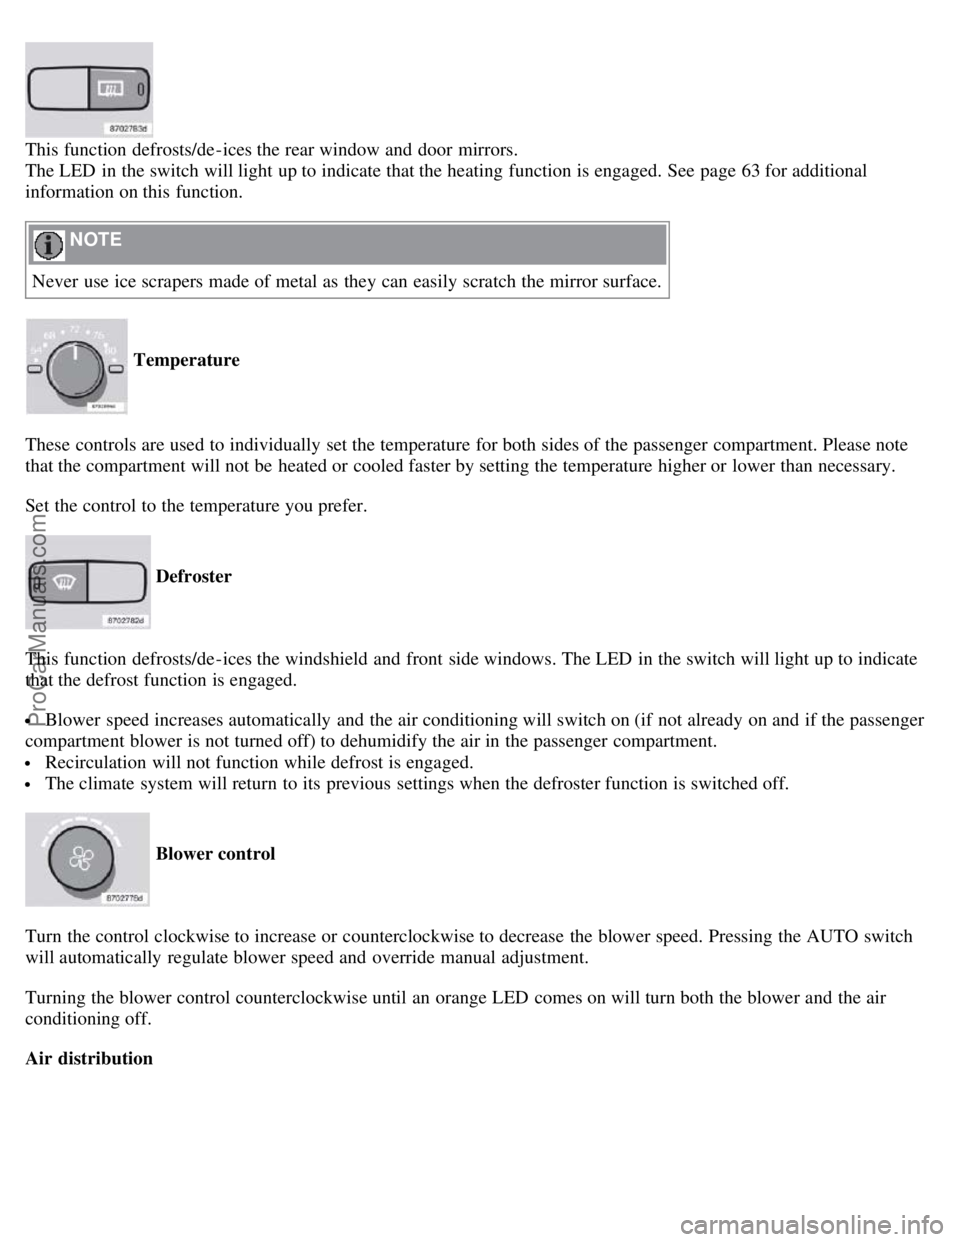
This function defrosts/de-ices the rear window and door mirrors.
The LED in the switch will light up to indicate that the heating function is engaged. See page 63 for additional
information on this function.
NOTE
Never use ice scrapers made of metal as they can easily scratch the mirror surface.
Temperature
These controls are used to individually set the temperature for both sides of the passenger compartment. Please note
that the compartment will not be heated or cooled faster by setting the temperature higher or lower than necessary.
Set the control to the temperature you prefer.
Defroster
This function defrosts/de-ices the windshield and front side windows. The LED in the switch will light up to indicate
that the defrost function is engaged.
Blower speed increases automatically and the air conditioning will switch on (if not already on and if the passenger
compartment blower is not turned off) to dehumidify the air in the passenger compartment.
Recirculation will not function while defrost is engaged.
The climate system will return to its previous settings when the defroster function is switched off.
Blower control
Turn the control clockwise to increase or counterclockwise to decrease the blower speed. Pressing the AUTO switch
will automatically regulate blower speed and override manual adjustment.
Turning the blower control counterclockwise until an orange LED comes on will turn both the blower and the air
conditioning off.
Air distribution
ProCarManuals.com
Page 82 of 230
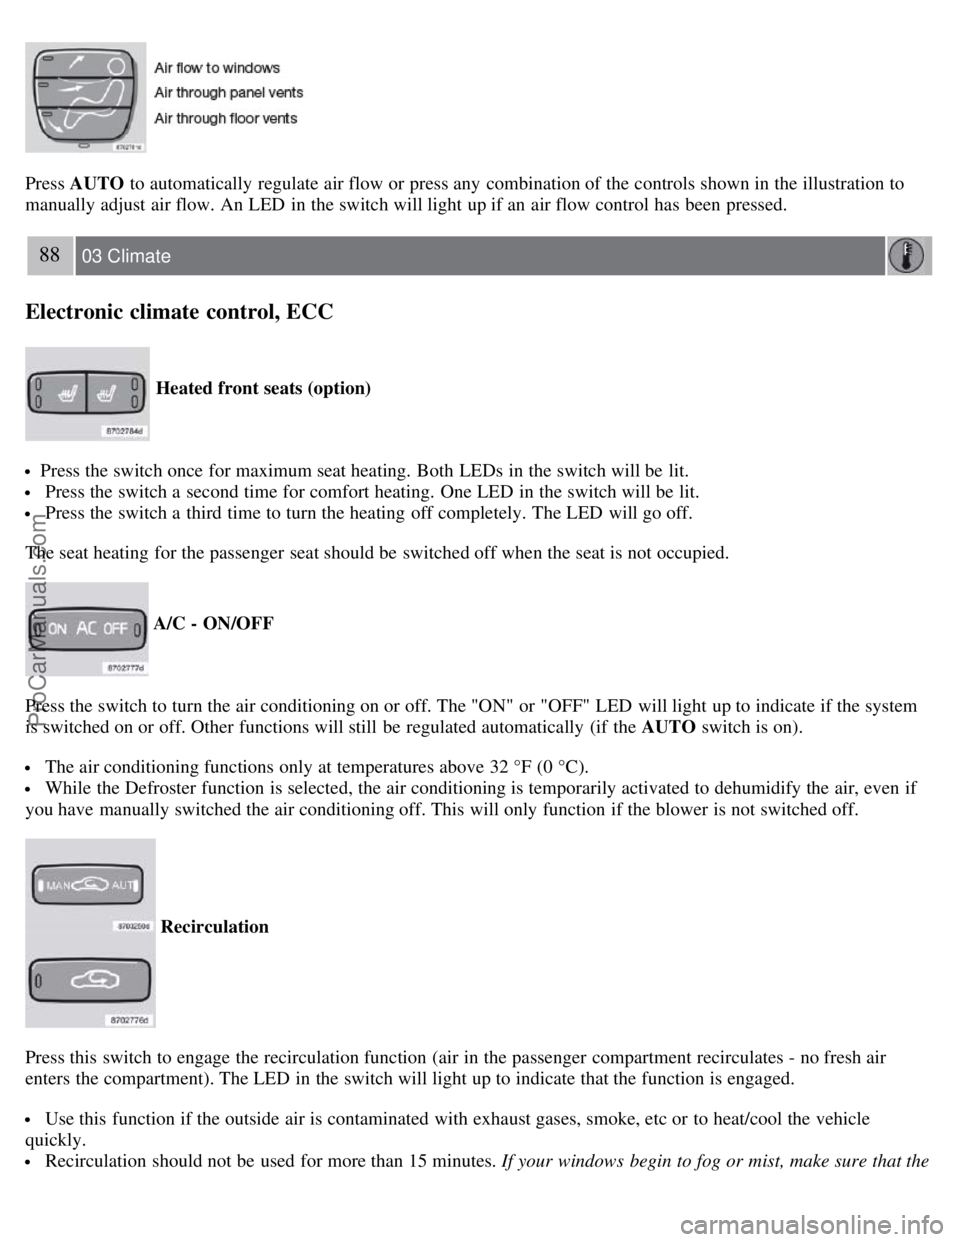
Press AUTO to automatically regulate air flow or press any combination of the controls shown in the illustration to
manually adjust air flow. An LED in the switch will light up if an air flow control has been pressed.
88 03 Climate
Electronic climate control, ECC
Heated front seats (option)
Press the switch once for maximum seat heating. Both LEDs in the switch will be lit.
Press the switch a second time for comfort heating. One LED in the switch will be lit.
Press the switch a third time to turn the heating off completely. The LED will go off.
The seat heating for the passenger seat should be switched off when the seat is not occupied.
A/C - ON/OFF
Press the switch to turn the air conditioning on or off. The "ON" or "OFF" LED will light up to indicate if the system
is switched on or off. Other functions will still be regulated automatically (if the AUTO switch is on).
The air conditioning functions only at temperatures above 32 °F (0 °C).
While the Defroster function is selected, the air conditioning is temporarily activated to dehumidify the air, even if
you have manually switched the air conditioning off. This will only function if the blower is not switched off.
Recirculation
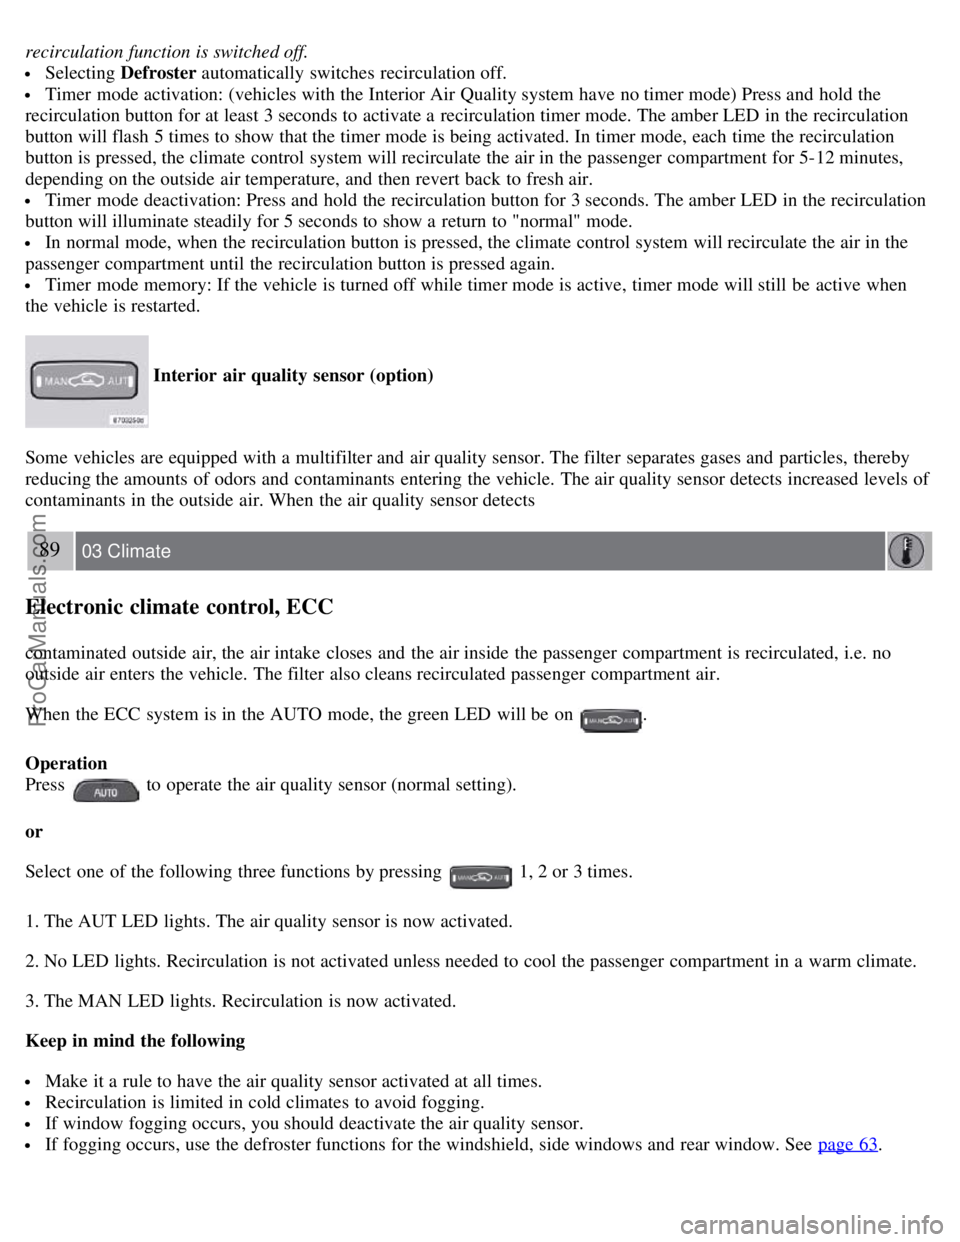
Press this switch to engage the recirculation function (air in the passenger compartment recirculates - no fresh air
enters the compartment). The LED in the switch will light up to indicate that the function is engaged.
Use this function if the outside air is contaminated with exhaust gases, smoke, etc or to heat/cool the vehicle
quickly.
Recirculation should not be used for more than 15 minutes. If your windows begin to fog or mist, make sure that the
ProCarManuals.com
Page 83 of 230
recirculation function is switched off.
Selecting Defroster automatically switches recirculation off.
Timer mode activation: (vehicles with the Interior Air Quality system have no timer mode) Press and hold the
recirculation button for at least 3 seconds to activate a recirculation timer mode. The amber LED in the recirculation
button will flash 5 times to show that the timer mode is being activated. In timer mode, each time the recirculation
button is pressed, the climate control system will recirculate the air in the passenger compartment for 5-12 minutes,
depending on the outside air temperature, and then revert back to fresh air.
Timer mode deactivation: Press and hold the recirculation button for 3 seconds. The amber LED in the recirculation
button will illuminate steadily for 5 seconds to show a return to "normal" mode.
In normal mode, when the recirculation button is pressed, the climate control system will recirculate the air in the
passenger compartment until the recirculation button is pressed again.
Timer mode memory: If the vehicle is turned off while timer mode is active, timer mode will still be active when
the vehicle is restarted.
Interior air quality sensor (option)
Some vehicles are equipped with a multifilter and air quality sensor. The filter separates gases and particles, thereby
reducing the amounts of odors and contaminants entering the vehicle. The air quality sensor detects increased levels of
contaminants in the outside air. When the air quality sensor detects
89 03 Climate
Electronic climate control, ECC
contaminated outside air, the air intake closes and the air inside the passenger compartment is recirculated, i.e. no
outside air enters the vehicle. The filter also cleans recirculated passenger compartment air.
When the ECC system is in the AUTO mode, the green LED will be on
.
Operation
Press
to operate the air quality sensor (normal setting).
or
Select one of the following three functions by pressing
1, 2 or 3 times.
1. The AUT LED lights. The air quality sensor is now activated.
2. No LED lights. Recirculation is not activated unless needed to cool the passenger compartment in a warm climate.
3. The MAN LED lights. Recirculation is now activated.
Keep in mind the following
Make it a rule to have the air quality sensor activated at all times.
Recirculation is limited in cold climates to avoid fogging.
If window fogging occurs, you should deactivate the air quality sensor.
If fogging occurs, use the defroster functions for the windshield, side windows and rear window. See page 63.
ProCarManuals.com
Page 84 of 230
The filter should be changed at the intervals recommended in the service schedule. However, if the vehicle is used in a
severely contaminated environment, it may be necessary to change the filter more frequently.
Contents | Top of Page
ProCarManuals.com
Page 85 of 230
2 0 0 8
VOLVO S60
90 04 Interior
Front seats 92
Interior lighting97
Storage compartments99
Rear seat and trunk103
Spare wheel, tools and jack106
91 04 Interior
92 04 Interior
Front seats
Manually adjusted front seats
1. Front-rear adjustment: lift the bar and move the seat to the position of your choice.
2. Raise/lower the front edge of the seat cushion (option): use the control to pump the front edge of the cushion up or
down.
ProCarManuals.com
Page 86 of 230
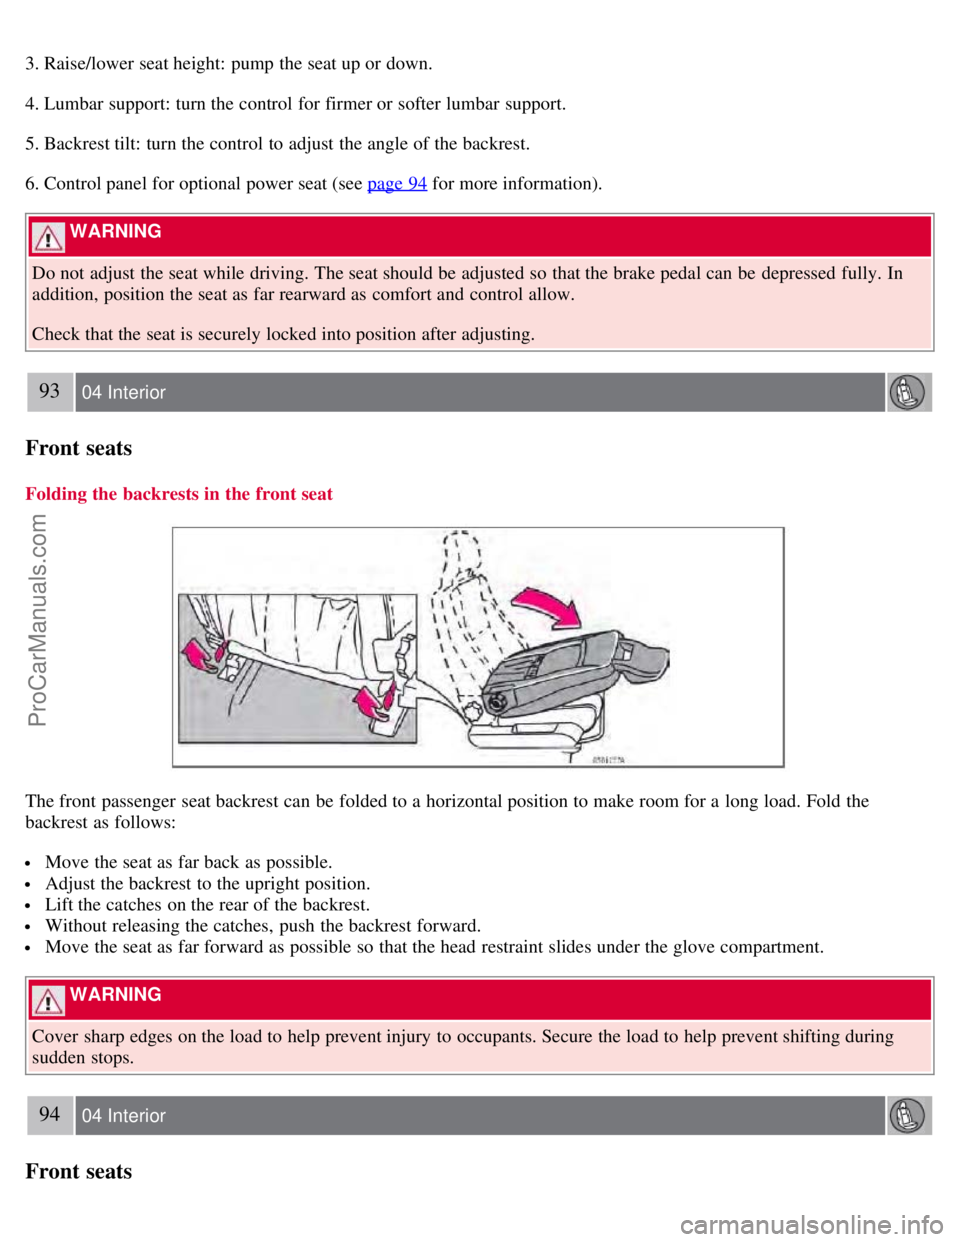
3. Raise/lower seat height: pump the seat up or down.
4. Lumbar support: turn the control for firmer or softer lumbar support.
5. Backrest tilt: turn the control to adjust the angle of the backrest.
6. Control panel for optional power seat (see page 94
for more information).
WARNING
Do not adjust the seat while driving. The seat should be adjusted so that the brake pedal can be depressed fully. In
addition, position the seat as far rearward as comfort and control allow.
Check that the seat is securely locked into position after adjusting.
93 04 Interior
Front seats
Folding the backrests in the front seat
The front passenger seat backrest can be folded to a horizontal position to make room for a long load. Fold the
backrest as follows:
Move the seat as far back as possible.
Adjust the backrest to the upright position.
Lift the catches on the rear of the backrest.
Without releasing the catches, push the backrest forward.
Move the seat as far forward as possible so that the head restraint slides under the glove compartment.
WARNING
Cover sharp edges on the load to help prevent injury to occupants. Secure the load to help prevent shifting during
sudden stops.
94 04 Interior
Front seats
ProCarManuals.com
Page 87 of 230
Power seat - (option on certain models)
Operation
Driver's seat: The seat can be adjusted if the ignition key is in position I, II or if the engine is running. It can also be
adjusted as follows with the ignition off:
Within several minutes after the driver's door has been unlocked from the outside, has been opened, and remains
open.
Within a short period if the driver's door has just been closed.
Within a short period if the driver's door has not been opened after the ignition has been switched off.
Passenger seat: The seat can only be adjusted if the ignition key is in position I, II or if the engine is running.
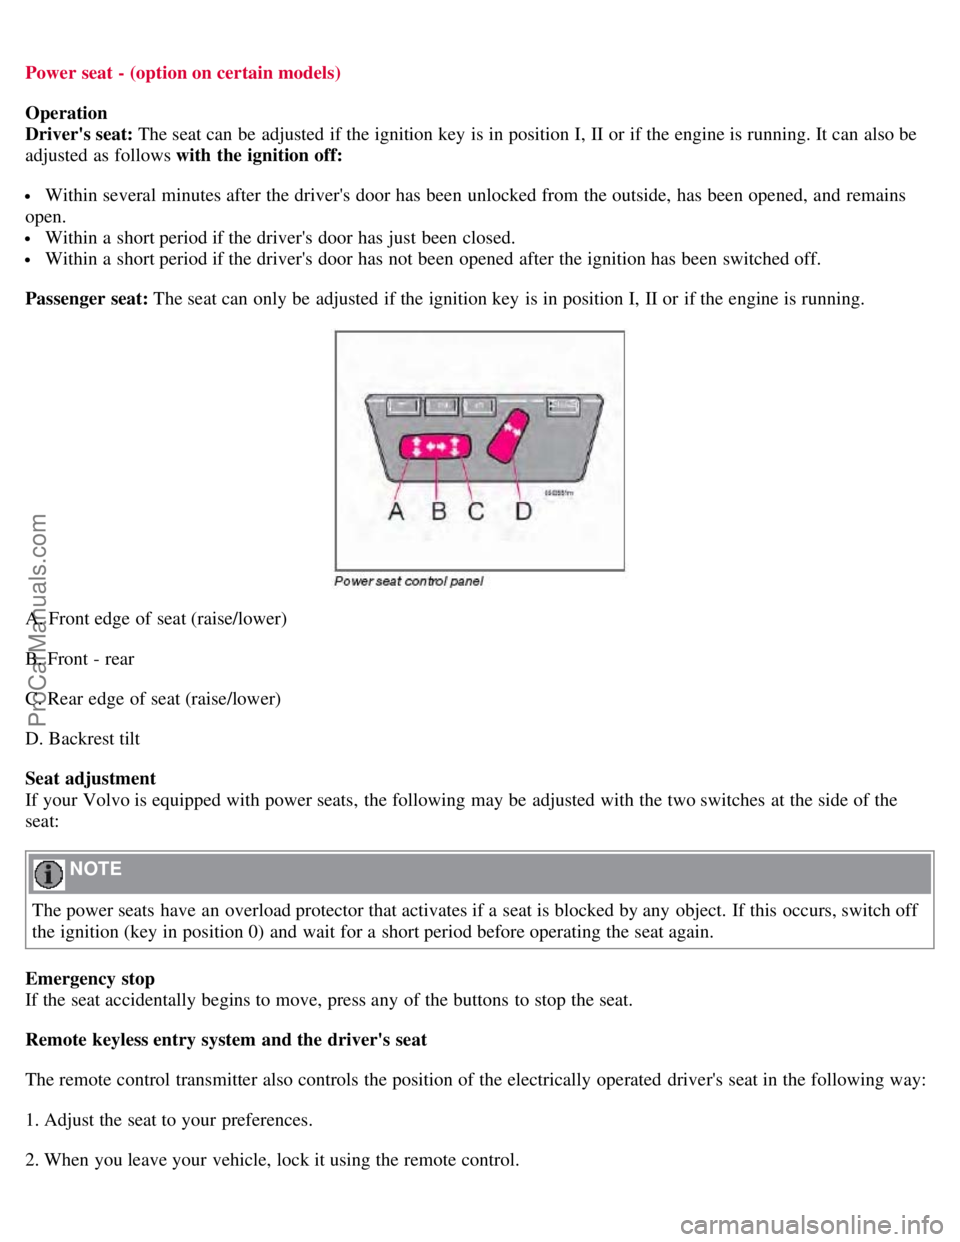
A. Front edge of seat (raise/lower)
B. Front - rear
C. Rear edge of seat (raise/lower)
D. Backrest tilt
Seat adjustment
If your Volvo is equipped with power seats, the following may be adjusted with the two switches at the side of the
seat:
NOTE
The power seats have an overload protector that activates if a seat is blocked by any object. If this occurs, switch off
the ignition (key in position 0) and wait for a short period before operating the seat again.
Emergency stop
If the seat accidentally begins to move, press any of the buttons to stop the seat.
Remote keyless entry system and the driver's seat
The remote control transmitter also controls the position of the electrically operated driver's seat in the following way:
1. Adjust the seat to your preferences.
2. When you leave your vehicle, lock it using the remote control.
ProCarManuals.com
Page 88 of 230
The position of the seat is now stored in the remote control.
Automatic seat adjustment
To move the seat to the position in which you left it:
1. Unlock the driver's door with the same remote control (the one used to lock the doors)
95 04 Interior
Front seats
2. Open the driver's door within 2 minutes.
The driver's seat will automatically move to the position in which you left it.
NOTE
The seat will move to this position even if someone else has moved it to a different seating position and locked the
vehicle with a different remote control.
This feature will work in the same way with all of the remote control transmitters (up to 3) that you use with your
vehicle.
This feature will not function if you lock your vehicle with the key.
WARNING
Because the driver's seat can be adjusted with the ignition off, children should never be left unattended in the
vehicle.
Movement of the seat can be STOPPED at any time by pressing any button on the power seat control panel.
Do not adjust the seat while driving. The seat should be adjusted so that the brake pedal can be depressed fully. In
addition, position the seat as far rearward as comfort and control allow.
The seat rails on the floor must not be obstructed in any way when the seat is in motion.
Programming the memory (option)
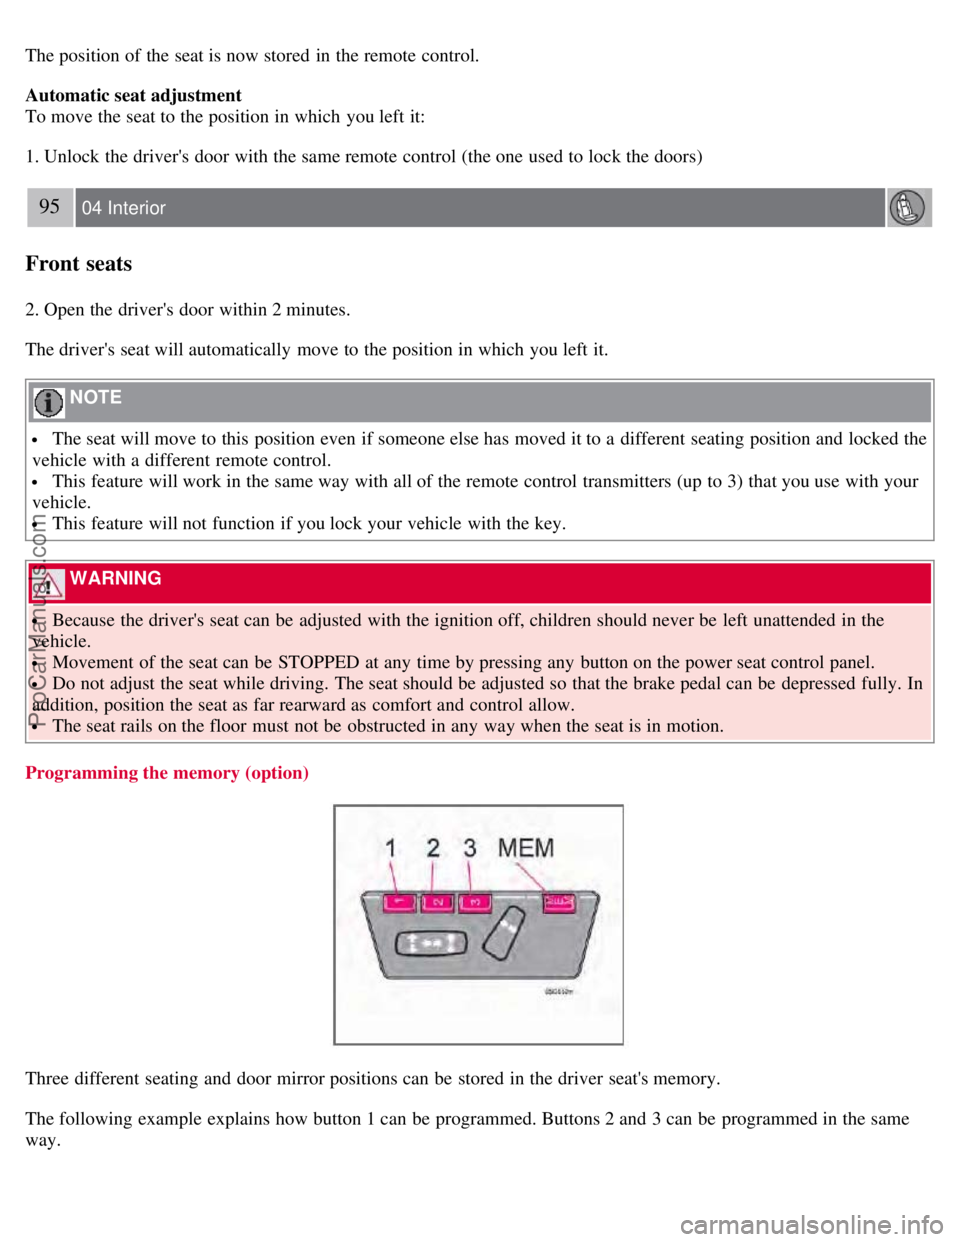
Three different seating and door mirror positions can be stored in the driver seat's memory.
The following example explains how button 1 can be programmed. Buttons 2 and 3 can be programmed in the same
way.
ProCarManuals.com
Page 89 of 230
To program (store) a seat position in button 1:
1. Move the seat to the desired position using the seat adjustment controls (see the previous page).
2. Press and hold down the MEM (memory) button.
96 04 Interior
Front seats
3. With the MEM button depressed, press button 1 briefly to store the seat's current position.
To move the seat to the position that it was in when button 1 was programmed:
Press and hold down button 1 until the seat stops moving.
As a safety precaution, the seat will stop automatically if the button is released before the seat has reached the preset
position.
97 04 Interior
Interior lighting
Reading lights and courtesy light
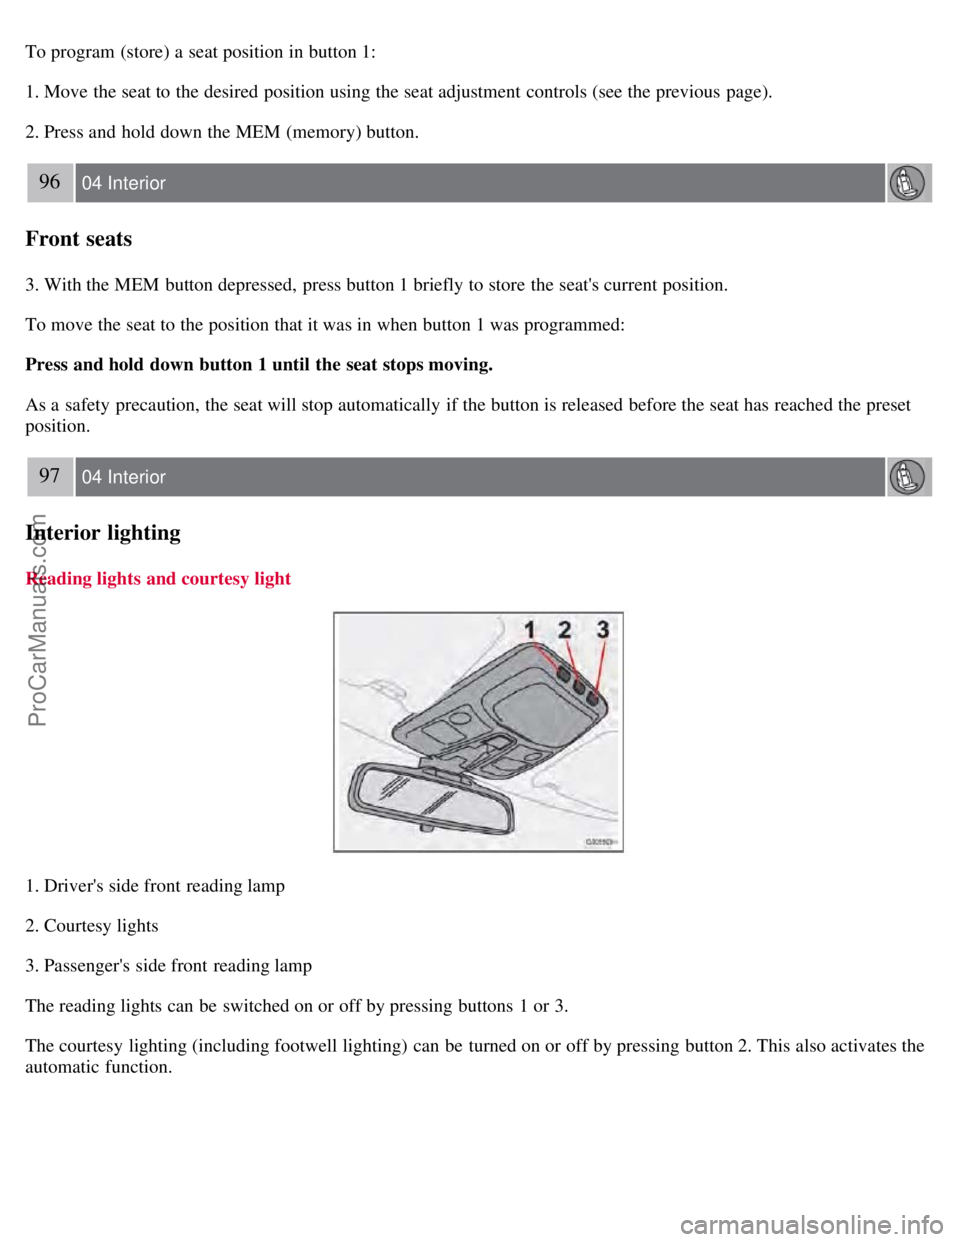
1. Driver's side front reading lamp
2. Courtesy lights
3. Passenger's side front reading lamp
The reading lights can be switched on or off by pressing buttons 1 or 3.
The courtesy lighting (including footwell lighting) can be turned on or off by pressing button 2. This also activates the
automatic function.
ProCarManuals.com
Page 90 of 230
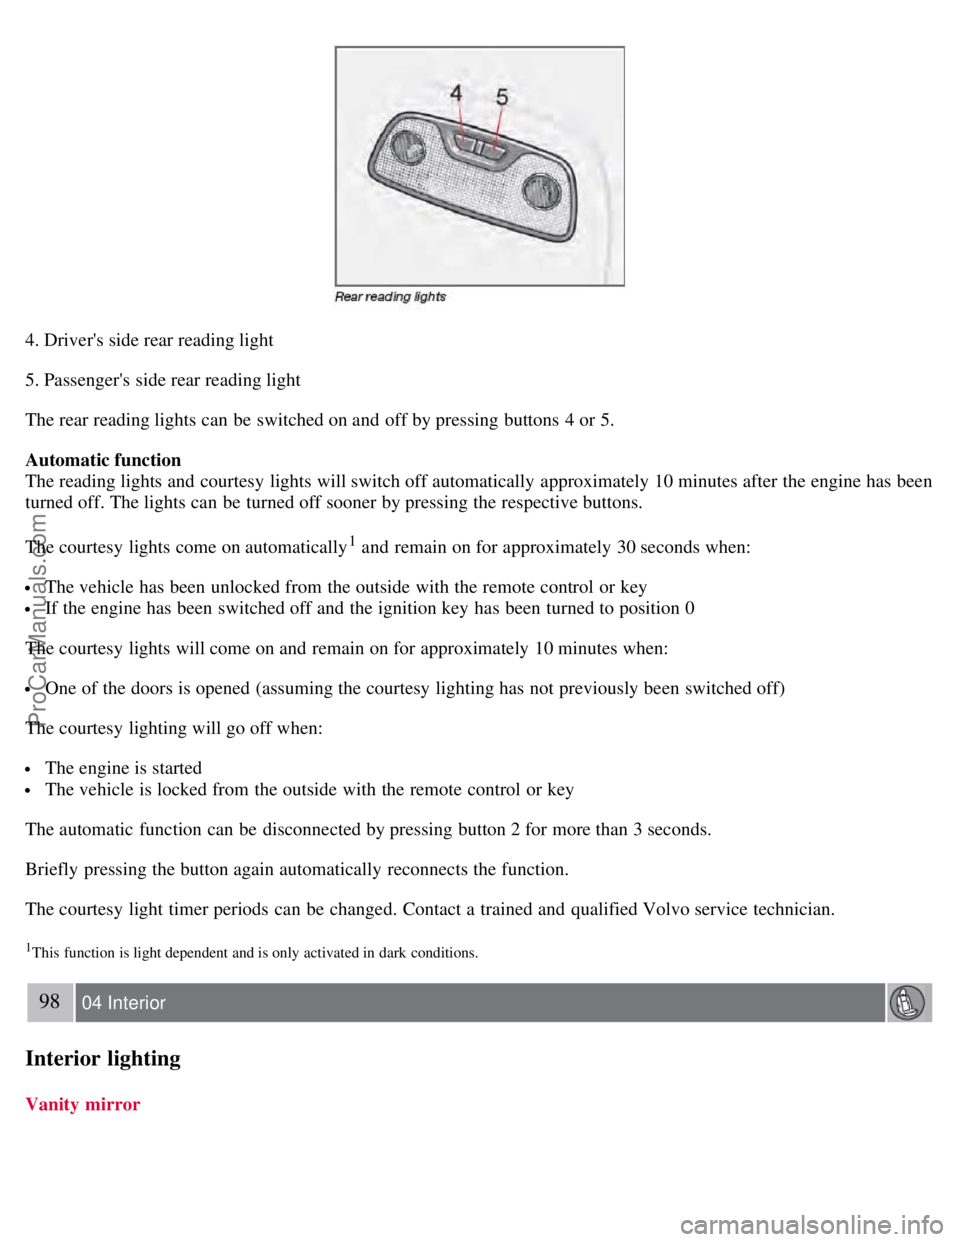
4. Driver's side rear reading light
5. Passenger's side rear reading light
The rear reading lights can be switched on and off by pressing buttons 4 or 5.
Automatic function
The reading lights and courtesy lights will switch off automatically approximately 10 minutes after the engine has been
turned off. The lights can be turned off sooner by pressing the respective buttons.
The courtesy lights come on automatically
1 and remain on for approximately 30 seconds when:
The vehicle has been unlocked from the outside with the remote control or key
If the engine has been switched off and the ignition key has been turned to position 0
The courtesy lights will come on and remain on for approximately 10 minutes when:
One of the doors is opened (assuming the courtesy lighting has not previously been switched off)
The courtesy lighting will go off when:
The engine is started
The vehicle is locked from the outside with the remote control or key
The automatic function can be disconnected by pressing button 2 for more than 3 seconds.
Briefly pressing the button again automatically reconnects the function.
The courtesy light timer periods can be changed. Contact a trained and qualified Volvo service technician.
1This function is light dependent and is only activated in dark conditions.
98 04 Interior
Interior lighting
Vanity mirror
ProCarManuals.com