buttons VOLVO S60 2008 Owners Manual
[x] Cancel search | Manufacturer: VOLVO, Model Year: 2008, Model line: S60, Model: VOLVO S60 2008Pages: 230, PDF Size: 5.33 MB
Page 2 of 230
In Canada: Volvo Cars of Canada Corp.
National Customer Service
175 Gordon Baker Road
North York, Ontario M2H 2N7
1-800-663-8255
www.volvocanada.com
2007 © Volvo Car Corporation. All rights reserved.
2 Contents
00 Introduction
General information 6
Volvo and the environment7
Important warnings9
01 Safety
Occupant safety 12
Seat belts14
Supplemental Restraint System16
Front airbags17
Occupant Weight Sensor (OWS)21
Side impact (SIP) airbag25
Volvo Inflatable Curtain (VIC)26
Whiplash Protection System
(WHIPS)28
Child safety
30
Child restraint systems32
Infant seats34
Convertible seats36
Booster cushions39
ISOFIX lower anchors40
Top tether anchors42
Child restraint registration and
recalls43
02 Instruments and control
Instrument overview
46
Instrument panel48
Instrument and warning symbols49
Buttons in the center console54
Steering wheel adjustment56
Lighting panel57
Fuel filler door-unlocking
manually59
Left-side steering wheel lever
60
Right-side steering wheel lever61
Hazard warning flashers, door
mirror defroster63
Trip computer
64
Cruise control66
Parking brake68
12-volt sockets69
Power windows70
Mirrors72
ProCarManuals.com
Page 9 of 230
In Canada: Volvo Cars of Canada Corp.
National Customer Service
175 Gordon Baker Road
North York, Ontario M2H 2N7
1-800-663-8255
www.volvocanada.com
2007 © Volvo Car Corporation. All rights reserved.
2 Contents
00 Introduction
General information 6
Volvo and the environment7
Important warnings9
01 Safety
Occupant safety 12
Seat belts14
Supplemental Restraint System16
Front airbags17
Occupant Weight Sensor (OWS)21
Side impact (SIP) airbag25
Volvo Inflatable Curtain (VIC)26
Whiplash Protection System
(WHIPS)28
Child safety
30
Child restraint systems32
Infant seats34
Convertible seats36
Booster cushions39
ISOFIX lower anchors40
Top tether anchors42
Child restraint registration and
recalls43
02 Instruments and control
Instrument overview
46
Instrument panel48
Instrument and warning symbols49
Buttons in the center console54
Steering wheel adjustment56
Lighting panel57
Fuel filler door-unlocking
manually59
Left-side steering wheel lever
60
Right-side steering wheel lever61
Hazard warning flashers, door
mirror defroster63
Trip computer
64
Cruise control66
Parking brake68
12-volt sockets69
Power windows70
Mirrors72
ProCarManuals.com
Page 44 of 230
2 0 0 8
VOLVO S60
44 02 Instruments and controls
Instrument overview 46
Instrument panel48
Instrument and warning symbols49
Buttons in the center console54
Steering wheel adjustment56
Lighting panel57
Fuel filler door-unlocking manually59
Left-side steering wheel lever60
Right-side steering wheel lever61
Hazard warning flashers, door mirror defroster63
Trip computer64
Cruise control66
Parking brake68
12-volt sockets69
Power windows70
Mirrors72
Power moonroof (option)76
Home Link® Universal Transceiver (option)78
45 02 Instruments and controls
46 02 Instruments and controls
Instrument overview
ProCarManuals.com
Page 45 of 230
47 02 Instruments and controls
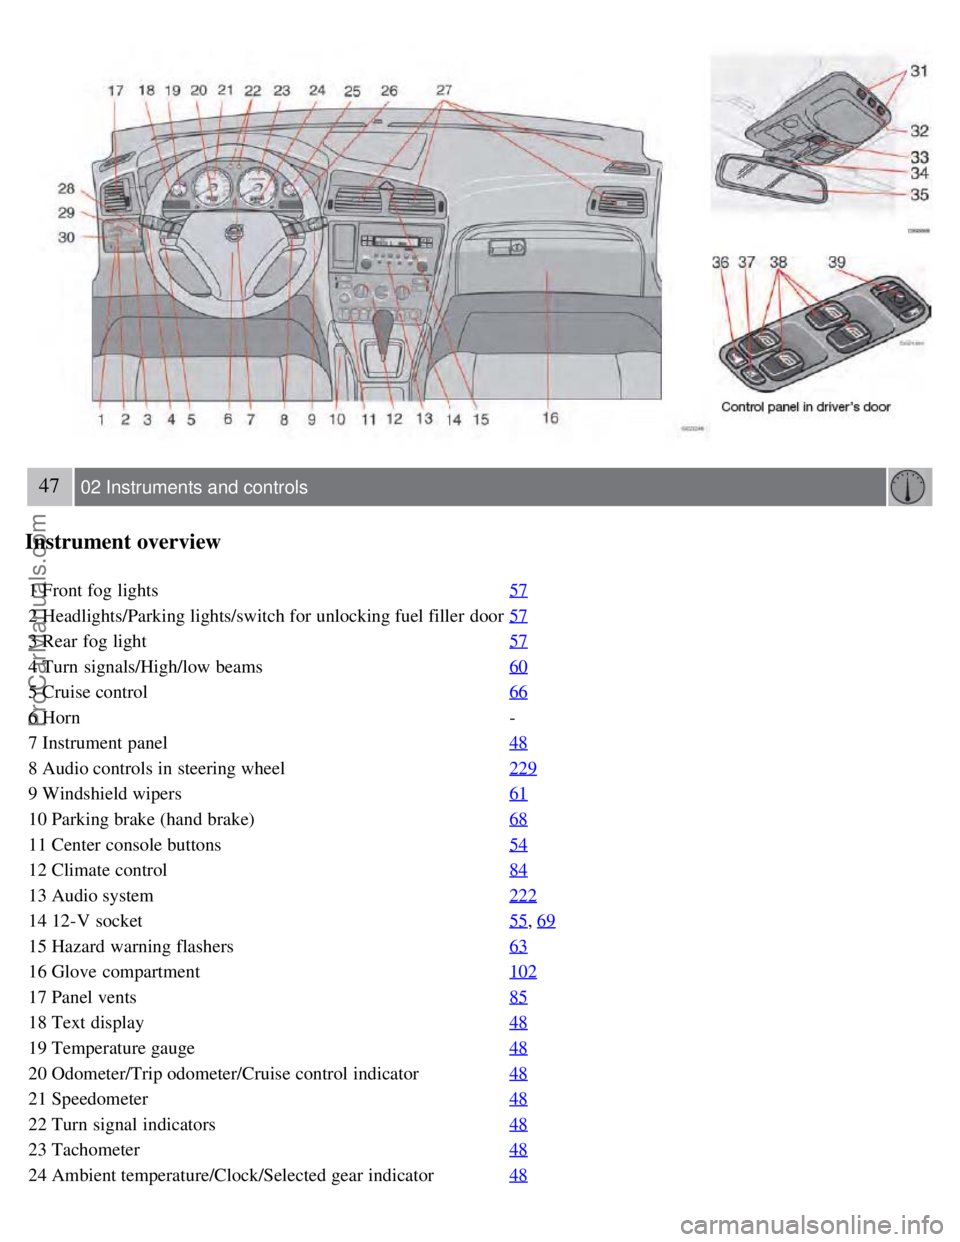
Instrument overview
1 Front fog lights57
2 Headlights/Parking lights/switch for unlocking fuel filler door57
3 Rear fog light57
4 Turn signals/High/low beams60
5 Cruise control66
6 Horn-
7 Instrument panel 48
8 Audio controls in steering wheel229
9 Windshield wipers61
10 Parking brake (hand brake)68
11 Center console buttons54
12 Climate control84
13 Audio system222
14 12-V socket55, 69
15 Hazard warning flashers63
16 Glove compartment102
17 Panel vents85
18 Text display48
19 Temperature gauge48
20 Odometer/Trip odometer/Cruise control indicator48
21 Speedometer48
22 Turn signal indicators48
23 Tachometer48
24 Ambient temperature/Clock/Selected gear indicator48
ProCarManuals.com
Page 51 of 230
54 02 Instruments and controls
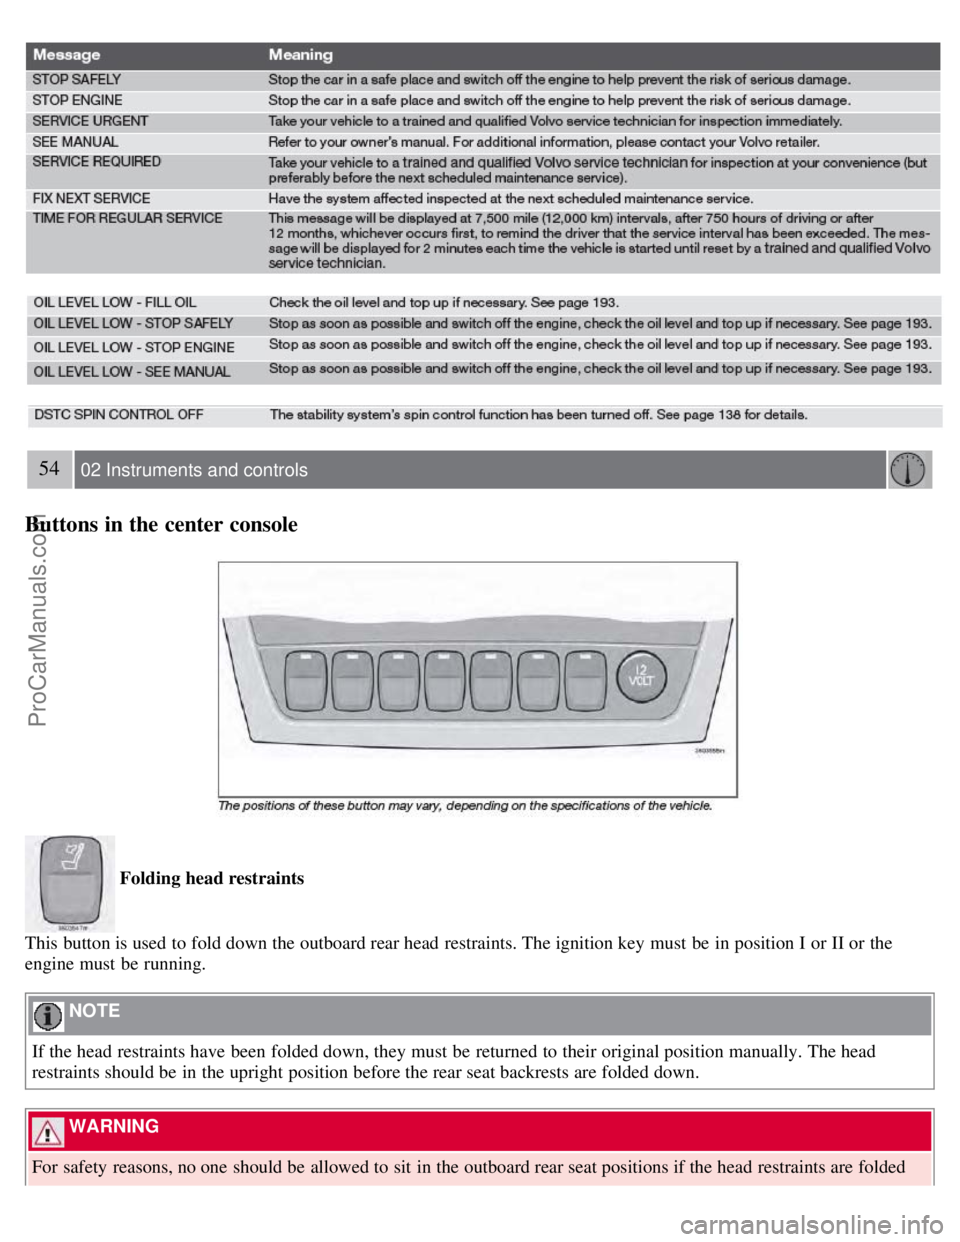
Buttons in the center console
Folding head restraints
This button is used to fold down the outboard rear head restraints. The ignition key must be in position I or II or the
engine must be running.
NOTE
If the head restraints have been folded down, they must be returned to their original position manually. The head
restraints should be in the upright position before the rear seat backrests are folded down.
WARNING
For safety reasons, no one should be allowed to sit in the outboard rear seat positions if the head restraints are folded
ProCarManuals.com
Page 52 of 230
down. If these positions are occupied, the head restraints should be in the upright (fixed) position.
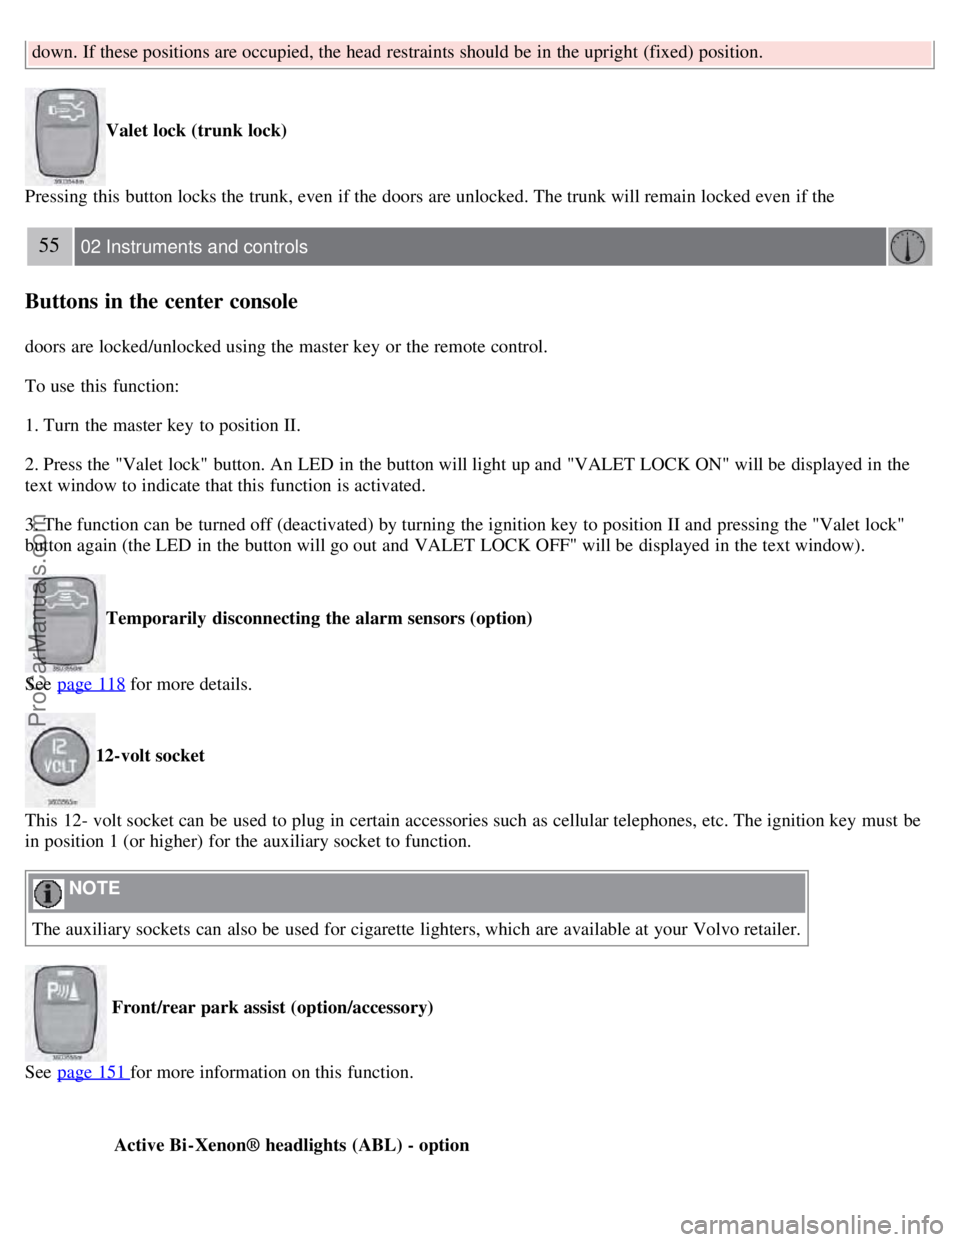
Valet lock (trunk lock)
Pressing this button locks the trunk, even if the doors are unlocked. The trunk will remain locked even if the
55 02 Instruments and controls
Buttons in the center console
doors are locked/unlocked using the master key or the remote control.
To use this function:
1. Turn the master key to position II.
2. Press the "Valet lock" button. An LED in the button will light up and "VALET LOCK ON" will be displayed in the
text window to indicate that this function is activated.
3. The function can be turned off (deactivated) by turning the ignition key to position II and pressing the "Valet lock"
button again (the LED in the button will go out and VALET LOCK OFF" will be displayed in the text window).
Temporarily disconnecting the alarm sensors (option)
See page 118
for more details.
12-volt socket
This 12- volt socket can be used to plug in certain accessories such as cellular telephones, etc. The ignition key must be
in position 1 (or higher) for the auxiliary socket to function.
NOTE
The auxiliary sockets can also be used for cigarette lighters, which are available at your Volvo retailer.
Front/rear park assist (option/accessory)
See page 151
for more information on this function.
Active Bi -Xenon® headlights (ABL) - option
ProCarManuals.com
Page 65 of 230

The power windows are controlled by buttons in the arm rests. The ignition switch must be ON1 (ignition key in position
I, II or the engine running) for the electrically operated windows to function.
To lower: Press down the front edge of the button to the first detent ("stop").
To raise: Lightly pull up the front edge of the button to the first detent ("stop").
1The power windows will also function after the ignition has been switched off as long as neither of the front doors has been opened.
NOTE
To reduce buffeting wind noise if the rear windows are opened, also open the front windows slightly.
Auto up/down function (front doors only)
Either front door window can be opened or closed automatically.
Auto down
Press the front part of the button as far down as possible and release it immediately. To stop the window at any time, pull
the button up.
Auto up
Pull the front part of the button up as far as possible and release it immediately. To stop the window at any time, press
the button down.
NOTE
The electrically operated windows in the front seat have an overload protecting circuit breaker which reverses
movement of the electrically operated windows to their starting points if they are obstructed in any way. Thereafter the
windows will operate normally again.
WARNING
Always remove the ignition key when the vehicle is unattended.
Make sure that the windows are completely unobstructed before they are operated. Never leave children unattended in
the vehicle.
71 02 Instruments and controls
ProCarManuals.com
Page 66 of 230
Power windows
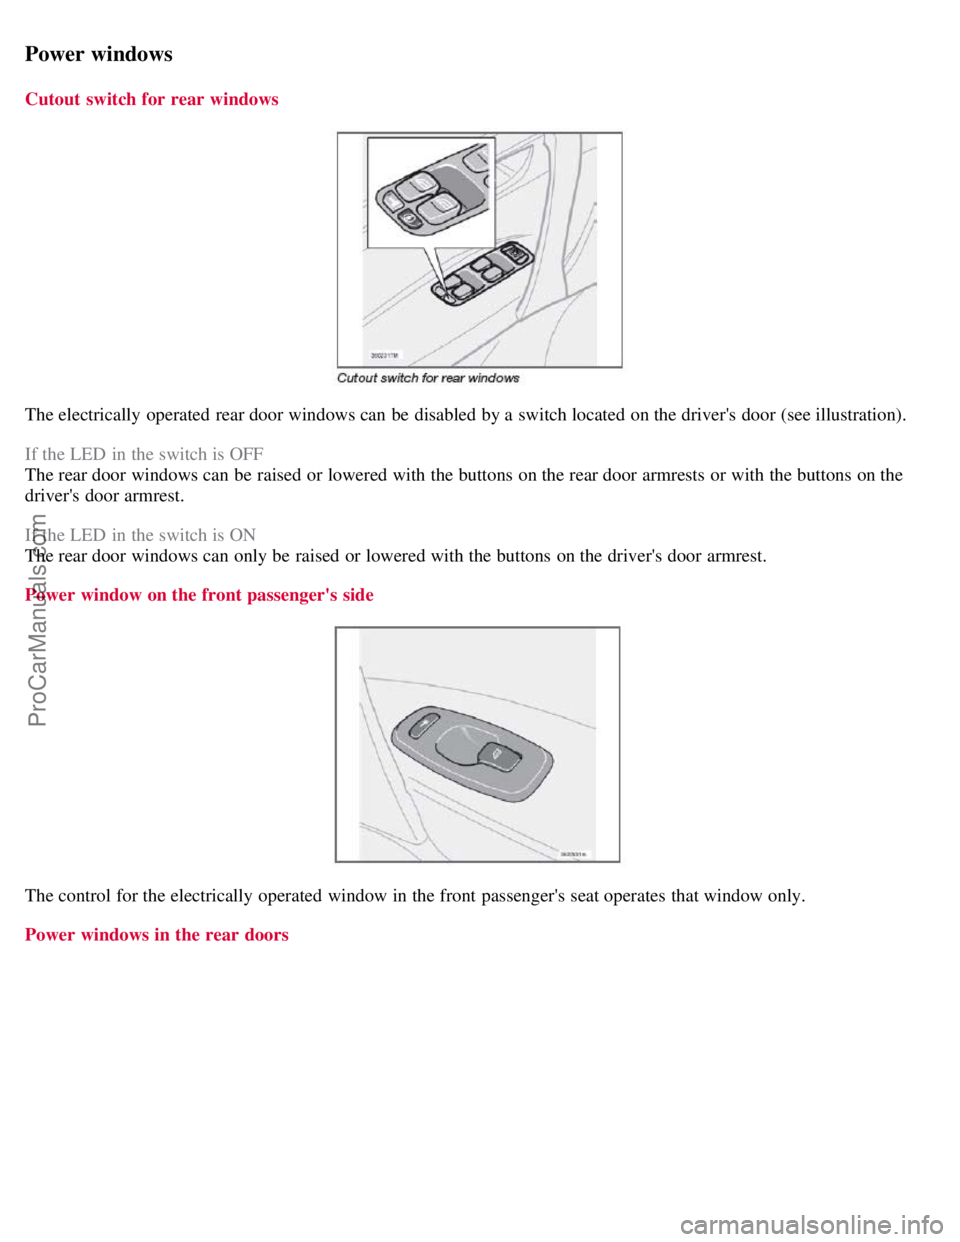
Cutout switch for rear windows
The electrically operated rear door windows can be disabled by a switch located on the driver's door (see illustration).
If the LED in the switch is OFF
The rear door windows can be raised or lowered with the buttons on the rear door armrests or with the buttons on the
driver's door armrest.
If the LED in the switch is ON
The rear door windows can only be raised or lowered with the buttons on the driver's door armrest.
Power window on the front passenger's side
The control for the electrically operated window in the front passenger's seat operates that window only.
Power windows in the rear doors
ProCarManuals.com
Page 72 of 230
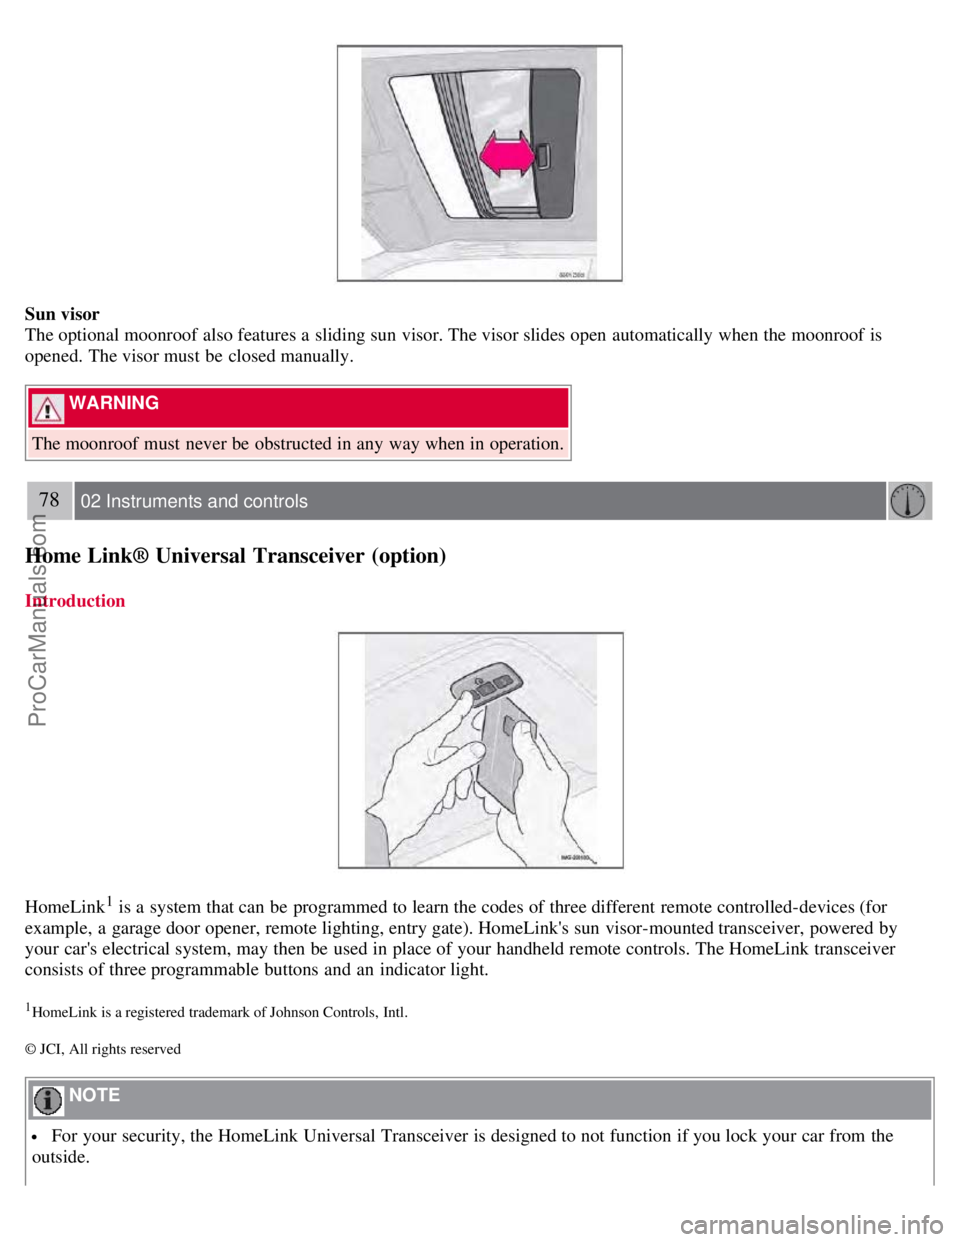
Sun visor
The optional moonroof also features a sliding sun visor. The visor slides open automatically when the moonroof is
opened. The visor must be closed manually.
WARNING
The moonroof must never be obstructed in any way when in operation.
78 02 Instruments and controls
Home Link® Universal Transceiver (option)
Introduction
HomeLink1 is a system that can be programmed to learn the codes of three different remote controlled-devices (for
example, a garage door opener, remote lighting, entry gate). HomeLink's sun visor-mounted transceiver, powered by
your car's electrical system, may then be used in place of your handheld remote controls. The HomeLink transceiver
consists of three programmable buttons and an indicator light.
1HomeLink is a registered trademark of Johnson Controls, Intl.
© JCI, All rights reserved
NOTE
For your security, the HomeLink Universal Transceiver is designed to not function if you lock your car from the
outside.
ProCarManuals.com
Page 73 of 230
Retain the original transmitter(s) for future programming procedures (for example, if you purchase a new vehicle).
For your own security, erase all programmed buttons on the HomeLink Universal Transceiver when you sell your
vehicle.
Metallic sun protection films should not be used on any windows in a vehicle equipped with HomeLink Universal
Transceiver. This could interfere with the transceivers function.
Operating the HomeLink Universal Transceiver
Once programmed, the HomeLink Universal Transceiver can be used in place of your handheld transmitters.
NOTE
The HomeLink universal transceiver will function for 30 minutes after the driver's door has been opened without
switching on the vehicle's ignition.
Press the programmed HomeLink button to activate the garage door, driveway gate, security lightning, home security
system etc.
Your original hand -held transmitters may, of course, be used at any time.
WARNING
If you use HomeLink to open a garage door or gate, be sure no one is near the gate or door while it is in motion.
Do not use the HomeLink Universal Transceiver with any garage door opener that lacks safety "stop" and "reverse"
features as required by federal safety standards. (This includes any garage door opener model manufactured before
April 1, 1982). A garage door opener that cannot "detect" an object, signalling the door to "stop" and "reverse" does
not meet current federal safety standards. Using a garage door opener without these features increases the risk of
serious injury or death. For more information on this matter, call toll-free 1-800-355-3515. (Internet:
www.HomeLink.com
).
Programming the transceiver for the first time (U.S. residents)
1. For first time training, press and hold the two outer HomeLink buttons, releasing only when the HomeLink indicator
light begins to flash after 20 seconds. (Do not perform this step when training the additional HomeLink buttons.)
2. Position the hand -held transmitter 1-3 inches away from the HomeLink surface
79 02 Instruments and controls
Home Link® Universal Transceiver (option)
(located on your sun visor), keeping the HomeLink indicator light in view.
3. Using both hands, simultaneously press and hold both the desired HomeLink button and hand held transmitter button.
DO NOT release until the HomeLink indicator light flashes slowly and then rapidly. When the indicator light flashes
rapidly, both buttons may be released. (The rapid flashing indicates successful training.)
NOTE
Some garage door openers may require you to replace step 3 with the "cycling" procedure noted in the "Programming
the transceiver for the first time (Canadian residents)" section.
4. Press and hold the trained HomeLink button and observe the indicator light.
ProCarManuals.com