tow VOLVO S60 TWIN ENGINE 2020 Service Manual
[x] Cancel search | Manufacturer: VOLVO, Model Year: 2020, Model line: S60 TWIN ENGINE, Model: VOLVO S60 TWIN ENGINE 2020Pages: 657, PDF Size: 13.6 MB
Page 439 of 657
STARTING AND DRIVING
}}
* Option/accessory.437
CAUTION
Bumper-attached trailer hitches must not be used on Volvos, nor shouldsafety chains be attached to thebumper.
Trailer hitches attaching to the vehiclerear axle must not be used.
Never connect a trailer's hydraulicbrake system directly to the vehiclebrake system, nor a trailer's lightingsystem directly to the vehicle lightingsystem. Consult your nearest author-ized Volvo retailer for correct installa-tion.
When towing a trailer, the trailer'ssafety chains or wire must be correctlyfastened to the attachment points pro-vided in the trailer hitch on the vehicle.The safety chain or wire must never befastened to or wound around the tow-ing ball.
NOTE
The optional detachable trailer hitch may not be available in all markets or on allmodels. Consult your Volvo retailer.
NOTE
Extreme weather conditions, towing a trailer, high altitude and lower fuel gradethan recommended are factors that cansignificantly increase the vehicle's fuel con-sumption.
Trailer weights
WARNING
Please adhere to the recommendations provided for trailer weight. If the recom-mendations are not followed, the vehicleand trailer may be difficult to control duringevasive maneuvers and braking.
NOTE
The specified maximum trailer weights are those permitted by Volvo. National vehicleregulations may set additional restrictionson trailer weight and speed. The trailerhitches may be certified for higher towingweights than the vehicle is permitted totow.
Self-leveling suspension
*The vehicle's self-leveling system attempts to keep the vehicle at a constant level, regardlessof load (up to the maximum permitted weight).When the vehicle is stationary, the rear end of the vehicle will be slightly lowered, which isnormal.
Driving in hilly terrain or hot weatherIn certain conditions, there is a risk of over-heating when driving with a trailer. If overheat-ing of the engine and drive system is detected,a warning symbol will illuminate in the instru-ment panel and a message will appear. The automatic transmission selects the opti- mal gear for the current load and enginespeed.
Steep inclines
Do not lock the automatic transmission into a higher gear than what the engine can handle
‒
it is not always preferable to drive in highgears at low rpm.
Parking on a hill
1. Depress the brake pedal.
2. Apply the parking brake.
3. Put the gear selector in P.
4. Release the brake pedal.Put chocks behind the wheels when the vehi- cle is parked on a hill with a trailer attached.
Starting on a hill
1. Depress the brake pedal.
2. Put the gear selector in D.
3. Release the parking brake.
4. Release the brake pedal and start driving.
Page 440 of 657
||
STARTING AND DRIVING
* Option/accessory.
438
Related information
Trailer Stability Assist
* (p. 438)
Checking trailer lights (p. 439)
Towing capacity and tongue weight (p. 630)
Overheating of engine and transmission(p. 433)
Trailer Stability Assist
*
Trailer Stability Assist (TSA 11
) is a function
designed to help stabilize a vehicle that is towing a trailer when the vehicle and trailerhave begun to sway. The function is part of the Electronic Stability Control system ESC 12
.
Reasons for swayingA vehicle towing a trailer may begin to sway for various reasons. Normally this only occursat high speeds. However, if the trailer is over-loaded or unevenly distributed, e.g. too farback, there is a risk of swaying even at lowspeeds. Swaying may be caused by factors such as:
The vehicle and trailer are hit by a sudden, strong crosswind.
The vehicle and trailer are traveling on anuneven road or over a bump.
Sudden movements of the steering wheel.
Once swaying has begun, it can be difficult orimpossible to stop it. This makes the vehicleand trailer difficult to control and there is a riskof swerving into oncoming traffic or driving offthe road.
Trailer Stability Assist functionTrailer Stability Assist continuously monitorsthe vehicle's movements, particularly lateral movements. If swaying is detected, the brakesare applied individually on the front wheels,which has a stabilizing effect on the vehicleand trailer. This is often enough to enable thedriver to regain control of the vehicle. If the Trailer Stability Assist function's first attempt is not adequate to stop the swayingmotion, the brakes are applied on all wheelsand engine power is temporarily reduced. Asthe swaying motion begins to decrease andthe vehicle and trailer have once againbecome stable, TSA stops regulating thebrakes/engine power and the driver regainscontrol of the vehicle.
NOTE
Trailer Stability Assist is deactivated if the driver selects the sport mode by deactivat- ing
ESC in the center display's menu sys-
tem.
Trailer Stability Assist may not intervene if the driver tries to compensate for the swayingmotion by moving the steering wheel rapidly,because the system will then not be able todetermine if it is the trailer or the driver caus-ing the swaying.
11 Trailer Stability Assist
12 Electronic Stability Control
Page 442 of 657
||
STARTING AND DRIVING
* Option/accessory.
440
Checking trailer lights *
Automatic check
When the trailer has been connected to the vehicle's electrical system, its lights can bechecked by automatically activating them.This function helps the driver check that thetrailer's lights are functioning correctly beforestarting to drive. In order to perform this check, the vehicle must be switched off.
1. When a trailer is connected to the towbar,
the message
Automatic Trailer Lamp
Check will appear in the instrument panel.
2. Acknowledge the message by pressing the O button on the right-side steering
wheel keypad.
> The light check will begin.
3. Get out of the vehicle to perform the check.
> All of the lights on the trailer will beginflashing, and then illuminate separately one at a time.
4. Visually check that all of the trailer's lights are functioning correctly.
5. After a short time, all of the trailer's lights will start flashing again.
> The light check is completed.
Disabling the automatic check
The automatic light check can be disabled in the center display. 1.Tap
Settings in the Top view.
2. Tap
My CarLights and Lighting.
3. Deselect
Automatic Trailer Lamp
Check.
Manual check
If the automatic check has been disabled, the check can be started manually. 1. Tap
Settings in the Top view.
2. Tap
My CarLights and Lighting.
3. Select
Manual Trailer Lamp Check.
> The light check will begin. Get out of the vehicle to perform the check.
Related information
Driving with a trailer (p. 436)
Towing using a towline
This section refers to one vehicle being towed behind another using a towline.
Never attempt to tow a Twin Engine vehicle behind another vehicle as this could damagethe electric motor. The vehicle must instead belifted onto a tow truck and transported with allfour wheels on the bed or lifting platform ofthe truck (no wheels may touch the road).
Towing another vehicleTowing another vehicle requires a lot of power - use the Constant AWD drive mode. This
helps charge the hybrid battery and improve the vehicle's driving and roadholding characte-ristics. Before towing another vehicle, check applica- ble speed limit regulations.
Jump startingNever attempt to tow the vehicle to start theengine, as this could damage the electricmotor. Use an auxiliary battery if the start bat-tery's charge level is so low that the enginecannot be started.
CAUTION
Attempts to tow-start the vehicle could cause damage to the electrical drive motorand three-way catalytic converter.
Page 443 of 657
STARTING AND DRIVING
}}
441
Related information
Attaching and removing the towing eyelet (p. 441)
Hazard warning flashers (p. 160)
Recovery (p. 442)
Jump starting using another battery(p. 434)
Selecting ignition mode (p. 396)
Transmission (p. 406)
Attaching and removing the towing eyelet
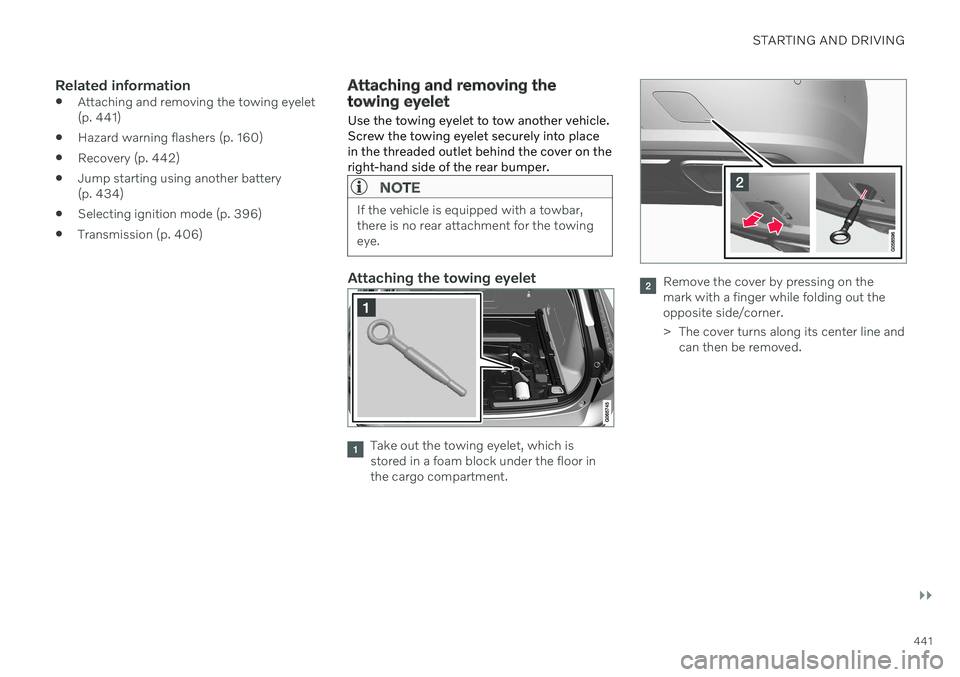
Use the towing eyelet to tow another vehicle. Screw the towing eyelet securely into placein the threaded outlet behind the cover on theright-hand side of the rear bumper.
NOTE
If the vehicle is equipped with a towbar, there is no rear attachment for the towingeye.
Attaching the towing eyelet
Take out the towing eyelet, which is stored in a foam block under the floor inthe cargo compartment.
Remove the cover by pressing on the mark with a finger while folding out theopposite side/corner.
> The cover turns along its center line and can then be removed.
Page 444 of 657
||
STARTING AND DRIVING
* Option/accessory.
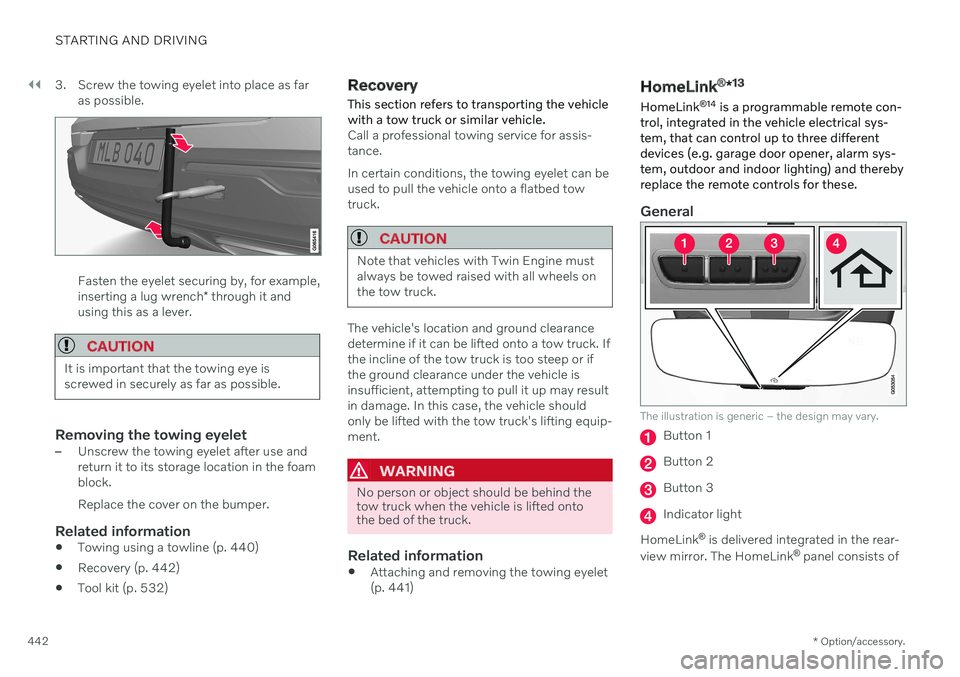
442 3. Screw the towing eyelet into place as far
as possible.
Fasten the eyelet securing by, for example, inserting a lug wrench * through it and
using this as a lever.
CAUTION
It is important that the towing eye is screwed in securely as far as possible.
Removing the towing eyelet–Unscrew the towing eyelet after use and return it to its storage location in the foamblock. Replace the cover on the bumper.
Related information
Towing using a towline (p. 440)
Recovery (p. 442)
Tool kit (p. 532)
Recovery
This section refers to transporting the vehicle with a tow truck or similar vehicle.
Call a professional towing service for assis- tance. In certain conditions, the towing eyelet can be used to pull the vehicle onto a flatbed towtruck.
CAUTION
Note that vehicles with Twin Engine must always be towed raised with all wheels onthe tow truck.
The vehicle's location and ground clearance determine if it can be lifted onto a tow truck. Ifthe incline of the tow truck is too steep or ifthe ground clearance under the vehicle isinsufficient, attempting to pull it up may resultin damage. In this case, the vehicle shouldonly be lifted with the tow truck's lifting equip-ment.
WARNING
No person or object should be behind the tow truck when the vehicle is lifted ontothe bed of the truck.
Related information
Attaching and removing the towing eyelet (p. 441)
HomeLink ®
*13
HomeLink ®
14
is a programmable remote con-
trol, integrated in the vehicle electrical sys- tem, that can control up to three differentdevices (e.g. garage door opener, alarm sys-tem, outdoor and indoor lighting) and therebyreplace the remote controls for these.
General
The illustration is generic – the design may vary.
Button 1
Button 2
Button 3
Indicator light
HomeLink ®
is delivered integrated in the rear-
view mirror. The HomeLink ®
panel consists of
Page 470 of 657
||
AUDIO, MEDIA AND INTERNET
* Option/accessory.
468
5 days
Tap to see weather information for the coming 5 days. Tap
Back to return to the Local screen orClose to return to the SiriusXM Travel Link
home screen.
Ski conditionTap to display a list of ski areas in the vicinity of the vehicle. Tap a name in the list for infor-mation such as if the ski area is open/closed,temperature, wind conditions, snow condi-tions, the number of lifts that are in operation,etc.
Weather locations
Ski location
Tap Map view to display a map and a weatherlegend. Tap
Map options to display the following
alternatives.
Weather radar
Storm attributes
Surface features
Tropical storm tracks
Winds
Tap the relevant box to the right of the option to select/deselect it. Tap Done to confirm and
return to the previous screen or Cancel.
AreasTap Areas to display a list of areas/locations in
states from the SiriusXM Travel Link database. Scroll to a state and tap to display:
Weather locations: tap arrow to the right
to display a list of towns. Scroll to desired town and tap for detailed weather infor-mation. You can choose Map view, today,5 days or Favorites (star)
Ski locations: tap arrow at right to dis-
play local ski areas. Tap an area for detailed info.
For information about storing a location, state,town, etc. as a favorite, see the heading"Favorites" in the article "SiriusXM TravelLink."
Related information
SiriusXM Travel Link ®
* (p. 466)
SiriusXM Travel Link ®
* - Fuel (p. 469)
SiriusXM Travel Link ®
* - Sports (p. 470)
SiriusXM Travel Link ®
* - Notifications
(p. 468)
SiriusXM Travel Link ®
* -
Notifications
This SiriusXM Travel Link service provides notifications of potential weather problems orother emergency situations in the vicinity ofthe vehicle.
From the SiriusXM Travel Link home screen, to show notifications:
–Tap the Alerts button to display this
screen.
If any notifications are currently available, a message will appear at the top of thescreen. They can also be listed from the
Settings menu in the center display's Top
view.
If no notifications are available,
No active
alerts will be displayed.
Types of notifications
To select the types of notifications to be dis- played: 1. From the
Alerts screen, tap the Select
alerts button at the bottom of the screen.
2. This displays the types of notifications that can be displayed. Tap the box to the right of each type of notification to select/dese-lect it.
3. Tap
Done when you have made your
selections. You will return to the Alertsscreen.
Page 486 of 657
||
AUDIO, MEDIA AND INTERNET
* Option/accessory.
484 but the text will be shown in your iOS device. When using Siri, note that it is thephone's microphones that are used andthe quality therefore depends on thephone's location.
If the device is connected to the vehiclethrough Bluetooth, the connection will bebroken when CarPlay is used. ResumeInternet connection in the vehicle by teth-ering using the device's Wi-Fi hotspot.
Some of CarPlay's functions (such asvoice calls and messages) interrupt theuse of the vehicle's own functions andCarPlay will instead be automatically dis-played. If you do not wish this to happen,deselect display of the correspondingfunction in CarPlay under the phone'snotification settings.
CarPlay only works with iPhone 9
.
NOTE
Availability and functionality can vary depending on market.
Related information
Apple ®
CarPlay ®
* (p. 480)
Connecting the vehicle to the Internet via a phone (Wi-Fi) (p. 497)
Android Auto
*
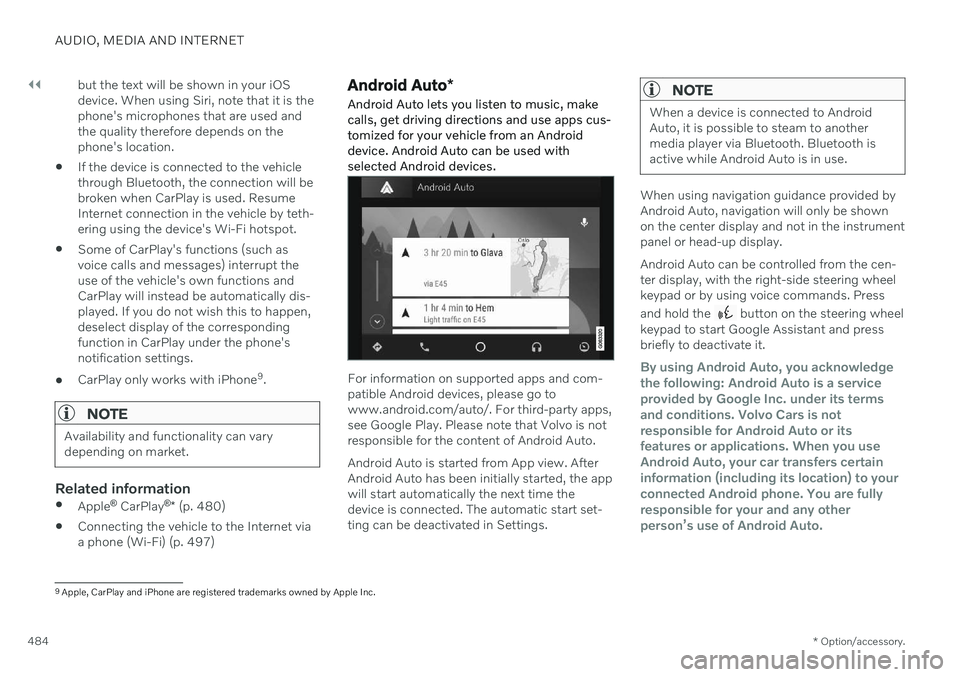
Android Auto lets you listen to music, make calls, get driving directions and use apps cus-tomized for your vehicle from an Androiddevice. Android Auto can be used withselected Android devices.
For information on supported apps and com- patible Android devices, please go towww.android.com/auto/. For third-party apps,see Google Play. Please note that Volvo is notresponsible for the content of Android Auto. Android Auto is started from App view. After Android Auto has been initially started, the appwill start automatically the next time thedevice is connected. The automatic start set-ting can be deactivated in Settings.
NOTE
When a device is connected to Android Auto, it is possible to steam to anothermedia player via Bluetooth. Bluetooth isactive while Android Auto is in use.
When using navigation guidance provided by Android Auto, navigation will only be shownon the center display and not in the instrumentpanel or head-up display. Android Auto can be controlled from the cen- ter display, with the right-side steering wheelkeypad or by using voice commands. Press and hold the
button on the steering wheel
keypad to start Google Assistant and press briefly to deactivate it.
By using Android Auto, you acknowledge the following: Android Auto is a serviceprovided by Google Inc. under its termsand conditions. Volvo Cars is notresponsible for Android Auto or itsfeatures or applications. When you useAndroid Auto, your car transfers certaininformation (including its location) to yourconnected Android phone. You are fullyresponsible for your and any otherperson
Page 509 of 657
AUDIO, MEDIA AND INTERNET
}}
507
Telegraph Co. or Unix System Laboratories, Inc. and are reproduced herein with thepermission of UNIX System Laboratories, Inc.Redistribution and use in source and binaryforms, with or without modification, arepermitted provided that the followingconditions are met: Redistributions of sourcecode must retain the above copyright notice,this list of conditions and the followingdisclaimer. Redistributions in binary form mustreproduce the above copyright notice, this listof conditions and the following disclaimer inthe documentation and/or other materialsprovided with the distribution. Neither thename of the
OF USE, DATA, OR PROFITS; OR BUSINESSINTERRUPTION) HOWEVER CAUSED ANDON ANY THEORY OF LIABILITY, WHETHERIN CONTRACT, STRICT LIABILITY, OR TORT(INCLUDING NEGLIGENCE OROTHERWISE) ARISING IN ANY WAY OUTOF THE USE OF THIS SOFTWARE, EVEN IFADVISED OF THE POSSIBILITY OF SUCHDAMAGE. This software is based in part on the work of the Independent JPEG Group. This software uses parts of sources from "libtess". The Original Code is: OpenGLSample Implementation, Version 1.2.1,released January 26, 2000, developed bySilicon Graphics, Inc. The Original Code isCopyright (c) 1991-2000 Silicon Graphics,Inc. Copyright in any portions created by thirdparties is as indicated elsewhere herein. AllRights Reserved. Copyright (C) [1991-2000]Silicon Graphics, Inc. All Rights Reserved.Permission is hereby granted, free of charge,to any person obtaining a copy of thissoftware and associated documentation files(the "Software"), to deal in the Softwarewithout restriction, including withoutlimitation the rights to use, copy, modify,merge, publish, distribute, sublicense, and/orsell copies of the Software, and to permitpersons to whom the Software is furnished todo so, subject to the following conditions: Theabove copyright notice including the dates of
first publication and either this permissionnotice or a reference to http://oss.sgi.com/projects/FreeB/ shall be included in all copiesor substantial portions of the Software. THESOFTWARE IS PROVIDED "AS IS",WITHOUT WARRANTY OF ANY KIND,EXPRESS OR IMPLIED, INCLUDING BUTNOT LIMITED TO THE WARRANTIES OFMERCHANTABILITY, FITNESS FOR APARTICULAR PURPOSE ANDNONINFRINGEMENT. IN NO EVENT SHALLSILICON GRAPHICS, INC. BE LIABLE FORANY CLAIM, DAMAGES OR OTHERLIABILITY, WHETHER IN AN ACTION OFCONTRACT, TORT OR OTHERWISE,ARISING FROM, OUT OF OR INCONNECTION WITH THE SOFTWARE ORTHE USE OR OTHER DEALINGS IN THESOFTWARE. Except as contained in thisnotice, the name of Silicon Graphics, Inc. shallnot be used in advertising or otherwise topromote the sale, use or other dealings in thisSoftware without prior written authorizationfrom Silicon Graphics, Inc. This software is based in parts on the work of the FreeType Team. This software uses parts of SSLeay Library: Copyright (C) 1995-1998 Eric Young([email protected]). All rights reserved
Linux software
Page 534 of 657
WHEELS AND TIRES
* Option/accessory.
532
When changing wheels
The wheels can be changed, e.g. to switch to snow tires or spare tires. Follow the applica-ble instructions for removing and installingthe wheel.
Changing to tires of another dimension
Make sure that the tire dimension is approved for use on the vehicle.
Related information
Removing a wheel (p. 534)
Installing a wheel (p. 536)
Tool kit (p. 532)
Snow tires (p. 539)
Spare wheel (p. 537)
Wheel bolts (p. 533)
Tool kit
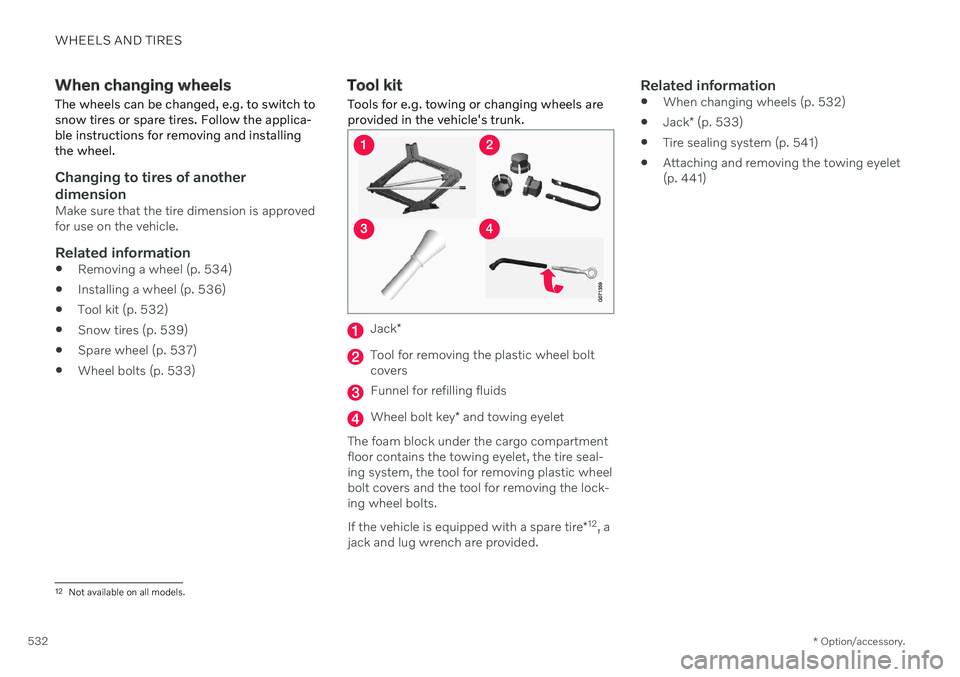
Tools for e.g. towing or changing wheels are provided in the vehicle's trunk.
Jack *
Tool for removing the plastic wheel bolt covers
Funnel for refilling fluids
Wheel bolt key * and towing eyelet
The foam block under the cargo compartment floor contains the towing eyelet, the tire seal-ing system, the tool for removing plastic wheelbolt covers and the tool for removing the lock-ing wheel bolts. If the vehicle is equipped with a spare tire *12
, a
jack and lug wrench are provided.
Related information
When changing wheels (p. 532)
Jack
* (p. 533)
Tire sealing system (p. 541)
Attaching and removing the towing eyelet (p. 441)
12
Not available on all models.
Page 536 of 657
WHEELS AND TIRES
* Option/accessory.
534
Removing a wheel Wheel changes must always be carried out correctly. The following instructions showhow to remove a wheel and what is impor-tant to keep in mind.
CAUTION
When not in use, the jack
* should be
kept in its storage compartment under the cargo compartment floor.
The jack provided with your vehicle isintended to be used only in temporarysituations such as changing wheels inthe event of a flat tire. Only the jackthat came with your particular modelshould be used to lift the vehicle. If thevehicle needs to be lifted more fre-quently or for a prolonged period, usinga garage jack or hoist is recommended.Always follow this device's instructionsfor use.
WARNING
Apply the parking brake and put the gear selector in the Park (
P) position.
Block the wheels standing on theground, use rigid wooden blocks orlarge stones.
Check that the jack is not damaged,the threads are properly lubricated andit is free from dirt.
Be sure the jack is on a firm, level, non-slippery surface and that it is uprightand not leaning.
The jack must correctly engage in thejack attachment.
No objects should be placed betweenthe base of the jack and the ground, orbetween the jack and the attachmentbar on the vehicle.
Never let anyone remain in the vehiclewhen it is raised on a jack.
If a tire must be changed near passingtraffic, make sure all passengers moveto a safe location.
Use a jack intended for the vehiclewhen changing a tire. For any otherjob, use stands to support the vehicle.
Never crawl under or allow any part ofyour body to be extended under a vehi-cle supported by a jack. 1. Turn on the vehicle's hazard warning
flashers if a wheel change must be per-formed in an area with traffic.
2. Apply the parking brake and put the gear selector in P, or first gear if the vehicle has
a manual transmission. For vehicles with
Leveling Control* : If the
vehicle is equipped with pneumatic sus- pension, this must be switched off before the vehicle is lifted with the jack *.
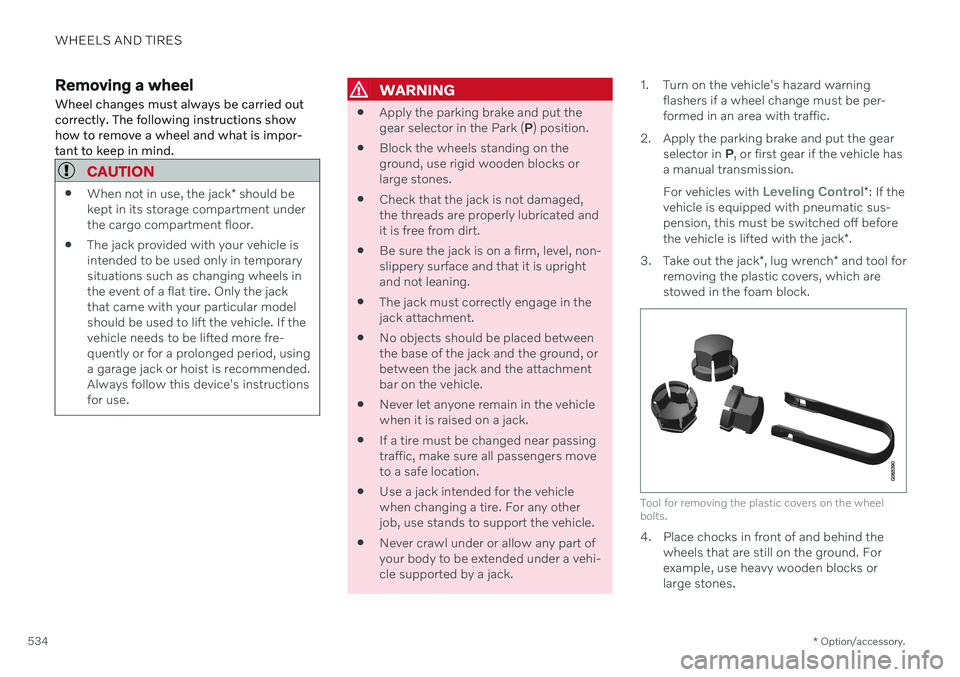
3. Take out the jack *, lug wrench * and tool for
removing the plastic covers, which are stowed in the foam block.
Tool for removing the plastic covers on the wheel bolts.
4. Place chocks in front of and behind the wheels that are still on the ground. For example, use heavy wooden blocks orlarge stones.