instrument panel VOLVO S80 2007 Owners Manual
[x] Cancel search | Manufacturer: VOLVO, Model Year: 2007, Model line: S80, Model: VOLVO S80 2007Pages: 251, PDF Size: 5.7 MB
Page 10 of 251
Make sure that the shoulder belt is rolled up into its retractor and that the shoulder and lap belts are taut.
15 01 Safety
Safety in the passenger compartment
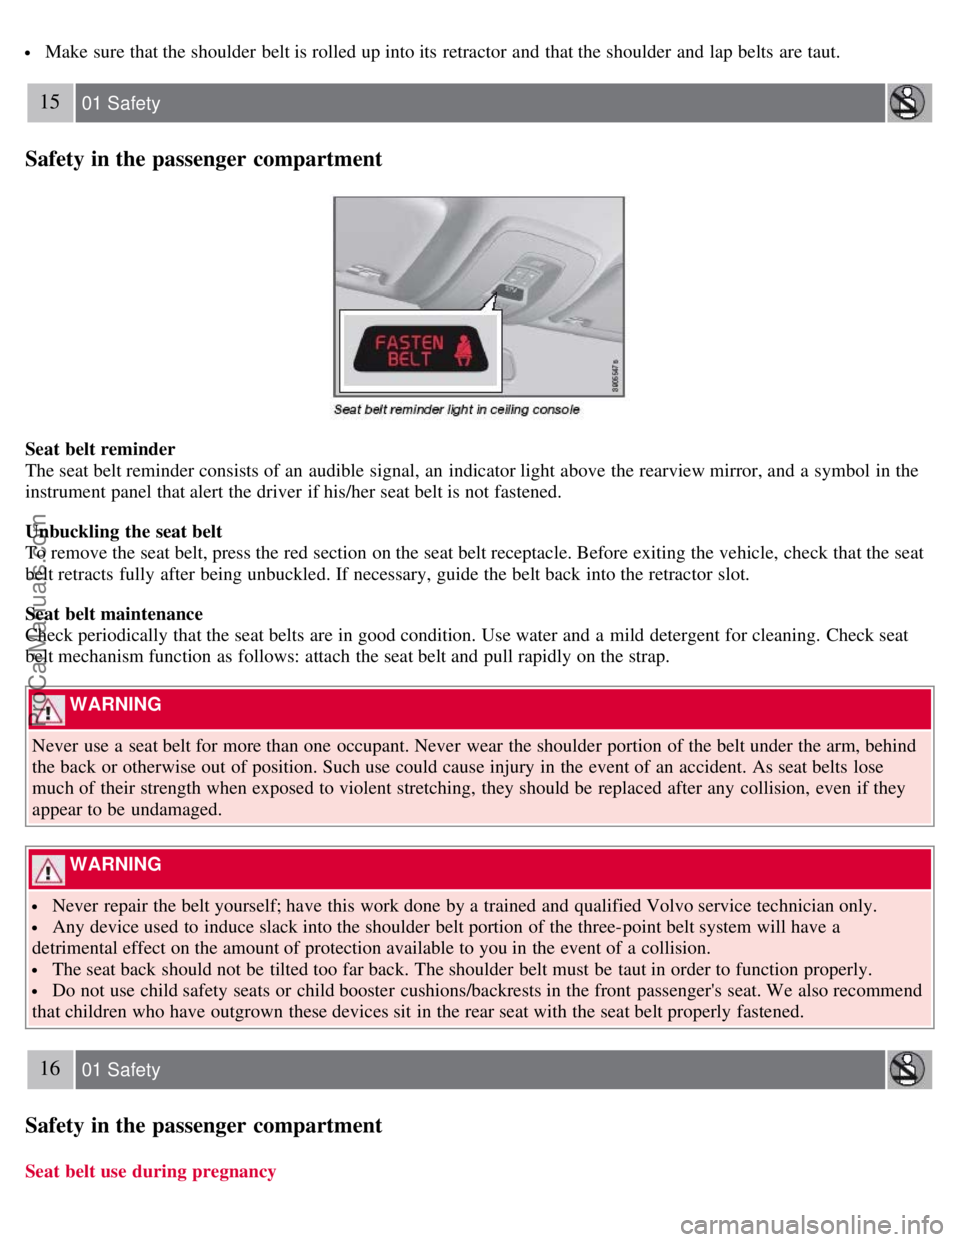
Seat belt reminder
The seat belt reminder consists of an audible signal, an indicator light above the rearview mirror, and a symbol in the
instrument panel that alert the driver if his/her seat belt is not fastened.
Unbuckling the seat belt
To remove the seat belt, press the red section on the seat belt receptacle. Before exiting the vehicle, check that the seat
belt retracts fully after being unbuckled. If necessary, guide the belt back into the retractor slot.
Seat belt maintenance
Check periodically that the seat belts are in good condition. Use water and a mild detergent for cleaning. Check seat
belt mechanism function as follows: attach the seat belt and pull rapidly on the strap.
WARNING
Never use a seat belt for more than one occupant. Never wear the shoulder portion of the belt under the arm, behind
the back or otherwise out of position. Such use could cause injury in the event of an accident. As seat belts lose
much of their strength when exposed to violent stretching, they should be replaced after any collision, even if they
appear to be undamaged.
WARNING
Never repair the belt yourself; have this work done by a trained and qualified Volvo service technician only.
Any device used to induce slack into the shoulder belt portion of the three-point belt system will have a
detrimental effect on the amount of protection available to you in the event of a collision.
The seat back should not be tilted too far back. The shoulder belt must be taut in order to function properly.
Do not use child safety seats or child booster cushions/backrests in the front passenger's seat. We also recommend
that children who have outgrown these devices sit in the rear seat with the seat belt properly fastened.
16 01 Safety
Safety in the passenger compartment
Seat belt use during pregnancy
ProCarManuals.com
Page 11 of 251
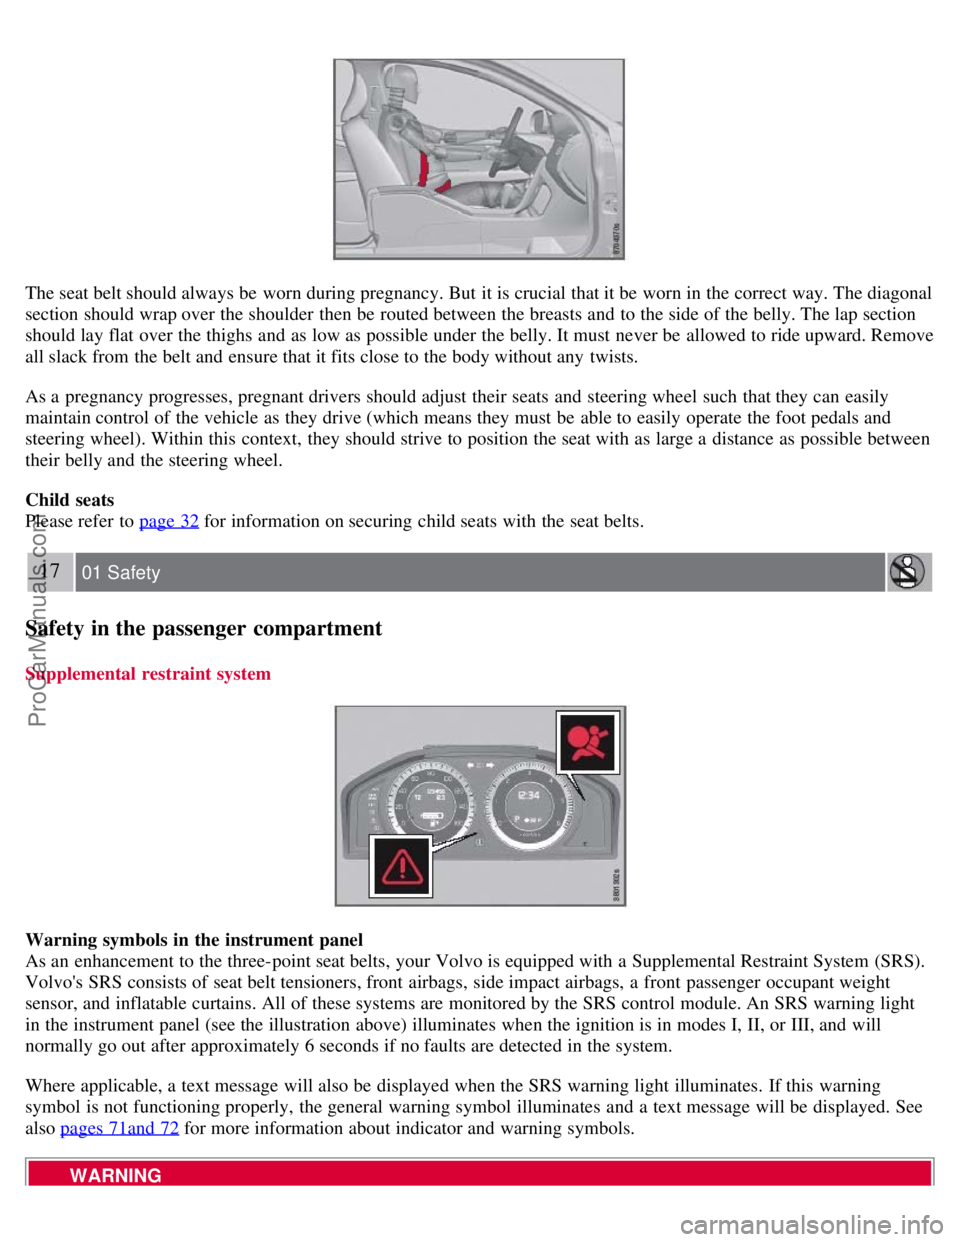
The seat belt should always be worn during pregnancy. But it is crucial that it be worn in the correct way. The diagonal
section should wrap over the shoulder then be routed between the breasts and to the side of the belly. The lap section
should lay flat over the thighs and as low as possible under the belly. It must never be allowed to ride upward. Remove
all slack from the belt and ensure that it fits close to the body without any twists.
As a pregnancy progresses, pregnant drivers should adjust their seats and steering wheel such that they can easily
maintain control of the vehicle as they drive (which means they must be able to easily operate the foot pedals and
steering wheel). Within this context, they should strive to position the seat with as large a distance as possible between
their belly and the steering wheel.
Child seats
Please refer to page 32
for information on securing child seats with the seat belts.
17 01 Safety
Safety in the passenger compartment
Supplemental restraint system
Warning symbols in the instrument panel
As an enhancement to the three-point seat belts, your Volvo is equipped with a Supplemental Restraint System (SRS).
Volvo's SRS consists of seat belt tensioners, front airbags, side impact airbags, a front passenger occupant weight
sensor, and inflatable curtains. All of these systems are monitored by the SRS control module. An SRS warning light
in the instrument panel (see the illustration above) illuminates when the ignition is in modes I, II, or III, and will
normally go out after approximately 6 seconds if no faults are detected in the system.
Where applicable, a text message will also be displayed when the SRS warning light illuminates. If this warning
symbol is not functioning properly, the general warning symbol illuminates and a text message will be displayed. See
also pages 71and 72
for more information about indicator and warning symbols.
WARNING
ProCarManuals.com
Page 15 of 251
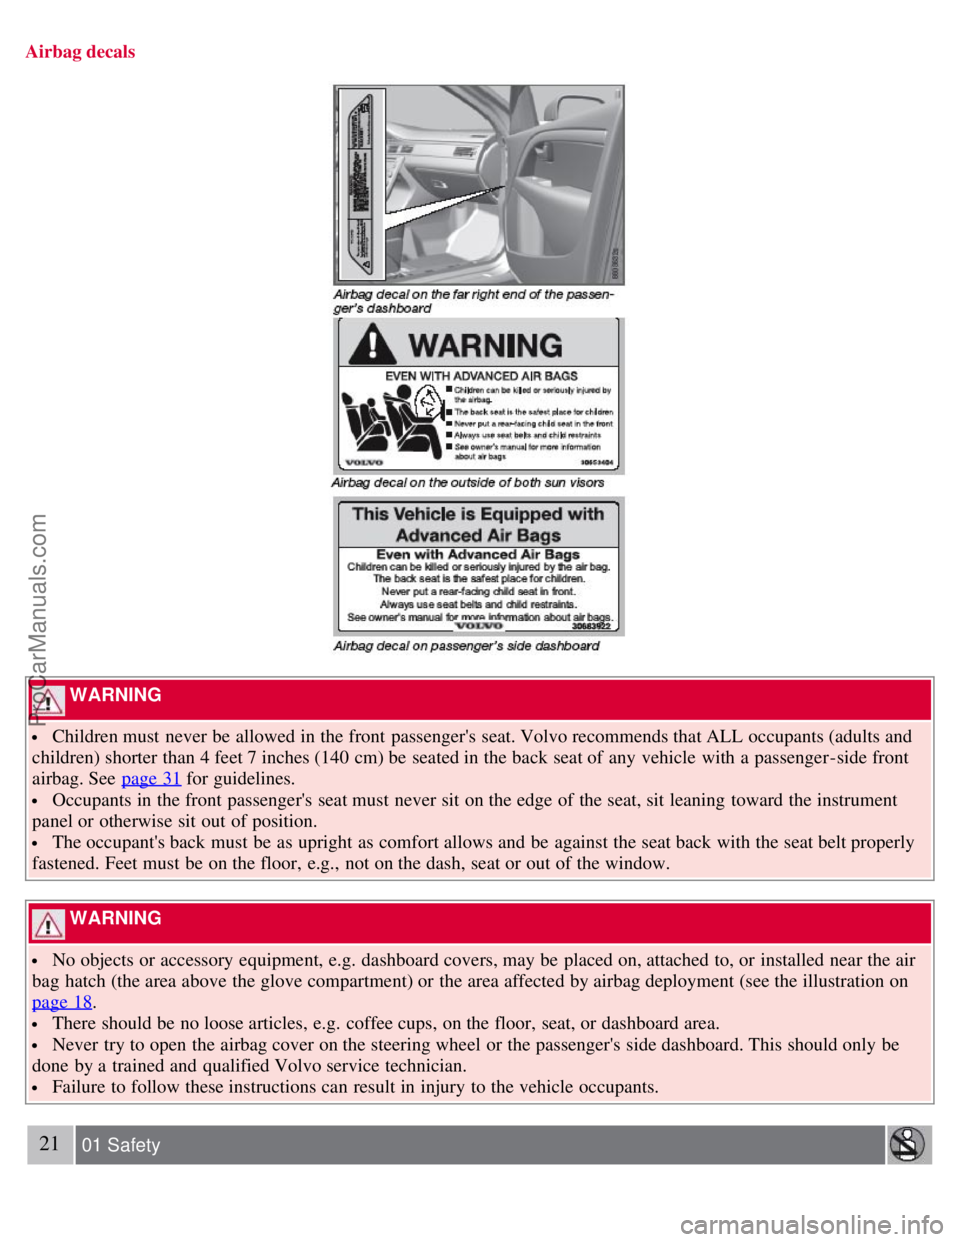
Airbag decals
WARNING
Children must never be allowed in the front passenger's seat. Volvo recommends that ALL occupants (adults and
children) shorter than 4 feet 7 inches (140 cm) be seated in the back seat of any vehicle with a passenger -side front
airbag. See page 31
for guidelines.
Occupants in the front passenger's seat must never sit on the edge of the seat, sit leaning toward the instrument
panel or otherwise sit out of position.
The occupant's back must be as upright as comfort allows and be against the seat back with the seat belt properly
fastened. Feet must be on the floor, e.g., not on the dash, seat or out of the window.
WARNING
No objects or accessory equipment, e.g. dashboard covers, may be placed on, attached to, or installed near the air
bag hatch (the area above the glove compartment) or the area affected by airbag deployment (see the illustration on
page 18
.
There should be no loose articles, e.g. coffee cups, on the floor, seat, or dashboard area.
Never try to open the airbag cover on the steering wheel or the passenger's side dashboard. This should only be
done by a trained and qualified Volvo service technician.
Failure to follow these instructions can result in injury to the vehicle occupants.
21 01 Safety
ProCarManuals.com
Page 16 of 251
Safety in the passenger compartment
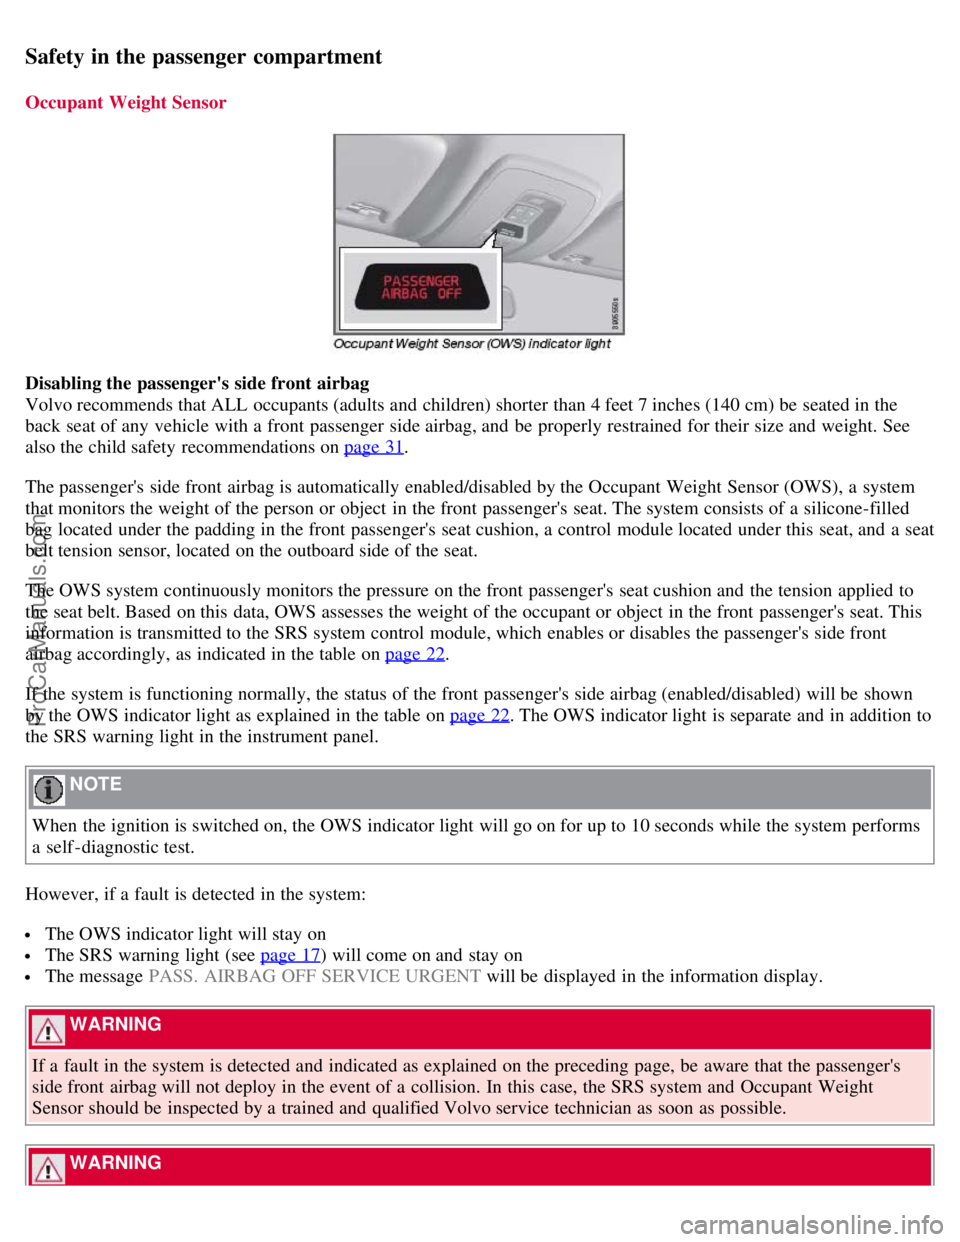
Occupant Weight Sensor
Disabling the passenger's side front airbag
Volvo recommends that ALL occupants (adults and children) shorter than 4 feet 7 inches (140 cm) be seated in the
back seat of any vehicle with a front passenger side airbag, and be properly restrained for their size and weight. See
also the child safety recommendations on page 31
.
The passenger's side front airbag is automatically enabled/disabled by the Occupant Weight Sensor (OWS), a system
that monitors the weight of the person or object in the front passenger's seat. The system consists of a silicone-filled
bag located under the padding in the front passenger's seat cushion, a control module located under this seat, and a seat
belt tension sensor, located on the outboard side of the seat.
The OWS system continuously monitors the pressure on the front passenger's seat cushion and the tension applied to
the seat belt. Based on this data, OWS assesses the weight of the occupant or object in the front passenger's seat. This
information is transmitted to the SRS system control module, which enables or disables the passenger's side front
airbag accordingly, as indicated in the table on page 22
.
If the system is functioning normally, the status of the front passenger's side airbag (enabled/disabled) will be shown
by the OWS indicator light as explained in the table on page 22
. The OWS indicator light is separate and in addition to
the SRS warning light in the instrument panel.
NOTE
When the ignition is switched on, the OWS indicator light will go on for up to 10 seconds while the system performs
a self -diagnostic test.
However, if a fault is detected in the system:
The OWS indicator light will stay on
The SRS warning light (see page 17) will come on and stay on
The message PASS. AIRBAG OFF SERVICE URGENT will be displayed in the information display.
WARNING
If a fault in the system is detected and indicated as explained on the preceding page, be aware that the passenger's
side front airbag will not deploy in the event of a collision. In this case, the SRS system and Occupant Weight
Sensor should be inspected by a trained and qualified Volvo service technician as soon as possible.
WARNING
ProCarManuals.com
Page 66 of 251
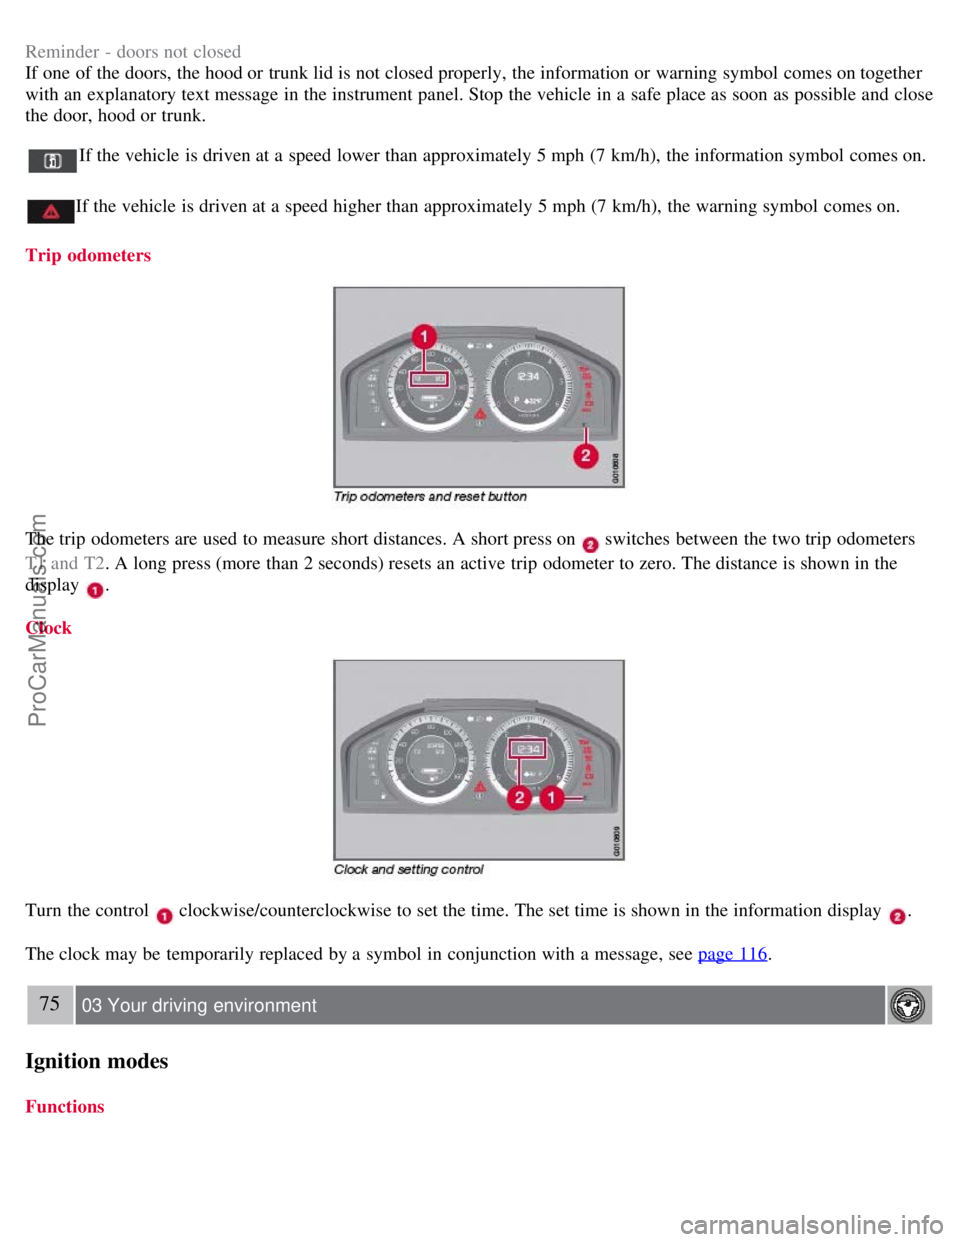
Reminder - doors not closed
If one of the doors, the hood or trunk lid is not closed properly, the information or warning symbol comes on together
with an explanatory text message in the instrument panel. Stop the vehicle in a safe place as soon as possible and close
the door, hood or trunk.
If the vehicle is driven at a speed lower than approximately 5 mph (7 km/h), the information symbol comes on.
If the vehicle is driven at a speed higher than approximately 5 mph (7 km/h), the warning symbol comes on.
Trip odometers
The trip odometers are used to measure short distances. A short press on switches between the two trip odometers
T1 and T2 . A long press (more than 2 seconds) resets an active trip odometer to zero. The distance is shown in the
display
.
Clock
Turn the control clockwise/counterclockwise to set the time. The set time is shown in the information display .
The clock may be temporarily replaced by a symbol in conjunction with a message, see page 116
.
75 03 Your driving environment
Ignition modes
Functions
ProCarManuals.com
Page 77 of 251
The use of daytime running lights is mandatory in Canada.
Continuous high beams cannot be activated when the headlight switch is in position or . High beam
flash will function in these positions.
High beam flash
Move the lever toward the steering wheel to position
. The high beams come on until the lever is released.
High/low beam headlights
Continuous high beams
Set the ignition to mode II.
With the light switch in position
, pull the turn signal lever toward the steering wheel to position to toggle
between high and low beams (this also applies on models equipped with the optional Active Bi -Xenon headlights).
The
symbol illuminates in the instrument panel to indicate that the high beams are on.
85 03 Your driving environment
Lighting
NOTE
Active Bi -Xenon headlights (option): Turn the headlight switch to position
to activate a daylight sensor, which
automatically switches the low beams on or off, depending on ambient light conditions. When driving in daylight,
the headlights will switch off and the daytime running lights will come on. In darkness, the daytime running lights
will switch off and the Active Bi -Xenon headlights will switch on.
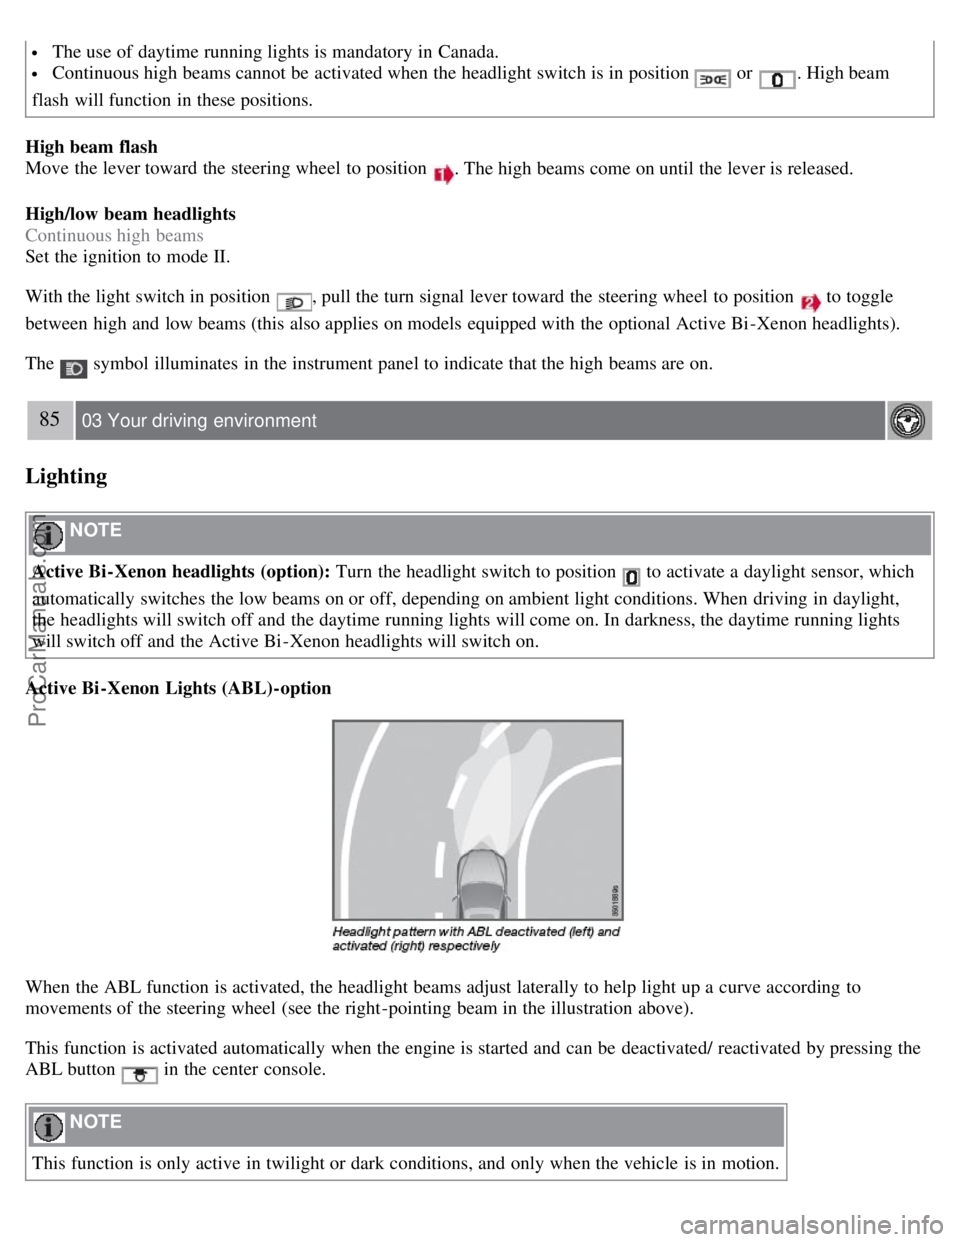
Active Bi -Xenon Lights (ABL)-option
When the ABL function is activated, the headlight beams adjust laterally to help light up a curve according to
movements of the steering wheel (see the right-pointing beam in the illustration above).
This function is activated automatically when the engine is started and can be deactivated/ reactivated by pressing the
ABL button
in the center console.
NOTE
This function is only active in twilight or dark conditions, and only when the vehicle is in motion.
ProCarManuals.com
Page 79 of 251
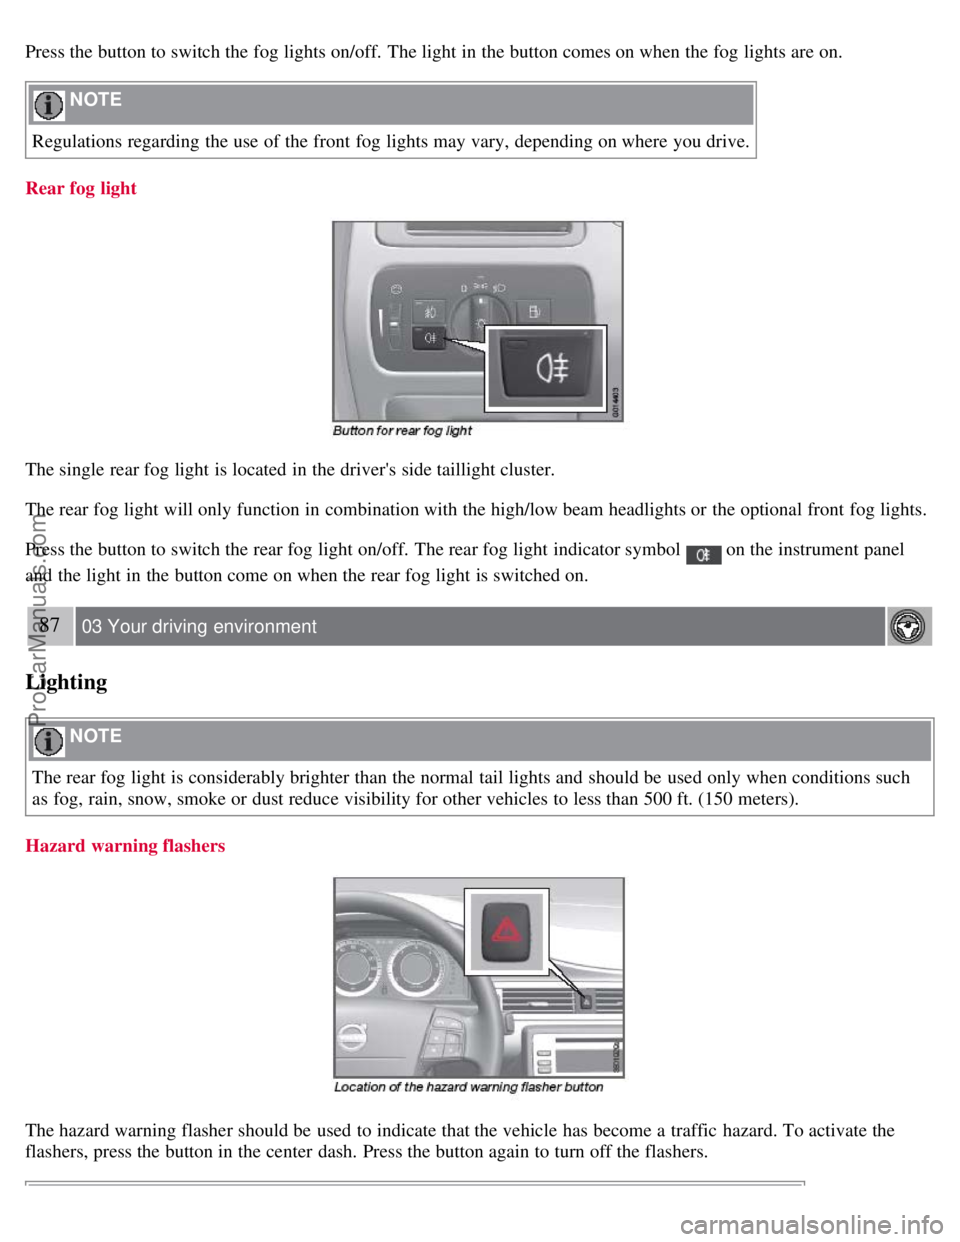
Press the button to switch the fog lights on/off. The light in the button comes on when the fog lights are on.
NOTE
Regulations regarding the use of the front fog lights may vary, depending on where you drive.
Rear fog light
The single rear fog light is located in the driver's side taillight cluster.
The rear fog light will only function in combination with the high/low beam headlights or the optional front fog lights.
Press the button to switch the rear fog light on/off. The rear fog light indicator symbol
on the instrument panel
and the light in the button come on when the rear fog light is switched on.
87 03 Your driving environment
Lighting
NOTE
The rear fog light is considerably brighter than the normal tail lights and should be used only when conditions such
as fog, rain, snow, smoke or dust reduce visibility for other vehicles to less than 500 ft. (150 meters).
Hazard warning flashers
The hazard warning flasher should be used to indicate that the vehicle has become a traffic hazard. To activate the
flashers, press the button in the center dash. Press the button again to turn off the flashers.
ProCarManuals.com
Page 84 of 251
The wipers will make an extra sweep each time the thumb wheel is adjusted upward.
When the rain sensor is activated, the symbol
will illuminate in the instrument panel.
Activating and setting the sensitivity
When activating the rain sensor, the vehicle must be running or in ignition mode II and the windshield wiper lever
must be in position 0.
Activate the rain sensor by pressing the button
. The windshield wipers will make one sweep.
Press the lever up for the wipers to make an extra sweep. The rain sensor returns to active mode when the stalk is
released back to position 0.
Deactivating
Deactivate the rain sensor by pressing the button
or press the lever down to another wiper position.
The rain sensor is automatically deactivated when the key is removed from the ignition slot or five minutes after the
ignition has been switched off.
91 03 Your driving environment
Wipers and washers
CAUTION
The rain sensor should be deactivated when washing the car in an automatic car wash, etc. If the rain sensor function
is left on, the wipers will start inadvertently in the car wash and could be damaged.
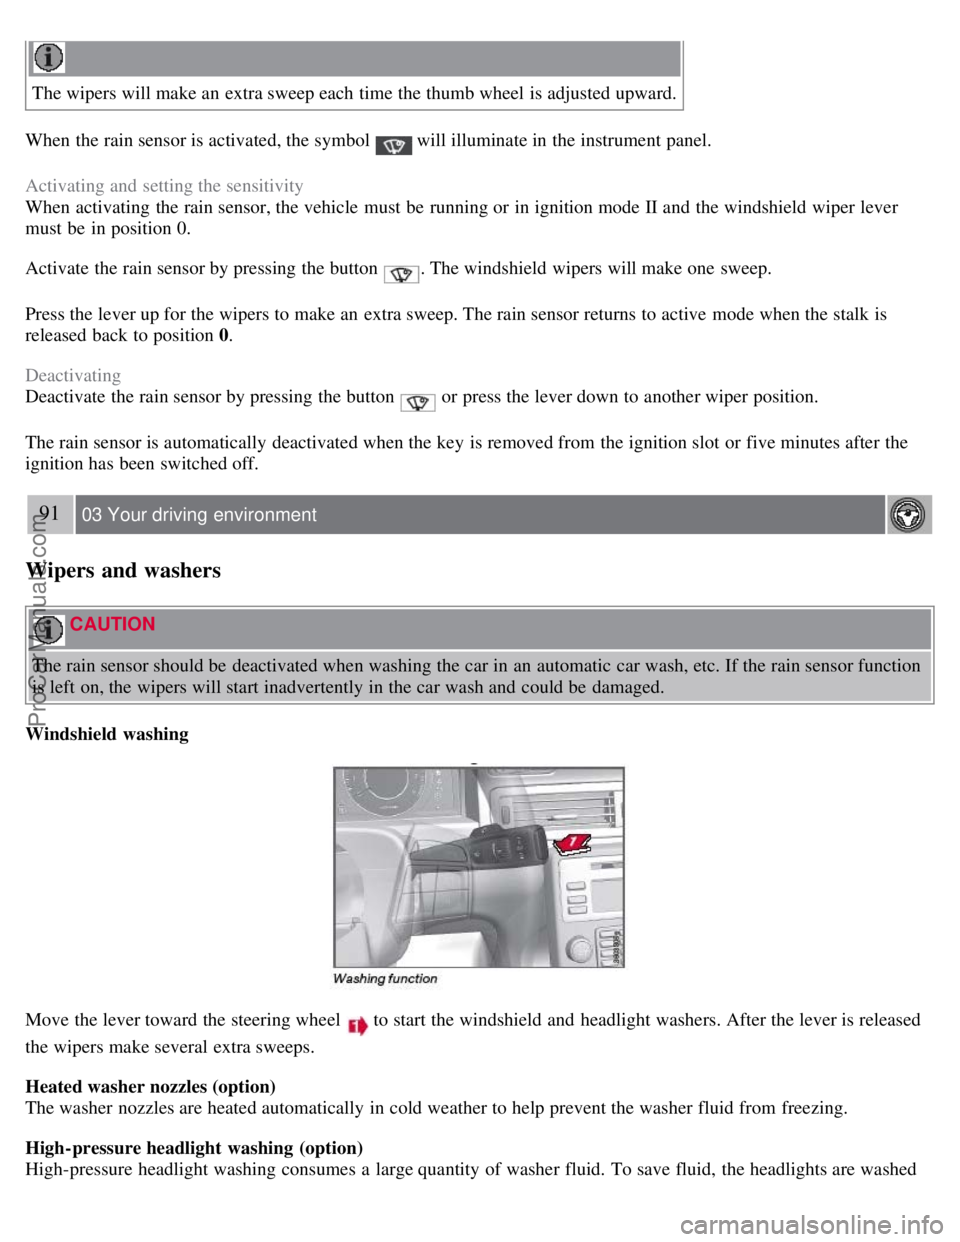
Windshield washing
Move the lever toward the steering wheel to start the windshield and headlight washers. After the lever is released
the wipers make several extra sweeps.
Heated washer nozzles (option)
The washer nozzles are heated automatically in cold weather to help prevent the washer fluid from freezing.
High-pressure headlight washing (option)
High-pressure headlight washing consumes a large quantity of washer fluid. To save fluid, the headlights are washed
ProCarManuals.com
Page 100 of 251
position so that the vehicle can be moved1.
Lift away the rubber mat on the floor of the storage compartment behind the center console and open the hatch.
Insert the key blade into the opening as far as possible. Press the key blade down and keep it held down. Move the
gear selector from the P position. For information on the key blade, see page 48
.
All Wheel Drive - AWD
2
Your Volvo can be equipped with permanent All Wheel Drive, which means that power is distributed automatically
between the front and rear wheels. Under normal driving conditions, most of the engine's power is directed to the front
wheels. However, if there is any tendency for the front wheels to spin, an electronically controlled coupling distributes
power to the wheels that have the best traction.
1If the battery is dead, the optional electric parking brake cannot be applied or released. Connect an auxiliary battery if the battery voltage is too
low, see page 104
.
2Standard on certain models.
107 03 Your driving environment
Brakes
Brake system
The brake system is a hydraulic system consisting of two separate brake circuits. If a problem should occur in one of
these circuits, it is still possible to stop the vehicle with the other brake circuit.
If the brake pedal must be depressed farther than normal and requires greater foot pressure, the stopping distance will
be longer.
A warning light in the instrument panel will light up to warn the driver that a fault has occurred.
If this light comes on while driving or braking, stop immediately and check the brake fluid level in the reservoir.
NOTE
Press the brake pedal hard and maintain pressure on the pedal - do not pump the brakes.
WARNING
If the fluid level is below the MIN mark in the reservoir or if a brake system message is shown in the information
display: DO NOT DRIVE. Have the vehicle towed to a trained and qualified Volvo service technician and have the
brake system inspected.
Power brakes function only when the engine is running
The power brakes utilize vacuum pressure which is only created when the engine is running. Never let the vehicle roll
to a stop with the engine switched off.
If the power brakes are not working, the brake pedal must be pressed approximately five times harder than usual to
make up for the lack of power assistance. This can happen for example when towing your vehicle or if the engine is
switched off when the vehicle is rolling. The brake pedal feels harder than usual.
ProCarManuals.com
Page 101 of 251
Water on brake discs and brake pads affects braking
Driving in rain and slush or passing through an automatic car wash can cause water to collect on the brake discs and
pads. This will cause a delay in braking effect when the pedal is depressed. To avoid such a delay when the brakes are
needed, depress the pedal occasionally when driving through rain, slush, etc. This will remove the water from the
brakes. Check that brake application feels normal. This should also be done after washing or starting in very damp or
cold weather.
Severe strain on the brake system
The brakes will be subject to severe strain when driving in mountains or hilly areas, or when towing a trailer. Vehicle
speed is usually slower, which means that the cooling of the brakes is less efficient than when driving on level roads.
To reduce the strain on the brakes, shift into a lower gear and let the engine help with the braking. Do not forget that if
you are towing a trailer, the brakes will be subjected to a greater than normal load.
Anti-lock braking system
The Anti-lock Braking System (ABS) helps to improve vehicle control (stopping and steering) during severe braking
conditions by limiting brake lockup. When the system "senses" impending lockup, braking pressure is automatically
modulated in order to help prevent lockup that could lead to a skid.
The system performs a self -diagnostic test when the engine is started and when the vehicle first reaches a speed of
approximately 12 mph (20 km/h). The brake pedal will pulsate several times and a sound may be audible from the
ABS control module. This is normal.
108 03 Your driving environment
Brakes
Cleaning the brake discs
Coatings of dirt and water on the brake discs may result in delayed brake function. This delay is minimized by
cleaning the brake linings.
Cleaning the brake pads is advisable in wet weather, prior to long-term parking, and after the vehicle has been washed.
Do this by braking gently for a short period while the vehicle is moving.
Emergency Brake Assistance
EBA is designed to provide full brake effect immediately in the event of sudden, hard braking. The system is activated
by the speed with which the brake pedal is depressed.
When the EBA system is activated, the brake pedal will go down and pressure in the brake system immediately
increases to the maximum level. Maintain full pressure on the brake pedal in order to utilize the system completely.
EBA is automatically deactivated when the brake pedal is released.
NOTE
When the EBA system is activated, the brake pedal will go down and pressure in the brake system immediately
increases to the maximum level. You must maintain full pressure on the brake pedal in order to utilize the system
completely. There will be no braking effect if the pedal is released. EBA is automatically deactivated when the brake
pedal is released.
When the vehicle has been parked for some time, the brake pedal may sink more than usual when the engine is
started. This is normal and the pedal will return to its usual position when it is released.
Symbols in the instrument panel
ProCarManuals.com