reset VOLVO S90 2020 Quick Guide
[x] Cancel search | Manufacturer: VOLVO, Model Year: 2020, Model line: S90, Model: VOLVO S90 2020Pages: 643, PDF Size: 13.68 MB
Page 90 of 643
||
DISPLAYS AND VOICE CONTROL
883. Scroll down to the option buttons to
choose which information to show in the instrument panel: Odometer
Distance to empty tank
Tourist (alternative speedometer)
Mileage for trip odometer TM, TA or no display of mileage
Current fuel consumption, average fuelconsumption for TM or TA, or no dis-play of fuel consumption
Select or clear a selection using the O but-
ton (4). The change will apply immedi-ately.
Related information
Trip computer (p. 85)
Resetting the trip odometer (p. 88)
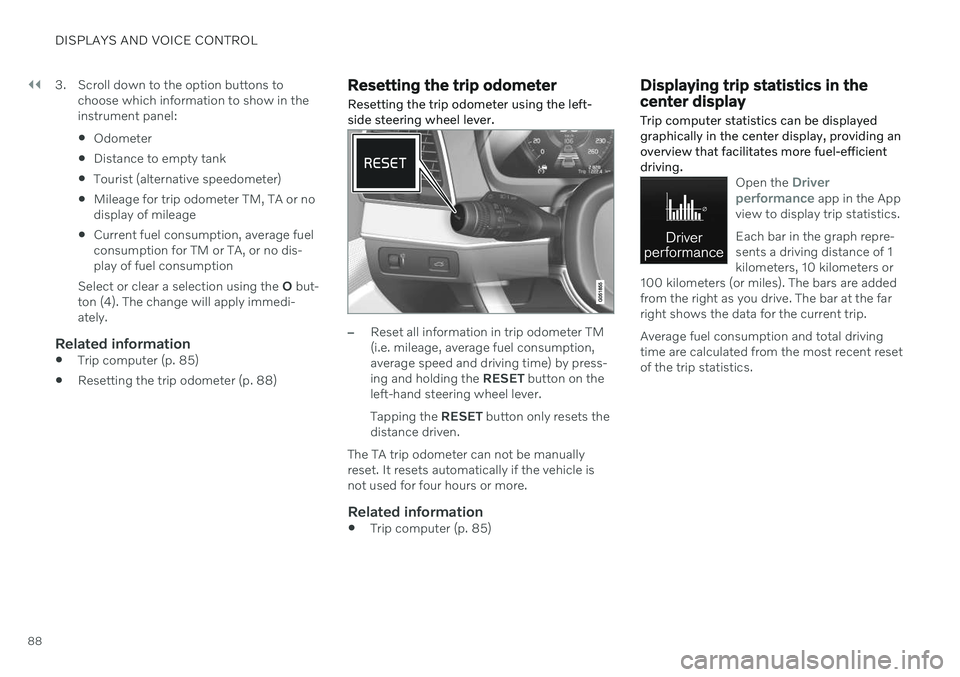
Resetting the trip odometer Resetting the trip odometer using the left- side steering wheel lever.
–Reset all information in trip odometer TM (i.e. mileage, average fuel consumption,average speed and driving time) by press-ing and holding the
RESET button on the
left-hand steering wheel lever. Tapping the RESET button only resets the
distance driven.
The TA trip odometer can not be manually reset. It resets automatically if the vehicle isnot used for four hours or more.
Related information
Trip computer (p. 85)
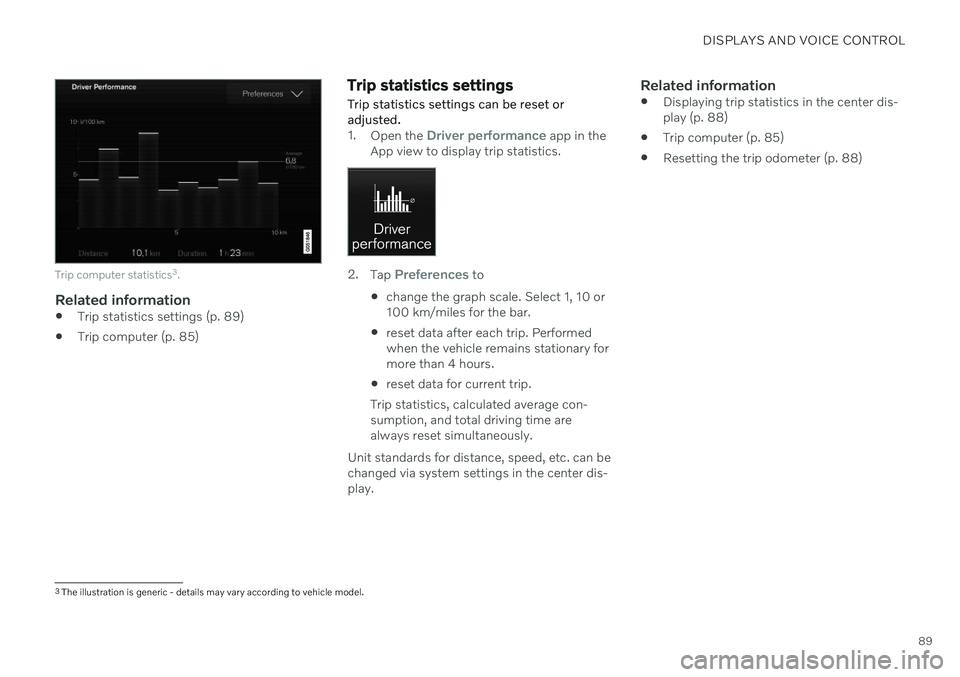
Displaying trip statistics in the center display Trip computer statistics can be displayed graphically in the center display, providing anoverview that facilitates more fuel-efficientdriving.
Open the Driver
performance app in the App
view to display trip statistics. Each bar in the graph repre- sents a driving distance of 1kilometers, 10 kilometers or
100 kilometers (or miles). The bars are addedfrom the right as you drive. The bar at the farright shows the data for the current trip. Average fuel consumption and total driving time are calculated from the most recent resetof the trip statistics.
Page 91 of 643
DISPLAYS AND VOICE CONTROL
89
Trip computer statistics3
.
Related information
Trip statistics settings (p. 89)
Trip computer (p. 85)
Trip statistics settings Trip statistics settings can be reset or adjusted.
1.
Open the Driver performance app in the
App view to display trip statistics.
2. Tap Preferences to
change the graph scale. Select 1, 10 or 100 km/miles for the bar.
reset data after each trip. Performedwhen the vehicle remains stationary formore than 4 hours.
reset data for current trip.
Trip statistics, calculated average con-sumption, and total driving time arealways reset simultaneously.
Unit standards for distance, speed, etc. can bechanged via system settings in the center dis-play.
Related information
Displaying trip statistics in the center dis-play (p. 88)
Trip computer (p. 85)
Resetting the trip odometer (p. 88)
3
The illustration is generic - details may vary according to vehicle model.
Page 132 of 643
||
DISPLAYS AND VOICE CONTROL
130
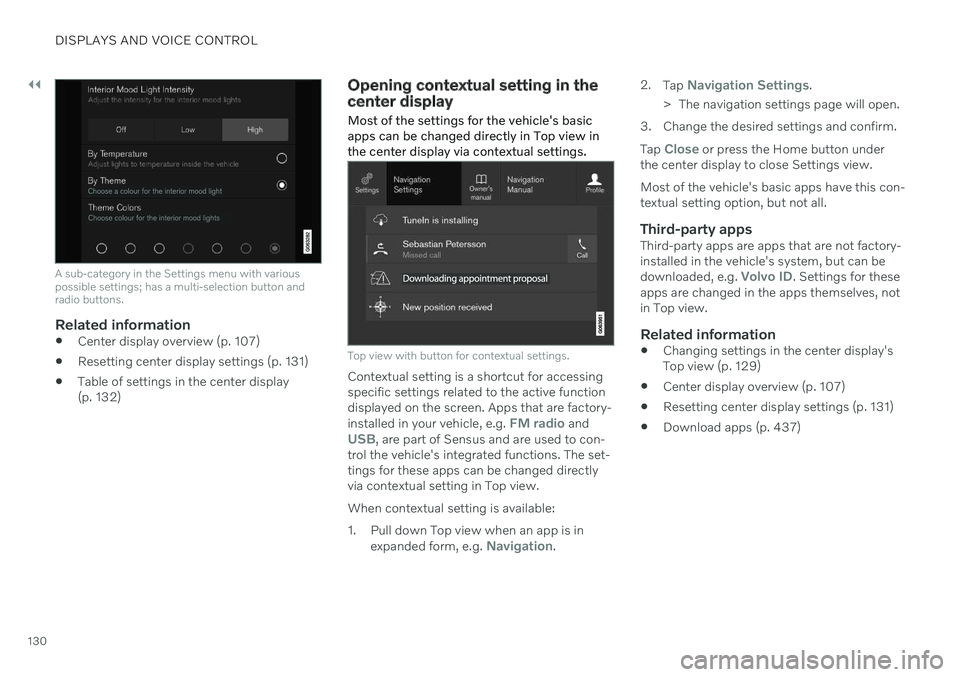
A sub-category in the Settings menu with various possible settings; has a multi-selection button andradio buttons.
Related information
Center display overview (p. 107)
Resetting center display settings (p. 131)
Table of settings in the center display (p. 132)
Opening contextual setting in the center display Most of the settings for the vehicle's basic apps can be changed directly in Top view inthe center display via contextual settings.
Top view with button for contextual settings.
Contextual setting is a shortcut for accessing specific settings related to the active functiondisplayed on the screen. Apps that are factory- installed in your vehicle, e.g.
FM radio andUSB, are part of Sensus and are used to con-
trol the vehicle's integrated functions. The set- tings for these apps can be changed directlyvia contextual setting in Top view. When contextual setting is available:
1. Pull down Top view when an app is in
expanded form, e.g.
Navigation. 2.
Tap
Navigation Settings.
> The navigation settings page will open.
3. Change the desired settings and confirm. Tap
Close or press the Home button under
the center display to close Settings view. Most of the vehicle's basic apps have this con- textual setting option, but not all.
Third-party appsThird-party apps are apps that are not factory-installed in the vehicle's system, but can be downloaded, e.g.
Volvo ID. Settings for these
apps are changed in the apps themselves, not in Top view.
Related information
Changing settings in the center display'sTop view (p. 129)
Center display overview (p. 107)
Resetting center display settings (p. 131)
Download apps (p. 437)
Page 133 of 643
DISPLAYS AND VOICE CONTROL
131
Resetting user data when the vehicle changes owners
If the vehicle changes owners, all user data and system settings should be reset to fac-tory defaults.
Vehicle settings can be reset at different lev- els. Reset all user data and system settings totheir original factory defaults when the vehiclechanges owner. It is also important to changethe owner of the Volvo On Call service.
Related information
Resetting center display settings (p. 131)
Resetting driver profile settings (p. 136)
Resetting center display settings
All settings made in the center display's Set- tings menu can be reset to default values.
Two types of resetThere are two ways to reset the settings in the Settings menu:
Factory Reset- erases all data and files
and resets all settings to factory default.
Reset Personal Settings- erases per-
sonal data and resets personalized set- tings to factory default.
Resetting settingsFollow these instructions to reset the settings.
NOTE
Factory Reset is only possible when the
vehicle is stationary.
1. Tap Settings in the Top view in the center
display.
2. Proceed to
SystemFactory Reset.
3. Select the type of reset you would like to do.
> A pop-up window will appear. 4.
Tap
OK to confirm the reset.
For
Reset Personal Settings, confirm
the reset by tapping Reset for the active
profile or Reset for all profiles.
> The selected settings will be reset.
Related information
Center display overview (p. 107)
Changing settings in the center display's Top view (p. 129)
Table of settings in the center display(p. 132)
Page 135 of 643
DISPLAYS AND VOICE CONTROL
* Option/accessory.133
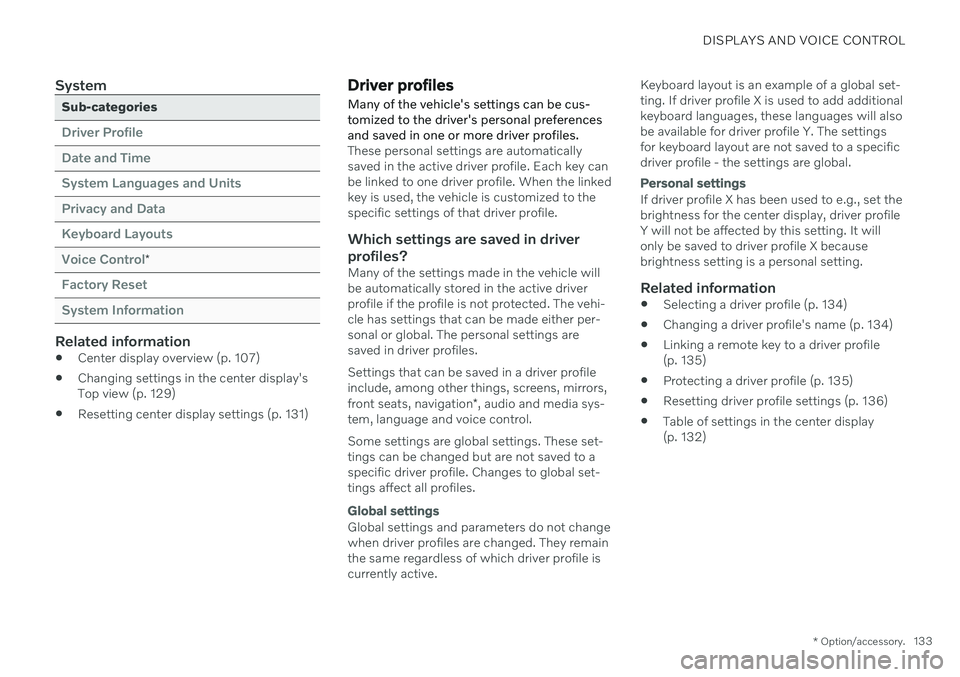
System
Sub-categories
Driver Profile Date and TimeSystem Languages and UnitsPrivacy and DataKeyboard LayoutsVoice Control
*
Factory Reset System Information
Related information
Center display overview (p. 107)
Changing settings in the center display's Top view (p. 129)
Resetting center display settings (p. 131)
Driver profiles
Many of the vehicle's settings can be cus- tomized to the driver's personal preferencesand saved in one or more driver profiles.
These personal settings are automatically saved in the active driver profile. Each key canbe linked to one driver profile. When the linkedkey is used, the vehicle is customized to thespecific settings of that driver profile.
Which settings are saved in driver
profiles?
Many of the settings made in the vehicle willbe automatically stored in the active driverprofile if the profile is not protected. The vehi-cle has settings that can be made either per-sonal or global. The personal settings aresaved in driver profiles. Settings that can be saved in a driver profile include, among other things, screens, mirrors, front seats, navigation *, audio and media sys-
tem, language and voice control. Some settings are global settings. These set- tings can be changed but are not saved to aspecific driver profile. Changes to global set-tings affect all profiles.
Global settings
Global settings and parameters do not change when driver profiles are changed. They remainthe same regardless of which driver profile iscurrently active. Keyboard layout is an example of a global set-ting. If driver profile X is used to add additionalkeyboard languages, these languages will alsobe available for driver profile Y. The settingsfor keyboard layout are not saved to a specificdriver profile - the settings are global.
Personal settings
If driver profile X has been used to e.g., set the brightness for the center display, driver profileY will not be affected by this setting. It willonly be saved to driver profile X becausebrightness setting is a personal setting.
Related information
Selecting a driver profile (p. 134)
Changing a driver profile's name (p. 134)
Linking a remote key to a driver profile(p. 135)
Protecting a driver profile (p. 135)
Resetting driver profile settings (p. 136)
Table of settings in the center display(p. 132)
Page 138 of 643
||
DISPLAYS AND VOICE CONTROL
136The active profile can then be linked to the key. 1.
Tap
Settings in the Top view in the center
display.
2. Tap
SystemDriver Profiles.
3. Mark the desired profile. The display will return to Home view. The
Guest profile
cannot be linked to a remote key.
4. Pull down Top view again and tap
SettingsSystemDriver ProfilesEdit Profile. 5.
Select
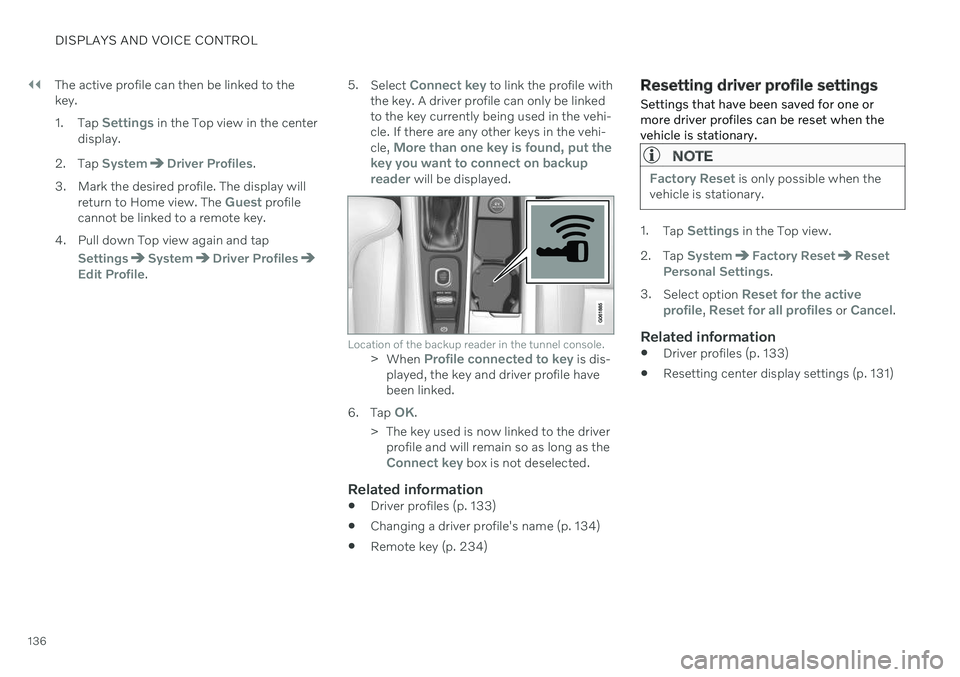
Connect key to link the profile with
the key. A driver profile can only be linked to the key currently being used in the vehi-cle. If there are any other keys in the vehi- cle,
More than one key is found, put the
key you want to connect on backup reader
will be displayed.
Location of the backup reader in the tunnel console.> When Profile connected to key is dis-
played, the key and driver profile have been linked.
6. Tap
OK.
> The key used is now linked to the driver profile and will remain so as long as the
Connect key box is not deselected.
Related information
Driver profiles (p. 133)
Changing a driver profile's name (p. 134)
Remote key (p. 234)
Resetting driver profile settings
Settings that have been saved for one or more driver profiles can be reset when thevehicle is stationary.
NOTE
Factory Reset is only possible when the
vehicle is stationary.
1. Tap Settings in the Top view.
2. Tap
SystemFactory ResetReset
Personal Settings.
3. Select option
Reset for the active
profile, Reset for all profiles or Cancel.
Related information
Driver profiles (p. 133)
Resetting center display settings (p. 131)
Page 164 of 643

WINDOWS, GLASS AND MIRRORS
* Option/accessory.
162
Windows, glass and mirrors The vehicle is equipped with several different types of windows, glass and mirrors. Some ofthe windows in the car are laminated.
The windshield has laminated glass. Lamina- ted glass is also available as on option forsome other glass surfaces. Laminated glass isreinforced, which provides better protectionagainst break-ins and improved soundproofingin the passenger compartment. The panoramic roof * also has laminated glass.
The symbol shows the windows containing lamina- ted glass. 1
Related information
Pinch protection for windows and sun cur- tains (p. 162)
Panoramic roof (p. 170)
Power windows (p. 164)
Rearview/door mirrors (p. 168)
Using sun curtains
* (p. 166)
Head-up display
* (p. 139)
Using the windshield wipers (p. 176)
Using the windshield and headlight wash-ers (p. 178)
Activating and deactivating the heatedrear window and door mirrors (p. 216)
Pinch protection for windows and sun curtains All power windows and sun curtains
* have a
pinch protection function that is triggered if anything blocks them while they are openingor closing.
If pinch protection is activated, movement will stop and then retract automatically to approx.50 mm (2 inches) from the point at which itwas blocked (or to full ventilation position). It is still possible to override pinch protection when closing is interrupted (e.g. due to ice) bypressing and holding down the control in thesame direction. If there is any problem with the pinch protec- tion, a rest procedure can be tested.
WARNING
If the starter battery is disconnected, the function for automatic opening and closingmust be reset to function correctly. A resetis required in order for the pinch protectionto work.
Related information
Reset procedure for pinch protection (p. 163)
Operating the power windows (p. 165)
1
Does not apply to windshield and panoramic roof *, which are always laminated and therefore do not have this symbol.
Page 165 of 643

WINDOWS, GLASS AND MIRRORS
* Option/accessory.163
Using sun curtains
* (p. 166)
Operating the panoramic roof (p. 172)
Reset procedure for pinch protection
If you experience any problems with the elec- trical functions for the power windows, youcan try to perform a reset. Power sun curtains * also have a reset proce-
dure that can be tested as needed.
WARNING
If the starter battery is disconnected, the function for automatic opening and closingmust be reset to function correctly. A resetis required in order for the pinch protectionto work.
If the problem persists or if it affects the pan- oramic roof, contact a workshop 2
.
Resetting a power window
1. Start with the window in the closed posi-
tion.
2. Then move the control in manual mode three times upward toward the closed position.
> The system will be automatically acti-vated.
Resetting a sun curtain *
1. Begin with the sun curtain in the lowered
position. 2. Press and hold the lowering control for
approx. 15 seconds.
> The system will be automatically acti-vated.
Related information
Pinch protection for windows and sun cur- tains (p. 162)
Operating the power windows (p. 165)
Using sun curtains
* (p. 166)
2
An authorized Volvo workshop is recommended.
Page 166 of 643
WINDOWS, GLASS AND MIRRORS
* Option/accessory.
164
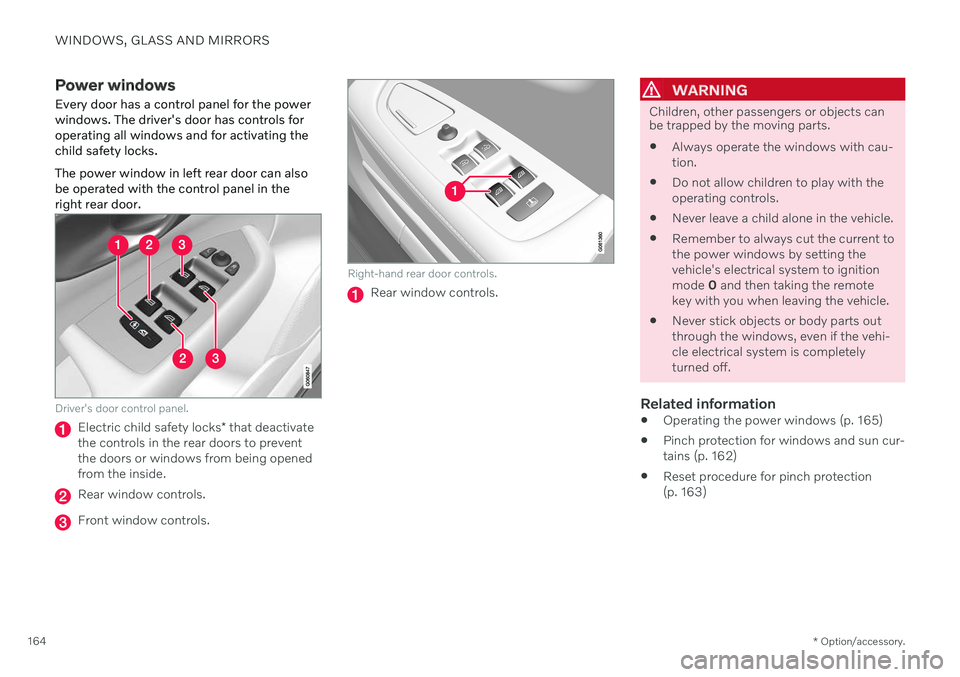
Power windows Every door has a control panel for the power windows. The driver's door has controls foroperating all windows and for activating thechild safety locks. The power window in left rear door can also be operated with the control panel in theright rear door.
Driver's door control panel.
Electric child safety locks * that deactivate
the controls in the rear doors to prevent the doors or windows from being openedfrom the inside.
Rear window controls.
Front window controls.
Right-hand rear door controls.
Rear window controls.
WARNING
Children, other passengers or objects can be trapped by the moving parts.
Always operate the windows with cau- tion.
Do not allow children to play with theoperating controls.
Never leave a child alone in the vehicle.
Remember to always cut the current tothe power windows by setting thevehicle's electrical system to ignitionmode
0 and then taking the remote
key with you when leaving the vehicle.
Never stick objects or body parts outthrough the windows, even if the vehi-cle electrical system is completelyturned off.
Related information
Operating the power windows (p. 165)
Pinch protection for windows and sun cur-tains (p. 162)
Reset procedure for pinch protection(p. 163)
Page 167 of 643
WINDOWS, GLASS AND MIRRORS
}}
* Option/accessory.165
Operating the power windows
All power windows can be operated using the control panel in the driver's door. The controlpanels in the other doors can be used tooperate that particular door. The power window in left rear door can also be operated with the control panel in theright rear door.
The power windows have pinch protection. If there is any problem with the pinch protection,a rest procedure can be tested.
WARNING
Children, other passengers or objects can be trapped by the moving parts.
Always operate the windows with cau- tion.
Do not allow children to play with theoperating controls.
Never leave a child alone in the vehicle.
Remember to always cut the current tothe power windows by setting thevehicle's electrical system to ignitionmode
0 and then taking the remote
key with you when leaving the vehicle.
Never stick objects or body parts outthrough the windows, even if the vehi-cle electrical system is completelyturned off.
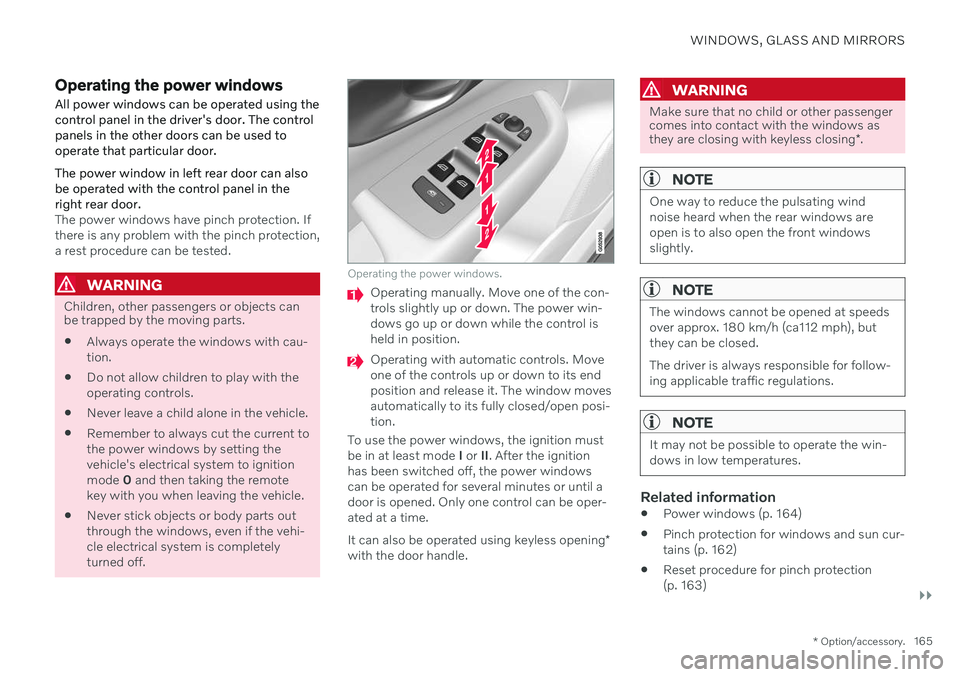
Operating the power windows.
Operating manually. Move one of the con- trols slightly up or down. The power win-dows go up or down while the control isheld in position.
Operating with automatic controls. Move one of the controls up or down to its endposition and release it. The window movesautomatically to its fully closed/open posi-tion.
To use the power windows, the ignition mustbe in at least mode I or II. After the ignition
has been switched off, the power windowscan be operated for several minutes or until adoor is opened. Only one control can be oper-ated at a time. It can also be operated using keyless opening *
with the door handle.
WARNING
Make sure that no child or other passenger comes into contact with the windows as they are closing with keyless closing *.
NOTE
One way to reduce the pulsating wind noise heard when the rear windows areopen is to also open the front windowsslightly.
NOTE
The windows cannot be opened at speeds over approx. 180 km/h (ca112 mph), butthey can be closed. The driver is always responsible for follow- ing applicable traffic regulations.
NOTE
It may not be possible to operate the win- dows in low temperatures.
Related information
Power windows (p. 164)
Pinch protection for windows and sun cur- tains (p. 162)
Reset procedure for pinch protection(p. 163)