buttons VOLVO S90 2020 Quick Guide
[x] Cancel search | Manufacturer: VOLVO, Model Year: 2020, Model line: S90, Model: VOLVO S90 2020Pages: 643, PDF Size: 13.68 MB
Page 298 of 643
DRIVER SUPPORT
* Option/accessory.
296
Adjusting set speed for driver support
It is possible to adjust set speeds for the Adaptive Cruise Control * and Pilot Assist *
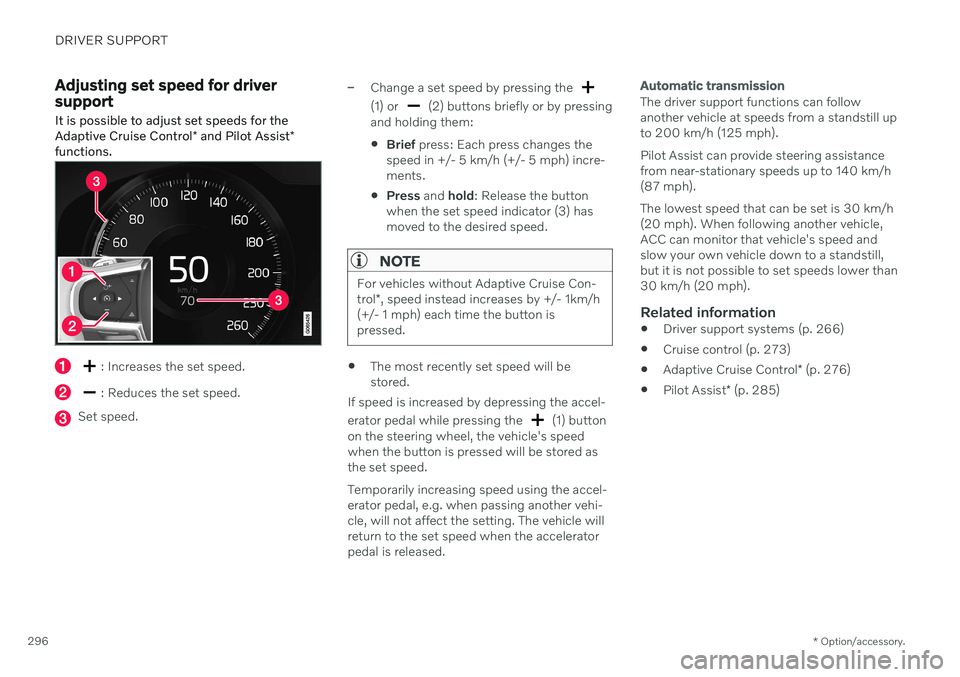
functions.
: Increases the set speed.
: Reduces the set speed.
Set speed.
–Change a set speed by pressing the
(1) or (2) buttons briefly or by pressing
and holding them:
Brief
press: Each press changes the
speed in +/- 5 km/h (+/- 5 mph) incre- ments.
Press
and hold: Release the button
when the set speed indicator (3) hasmoved to the desired speed.
NOTE
For vehicles without Adaptive Cruise Con- trol *, speed instead increases by +/- 1km/h
(+/- 1 mph) each time the button is pressed.
The most recently set speed will be stored.
If speed is increased by depressing the accel- erator pedal while pressing the
(1) button
on the steering wheel, the vehicle's speed when the button is pressed will be stored as the set speed. Temporarily increasing speed using the accel- erator pedal, e.g. when passing another vehi-cle, will not affect the setting. The vehicle willreturn to the set speed when the acceleratorpedal is released.
Automatic transmission
The driver support functions can follow another vehicle at speeds from a standstill upto 200 km/h (125 mph). Pilot Assist can provide steering assistance from near-stationary speeds up to 140 km/h(87 mph). The lowest speed that can be set is 30 km/h (20 mph). When following another vehicle,ACC can monitor that vehicle's speed andslow your own vehicle down to a standstill,but it is not possible to set speeds lower than30 km/h (20 mph).
Related information
Driver support systems (p. 266)
Cruise control (p. 273)
Adaptive Cruise Control
* (p. 276)
Pilot Assist
* (p. 285)
Page 368 of 643
||
DRIVER SUPPORT
* Option/accessory.
366 The color of the side field changes as the vehi- cle moves closer to the object – from YEL-LOW to RED.
Side field
color Distance in meters
(feet)
Yellow 0,25–0,9 (0,8–3,0) Red 0–0,25 (0–0,8)
When the sensor field is RED, the audible pulsing signal will become more rapid.
Related information
Park Assist
* (p. 355)
Park Assist Camera
* (p. 360)
Location and field of vision of Park Assist Cameras
* (p. 361)
Camera/radar sensor limitations (p. 307)
Activating Park Assist Camera
The Park Assist Camera is automatically acti- vated when reverse gear is engaged or canbe started manually using one of the centerdisplay's function buttons.
Camera view when backing upWhen reverse gear is engaged, the screen shows the rear view 95
.
Camera view when manually
activating the camera
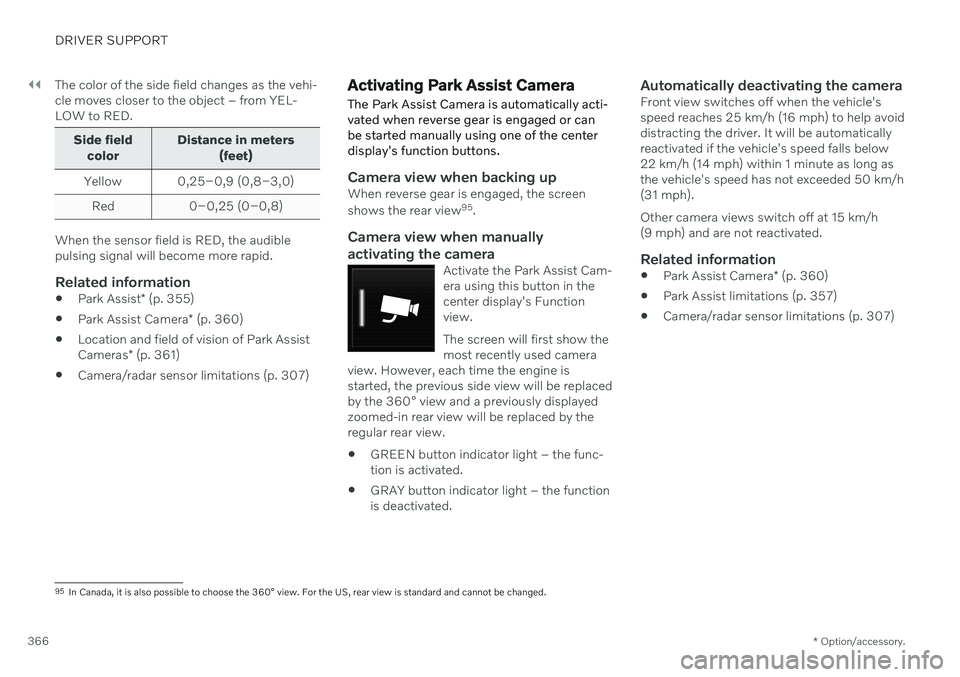
Activate the Park Assist Cam- era using this button in thecenter display's Functionview. The screen will first show the most recently used camera
view. However, each time the engine isstarted, the previous side view will be replacedby the 360° view and a previously displayedzoomed-in rear view will be replaced by theregular rear view.
GREEN button indicator light – the func- tion is activated.
GRAY button indicator light – the functionis deactivated.
Automatically deactivating the cameraFront view switches off when the vehicle'sspeed reaches 25 km/h (16 mph) to help avoiddistracting the driver. It will be automaticallyreactivated if the vehicle's speed falls below22 km/h (14 mph) within 1 minute as long asthe vehicle's speed has not exceeded 50 km/h(31 mph). Other camera views switch off at 15 km/h (9 mph) and are not reactivated.
Related information
Park Assist Camera
* (p. 360)
Park Assist limitations (p. 357)
Camera/radar sensor limitations (p. 307)
95
In Canada, it is also possible to choose the 360° view. For the US, rear view is standard and cannot be changed.
Page 428 of 643
||
STARTING AND DRIVING
* Option/accessory.
426 HomeLink
®
is delivered integrated in the rear-
view mirror. The HomeLink ®
panel consists of
three programmable buttons and an indicator light in the mirror. For more information about HomeLink ®
,
please visit: www.HomeLink.com or call 1-800-355-3515. Save the original remote controls for future programming (e.g. for use in another vehicle).It is also advisable to delete the button pro-gramming if the vehicle is sold.
Related information
Using HomeLink ®
* (p. 428)
Programming HomeLink ®
* (p. 426)
Type approval for HomeLink ®
* (p. 429)
Programming HomeLink ®
*19
Follow these instructions to program HomeLink ®
, reset all programming, or pro-
gram individual buttons.
NOTE
In some vehicles, the ignition must be on or in the "accessory position" before HomeLink ®
can be programmed or used. It
can be a good idea to put new batteries in the remote control being replaced by HomeLink ®
for faster programming and
better radio signal transmission. TheHomeLink ®
buttons should be reset before
programming.
WARNING
While HomeLink ®
is being programmed,
the garage door or gate being programmed may be activated. Make sure that no one isnear the door or gate during programming.When programming a garage door opener,it is advised to park outside of the garage. 1. Point the remote control at the
HomeLink ®
button to be programmed and
hold it about 2-8 cm (1-3 inches) from the button. Do not obstruct the HomeLink ®
indicator light. Note: Some remote controls are more
effective at programming HomeLink ®
from
a distance of about 15-20 cm (6-12 inches). Keep this in mind if you experi-ence any programming difficulties.
2. Press and hold both the remote control button and the HomeLink ®
button to be
programmed.
19 Certain markets only.
Page 429 of 643
STARTING AND DRIVING
}}
427
3. Do not release the buttons until the indica-
tor light has stopped flashing slowly (about once a second) and either flashesquickly (about 10 times a second) orglows steadily. >If the indicator light glows steadily: Indication that programming is com-plete. Press the programmed buttontwice to activate. If the indicator light flashes quickly: The device being programmed with HomeLink ®
may have a security func-
tion that requires an extra step. Try pressing the programmed button twiceto see whether the programmingworks. Otherwise, continue with thefollowing steps.
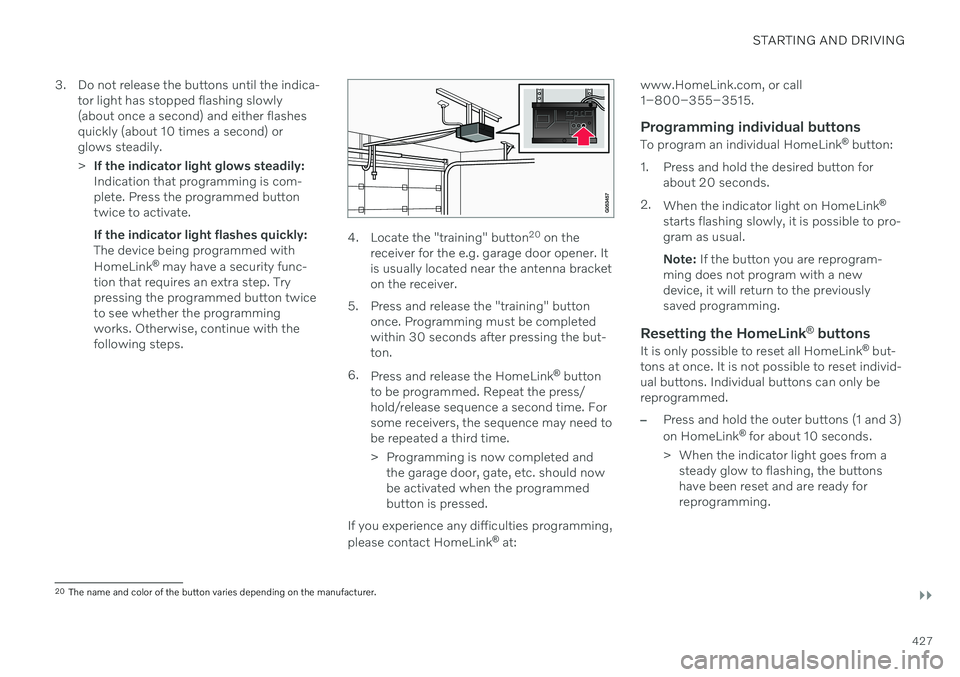
4. Locate the "training" button 20
on the
receiver for the e.g. garage door opener. It is usually located near the antenna bracketon the receiver.
5. Press and release the "training" button once. Programming must be completedwithin 30 seconds after pressing the but-ton.
6. Press and release the HomeLink ®
button
to be programmed. Repeat the press/hold/release sequence a second time. Forsome receivers, the sequence may need tobe repeated a third time.
> Programming is now completed and the garage door, gate, etc. should now be activated when the programmedbutton is pressed.
If you experience any difficulties programming, please contact HomeLink ®
at: www.HomeLink.com, or call 1–800–355–3515.
Programming individual buttons
To program an individual HomeLink
®
button:
1. Press and hold the desired button for about 20 seconds.
2. When the indicator light on HomeLink ®
starts flashing slowly, it is possible to pro-gram as usual. Note: If the button you are reprogram-
ming does not program with a new device, it will return to the previouslysaved programming.
Resetting the HomeLink ®
buttons
It is only possible to reset all HomeLink ®
but-
tons at once. It is not possible to reset individ-ual buttons. Individual buttons can only bereprogrammed.
–Press and hold the outer buttons (1 and 3) on HomeLink ®
for about 10 seconds.
> When the indicator light goes from a steady glow to flashing, the buttons have been reset and are ready forreprogramming.
20The name and color of the button varies depending on the manufacturer.
Page 546 of 643
||
MAINTENANCE AND SERVICE
544
Monthly:
Check cold tire pressure in all tires. Inspect the tires for wear.
Check that engine coolant and other fluidlevels are between the indicated "min"and "max" markings.
Clean interior glass surfaces with a glasscleaner and soft paper towels.
Wipe driver information displays with asoft cloth.
Visually inspect battery terminals for cor-rosion. Corrosion may indicate a loose ter-minal connector, or a battery near the endof its useful service life. Consult your Volvoretailer for additional information.
As needed:
Wash the vehicle, including the undercarriage, to reduce wear that can be caused by abuildup of dirt, and corrosion that can becaused by salt residues. Clean leaves and twigs from air intake vents at the base of the windshield, and from other pla-ces where they may collect.
NOTE
Complete service information for qualified technicians is available online for purchaseor subscription at www.volvotechinfo.com.
Related information
Vehicle status (p. 546)
Scheduling service and repairs (p. 547)
Connecting equipment to the vehicle's data link connector (p. 37)
Technician certification (p. 38)
Climate control system service (p. 551)
Maintenance of the brake system (p. 385)
Engine compartment overview (p. 553)
Data transfer between vehicle and workshop over Wi-Fi
Volvo workshops have a designated Wi-Fi network for data transfer between your vehi-cle and the workshop. Your visit to the work-shop will be easier and more effective whendiagnostics information and software can betransferred over the workshop's network.
At the workshop, your service technician can connect your vehicle to the workshop's Wi-Finetwork to perform troubleshooting anddownload software. For this type of communi-cation, the vehicle only connects to a work-shop's network. It is not possible to connectthe vehicle to another Wi-Fi network (e.g. yourhome network) in the same way as to a work-shop's network.
Connecting with remote keyConnection is usually managed by the servicetechnician, who will use the remote key but-tons. It is therefore important to bring a keywith buttons with you when you visit theworkshop. Pressing the lock button on theremote key three times will connect the vehi-cle to the workshop's Wi-Fi network. When the car is connected to a Wi-Fi net- work, the
symbol appears in the center
display.
Page 566 of 643
||
MAINTENANCE AND SERVICE
564
Buttons in the trunk lid.
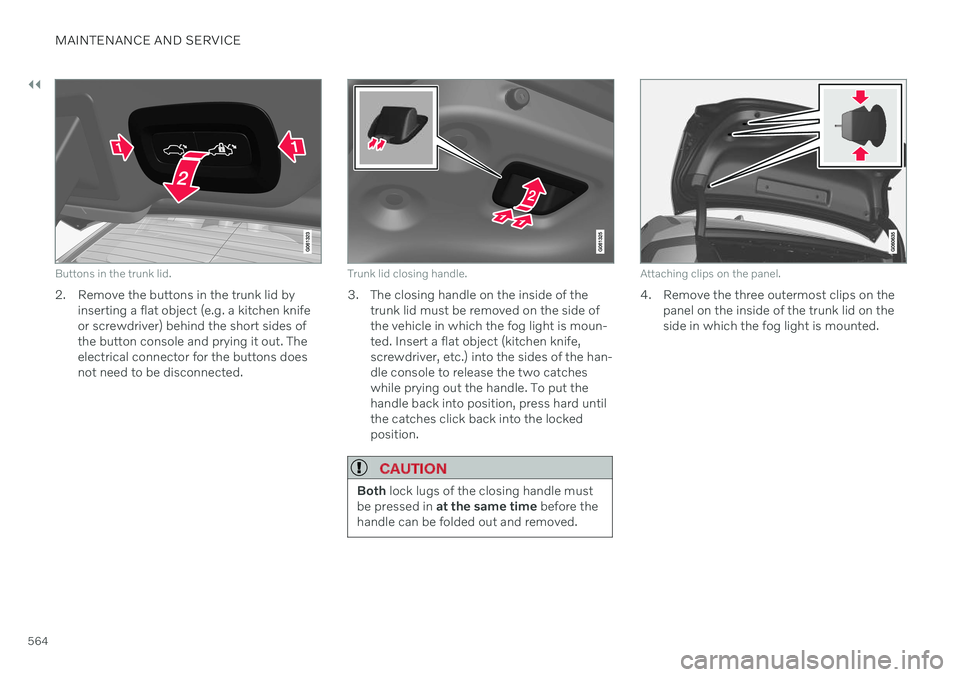
2. Remove the buttons in the trunk lid byinserting a flat object (e.g. a kitchen knife or screwdriver) behind the short sides ofthe button console and prying it out. Theelectrical connector for the buttons doesnot need to be disconnected.
Trunk lid closing handle.
3. The closing handle on the inside of thetrunk lid must be removed on the side of the vehicle in which the fog light is moun-ted. Insert a flat object (kitchen knife,screwdriver, etc.) into the sides of the han-dle console to release the two catcheswhile prying out the handle. To put thehandle back into position, press hard untilthe catches click back into the lockedposition.
CAUTION
Both lock lugs of the closing handle must
be pressed in at the same time before the
handle can be folded out and removed.
Attaching clips on the panel.
4. Remove the three outermost clips on the panel on the inside of the trunk lid on the side in which the fog light is mounted.
Page 584 of 643
||
MAINTENANCE AND SERVICE
* Option/accessory.
582
Function Ampere Type
Medium voltage module 10 Micro
Electrical outlet in tunnel console between rear seats* 30
MCaseA
–
– Micro
Movement sensor* 5 Micro
–
– Micro
Instrument panel 5 Micro
Center console buttons5 Micro
Sun sensor5 Micro
–– Micro
–– Micro
Steering wheel module 5 Micro
Module for start knob and parking brake controls5 Micro
Heated steering wheel* module 15 Micro
–
– Micro
–– Micro
–– Micro
–– Micro
Page 593 of 643
MAINTENANCE AND SERVICE
}}
* Option/accessory.591
Cleaning the interior
Only use cleaning agents and car care prod- ucts recommended by Volvo. Clean regularlyand treat stains immediately. It is importantto vacuum before using a cleaning agent.
CAUTION
Some colored clothing (for example, dark jeans and suede garments) maystain the upholstery. If this occurs, it isimportant to clean and treat theseparts of the upholstery as soon as pos-sible.
Never use strong solvents such aswasher fluid, gasoline, mineral spirit orconcentrated alcohol to clean the inte-rior as this can damage the upholsteryas well as other interior materials.
Never spray cleaning agent directlyonto components that have electricalbuttons and controls. Wipe insteadwith a damp cloth with cleaning agent.
Sharp objects and Velcro can damagethe car's textile upholstery.
Only use cleaning agent on the type ofmaterial it is intended for.
Related information
Cleaning the center display (p. 591)
Cleaning fabric upholstery and ceiling liner (p. 593)
Cleaning the seat belt (p. 593)
Cleaning floor mats and inlay mats(p. 593)
Cleaning leather upholstery
* (p. 594)
Cleaning the leather steering wheel(p. 595)
Cleaning interior plastic, metal and woodsurfaces (p. 595)
Cleaning the center display
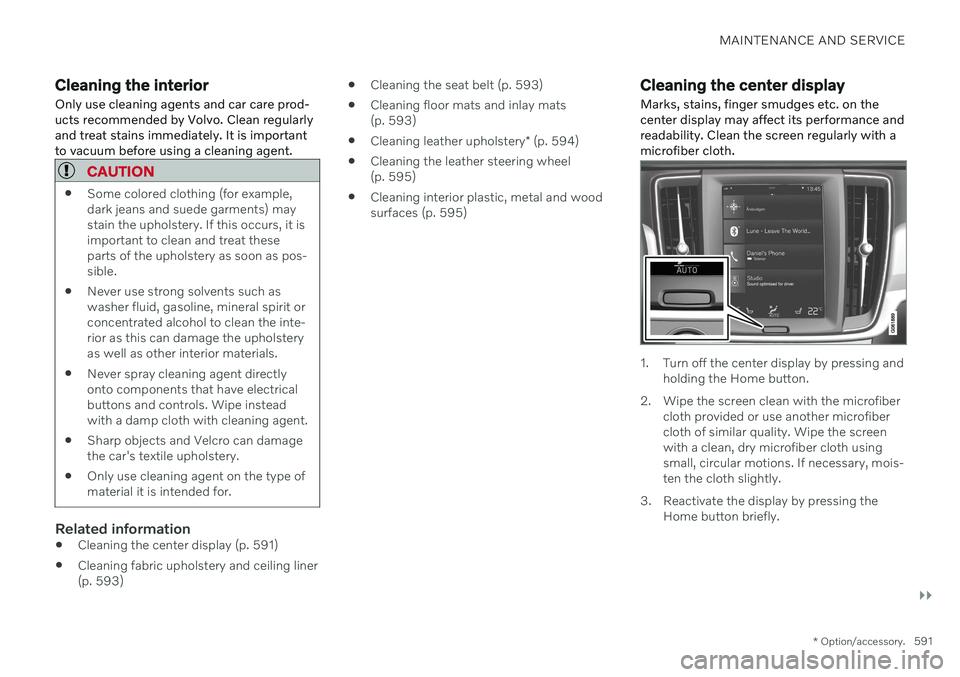
Marks, stains, finger smudges etc. on the center display may affect its performance andreadability. Clean the screen regularly with amicrofiber cloth.
1. Turn off the center display by pressing and holding the Home button.
2. Wipe the screen clean with the microfiber cloth provided or use another microfiber cloth of similar quality. Wipe the screenwith a clean, dry microfiber cloth usingsmall, circular motions. If necessary, mois-ten the cloth slightly.
3. Reactivate the display by pressing the Home button briefly.