dashboard VOLVO S90 2020 Quick Guide
[x] Cancel search | Manufacturer: VOLVO, Model Year: 2020, Model line: S90, Model: VOLVO S90 2020Pages: 643, PDF Size: 13.68 MB
Page 40 of 643
||
YOUR VOLVO
38Canada IC: 20839-ACUII06 This device complies with Industry Canada license-exempt RSS standards. Operation issubject to the following two conditions: (1) This device may not cause interference, and(2) this device must accept any interference received, including interference that maycause undesired operation.
Related information
Important information on accessories andextra equipment (p. 35)
Technician certification In addition to Volvo factory training, Volvo supports certification by the National Insti-tute for Automotive Service Excellence(A.S.E.).
Certified technicians have demonstrated a high degree of competence in specific areas.Besides passing exams, each technician mustalso have worked in the field for two or moreyears before a certificate is issued. These pro-fessional technicians are best able to analyzevehicle problems and perform the necessarymaintenance procedures to keep your Volvo atpeak operating condition.
Viewing the Vehicle Identification Number (VIN) When contacting a Volvo retailer, about e.g. your Volvo On Call subscription, your Vehicle Identification Number (VIN 4
) may be needed.
1. Tap Settings in the Top view in the center
display.
2. Proceed to
SystemSystem
Information
Vehicle Identification
Number.
> The vehicle identification number will be displayed.
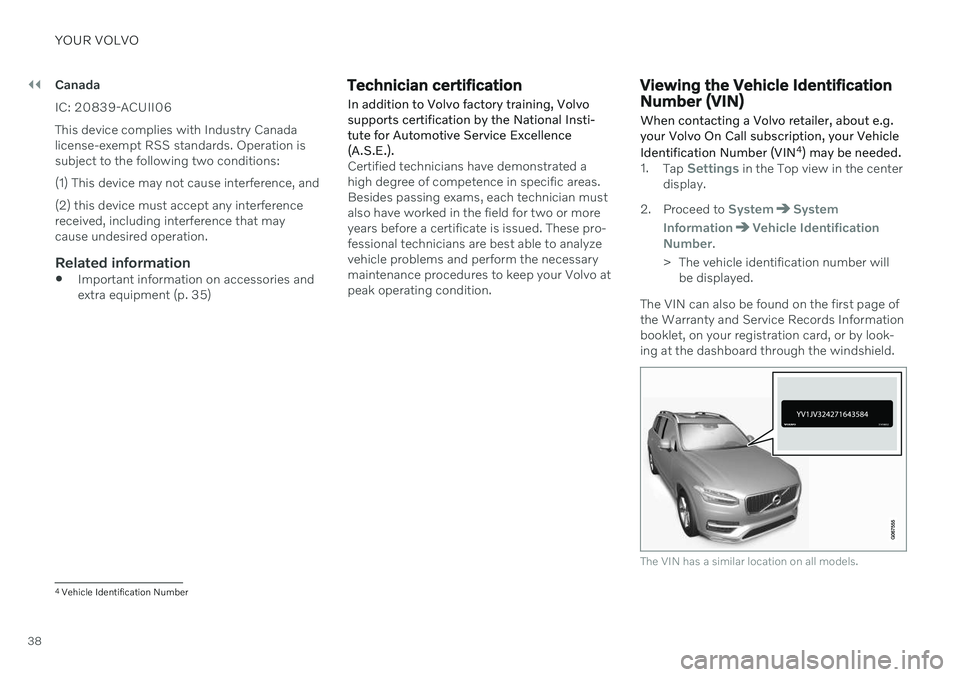
The VIN can also be found on the first page of the Warranty and Service Records Informationbooklet, on your registration card, or by look-ing at the dashboard through the windshield.
The VIN has a similar location on all models.
4 Vehicle Identification Number
Page 56 of 643

||
SAFETY
54
The front airbag systemThe front airbag system includes gas genera- tors surrounded by the airbags, and decelera-tion sensors that activate the gas generators,causing the airbags to be inflated with nitro-gen gas. As the movement of the seats' occupants compresses the airbags, some of the gas isexpelled at a controlled rate to provide bettercushioning. The belt tensioners minimize slackin the seat belts and are activated for occu-pants wearing their seat belts. The entire proc-ess, from inflation to deflation of the airbag,occurs within tenths of a second. The location of the front airbags is indicated by SRS AIRBAG embossed on the steering
wheel pad and above the glove compartment,and by decals on both sun visors and on thefront and far right side of the dash. The driver's side front airbag is folded and
located in the steering wheel hub.The knee airbag is folded on the underside of
the dashboard on the driver's side. The text AIRBAG is embossed on the panel.
The passenger's side front airbag is folded
behind a panel located above the glove com-partment.WARNING
The airbags in the vehicle are designed to be a SUPPLEMENT to-not areplacement for-the three-point seatbelts. For maximum protection, wearseat belts at all times. Be aware that nosystem can prevent all possible injuriesthat may occur in an accident.
Never drive with your hands on thesteering wheel pad/airbag housing.
The front airbags are designed to helpprevent serious injury. Deploymentoccurs very quickly and with considera-ble force. During normal deploymentand depending on variables such asseating position, one may experienceabrasions, bruises, swellings, or otherinjuries as a result of deployment ofone or both of the airbags.
When installing any accessory equip-ment, make sure that the front airbagsystem is not damaged. Any interfer-ence in the system could cause mal-function.
Front airbag deployment
The front airbags are designed to deployduring certain frontal or front-angular colli-sions, impacts, or decelerations, depend-ing on the crash severity, angle, speed andobject impacted. The airbags may also deploy in certain non-frontal collisionswhere rapid deceleration occurs.
The airbag system's sensors, which triggerthe front airbags, are designed to deter-mine if the collision is powerful enough toactivate the belt tensioners and/or the air-bags.
However, not all frontal collisions activate thefront airbags. If the collision involves a nonrigid object (e.g., a snow drift or bush), or a rigid, fixedobject at a low speed, the front airbagswill not necessarily deploy.
Front airbags do not normally deploy in aside impact collision, in a collision fromthe rear or in a rollover situation.
The amount of damage to the bodyworkdoes not reliably indicate if the airbagsshould have deployed or not.
Page 58 of 643
||
SAFETY
56
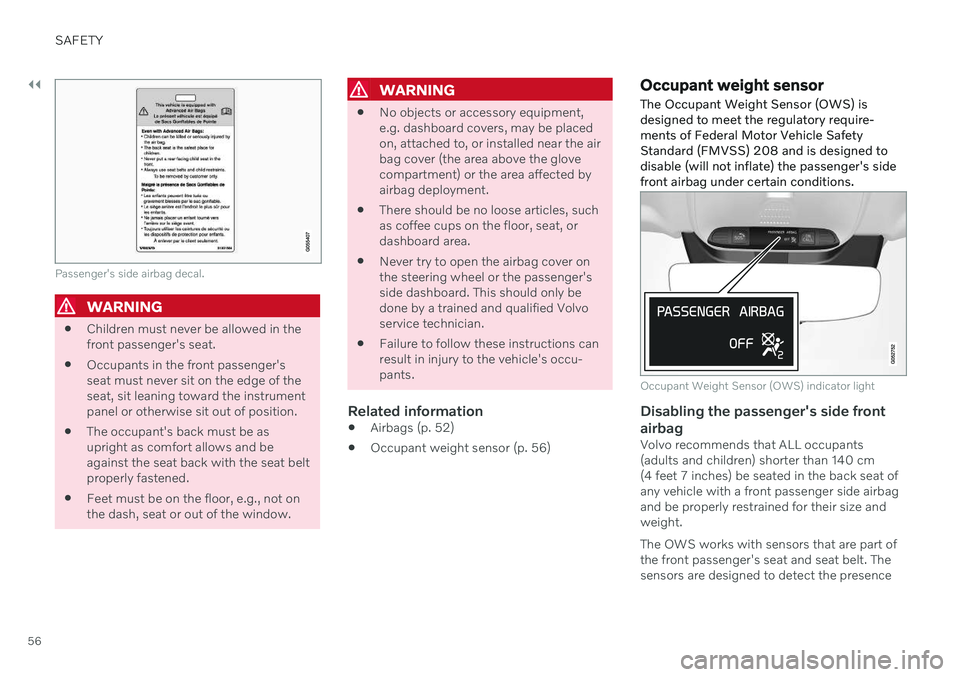
Passenger's side airbag decal.
WARNING
Children must never be allowed in the front passenger's seat.
Occupants in the front passenger'sseat must never sit on the edge of theseat, sit leaning toward the instrumentpanel or otherwise sit out of position.
The occupant's back must be asupright as comfort allows and beagainst the seat back with the seat beltproperly fastened.
Feet must be on the floor, e.g., not onthe dash, seat or out of the window.
WARNING
No objects or accessory equipment, e.g. dashboard covers, may be placedon, attached to, or installed near the airbag cover (the area above the glovecompartment) or the area affected byairbag deployment.
There should be no loose articles, suchas coffee cups on the floor, seat, ordashboard area.
Never try to open the airbag cover onthe steering wheel or the passenger'sside dashboard. This should only bedone by a trained and qualified Volvoservice technician.
Failure to follow these instructions canresult in injury to the vehicle's occu-pants.
Related information
Airbags (p. 52)
Occupant weight sensor (p. 56)
Occupant weight sensor
The Occupant Weight Sensor (OWS) is designed to meet the regulatory require-ments of Federal Motor Vehicle SafetyStandard (FMVSS) 208 and is designed todisable (will not inflate) the passenger's sidefront airbag under certain conditions.
Occupant Weight Sensor (OWS) indicator light
Disabling the passenger's side front airbag
Volvo recommends that ALL occupants (adults and children) shorter than 140 cm(4 feet 7 inches) be seated in the back seat ofany vehicle with a front passenger side airbagand be properly restrained for their size andweight. The OWS works with sensors that are part of the front passenger's seat and seat belt. Thesensors are designed to detect the presence
Page 80 of 643
DISPLAYS AND VOICE CONTROL
* Option/accessory.
78
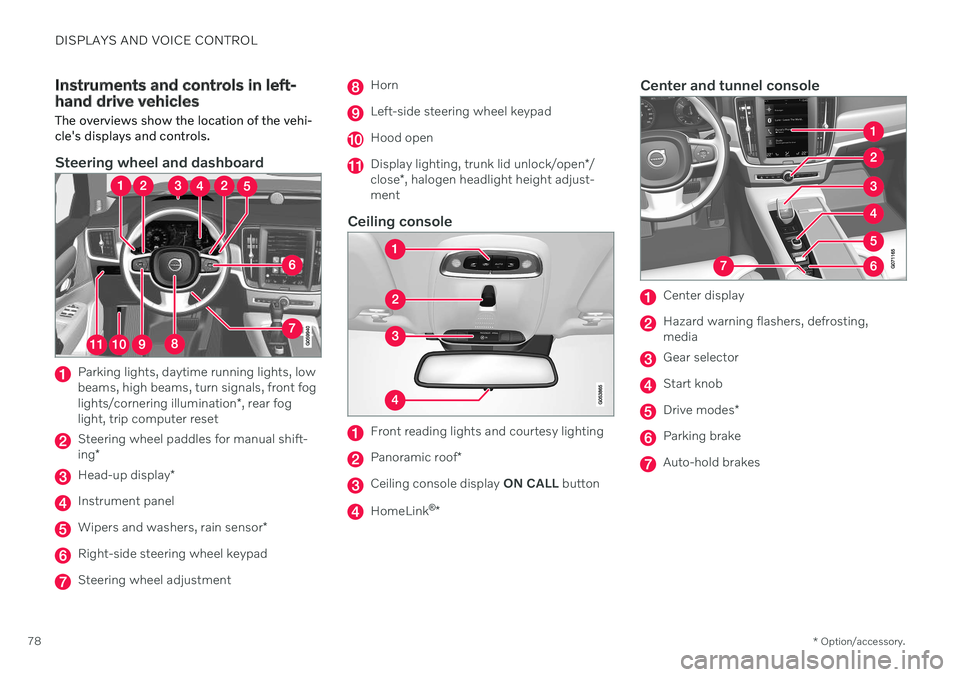
Instruments and controls in left- hand drive vehicles The overviews show the location of the vehi- cle's displays and controls.
Steering wheel and dashboard
Parking lights, daytime running lights, low beams, high beams, turn signals, front fog lights/cornering illumination *, rear fog
light, trip computer reset
Steering wheel paddles for manual shift- ing *
Head-up display *
Instrument panel
Wipers and washers, rain sensor *
Right-side steering wheel keypad
Steering wheel adjustment
Horn
Left-side steering wheel keypad
Hood open
Display lighting, trunk lid unlock/open */
close *, halogen headlight height adjust-
ment
Ceiling console
Front reading lights and courtesy lighting
Panoramic roof *
Ceiling console display ON CALL button
HomeLink ®
*
Center and tunnel console
Center display
Hazard warning flashers, defrosting, media
Gear selector
Start knob
Drive modes *
Parking brake
Auto-hold brakes
Page 141 of 643
DISPLAYS AND VOICE CONTROL
}}
* Option/accessory.139
Head-up display *
The head-up display is a complement to the instrument panel and projects informationfrom the instrument panel onto the wind-shield. The projected images can only beseen from the driver's seat.
The head-up display projects warnings and information related to speed, cruise controlfunctions, navigation, etc. onto the windshieldin the driver's field of vision. Traffic informationand incoming phone calls can also be shownon the head-up display.
NOTE
The driver's ability to see information in the head-up display may be impeded by
the use of polarizing sunglasses
a driving posture in which the driver isnot centered in the seat
objects on the display unit's glasscover
unfavorable lighting conditions.
CAUTION
The information is projected from a display unit located in the dashboard. To help pre-vent damage to the display unit's glasscover, do not place any objects on theglass and prevent objects from falling ontoit.
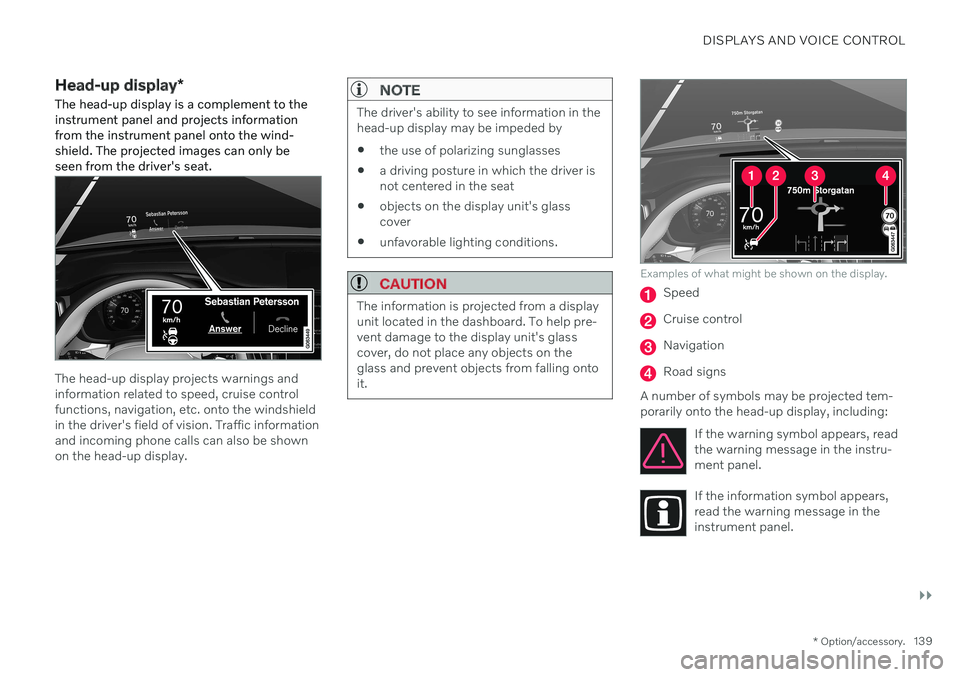
Examples of what might be shown on the display.
Speed
Cruise control
Navigation
Road signs
A number of symbols may be projected tem- porarily onto the head-up display, including: If the warning symbol appears, readthe warning message in the instru-ment panel.
If the information symbol appears, read the warning message in theinstrument panel.
Page 150 of 643
LIGHTING
* Option/accessory.
148
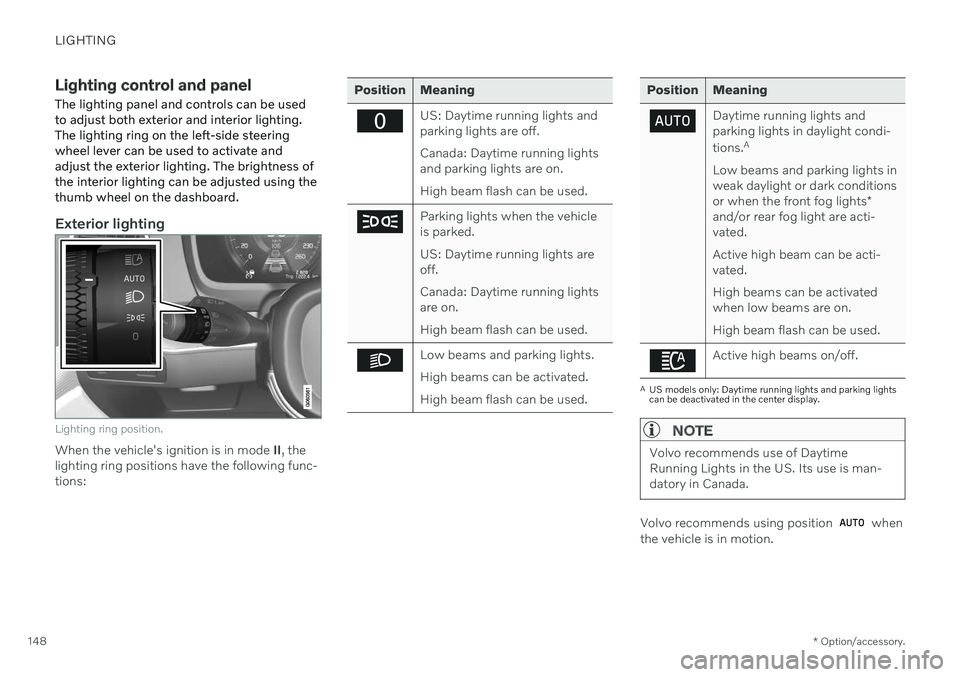
Lighting control and panel
The lighting panel and controls can be used to adjust both exterior and interior lighting.The lighting ring on the left-side steeringwheel lever can be used to activate andadjust the exterior lighting. The brightness ofthe interior lighting can be adjusted using thethumb wheel on the dashboard.
Exterior lighting
Lighting ring position.
When the vehicle's ignition is in mode II, the
lighting ring positions have the following func- tions:
Position Meaning
US: Daytime running lights and parking lights are off. Canada: Daytime running lights and parking lights are on. High beam flash can be used.
Parking lights when the vehicle is parked. US: Daytime running lights are off. Canada: Daytime running lights are on. High beam flash can be used.
Low beams and parking lights. High beams can be activated.High beam flash can be used.
Position Meaning
Daytime running lights and parking lights in daylight condi- tions. A
Low beams and parking lights in weak daylight or dark conditions or when the front fog lights *
and/or rear fog light are acti- vated. Active high beam can be acti- vated. High beams can be activated when low beams are on. High beam flash can be used.
Active high beams on/off.
A US models only: Daytime running lights and parking lights can be deactivated in the center display.
NOTE
Volvo recommends use of Daytime Running Lights in the US. Its use is man-datory in Canada.
Volvo recommends using position when
the vehicle is in motion.
Page 160 of 643
LIGHTING
* Option/accessory.
158
Using home safe lighting
Some of the exterior lights remain on to illu- minate the area around the vehicle. This iscalled home safe lighting.
To activate home safe lighting:
1. Switch off the ignition.
2. Push the left-side steering wheel lever toward the dashboard and release.
3. Exit the vehicle and lock the doors. > A symbol in the instrument panel illumi-nates to indicate that the function is activated and exterior lighting switcheson: Parking lights, headlights, licenseplate lighting and outer door handle lighting *.
The length of time home safe lighting remains illuminated can be set in the center display.
Related information
Adjusting light functions via the centerdisplay (p. 149)
Welcome Light (p. 158)
Welcome Light
Approach lighting is activated when the vehi- cle is unlocked and can be used to providelight as you walk toward the vehicle.
The function is activated when the remote key is used for unlocking. The parking lights, ceil-ing lights, footwell lights and trunk/cargocompartment lights are activated in daylightconditions. In weak daylight or dark condi-tions, the license plate lighting and outer door handle lighting * will also be activated, with the
light directed toward the ground. If no door is opened, the lights will remain illu- minated for approx. 2 minutes. If a door isopened while the function is activated, the interior lighting and outer door handle lighting *
will remain on for a longer period of time. This function can be activated and deactivated in the center display.
Related information
Adjusting light functions via the centerdisplay (p. 149)
Using home safe lighting (p. 158)
Remote key (p. 234)
Interior Lighting
The passenger compartment is equipped with several different types of lighting, e.g.general lighting, adjustable ambient lightingand reading lights.
All lighting in the passenger compartment can be turned on and off manually within5 minutes after:
the engine has been switched off and theignition is in mode
0.
the vehicle is unlocked but has not yetbeen started.
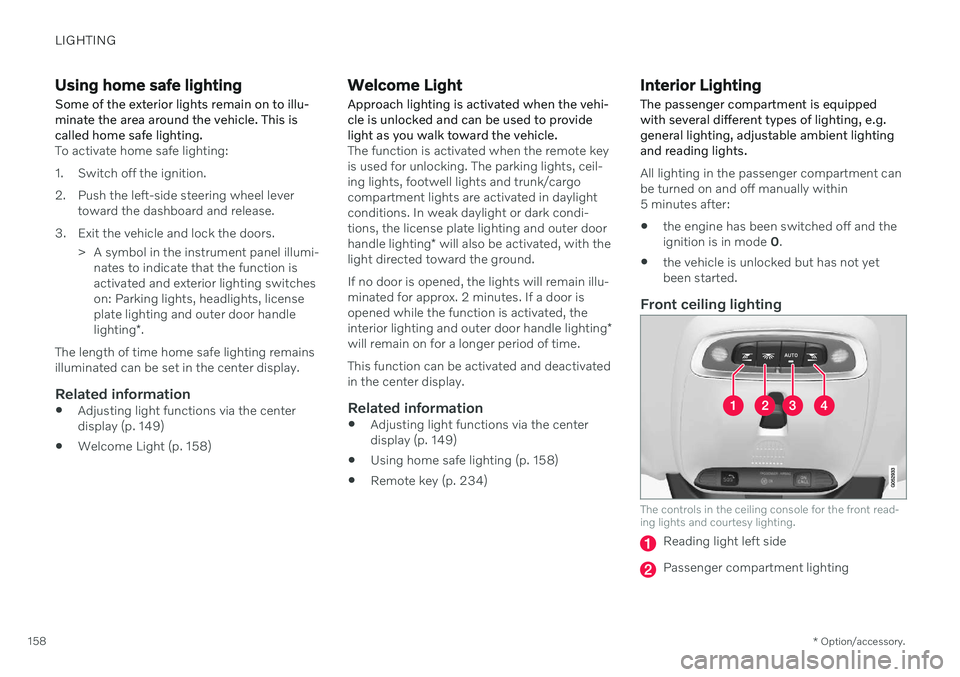
Front ceiling lighting
The controls in the ceiling console for the front read- ing lights and courtesy lighting.
Reading light left side
Passenger compartment lighting
Page 161 of 643

LIGHTING
}}
* Option/accessory.159
Courtesy lighting auto switch
Reading light right side
Reading lights
The reading lights on the right and left sides are switched on and off by briefly pressing thebuttons in the ceiling console. To adjust thebrightness, press and hold the button.
Passenger compartment lighting
Briefly press the button in the ceiling console to switch on or off the footwell lighting andceiling lighting.
Courtesy lighting auto switch
Activate the auto switch by briefly pressing the AUTO button in the ceiling console. With
Auto activated, the indicator light in the buttonand the courtesy lighting come on and areturned off as follows. Courtesy lighting is switched on when:
The vehicle is unlocked
The vehicle is switched off
A side door is opened.
Courtesy lighting is switched off when: The vehicle is locked
The engine is started
A side door is closed
A side door has been open for approx. 2 minutes.
Rear roof lightingReading lights are located in the rear sectionof the vehicle and can also be used as passen-ger compartment lighting.
In vehicles with panoramic roofs
*, there are two lamp
units, one on each side of the ceiling.
Briefly press the button on the light to turn on or off the reading lights. To adjust the bright-ness, press and hold the button.
Glove compartment lightingThe glove compartment lighting comes on orgoes off when the glove compartment isopened or closed.
Vanity mirror lighting *The vanity mirror lighting comes on or goes offwhen the cover over the mirror is opened orclosed.
Ground lighting*The ground lighting comes on or goes offwhen a door is opened or closed.
Doorsill lightingThe doorsill lighting comes on or goes offwhen a door is opened or closed.
Trunk lightingThe trunk lighting comes on or goes off whenthe trunk lid is opened or closed.
Ambient LightingThe ambient lighting comes on when thedoors are opened and goes out when the vehi-cle is locked. Ambient lighting brightness canbe adjusted in the center display and also fine-tuned using the thumb wheel in the dash-board.
Mood lighting*The vehicle is equipped with LEDs that pro-vide faint lighting in various colors. This light-ing is on when the engine is running. Moodlighting can be adjusted in the center displayand also fine-tuned using the thumb wheel inthe dashboard.
Lighting in the door storage compartments
Lighting in the door storage compartments comes on when the doors are opened andgoes out when the vehicle is locked. The
Page 162 of 643
||
LIGHTING
* Option/accessory.
160 brightness can be adjusted using the thumb wheel in the dashboard.
Lighting in the tunnel console's front
cup holder
The lighting in front console cup holdersswitches on when the vehicle is unlocked andoff when the vehicle is locked. The brightnesscan be adjusted using the thumb wheel in thedashboard.
Related information
Adjusting interior lighting (p. 160)
Lighting control and panel (p. 148)
Ignition modes (p. 381)
Passenger compartment interior (p. 532)
Adjusting interior lighting
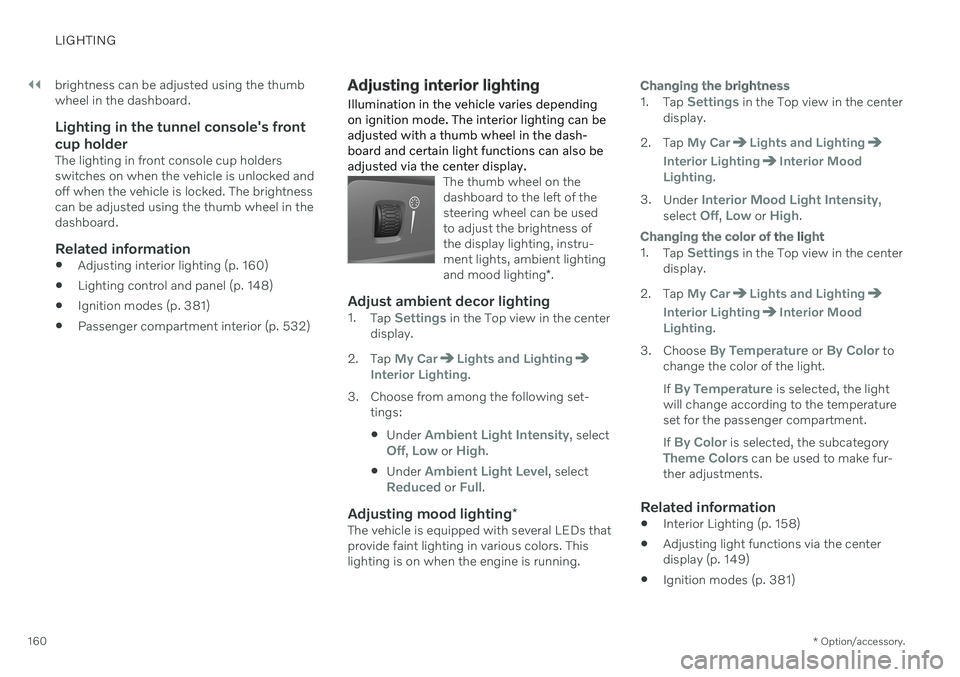
Illumination in the vehicle varies depending on ignition mode. The interior lighting can beadjusted with a thumb wheel in the dash-board and certain light functions can also beadjusted via the center display.
The thumb wheel on the dashboard to the left of thesteering wheel can be usedto adjust the brightness ofthe display lighting, instru-ment lights, ambient lighting and mood lighting *.
Adjust ambient decor lighting1.
Tap Settings in the Top view in the center
display.
2. Tap
My CarLights and LightingInterior Lighting.
3. Choose from among the following set- tings:
Under
Ambient Light Intensity, selectOff, Low or High.
Under
Ambient Light Level, selectReduced or Full.
Adjusting mood lighting
*The vehicle is equipped with several LEDs that provide faint lighting in various colors. Thislighting is on when the engine is running.
Changing the brightness
1.
Tap Settings in the Top view in the center
display.
2. Tap
My CarLights and Lighting
Interior LightingInterior Mood
Lighting.
3. Under
Interior Mood Light Intensity,
select Off, Low or High.
Changing the color of the light
1. Tap Settings in the Top view in the center
display.
2. Tap
My CarLights and Lighting
Interior LightingInterior Mood
Lighting.
3. Choose
By Temperature or By Color to
change the color of the light. If
By Temperature is selected, the light
will change according to the temperature set for the passenger compartment. If
By Color is selected, the subcategoryTheme Colors can be used to make fur-
ther adjustments.
Related information
Interior Lighting (p. 158)
Adjusting light functions via the center display (p. 149)
Ignition modes (p. 381)
Page 199 of 643

CLIMATE CONTROL
* Option/accessory.197
Climate control sensors
The climate system has a number of sensors to help regulate the climate settings in thevehicle.
Location of the sensors
Sunlight sensors - on the upper side of the dashboard.
Humidity sensor - in the rearview mirror console.
Ambient temperature sensor - in the right- side door mirror.
Passenger compartment temperature sen- sor - near the buttons in the center con-sole.
NOTE
Do not cover or block the sensors with clothing or other objects.
On vehicles equipped with the Interior Air Quality System *, there is also an air quality
sensor in the climate system's air intake.
Related information
Climate (p. 196)
Interior Air Quality System
* (p. 200)
Perceived temperature
The climate control system regulates the cli- mate in the passenger compartment basedon perceived temperature, not actual tem-perature.
The selected passenger compartment tem- perature is based on the physical perception ofthe current ambient temperature, airflowspeed, humidity, sunlight in the passengercompartment, etc. The system has a sunlight sensor that detects which side of the vehicle the sunlight is shin-ing on and adjusts the temperature accord-ingly. This means that the temperature of theair coming out of the vents may be differentfor the left and right sides, even if the tem-perature setting is the same for both sides.
Related information
Climate (p. 196)