headlamp VOLVO V90 2017 Owners Manual
[x] Cancel search | Manufacturer: VOLVO, Model Year: 2017, Model line: V90, Model: VOLVO V90 2017Pages: 594, PDF Size: 15.07 MB
Page 5 of 594
3
Table for location of i-Size child seats81
Integrated booster cushion *
82
Folding up the integrated booster cushion * 82
Folding down the integrated boostercushion * 84
INSTRUMENTS AND CONTROLS
Instruments and controls, left-hand drive car
86
Instruments and controls, right-handdrive car 87
Driver display 90
Driver display settings 94
Indicator symbols in the driver display 95
Warning symbols in the driver display 97
Outside temperature gauge 98
Clock 99
License agreement for the driver display 99
Application menu in the driver display 105
Using the application menu in thedriver display 105
Messages in the driver display andthe centre display 106
Managing messages in the driverdisplay and the centre display 108
Managing messages saved from thedriver display and centre display 110
Head-up display *
112
Voice recognition 115
Using voice recognition 116
Settings for voice recognition 117
Voice recognition control of the phone 118
Voice recognition control of radioand media 118
Voice recognition control of climate control119
Voice recognition and map navigation 120
Manual front seat 121
Power front seat *
121
Adjusting the power front seat *
122
Using the memory function in the power front seat * 122
Multi-functional front seat *
123
Adjusting functions in the multi-func-tional front seat * 124
Adjusting the passenger seat fromthe driver's seat * 127
Rear seat 128
Adjusting the head restraints in the rear seat 128
Lowering the backrests in the rear seat 130
Steering wheel 131
Adjusting the steering wheel 132
Headlamp control 134
Headlamp levelling 135
Position lamps 136
Daytime running lights 137
Dipped beam 137
Activating/deactivating main beam 138
Active bending lights *
141
Page 6 of 594

4
Adapting the beam pattern from the headlamps141
Front fog lamps/cornering lights *
142
Rear fog lamp 142
Brake lights 143
Hazard warning flashers 143
Using direction indicators 144
Passenger compartment lighting 145
Home safe light duration 148
Approach light duration 148
Using windscreen wipers 148
Activating/deactivating the rain sensor 149
Windscreen and headlamp washers 150
Rear window wiper and washer 151
Power windows 151
Operating power windows 152
Using the sun blind *
153
Adjusting the door mirrors 153
Interior rearview mirror 155
Compass *
156
Calibrating the compass *
157
Panorama roof *
158
Operating the panorama roof *
159
HomeLink ®
* 162
Programming HomeLink®
* 163
Trip computer 165
Show trip data in the driver display 166
Show trip statistics in the centre display 168
Settings view 169
Categories in the settings view 170
Changing system settings in the set- tings view 172
Resetting settings in the settings view 173
Driver profiles 174
Selecting driver profile 174
Editing a driver profile 175
Linking remote control key to driverprofile 176
Importing/exporting a driver profilefrom/to USB 177
Changing settings for apps 178
Resetting user data for change ofownership 179
CLIMATE CONTROL
Climate control
182
Climate control - sensors 183
Perceived temperature 183
Air quality 184
Passenger compartment filter 185
Clean Zone Interior Package *
185
Interior Air Quality System *
185
Climate controls 186
Climate controls in the centre display 187
Climate controls at the rear of the tunnel console * 188
Auto-regulating the climate 189
Activating/deactivating air conditioning 190
Regulating the temperature 190
Regulating the fan level 193
Activating/deactivating defrost of windows and door mirrors 194
Activating/deactivating air recirculation 196
Air distribution 197
Changing the air distribution 198
Opening/closing and aiming the air vents 199
Table of air distribution options 201
Activating/deactivating heating of the seats * 203
Activating/deactivating ventilation ofthe seats * 204
Page 34 of 594
INTRODUCTION
* Option/accessory.
32
The owner's manual and the environment
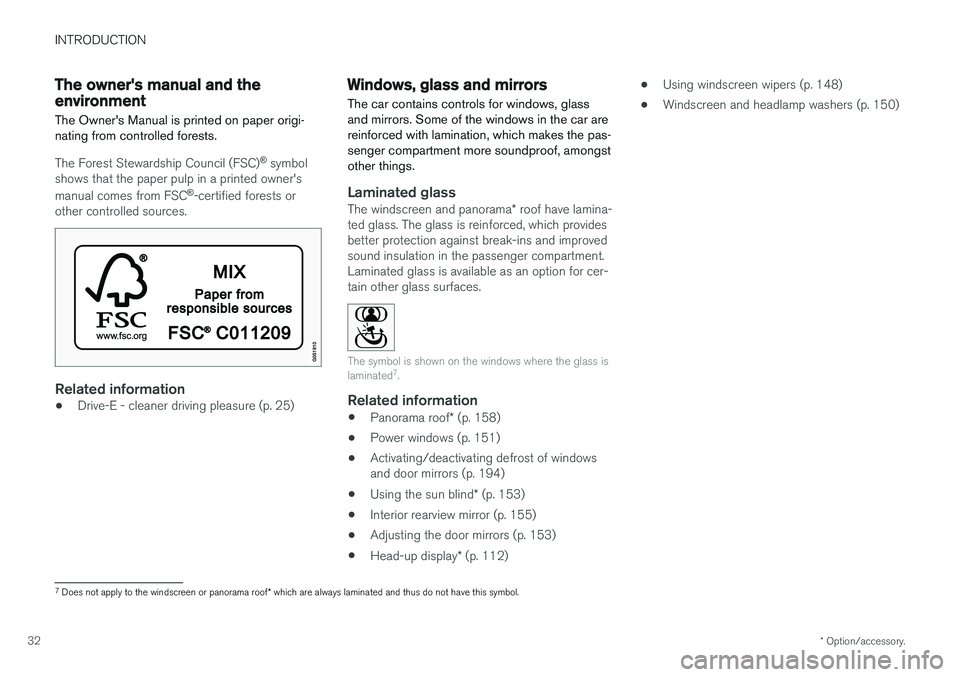
The Owner's Manual is printed on paper origi- nating from controlled forests.
The Forest Stewardship Council (FSC) ®
symbol
shows that the paper pulp in a printed owner's manual comes from FSC ®
-certified forests or
other controlled sources.
Related information
• Drive-E - cleaner driving pleasure (p. 25)
Windows, glass and mirrors
The car contains controls for windows, glass and mirrors. Some of the windows in the car arereinforced with lamination, which makes the pas-senger compartment more soundproof, amongstother things.
Laminated glass
The windscreen and panorama * roof have lamina-
ted glass. The glass is reinforced, which provides better protection against break-ins and improvedsound insulation in the passenger compartment.Laminated glass is available as an option for cer-tain other glass surfaces.
The symbol is shown on the windows where the glass is laminated 7
.
Related information
• Panorama roof
* (p. 158)
• Power windows (p. 151)
• Activating/deactivating defrost of windows and door mirrors (p. 194)
• Using the sun blind
* (p. 153)
• Interior rearview mirror (p. 155)
• Adjusting the door mirrors (p. 153)
• Head-up display
* (p. 112) •
Using windscreen wipers (p. 148)
• Windscreen and headlamp washers (p. 150)
7
Does not apply to the windscreen or panorama roof * which are always laminated and thus do not have this symbol.
Page 97 of 594
INSTRUMENTS AND CONTROLS
}}
95
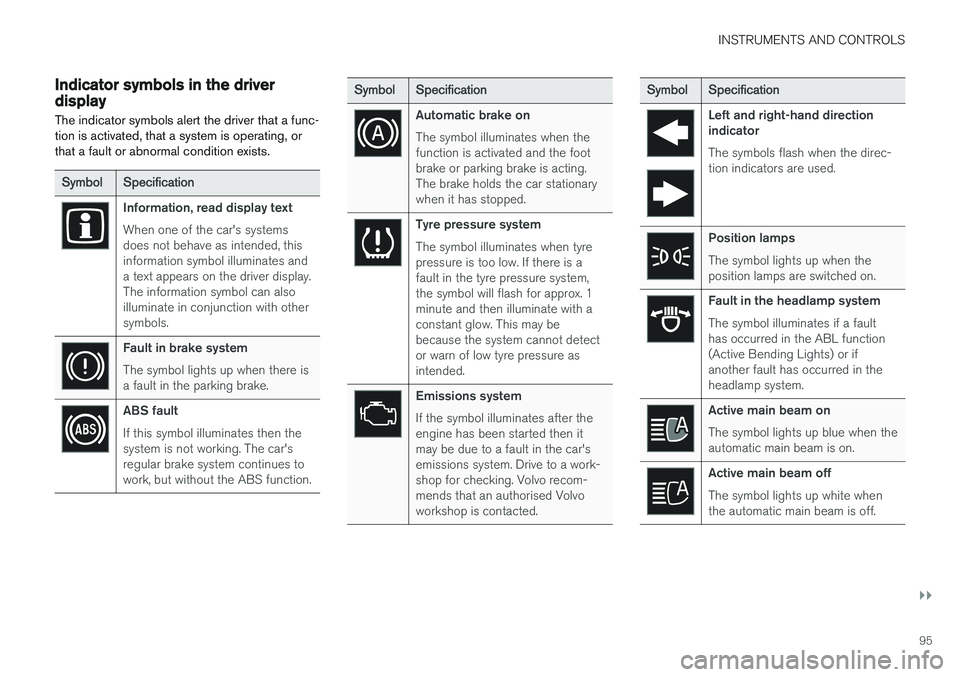
Indicator symbols in the driver display The indicator symbols alert the driver that a func- tion is activated, that a system is operating, orthat a fault or abnormal condition exists.
SymbolSpecification
Information, read display text When one of the car's systems does not behave as intended, thisinformation symbol illuminates anda text appears on the driver display.The information symbol can alsoilluminate in conjunction with othersymbols.
Fault in brake system The symbol lights up when there is a fault in the parking brake.
ABS fault If this symbol illuminates then the system is not working. The car'sregular brake system continues towork, but without the ABS function.
SymbolSpecification
Automatic brake on The symbol illuminates when the function is activated and the footbrake or parking brake is acting.The brake holds the car stationarywhen it has stopped.
Tyre pressure system The symbol illuminates when tyre pressure is too low. If there is afault in the tyre pressure system,the symbol will flash for approx. 1minute and then illuminate with aconstant glow. This may bebecause the system cannot detector warn of low tyre pressure asintended.
Emissions system If the symbol illuminates after the engine has been started then itmay be due to a fault in the car'semissions system. Drive to a work-shop for checking. Volvo recom-mends that an authorised Volvoworkshop is contacted.
Symbol Specification
Left and right-hand direction indicator The symbols flash when the direc- tion indicators are used.
Position lamps The symbol lights up when the position lamps are switched on.
Fault in the headlamp system The symbol illuminates if a fault has occurred in the ABL function(Active Bending Lights) or ifanother fault has occurred in theheadlamp system.
Active main beam on The symbol lights up blue when the automatic main beam is on.
Active main beam off The symbol lights up white when the automatic main beam is off.
Page 136 of 594
INSTRUMENTS AND CONTROLS
* Option/accessory.
134
Headlamp control
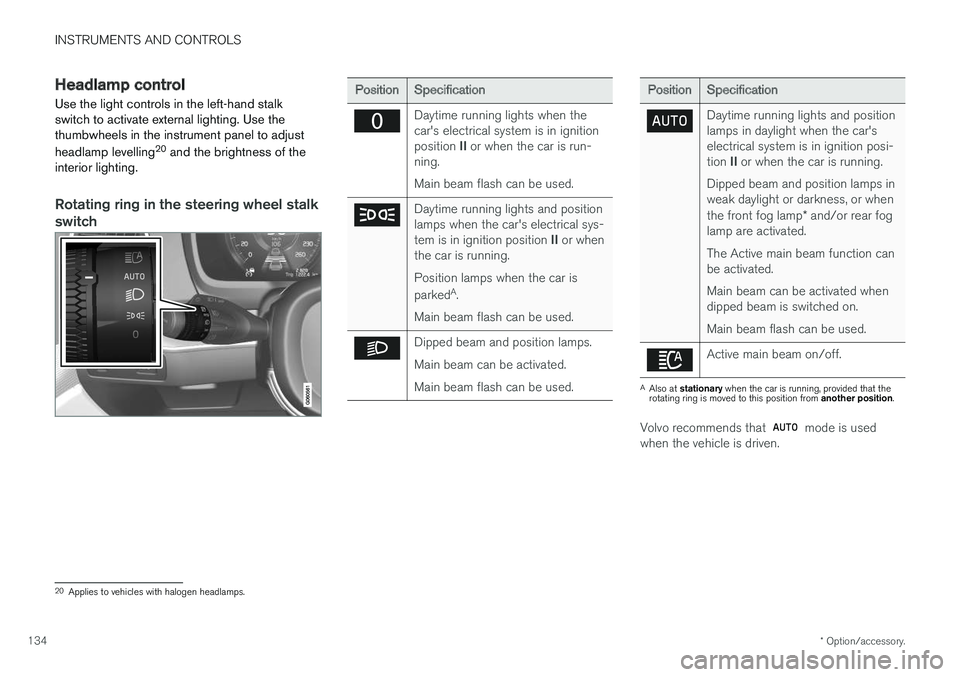
Use the light controls in the left-hand stalk switch to activate external lighting. Use thethumbwheels in the instrument panel to adjust headlamp levelling 20
and the brightness of the
interior lighting.
Rotating ring in the steering wheel stalk
switch
Position Specification
Daytime running lights when the car's electrical system is in ignition position II or when the car is run-
ning. Main beam flash can be used.
Daytime running lights and position lamps when the car's electrical sys- tem is in ignition position II or when
the car is running. Position lamps when the car is parked A
.
Main beam flash can be used.
Dipped beam and position lamps. Main beam can be activated.Main beam flash can be used.
Position Specification
Daytime running lights and position lamps in daylight when the car'selectrical system is in ignition posi- tion II or when the car is running.
Dipped beam and position lamps in weak daylight or darkness, or when the front fog lamp * and/or rear fog
lamp are activated. The Active main beam function can be activated. Main beam can be activated when dipped beam is switched on. Main beam flash can be used.
Active main beam on/off.
A Also at stationary when the car is running, provided that the
rotating ring is moved to this position from another position.
Volvo recommends that mode is used
when the vehicle is driven.
20 Applies to vehicles with halogen headlamps.
Page 137 of 594
INSTRUMENTS AND CONTROLS
}}
* Option/accessory.135
WARNING
The car's audio system is not able to deter- mine when daylight is too weak or sufficientlystrong, e.g. in fog and rain, in all situations. The driver is always responsible for ensuring that the car is driven with a beam pattern suit-able for the traffic situation and in accordancewith applicable traffic regulations.
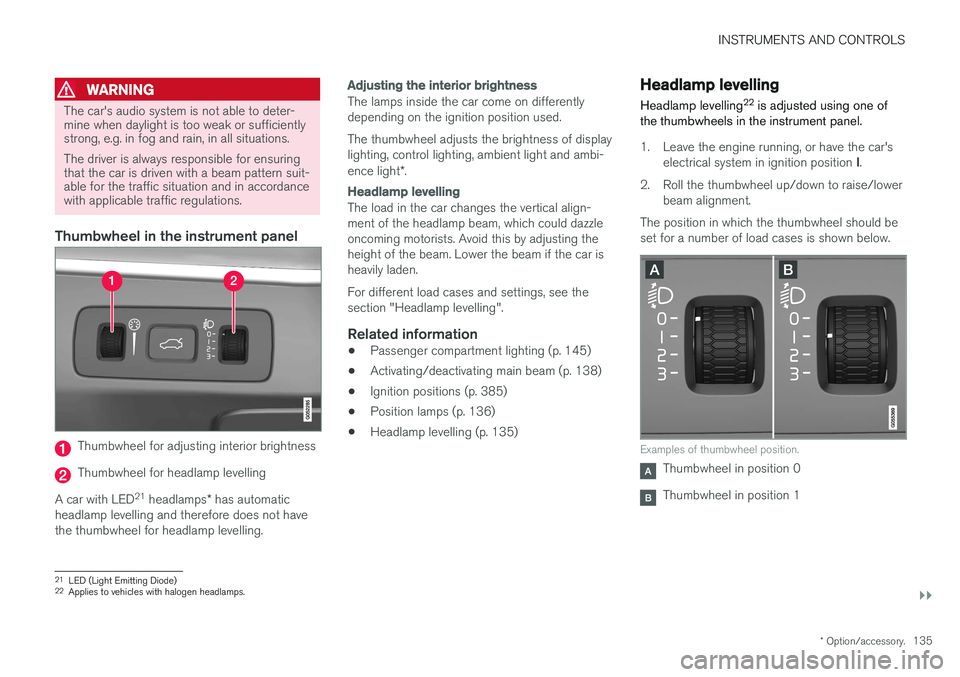
Thumbwheel in the instrument panel
Thumbwheel for adjusting interior brightness
Thumbwheel for headlamp levelling
A car with LED 21
headlamps * has automatic
headlamp levelling and therefore does not have the thumbwheel for headlamp levelling.
Adjusting the interior brightness
The lamps inside the car come on differently depending on the ignition position used. The thumbwheel adjusts the brightness of display lighting, control lighting, ambient light and ambi- ence light *.
Headlamp levelling
The load in the car changes the vertical align- ment of the headlamp beam, which could dazzleoncoming motorists. Avoid this by adjusting theheight of the beam. Lower the beam if the car isheavily laden. For different load cases and settings, see the section "Headlamp levelling".
Related information
• Passenger compartment lighting (p. 145)
• Activating/deactivating main beam (p. 138)
• Ignition positions (p. 385)
• Position lamps (p. 136)
• Headlamp levelling (p. 135)
Headlamp levelling
Headlamp levelling 22
is adjusted using one of
the thumbwheels in the instrument panel.
1. Leave the engine running, or have the car's
electrical system in ignition position I.
2. Roll the thumbwheel up/down to raise/lower beam alignment.
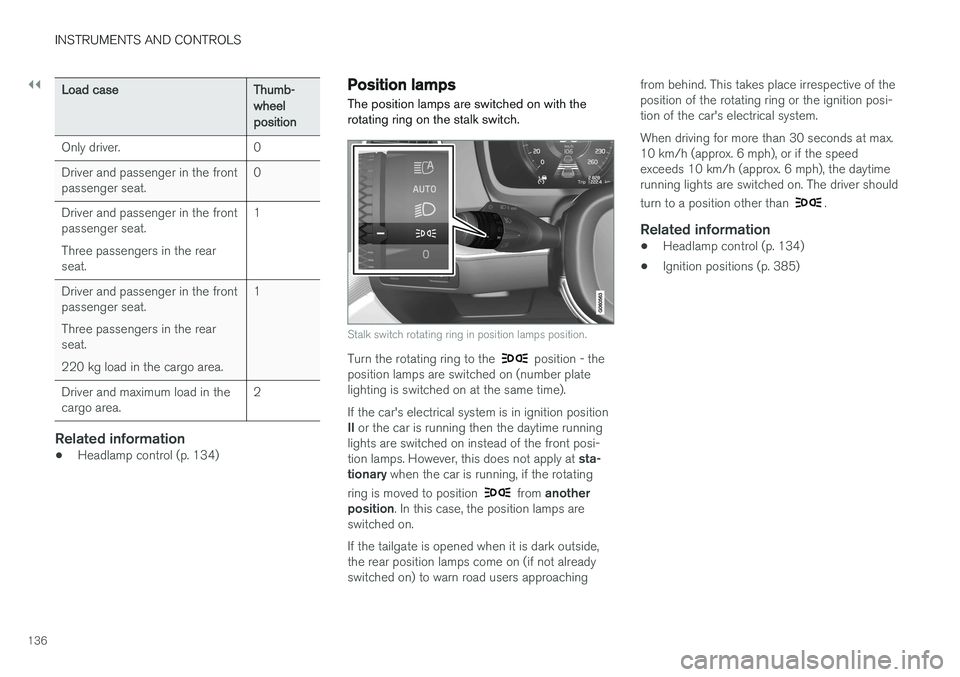
The position in which the thumbwheel should be set for a number of load cases is shown below.
Examples of thumbwheel position.
Thumbwheel in position 0
Thumbwheel in position 1
21 LED (Light Emitting Diode)
22 Applies to vehicles with halogen headlamps.
Page 138 of 594
||
INSTRUMENTS AND CONTROLS
136
Load caseThumb- wheelposition
Only driver. 0 Driver and passenger in the front passenger seat. 0
Driver and passenger in the frontpassenger seat. Three passengers in the rear seat. 1
Driver and passenger in the frontpassenger seat. Three passengers in the rear seat. 220 kg load in the cargo area. 1
Driver and maximum load in the cargo area. 2
Related information
•
Headlamp control (p. 134)
Position lamps
The position lamps are switched on with the rotating ring on the stalk switch.
Stalk switch rotating ring in position lamps position.
Turn the rotating ring to the position - the
position lamps are switched on (number plate lighting is switched on at the same time). If the car's electrical system is in ignition position II or the car is running then the daytime running
lights are switched on instead of the front posi-tion lamps. However, this does not apply at sta-
tionary when the car is running, if the rotating
ring is moved to position
from another
position . In this case, the position lamps are
switched on. If the tailgate is opened when it is dark outside, the rear position lamps come on (if not alreadyswitched on) to warn road users approaching from behind. This takes place irrespective of theposition of the rotating ring or the ignition posi-tion of the car's electrical system. When driving for more than 30 seconds at max. 10 km/h (approx. 6 mph), or if the speedexceeds 10 km/h (approx. 6 mph), the daytimerunning lights are switched on. The driver should turn to a position other than
.
Related information
•
Headlamp control (p. 134)
• Ignition positions (p. 385)
Page 139 of 594
INSTRUMENTS AND CONTROLS
}}
* Option/accessory.137
Daytime running lights The daytime running lights are switched on when the rotating ring on the stalk switch is in position
, or as well as when
the car's electrical system is in ignition position II
or when the car is running. For the
posi-
tion, this only applies in daylight. In weak daylight or darkness, dipped beam is switched oninstead.
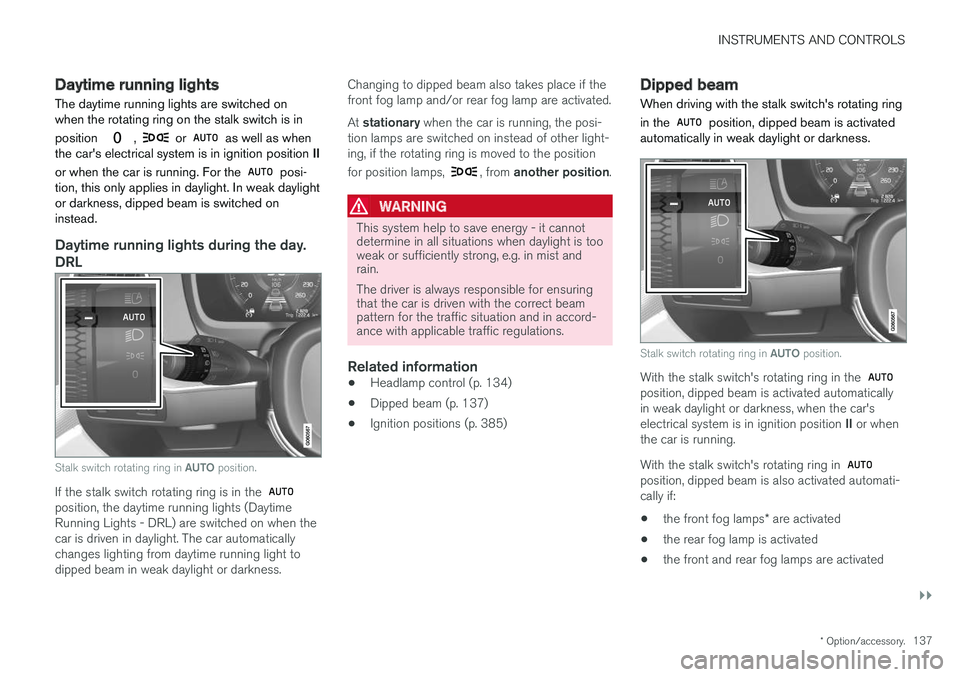
Daytime running lights during the day.
DRL
Stalk switch rotating ring in AUTO position.
If the stalk switch rotating ring is in the position, the daytime running lights (Daytime Running Lights - DRL) are switched on when thecar is driven in daylight. The car automaticallychanges lighting from daytime running light todipped beam in weak daylight or darkness. Changing to dipped beam also takes place if thefront fog lamp and/or rear fog lamp are activated. At
stationary when the car is running, the posi-
tion lamps are switched on instead of other light- ing, if the rotating ring is moved to the position for position lamps,
, from another position .
WARNING
This system help to save energy - it cannot determine in all situations when daylight is tooweak or sufficiently strong, e.g. in mist andrain. The driver is always responsible for ensuring that the car is driven with the correct beampattern for the traffic situation and in accord-ance with applicable traffic regulations.
Related information
•Headlamp control (p. 134)
• Dipped beam (p. 137)
• Ignition positions (p. 385)
Dipped beam
When driving with the stalk switch's rotating ring in the
position, dipped beam is activated
automatically in weak daylight or darkness.
Stalk switch rotating ring in AUTO position.
With the stalk switch's rotating ring in the position, dipped beam is activated automatically in weak daylight or darkness, when the car's electrical system is in ignition position II or when
the car is running. With the stalk switch's rotating ring in
position, dipped beam is also activated automati- cally if:
• the front fog lamps
* are activated
• the rear fog lamp is activated
• the front and rear fog lamps are activated
Page 140 of 594

||
INSTRUMENTS AND CONTROLS
138Dipped beam is always switched on when the rotating ring on the stalk switch is in position
when the car's electrical system is in igni-
tion position II or when the car is running.
Tunnel detection
The car detects when it is driven into a tunnel and switches from daytime running lights todipped beam. Note that the rotating ring in the left-hand stalk switch must be in
mode for tunnel detec-
tion to work.
Related information
• Daytime running lights (p. 137)
• Headlamp control (p. 134)
• Ignition positions (p. 385)
Activating/deactivating main beam Main beam is activated with the stalk switch. Active main beam is activated with the rotating ring on the stalk switch.
Steering wheel stalk switch with rotating ring.
Position for main beam flash
Position for main beam
Main beam flashMove the stalk switch backwards slightly to main beam flash position. Main beam comes on untilthe stalk switch is released.
Main beamMain beam can be activated when the steeringwheel stalk switch's rotating ring is in position
23
or . Activate main beam by moving
the stalk switch forwards. Deactivate by moving the stalk switch backwards. When main beam has been activated the
symbol illuminates in the driver display.
Active main beamActive main beam is a function which uses a camera sensor at the top edge of the windscreento detect the headlamp beams from oncomingtraffic or the rear lights of vehicles in front, andthen switches from main beam to dipped beam.The function can also take streetlights intoaccount. Main beam is reactivated when the camera sen- sor no longer sees any oncoming vehicles orvehicles ahead.
Car with halogen headlamps
The lighting returns to main beam about a sec- ond after the camera sensor no longer detectsthe headlamp beams from oncoming traffic or therear lights from vehicles in front.
23 When dipped beam is activated.
Page 141 of 594
INSTRUMENTS AND CONTROLS
}}
* Option/accessory.139
Car with LED24
headlamps *
If the active main beam has the on/off functional- ity25
then the lighting returns to main beam about
a second after the camera sensor no longer detects the headlamp beams from oncomingtraffic or the rear lights from vehicles in front. If the active main beam has adaptive functional- ity 25
then, unlike what happens during conven-
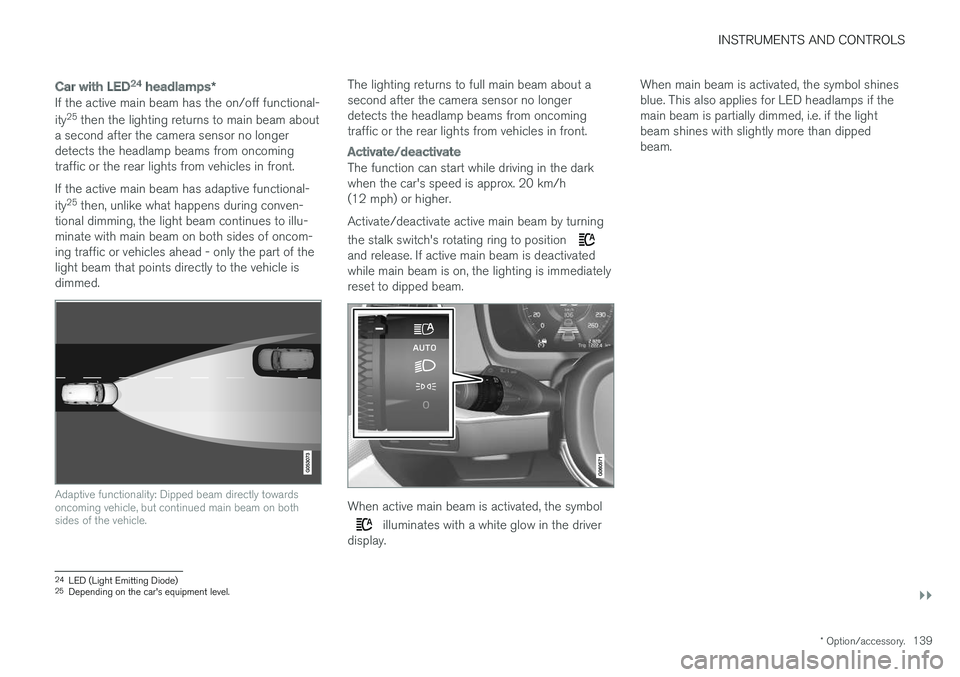
tional dimming, the light beam continues to illu- minate with main beam on both sides of oncom-ing traffic or vehicles ahead - only the part of thelight beam that points directly to the vehicle isdimmed.
Adaptive functionality: Dipped beam directly towards oncoming vehicle, but continued main beam on bothsides of the vehicle.
The lighting returns to full main beam about a second after the camera sensor no longerdetects the headlamp beams from oncomingtraffic or the rear lights from vehicles in front.
Activate/deactivate
The function can start while driving in the dark when the car's speed is approx. 20 km/h(12 mph) or higher. Activate/deactivate active main beam by turning the stalk switch's rotating ring to position
and release. If active main beam is deactivated while main beam is on, the lighting is immediatelyreset to dipped beam.
When active main beam is activated, the symbol
illuminates with a white glow in the driver
display. When main beam is activated, the symbol shines blue. This also applies for LED headlamps if themain beam is partially dimmed, i.e. if the lightbeam shines with slightly more than dippedbeam.
24
LED (Light Emitting Diode)25
Depending on the car's equipment level.