washer fluid VOLVO V90 2017 Owners Manual
[x] Cancel search | Manufacturer: VOLVO, Model Year: 2017, Model line: V90, Model: VOLVO V90 2017Pages: 594, PDF Size: 15.07 MB
Page 13 of 594
11
Wiper blades in service position527
Replacing a wiper blade 528
Filling washer fluid 529
Starter battery 530
Symbols on the batteries 533
Support battery 533
Fuses 535
Replacing a fuse 536
Fuses in engine compartment 537
Fuses under glovebox 542
Fuses in cargo area 546
Cleaning the exterior 549
Polishing and waxing 551
Rustproofing 552
Cleaning the interior 552
Cleaning the centre display 553
Paint damage 554
Repairing paint damage 555
SPECIFICATIONS
Type designations558
Dimensions 561
Weights 563
Towing capacity and towball load 564
Engine specifications 566
Engine oil — specifications 567
Adverse driving conditions for engine oil 569
Coolant — specifications 570
Transmission fluid — specifications 570
Brake fluid — specifications 570
Fuel tank - volume 571
Air conditioning — specifications 571
Fuel consumption and CO2 emissions 572
Approved tyre pressures 574
Performance 575
ALPHABETICAL INDEX
Alphabetical Index 577
Page 151 of 594
INSTRUMENTS AND CONTROLS
}}
149
Continuous wipingRaise the stalk switch for the wipers to sweep at normal speed.
Raise the stalk switch further for the wip- ers to sweep at high speed.
IMPORTANT
Before activating the wipers - ensure that the wiper blades are not frozen in, and that anysnow or ice on the windscreen (and rear win-dow) is scraped away.
IMPORTANT
Use plenty of washer fluid when the wipers are cleaning the windscreen. The windscreenmust be wet when the windscreen wipers areoperating.
Related information
•Activating/deactivating the rain sensor (p. 149)
• Windscreen and headlamp washers (p. 150)
• Wiper blades in service position (p. 527)
Activating/deactivating the rain sensor
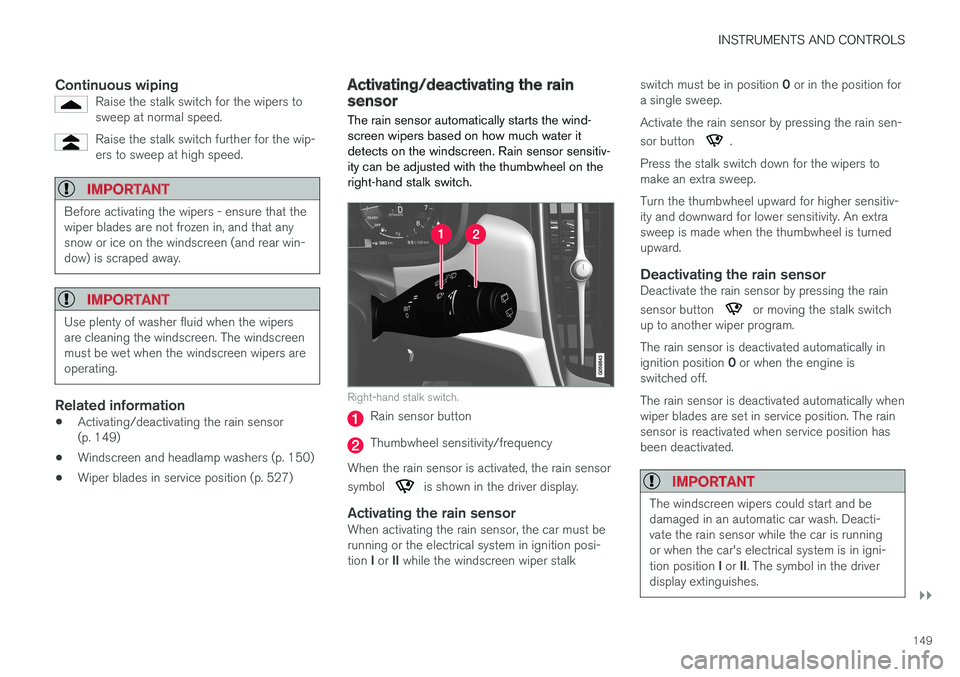
The rain sensor automatically starts the wind- screen wipers based on how much water itdetects on the windscreen. Rain sensor sensitiv-ity can be adjusted with the thumbwheel on theright-hand stalk switch.
Right-hand stalk switch.
Rain sensor button
Thumbwheel sensitivity/frequency
When the rain sensor is activated, the rain sensor symbol
is shown in the driver display.
Activating the rain sensorWhen activating the rain sensor, the car must be running or the electrical system in ignition posi- tion I or II while the windscreen wiper stalk switch must be in position
0 or in the position for
a single sweep. Activate the rain sensor by pressing the rain sen- sor button
.
Press the stalk switch down for the wipers to make an extra sweep. Turn the thumbwheel upward for higher sensitiv- ity and downward for lower sensitivity. An extrasweep is made when the thumbwheel is turnedupward.
Deactivating the rain sensorDeactivate the rain sensor by pressing the rain sensor button
or moving the stalk switch
up to another wiper program. The rain sensor is deactivated automatically in ignition position 0 or when the engine is
switched off. The rain sensor is deactivated automatically when wiper blades are set in service position. The rainsensor is reactivated when service position hasbeen deactivated.
IMPORTANT
The windscreen wipers could start and be damaged in an automatic car wash. Deacti-vate the rain sensor while the car is runningor when the car's electrical system is in igni- tion position I or II. The symbol in the driver
display extinguishes.
Page 152 of 594
||
INSTRUMENTS AND CONTROLS
* Option/accessory.
150
Activating/deactivating the memory function
The memory function for the rain sensor can be activated in such a way that the rain sensor but-ton does not need to be depressed each time thecar is started: 1.
Press
Settings in the top view in the centre
display.
2. Press
My CarWipers.
3. Select
Rain Sensor Memory to activate/
deactivate the memory function.
Related information
• Using windscreen wipers (p. 148)
• Wiper blades in service position (p. 527)
• Rear window wiper and washer (p. 151)
Windscreen and headlamp washers
Windscreen and headlamp washers clean the windscreen and headlamps. Washing/wiping isstarted by means of the right-hand stalk switch.
Starting windscreen and headlamp
washers
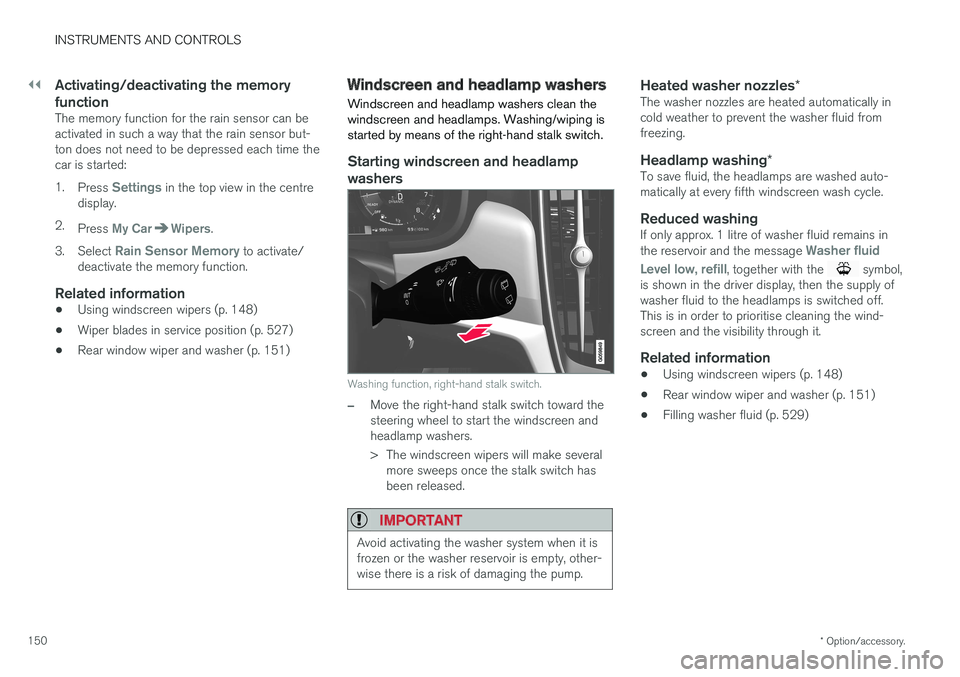
Washing function, right-hand stalk switch.
–Move the right-hand stalk switch toward the steering wheel to start the windscreen andheadlamp washers.
> The windscreen wipers will make several more sweeps once the stalk switch has been released.
IMPORTANT
Avoid activating the washer system when it is frozen or the washer reservoir is empty, other-wise there is a risk of damaging the pump.
Heated washer nozzles *The washer nozzles are heated automatically in cold weather to prevent the washer fluid fromfreezing.
Headlamp washing*To save fluid, the headlamps are washed auto-matically at every fifth windscreen wash cycle.
Reduced washingIf only approx. 1 litre of washer fluid remains in the reservoir and the message Washer fluid
Level low, refill
, together with the symbol,
is shown in the driver display, then the supply of washer fluid to the headlamps is switched off.This is in order to prioritise cleaning the wind-screen and the visibility through it.
Related information
• Using windscreen wipers (p. 148)
• Rear window wiper and washer (p. 151)
• Filling washer fluid (p. 529)
Page 386 of 594
STARTING AND DRIVING
* Option/accessory.
384
Alcohol lock *
The function of the alcohol lock is to prevent the car from being driven by individuals under theinfluence of alcohol. Before the engine can bestarted the driver must take a breath test thatverifies that he/she is not under the influence ofalcohol. Alcohol lock calibration takes place inaccordance with each market's limit value inforce for driving legally.
The car has an interface for the electrical con- nection of the different makes and models ofalcohol lock recommended by Volvo. The inter-face facilitates alcohol lock connection, and givesthe option of an integrated function includingmessages related to the alcohol lock in the car'smain display. For information about a specificalcohol lock, please refer to its owner's manual.
WARNING
The alcohol lock is an aid and does not exempt the driver from responsibility. It isalways the responsibility of the driver to besober and to drive the car safely.
Bypass of the alcohol lock *
In the event of an emergency situation or the alcohol lock is out of order, it is possible tobypass the alcohol lock in order to drive the car.
For deactivation via the alcohol lock, see the sep- arate instructions for that specific lock. Activating the bypass function (Bypass)
NOTE
All bypass activation is logged and saved in the memory in the alcohol lock's control unit.It is not possible to undo a bypass.
The message, Blow into alcolock Bypass
instead?, is shown in the screen:
–Select Bypass by pressing once on the O
button on the steering wheel's right-hand keypad.
> The alcohol lock is now bypassed and the car can be started.
The number of bypasses possible before service is required is selected during alcohol lock instal-lation.
Related information
• Before starting the engine with the alcohollock (p. 384)
• Starting the car (p. 386)
Before starting the engine with the alcohol lock
The alcohol lock is activated automatically and is then ready for use when the car is opened.
To bear in mindIn order to obtain correct function and as accu- rate a measurement result as possible: • Avoid eating or drinking approx. 5 minutes before the breath test.
• Avoid excess windscreen washing - the alco-hol in the washer fluid may result in an incor-rect measurement result.
NOTE
After a completed period of driving, the engine can be restarted within 30 minuteswithout a new breath test.
Related information
•
Bypass of the alcohol lock
* (p. 384)
• Starting the car (p. 386)
Page 417 of 594
STARTING AND DRIVING
}}
* Option/accessory.415
Related information
•Driving with a trailer under special conditions (p. 428)
• Preparations for a long trip (p. 415)
Overloading the starter battery
The electrical functions in the car load the starter battery to varying degrees. Avoid using the igni-tion position II when the car is switched off.
Instead, use ignition position I - which uses less
power.
Also, be aware of different accessories that load the electrical system. Do not use functions whichuse a lot of power when the car is switched off.Examples of such functions are:
• ventilation fan
• headlamps
• windscreen wiper
• audio system (high volume).
If the starter battery voltage is low, the message
12 V Battery Low charge, will soon enter
power save mode is shown in the driver display.
The energy-saving function then shuts down cer- tain functions or reduces certain functions suchas the ventilation fan and/or audio system.
–In which case, charge the starter battery by starting the car and then running it for atleast 15 minutes - starter battery charging ismore effective during driving than runningthe engine at idling speed while stationary.
Related information
• Ignition positions (p. 385)
• Starter battery (p. 530)
Preparations for a long trip
Before a driving holiday or some other type of long journey, it is important to check the car'sfunctions and equipment particularly carefully.
Check that:
• the engine is working normally and that fuel consumption is normal
• there are no leaks (fuel, oil or other fluid)
• all bulbs are working
• the tyres have sufficient tread depth andpressure
• a warning triangle and high-visibility vest arelocated in the car - legally required in certaincountries
• the wiper blades are in good condition.
Related information
•
Fuel consumption and CO2 emissions(p. 572)
• Checking the tyre pressures (p. 484)
• Filling washer fluid (p. 529)
• Winter driving (p. 416)
• Economical driving (p. 422)
• Settings for car modem
* (p. 468)
• Loading (p. 227)
• Pilot Assist
* (p. 304)
• Speed limiter
* (p. 277)
Page 418 of 594
STARTING AND DRIVING
* Option/accessory.
416 •
Speed camera information
* (p. 350)
• Driving with a trailer (p. 426)
• Driving in water (p. 413)
• Alarm
* (p. 262)
• Level control
* and shock absorption (p. 405)
• Warning triangle (p. 500)
• Emergency puncture repair kit (p. 490)
• Spare wheel
* (p. 498)
Winter driving
For winter driving it is important to perform cer- tain checks of the car in order to ensure that itcan be driven safely.
Check the following in particular before the cold season:
• The engine coolant must contain 50% glycol.This mixture protects the engine againstfrost erosion down to approximately –35 °C.To avoid health risks, different types of glycolmust not be mixed.
• The fuel tank must be kept filled to preventcondensation.
• Engine oil viscosity is important. Oils withlower viscosity (thinner oils) facilitate startingin cold weather and also reduce fuel con-sumption while the engine is cold. Readmore about suitable oils in the section"Adverse driving conditions for engine oil".
IMPORTANT
Low viscosity oil must not be used for hard driving or in hot weather.
• The condition of the starter battery and charge level must be inspected. Coldweather places great demands on the starter battery and its capacity is reduced by thecold.
• Use washer fluid with antifreeze to avoid iceforming in the washer fluid reservoir.
Slippery driving conditionsTo achieve optimum roadholding Volvo recom-mends using winter tyres on all wheels if there isa risk of snow or ice.
NOTE
The use of winter tyres is a legal requirement in certain countries. Studded tyres are notpermitted in all countries.
Practise driving on slippery surfaces under con- trolled conditions to learn how the car reacts.
Related information
•Topping up coolant (p. 518)
• Adverse driving conditions for engine oil(p. 569)
• Starter battery (p. 530)
• Winter wheels (p. 499)
• Filling washer fluid (p. 529)
• Replacing a wiper blade (p. 528)
• Parking climate
* (p. 206)
• Activating/deactivating defrost of windowsand door mirrors (p. 194)
Page 517 of 594
MAINTENANCE AND SERVICE
515
Bonnet completely closed.
WARNING
Never drive with an open bonnet! If there are any signs that the bonnet is not properly closed whilst driving, stop immedi-ately and close it.
Related information
•Engine compartment overview (p. 515)
• Door and seatbelt reminder (p. 62)
Engine compartment overview
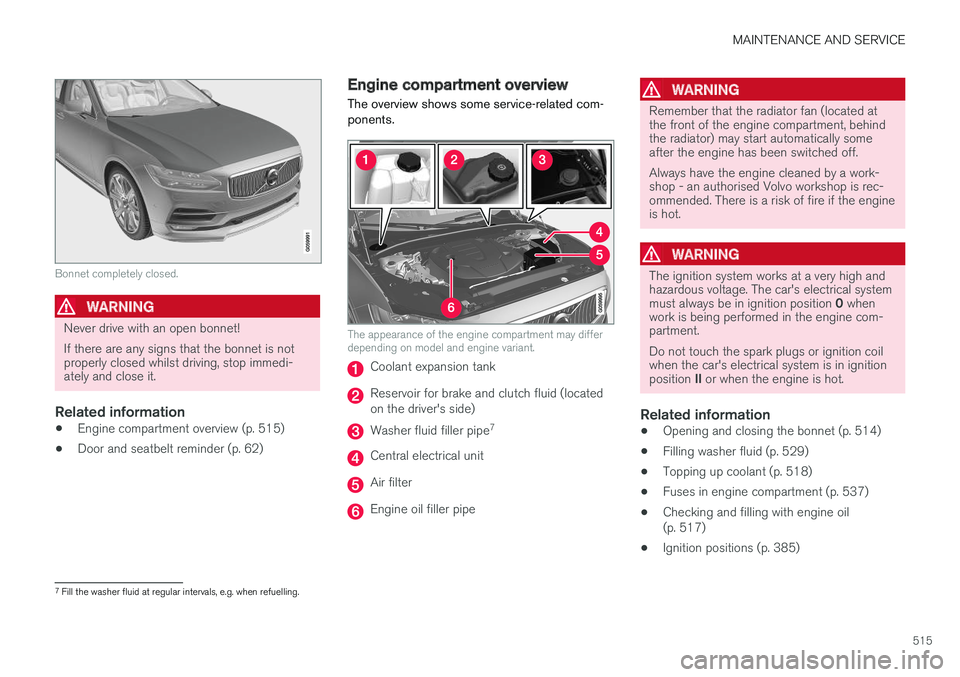
The overview shows some service-related com- ponents.
The appearance of the engine compartment may differ depending on model and engine variant.
Coolant expansion tank
Reservoir for brake and clutch fluid (located on the driver's side)
Washer fluid filler pipe 7
Central electrical unit
Air filter
Engine oil filler pipe
WARNING
Remember that the radiator fan (located at the front of the engine compartment, behindthe radiator) may start automatically someafter the engine has been switched off. Always have the engine cleaned by a work- shop - an authorised Volvo workshop is rec-ommended. There is a risk of fire if the engineis hot.
WARNING
The ignition system works at a very high and hazardous voltage. The car's electrical system must always be in ignition position
0 when
work is being performed in the engine com- partment. Do not touch the spark plugs or ignition coil when the car's electrical system is in ignition position II or when the engine is hot.
Related information
• Opening and closing the bonnet (p. 514)
• Filling washer fluid (p. 529)
• Topping up coolant (p. 518)
• Fuses in engine compartment (p. 537)
• Checking and filling with engine oil (p. 517)
• Ignition positions (p. 385)
7
Fill the washer fluid at regular intervals, e.g. when refuelling.
Page 529 of 594
MAINTENANCE AND SERVICE
527
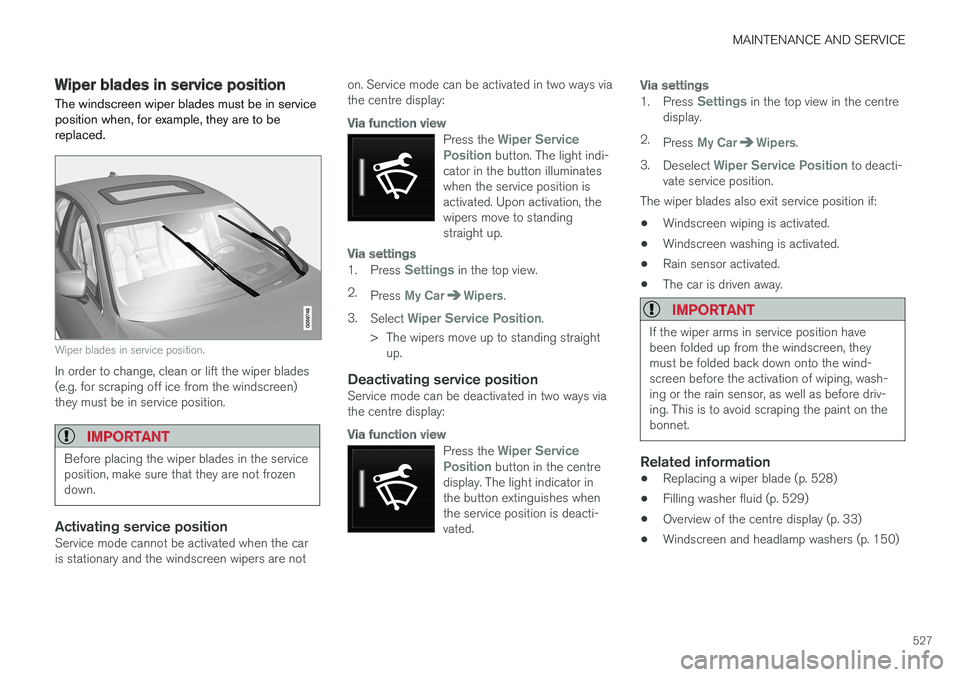
Wiper blades in service position The windscreen wiper blades must be in service position when, for example, they are to bereplaced.
Wiper blades in service position.
In order to change, clean or lift the wiper blades (e.g. for scraping off ice from the windscreen)they must be in service position.
IMPORTANT
Before placing the wiper blades in the service position, make sure that they are not frozendown.
Activating service positionService mode cannot be activated when the car is stationary and the windscreen wipers are noton. Service mode can be activated in two ways viathe centre display:
Via function view
Press the Wiper Service
Position button. The light indi-
cator in the button illuminates when the service position isactivated. Upon activation, thewipers move to standingstraight up.
Via settings
1. Press Settings in the top view.
2. Press
My CarWipers.
3. Select
Wiper Service Position.
> The wipers move up to standing straight up.
Deactivating service positionService mode can be deactivated in two ways via the centre display:
Via function view
Press the Wiper Service
Position button in the centre
display. The light indicator in the button extinguishes whenthe service position is deacti-vated.
Via settings
1. Press Settings in the top view in the centre
display.
2. Press
My CarWipers.
3. Deselect
Wiper Service Position to deacti-
vate service position.
The wiper blades also exit service position if:
• Windscreen wiping is activated.
• Windscreen washing is activated.
• Rain sensor activated.
• The car is driven away.
IMPORTANT
If the wiper arms in service position have been folded up from the windscreen, theymust be folded back down onto the wind-screen before the activation of wiping, wash-ing or the rain sensor, as well as before driv-ing. This is to avoid scraping the paint on thebonnet.
Related information
• Replacing a wiper blade (p. 528)
• Filling washer fluid (p. 529)
• Overview of the centre display (p. 33)
• Windscreen and headlamp washers (p. 150)
Page 530 of 594
MAINTENANCE AND SERVICE
528
Replacing a wiper blade
The wiper blades sweep water away from the windscreen and rear window. Together with thewasher fluid they clean the windows and ensurevisibility for driving. Windscreen and rear windowwiper blades can be replaced.
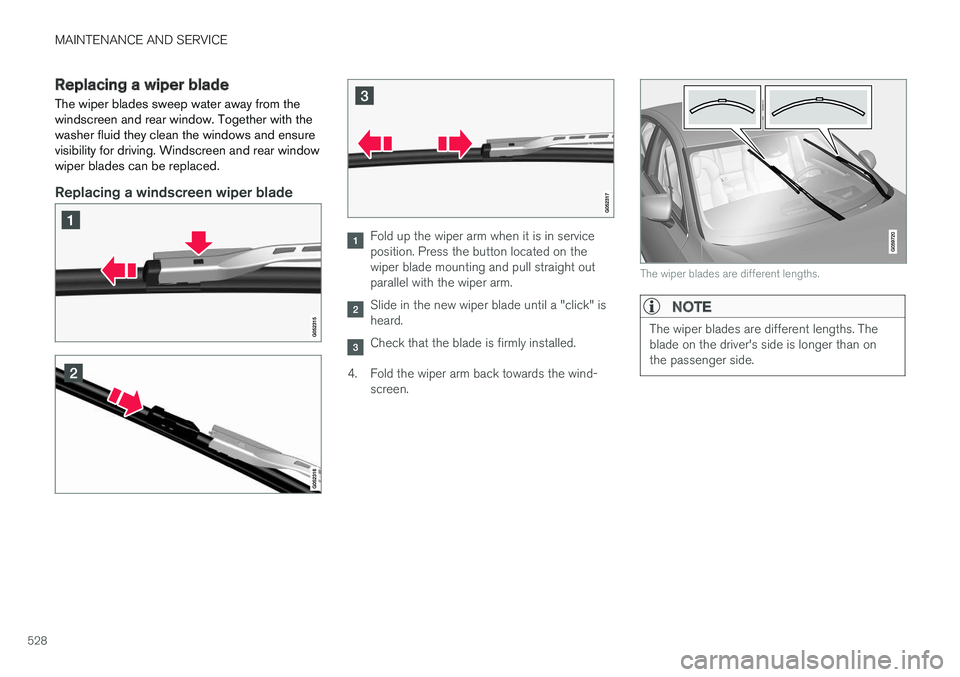
Replacing a windscreen wiper blade
Fold up the wiper arm when it is in service position. Press the button located on thewiper blade mounting and pull straight outparallel with the wiper arm.
Slide in the new wiper blade until a "click" is heard.
Check that the blade is firmly installed.
4. Fold the wiper arm back towards the wind- screen.
The wiper blades are different lengths.
NOTE
The wiper blades are different lengths. The blade on the driver's side is longer than onthe passenger side.
Page 531 of 594
MAINTENANCE AND SERVICE
}}
529
Replacing the wiper blade, rear window
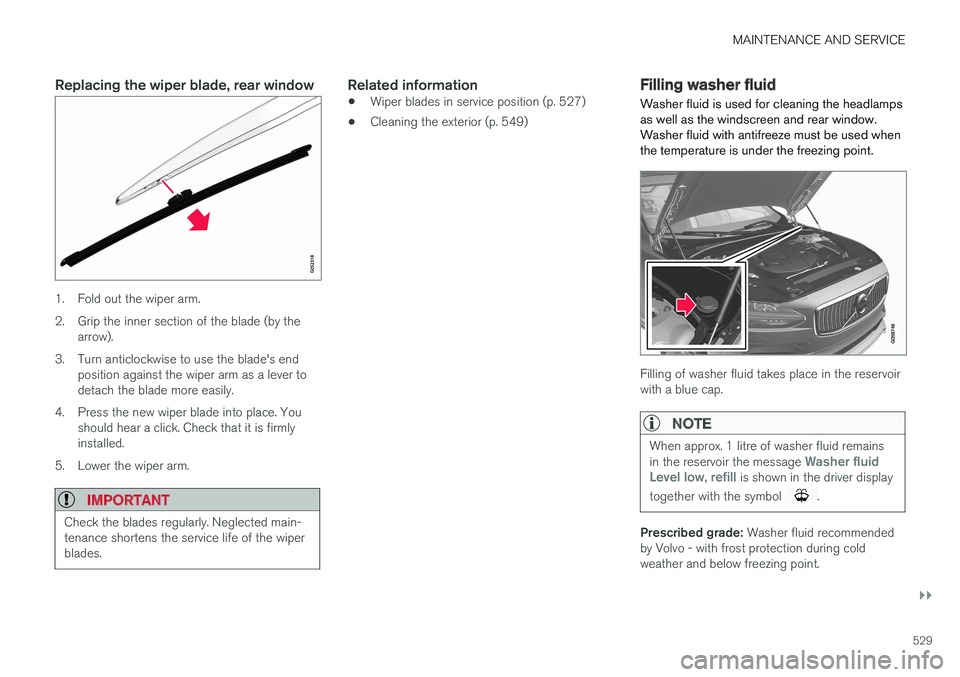
1. Fold out the wiper arm.
2. Grip the inner section of the blade (by thearrow).
3. Turn anticlockwise to use the blade's end position against the wiper arm as a lever to detach the blade more easily.
4. Press the new wiper blade into place. You should hear a click. Check that it is firmlyinstalled.
5. Lower the wiper arm.
IMPORTANT
Check the blades regularly. Neglected main- tenance shortens the service life of the wiperblades.
Related information
• Wiper blades in service position (p. 527)
• Cleaning the exterior (p. 549)
Filling washer fluid
Washer fluid is used for cleaning the headlamps as well as the windscreen and rear window.Washer fluid with antifreeze must be used whenthe temperature is under the freezing point.
Filling of washer fluid takes place in the reservoir with a blue cap.
NOTE
When approx. 1 litre of washer fluid remains in the reservoir the message Washer fluid
Level low, refill is shown in the driver display
together with the symbol
.
Prescribed grade: Washer fluid recommended
by Volvo - with frost protection during cold weather and below freezing point.