VOLVO XC60 TWIN ENGINE 2019 Owners Manual
Manufacturer: VOLVO, Model Year: 2019, Model line: XC60 TWIN ENGINE, Model: VOLVO XC60 TWIN ENGINE 2019Pages: 695, PDF Size: 14.96 MB
Page 611 of 695
MAINTENANCE AND SERVICE
}}
609
Periodic maintenance helps minimize
emissions
NOTE
Refer to your Service and Warranty Book-let for a comprehensive service and main-tenance schedule up to 240,000 km(150,000 miles). This program containsinspections and services necessary forthe proper function of your vehicle andincludes components that affect vehicleemissions.
The Warranty and Service Records Infor-mation booklet also contains detailedinformation concerning the warrantiesthat apply to your vehicle.
On-board Diagnostic System
OBD II is part of your vehicle's computerizedengine management system. It stores diagnosticinformation about your vehicle's emission con-trols. It can light the Check Engine light (MIL) if itdetects an emission control "fault." A "fault" is acomponent or system that is not performingwithin an expected range. A fault may be perma-nent or temporary. OBD II will store a messageabout any fault.
Emission inspection readiness
How do states use OBD II for emission
inspections?
Many states connect a computer directly to avehicle's OBD II system. The inspector can thenread "faults." In some states, this type of inspec-tion has replaced the tailpipe emission test.
How can my vehicle fail OBD II emission
inspection?
Your vehicle can fail OBD II emission inspectionfor any of the following reasons:
If your Check Engine (MIL) light is lit, yourvehicle may fail inspection.
If your vehicle's Check Engine light was lit,but went out without any action on your part,OBD II will still have a recorded fault. Yourvehicle may pass or fail, depending on theinspection practices in your area.
If you had recent service that required dis-connecting the battery, OBD II diagnosticinformation may be incomplete and "notready" for inspection. A vehicle that is notready may fail inspection.
How can I prepare for my next OBD II
emission inspection?
If your Check Engine (MIL) light is lit or waslit but went out without service, have your
vehicle diagnosed and, if necessary, servicedby a qualified Volvo technician.
If you recently had service for a lit CheckEngine light, or if you had service thatrequired disconnecting the battery, a periodof driving is necessary to bring the OBD IIsystem to "ready" for inspection. Two half-hour trips of mixed stop-and-go/highwaydriving are typically needed to allow OBD II toreach readiness. Your Volvo retailer can pro-vide you with more information on planning atrip.
Maintain your vehicle in accordance with yourvehicle's maintenance schedule.
Owner maintenance
Periodic maintenance requirements and intervalsare described in your vehicle's Warranty andService Records Information booklet.
The following points can be carried out betweenthe normally scheduled maintenance services.
Each time the car is refueled:
Check the engine oil level.
Clean the windshield, windshield wipers,headlights, and taillights.
Page 612 of 695
||
MAINTENANCE AND SERVICE
610
Monthly:
Check cold tire pressure in all tires. Inspectthe tires for wear.
Check that engine coolant and other fluidlevels are between the indicated "min" and"max" markings.
Clean interior glass surfaces with a glasscleaner and soft paper towels.
Wipe driver information displays with a softcloth.
Visually inspect battery terminals for corro-sion. Corrosion may indicate a loose terminalconnector, or a battery near the end of itsuseful service life. Consult your Volvo retailerfor additional information.
As needed:
Wash the car, including the undercarriage, toreduce wear that can be caused by a buildup ofdirt, and corrosion that can be caused by salt res-idues.
Clean leaves and twigs from air intake vents atthe base of the windshield, and from other placeswhere they may collect.
NOTE
Complete service information for qualifiedtechnicians is available online for purchase orsubscription at www.volvotechinfo.com.
Related information
Vehicle status (p. 612)
Scheduling service and repairs (p. 613)
Connecting equipment to the vehicle's datalink connector (p. 37)
Technician certification (p. 38)
Climate control system service (p. 619)
Maintenance of the brake system (p. 438)
Engine compartment overview (p. 620)
Data transfer between vehicle andworkshop over Wi-Fi
Volvo workshops have a designated Wi-Fi net-work for secure data transfer between your vehi-cle and the workshop. Your visit to the workshopwill be easier and more effective when diagnos-tics information and software can be transferredover the workshop's network.
When you arrive at the workshop, your servicetechnician can connect your vehicle to the work-shop's Wi-Fi network to perform troubleshootingand download software. For this type of commu-nication, the vehicle only connects to a work-shop's network. It is not possible to connect thevehicle to another Wi-Fi network (e.g. your homenetwork) in the same way as to a workshop's net-work.
Connecting with remote key
Connection is usually managed by the servicetechnician, who will use the remote key buttons. Itis therefore important to bring a key with buttonswith you when you visit the workshop. Pressingthe lock button on the remote key three times willconnect the vehicle to the workshop's Wi-Fi net-work.
When the car is connected to a Wi-Fi network,
the symbol appears in the center display.
Page 613 of 695
MAINTENANCE AND SERVICE
}}
* Option/accessory.611
WARNING
The vehicle may not be driven when it is con-nected to the workshop's networks and sys-tems.
Related information
Handling system updates via Download Cen-ter (p. 611)
Scheduling service and repairs (p. 613)
Download Center
With the vehicle connected to the Internet1,updates for a number of the vehicle's systemscan be downloaded from the center display.
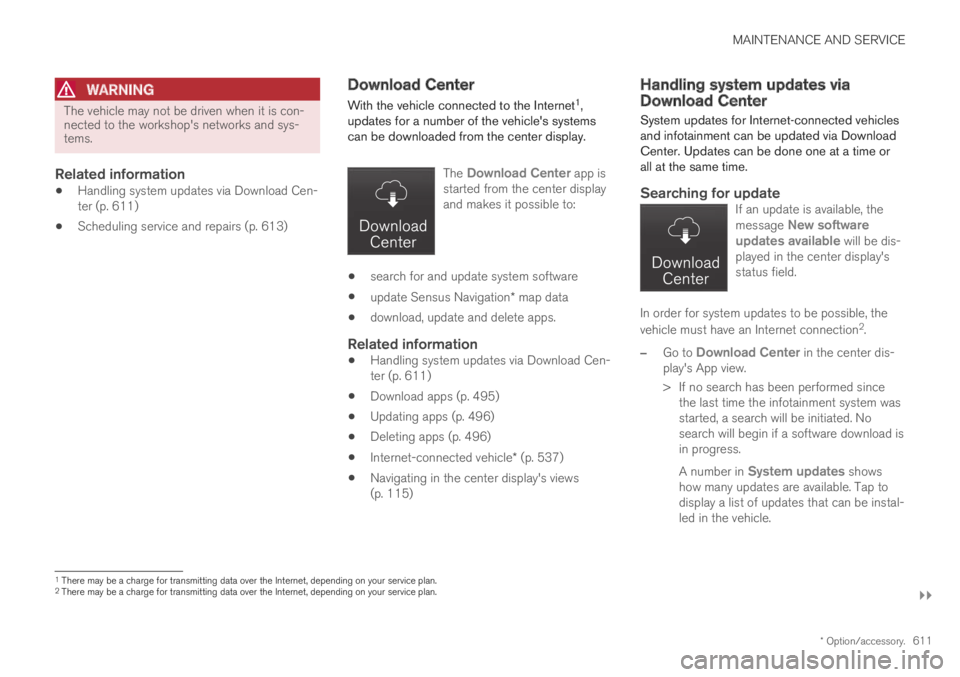
The Download Center app isstarted from the center displayand makes it possible to:
search for and update system software
update Sensus Navigation* map data
download, update and delete apps.
Related information
Handling system updates via Download Cen-ter (p. 611)
Download apps (p. 495)
Updating apps (p. 496)
Deleting apps (p. 496)
Internet-connected vehicle* (p. 537)
Navigating in the center display's views(p. 115)
Handling system updates viaDownload Center
System updates for Internet-connected vehiclesand infotainment can be updated via DownloadCenter. Updates can be done one at a time orall at the same time.
Searching for update
If an update is available, themessage New softwareupdates available will be dis-played in the center display'sstatus field.
In order for system updates to be possible, the
vehicle must have an Internet connection2.
–Go to Download Center in the center dis-play's App view.
>If no search has been performed sincethe last time the infotainment system wasstarted, a search will be initiated. Nosearch will begin if a software download isin progress.
A number in System updates showshow many updates are available. Tap todisplay a list of updates that can be instal-led in the vehicle.
1There may be a charge for transmitting data over the Internet, depending on your service plan.2There may be a charge for transmitting data over the Internet, depending on your service plan.
Page 614 of 695
||
MAINTENANCE AND SERVICE
* Option/accessory.612
NOTE
Data downloading can affect other servicessuch as transfer data, e.g. web radio. If theaffect on other services is experienced asproblematic, the download can be interrupted.Alternatively, it may be appropriate to switchoff or cancel other services.
NOTE
An update can be interrupted when the igni-tion is switched off and the vehicle is left.
However, the update does not have to becompleted before the vehicle is left as theupdate is resumed the next time the vehicle isused.
Updating all system software
–Select Install all at the bottom of the list.
To avoid displaying a list, select Install all viaSystem updates.
Updating individual system software
–Select Install to choose the software youwould like to download.
Canceling software download
–Tap the checkbox in the activity indicator thatreplaced Install when the download began.
Note that only a download can be cancelled. Aninstallation cannot be cancelled once it hasbegun.
Deactivating the background search for
software update
Automatic background searching for softwareupdates is activated as the default factory setting,but the function can be deactivated.
1.Tap Settings in the center display's Topview.
2.Tap SystemDownload Center.
3.Tap to deselect Auto Software Update.
Related information
Download Center (p. 611)
Internet-connected vehicle* (p. 537)
Navigating in the center display's views(p. 115)
Vehicle status
The vehicle's general status can be displayed inthe center display along with the option to
schedule service3.
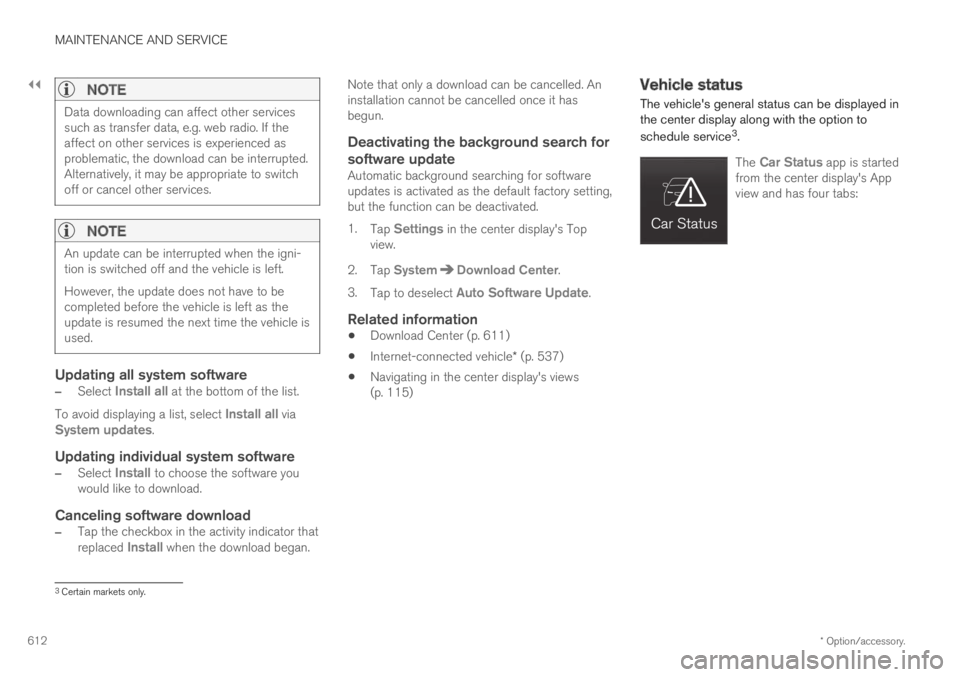
The Car Status app is startedfrom the center display's Appview and has four tabs:
3Certain markets only.
Page 615 of 695
MAINTENANCE AND SERVICE
}}
* Option/accessory.613
Messages - status messages
Status – checking engine oil level and
AdBlue level4
TPMS - tire inflation pressure check
Appointments - appointment information
and vehicle information3.
Related information
Handling messages saved from the instru-ment panel (p. 107)
Checking and filling engine oil (p. 622)
Tire pressure monitoring system* (p. 565)
Scheduling service and repairs (p. 613)
Sending vehicle information to the workshop(p. 614)
Navigating in the center display's views(p. 115)
Scheduling service and repairs5
This service offers a convenient way to scheduleservice and workshop appoints directly from thevehicle.
When it is time for service, and in certain cases ifthe vehicle requires repairs, a message will bedisplayed in the instrument panel and at the topof the center display. The time for service isdetermined by how much time has elapsed, thenumber of hours the engine has run, or the dis-tance driven since the last service.
To use the service
Create a Volvo ID and register it to the vehi-cle.
To select a Volvo retailer you would like tocontact, go to www.volvocars.com and log in.
To send and receive appointment informa-tion, the vehicle must be connected to the
Internet6.
Book service
Book a service request when desired or when amessage is displayed indicating that service orrepairs are needed.
1.Open the Car Status app from App view inthe center display.
2.Tap Appointments.
3.Tap Request appointment.
4.Check that your Volvo ID is correct.
5.Make sure your preferred Workshop is cor-rect.
6.In the Tap to write information to theworkshop field, you can provide details onwhat you would like performed during thevisit or other important information to yourworkshop.
4AdBlue Diesel models only.3Certain markets only.5Certain markets only.6There may be a charge for transmitting data over the Internet, depending on your service plan.
Page 616 of 695
||
MAINTENANCE AND SERVICE
* Option/accessory.614
7.Tap Send appointment request.
>You will receive an appointment sugges-
tion by email within a couple of days7.
You will also receive the same messagevia email and when you log in towww.volvocars.com.
On some markets, the message in theinstrument panel indicating that the vehi-cle requires service will go out once theappointment request has been sent.
8.Tap Cancel request if you would like tocancel your request.
The appointment request contains informationabout your vehicle that helps the workshop planfor your visit.
The retailer will send you a digital appointmentsuggestion. Information about your retailer is alsoavailable in the vehicle so that you can contactyour workshop at any time.
Accepting an appointment suggestion
When the vehicle has received an appointmentsuggestion, a message will be displayed at thetop of the center display.
1. Tap the message.
2. To accept the suggested appointment, tapAccept. Otherwise, tap Send newproposal or Decline.
For some markets, the system reminds you whenan appointment time is approaching and the navi-
gation system8 can also guide you to the work-shop at the appointed time.
Related information
Vehicle status (p. 612)
Sending vehicle information to the workshop(p. 614)
Navigating in the center display's views(p. 115)
Volvo ID (p. 26)
Internet-connected vehicle* (p. 537)
Sending vehicle information to the
workshop9
Vehicle-related information can be sent at anytime from the vehicle, e.g. if you schedule a visitto a workshop and would like to assist yourworkshop by providing additional basic informa-tion. Sending vehicle information is not the sameas scheduling service.
1.Open the Car Status app from App view inthe center display.
2.Tap Appointments.
3.Tap Send vehicle data.
>A message confirming that vehicle-relatedinformation has been sent will appear atthe top of the center display. You cancancel data transmission by tapping thecheckbox in the activity indicator.
Information is sent via the vehicle's Inter-
net connection10.
7Timespan may vary depending on market.8For vehicles with Sensus Navigation*.9Certain markets only.10There may be a charge for transmitting data over the Internet, depending on your service plan.
Page 617 of 695
MAINTENANCE AND SERVICE
* Option/accessory.615
Vehicle information can be accessed by anyretailer if they are provided with your vehicle iden-
tification number (VIN11).
Vehicle information contents
The most recently saved vehicle-related informa-tion will be sent (the last time the vehicle wasturned on). This includes information regarding:
service requirements
time since last service was performed
function status
fluid levels
mileage (odometer reading)
Vehicle Identification Number (VIN11)
software version
diagnostic information.
Related information
Scheduling service and repairs (p. 613)
Vehicle status (p. 612)
Navigating in the center display's views(p. 115)
Internet-connected vehicle* (p. 537)
11Vehicle Identification Number.
Page 618 of 695
MAINTENANCE AND SERVICE
* Option/accessory.616
Hoisting the vehicle
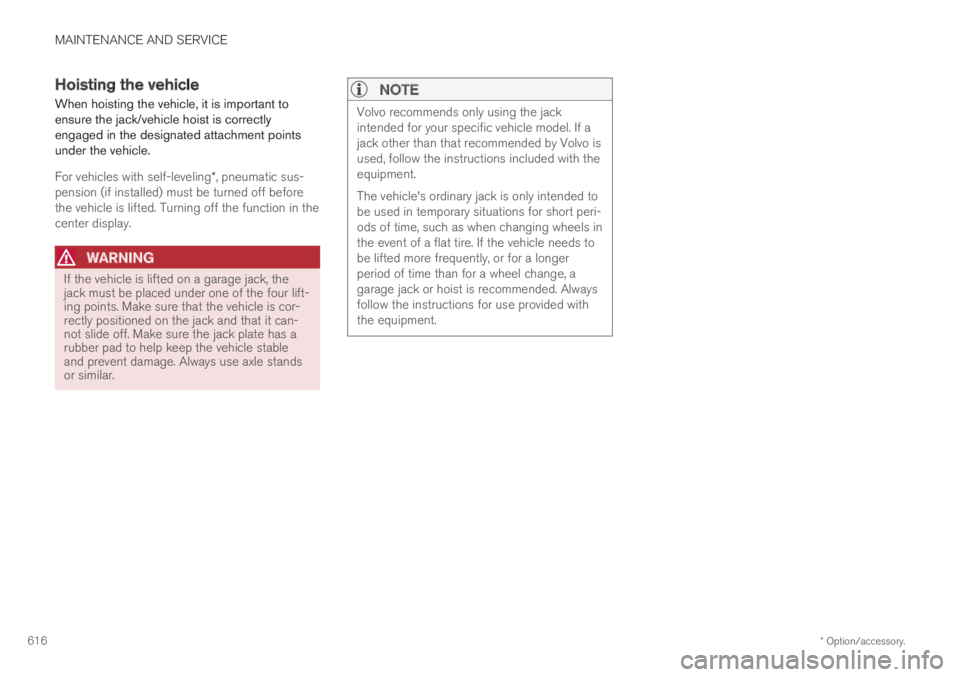
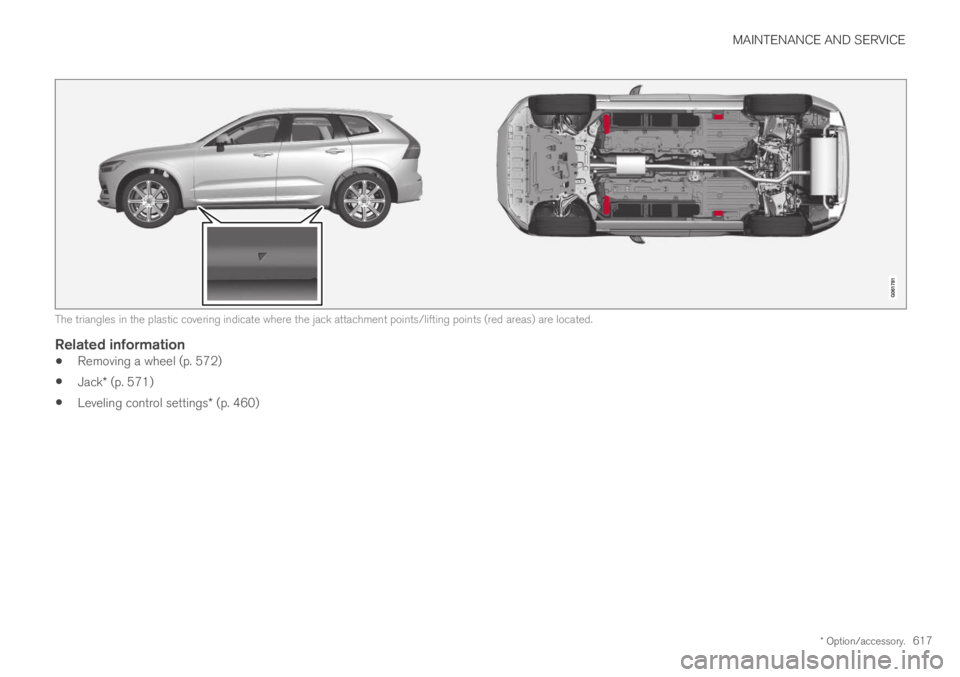
When hoisting the vehicle, it is important toensure the jack/vehicle hoist is correctlyengaged in the designated attachment pointsunder the vehicle.
For vehicles with self-leveling*, pneumatic sus-pension (if installed) must be turned off beforethe vehicle is lifted. Turning off the function in thecenter display.
WARNING
If the vehicle is lifted on a garage jack, thejack must be placed under one of the four lift-ing points. Make sure that the vehicle is cor-rectly positioned on the jack and that it can-not slide off. Make sure the jack plate has arubber pad to help keep the vehicle stableand prevent damage. Always use axle standsor similar.
NOTE
Volvo recommends only using the jackintended for your specific vehicle model. If ajack other than that recommended by Volvo isused, follow the instructions included with theequipment.
The vehicle's ordinary jack is only intended tobe used in temporary situations for short peri-ods of time, such as when changing wheels inthe event of a flat tire. If the vehicle needs tobe lifted more frequently, or for a longerperiod of time than for a wheel change, agarage jack or hoist is recommended. Alwaysfollow the instructions for use provided withthe equipment.
Page 619 of 695
MAINTENANCE AND SERVICE
* Option/accessory.617
The triangles in the plastic covering indicate where the jack attachment points/lifting points (red areas) are located.
Related information
Removing a wheel (p. 572)
Jack* (p. 571)
Leveling control settings* (p. 460)
Page 620 of 695
MAINTENANCE AND SERVICE
618
Opening and closing the hood
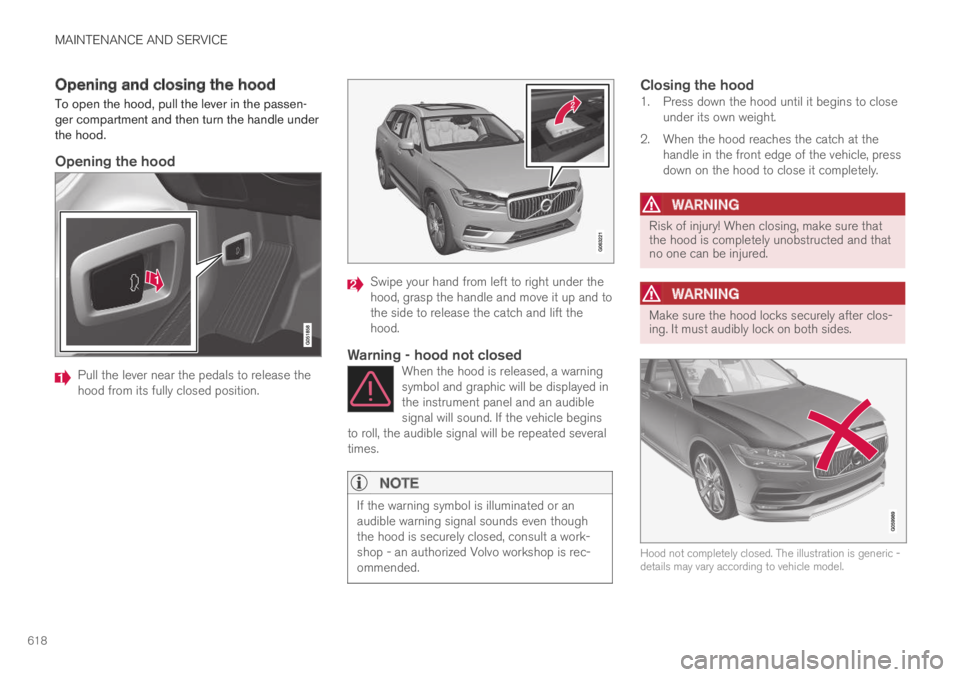
To open the hood, pull the lever in the passen-ger compartment and then turn the handle underthe hood.
Opening the hood
Pull the lever near the pedals to release thehood from its fully closed position.
Swipe your hand from left to right under thehood, grasp the handle and move it up and tothe side to release the catch and lift thehood.
Warning - hood not closed
When the hood is released, a warningsymbol and graphic will be displayed inthe instrument panel and an audiblesignal will sound. If the vehicle beginsto roll, the audible signal will be repeated severaltimes.
NOTE
If the warning symbol is illuminated or anaudible warning signal sounds even thoughthe hood is securely closed, consult a work-shop - an authorized Volvo workshop is rec-ommended.
Closing the hood
1. Press down the hood until it begins to closeunder its own weight.
2. When the hood reaches the catch at thehandle in the front edge of the vehicle, pressdown on the hood to close it completely.
WARNING
Risk of injury! When closing, make sure thatthe hood is completely unobstructed and thatno one can be injured.
WARNING
Make sure the hood locks securely after clos-ing. It must audibly lock on both sides.
Hood not completely closed. The illustration is generic -details may vary according to vehicle model.