display VOLVO XC70 2014 Owner´s Manual
[x] Cancel search | Manufacturer: VOLVO, Model Year: 2014, Model line: XC70, Model: VOLVO XC70 2014Pages: 394, PDF Size: 11.55 MB
Page 129 of 394

03 Your driving environment
Transmission
03
127
Steering-wheel mounted gear shift paddles
"– ": Shift down to a lower gear.
"+ ": Shift up to a higher gear.
In order to shift gears with the paddles, they have to first be activated. The gear selector
can remain in the D position. To activate the paddles:
• Pull either paddle toward the steering wheel and release it; the
D in the instru-
ment panel will change to the number ofthe gear currently being used.
To shift gears:
• Pull the paddle toward the steering wheeland release it.
Geartronic: Sport mode (S) 2This transmission mode provides sportier shifting characteristics and enables a moreactive driving style by making it possible todrive at higher rpm in each gear before shift-ing up. The engine also responds faster whenthe accelerator pedal is pressed. To access Sport mode from Drive (
D), move
the gear selector to the left. The transmission will not switch to manual shifting mode untilthe gear selector is moved forward or rear-ward toward + or –. Sport mode can be selected any time.
NOTE
• On vehicles equipped with Sport mode, the transmission symbol in themain instrument panel will changefrom
D to S when the gear selector is
moved to the manual shifting mode. Ifthe gear selector is moved toward "+"or "-", the number of the gear currentlybeing used will be displayed, seepage 77).
• Please be aware that using Sportmode may result in a slight decrease infuel economy. Driving in
D can help
improve fuel economy.
Geartronic: starting on slippery surfaces
Selecting 3rd gear in Geartronic’s manual shifting mode can help provide better tractionwhen starting off on slippery surfaces. To doso:
1. Depress the brake pedal and move the
gear selector to the side from D toward
+S– .
2. Press the gear selector forward and release it (this selects 2nd gear). Press the selector forward again and release itto select 3rd gear. The optional steeringwheel paddles can also be used; see theprevious section "Geartronic: steeringwheel paddles."
3. Release the brake pedal and press gently on the accelerator pedal.
2Certain models only
Page 130 of 394

03 Your driving environment
Transmission
03
128
Shiftlock override
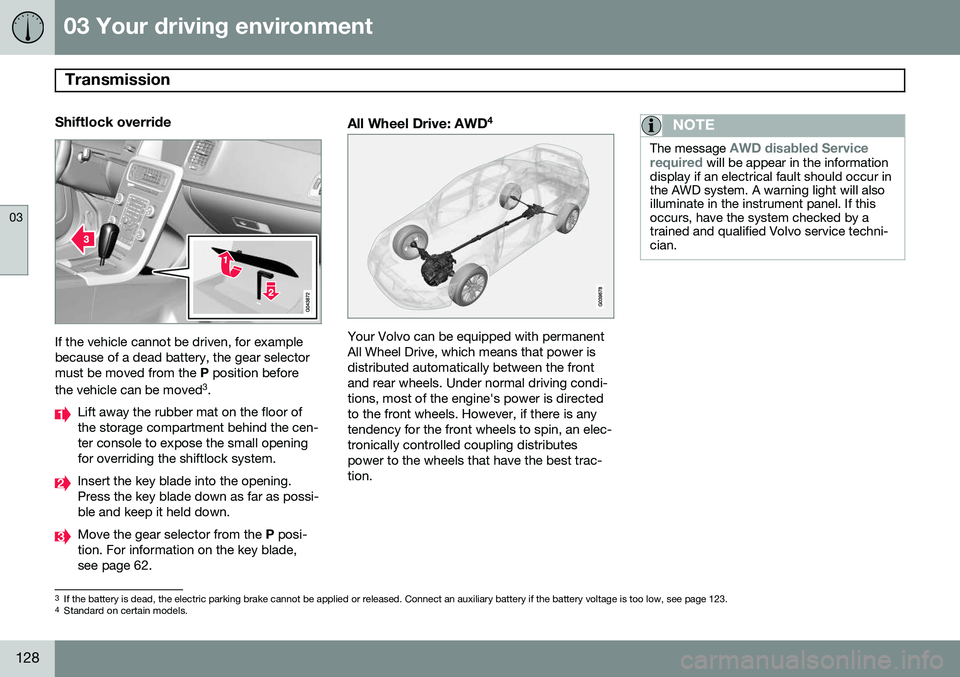
If the vehicle cannot be driven, for example because of a dead battery, the gear selectormust be moved from the P position before
the vehicle can be moved 3
.
Lift away the rubber mat on the floor of the storage compartment behind the cen-ter console to expose the small openingfor overriding the shiftlock system.
Insert the key blade into the opening. Press the key blade down as far as possi-ble and keep it held down.
Move the gear selector from the P posi-
tion. For information on the key blade, see page 62.
All Wheel Drive: AWD 4
Your Volvo can be equipped with permanent All Wheel Drive, which means that power isdistributed automatically between the frontand rear wheels. Under normal driving condi-tions, most of the engine's power is directedto the front wheels. However, if there is anytendency for the front wheels to spin, an elec-tronically controlled coupling distributespower to the wheels that have the best trac-tion.
NOTE
The message AWD disabled Service
required will be appear in the information
display if an electrical fault should occur in the AWD system. A warning light will alsoilluminate in the instrument panel. If thisoccurs, have the system checked by atrained and qualified Volvo service techni-cian.
3 If the battery is dead, the electric parking brake cannot be applied or released. Connect an auxiliary battery if the battery voltage is too low, see page 123.4
Standard on certain models.
Page 131 of 394

03 Your driving environment
Eco Guide* and Power Meter*
03
}}
* Option/accessory, for more information, see Introduction.129
Introduction
These gauges help improve driving economy. To display or remove these functions from the instrument panel, select the "Eco" theme (seepage 78). Driving statistics are also stored and can be displayed in the form of a bar chart (seepage 220).
Eco Guide
This gauge gives an indication of how eco- nomically the vehicle is being driven.
Current (instantaneous) reading
Average
Current (instantaneous) readingThis is the current level of economical driving; the higher the reading, the more economicallythe vehicle is being driven. This value is calculated based on the vehi- cle's speed, engine speed (rpm), engine loadand brake use. The optimal speed range is between approxi- mately 30–50 mph (50–80 km/h), preferably atas low rpm as possible. The markers fallwhen the brake or accelerator pedal ispressed. If the current reading is very low, the red field in the gauge will illuminate after a slight delay,indicating low driving economy.
AverageThe average reading changes graduallyaccording to changes in the current readingto indicate how economically the vehicle hasbeen driven recently. The higher the averagereading, the more economically the vehiclehas been driven.
Power Meter
This gauge indicates the engine power that has been utilized and the amount of powerremaining.
Available power
Utilized power
Available powerThe smaller, upper indicator shows the engine's available power 1
. The higher the
reading on the scale, the greater the amount of power remaining in the current gear.
Utilized powerThe larger, lower indicator shows the amount of engine power that has been utilized 1
. The
1 Depending on rpm
Page 133 of 394

03 Your driving environment
Brakes
03
* Option/accessory, for more information, see Introduction.131
Brake system
The brake system is a hydraulic system con- sisting of two separate brake circuits. If aproblem should occur in one of these circuits,it is still possible to stop the vehicle with theother brake circuit. If the brake pedal must be depressed farther than normal and requires greater foot pres-sure, the stopping distance will be longer. A warning light in the instrument panel will light up to warn the driver that a fault hasoccurred. If this light comes on while driving or braking, stop immediately and check the brake fluidlevel in the reservoir.
NOTE
Press the brake pedal hard and maintain pressure on the pedal – do not pump thebrakes.
WARNING
If the fluid level is below the MIN mark in
the reservoir or if a brake system message is shown in the information display: DO
NOT DRIVE . Have the vehicle towed to a
trained and qualified Volvo service techni-cian and have the brake system inspected.
Brake pad inspectionOn vehicles equipped with a jack*, the condi- tion of the brake pads can be checked byraising the vehicle (see page 322 for informa-tion about using the jack and removing awheel) and performing a visual inspection ofthe brake pads.
WARNING
• If the vehicle has been driven immedi- ately prior to a brake pad inspection,the wheel hub, brake components,etc., will be very hot. Allow time forthese components to cool before car-rying out the inspection.
• Apply the parking brake and put thegear selector in the Park (
P) position.
• Block the wheels standing on theground, use rigid wooden blocks orlarge stones.
WARNING
•Use the jack intended for the vehicle when changing a tire. For any otherjob, use stands to support the vehicle.
• The jack should be kept well-greasedand clean, and should not be dam-aged.
• Be sure the jack is on a firm, level,non-slippery surface.
• No objects should be placed betweenthe base of jack and the ground, orbetween the jack and the attachmentbar on the vehicle.
• The jack must correctly engage thejack attachment.
• Never allow any part of your body tobe extended under a vehicle suppor-ted by a jack.
Brake lightsThe brake lights come on automatically when the brakes are applied.
Adaptive brake lightsThe adaptive brake lights activate in the event of sudden braking or if the ABS system isactivated. This function causes an additionaltaillight on each side of the vehicle to illumi-nate to help alert vehicles traveling behind.
Page 135 of 394

03 Your driving environment
Brakes
03
133
NOTE
•When the EBA system is activated, the brake pedal will go down and pressurein the brake system immediatelyincreases to the maximum level. Youmust maintain full pressure on thebrake pedal in order to utilize the sys-tem completely. There will be no brak-ing effect if the pedal is released. EBAis automatically deactivated when thebrake pedal is released.
• When the vehicle has been parked forsome time, the brake pedal may sinkmore than usual when the engine isstarted. This is normal and the pedalwill return to its usual position when itis released.
Symbols in the instrument panel
SymbolSpecification
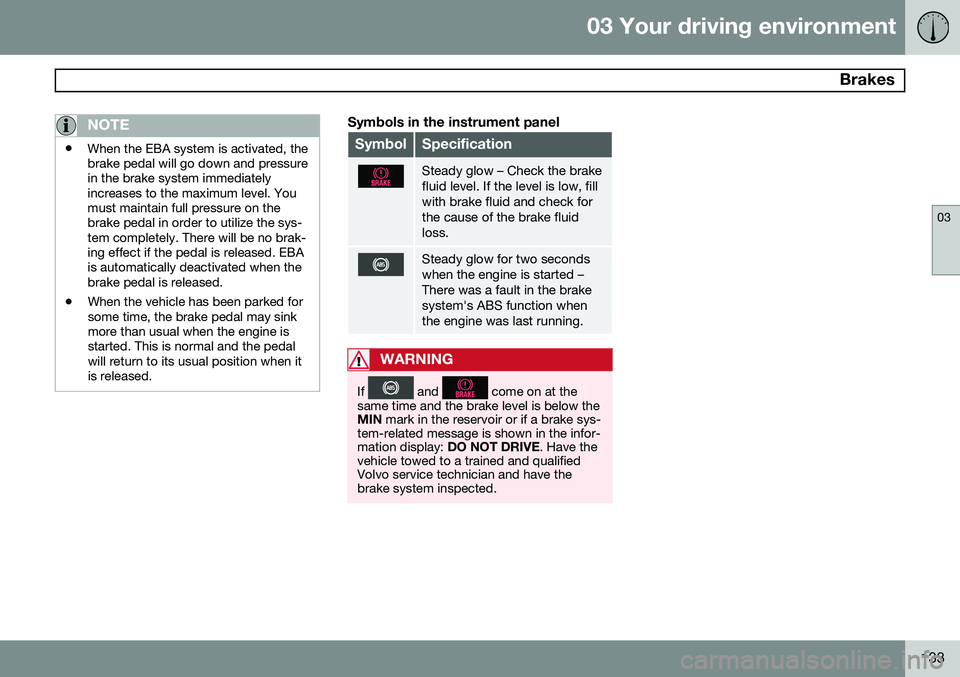
Steady glow – Check the brake fluid level. If the level is low, fillwith brake fluid and check forthe cause of the brake fluidloss.
Steady glow for two seconds when the engine is started –There was a fault in the brakesystem's ABS function whenthe engine was last running.
WARNING
If and come on at the
same time and the brake level is below the MIN mark in the reservoir or if a brake sys-
tem-related message is shown in the infor-mation display: DO NOT DRIVE . Have the
vehicle towed to a trained and qualifiedVolvo service technician and have thebrake system inspected.
Page 137 of 394

03 Your driving environment
Parking brake
03
135
Releasing the electric parking brake
Parking brake control
Manual release1. Fasten the seat belt.
2. Insert the remote key in the ignition slotand press the START/STOP ENGINE
button (or press the START/STOP
ENGINE button with a valid remote key in the passenger compartment on vehicles with the optional keyless drive).
3. Press firmly on the brake pedal.
4. Pull the parking brake control.
Automatic release1. Start the engine.
NOTE
• For safety reasons, the parking brake is only released automatically if the engineis running and the driver is wearing aseat belt.
• The electric parking brake will bereleased immediately when the acceler-ator pedal is pressed and the gearselector is in position
D or R.
2. Fasten the seat belt.
3. Move the gear selector to position D or R
and press the accelerator pedal. The parking brake will release when the vehi cle begins to move.
Heavy load uphillA heavy load, such as a trailer, can cause the vehicle to roll backward when the parkingbrake is released automatically on a steepincline. To help avoid this:
1. Keep the electric parking brake lever
pushed in with the left hand while shifting into Drive with the right.
2. While pressing the accelerator pedal to pull away, release the parking brake leveronly after the vehicle begins to move.
Symbol and messages in the instrument panel
See page 197 for information about display- ing or erasing messages.
SymbolMessageDescription/action
"Message"Read the message in the information display
A flashing symbol indicates that the parking brake is being applied. If the symbol flashes in any other situation then this means that a fault has arisen. Read the message on the information display.
Page 139 of 394

03 Your driving environment
Hill Descent Control (HDC)*
03
* Option/accessory, for more information, see Introduction.137
Introduction
Normally, when the accelerator pedal is released while driving down hills, the vehicle'sspeed slows as the engine runs at lower rpm(the normal engine braking effect). However, ifthe downhill gradient becomes steeper and ifthe vehicle is carrying a load, speed increasesdespite the engine braking effect. In this sit-uation, the brakes must be applied to reducethe vehicle's speed. HDC is a type of automatic engine brake and makes it possible to increase or decrease thevehicle's speed on downhill gradients usingonly the accelerator pedal, without applyingthe brakes. The brake system functions auto-matically to maintain a low and steady speed. HDC is particularly useful when driving down steep hills with rough surfaces, and where theroad may have slippery patches.
WARNING
HDC does not function in all situations, and is a supplementary braking aid. Thedriver has full responsibility for driving in asafe manner.
Function
• HDC can be switched on and off with the button in the center console. An indicatorlight in the button illuminates when HDCis activated.
• The indicator light
in the instru-
ment panel illuminates and a message is displayed when the system is controllingthe vehicle's speed.
• HDC only functions when
first or reverse
gears are selected (
1 will be shown in the
instrument panel display when first gear is selected).
NOTE
HDC cannot be activated if the gear selec- tor is the D position.
Using HDC
HDC allows the car to roll forward at a maxi- mum speed of 6 mph (10 km/h), and 4 mph(7 km/h) in reverse. However, the acceleratorpedal can be used to select any speed that ispossible in first or reverse gears. When theaccelerator pedal is released, speed isquickly reduced again to 6 mph (10 km/h) or4 mph (7 km/h), depending on the gearselected, regardless of the hill's gradient. It isnot necessary to apply the brakes.
• The brake lights illuminate automatically when HDC is controlling the vehicle'sspeed.
• The driver can slow or stop the vehicle atany time by applying the brakes.
HDC is deactivated when:
• The button on the center console ispressed
• A gear higher than first gear is selected
• D
is selected on vehicles with an auto-
matic transmission
HDC can be deactivated at any time. If this is done while driving down a steep hill, the sys-tem's braking effect will decrease gradually.
Page 145 of 394

04 Driver support
Stability system
04
143
Symbols and messages in the main instrument panel
SymbolMessageDescription
DSTC Temporarily OFFThe DSTC system function has been temporarily reduced due to high brake disc temperature. DSTC reactivates automatically when the brakes have cooled.
DSTC Service requiredThe DSTC system is not functioning properly.
• Stop the vehicle in a safe place, turn off the engine and restart it.
• If the message is still displayed when the engine has restarted, drive to an authorized Volvo work- shop to have the system inspected.
and
"Message"Read the message in the instrument panel
Steady glow for 2 secs.The system is performing a self-diagnostic test.
Flashing symbolDSTC is actively functioning to help counteract wheel spin and/or a skid.
-Sport
mode has been activated.
WARNING
The stability system is intended to help improve driving safety. It supplements, butcan never replace, the driver's judgmentand responsibility when operating the vehi-cle. Speed and driving style should alwaysbe adapted to traffic and road conditions.
Page 146 of 394

04 Driver support
Road sign information (RSI)*
04
144* Option/accessory, for more information, see Introduction.
Introduction
Examples of readable road signs Road Sign Information (RSI) is a feature that helps the driver see road signs with the pos-ted speed limit. If the vehicle passes a sign showing the speed limit, this will be displayed in the centerconsole.
WARNING
RSI does not function in all situations and is only intended to provide supplementaryinformation. The driver is always responsible for oper- ating the vehicle safely.
Operation
Speed limit information
When RSI registers a road sign showing the speed limit, this sign is displayed as a symbolon the instrument panel.
Settings in MY CAR
Possible settings in MY CAR Displaying the speed limit indication can be deactivated. To do so:
• Deselect the alternative in
MY CAR
SettingsCar settingsRoad Sign
Information or cancel by pressing EXIT.
Speed alertThe driver can opt to be alerted if the vehicle exceeds the posted speed limit by more than3 mph (5 km/h). The alert is given when thesymbol with the posted speed limit in theinstrument panel begins to flash. To activate speed alert:
• Check the Speed alert box in
MY CAR
SettingsCar settingsSpeed alertor cancel by pressing EXIT.
Limitations
RSI's camera has the same limitations as the human eye. See page 172 for more informa-tion about the camera's limitations. Signs that indirectly indicate the speed limit (such as a sign with a town's name and thepermitted speed limit) will not be registeredby RSI. Other factors that may interfere with RSI include:
• Faded signs
• Signs located in a curve
Page 148 of 394

04 Driver support
Cruise control
04
146
Operation
Steering wheel-mounted controls and display
Standby mode
Resume set speed
Deactivating
Activate/set speed
Selected speed (gray symbol indicates
standby mode)
Cruise control active: white symbol ( gray
symbol indicates standby mode)
Engaging the cruise control functionBefore a speed can be set, the cruise control system must be engaged (put in standbymode).
–Press the CRUISE button (1).
> The symbol
illuminates and the text
(---) mph (5) indicates that cruise con-
trol is in standby mode.
NOTE
• Putting cruise control in standby mode does not set a cruising speed.
• When cruise control is in standbymode, the driver's seat belt must befastened before a cruising speed canbe set.
Setting a speed
Use the or buttons set the vehicle's
current speed. The set speed is shown in the display.
NOTE
Cruise control cannot be engaged at speeds below 20 mph (30 km/h).
Adjusting the set speedAfter a speed has been set, it can be increased or decreased by using the
or buttons. 1. Press and hold down
or until the
vehicle reaches the desired speed.
> This will become the set speed when the button is released.
2. Press
or for approximately a half
second and release the button to increase or decrease vehicle speed byapproximately 1 mph (1.6 km/h).
NOTE
• A temporary increase in speed by pressing the accelerator pedal, for lessthan 1 minute (e.g. when passinganother car), does not affect the cur-rent cruise control setting. The vehiclewill automatically return to the previ-ously set speed when the acceleratorpedal is released.
• If one of the cruise control buttons iskept depressed for more than approx.1 minute cruise control is disengaged.The engine must then be switched offin order to reset cruise control.