mode VOLVO XC90 T8 2017 Owner´s Manual
[x] Cancel search | Manufacturer: VOLVO, Model Year: 2017, Model line: XC90 T8, Model: VOLVO XC90 T8 2017Pages: 580, PDF Size: 10.37 MB
Page 136 of 580
||
INSTRUMENTS AND CONTROLS
134
Power utilized by the driver
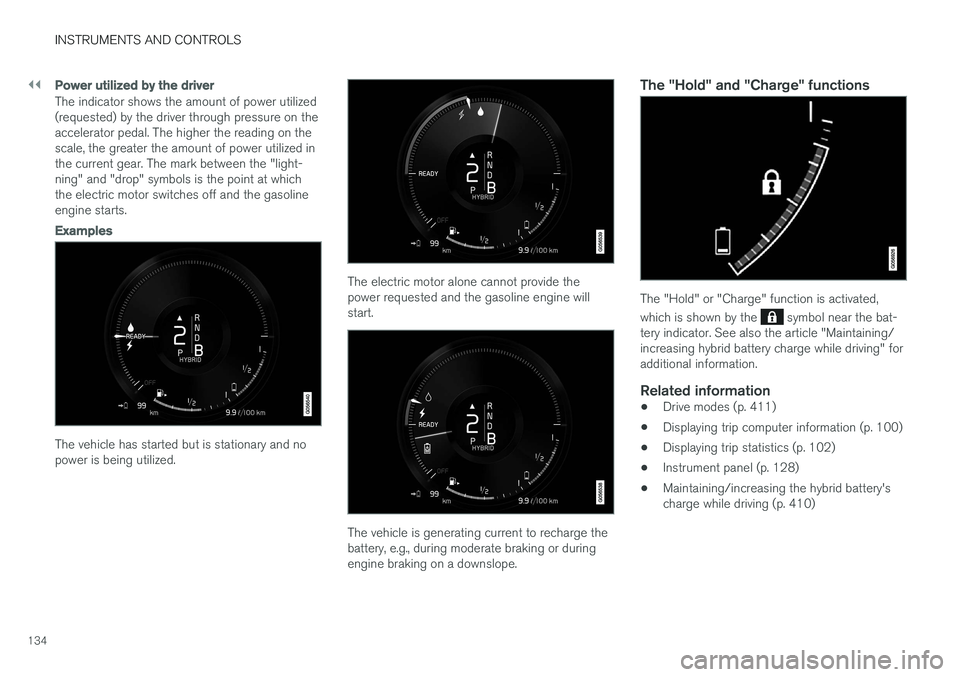
The indicator shows the amount of power utilized (requested) by the driver through pressure on theaccelerator pedal. The higher the reading on thescale, the greater the amount of power utilized inthe current gear. The mark between the "light-ning" and "drop" symbols is the point at whichthe electric motor switches off and the gasolineengine starts.
Examples
The vehicle has started but is stationary and no power is being utilized.
The electric motor alone cannot provide the power requested and the gasoline engine willstart.
The vehicle is generating current to recharge the battery, e.g., during moderate braking or duringengine braking on a downslope.
The "Hold" and "Charge" functions
The "Hold" or "Charge" function is activated, which is shown by the
symbol near the bat-
tery indicator. See also the article "Maintaining/ increasing hybrid battery charge while driving" foradditional information.
Related information
• Drive modes (p. 411)
• Displaying trip computer information (p. 100)
• Displaying trip statistics (p. 102)
• Instrument panel (p. 128)
• Maintaining/increasing the hybrid battery'scharge while driving (p. 410)
Page 143 of 580

INSTRUMENTS AND CONTROLS
}}
141
SymbolMeaning
Oil pressure If the symbol illuminates during driving, stop the vehicle, theengine oil level is too low. Stop theengine immediately and check theengine oil level. Add oil if neces-sary. If the oil level is normal andthe symbol remains illuminated,have the vehicle towed to thenearest authorized Volvo work-shop or trained and qualified Volvoservice technician.
Generator not charging This symbol illuminates during driving if a fault has occurred inthe electrical system. Contact anauthorized Volvo workshop ortrained and qualified Volvo servicetechnician.
A
US models
B Canadian models
WARNING
• If the fluid level is below the
MIN mark in
the brake fluid reservoir or if a warning message is displayed in the text window: DO NOT DRIVE . Have the vehicle towed
to a trained and qualified Volvo service technician and have the brake systeminspected.
• If the
BRAKE and ABS symbols illumi-
nate at the same time, there is a risk ofreduced vehicle stability.
Door/hood/tailgate/fuel filler door reminder
It a door, tailgate, the hood or the fuel filler door are not closed properly, the information or warn-ing symbol will illuminate and a graphic will bedisplayed in the instrument panel.
Related information
• Instrument panel (p. 128)
• Indicator symbols in the instrument panel(p. 131)
Compass
The rear-view mirror has an integrated compass that shows the direction in which the vehicle istraveling.
Rearview mirror with compass
Eight different directions are shown with the abbreviations: N (north) NE (northeast) E (east),SE (southeast) S (south), SW (southwest) W(west) NW (northwest)
Switching the compass on/offThe compass is displayed automatically when the vehicle is started. To switch the compass on/off:
–Use a pen, paperclip or similar object and press in the button on the underside of themirror.
Page 144 of 580
||
INSTRUMENTS AND CONTROLS
* Option/accessory.
142
Related information
• Calibrating the compass (p. 142)
• Ignition modes (p. 389)
Calibrating the compass
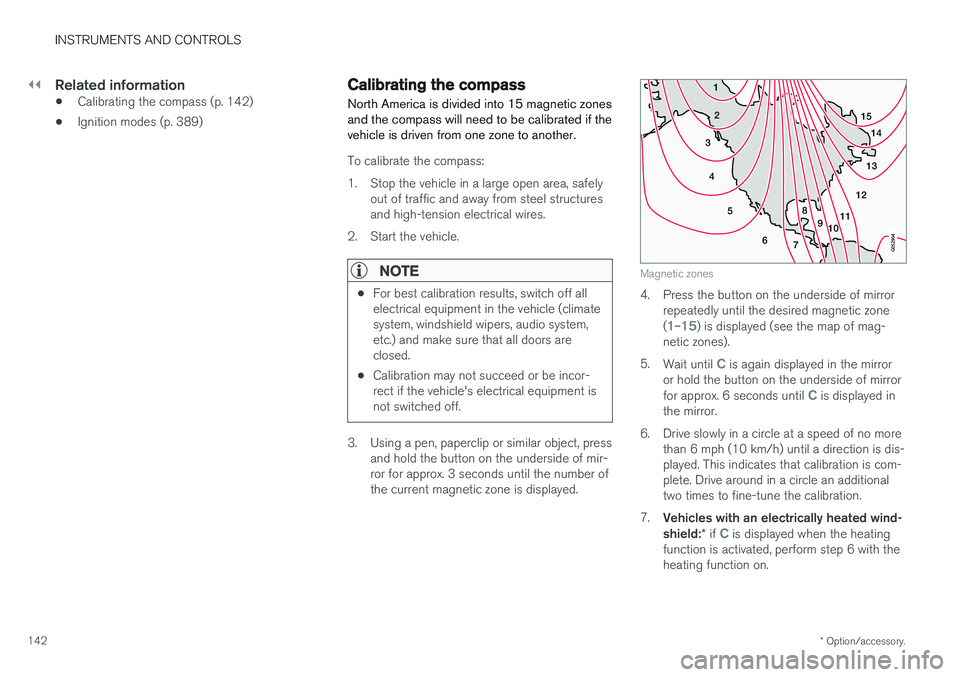
North America is divided into 15 magnetic zones and the compass will need to be calibrated if thevehicle is driven from one zone to another.
To calibrate the compass:
1. Stop the vehicle in a large open area, safely out of traffic and away from steel structures and high-tension electrical wires.
2. Start the vehicle.
NOTE
• For best calibration results, switch off all electrical equipment in the vehicle (climatesystem, windshield wipers, audio system,etc.) and make sure that all doors areclosed.
• Calibration may not succeed or be incor-rect if the vehicle's electrical equipment isnot switched off.
3. Using a pen, paperclip or similar object, press
and hold the button on the underside of mir- ror for approx. 3 seconds until the number ofthe current magnetic zone is displayed.
15
14
13
12
11
9
8
7
6
5
4
3
2
1
10
Magnetic zones
4. Press the button on the underside of mirrorrepeatedly until the desired magnetic zone (
1–15) is displayed (see the map of mag-
netic zones).
5. Wait until
C is again displayed in the mirror
or hold the button on the underside of mirror for approx. 6 seconds until
C is displayed in
the mirror.
6. Drive slowly in a circle at a speed of no more than 6 mph (10 km/h) until a direction is dis- played. This indicates that calibration is com-plete. Drive around in a circle an additionaltwo times to fine-tune the calibration.
7. Vehicles with an electrically heated wind- shield: * if
C is displayed when the heating
function is activated, perform step 6 with the heating function on.
Page 145 of 580
INSTRUMENTS AND CONTROLS
}}
143
8. Repeat the calibration procedure if neces-
sary.
Related information
• Defrosting windows and mirrors (p. 204)
• Compass (p. 141)
Lighting panel and controls
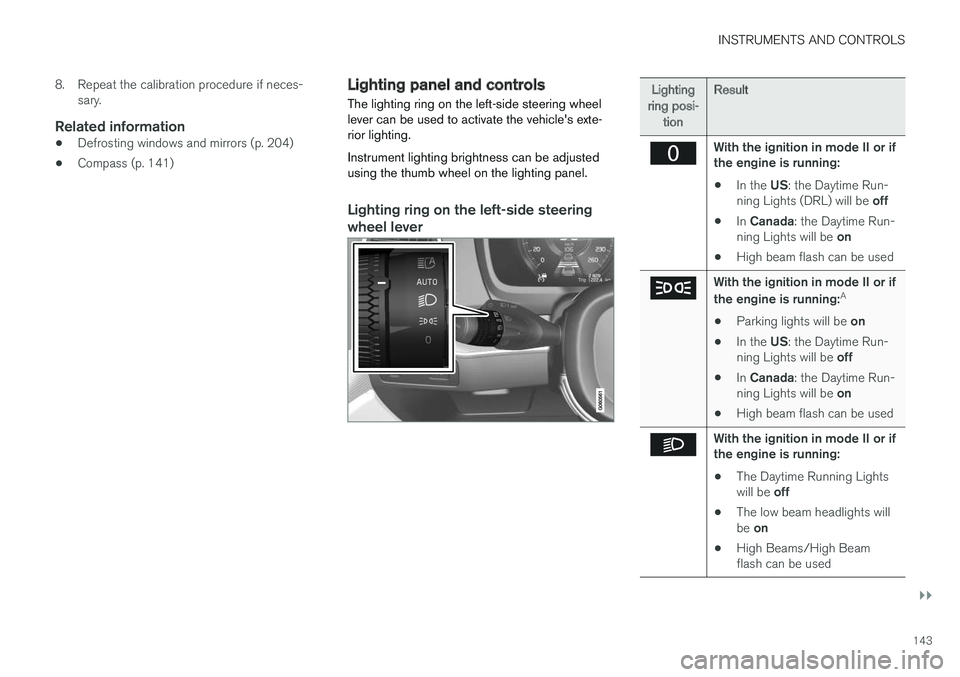
The lighting ring on the left-side steering wheel lever can be used to activate the vehicle's exte-rior lighting. Instrument lighting brightness can be adjusted using the thumb wheel on the lighting panel.
Lighting ring on the left-side steering
wheel lever
Lighting
ring posi- tion Result
With the ignition in mode II or if the engine is running:
• In the
US: the Daytime Run-
ning Lights (DRL) will be off
• In
Canada : the Daytime Run-
ning Lights will be on
• High beam flash can be used
With the ignition in mode II or if the engine is running: A
• Parking lights will be
on
• In the
US: the Daytime Run-
ning Lights will be off
• In
Canada : the Daytime Run-
ning Lights will be on
• High beam flash can be used
With the ignition in mode II or if the engine is running:
• The Daytime Running Lights will be
off
• The low beam headlights willbe
on
• High Beams/High Beam flash can be used
Page 146 of 580
||
INSTRUMENTS AND CONTROLS
144
Lighting
ring posi- tion Result
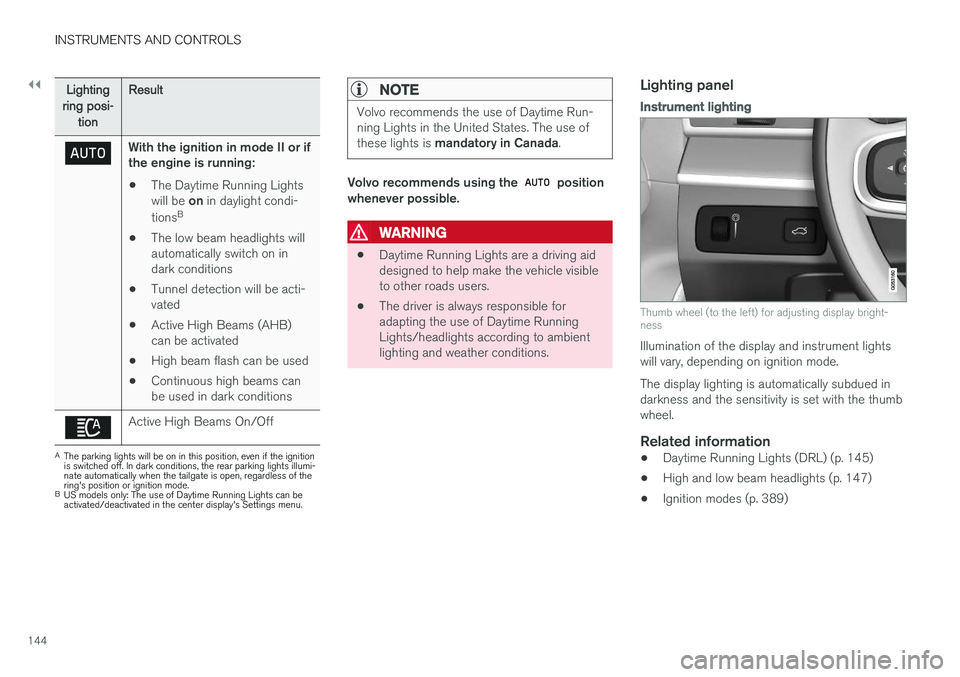
With the ignition in mode II or if the engine is running:
• The Daytime Running Lights will be
on in daylight condi-
tions B
• The low beam headlights will automatically switch on indark conditions
• Tunnel detection will be acti-vated
• Active High Beams (AHB)can be activated
• High beam flash can be used
• Continuous high beams canbe used in dark conditions
Active High Beams On/Off
A
The parking lights will be on in this position, even if the ignition is switched off. In dark conditions, the rear parking lights illumi-nate automatically when the tailgate is open, regardless of thering's position or ignition mode.
B US models only: The use of Daytime Running Lights can beactivated/deactivated in the center display's Settings menu.
NOTE
Volvo recommends the use of Daytime Run- ning Lights in the United States. The use of these lights is mandatory in Canada .
Volvo recommends using the position
whenever possible.
WARNING
• Daytime Running Lights are a driving aid designed to help make the vehicle visibleto other roads users.
• The driver is always responsible foradapting the use of Daytime RunningLights/headlights according to ambientlighting and weather conditions.
Lighting panel
Instrument lighting
Thumb wheel (to the left) for adjusting display bright- ness
Illumination of the display and instrument lights will vary, depending on ignition mode. The display lighting is automatically subdued in darkness and the sensitivity is set with the thumbwheel.
Related information
• Daytime Running Lights (DRL) (p. 145)
• High and low beam headlights (p. 147)
• Ignition modes (p. 389)
Page 147 of 580
INSTRUMENTS AND CONTROLS
}}
145
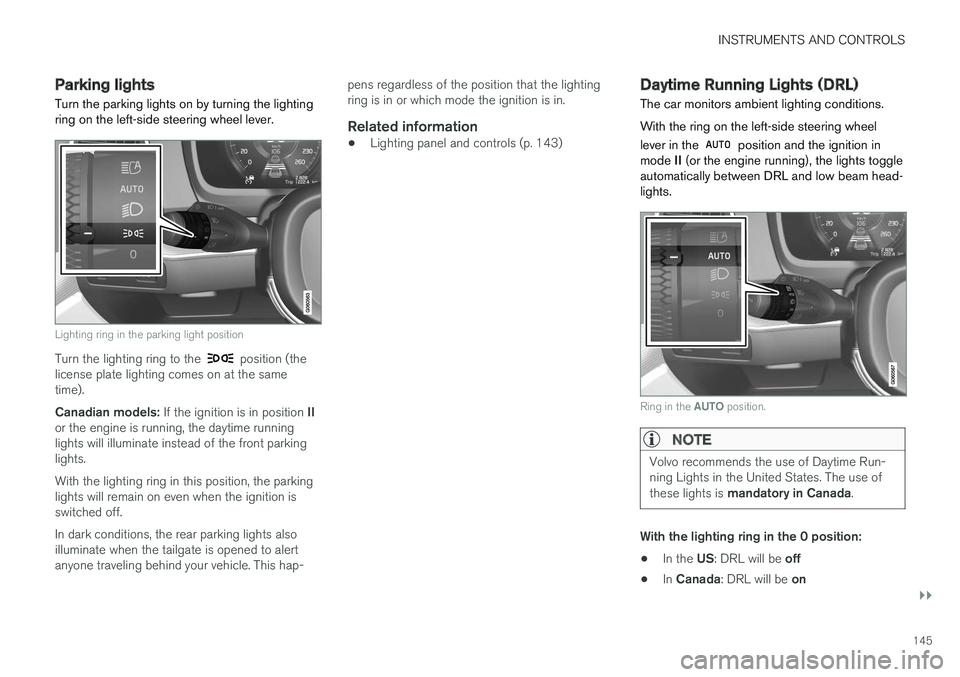
Parking lights Turn the parking lights on by turning the lighting ring on the left-side steering wheel lever.
Lighting ring in the parking light position
Turn the lighting ring to the position (the
license plate lighting comes on at the same time). Canadian models: If the ignition is in position II
or the engine is running, the daytime running lights will illuminate instead of the front parkinglights. With the lighting ring in this position, the parking lights will remain on even when the ignition isswitched off. In dark conditions, the rear parking lights also illuminate when the tailgate is opened to alertanyone traveling behind your vehicle. This hap- pens regardless of the position that the lightingring is in or which mode the ignition is in.
Related information
•
Lighting panel and controls (p. 143)
Daytime Running Lights (DRL)
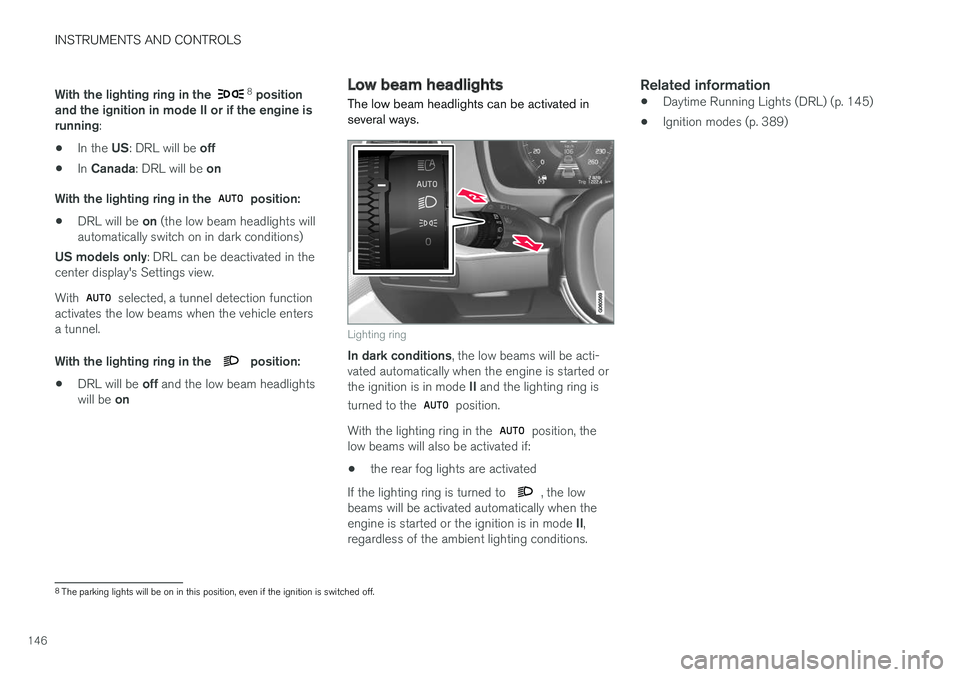
The car monitors ambient lighting conditions. With the ring on the left-side steering wheel lever in the
position and the ignition in
mode II (or the engine running), the lights toggle
automatically between DRL and low beam head- lights.
Ring in the AUTO position.
NOTE
Volvo recommends the use of Daytime Run- ning Lights in the United States. The use of these lights is mandatory in Canada .
With the lighting ring in the 0 position:
• In the
US: DRL will be off
• In
Canada : DRL will be on
Page 148 of 580
INSTRUMENTS AND CONTROLS
146With the lighting ring in the
8
position
and the ignition in mode II or if the engine is running :
• In the
US: DRL will be off
• In
Canada : DRL will be on
With the lighting ring in the
position:
• DRL will be
on (the low beam headlights will
automatically switch on in dark conditions)
US models only : DRL can be deactivated in the
center display's Settings view. With
selected, a tunnel detection function
activates the low beams when the vehicle enters a tunnel. With the lighting ring in the
position:
• DRL will be
off and the low beam headlights
will be on
Low beam headlights The low beam headlights can be activated in several ways.
Lighting ring
In dark conditions , the low beams will be acti-
vated automatically when the engine is started or the ignition is in mode II and the lighting ring is
turned to the
position.
With the lighting ring in the
position, the
low beams will also be activated if:
• the rear fog lights are activated
If the lighting ring is turned to
, the low
beams will be activated automatically when the engine is started or the ignition is in mode II,
regardless of the ambient lighting conditions.
Related information
• Daytime Running Lights (DRL) (p. 145)
• Ignition modes (p. 389)
8
The parking lights will be on in this position, even if the ignition is switched off.
Page 149 of 580
INSTRUMENTS AND CONTROLS
}}
147
High and low beam headlights
If the ignition is in mode II or when the engine is started, the low beams are activated automati- cally if the lighting ring is in position
. In
dark conditions, the low beams will also be on if the lighting ring is in the
position.
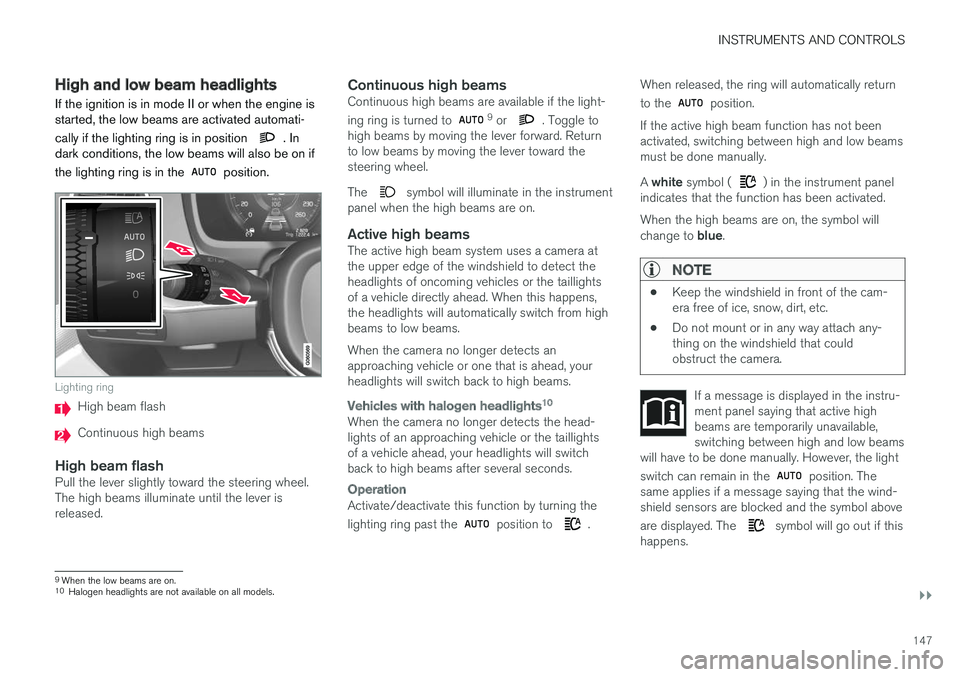
Lighting ring
High beam flash
Continuous high beams
High beam flashPull the lever slightly toward the steering wheel. The high beams illuminate until the lever isreleased.
Continuous high beamsContinuous high beams are available if the light- ing ring is turned to 9 or . Toggle to
high beams by moving the lever forward. Return to low beams by moving the lever toward thesteering wheel. The
symbol will illuminate in the instrument
panel when the high beams are on.
Active high beamsThe active high beam system uses a camera at the upper edge of the windshield to detect theheadlights of oncoming vehicles or the taillightsof a vehicle directly ahead. When this happens,the headlights will automatically switch from highbeams to low beams. When the camera no longer detects an approaching vehicle or one that is ahead, yourheadlights will switch back to high beams.
Vehicles with halogen headlights 10
When the camera no longer detects the head- lights of an approaching vehicle or the taillightsof a vehicle ahead, your headlights will switchback to high beams after several seconds.
Operation
Activate/deactivate this function by turning the lighting ring past the
position to .When released, the ring will automatically return to the
position.
If the active high beam function has not been activated, switching between high and low beamsmust be done manually. A white symbol (
) in the instrument panel
indicates that the function has been activated. When the high beams are on, the symbol will change to blue.
NOTE
•Keep the windshield in front of the cam- era free of ice, snow, dirt, etc.
• Do not mount or in any way attach any-thing on the windshield that couldobstruct the camera.
If a message is displayed in the instru- ment panel saying that active highbeams are temporarily unavailable,switching between high and low beams
will have to be done manually. However, the light switch can remain in the
position. The
same applies if a message saying that the wind- shield sensors are blocked and the symbol above are displayed. The
symbol will go out if this
happens.
9 When the low beams are on.10
Halogen headlights are not available on all models.
Page 151 of 580
INSTRUMENTS AND CONTROLS
149
NOTE
This function is only active in twilight or dark conditions, and only when the vehicle is inmotion.
Deactivating/activating the functionABL can be deactivated/activated in two ways in the center display:
Via Function view
Tap the Active Bending
Lights button.
Via settings
1. Tap Settings in Top view.
2. Tap
My CarLights and LightingExterior Lights.
3. Deselect/select
Active Bending Lights.
Related information
• Settings view (p. 113)
Rear fog lights (certain models only) 12
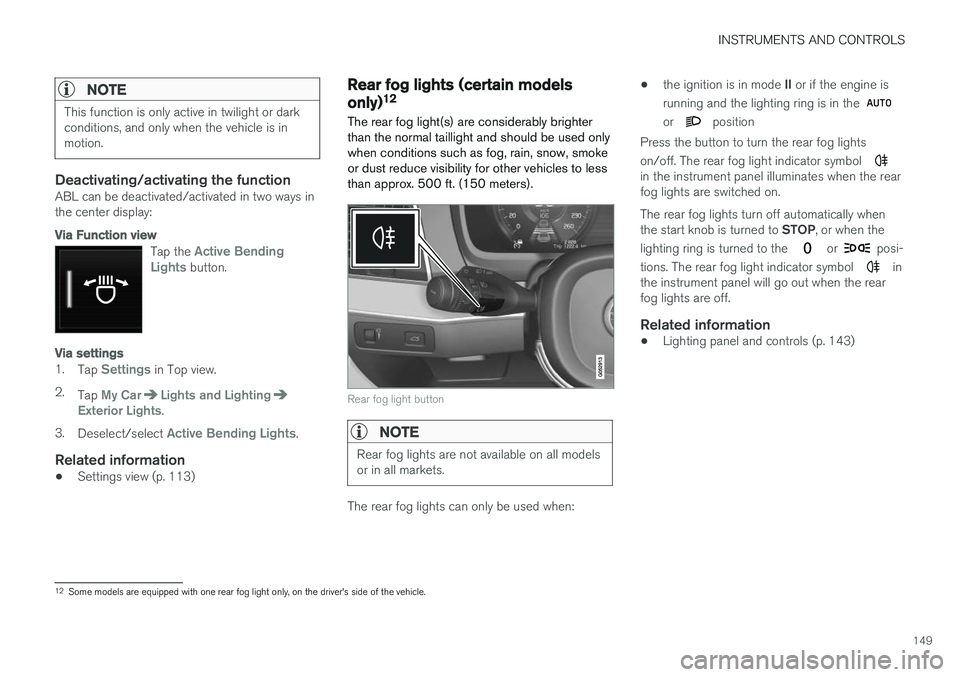
The rear fog light(s) are considerably brighter than the normal taillight and should be used onlywhen conditions such as fog, rain, snow, smokeor dust reduce visibility for other vehicles to lessthan approx. 500 ft. (150 meters).
Rear fog light button
NOTE
Rear fog lights are not available on all models or in all markets.
The rear fog lights can only be used when: •
the ignition is in mode
II or if the engine is
running and the lighting ring is in the
or position
Press the button to turn the rear fog lights on/off. The rear fog light indicator symbol
in the instrument panel illuminates when the rear fog lights are switched on. The rear fog lights turn off automatically when the start knob is turned to STOP, or when the
lighting ring is turned to the
or posi-
tions. The rear fog light indicator symbol
in
the instrument panel will go out when the rear fog lights are off.
Related information
• Lighting panel and controls (p. 143)
12
Some models are equipped with one rear fog light only, on the driver's side of the vehicle.
Page 153 of 580
INSTRUMENTS AND CONTROLS
}}
151
NOTE
•This automatic flashing sequence can be interrupted by immediately moving thelever in the opposite direction.
• If the turn signal indicator flashes fasterthan normal, see the message in theinstrument panel.
Continuous flashing sequenceMove the lever as far up or down as possible to start the turn signals.
The turn signals will be cancelled automaticallyby the movement of the steering wheel, or thelever can be returned to its initial position byhand.
Related information
• Lighting panel and controls (p. 143)
• Hazard warning flashers (p. 150)
• Settings view (p. 113)
Passenger compartment lighting
The passenger compartment lighting is con- trolled using the buttons in the ceiling above thefront and rear seats.
All passenger compartment lighting can be turned on and off manually within 30 minutesafter:
• the vehicle is unlocked but the engine hasnot been started
• the engine is switched off and the ignition is in mode
0.
Front interior lighting
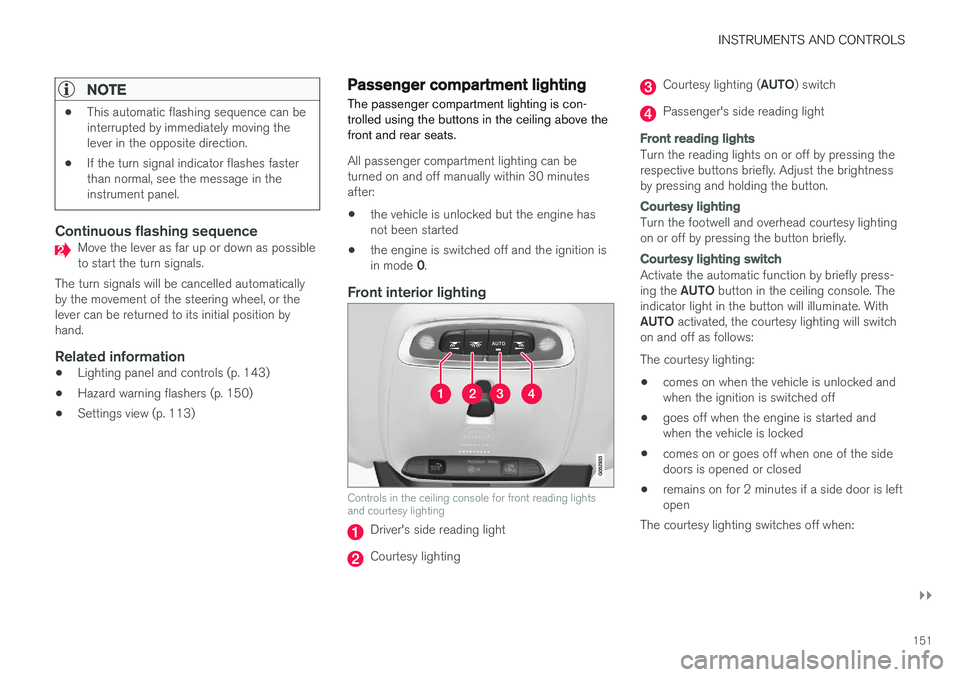
Controls in the ceiling console for front reading lights and courtesy lighting
Driver's side reading light
Courtesy lighting
Courtesy lighting ( AUTO) switch
Passenger's side reading light
Front reading lights
Turn the reading lights on or off by pressing the respective buttons briefly. Adjust the brightnessby pressing and holding the button.
Courtesy lighting
Turn the footwell and overhead courtesy lighting on or off by pressing the button briefly.
Courtesy lighting switch
Activate the automatic function by briefly press- ing the AUTO button in the ceiling console. The
indicator light in the button will illuminate. WithAUTO activated, the courtesy lighting will switch
on and off as follows: The courtesy lighting: • comes on when the vehicle is unlocked and when the ignition is switched off
• goes off when the engine is started andwhen the vehicle is locked
• comes on or goes off when one of the sidedoors is opened or closed
• remains on for 2 minutes if a side door is leftopen
The courtesy lighting switches off when: