mode VOLVO XC90 T8 2017 Owner´s Manual
[x] Cancel search | Manufacturer: VOLVO, Model Year: 2017, Model line: XC90 T8, Model: VOLVO XC90 T8 2017Pages: 580, PDF Size: 10.37 MB
Page 154 of 580
||
INSTRUMENTS AND CONTROLS
* Option/accessory.
152
Rear interior lighting
Rear reading lights
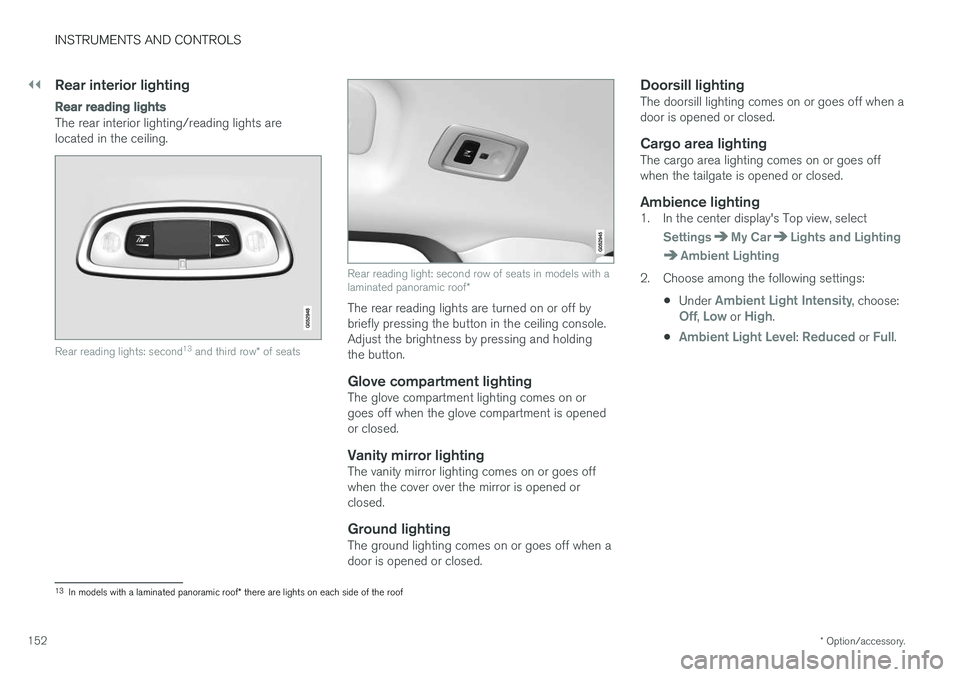
The rear interior lighting/reading lights are located in the ceiling.
Rear reading lights: second 13
and third row * of seats
Rear reading light: second row of seats in models with a laminated panoramic roof *
The rear reading lights are turned on or off by briefly pressing the button in the ceiling console.Adjust the brightness by pressing and holdingthe button.
Glove compartment lightingThe glove compartment lighting comes on orgoes off when the glove compartment is openedor closed.
Vanity mirror lightingThe vanity mirror lighting comes on or goes offwhen the cover over the mirror is opened orclosed.
Ground lightingThe ground lighting comes on or goes off when adoor is opened or closed.
Doorsill lightingThe doorsill lighting comes on or goes off when adoor is opened or closed.
Cargo area lightingThe cargo area lighting comes on or goes offwhen the tailgate is opened or closed.
Ambience lighting1. In the center display's Top view, select
SettingsMy CarLights and Lighting
Ambient Lighting
2. Choose among the following settings:
•Under
Ambient Light Intensity, choose:Off, Low or High.
•
Ambient Light Level: Reduced or Full.
13 In models with a laminated panoramic roof * there are lights on each side of the roof
Page 155 of 580
INSTRUMENTS AND CONTROLS
* Option/accessory.153
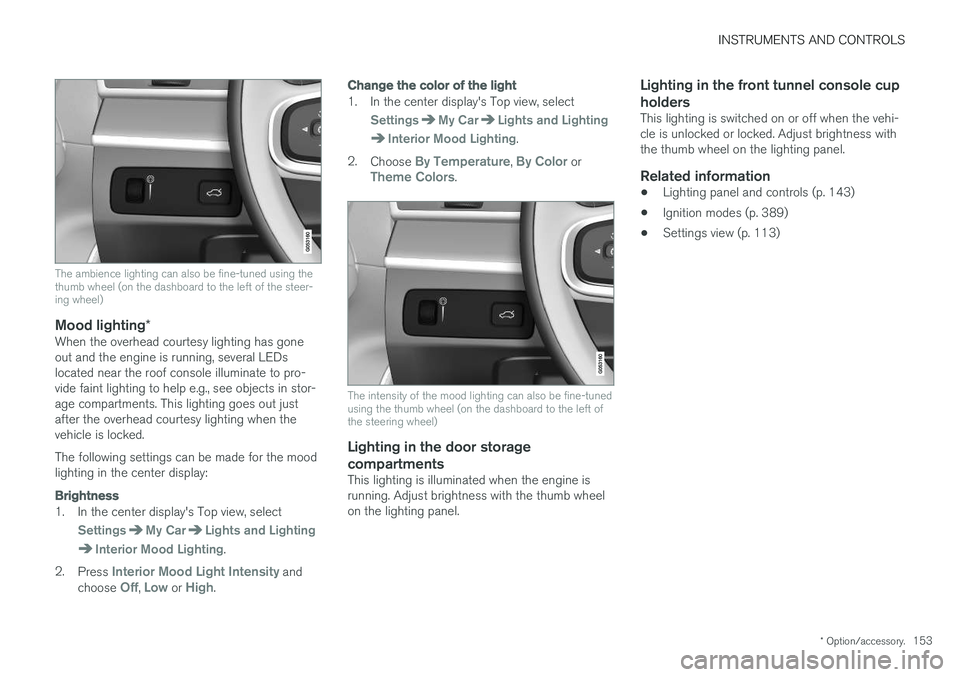
The ambience lighting can also be fine-tuned using the thumb wheel (on the dashboard to the left of the steer-ing wheel)
Mood lighting*When the overhead courtesy lighting has gone out and the engine is running, several LEDslocated near the roof console illuminate to pro-vide faint lighting to help e.g., see objects in stor-age compartments. This lighting goes out justafter the overhead courtesy lighting when thevehicle is locked. The following settings can be made for the mood lighting in the center display:
Brightness
1. In the center display's Top view, select
SettingsMy CarLights and Lighting
Interior Mood Lighting.
2. Press
Interior Mood Light Intensity and
choose Off, Low or High.
Change the color of the light
1. In the center display's Top view, select
SettingsMy CarLights and Lighting
Interior Mood Lighting.
2. Choose
By Temperature, By Color orTheme Colors.
The intensity of the mood lighting can also be fine-tuned using the thumb wheel (on the dashboard to the left ofthe steering wheel)
Lighting in the door storage
compartments
This lighting is illuminated when the engine is running. Adjust brightness with the thumb wheelon the lighting panel.
Lighting in the front tunnel console cup holders
This lighting is switched on or off when the vehi- cle is unlocked or locked. Adjust brightness withthe thumb wheel on the lighting panel.
Related information
• Lighting panel and controls (p. 143)
• Ignition modes (p. 389)
• Settings view (p. 113)
Page 156 of 580
INSTRUMENTS AND CONTROLS
* Option/accessory.
154
Home safe lighting
The home safe lighting function illuminates the area in front of the vehicle in dark conditions.
This function turns on the headlights, parking lights, outer door handle lights * and license plate
lights for a set amount of time. The length of time that these lights remain illumi- nated can be set in the center display. Thedefault setting is 30 seconds. To activate home safe lighting:1. Switch off the ignition (mode 0).
2. Push the turn signal lever as far as possible towards the dashboard and release it.
3. Exit the vehicle and lock the doors.
Related information
• Using the center display (p. 49)
• Settings view (p. 113)
• Ignition modes (p. 389)
Approach lighting
Approach lighting (the parking lights, outer door handle lights *, license plate lighting, courtesy
lighting and footwell lighting) can be activated to provide light as you walk toward the vehicle.
To use this feature, deselect/select Welcome
Light in the center display's menu system.
If this function has been selected in the menu, it
is activated by pressing the unlock button on the remote key as you approach the vehicle .
If a door is opened while the function is activated, the lighting in the outer door handle * and cour-
tesy lighting will remain illuminated for a some- what longer period of time.
Related information
• Settings view (p. 113)
• Home safe lighting (p. 154)
• Remote key (p. 235)
Messages in the instrument panel and center display Information and warning messages are dis- played in the instrument panel and center dis-play.
Instrument panel
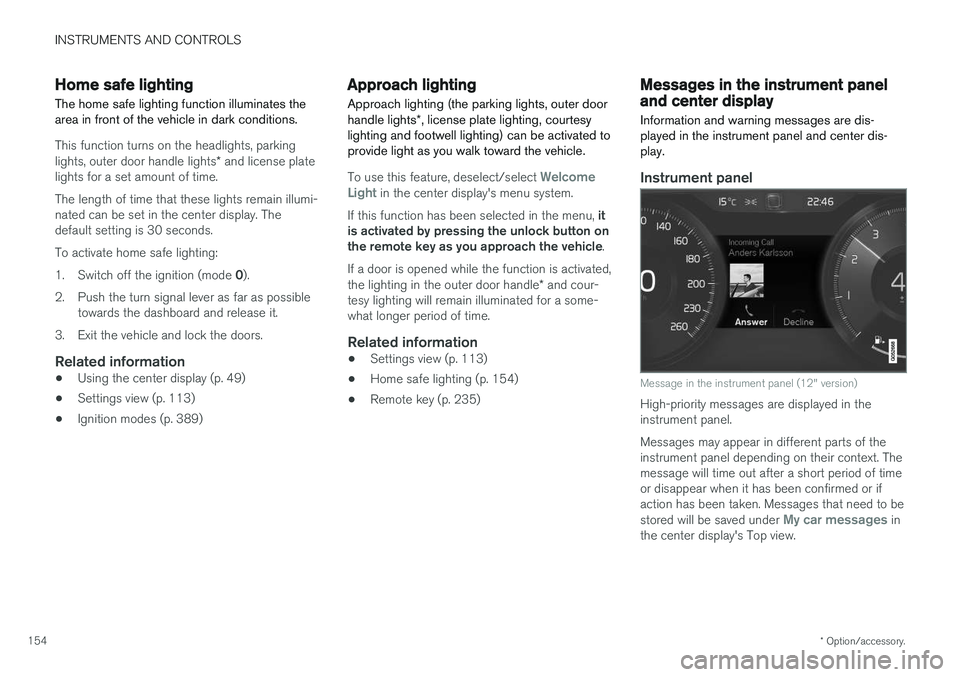
Message in the instrument panel (12" version)
High-priority messages are displayed in the instrument panel. Messages may appear in different parts of the instrument panel depending on their context. Themessage will time out after a short period of timeor disappear when it has been confirmed or ifaction has been taken. Messages that need to be stored will be saved under
My car messages in
the center display's Top view.
Page 163 of 580
INSTRUMENTS AND CONTROLS
}}
161
Continuous wipersMove the lever upward for the wipers to operate at normal speed.
NOTE
Before using the wipers, be sure that the wiper blades are not frozen onto the wind-shield and that any ice or snow on the wind-shield has been removed.
Move the lever upward to the next posi- tion for maximum wiper speed.
Related information
•Tailgate window wiper and washer (p. 163)
• Activating/deactivating the rain sensor (p. 161)
• Windshield and headlight washers (p. 162)
Activating/deactivating the rain sensor
The rain sensor monitors the amount of water on the windshield and automatically regulates wiperspeed.
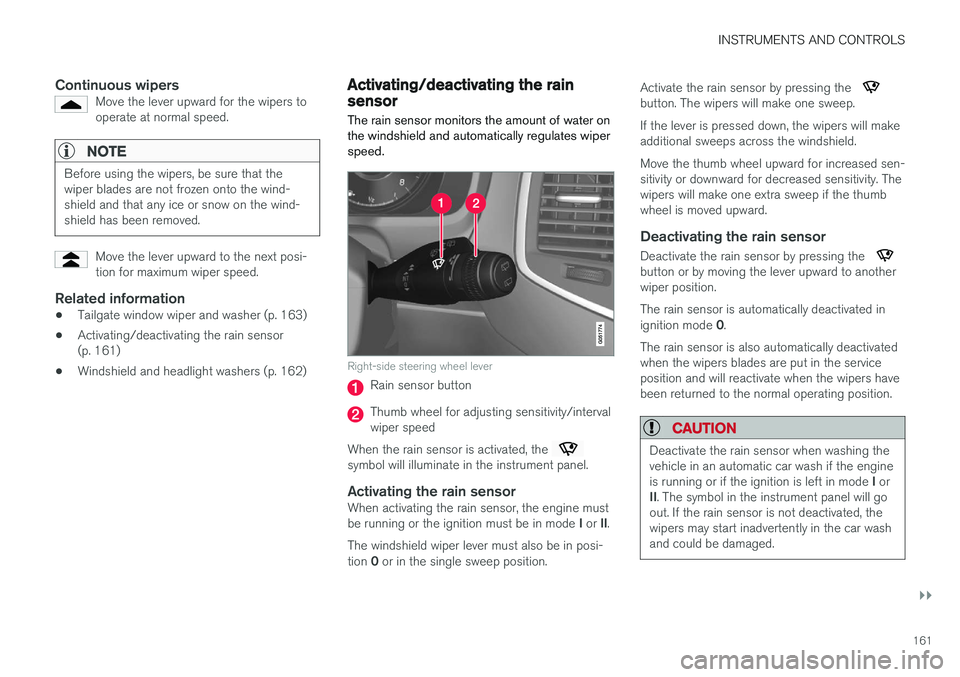
Right-side steering wheel lever
Rain sensor button
Thumb wheel for adjusting sensitivity/interval wiper speed
When the rain sensor is activated, the
symbol will illuminate in the instrument panel.
Activating the rain sensorWhen activating the rain sensor, the engine must be running or the ignition must be in mode I or II.
The windshield wiper lever must also be in posi-tion 0 or in the single sweep position. Activate the rain sensor by pressing the
button. The wipers will make one sweep. If the lever is pressed down, the wipers will make additional sweeps across the windshield. Move the thumb wheel upward for increased sen- sitivity or downward for decreased sensitivity. Thewipers will make one extra sweep if the thumbwheel is moved upward.
Deactivating the rain sensor
Deactivate the rain sensor by pressing the button or by moving the lever upward to another wiper position. The rain sensor is automatically deactivated in ignition mode
0.
The rain sensor is also automatically deactivated when the wipers blades are put in the serviceposition and will reactivate when the wipers havebeen returned to the normal operating position.
CAUTION
Deactivate the rain sensor when washing the vehicle in an automatic car wash if the engine is running or if the ignition is left in mode I or
II . The symbol in the instrument panel will go
out. If the rain sensor is not deactivated, the wipers may start inadvertently in the car washand could be damaged.
Page 169 of 580
INSTRUMENTS AND CONTROLS
* Option/accessory.167
Power front seats *
The power front seats offer a number of adjust- ment possibilities to help maximize comfort andergonomics.
The power seats have an overload protector that
activates if a seat is blocked by any object. If this occurs, put the ignition in mode I or 0 and wait
for a short period before operating the seat again. The power seat(s) can be adjusted for a short period after unlocking the door with the remotekey without switching the ignition on. Seat adjust-ment can always be made when the engine isrunning.
Related information
• Multifunctional front seats
* (p. 169)
• Adjusting power front seats
* (p. 167)
• Using the power seat memory function
*
(p. 168)
• Manually operated front seats (p. 166)
• Turning seat heating
* on and off (p. 208)
• Turning front seat ventilation
* on and off
(p. 209)
Adjusting power front seats *
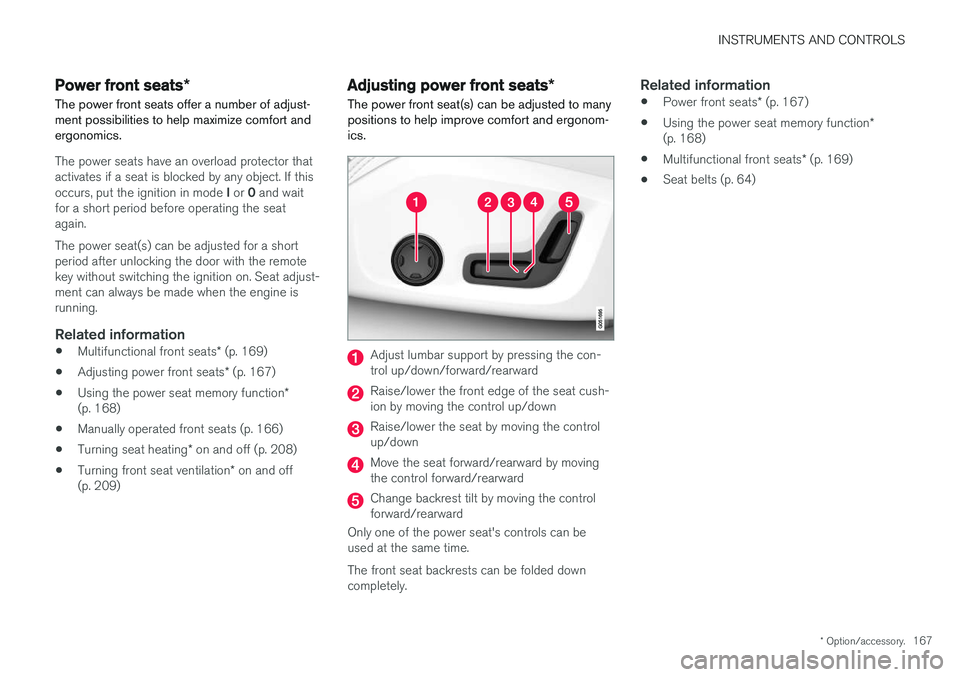
The power front seat(s) can be adjusted to many positions to help improve comfort and ergonom-ics.
Adjust lumbar support by pressing the con- trol up/down/forward/rearward
Raise/lower the front edge of the seat cush- ion by moving the control up/down
Raise/lower the seat by moving the control up/down
Move the seat forward/rearward by moving the control forward/rearward
Change backrest tilt by moving the control forward/rearward
Only one of the power seat's controls can beused at the same time. The front seat backrests can be folded down completely.
Related information
• Power front seats
* (p. 167)
• Using the power seat memory function
*
(p. 168)
• Multifunctional front seats
* (p. 169)
• Seat belts (p. 64)
Page 189 of 580
CLIMATE
}}
* Option/accessory.187
Climate system sensors The climate system's sensors help regulate the passenger compartment temperature, humiditylevel, etc.
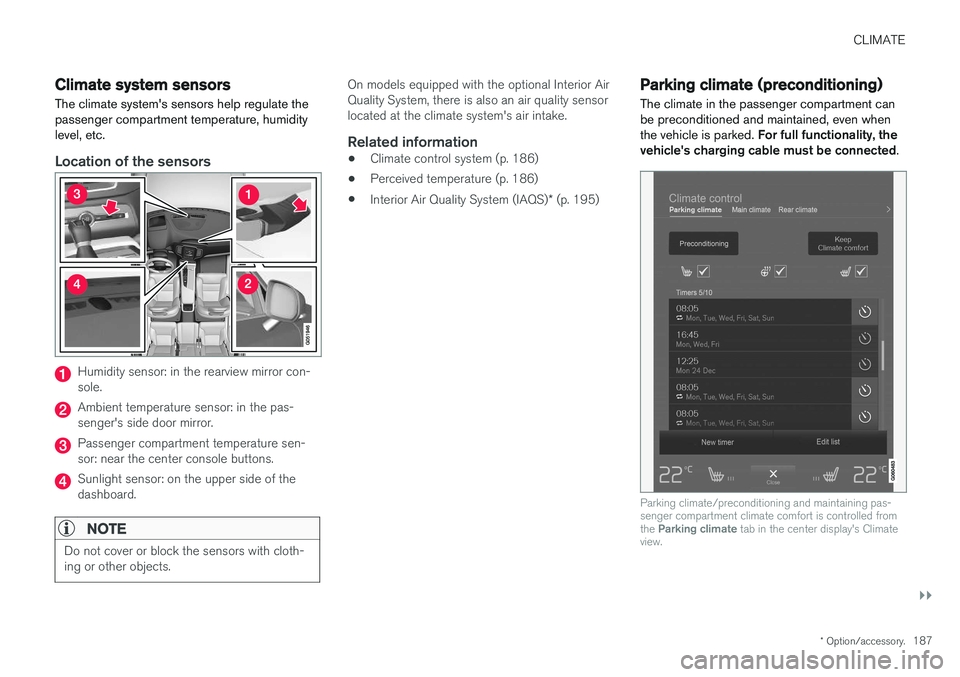
Location of the sensors
Humidity sensor: in the rearview mirror con- sole.
Ambient temperature sensor: in the pas- senger's side door mirror.
Passenger compartment temperature sen- sor: near the center console buttons.
Sunlight sensor: on the upper side of the dashboard.
NOTE
Do not cover or block the sensors with cloth- ing or other objects.
On models equipped with the optional Interior Air Quality System, there is also an air quality sensorlocated at the climate system's air intake.
Related information
•Climate control system (p. 186)
• Perceived temperature (p. 186)
• Interior Air Quality System (IAQS)
* (p. 195)
Parking climate (preconditioning)
The climate in the passenger compartment can be preconditioned and maintained, even whenthe vehicle is parked. For full functionality, the
vehicle's charging cable must be connected .
Parking climate/preconditioning and maintaining pas- senger compartment climate comfort is controlled from the Parking climate tab in the center display's Climate
view.
Page 198 of 580
CLIMATE
* Option/accessory.
196
Passenger compartment air filter
All air entering the passenger compartment through the climate system air intake is filtered.
Filter replacementThe filter must be replaced according to the serv- ice schedule for your vehicle. When driving in e.g.,dusty or industrial areas, the filer may need to bereplaced more often. Consult your Volvo retailer.
Related information
• Air quality (p. 194)
• Clean Zone Interior Package (CZIP)
*
(p. 195)
• Interior Air Quality System (IAQS)
* (p. 195)
• Volvo's service program (p. 498)
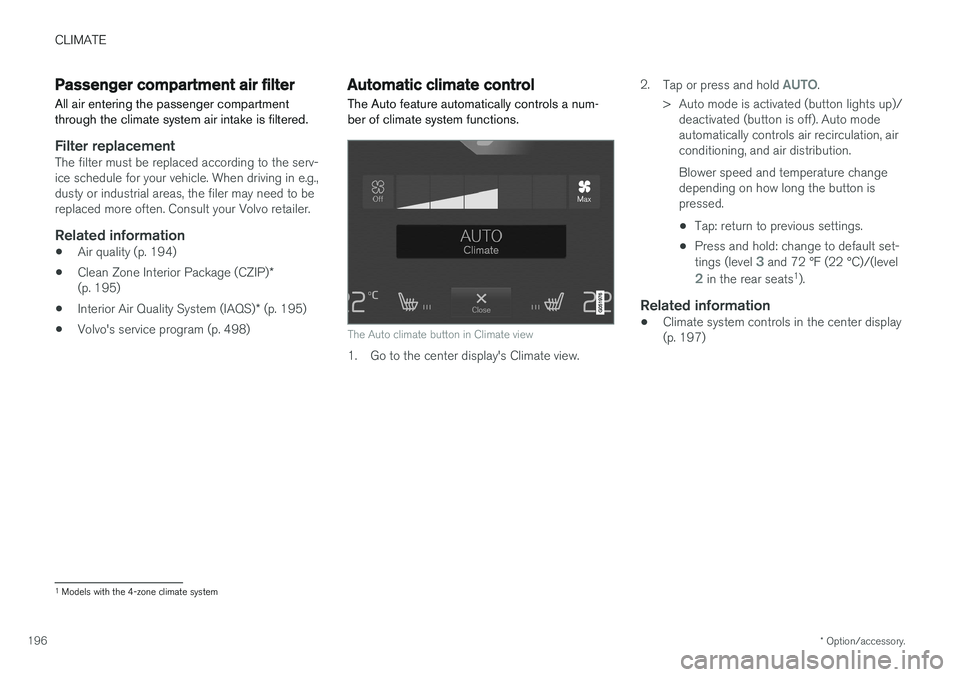
Automatic climate control The Auto feature automatically controls a num- ber of climate system functions.
The Auto climate button in Climate view
1. Go to the center display's Climate view. 2.
Tap or press and hold
AUTO.
> Auto mode is activated (button lights up)/ deactivated (button is off). Auto mode automatically controls air recirculation, airconditioning, and air distribution. Blower speed and temperature change depending on how long the button ispressed.
• Tap: return to previous settings.
• Press and hold: change to default set- tings (level
3 and 72 °F (22 °C)/(level
2 in the rear seats 1
).
Related information
• Climate system controls in the center display (p. 197)
1
Models with the 4-zone climate system
Page 200 of 580
||
CLIMATE
198
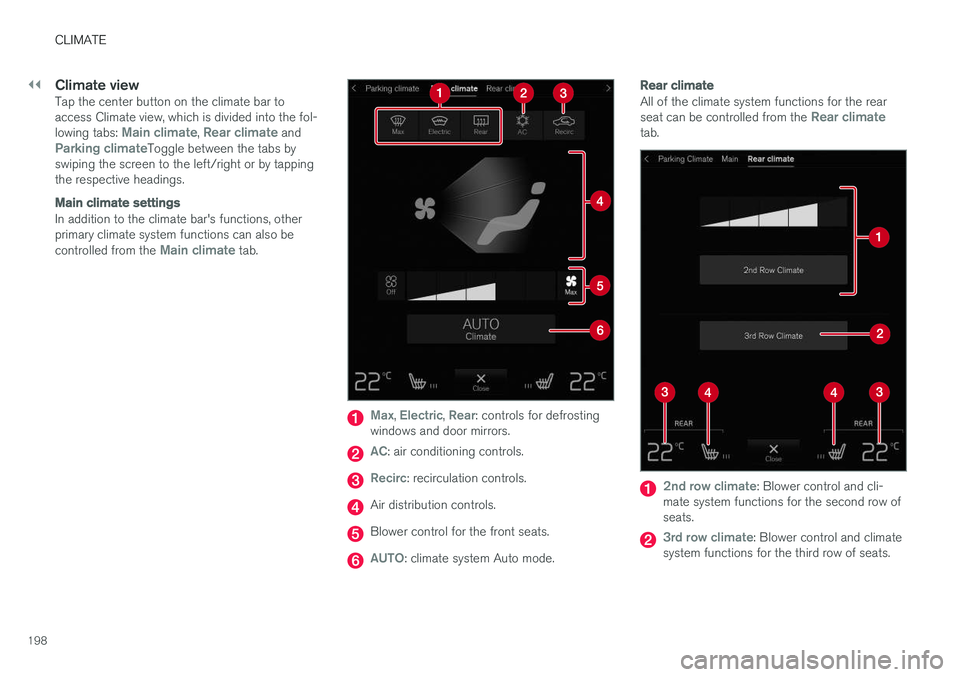
Climate viewTap the center button on the climate bar to access Climate view, which is divided into the fol- lowing tabs:
Main climate, Rear climate andParking climateToggle between the tabs by
swiping the screen to the left/right or by tapping the respective headings.
Main climate settings
In addition to the climate bar's functions, other primary climate system functions can also be controlled from the
Main climate tab.
Max, Electric, Rear: controls for defrosting
windows and door mirrors.
AC: air conditioning controls.
Recirc: recirculation controls.
Air distribution controls.
Blower control for the front seats.
AUTO: climate system Auto mode.
Rear climate
All of the climate system functions for the rear seat can be controlled from the Rear climatetab.
2nd row climate: Blower control and cli-
mate system functions for the second row of seats.
3rd row climate: Blower control and climate
system functions for the third row of seats.
Page 201 of 580
CLIMATE
}}
* Option/accessory.199
Rear seat temperature control.
Rear seat heating control *.
Parking climate 2
All of the parking climate functions can be con- trolled from the Parking climate tab.
Related information
•
Climate system controls (p. 197)
• Defrosting windows and mirrors (p. 204)
• Air conditioning (p. 207)
• Adjusting air distribution (p. 211)
• Setting the temperature (p. 201)
• Setting the blower speed (p. 199)
• Automatic climate control (p. 196)
• Turning steering wheel heating
* on and off
(p. 206)
• Turning seat heating
* on and off (p. 208)
Rear climate system controls on the tunnel console
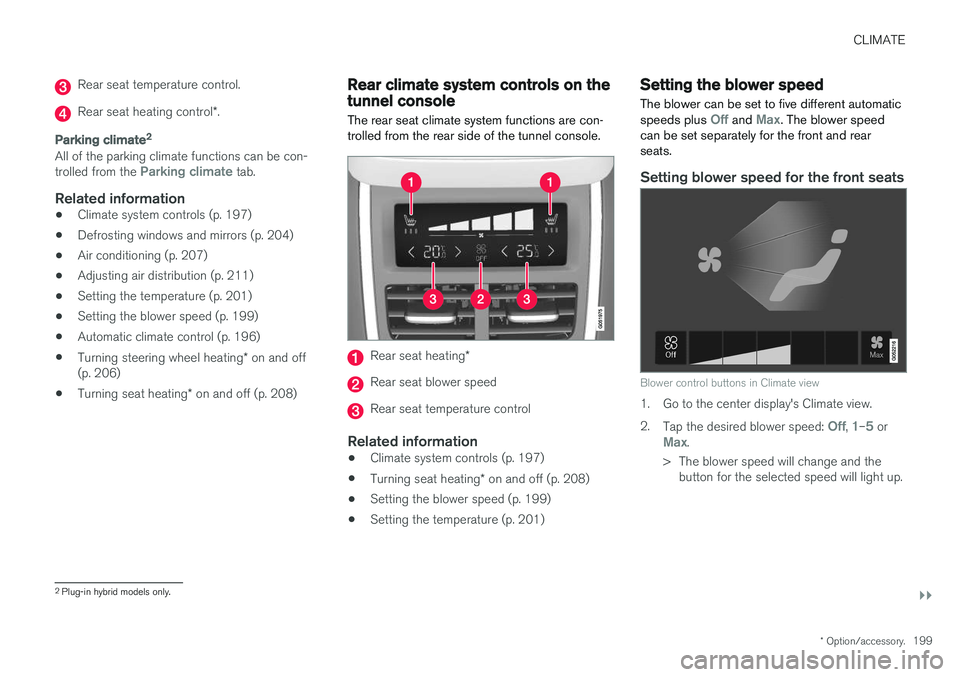
The rear seat climate system functions are con- trolled from the rear side of the tunnel console.
Rear seat heating *
Rear seat blower speed
Rear seat temperature control
Related information
•Climate system controls (p. 197)
• Turning seat heating
* on and off (p. 208)
• Setting the blower speed (p. 199)
• Setting the temperature (p. 201)
Setting the blower speed The blower can be set to five different automatic speeds plus
Off and Max. The blower speed
can be set separately for the front and rear seats.
Setting blower speed for the front seats
Blower control buttons in Climate view
1. Go to the center display's Climate view. 2. Tap the desired blower speed:
Off, 1–5 orMax.
> The blower speed will change and the button for the selected speed will light up.
2Plug-in hybrid models only.
Page 206 of 580
CLIMATE
* Option/accessory.
204
Defrosting windows and mirrors
The max. defroster, heated windshield * and
heated rear window/door mirror functions are used to remove ice or condensation.
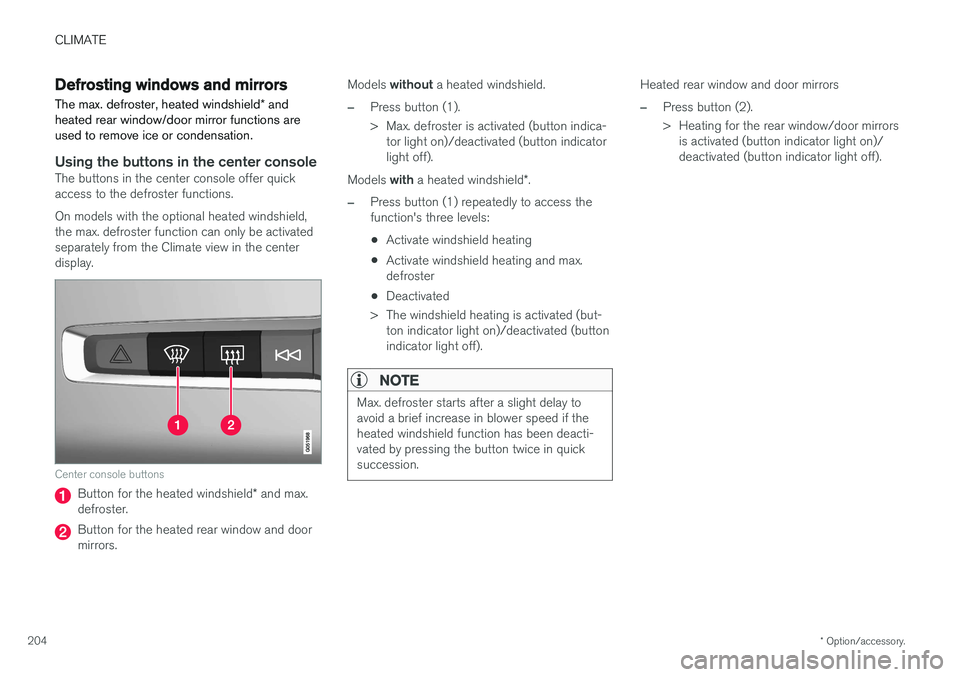
Using the buttons in the center consoleThe buttons in the center console offer quick access to the defroster functions. On models with the optional heated windshield, the max. defroster function can only be activatedseparately from the Climate view in the centerdisplay.
Center console buttons
Button for the heated windshield * and max.
defroster.
Button for the heated rear window and door mirrors. Models
without a heated windshield.
–Press button (1).
> Max. defroster is activated (button indica-
tor light on)/deactivated (button indicator light off).
Models with a heated windshield *.
–Press button (1) repeatedly to access the function's three levels:
• Activate windshield heating
• Activate windshield heating and max.defroster
• Deactivated
> The windshield heating is activated (but- ton indicator light on)/deactivated (buttonindicator light off).
NOTE
Max. defroster starts after a slight delay to avoid a brief increase in blower speed if theheated windshield function has been deacti-vated by pressing the button twice in quicksuccession.
Heated rear window and door mirrors
–Press button (2).
> Heating for the rear window/door mirrorsis activated (button indicator light on)/ deactivated (button indicator light off).