ESP VOLVO XC90 TWIN ENGINE 2019 User Guide
[x] Cancel search | Manufacturer: VOLVO, Model Year: 2019, Model line: XC90 TWIN ENGINE, Model: VOLVO XC90 TWIN ENGINE 2019Pages: 697, PDF Size: 10.33 MB
Page 61 of 697

SAFETY
59
WARNING
No objects that add to the total weight onthe seat should be placed on the frontpassenger's seat. If a child is seated inthe front passenger's seat with any addi-tional weight, this extra weight couldcause the OWS system to enable the air-bag, which might cause it to deploy in theevent of a collision, thereby injuring thechild.
The seat belt should never be wrappedaround an object on the front passeng-er's seat. This could interfere with theOWS system's function.
The front passenger's seat belt shouldnever be used in a way that exerts morepressure on the passenger than normal.This could increase the pressure exertedon the weight sensor by a child, andcould result in the airbag being enabled,which might cause it to deploy in theevent of a collision, thereby injuring thechild.
WARNING
Keep the following points in mind withrespect to the OWS system. Failure tofollow these instructions could adverselyaffect the system's function and result inserious injury to the occupant of the frontpassenger's seat:
The full weight of the front seat passen-ger should always be on the seat cushion.The passenger should never lift him/herself off the seat cushion using thearmrest in the door or the center console,by pressing the feet on the floor, by sit-ting on the edge of the seat cushion, orby pressing against the backrest in a waythat reduces pressure on the seat cush-ion. This could cause OWS to disable thefront, passenger's side airbag.
WARNING
Do not place any type of object on thefront passenger's seat in such a way thatjamming, pressing, or squeezing occursbetween the object and the front seat,other than as a direct result of the correctuse of the Automatic Locking Retractor/Emergency Locking Retractor (ALR/ELR)seat belt.
No objects should be placed under thefront passenger's seat. This could inter-fere with the OWS system's function.
Related information
Driver/passenger-side airbags (p. 53)
Page 117 of 697
DISPLAYS AND VOICE CONTROL
}}
* Option/accessory. 115
Activating and deactivating the
center display
The center display can be dimmed and reactiva-
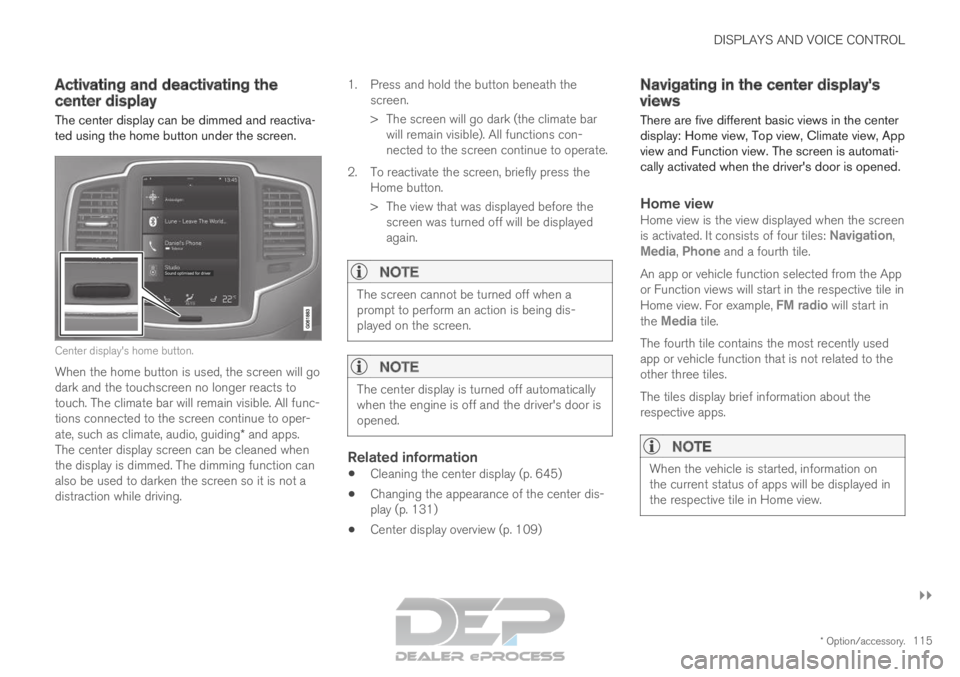
ted using the home button under the screen. Center display's home button.
When the home button is used, the screen will go
dark and the touchscreen no longer reacts to
touch. The climate bar will remain visible. All func-
tions connected to the screen continue to oper-
ate, such as climate, audio, guiding* and apps.
The center display screen can be cleaned when
the display is dimmed. The dimming function can
also be used to darken the screen so it is not a
distraction while driving. 1.
Press and hold the button beneath the
screen.
> The screen will go dark (the climate bar will remain visible). All functions con-
nected to the screen continue to operate.
2. To reactivate the screen, briefly press the Home button.
> The view that was displayed before thescreen was turned off will be displayed
again.
NOTE The screen cannot be turned off when a
prompt to perform an action is being dis-
played on the screen.
NOTE
The center display is turned off automatically
when the engine is off and the driver's door is
opened.
Related information
Cleaning the center display (p. 645)
Changing the appearance of the center dis-
play (p. 131)
Center display overview (p. 109) Navigating in the center display's
views
There are five different basic views in the center
display: Home view, Top view, Climate view, App
view and Function view. The screen is automati-
cally activated when the driver's door is opened.
Home viewHome view is the view displayed when the screen
is activated. It consists of four tiles: Navigation,
Media, Phone and a fourth tile.
An app or vehicle function selected from the App
or Function views will start in the respective tile in
Home view. For example, FM radio will start in
the
Media tile.
The fourth tile contains the most recently used
app or vehicle function that is not related to the
other three tiles.
The tiles display brief information about the
respective apps.
NOTE When the vehicle is started, information on
the current status of apps will be displayed in
the respective tile in Home view.
Page 123 of 697
DISPLAYS AND VOICE CONTROL
121
Expanding a tile:
– For tiles Navigation, Media and Phone:
Tap the screen anywhere in the tile. When a
tile is expanded, the extra tile in Home view
will be temporarily hidden. The other two tiles
will be minimized and only show certain infor-
mation. When the extra tile is tapped, the
other three tiles are minimized and only cer-
tain information is displayed.
Expanded view provides access to the basic
functions of the respective apps.
Closing an expanded tile:
– The tile can be closed in three different
ways:
Tap the top section of the expanded tile.
Tap another tile (it will then be opened in
expanded mode instead).
Press briefly on the Home button under
the center display.
Opening or closing a tile in full-screen
mode
The fourth tile 7
and tile for Navigation can be
opened in full-screen mode to show additional
information and possible settings.
When a tile is opened in full-screen mode, no
information from the other tiles is displayed. In expanded mode, open the
app in full-screen mode. Tap
the symbol. To return to expanded mode,
tap the symbol or press the
Home button under the screen.
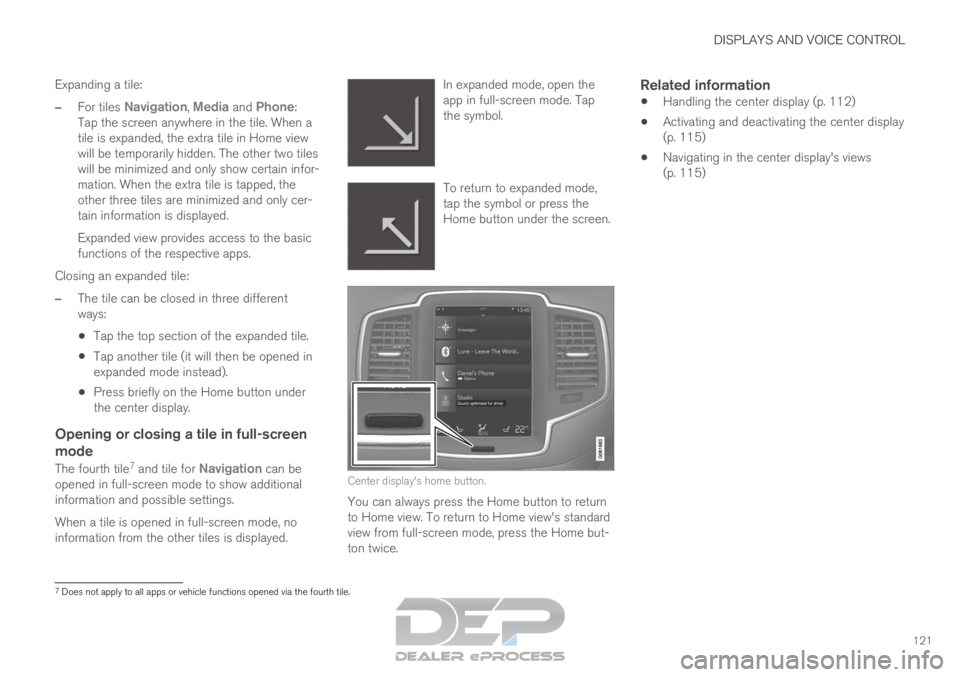
Center display's home button.
You can always press the Home button to return
to Home view. To return to Home view's standard
view from full-screen mode, press the Home but-
ton twice.
Related information
Handling the center display (p. 112)
Activating and deactivating the center display
(p. 115)
Navigating in the center display's views
(p. 115) 7
Does not apply to all apps or vehicle functions opened via the fourth ti\
le.
Page 137 of 697
DISPLAYS AND VOICE CONTROL
}}
* Option/accessory. 135
Table of settings in the center
display
The center display's Settings menu has a num-
ber of main categories and sub-categories that
contain settings and information for many of the
vehicle's features and functions.
There are seven main categories: My Car,
Sound, Navigation, Media, Communication,
Climate and System.
Each category, in turn, contains a number of sub-
categories and possible settings. The table below
shows the first level of sub-categories. The possi-
ble settings for a function or an area are descri-
bed in more detail in their respective sections of
the Owner's Manual.
Some settings are personal, which means that
they can be saved to a Driver Profiles. Others
are global, which means that they are not linked
to a driver profile.
My Car Sub-categories
Displays
IntelliSafe
Drive Preferences/Individual Drive Mode*
Lights and Lighting
Mirrors and Convenience Sub-categories
Locking
Parking Brake and Suspension
Wipers
Sound
Sub-categories
Tone
Balance
System Volumes
Navigation
Sub-categories
Map
Route and Guidance
Traffic
Media
Sub-categories
AM/FM Radio
SiriusXM
SiriusXM Travel Link Sub-categories
Gracenote®
Video
Communication
Sub-categories
Phone
Text Messages
Android Auto
*
Apple CarPlay*
Bluetooth Devices
Wi-Fi
Vehicle Wi-Fi Hotspot
Vehicle Modem Internet
Volvo On Call
Volvo Service Networks
ClimateThe Climate main category does not have any
sub-categories.
Page 147 of 697
DISPLAYS AND VOICE CONTROL
}}
* Option/accessory. 145
Calibrating the horizontal position
If the windshield or display unit has been
replaced, the head-up display's horizontal posi-
tion may need to be calibrated. Calibration means
that the projected image is rotated clockwise or
counterclockwise.
1.
Tap Settings in the center display's Top
view.
2.
Select My Car Displays Head-Up
Display Options Head-Up Display
Calibration .
3.
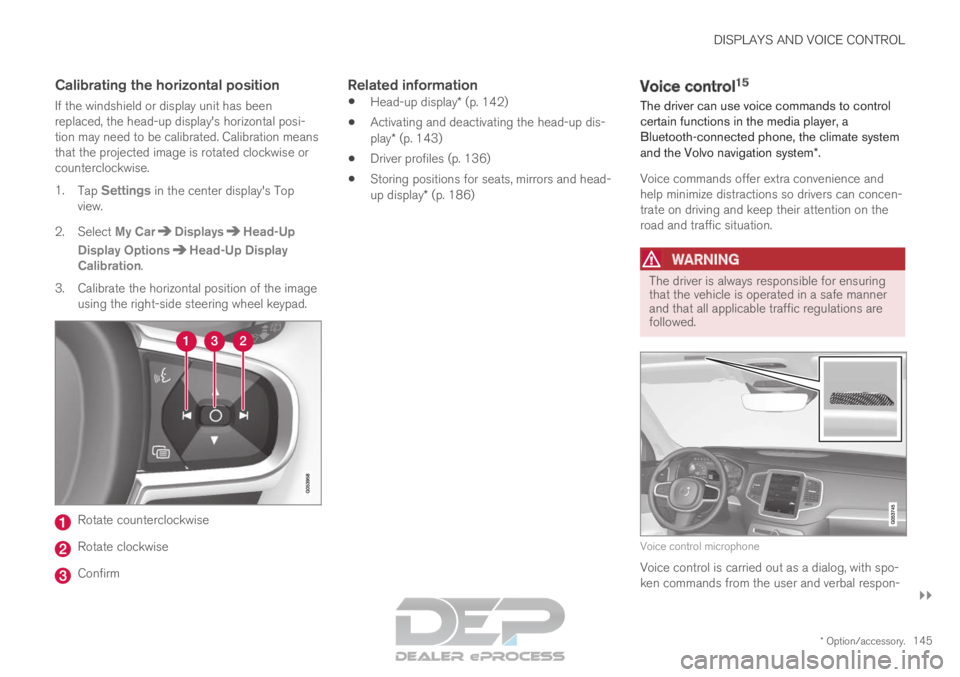
Calibrate the horizontal position of the image
using the right-side steering wheel keypad. Rotate counterclockwise
Rotate clockwise
Confirm
Related information
Head-up display* (p. 142)
Activating and deactivating the head-up dis-
play* (p. 143)
Driver profiles (p. 136)
Storing positions for seats, mirrors and head-
up display* (p. 186) Voice control
15
The driver can use voice commands to control
certain functions in the media player, a
Bluetooth-connected phone, the climate system
and the Volvo navigation system*.
Voice commands offer extra convenience and
help minimize distractions so drivers can concen-
trate on driving and keep their attention on the
road and traffic situation.
WARNING The driver is always responsible for ensuring
that the vehicle is operated in a safe manner
and that all applicable traffic regulations are
followed.
Voice control microphone
Voice control is carried out as a dialog, with spo-
ken commands from the user and verbal respon-
Page 148 of 697
||DISPLAYS AND VOICE CONTROL
* Option/accessory.
146 ses from the system. The voice control system
uses the same microphone as devices connected
with Bluetooth, and the voice control system
responds through the vehicle's loudspeakers. In
certain cases, text messages will also be dis-
played in the instrument panel. The functions are
controlled using the right-side steering wheel
keypad and settings are made in the center dis-
play.
System updates
The voice control system is continuously
improved. For optimal functionality, always down-
load the latest update at support.volvocars.com.
Related information
Using voice commands (p. 146)
Voice control for cellular phones (p. 147)
Voice control for radio and media (p. 148)
Climate control system voice commands
(p. 205)
Voice control settings (p. 148) Using voice commands
16
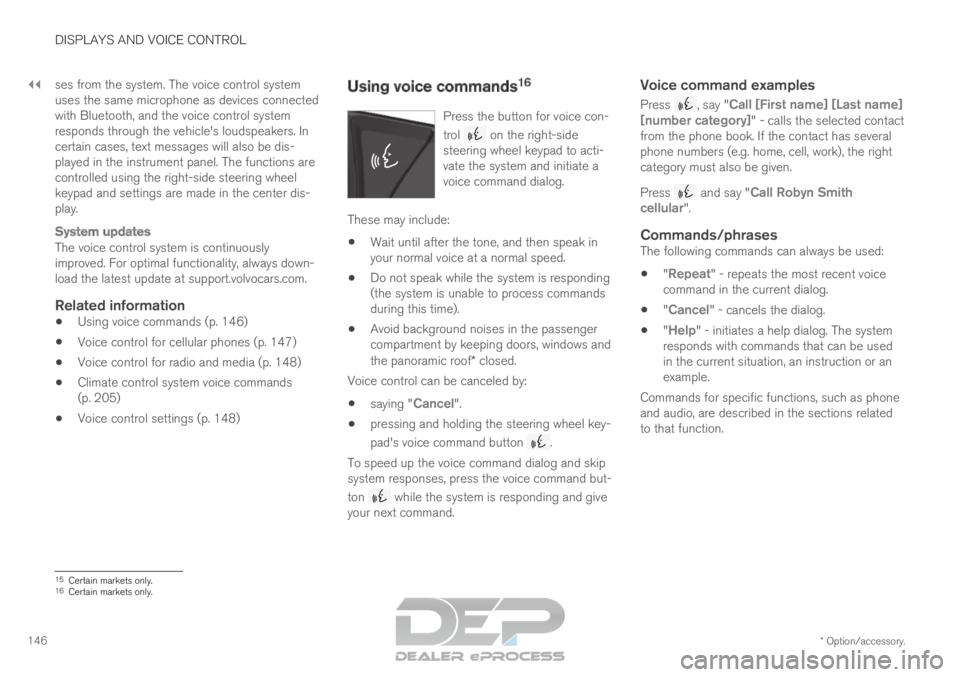
Press the button for voice con-
trol on the right-side
steering wheel keypad to acti-
vate the system and initiate a
voice command dialog. These may include:
Wait until after the tone, and then speak in
your normal voice at a normal speed.
Do not speak while the system is responding
(the system is unable to process commands
during this time).
Avoid background noises in the passenger
compartment by keeping doors, windows and
the panoramic roof* closed.
Voice control can be canceled by:
saying "
Cancel".
pressing and holding the steering wheel key-
pad's voice command button .
To speed up the voice command dialog and skip
system responses, press the voice command but-
ton while the system is responding and give
your next command.
Voice command examples
Press , say "Call [First name] [Last name]
[number category]" - calls the selected contact
from the phone book. If the contact has several
phone numbers (e.g. home, cell, work), the right
category must also be given.
Press and say "
Call Robyn Smith
cellular".
Commands/phrasesThe following commands can always be used:
"Repeat" - repeats the most recent voice
command in the current dialog.
"Cancel" - cancels the dialog.
"
Help" - initiates a help dialog. The system
responds with commands that can be used
in the current situation, an instruction or an
example.
Commands for specific functions, such as phone
and audio, are described in the sections related
to that function. 15
Certain markets only.
16 Certain markets only.
Page 155 of 697
LIGHTING
* Option/accessory.153
WARNINGThe vehicle lighting system cannot in all situa-
tions determine when the daylight is too weak
or not strong enough, e.g. when there is fog
or rain.
The driver is always responsible for driving the
vehicle with lighting that is safe for the traffic
conditions and as specified by applicable traf-
fic regulations.
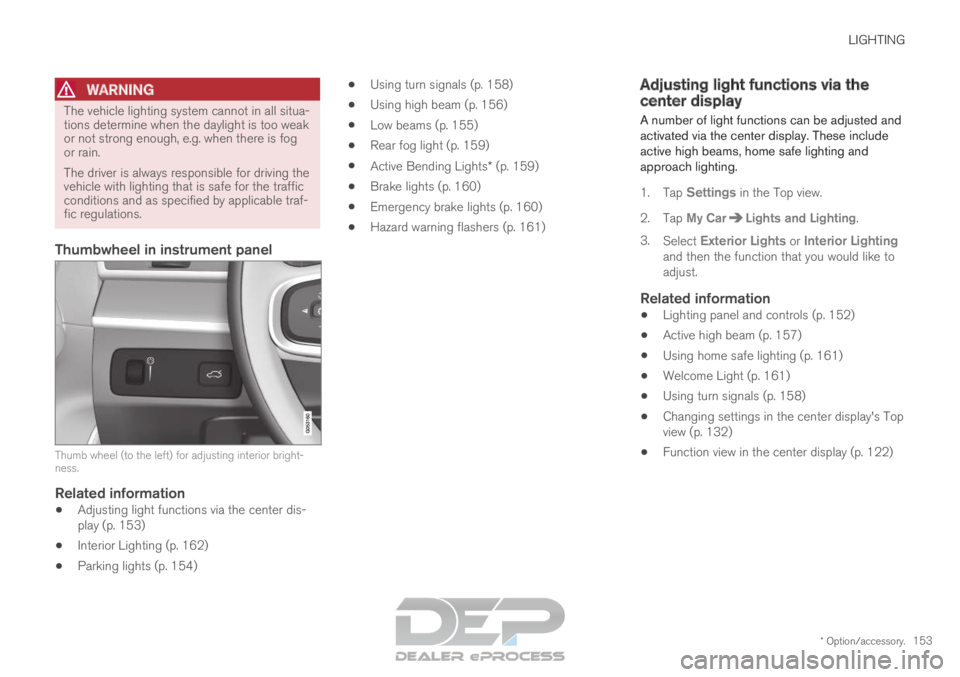
Thumbwheel in instrument panel
Thumb wheel (to the left) for adjusting interior bright-
ness.
Related information
Adjusting light functions via the center dis-
play (p. 153)
Interior Lighting (p. 162)
Parking lights (p. 154)
Using turn signals (p. 158)
Using high beam (p. 156)
Low beams (p. 155)
Rear fog light (p. 159)
Active Bending Lights* (p. 159)
Brake lights (p. 160)
Emergency brake lights (p. 160)
Hazard warning flashers (p. 161) Adjusting light functions via the
center display
A number of light functions can be adjusted and
activated via the center display. These include
active high beams, home safe lighting and
approach lighting.
1. Tap Settings in the Top view.
2.
Tap My Car Lights and Lighting
.
3. Select Exterior Lights or Interior Lighting
and then the function that you would like to
adjust.
Related information
Lighting panel and controls (p. 152)
Active high beam (p. 157)
Using home safe lighting (p. 161)
Welcome Light (p. 161)
Using turn signals (p. 158)
Changing settings in the center display's Top
view (p. 132)
Function view in the center display (p. 122)
Page 157 of 697
LIGHTING
}}
* Option/accessory. 155
With the steering wheel lever's lighting ring in the position, the daytime running lights (DRL
1
)
will illuminate when the vehicle is driven in day-
light conditions. The headlights will switch auto-
matically from daytime running lights to low
beams in weak daylight or dark conditions. The
headlights will also switch to low beams if the
front fog lights* and/or rear fog light are acti-
vated.
US models: When mode is selected, the
daytime running lights can be deactivated in the
center display. The parking lights will also be
deactivated. In weak daylight or dark conditions,
the parking lights and low beams will be illumi-
nated.
US models: With the lighting ring in the or position, the daytime running lights will
be off.
Canadian models: With the lighting ring in the or position, the daytime running
lights will be on.
NOTE Volvo recommends use of Daytime Running
Lights in the US. Its use is mandatory in Can-
ada.
WARNING The system is an energy saving aid – it cannot
in all situations determine when the daylight is
too weak or not strong enough, e.g. when
there is fog or rain.
The driver is always responsible for driving the
vehicle with lighting that is safe for the traffic
conditions and as specified by applicable traf-
fic regulations.
Related information
Lighting panel and controls (p. 152)
Ignition modes (p. 437)
Low beams (p. 155) Low beams
When driving with the lighting ring in the position, low beam will be automatically acti-
vated in weak daylight or dark conditions, when
the ignition is in the II position.
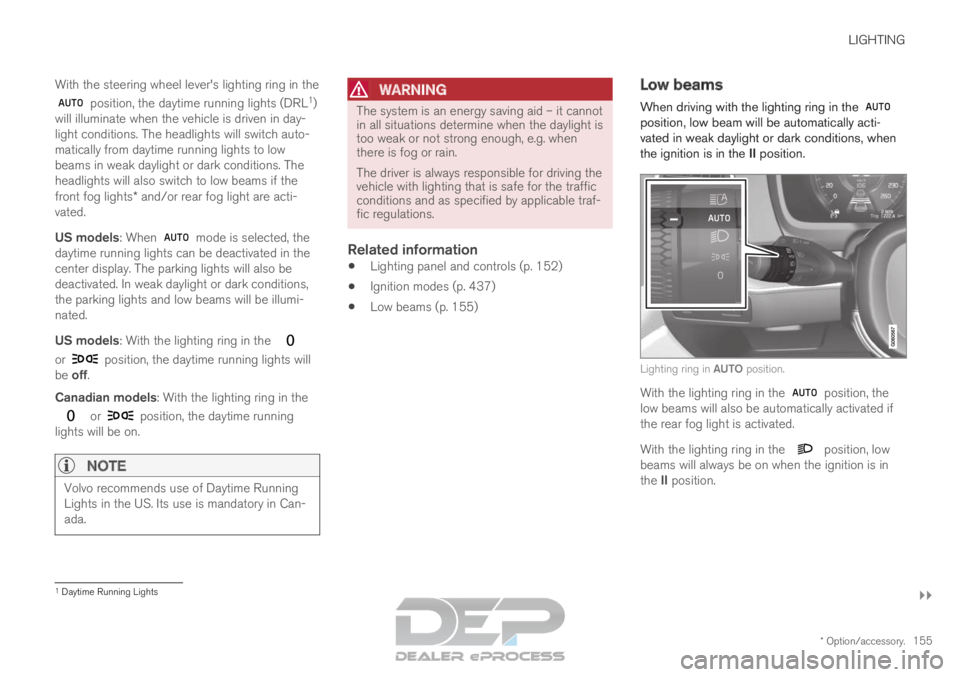
Lighting ring in AUTO position.
With the lighting ring in the
position, the
low beams will also be automatically activated if
the rear fog light is activated.
With the lighting ring in the position, low
beams will always be on when the ignition is in
the II position. 1
Daytime Running Lights
Page 159 of 697
LIGHTING
}}
* Option/accessory. 157
Active high beam
Active high beams is a function that uses cam-
era sensors in the upper edge of the windshield
to detect the headlights of approaching vehicles
or the taillights of the vehicle directly ahead.
When either of these is detected, the vehicle's
headlights will automatically switch from high
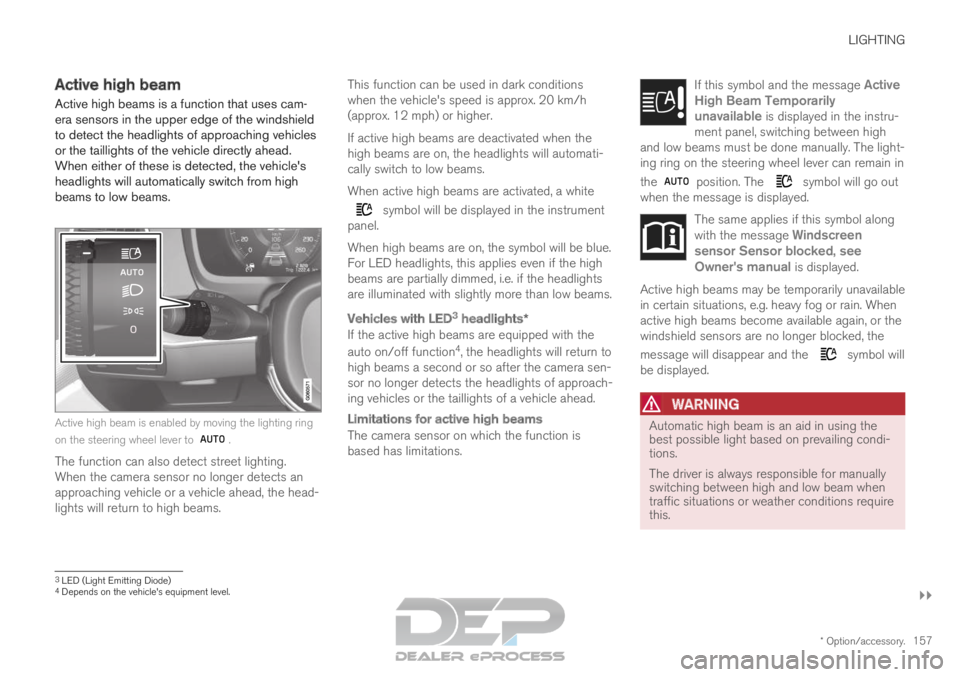
beams to low beams. Active high beam is enabled by moving the lighting ring
on the steering wheel lever to
.
The function can also detect street lighting.
When the camera sensor no longer detects an
approaching vehicle or a vehicle ahead, the head-
lights will return to high beams. This function can be used in dark conditions
when the vehicle's speed is approx. 20 km/h
(approx. 12 mph) or higher.
If active high beams are deactivated when the
high beams are on, the headlights will automati-
cally switch to low beams.
When active high beams are activated, a white symbol will be displayed in the instrument
panel.
When high beams are on, the symbol will be blue.
For LED headlights, this applies even if the high
beams are partially dimmed, i.e. if the headlights
are illuminated with slightly more than low beams.
Vehicles with LED 3
headlights*
If the active high beams are equipped with the
auto on/off function 4
, the headlights will return to
high beams a second or so after the camera sen-
sor no longer detects the headlights of approach-
ing vehicles or the taillights of a vehicle ahead.
Limitations for active high beams
The camera sensor on which the function is
based has limitations. If this symbol and the message Active
High Beam Temporarily unavailable is displayed in the instru-
ment panel, switching between high
and low beams must be done manually. The light-
ing ring on the steering wheel lever can remain in
the position. The symbol will go out
when the message is displayed. The same applies if this symbol along
with the message
Windscreen
sensor Sensor blocked, see Owner's manual is displayed. Active high beams may be temporarily unavailable
in certain situations, e.g. heavy fog or rain. When
active high beams become available again, or the
windshield sensors are no longer blocked, the
message will disappear and the
symbol will
be displayed.
WARNING Automatic high beam is an aid in using the
best possible light based on prevailing condi-
tions.
The driver is always responsible for manually
switching between high and low beam when
traffic situations or weather conditions require
this.
3
LED (Light Emitting Diode)4 Depends on the vehicle's equipment level.
Page 171 of 697

WINDOWS, GLASS AND MIRRORS
}}
* Option/accessory. 169
WARNINGMake sure that no child or other passenger
comes into contact with the windows as they
are closing with keyless closing*.
NOTE
One way to reduce the pulsating wind noise
heard when the rear windows are open is to
also open the front windows slightly.
NOTE
The windows cannot be opened at speeds
over approx. 180 km/h (ca112 mph), but they
can be closed.
The driver is always responsible for following
applicable traffic regulations.
Related information
Power windows (p. 167)
Pinch protection for windows and sun cur-
tains (p. 166)
Reset procedure for pinch protection
(p. 167)
Keyless locking and unlocking* (p. 259)
Locking and unlocking using the remote key
(p. 246) Using sun curtains*
There are integrated sun curtains in each rear
door.
Rear door – manually operated The illustration is generic – the design may vary.
Hook with locking mechanism
– Pull up the sun curtain and hook it to the
upper section of the door frame.
The window can be opened and closed when the
sun curtain is being used.
Related information
Pinch protection for windows and sun cur-
tains (p. 166)
Reset procedure for pinch protection
(p. 167)
Power windows (p. 167) Rearview/door mirrors
The rearview mirror and door mirrors can be
used to improve the driver's visibility behind the
vehicle.
Rearview mirrorThe rearview mirror can be easily adjusted man-
ually. The rearview mirror can be equipped with
HomeLink*, auto-dim* and compass*.
Door mirrors
WARNING The door mirror on the passenger side is
curved to improve visibility. Objects in the mir-
ror may appear farther away than they actually
are.
The joystick in the drivers' door control panel is
used to adjust the position of the door mirrors.
There are also several automatic settings that
can also be connected to the memory function
buttons for the power seat*.
Related information
HomeLink ®
* (p. 489)
Compass* (p. 493)
Adjusting the rearview mirror dimming func-
tion (p. 170)
Adjusting the door mirrors (p. 171)