YAMAHA BLASTER 200 2007 Owners Manual
BLASTER 200 2007
YAMAHA
YAMAHA
https://www.carmanualsonline.info/img/51/49385/w960_49385-0.png
YAMAHA BLASTER 200 2007 Owners Manual
Trending: oil change, tire size, clutch, flat tire, change wheel, brake fluid, weight
Page 111 of 132
8-36
1
2
3
4
5
6
78
9
10
11
EBU25340
Replacing the headlight bulb
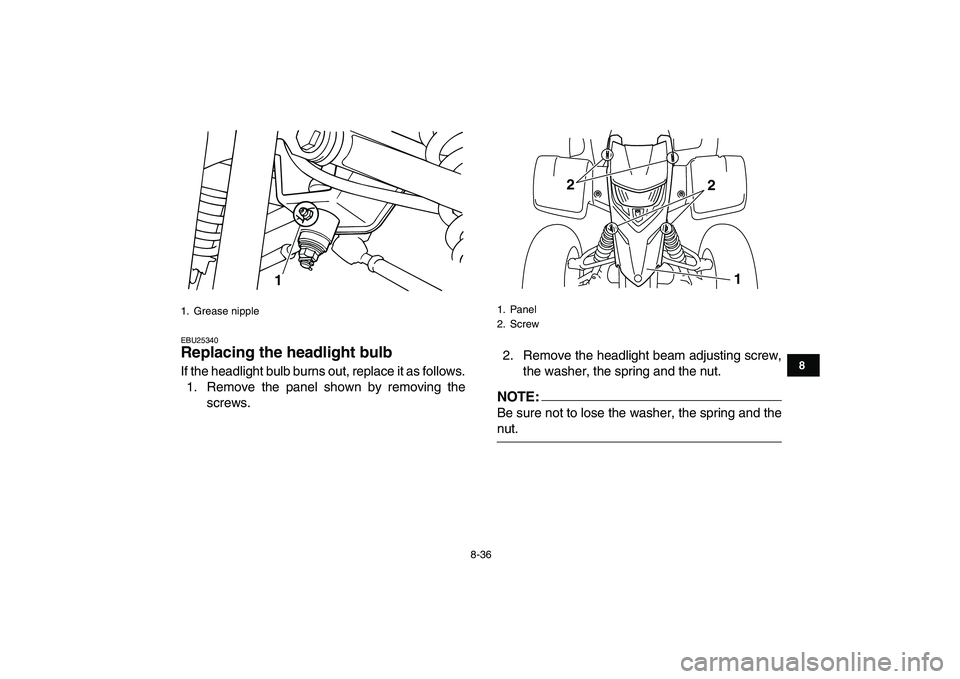
If the headlight bulb burns out, replace it as follows.
1. Remove the panel shown by removing the
screws.2. Remove the headlight beam adjusting screw,
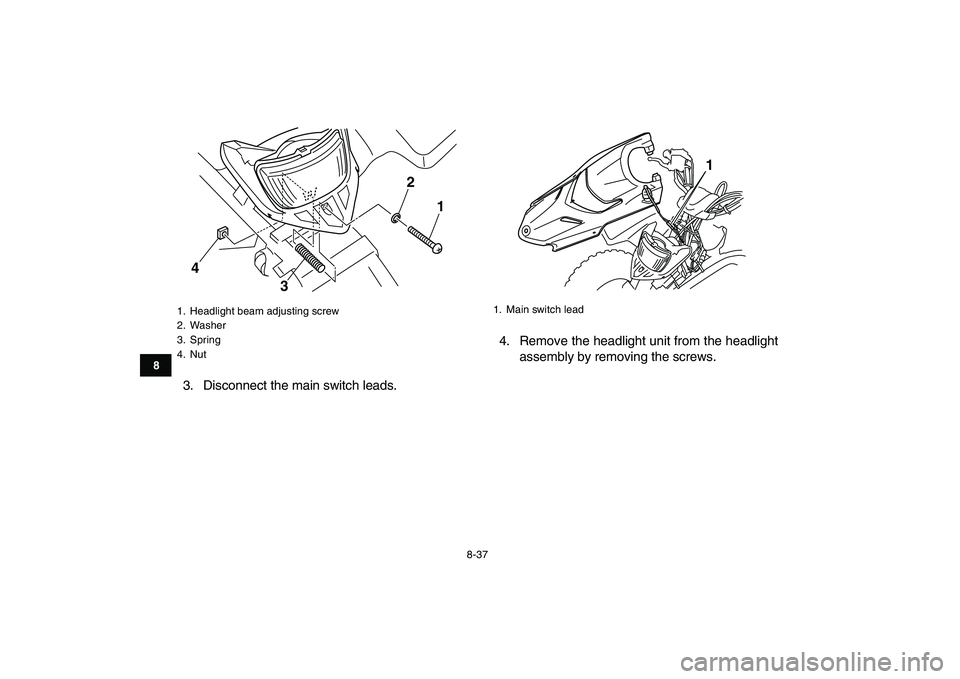
the washer, the spring and the nut.
NOTE:
Be sure not to lose the washer, the spring and the
nut.
1. Grease nipple
1
1. Panel
2. Screw
1 2 2
Page 112 of 132
8-37
1
2
3
4
5
6
78
9
10
11
3. Disconnect the main switch leads.4. Remove the headlight unit from the headlight
assembly by removing the screws.
1. Headlight beam adjusting screw
2. Washer
3. Spring
4. Nut
1 2
3 4
1. Main switch lead
1
Page 113 of 132
8-38
1
2
3
4
5
6
78
9
10
11
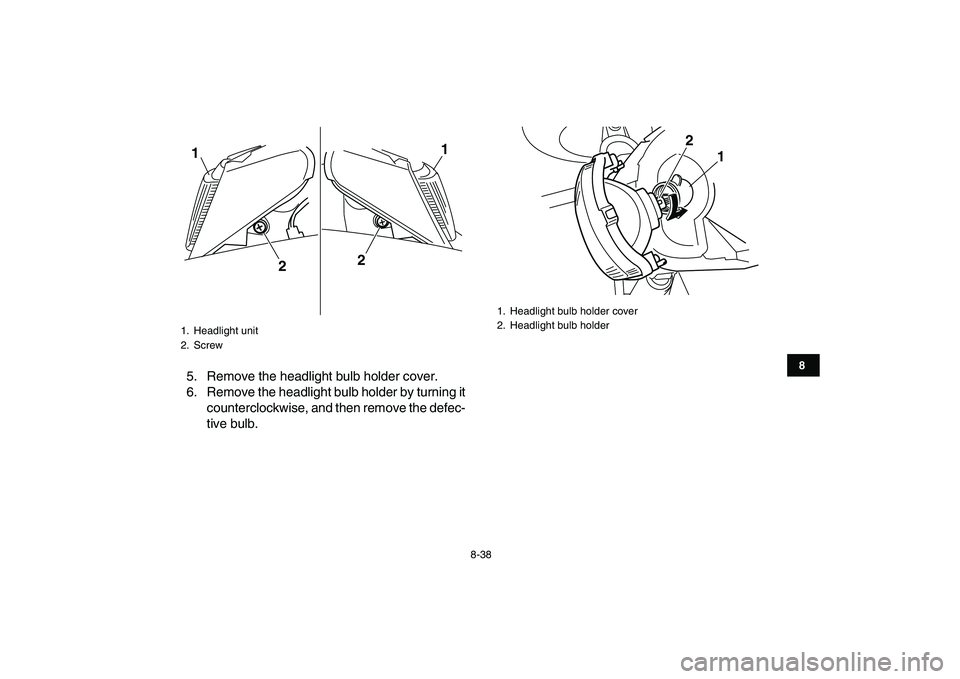
5. Remove the headlight bulb holder cover.
6. Remove the headlight bulb holder by turning it
counterclockwise, and then remove the defec-
tive bulb.
1. Headlight unit
2. Screw
1
21
2
1. Headlight bulb holder cover
2. Headlight bulb holder
1 2
Page 114 of 132
8-39
1
2
3
4
5
6
78
9
10
11
WARNING
EWB02200
A headlight bulb is hot when it is on and imme-
diately after it is turned off. Wait for the bulb to
cool before touching or removing it. You can
be burned, or a fire could start if the bulb
touches something flammable.
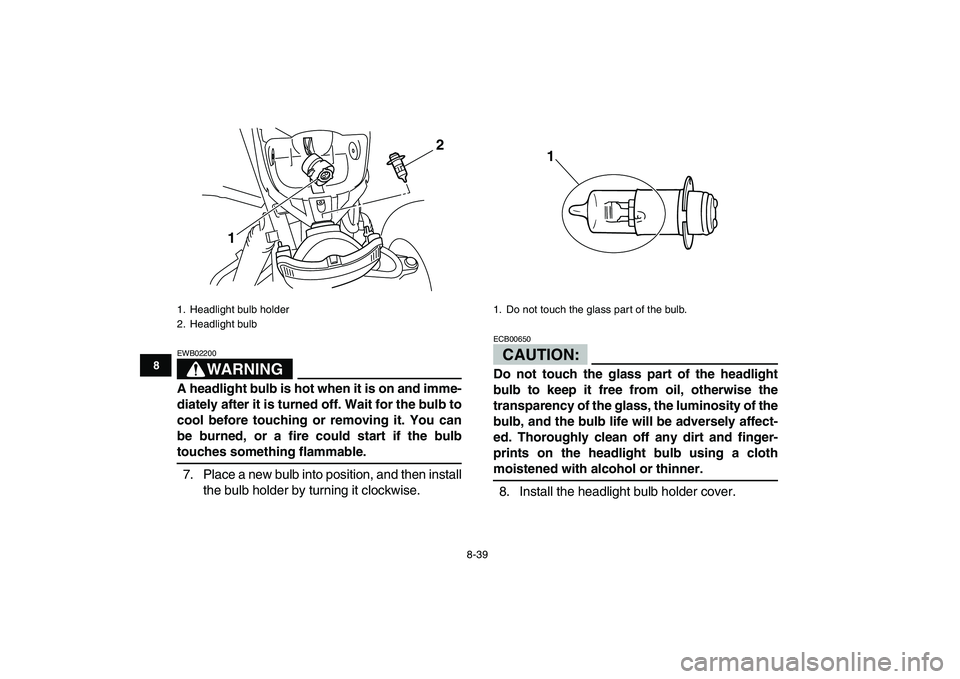
7. Place a new bulb into position, and then install
the bulb holder by turning it clockwise.
CAUTION:
ECB00650
Do not touch the glass part of the headlight
bulb to keep it free from oil, otherwise the
transparency of the glass, the luminosity of the
bulb, and the bulb life will be adversely affect-
ed. Thoroughly clean off any dirt and finger-
prints on the headlight bulb using a cloth
moistened with alcohol or thinner.
8. Install the headlight bulb holder cover.
1. Headlight bulb holder
2. Headlight bulb
12
1. Do not touch the glass part of the bulb.1
Page 115 of 132
8-40
1
2
3
4
5
6
78
9
10
11
CAUTION:
ECB00670
Make sure the headlight bulb holder cover is
securely fitted over the bulb holder and seated
properly.
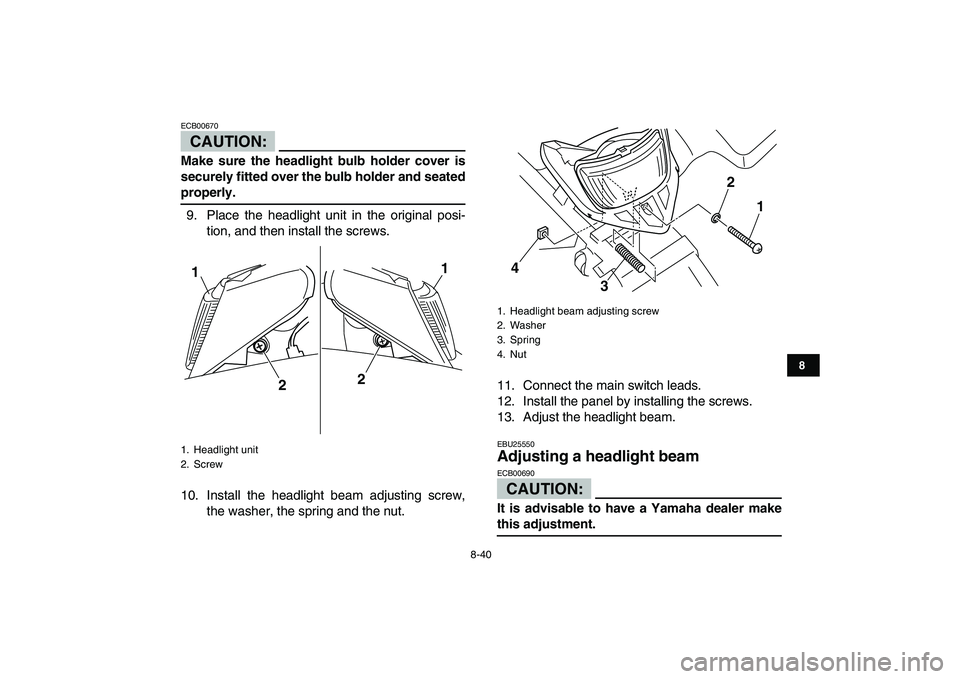
9. Place the headlight unit in the original posi-
tion, and then install the screws.
10. Install the headlight beam adjusting screw,
the washer, the spring and the nut.11. Connect the main switch leads.
12. Install the panel by installing the screws.
13. Adjust the headlight beam.
EBU25550
Adjusting a headlight beam
CAUTION:
ECB00690
It is advisable to have a Yamaha dealer make
this adjustment.
1. Headlight unit
2. Screw
1
21
2
1. Headlight beam adjusting screw
2. Washer
3. Spring
4. Nut
1 2
3 4
Page 116 of 132
8-41
1
2
3
4
5
6
78
9
10
11
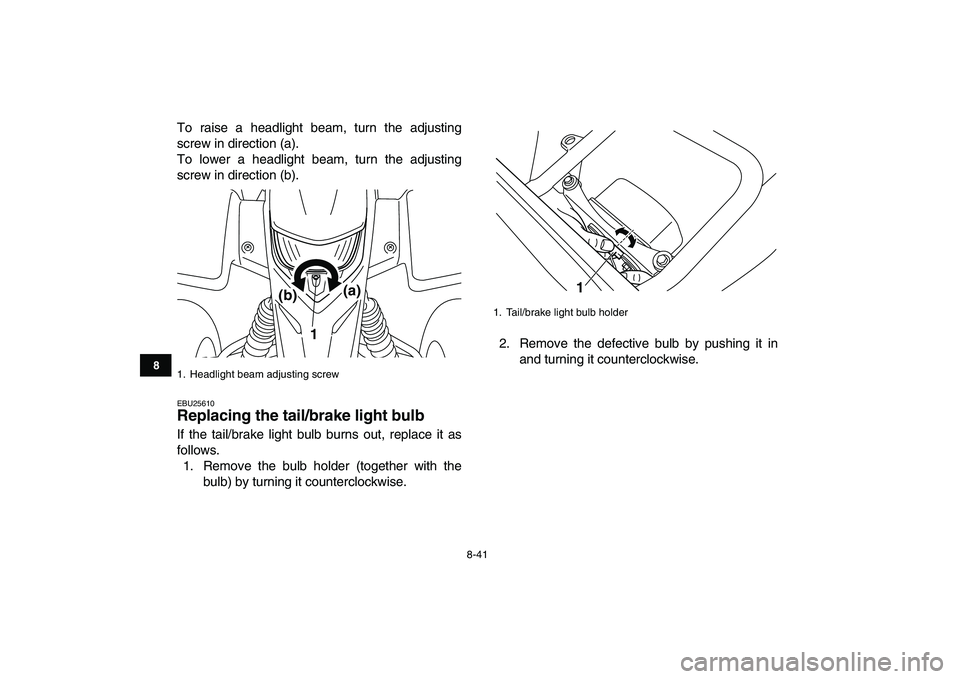
To raise a headlight beam, turn the adjusting
screw in direction (a).
To lower a headlight beam, turn the adjusting
screw in direction (b).
EBU25610
Replacing the tail/brake light bulb
If the tail/brake light bulb burns out, replace it as
follows.
1. Remove the bulb holder (together with the
bulb) by turning it counterclockwise.2. Remove the defective bulb by pushing it in
and turning it counterclockwise.
1. Headlight beam adjusting screw
1(a)
(b)
1. Tail/brake light bulb holder
1
Page 117 of 132
8-42
1
2
3
4
5
6
78
9
10
11
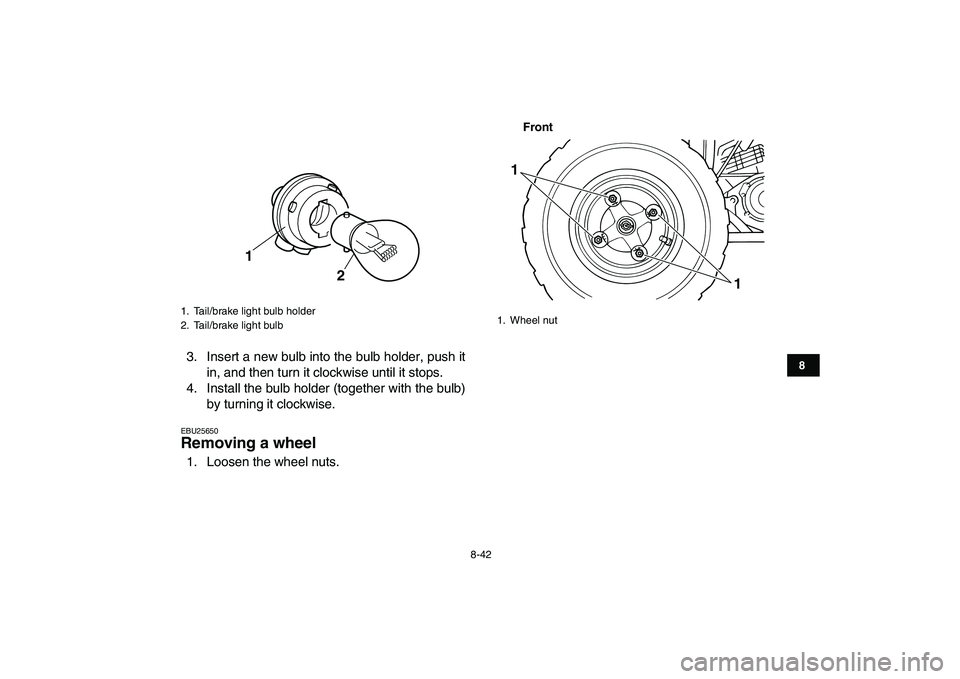
3. Insert a new bulb into the bulb holder, push it
in, and then turn it clockwise until it stops.
4. Install the bulb holder (together with the bulb)
by turning it clockwise.
EBU25650
Removing a wheel
1. Loosen the wheel nuts.
Front
1. Tail/brake light bulb holder
2. Tail/brake light bulb
1
2
1. Wheel nut
1
1
Page 118 of 132
8-43
1
2
3
4
5
6
78
9
10
11
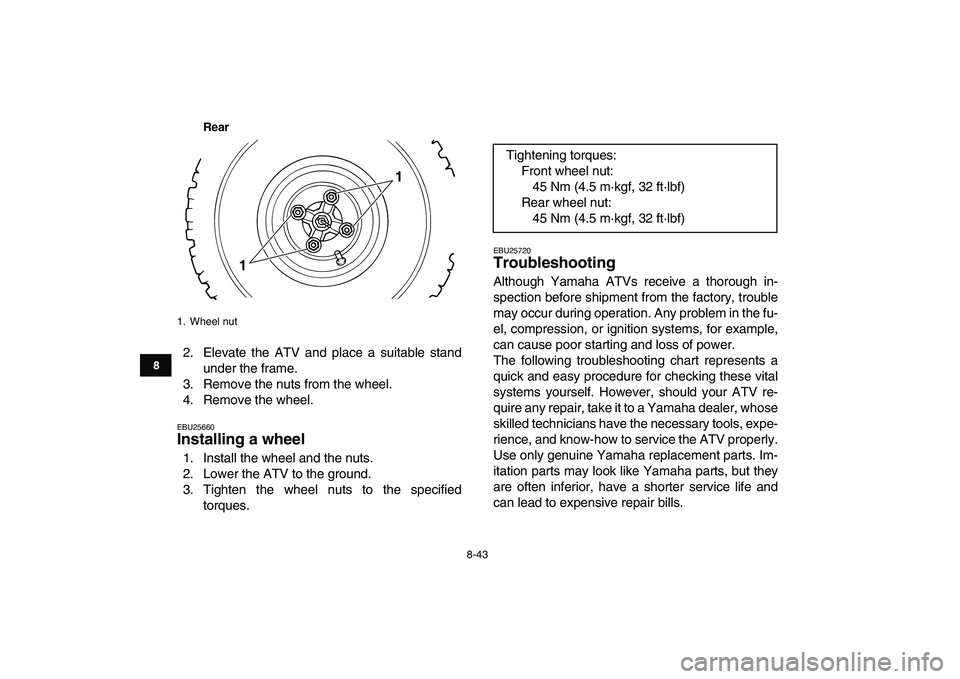
Rear
2. Elevate the ATV and place a suitable stand
under the frame.
3. Remove the nuts from the wheel.
4. Remove the wheel.
EBU25660
Installing a wheel
1. Install the wheel and the nuts.
2. Lower the ATV to the ground.
3. Tighten the wheel nuts to the specified
torques.
EBU25720
Troubleshooting
Although Yamaha ATVs receive a thorough in-
spection before shipment from the factory, trouble
may occur during operation. Any problem in the fu-
el, compression, or ignition systems, for example,
can cause poor starting and loss of power.
The following troubleshooting chart represents a
quick and easy procedure for checking these vital
systems yourself. However, should your ATV re-
quire any repair, take it to a Yamaha dealer, whose
skilled technicians have the necessary tools, expe-
rience, and know-how to service the ATV properly.
Use only genuine Yamaha replacement parts. Im-
itation parts may look like Yamaha parts, but they
are often inferior, have a shorter service life and
can lead to expensive repair bills.
1. Wheel nut
1
1
Tightening torques:
Front wheel nut:
45 Nm (4.5 m·kgf, 32 ft·lbf)
Rear wheel nut:
45 Nm (4.5 m·kgf, 32 ft·lbf)
Page 119 of 132
8-44
1
2
3
4
5
6
78
9
10
11
WARNING
EWB02280
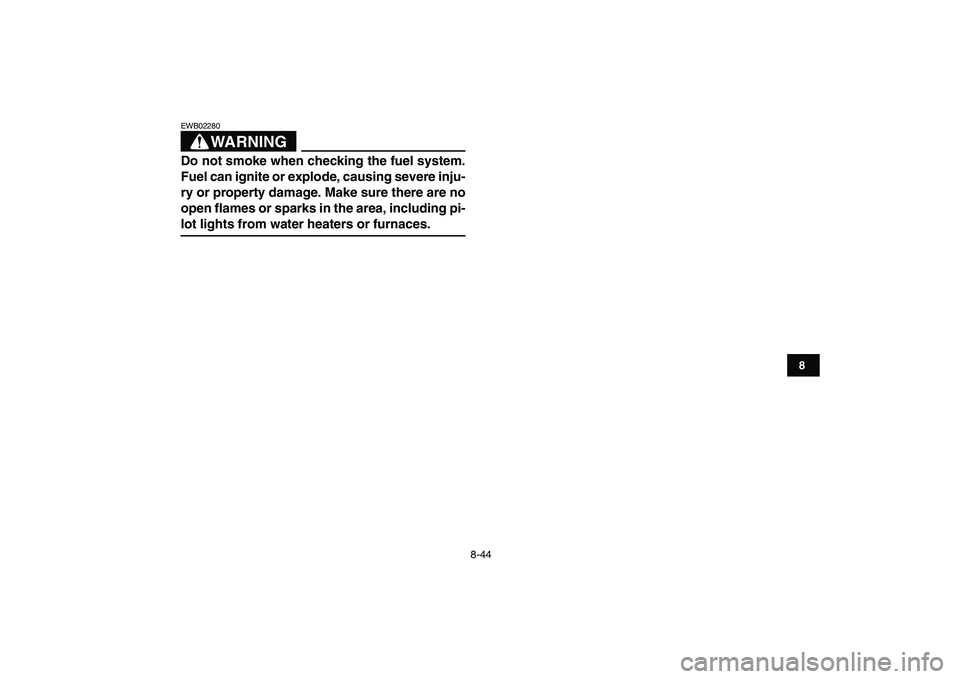
Do not smoke when checking the fuel system.
Fuel can ignite or explode, causing severe inju-
ry or property damage. Make sure there are no
open flames or sparks in the area, including pi-
lot lights from water heaters or furnaces.
Page 120 of 132
8-45
1
2
3
4
5
6
78
9
10
11
EBU25811
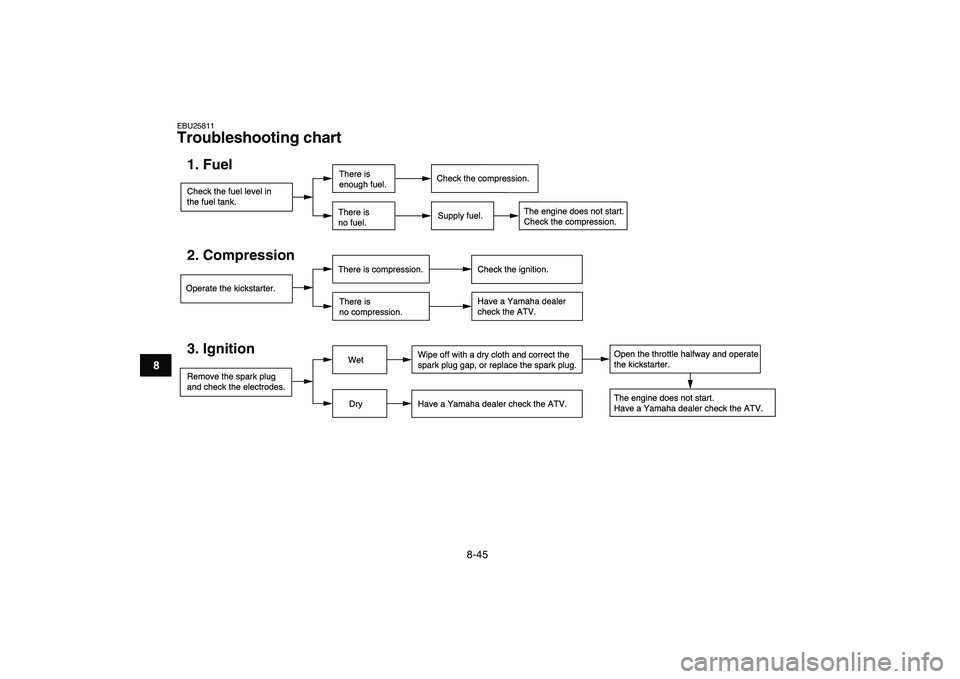
Troubleshooting chart
Check the fuel level in
the fuel tank.1. Fuel
There is
enough fuel.
There is
no fuel.
Supply fuel.
Operate the kickstarter.2. Compression
There is compression.
There is
no compression.Check the ignition.
Have a Yamaha dealer
check the ATV.
Remove the spark plug
and check the electrodes.3. Ignition
Wet
DryWipe off with a dry cloth and correct the
spark plug gap, or replace the spark plug.
Have a Yamaha dealer check the ATV.The engine does not start.
Have a Yamaha dealer check the ATV.
Open the throttle halfway and operate
the kickstarter.
Check the compression.
The engine does not start.
Check the compression.
Trending: inflation pressure, towing, transmission oil, maintenance, brake light, low beam, checking oil
