brake YAMAHA DT125R 2002 Owners Manual
[x] Cancel search | Manufacturer: YAMAHA, Model Year: 2002, Model line: DT125R, Model: YAMAHA DT125R 2002Pages: 96, PDF Size: 2.14 MB
Page 6 of 96
EAU00009
TABLE OF CONTENTS
GIVE SAFETY THE RIGHT OF WAY ............... 1-1
DESCRIPTION .................................................. 2-1
Left view ......................................................... 2-1
Right view ....................................................... 2-2
Controls and instruments ............................... 2-3
INSTRUMENT AND CONTROL FUNCTIONS .. 3-1
Main switch ..................................................... 3-1
Indicator and warning lights ............................ 3-1
Speedometer unit .......................................... 3-2
Tachometer .................................................... 3-2
Coolant temperature gauge ............................ 3-3
Handlebar switches ........................................ 3-3
Clutch lever .................................................... 3-4
Shift pedal ...................................................... 3-4
Brake lever ..................................................... 3-5
Brake pedal .................................................... 3-5
Fuel tank cap .................................................. 3-5
Fuel (except for Switzerland and Austria) ...... 3-6
Fuel (for Switzerland and Austria) ................. 3-6
Catalytic converter
(for Switzerland and Austria) ....................... 3-7
2-stroke engine oil .......................................... 3-8
Fuel cock ........................................................ 3-9
Starter (choke) lever ..................................... 3-10Kickstarter .................................................... 3-10
Steering lock ................................................. 3-10
Seat .............................................................. 3-11
Helmet holder ............................................... 3-12
Adjusting the shock absorber assembly ....... 3-12
Carrier .......................................................... 3-14
YEIS handling precautions .......................... 3-14
YPVS ............................................................ 3-14
Sidestand ..................................................... 3-15
Ignition circuit cut-off system ........................ 3-16
PRE-OPERATION CHECKS ............................. 4-1
Pre-operation check list .................................. 4-1
OPERATION AND IMPORTANT
RIDING POINTS ............................................... 5-1
Starting a cold engine .................................... 5-1
Starting a warm engine .................................. 5-2
Shifting ........................................................... 5-2
Recommended shift points
(for Switzerland only) .................................. 5-3
Tips for reducing fuel consumption ................ 5-3
Engine break-in .............................................. 5-4
Parking ........................................................... 5-5
123
45
3MB-9-E8 6/13/01 10:55 AM Page 5
Page 7 of 96

PERIODIC MAINTENANCE AND
MINOR REPAIR ................................................ 6-1
Owner’s tool kit ............................................... 6-1
Periodic maintenance and lubrication chart ... 6-2
Removing and installing cowlings .................. 6-5
Removing and installing panels ...................... 6-7
Checking the spark plug ................................. 6-9
Transmission oil ........................................... 6-10
Coolant ......................................................... 6-12
Changing the coolant ................................... 6-14
Cleaning the air filter element........................ 6-16
Adjusting the carburetor ............................... 6-17
Adjusting the engine idling speed ................ 6-17
Adjusting the throttle cable free play ............ 6-18
Tires ............................................................. 6-19
Spoke wheels ............................................... 6-21
Adjusting the clutch lever free play ............... 6-22
Adjusting the brake lever free play ............... 6-23
Adjusting the brake pedal position ............... 6-23
Adjusting the rear brake light switch ............. 6-24
Checking the front and rear brake pads ....... 6-24
Checking the brake fluid level ...................... 6-25
Changing the brake fluid .............................. 6-26
Drive chain slack .......................................... 6-27
Lubricating the drive chain ........................... 6-28
Checking and lubricating the cables ............. 6-29Checking and lubricating the
throttle grip and cable ................................ 6-29
Adjusting the Autolube pump ....................... 6-30
Checking and lubricating the brake and
shift pedals ................................................ 6-30
Checking and lubricating the brake and
clutch levers .............................................. 6-30
Checking and lubricating the sidestand ....... 6-31
Checking the front fork ................................. 6-31
Checking the steering ................................... 6-32
Checking the wheel bearings ....................... 6-32
Battery .......................................................... 6-33
Replacing the fuse ....................................... 6-35
Replacing the headlight bulb ........................ 6-36
Replacing a turn signal light bulb ................. 6-37
Replacing the tail/brake light bulb ................ 6-38
Supporting the motorcycle ............................ 6-39
Front wheel ................................................... 6-39
Rear wheel ................................................... 6-42
Troubleshooting ............................................ 6-43
Troubleshooting charts ................................. 6-44
MOTORCYCLE CARE AND STORAGE ........... 7-1
Care ................................................................ 7-1
Storage ........................................................... 7-4
TABLE OF CONTENTS6
7
3MB-9-E8 6/13/01 10:55 AM Page 6
Page 12 of 96
2-2
DESCRIPTION
2
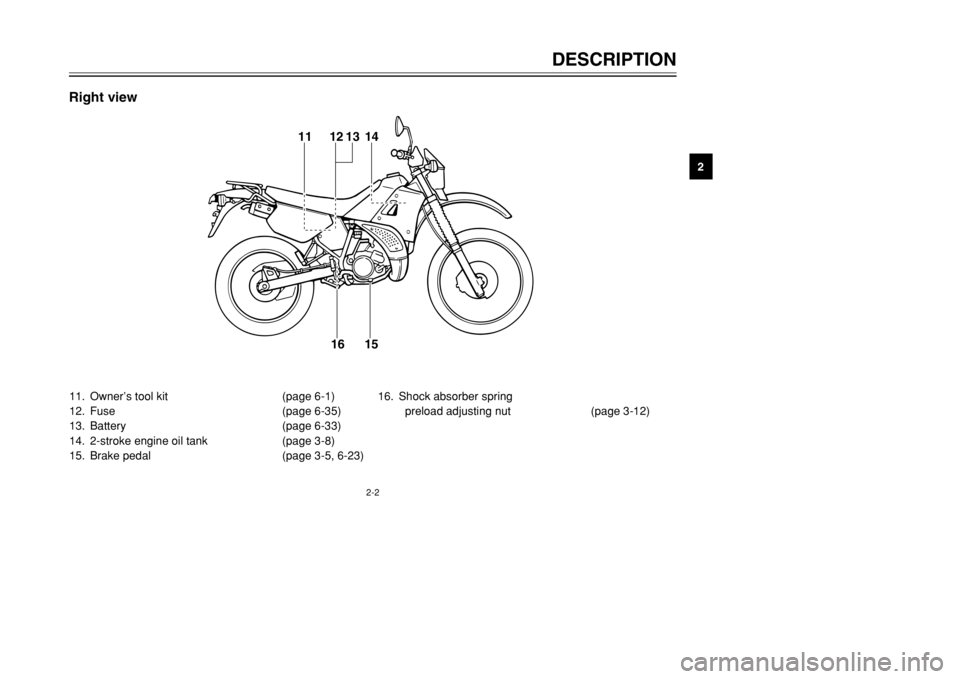
11. Owner’s tool kit (page 6-1)
12. Fuse (page 6-35)
13. Battery (page 6-33)
14. 2-stroke engine oil tank (page 3-8)
15. Brake pedal (page 3-5, 6-23)16. Shock absorber spring
preload adjusting nut (page 3-12)
11 12 14
15 1613
Right view
3MB-9-E8 6/13/01 10:55 AM Page 11
Page 13 of 96
2-3
DESCRIPTION
2
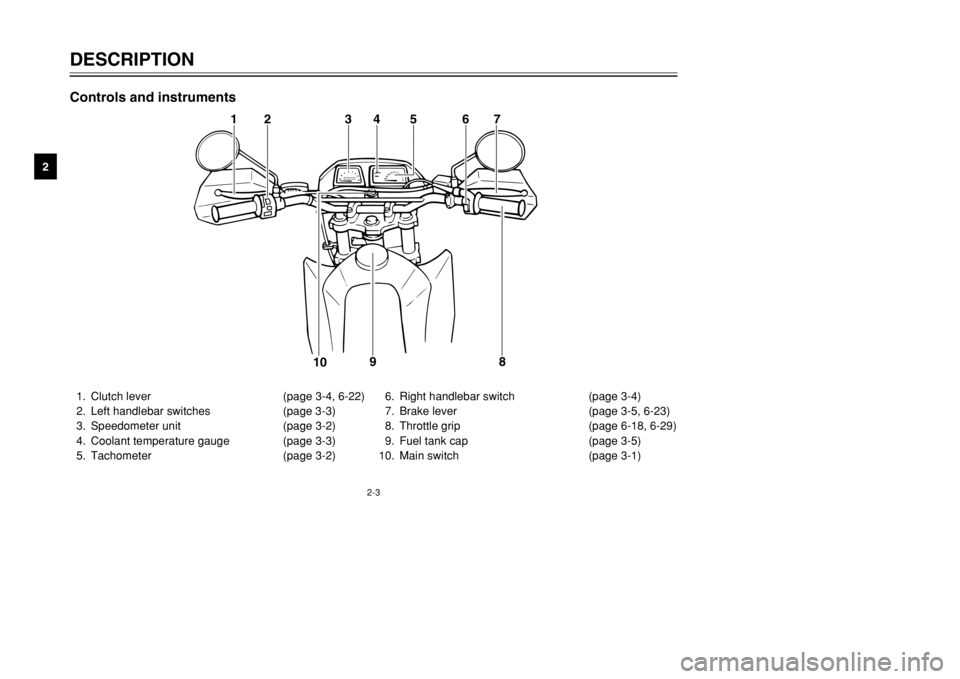
1. Clutch lever (page 3-4, 6-22)
2. Left handlebar switches (page 3-3)
3. Speedometer unit (page 3-2)
4. Coolant temperature gauge (page 3-3)
5. Tachometer (page 3-2)6. Right handlebar switch (page 3-4)
7. Brake lever (page 3-5, 6-23)
8. Throttle grip (page 6-18, 6-29)
9. Fuel tank cap (page 3-5)
10. Main switch (page 3-1)
12 34 5
67
8 9
10
Controls and instruments
3MB-9-E8 6/13/01 10:55 AM Page 12
Page 18 of 96
3-5
INSTRUMENT AND CONTROL FUNCTIONS
3
EAU00158
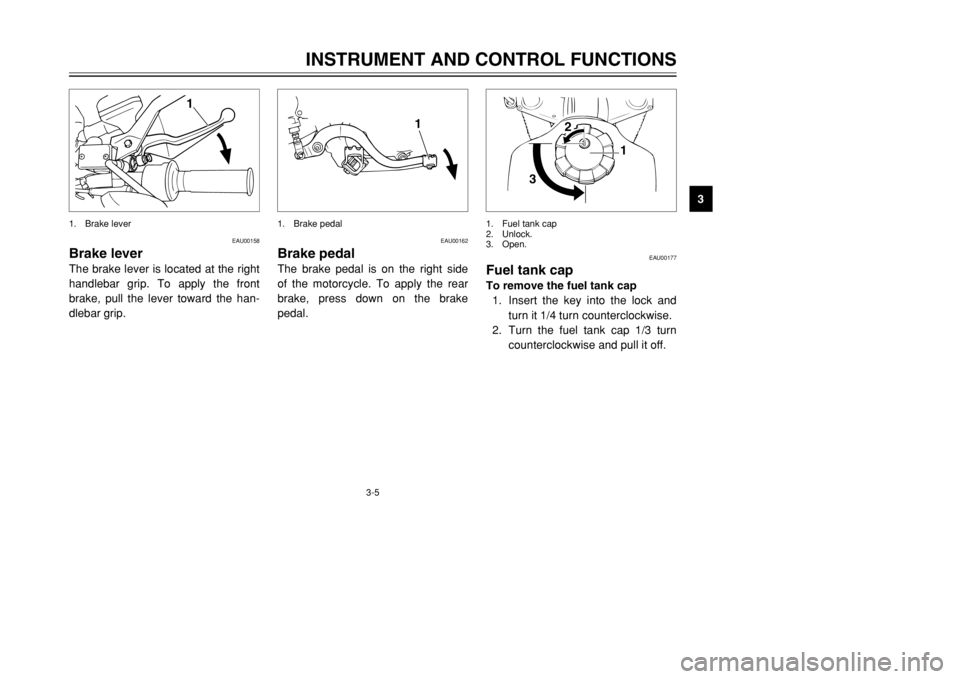
Brake leverThe brake lever is located at the right
handlebar grip. To apply the front
brake, pull the lever toward the han-
dlebar grip.
1
1. Brake lever
EAU00162
Brake pedalThe brake pedal is on the right side
of the motorcycle. To apply the rear
brake, press down on the brake
pedal.
1
1. Brake pedal
EAU00177
Fuel tank capTo remove the fuel tank cap
1. Insert the key into the lock and
turn it 1/4 turn counterclockwise.
2. Turn the fuel tank cap 1/3 turn
counterclockwise and pull it off.
31
2
1. Fuel tank cap
2. Unlock.
3. Open.
3MB-9-E8 6/13/01 10:55 AM Page 17
Page 31 of 96

4-1
EAU01114
PRE-OPERATION CHECKS
4The condition of a vehicle is the owner’s responsibility. Vital components can start to deteriorate quickly and unexpect-
edly, even if the vehicle remains unused (for example, as a result of exposure to the elements). Any damage, fluid leak-
age or loss of tire air pressure could have serious consequences. Therefore, it is very important, in addition to a thor-
ough visual inspection, to check the following points before each ride.
EAU03439
Pre-operation check list
ITEM CHECKS PAGE
Fuel•Check fuel level in fuel tank.
•Refuel if necessary.
•Check fuel line for leakage.3-5–3-7
2-stroke engine oil•Check oil level in oil tank.
•If necessary, add recommended oil to specified level.
•Check vehicle for oil leakage.3-8
Transmission oil•Check oil level in transmission case.
•If necessary, add recommended oil to specified level.6-10–6-12
Coolant•Check coolant level in reservoir.
•If necessary, add recommended coolant to specified level.
•Check cooling system for leakage.6-12–6-15
Front brake•Check operation.
•If soft or spongy, have Yamaha dealer bleed hydraulic system.
•Check lever free play.
•Adjust if necessary.
•Check fluid level in reservoir.
•If necessary, add recommended brake fluid to specified level.
•Check hydraulic system for leakage.3-5, 6-23, 6-24–6-26
Rear brake•Check operation.
•If soft or spongy, have Yamaha dealer bleed hydraulic system.
•Check fluid level in reservoir.
•If necessary, add recommended brake fluid to specified level.
•Check hydraulic system for leakage.3-5, 6-23–6-26
3MB-9-E8 6/13/01 10:55 AM Page 30
Page 32 of 96

4-2
PRE-OPERATION CHECKS
4
Clutch•Check operation.
•Lubricate cable if necessary.
•Check lever free play.
•Adjust if necessary.3-4, 6-22
Throttle grip•Make sure that operation is smooth.
•Check free play.
•If necessary, have Yamaha dealer make adjustment or lubricate.6-18, 6-29
Control cables•Make sure that operation is smooth.
•Lubricate if necessary.6-29
Drive chain•Check chain slack.
•Adjust if necessary.
•Check chain condition.
•Lubricate if necessary.6-7–6-28
Wheels and tires•Check for damage.
•Check tire condition and tread depth.
•Check air pressure.
•Correct if necessary.6-19–6-21
Brake and shift pedals•Make sure that operation is smooth.
•Lubricate pedal pivoting points if necessary.6-30
Brake and clutch levers•Make sure that operation is smooth.
•Lubricate lever pivoting points if necessary.6-30
Sidestand•Make sure that operation is smooth.
•Lubricate pivot if necessary.6-31
Chassis fasteners•Make sure that all nuts, bolts and screws are properly tightened.
•Tighten if necessary.— ITEM CHECKS PAGE
3MB-9-E8 6/13/01 10:55 AM Page 31
Page 40 of 96

6-2
PERIODIC MAINTENANCE AND MINOR REPAIR
6
NO. ITEM CHECK OR MAINTENANCE JOBODOMETER READING (× 1,000 km)
ANNUAL
CHECK
1 6 12 18 24
1
*Fuel line•Check fuel hoses for cracks or damage.√√√√ √
2 Spark plug•Replace.√√√√ √
3 Air filter element•Clean.√√
•Replace.√√
4*Battery•Check electrolyte level and specific gravity.
•Make sure that the breather hose is properly routed.√√√√ √
5 Clutch•Check operation.
•Adjust.√√√√√
6*Front brake•Check operation, fluid level and vehicle for fluid leakage.
(See NOTE on page 6-4.)√√√√√ √
•Replace brake pads.Whenever worn to the limit
7*Rear brake•Check operation, fluid level and vehicle for fluid leakage.
(See NOTE on page 6-4.)√√√√√ √
•Replace brake pads.Whenever worn to the limit
8*Brake hoses•Check for cracks or damage.√√√√ √
•Replace. (See NOTE on page 6-4.)Every 4 years
EAU03686
Periodic maintenance and lubrication chart
NOTE:
8The annual checks must be performed every year, except if a kilometer-based maintenance is performed instead.
8From 30,000 km, repeat the maintenance intervals starting from 6,000 km.
8Items marked with an asterisk should be performed by a Yamaha dealer as they require special tools, data and
technical skills.
3MB-9-E8 6/13/01 10:55 AM Page 39
Page 42 of 96

6-4
PERIODIC MAINTENANCE AND MINOR REPAIR
6
EAU03884
NOTE:
8The air filter needs more frequent service if you are riding in unusually wet or dusty areas.
8Hydraulic brake service
9Regularly check and, if necessary, correct the brake fluid level.
9Every two years replace the internal components of the brake master cylinders and calipers, and change the
brake fluid.
9Replace the brake hoses every four years and if cracked or damaged.21
*Carburetor•Check starter (choke) operation.
•Adjust engine idling speed.√√√√√ √
22*Autolube pump•Check operation.
•Bleed if necessary.√√√√
23 Transmission oil•Check oil level.√√√√√ √
•Change.√√
24*Cooling system•Check coolant level and vehicle for coolant leakage.√√√√ √
•Change.Every 3 years
25*Front and rear brake
switches•Check operation.√√√√√ √
26 Moving parts and cables•Lubricate.√√√√ √
27*Lights, signals and
switches•Check operation.
•Adjust headlight beam.√√√√√ √ NO. ITEM CHECK OR MAINTENANCE JOBODOMETER READING (× 1,000 km)
ANNUAL
CHECK
1 6 12 18 24
3MB-9-E8 6/13/01 10:55 AM Page 41
Page 58 of 96
6-20
PERIODIC MAINTENANCE AND MINOR REPAIR
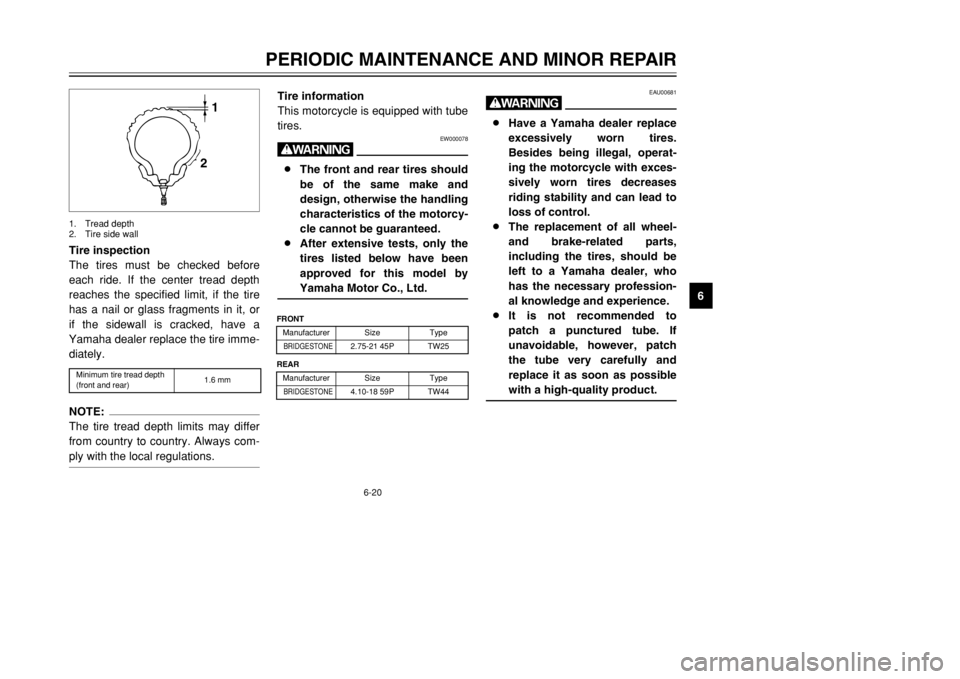
6 Tire inspection
The tires must be checked before
each ride. If the center tread depth
reaches the specified limit, if the tire
has a nail or glass fragments in it, or
if the sidewall is cracked, have a
Yamaha dealer replace the tire imme-
diately.
NOTE:
The tire tread depth limits may differ
from country to country. Always com-
ply with the local regulations.
1
2
1. Tread depth
2. Tire side wall
EAU00681
w8Have a Yamaha dealer replace
excessively worn tires.
Besides being illegal, operat-
ing the motorcycle with exces-
sively worn tires decreases
riding stability and can lead to
loss of control.
8The replacement of all wheel-
and brake-related parts,
including the tires, should be
left to a Yamaha dealer, who
has the necessary profession-
al knowledge and experience.
8It is not recommended to
patch a punctured tube. If
unavoidable, however, patch
the tube very carefully and
replace it as soon as possible
with a high-quality product.
Tire information
This motorcycle is equipped with tube
tires.
EW000078
w8The front and rear tires should
be of the same make and
design, otherwise the handling
characteristics of the motorcy-
cle cannot be guaranteed.
8After extensive tests, only the
tires listed below have been
approved for this model by
Yamaha Motor Co., Ltd.
Minimum tire tread depth
(front and rear)1.6 mm
FRONT
Manufacturer Size TypeBRIDGESTONE
2.75-21 45P TW25
REAR
Manufacturer Size Type
BRIDGESTONE
4.10-18 59P TW44
3MB-9-E8 6/13/01 10:55 AM Page 57