YAMAHA KODIAK 450 2018 Owner's Guide
Manufacturer: YAMAHA, Model Year: 2018, Model line: KODIAK 450, Model: YAMAHA KODIAK 450 2018Pages: 162, PDF Size: 4.86 MB
Page 31 of 162
4-1
4
EBU17739
INSTRUMENT AND CONTROL FUNCTIONS
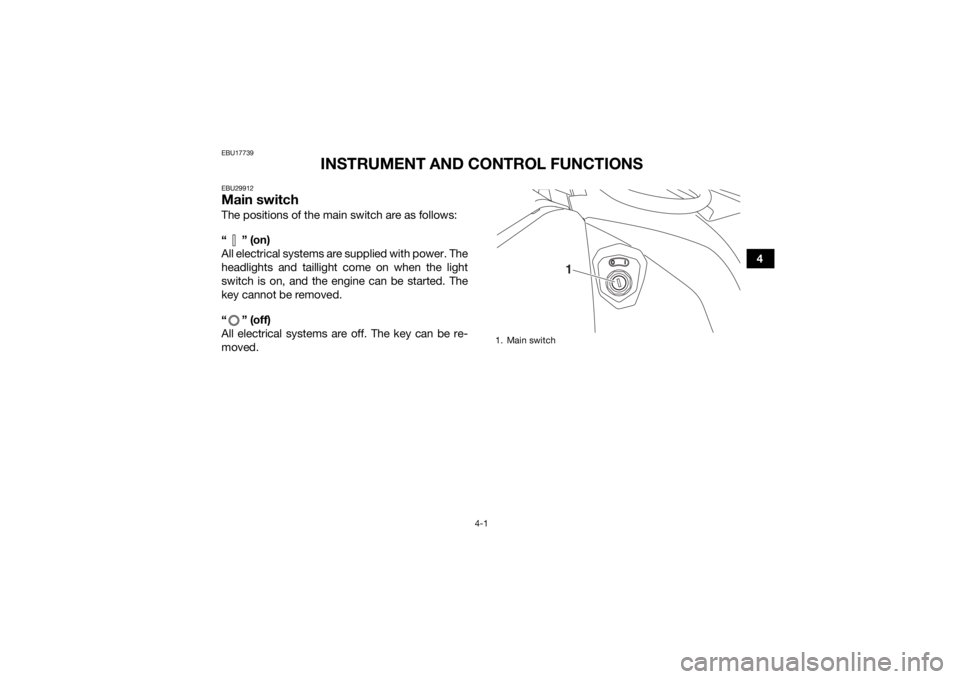
EBU29912Main switchThe positions of the main switch are as follows:
“” (on)
All electrical systems are supplied with power. The
headlights and taillight come on when the light
switch is on, and the engine can be started. The
key cannot be removed.
“ ” (off)
All electrical systems are off. The key can be re-
moved.
1. Main switch
1
UBB560E0.book Page 1 Tuesday, May 9, 2017 5:31 PM
Page 32 of 162
4-2
4
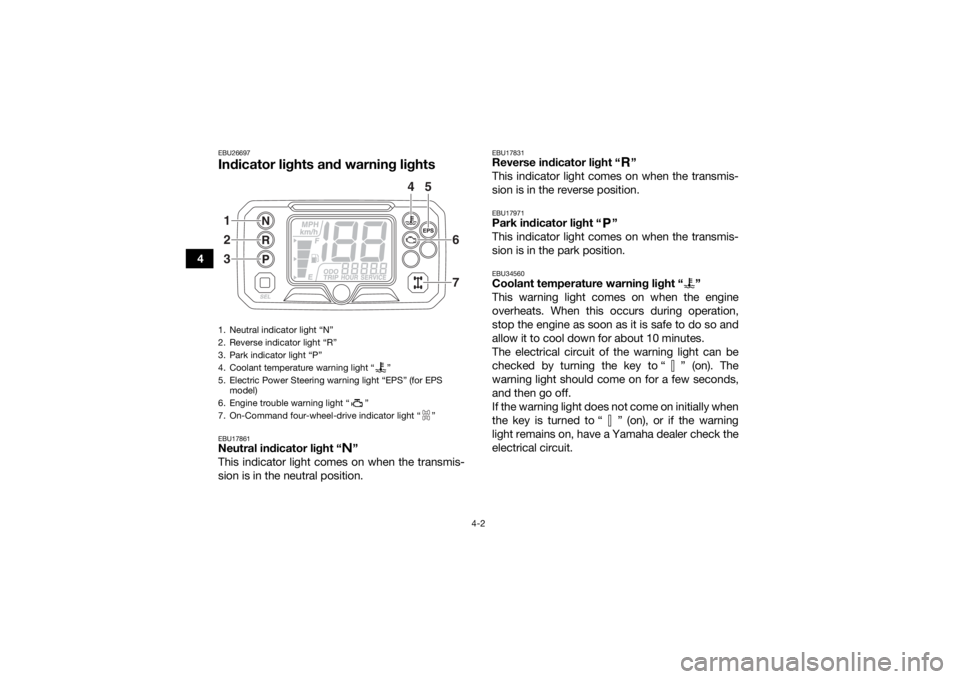
EBU26697Indicator lights and warning lightsEBU17861Neutral indicator light “ ”
This indicator light comes on when the transmis-
sion is in the neutral position.
EBU17831Reverse indicator light “ ”
This indicator light comes on when the transmis-
sion is in the reverse position.EBU17971Park indicator light “ ”
This indicator light comes on when the transmis-
sion is in the park position.EBU34560Coolant temperature warning light “ ”
This warning light comes on when the engine
overheats. When this occurs during operation,
stop the engine as soon as it is safe to do so and
allow it to cool down for about 10 minutes.
The electrical circuit of the warning light can be
checked by turning the key to “ ” (on). The
warning light should come on for a few seconds,
and then go off.
If the warning light does not come on initially when
the key is turned to “ ” (on), or if the warning
light remains on, have a Yamaha dealer check the
electrical circuit.
1. Neutral indicator light “N”
2. Reverse indicator light “R”
3. Park indicator light “P”
4. Coolant temperature warning light “ ”
5. Electric Power Steering warning light “EPS” (for EPS model)
6. Engine trouble warning light “ ”
7. On-Command four-wheel-drive indicator light “ ”1
2
3 4
6
7
5UBB560E0.book Page 2 Friday, March 10, 2017 10:20 AM
Page 33 of 162
4-3
4
NOTICEECB02400The engine may overheat if the ATV is over-
loaded. In this case, reduce the load to spec-
ification.
The engine may also overheat if mud or dirt
has accumulated on the radiator (i.e., after
riding in wet terrain). In this case, have a
Yamaha dealer clean the radiator.
Start the engine after making sure that the
warning light is out. Continuous use while
the warning light is on may cause damage to
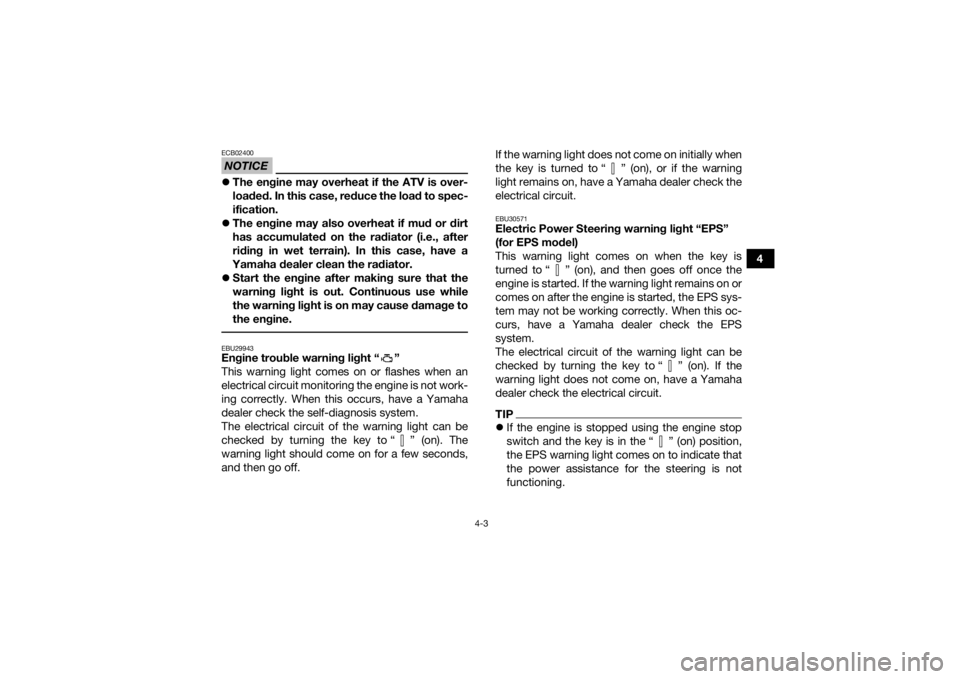
the engine. EBU29943Engine trouble warning light “ ”
This warning light comes on or flashes when an
electrical circuit monitoring the engine is not work-
ing correctly. When this occurs, have a Yamaha
dealer check the self-diagnosis system.
The electrical circuit of the warning light can be
checked by turning the key to “ ” (on). The
warning light should come on for a few seconds,
and then go off. If the warning light does not come on initially when
the key is turned to “ ” (on), or if the warning
light remains on, have a Yamaha dealer check the
electrical circuit.
EBU30571Electric Power Steering warning light “EPS”
(for EPS model)
This warning light comes on when the key is
turned to “ ” (on), and then goes off once the
engine is started. If the warning light remains on or
comes on after the engine is started, the EPS sys-
tem may not be working correctly. When this oc-
curs, have a Yamaha dealer check the EPS
system.
The electrical circuit of the warning light can be
checked by turning the key to “ ” (on). If the
warning light does not come on, have a Yamaha
dealer check the electrical circuit.TIP
If the engine is stopped using the engine stop
switch and the key is in the “ ” (on) position,
the EPS warning light comes on to indicate that
the power assistance for the steering is not
functioning.
UBB560E0.book Page 3 Friday, March 10, 2017 10:20 AM
Page 34 of 162
4-4
4
If the steering load is too heavy (i.e., excessive
steering use when the ATV is traveling at a slow
speed), the power assist is reduced to protect
the EPS motor from overheating.
EBU17954On-Command four-wheel-drive indicator
light “ ”
This indicator light comes on when the On-Com-
mand four-wheel-drive switch is set to the “4WD”
position.TIPDue to the synchronizing mechanism in the differ-
ential gear case, the light may not come on until
the ATV starts moving.
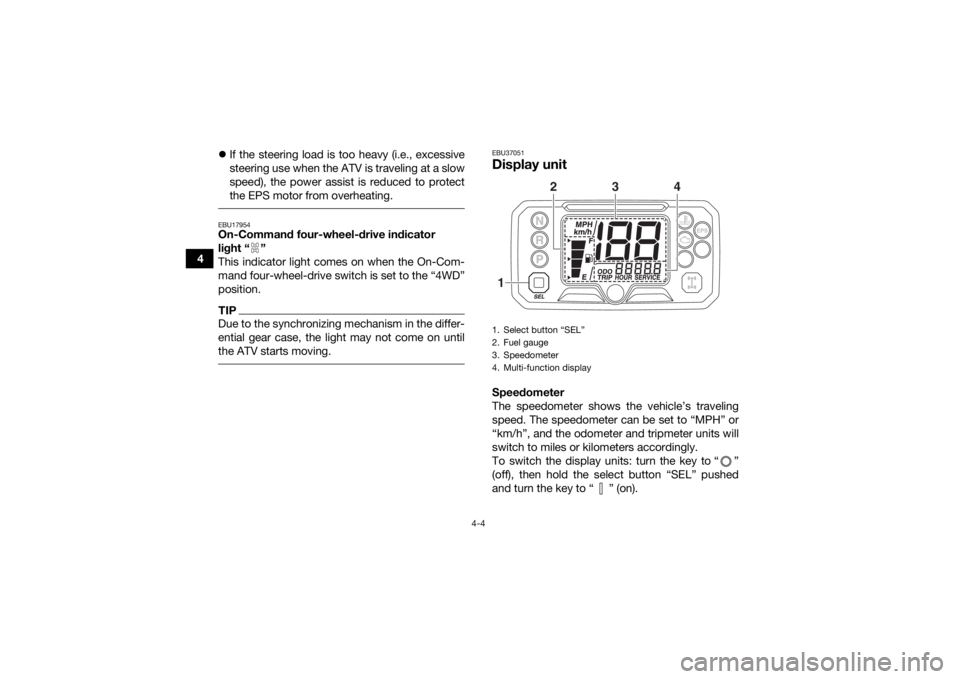
EBU37051Display unit Speedometer
The speedometer shows the vehicle’s traveling
speed. The speedometer can be set to “MPH” or
“km/h”, and the odometer and tripmeter units will
switch to miles or kilometers accordingly.
To switch the display units: turn the key to “ ”
(off), then hold the select button “SEL” pushed
and turn the key to “ ” (on).1. Select button “SEL”
2. Fuel gauge
3. Speedometer
4. Multi-function display1 2
4
3
UBB560E0.book Page 4 Friday, March 10, 2017 10:20 AM
Page 35 of 162
4-5
4
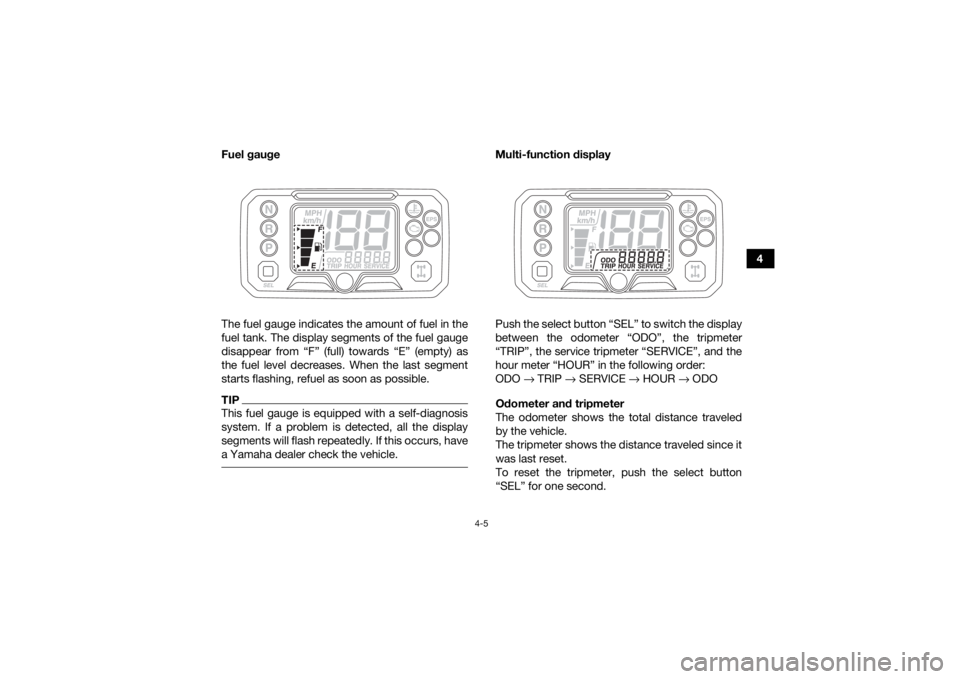
Fuel gauge
The fuel gauge indicates the amount of fuel in the
fuel tank. The display segments of the fuel gauge
disappear from “F” (full) towards “E” (empty) as
the fuel level decreases. When the last segment
starts flashing, refuel as soon as possible.
TIPThis fuel gauge is equipped with a self-diagnosis
system. If a problem is detected, all the display
segments will flash repeatedly. If this occurs, have
a Yamaha dealer check the vehicle.
Multi-function display
Push the select button “SEL” to switch the display
between the odometer “ODO”, the tripmeter
“TRIP”, the service tripmeter “SERVICE”, and the
hour meter “HOUR” in the following order:
ODO
→ TRIP → SERVICE → HOUR → ODO
Odometer and tripmeter
The odometer shows the total distance traveled
by the vehicle.
The tripmeter shows the distance traveled since it
was last reset.
To reset the tripmeter, push the select button
“SEL” for one second.
UBB560E0.book Page 5 Friday, March 10, 2017 10:20 AM
Page 36 of 162
4-6
4
TIPThe odometer will lock at 99999.
The tripmeter will reset and continue counting
after 9999.9 is reached. Service tripmeter
The service tripmeter shows the distance traveled
since it was reset at the last maintenance.
To reset the service tripmeter, push the select but-
ton “SEL” for one second.TIPThe service tripmeter will reset and continue
counting after 9999.9 is reached. Hour meter
The hour meter shows the total time the engine
has been running.EBU30761Self-diagnosis deviceThis model is equipped with a self-diagnosis de-
vice for various electrical circuits. If a problem is detected in any of those circuits,
the engine trouble warning light will come on or
flash. If this occurs, have a Yamaha dealer check
the vehicle.
NOTICEECB01181To prevent engine damage, be sure to consult
a Yamaha dealer as soon as possible if this oc-
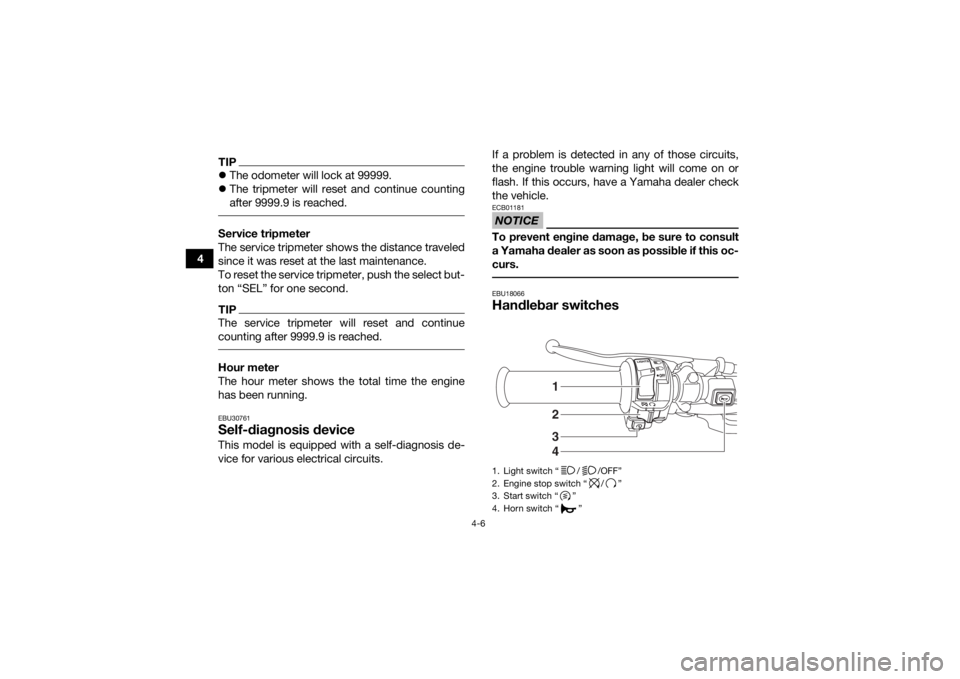
curs. EBU18066Handlebar switches1. Light switch “ / /OFF”
2. Engine stop switch “ / ”
3. Start switch “ ”
4. Horn switch “ ”
3421
UBB560E0.book Page 6 Friday, March 10, 2017 10:20 AM
Page 37 of 162
4-7
4
EBU18081Engine stop switch “ / ”
Set this switch to “ ” before starting the engine.
The engine stop switch controls the ignition and
stops the engine when it is running. Use this
switch to stop the engine in an emergency situa-
tion. The engine will not start or run when this
switch is set to “ ”.EBU18102Start switch “ ”
Push this switch to crank the engine with the start-
er. See the starting instructions on page 6-1 prior
to starting the engine.EBU34123Light switch “ / /OFF”
Set this switch to “ ” to turn on the left and right
headlights (low beams) and the taillight. Set the
switch to “ ” to turn on the left and right head-
lights (high beams), the handlebar-mounted light
(YFM45KPXJ / YFM45KPAJ / YFM45KPHJ), and
the taillight. Set the switch to “OFF” to turn off all
the lights.
NOTICEECB00046Do not use the headlights with the engine
turned off for an extended period of time. The
battery may discharge to the point that the
starter will not have enough power to crank the
engine. If this should happen, remove the bat-
tery and recharge it. (See page 8-51.) EBU18171Horn switch “ ”
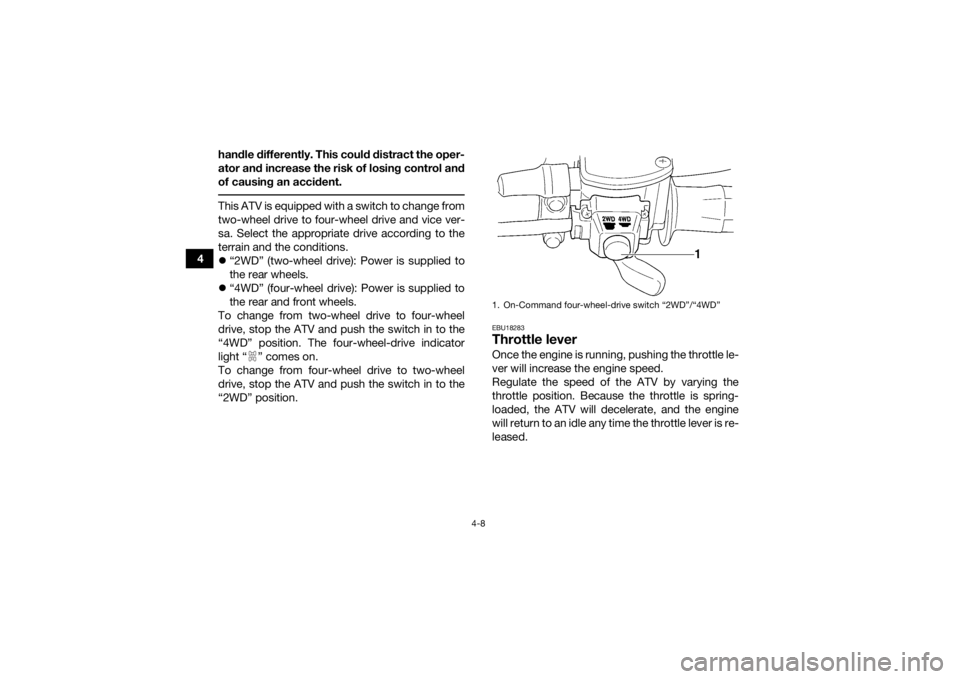
Press the switch to sound the horn.EBU28433On-Command four-wheel-drive switch
“2WD”/“4WD”
WARNING
EWB00164Always stop the ATV before changing from
two-wheel drive to four-wheel drive and vice
versa. The ATV handles differently in two-
wheel drive than in four-wheel drive in some
circumstances. Changing from two-wheel
drive to four-wheel drive or vice versa while
moving may cause the ATV to unexpectedly
UBB560E0.book Page 7 Friday, March 10, 2017 10:20 AM
Page 38 of 162
4-8
4handle differently. This could distract the oper-
ator and increase the risk of losing control and
of causing an accident.
This ATV is equipped with a switch to change from
two-wheel drive to four-wheel drive and vice ver-
sa. Select the appropriate drive according to the
terrain and the conditions.
“2WD” (two-wheel drive): Power is supplied to
the rear wheels.
“4WD” (four-wheel drive): Power is supplied to
the rear and front wheels.
To change from two-wheel drive to four-wheel
drive, stop the ATV and push the switch in to the
“4WD” position. The four-wheel-drive indicator
light “ ” comes on.
To change from four-wheel drive to two-wheel
drive, stop the ATV and push the switch in to the
“2WD” position.
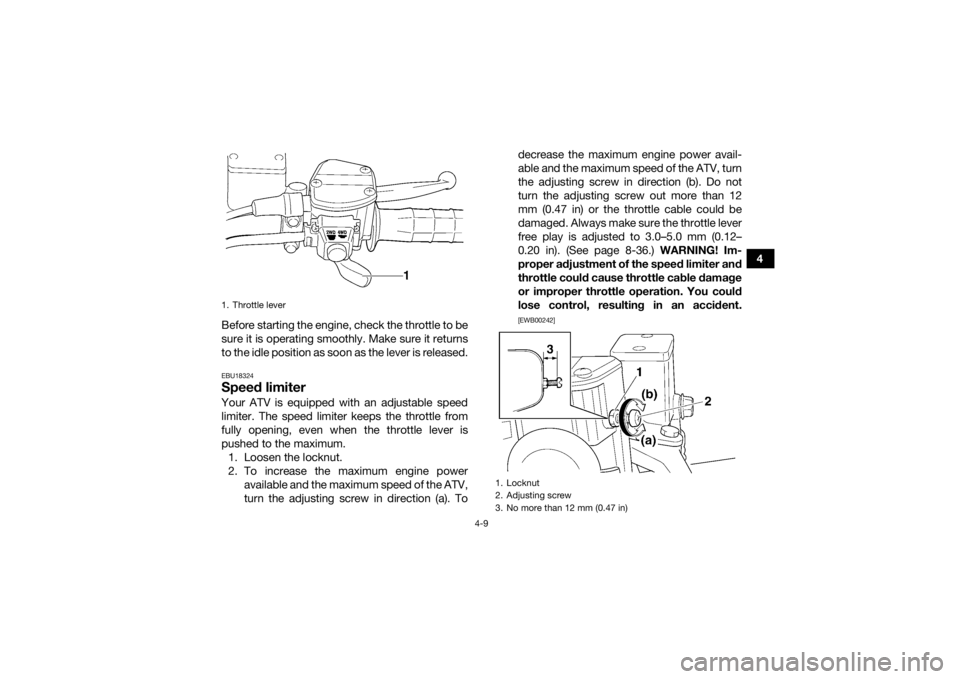
EBU18283Throttle leverOnce the engine is running, pushing the throttle le-
ver will increase the engine speed.
Regulate the speed of the ATV by varying the
throttle position. Because the throttle is spring-
loaded, the ATV will decelerate, and the engine
will return to an idle any time the throttle lever is re-
leased.1. On-Command four-wheel-drive switch “2WD”/“4WD”
UBB560E0.book Page 8 Friday, March 10, 2017 10:20 AM
Page 39 of 162
4-9
4
Before starting the engine, check the throttle to be
sure it is operating smoothly. Make sure it returns
to the idle position as soon as the lever is released.
EBU18324Speed limiterYour ATV is equipped with an adjustable speed
limiter. The speed limiter keeps the throttle from
fully opening, even when the throttle lever is
pushed to the maximum. 1. Loosen the locknut.
2. To increase the maximum engine power available and the maximum speed of the ATV,
turn the adjusting screw in direction (a). To decrease the maximum engine power avail-
able and the maximum speed of the ATV, turn
the adjusting screw in direction (b). Do not
turn the adjusting screw out more than 12
mm (0.47 in) or the throttle cable could be
damaged. Always make sure the throttle lever
free play is adjusted to 3.0–5.0 mm (0.12–
0.20 in). (See page 8-36.)
WARNING! Im-
proper adjustment of the speed limiter and
throttle could cause throttle cable damage
or improper throttle operation. You could
lose control, resulting in an accident.
[EWB00242]
1. Throttle lever
1. Locknut
2. Adjusting screw
3. No more than 12 mm (0.47 in)
UBB560E0.book Page 9 Friday, March 10, 2017 10:20 AM
Page 40 of 162
4-10
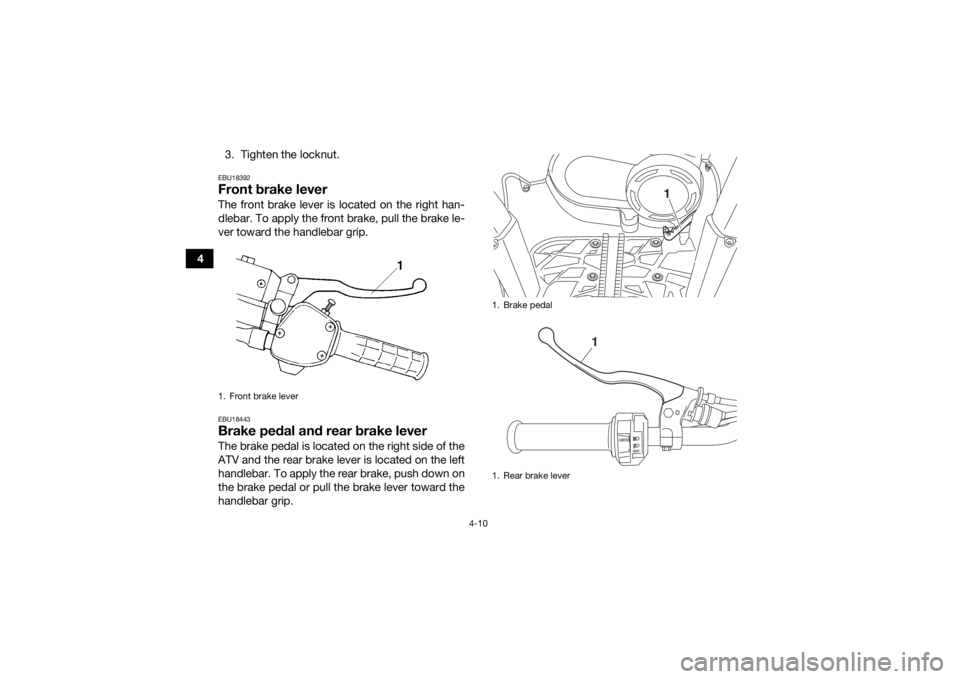
43. Tighten the locknut.
EBU18392Front brake leverThe front brake lever is located on the right han-
dlebar. To apply the front brake, pull the brake le-
ver toward the handlebar grip.EBU18443Brake pedal and rear brake leverThe brake pedal is located on the right side of the
ATV and the rear brake lever is located on the left
handlebar. To apply the rear brake, push down on
the brake pedal or pull the brake lever toward the
handlebar grip.1. Front brake lever
1. Brake pedal
1. Rear brake lever
1
1
UBB560E0.book Page 10 Friday, March 10, 2017 10:20 AM