warning YAMAHA NMAX 155 2021 Owners Manual
[x] Cancel search | Manufacturer: YAMAHA, Model Year: 2021, Model line: NMAX 155, Model: YAMAHA NMAX 155 2021Pages: 114, PDF Size: 10.93 MB
Page 5 of 114

Introduction
EAU10103
Welcome to the Yamaha world of motorcycling!
As the owner of the GPD155-A, you are benefiting from Yamaha’s vast experience and newest technology regarding the
design and manufacture of high-quality products, which have earned Yamaha a reputation for dependability.
Please take the time to read this manual thoroughly, so as to enjoy all advantages of your GPD155-A. The Owner’s Manual
does not only instruct you in how to operate, inspect and maintain your motorcycle, but also in how to safeguard yourself
and others from trouble and injury.
In addition, the many tips given in this manual will help keep your motorcycle in the best possible condition. If you have any
further questions, do not hesitate to contact your Yamaha dealer.
The Yamaha team wishes you many safe and pleasant rides. So, remember to put safety first!
Yamaha continually seeks advancements in product design and quality. Therefore, while this manual contains the most cur- rent product information available at the time of printing, there may be minor discrepancies between your motorcycle and
this manual. If there is any question concerning this manual, please consult a Yamaha dealer.
WARNING
EWA10032
Please rea d this manual carefully an d completely before operatin g this motorcycle.
UBBDE0E0.book Page 1 Wednesday, June 2, 2021 2:57 PM
Page 6 of 114

Important manual information
EAU10134
Particularly important information is distinguished in this manual by the following notations:
*Product and specifications are subject to change without notice.This is the safety alert sym
bol. It is use d to alert you to potential personal injury
hazar ds. Ob ey all safety messa ges that follow this sym bol to avoi d possi ble injury
or death.
A WARNING in dicates a hazar dous situation which, if not avoi ded , coul d result in
d eath or serious injury.
A NOTICE in dicates special precautions that must be taken to avoi d d ama ge to the
vehicle or other property.
A TIP provides key information to make procedures easier or clearer.
WARNING
NOTICETIP
UBBDE0E0.book Page 1 Wednesday, June 2, 2021 2:57 PM
Page 8 of 114
Table of contentsSafety information ............................ 1-1
Further safe-riding points ............... 1-5
Description ....................................... 2-1
Left view ......................................... 2-1
Right view ....................................... 2-2
Controls and instruments ............... 2-3
Smart key system ........................... 3-1
Smart key system ........................... 3-1
Operating range of the smart key system .................................. 3-2
Handling of the smart key and mechanical keys ......................... 3-3
Smart key ....................................... 3-4
Replacing the smart key battery..... 3-6
Main switch .................................... 3-7
Stop an d Start System ..................... 4-1
Stop and Start System ................... 4-1
Stop and Start System operation ... 4-1
Special features .............................. 5-1
CCU (Communication Control Unit) ................................ 5-1
Instrument an d control functions ... 6-1
Indicator lights and warning lights............................................ 6-1
Multi-function meter unit ................ 6-3
Handlebar switches ...................... 6-10 Front brake lever ........................... 6-11
Rear brake lever ............................ 6-11
ABS ............................................... 6-12
Traction control system ................ 6-13
Fuel tank cap ................................ 6-14
Fuel ............................................... 6-15
Fuel tank overflow hose ................ 6-17
Catalytic converter ........................ 6-17
Seat ............................................... 6-17
Helmet holders .............................. 6-18
Storage compartments ................. 6-19
Adjusting the shock absorber
assemblies ................................. 6-20
Power outlet ................................. 6-21
Sidestand ...................................... 6-22
Ignition circuit cut-off system ....... 6-22
For your safety – pre-operation
checks ............................................... 7-1
Operation an d important ri din g
points ................................................. 8-1
Engine break-in ............................... 8-1
Starting the engine .......................... 8-2
Starting off ...................................... 8-2
Acceleration and deceleration ........ 8-3
Braking ............................................ 8-3
Tips for reducing fuel consumption ................................ 8-3
Parking ........................................... 8-4 Perio
dic maintenance an d
a d justment ........................................ 9-1
Tool kit ............................................ 9-1
Periodic maintenance chart for the emission control system ....... 9-2
General maintenance and lubrication chart .......................... 9-3
Removing and installing panels ...... 9-7
Checking the spark plug................. 9-9
Canister ........................................ 9-11
Engine oil and oil strainer ............. 9-11
Why Yamalube.............................. 9-13
Final transmission oil .................... 9-13
Coolant ......................................... 9-15
Air filter and V-belt case
air filter elements ....................... 9-16
Checking the throttle grip
free play..................................... 9-19
Valve clearance............................. 9-19
Tires .............................................. 9-19
Cast wheels .................................. 9-21
Checking the front and rear brake lever free play .................. 9-21
Checking the front and rear brake pads ................................ 9-22
Checking the brake fluid level ...... 9-23
Changing the brake fluid .............. 9-24
Checking the V-belt ...................... 9-24
Checking and lubricating the
cables ........................................ 9-25UBBDE0E0.book Page 1 Wednesday, June 2, 2021 2:57 PM
Page 10 of 114
1-1
1
Safety information
EAU1026B
Be a Responsible Owner
As the vehicle’s owner, you are re-
sponsible for the safe and proper oper-
ation of your scooter.
Scooters are single-track vehicles.
Their safe use and operation are de-
pendent upon the use of proper riding
techniques as well as the expertise of
the operator. Every operator should
know the following requirements be-
fore riding this scooter.
He or she should: Obtain thorough instructions from
a competent source on all aspects
of scooter operation.
Observe the warnings and mainte-
nance requirements in this Own-
er’s Manual.
Obtain qualified training in safe
and proper riding techniques.
Obtain professional technical ser-
vice as indicated in this Owner’s
Manual and/or when made neces-
sary by mechanical conditions.
Never operate a scooter without
proper training or instruction. Take
a training course. Beginners
should receive training from a cer-
tified instructor. Contact an autho-
rized scooter dealer to find out
about the training courses nearest
you.
Safe Ri din g
Perform the pre-operation checks
each time you use the vehicle to make
sure it is in safe operating condition.
Failure to inspect or maintain the vehi-
cle properly increases the possibility of
an accident or equipment damage.
See page 7-1 for a list of pre-operation
checks. This scooter is designed to carry
the operator and a passenger.
The failure of motorists to detect
and recognize scooters in traffic is
the predominating cause of auto-
mobile/scooter accidents. Many
accidents have been caused by
an automobile driver who did not
see the scooter. Making yourself conspicuous appears to be very
effective in reducing the chance of
this type of accident.
Therefore:
• Wear a brightly colored jacket.
• Use extra caution when you are approaching and passing
through intersections, since in-
tersections are the most likely
places for scooter accidents to
occur.
• Ride where other motorists can see you. Avoid riding in another
motorist’s blind spot.
• Never maintain a scooter with- out proper knowledge. Contact
an authorized scooter dealer to
inform you on basic scooter
maintenance. Certain mainte-
nance can only be carried out
by certified staff.UBBDE0E0.book Page 1 Wednesday, June 2, 2021 2:57 PM
Page 19 of 114

Smart key system
3-1
3
EAU76444
Smart key systemThe smart key system enables you to
operate the vehicle without using a
mechanical key. In addition, there is an
answer-back function to help you lo-
cate the vehicle in a parking lot. (See
page 3-5.)
WARNING
EWA14704
Keep implante d pacemakers or
car diac defi brillators, as well as
other electric med ical devices
away from the vehicle mounte d
antenna (see illustration).
Radio waves transmitte d b y the
antenna may affect the opera-
tion of such devices when close
b y.
If you have an electric me dical
d evice, consult a d octor or the
d evice manufacturer before us-
in g this vehicle.
NOTICE
ECA24080
The smart key system uses weak ra-
dio waves. The smart key system
may not work in the followin g situa-
tions. The smart key is placed in a lo-
cation exposed to strong ra dio
waves or other electromag netic
noise
There are facilities near by that
are emittin g stron g ra dio waves
(TV or ra dio towers, power
plants, broa dcastin g stations,
airports, etc.)
1. Smart key
2. Smart key button
1
2
1. Main switch
2. Main switch knob
2
1
1. Vehicle mounted antenna
1
UBBDE0E0.book Page 1 Wednesday, June 2, 2021 2:57 PM
Page 21 of 114
Smart key system
3-3
3
EAUN2460
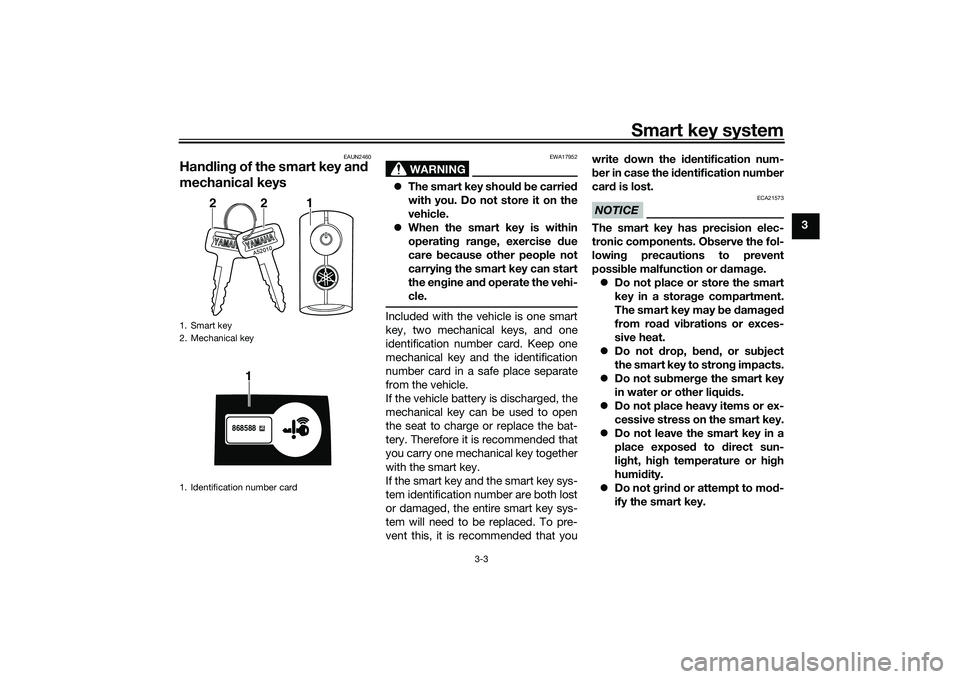
Handlin g of the smart key an d
mechanical keys
WARNING
EWA17952
The smart key shoul d b e carried
with you. Do not store it on the
vehicle.
When the smart key is within
operatin g ran ge, exercise due
care because other people not
carryin g the smart key can start
the en gine an d operate the vehi-
cle.Included with the vehicle is one smart
key, two mechanical keys, and one
identification number card. Keep one
mechanical key and the identification
number card in a safe place separate
from the vehicle.
If the vehicle battery is discharged, the
mechanical key can be used to open
the seat to charge or replace the bat-
tery. Therefore it is recommended that
you carry one mechanical key together
with the smart key.
If the smart key and the smart key sys-
tem identification number are both lost
or damaged, the entire smart key sys-
tem will need to be replaced. To pre-
vent this, it is recommended that you write
down the i dentification num-
b er in case the i dentification num ber
car d is lost.
NOTICE
ECA21573
The smart key has precision elec-
tronic components. O bserve the fol-
lowin g precautions to prevent
possi ble malfunction or damag e.
Do not place or store the smart
key in a stora ge compartment.
The smart key may be damag ed
from roa d vi brations or exces-
sive heat.
Do not drop, ben d, or su bject
the smart key to stron g impacts.
Do not su bmer ge the smart key
in water or other liqui ds.
Do not place heavy items or ex-
cessive stress on the smart key.
Do not leave the smart key in a
place exposed to direct sun-
lig ht, hi gh temperature or hi gh
humi dity.
Do not g rind or attempt to mo d-
ify the smart key.
1. Smart key
2. Mechanical key
1. Identification number card
A52010
221
868588
1
UBBDE0E0.book Page 3 Wednesday, June 2, 2021 2:57 PM
Page 22 of 114
Smart key system
3-4
3
Keep the smart key away from
stron g ma gnetic fiel ds an d
ma gnetic o bjects such as key
hol ders, TVs, an d computers.
Keep the smart key away from
electric me dical equipment.
Do not allow oils, polishin g
a g ents, fuel, or any stron g
chemicals to come in contact
with the smart key. The smart
key body may become discol-
ore d or cracked .
TIPThe smart key battery life is ap-
proximately two years, but this
may vary according to operating
conditions.
Replace the smart key battery
when the smart key system indi-
cator light flashes for 20 seconds
when the vehicle is turned on, or
when the smart key indicator light
does not come on when the smart
key button is pushed. (See page
3-6.) After changing the smart key
battery, if the smart key system still does not operate, check the
vehicle battery and then have a
Yamaha dealer check the vehicle.
If the smart key continually re-
ceives radio waves, the smart key
battery will discharge quickly. (For
example, when placed in the vicin-
ity of electrical products such as
televisions, radios, or computers.)
You can register up to six smart
keys for the same vehicle. See a
Yamaha dealer regarding spare
smart keys.
If a smart key is lost, contact a
Yamaha dealer immediately to
prevent the vehicle from being
stolen, etc.
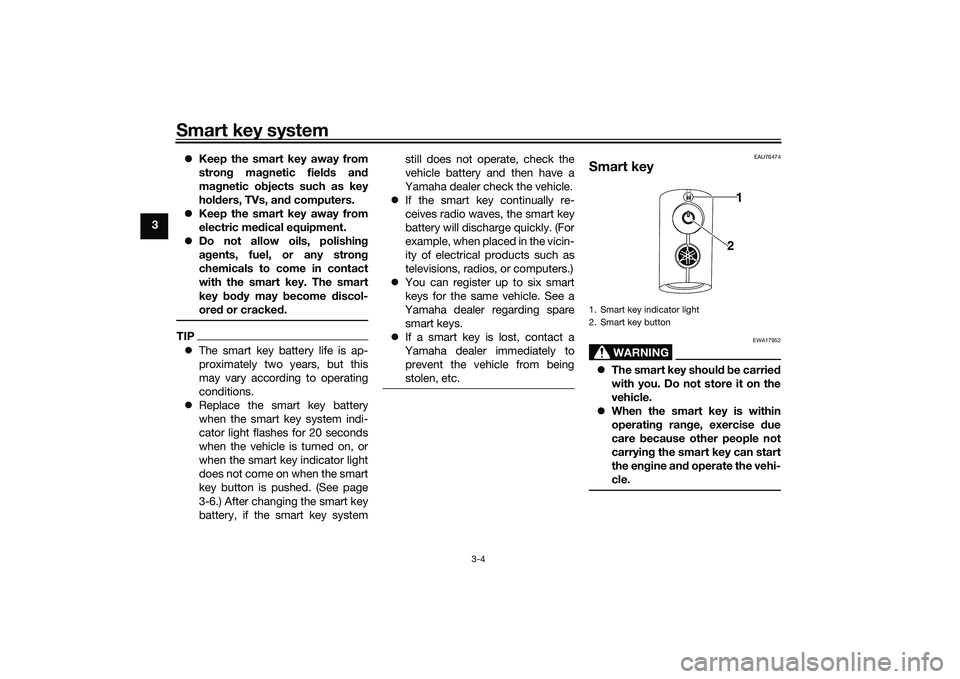
EAU76474
Smart key
WARNING
EWA17952
The smart key shoul d b e carrie d
with you. Do not store it on the
vehicle.
When the smart key is within
operatin g ran ge, exercise due
care because other people not
carryin g the smart key can start
the en gine an d operate the vehi-
cle.1. Smart key indicator light
2. Smart key button
1
2
UBBDE0E0.book Page 4 Wednesday, June 2, 2021 2:57 PM
Page 24 of 114
Smart key system
3-6
3
EAUN2712
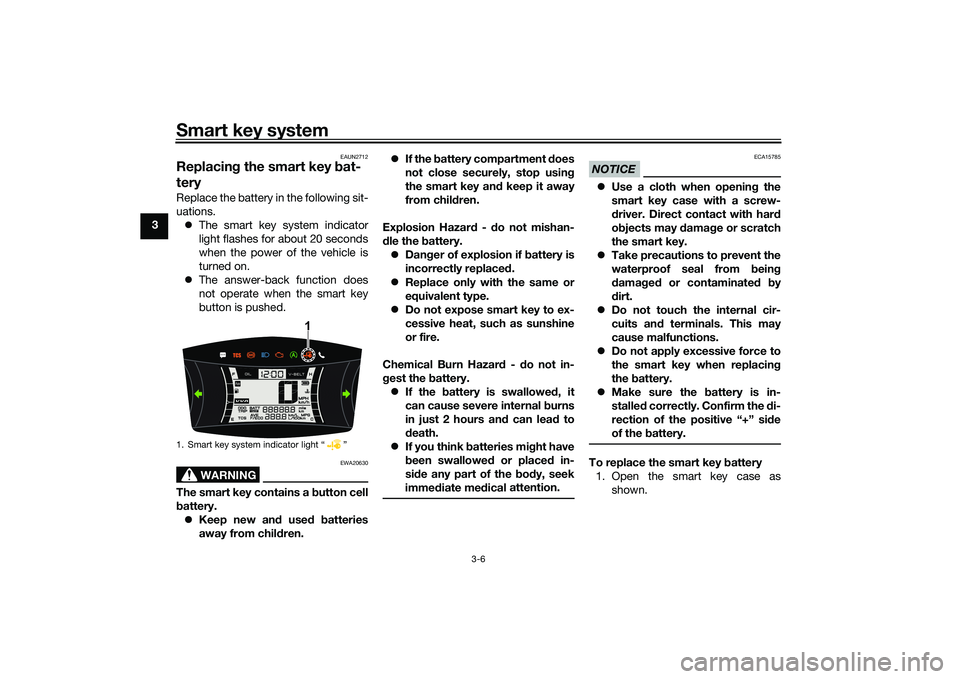
Replacing the smart key bat-
teryReplace the battery in the following sit-
uations.
The smart key system indicator
light flashes for about 20 seconds
when the power of the vehicle is
turned on.
The answer-back function does
not operate when the smart key
button is pushed.
WARNING
EWA20630
The smart key contains a button cell
b attery.
Keep new an d use d b atteries
away from chil dren.
If the b attery compartment d oes
not close securely, stop usin g
the smart key an d keep it away
from chil dren.
Explosion Hazar d - d o not mishan-
d le the battery.
Dan ger of explosion if battery is
incorrectly replace d.
Replace only with the same or
equivalent type.
Do not expose smart key to ex-
cessive heat, such as sunshine
or fire.
Chemical Burn Hazar d - do not in-
g est the battery.
If the battery is swallowed , it
can cause severe internal burns
in just 2 hours an d can lea d to
d eath.
If you think batteries mi ght have
b een swallowed or placed in-
si de any part of the body, seek
imme diate me
dical attention.
NOTICE
ECA15785
Use a cloth when openin g the
smart key case with a screw-
d river. Direct contact with har d
o bjects may d amage or scratch
the smart key.
Take precautions to prevent the
waterproof seal from bein g
d amag ed or contaminate d by
d irt.
Do not touch the internal cir-
cuits an d terminals. This may
cause malfunctions.
Do not apply excessive force to
the smart key when replacin g
the battery.
Make sure the battery is in-
stalle d correctly. Confirm the di-
rection of the positive “+” si de
of the battery.To replace the smart key battery
1. Open the smart key case as shown.
1. Smart key system indicator light “ ”
1
UBBDE0E0.book Page 6 Wednesday, June 2, 2021 2:57 PM
Page 26 of 114
Smart key system
3-8
3taken place), the main switch can be
turned while the smart key system indi-
cator light is on (approximately 4 sec-
onds).
WARNING
EWA18720
Never turn the main switch to
“OFF”, “ ”, or “OPEN” while the ve-
hicle is movin
g. Otherwise the elec-
trical systems will b e switched off,
which may result in loss of control or
an acci dent.TIPDo not push the main switch knob re-
peatedly or turn the main switch back
and forth excessively (beyond normal
use). To protect the main switch from
damage, the smart key system will
temporarily disable, and the smart key
system indicator light will flash. If this
occurs, wait until the indicator light
stops flashing, and then operate the
main switch.The main switch positions are de-
scribed below.
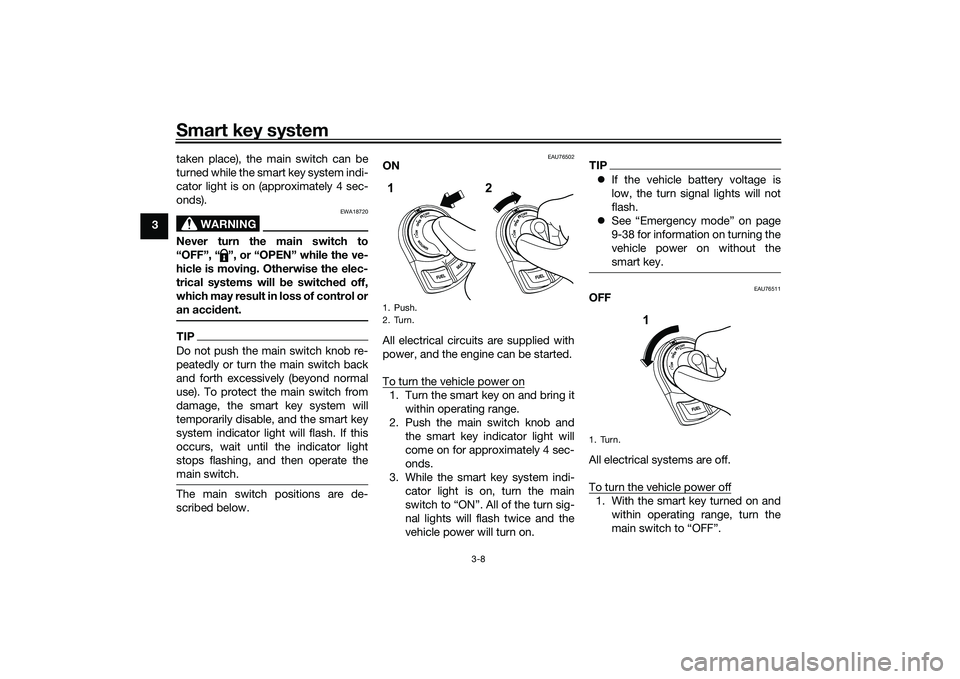
EAU76502
ON
All electrical circuits are supplied with
power, and the engine can be started.
To turn the vehicle power on1. Turn the smart key on and bring it
within operating range.
2. Push the main switch knob and the smart key indicator light will
come on for approximately 4 sec-
onds.
3. While the smart key system indi- cator light is on, turn the main
switch to “ON”. All of the turn sig-
nal lights will flash twice and the
vehicle power will turn on.
TIPIf the vehicle battery voltage is
low, the turn signal lights will not
flash.
See “Emergency mode” on page
9-38 for information on turning the
vehicle power on without the
smart key.
EAU76511
OFF
All electrical systems are off.
To turn the vehicle power off1. With the smart key turned on and
within operating range, turn the
main switch to “OFF”.
1. Push.
2. Turn.1 2
1. Turn.
1
UBBDE0E0.book Page 8 Wednesday, June 2, 2021 2:57 PM
Page 31 of 114

Stop and Start System
4-3
4
WARNING
EWA18731
Do not turn the throttle g rip too
much or too quickly when the Stop
an d Start System is activate d an d
the en gine is stoppe d. Otherwise,
the vehicle coul d start movin g unex-
pected ly after the en gine restarts.
TIP When the sidestand is lowered,
the Stop and Start System is de-
activated.
If the Stop and Start System does
not operate correctly, have a
Yamaha dealer check the vehicle.
EAU76711
Precautions when usin g the Stop
an d Start System
In order to prevent accidents due to
improper operation, carefully read and
observe the following precautions.
WARNING
EWA18741
When walkin g while pushin g the ve-
hicle, be sure to turn the main switch
off. If the vehicle is pushe d while the Stop an
d Start System is left turned
on, the en gine coul d start an d the
vehicle coul d start movin g if the
throttle grip is turne d acci dentally.
WARNING
EWA18751
When placin g the vehicle on the
centerstan d, be sure to turn the
main switch off. If the vehicle is
placed on the centerstand while the
Stop an d Start System is left turned
on, the en gine coul d start an d the
vehicle coul d start movin g if the
throttle grip is turne d acci dentally.
1. Flashing
2. Off
1
2
A
OFF
UBBDE0E0.book Page 3 Wednesday, June 2, 2021 2:57 PM