check engine light YAMAHA SR125 2000 Owners Manual
[x] Cancel search | Manufacturer: YAMAHA, Model Year: 2000, Model line: SR125, Model: YAMAHA SR125 2000Pages: 78, PDF Size: 8.59 MB
Page 7 of 78

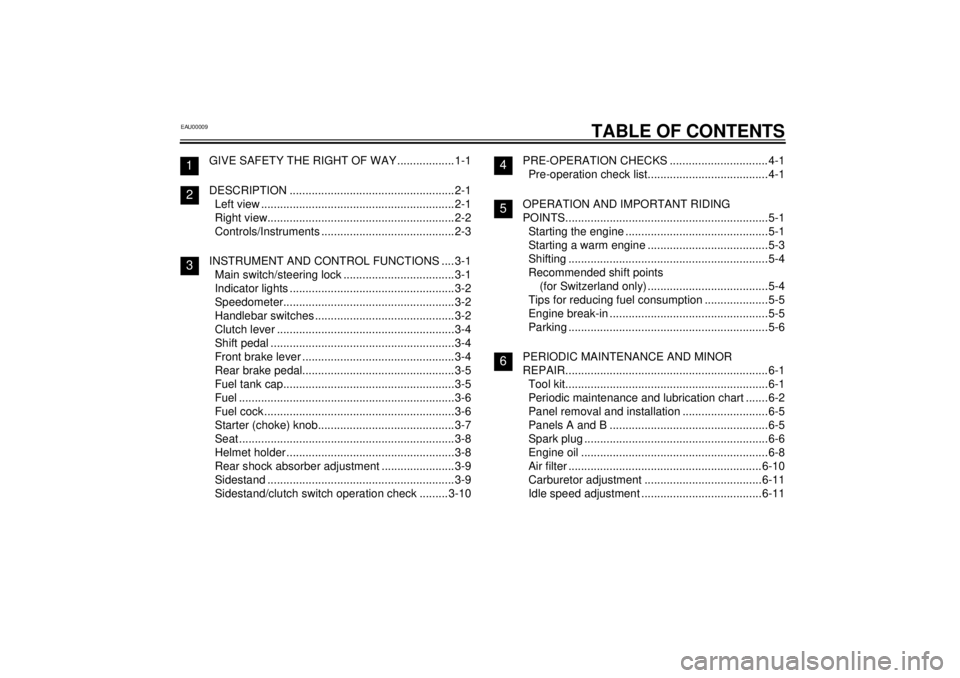
EAU00009
TABLE OF CONTENTS
GIVE SAFETY THE RIGHT OF WAY ..................1-1
DESCRIPTION ....................................................2-1
Left view ............................................................. 2-1
Right view...........................................................2-2
Controls/Instruments ..........................................2-3
INSTRUMENT AND CONTROL FUNCTIONS ....3-1
Main switch/steering lock ................................... 3-1
Indicator lights ....................................................3-2
Speedometer......................................................3-2
Handlebar switches ............................................3-2
Clutch lever ........................................................3-4
Shift pedal ..........................................................3-4
Front brake lever ................................................ 3-4
Rear brake pedal................................................ 3-5
Fuel tank cap......................................................3-5
Fuel ....................................................................3-6
Fuel cock ............................................................3-6
Starter (choke) knob...........................................3-7
Seat ....................................................................3-8
Helmet holder .....................................................3-8
Rear shock absorber adjustment .......................3-9
Sidestand ...........................................................3-9
Sidestand/clutch switch operation check ......... 3-10PRE-OPERATION CHECKS ...............................4-1
Pre-operation check list......................................4-1
OPERATION AND IMPORTANT RIDING
POINTS................................................................5-1
Starting the engine .............................................5-1
Starting a warm engine ......................................5-3
Shifting ...............................................................5-4
Recommended shift points
(for Switzerland only) ......................................5-4
Tips for reducing fuel consumption ....................5-5
Engine break-in ..................................................5-5
Parking ...............................................................5-6
PERIODIC MAINTENANCE AND MINOR
REPAIR................................................................6-1
Tool kit................................................................6-1
Periodic maintenance and lubrication chart .......6-2
Panel removal and installation ...........................6-5
Panels A and B ..................................................6-5
Spark plug ..........................................................6-6
Engine oil ...........................................................6-8
Air filter .............................................................6-10
Carburetor adjustment .....................................6-11
Idle speed adjustment ......................................6-11
123
456
E_3mw.book Page 1 Monday, February 5, 2001 9:54 AM
Page 38 of 78

PERIODIC MAINTENANCE AND MINOR REPAIR
6-8
6
EAU01093*
Engine oilOil level inspection
1. Place the motorcycle on the cen-
terstand. Warm up the engine for
several minutes.NOTE:@ Be sure the motorcycle is positioned
straight up when checking the oil level.
A slight tilt toward the side can result in
false readings. @
2. With the engine stopped, check
the oil level through the level win-
dow located at the lower part of
the right side crankcase cover.NOTE:@ Wait a few minutes until the oil level
settles before checking. @3. The oil level should be between
the maximum level and minimum
level marks. If the level is low, fill
the engine with sufficient oil to
raise it to the specified level.Engine oil replacement and oil filter
element cleaning
1. Warm up the engine for a few min-
utes.
2. Stop the engine. Place an oil pan
under the engine and remove the
oil filler cap.
3. Remove the drain bolt and drain
the oil.
EC000070*
CAUTION:@ When removing the oil drain bolt,
the O-ring, compression spring, and
oil strainer will fall out. Take care not
to lose these parts. @
1. Oil level window
2. Maximum level mark
3. Minimum level mark
1. Engine oil drain bolt A
E_3mw.book Page 8 Monday, February 5, 2001 9:54 AM
Page 52 of 78

PERIODIC MAINTENANCE AND MINOR REPAIR
6-22
6
EAU01533
Drive chain slack adjustment1. Loosen the rear brake adjusting
nut.
2. Loosen the wheel axle nut.3. To tighten the chain, turn the chain
adjusting plates in direction
a.
To loosen the chain, turn the chain
adjusting plates in direction
b and
push the wheel forward. Turn each
chain adjusting plate to exactly the
same position to maintain correct
axle alignment.
EC000096
CAUTION:@ Too little chain slack will overload
the engine and other vital parts.
Keep the slack within the specified
limits. @
4. Tighten the wheel axle nut to the
specified torque.
5. Adjust the brake pedal free play.
EW000103
WARNING
@ Check the operation of the brake
light after adjusting the rear brake. @
1. Adjusting nut
1. Axle nut
2. Chain adjusting plate
Tightening torque:
Wheel axle nut:
65 Nm (6.5 m·kg)
E_3mw.book Page 22 Monday, February 5, 2001 9:54 AM