torque YAMAHA TMAX 2002 Owners Manual
[x] Cancel search | Manufacturer: YAMAHA, Model Year: 2002, Model line: TMAX, Model: YAMAHA TMAX 2002Pages: 102, PDF Size: 1.67 MB
Page 45 of 102

6-1
EAU00462
PERIODIC MAINTENANCE AND MINOR REPAIR
6
EAU00464
Safety is an obligation of the owner.
Periodic inspection, adjustment and
lubrication will keep your vehicle in
the safest and most efficient condi-
tion possible. The most important
points of inspection, adjustment, and
lubrication are explained on the fol-
lowing pages.
The intervals given in the periodic
maintenance and lubrication chart
should be simply considered as a
general guide under normal riding
conditions. However, DEPENDING
ON THE WEATHER, TERRAIN,
GEOGRAPHICAL LOCATION, AND
INDIVIDUAL USE, THE MAINTE-
NANCE INTERVALS MAY NEED TO
BE SHORTENED.
EW000060
wIf you are not familiar with scooter
maintenance work, have a Yamaha
dealer do it for you.
EAU00466
wThis scooter is designed for use
on paved roads only. If this scoot-
er is operated in abnormally dusty,
muddy or wet conditions, the air
filter element should be cleaned or
replaced more frequently, other-
wise rapid engine wear may result.
Consult a Yamaha dealer for prop-
er maintenance intervals.
EAU03846
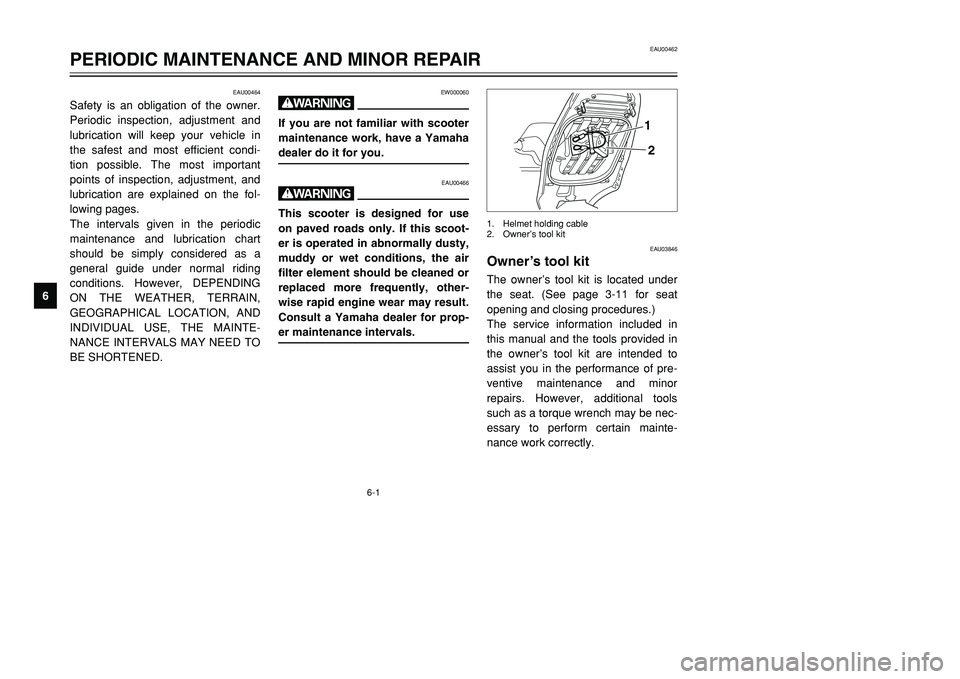
Owner’s tool kitTool kitThe owner’s tool kit is located under
the seat. (See page 3-11 for seat
opening and closing procedures.)
The service information included in
this manual and the tools provided in
the owner’s tool kit are intended to
assist you in the performance of pre-
ventive maintenance and minor
repairs. However, additional tools
such as a torque wrench may be nec-
essary to perform certain mainte-
nance work correctly.
2 1
1. Helmet holding cable
2. Owner’s tool kit
5GJ-9-E1 9/4/01 1:27 PM Page 44
Page 55 of 102

6-11
PERIODIC MAINTENANCE AND MINOR REPAIR
6To check the spark plugs
1. Check that the porcelain insula-
tor around the center electrode
on each spark plug is a medium-
to-light tan (the ideal color when
the scooter is ridden normally).
2. Check that all spark plugs
installed in the engine have the
same color.
NOTE:
If any spark plug shows a distinctly
different color, the engine could be
defective. Do not attempt to diagnose
such problems yourself. Instead,
have a Yamaha dealer check the
scooter.3. Check each spark plug for elec-
trode erosion and excessive car-
bon or other deposits, and
replace it if necessary.
NOTE:
If a torque wrench is not available
when installing a spark plug, a good
estimate of the correct torque is
1/4–1/2 turn past finger tight.
However, the spark plug should be
tightened to the specified torque as
soon as possible.4. Install the spark plug cap. To install a spark plug
1. Measure the spark plug gap with
a wire thickness gauge and, if
necessary, adjust the gap to
specification.
2. Clean the surface of the spark
plug gasket and its mating sur-
face, and then wipe off any grime
from the spark plug threads.
3. Install the spark plug with the
spark plug wrench, and then
tighten it to the specified torque.
a
a. Spark plug gap
Specified spark plug:
CR7E (NGK)
Spark plug gap:
0.7–0.8 mm
Tightening torque:
Spark plug:
12.5 Nm (1.25 m·kgf)
5GJ-9-E1 9/4/01 1:27 PM Page 54
Page 58 of 102

6-14
PERIODIC MAINTENANCE AND MINOR REPAIR
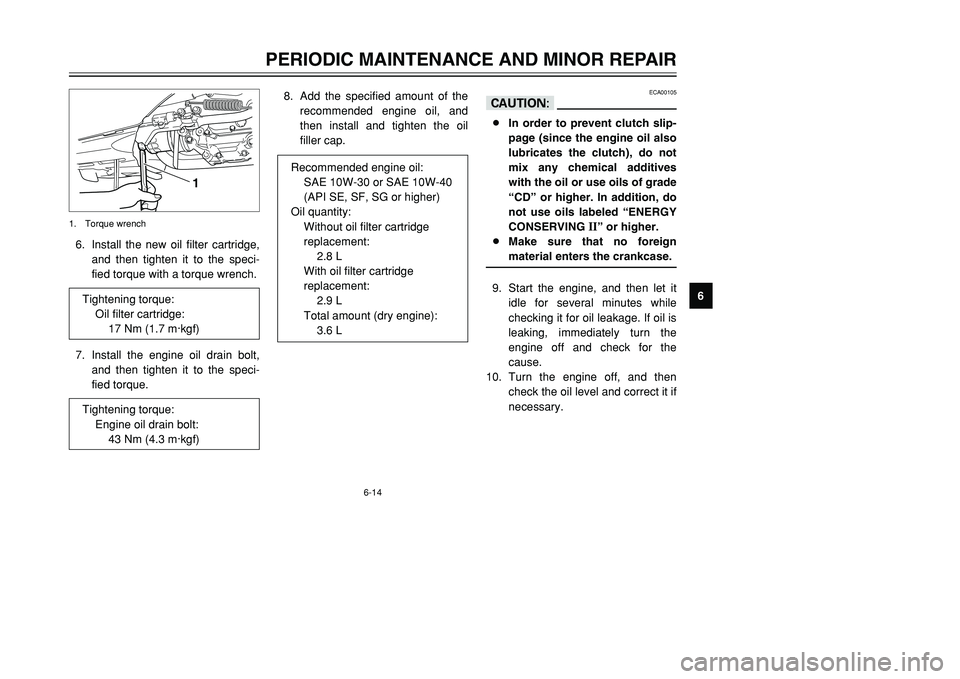
6 6. Install the new oil filter cartridge,
and then tighten it to the speci-
fied torque with a torque wrench.
7. Install the engine oil drain bolt,
and then tighten it to the speci-
fied torque.
1
1. Torque wrench
ECA00105
cC8In order to prevent clutch slip-
page (since the engine oil also
lubricates the clutch), do not
mix any chemical additives
with the oil or use oils of grade
“CD” or higher. In addition, do
not use oils labeled “ENERGY
CONSERVING
II” or higher.
8Make sure that no foreign
material enters the crankcase.
9. Start the engine, and then let it
idle for several minutes while
checking it for oil leakage. If oil is
leaking, immediately turn the
engine off and check for the
cause.
10. Turn the engine off, and then
check the oil level and correct it if
necessary. 8. Add the specified amount of the
recommended engine oil, and
then install and tighten the oil
filler cap.
Tightening torque:
Oil filter cartridge:
17 Nm (1.7 m·kgf)
Tightening torque:
Engine oil drain bolt:
43 Nm (4.3 m·kgf)
Recommended engine oil:
SAE 10W-30 or SAE 10W-40
(API SE, SF, SG or higher)
Oil quantity:
Without oil filter cartridge
replacement:
2.8 L
With oil filter cartridge
replacement:
2.9 L
Total amount (dry engine):
3.6 L
5GJ-9-E1 9/4/01 1:27 PM Page 57
Page 60 of 102

6-16
PERIODIC MAINTENANCE AND MINOR REPAIR
6 4. Install the chain drive oil drain
bolt, and then tighten it to the
specified torque.
5. Add the specified amount of the
recommended oil.
6. Wipe the dipstick clean, insert it
into the oil filler hole (without
screwing it in), and then remove
it to check the oil level.
ECA00078
cCMake sure that no foreign material
enters the chain drive case.
NOTE:
The engine oil should be between the
minimum and maximum level marks.7. If the engine oil is below the min-
imum level mark, add sufficient
oil of the recommended type to
raise it to the correct level.
8. Insert the dipstick into the oil filler
hole, and then tighten the oil filler
cap.
1
2
1. Maximum level mark
2. Minimum level mark
Tightening torque:
Chain drive oil drain bolt:
20 Nm (2.0 m·kgf)Recommended chain drive oil:
See page 8-1.
Oil quantity:
0.7 L
5GJ-9-E1 9/4/01 1:27 PM Page 59
Page 71 of 102

6-27
PERIODIC MAINTENANCE AND MINOR REPAIR
6
EAU03294
Checking the brake fluid
levelBrake fluid level, checkingInsufficient brake fluid may allow air
to enter the brake system, possibly
causing it to become ineffective.
Before riding, check that the brake
fluid is above the minimum level mark
and replenish if necessary. A low
brake fluid level may indicate worn
brake pads and/or brake system
leakage. If the brake level is low, be
sure to check the brake pads for
wear and the brake system for leak-
age.
1
1. Minimum level mark
EAU01248
Rear brake pads
1. Remove the rear brake caliper
by removing the bolts.
2. Check each rear brake pad for
damage and measure the lining
thickness. If a brake pad is dam-
aged or if the lining thickness is
less than 0.8 mm, have a
Yamaha dealer replace the
brake pads as a set.
3. Install the rear brake caliper by
installing the bolts, then tighten-
ing them to the specified torque.
a1
1. Bolt (×2)
a. Brake pad wear limit
Tightening torque:
Brake caliper bolt:
40 Nm (4.0 m·kgf)
REAR
FRONT
5GJ-9-E1 9/4/01 1:27 PM Page 70
Page 95 of 102

8-5
SPECIFICATIONS
8
EAU03941
Conversion tableConversion table
Conversion tableAll specification data in this manual are listed in SI and
METRIC UNITS.
Use this table to convert METRIC unit values to IMPERIAL
unit values.
Example:METRIC VALUE CONVERSION
FACTORIMPERIAL VALUE
2 mm× 0.03937 = 0.08 in
Conversion table
METRIC SYSTEM TO IMPERIAL SYSTEM
Metric unit Conversion factor Imperial unit
Torquem·kgf
m·kgf
cm·kgf
cm·kgf
× 7.233× 86.794× 0.0723× 0.8679ft·lb
in·lb
ft·lb
in·lb
Weightkg
g× 2.205× 0.03527lb
oz
Speed km/h× 0.6214 mi/h
Distancekm
m
m
cm
mm× 0.6214× 3.281× 1.094× 0.3937× 0.03937mi
ft
yd
in
in
Volume,
Capacitycc (cm
3)
cc (cm3)
L (liter)
L (liter)
× 0.03527× 0.06102× 0.8799× 0.2199oz (IMP liq.)
cu·in
qt (IMP liq.)
gal (IMP liq.)
Miscellaneouskgf/mm
kgf/cm
2
°C
× 55.997× 14.2234× 1.8 + 32 lb/in
psi (lb/in
2)
°F
5GJ-9-E1 9/4/01 1:27 PM Page 94