YAMAHA TTR125 2000 Notices Demploi (in French)
Manufacturer: YAMAHA, Model Year: 2000, Model line: TTR125, Model: YAMAHA TTR125 2000Pages: 442, PDF Size: 26.34 MB
Page 241 of 442
4 - 31
ENG
SOUPAPES ET RESSORTS DE SOUPAPE
VENTILE UND VENTILFEDERN
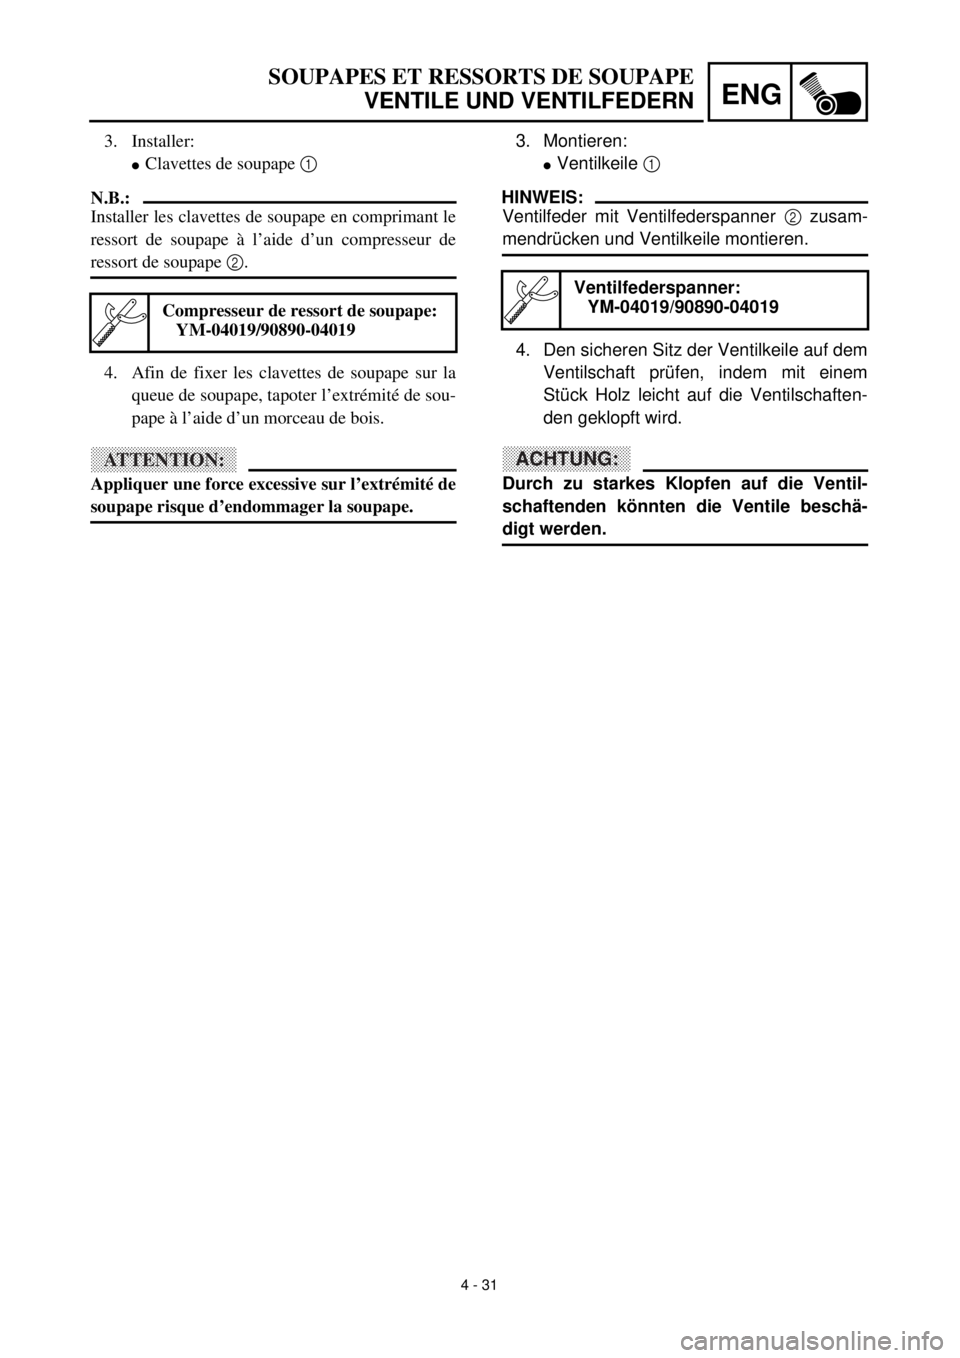
3. Montieren:
lVentilkeile 1
HINWEIS:
Ventilfeder mit Ventilfederspanner 2 zusam-
mendrücken und Ventilkeile montieren.
4. Den sicheren Sitz der Ventilkeile auf dem
Ventilschaft prüfen, indem mit einem
Stück Holz leicht auf die Ventilschaften-
den geklopft wird.
ACHTUNG:
Durch zu starkes Klopfen auf die Ventil-
schaftenden könnten die Ventile beschä-
digt werden.
Ventilfederspanner:
YM-04019/90890-04019
3. Installer:
lClavettes de soupape 1
N.B.:
Installer les clavettes de soupape en comprimant le
ressort de soupape à l’aide d’un compresseur de
ressort de soupape 2.
4. Afin de fixer les clavettes de soupape sur la
queue de soupape, tapoter l’extrémité de sou-
pape à l’aide d’un morceau de bois.
ATTENTION:
Appliquer une force excessive sur l’extrémité de
soupape risque d’endommager la soupape.
Compresseur de ressort de soupape:
YM-04019/90890-04019
Page 242 of 442

4 - 32
ENGCYLINDER AND PISTON
CYLINDER AND PISTON
Extent of removal:1 Cylinder removal2 Piston removal
Extent of removal Order Part name Q’ty Remarks
CYLINDER AND PISTON
REMOVAL
Preparation for removal Cylinder head Refer to “CYLINDER HEAD” section.
1 Exhaust timing chain guide 1
2 Cylinder/O-ring 1/1
3 Dowel pin 2
4 Gasket 1
5 Piston pin clip 2
Refer to “REMOVAL POINTS”. 6 Piston pin 1
7 Piston 1
8Piston ring set
1
1
2
Page 243 of 442
ENG
4 - 32
CYLINDRE ET PISTON
ZYLINDER UND KOLBEN
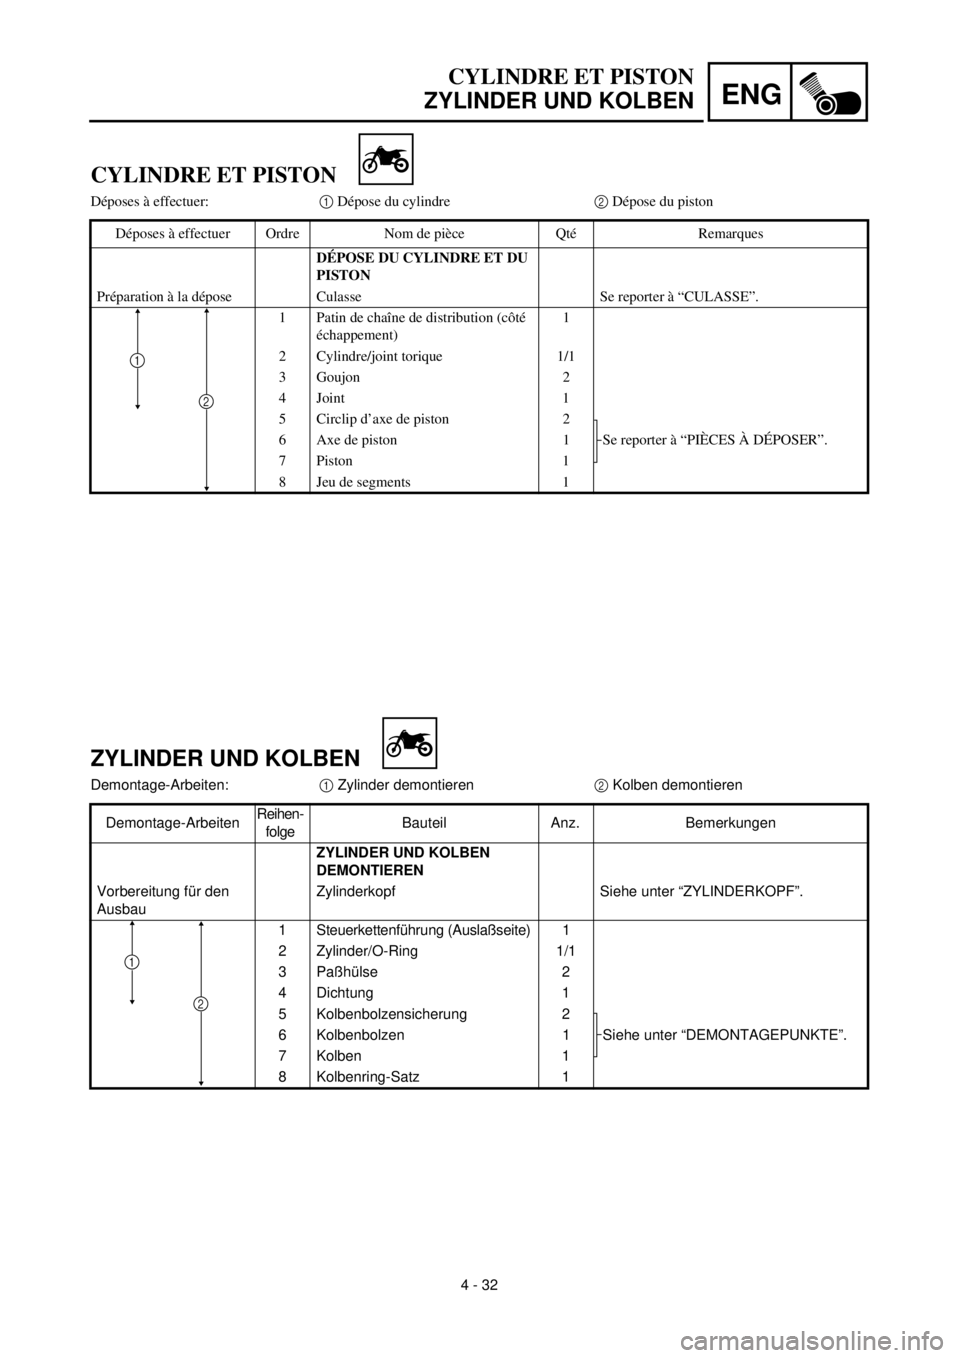
ZYLINDER UND KOLBEN
Demontage-Arbeiten:1 Zylinder demontieren2 Kolben demontieren
Demontage-ArbeitenReihen-
folgeBauteil Anz. Bemerkungen
ZYLINDER UND KOLBEN
DEMONTIEREN
Vorbereitung für den
AusbauZylinderkopf Siehe unter “ZYLINDERKOPF”.
1 Steuerkettenführung (Auslaßseite) 1
2 Zylinder/O-Ring 1/1
3 Paßhülse 2
4 Dichtung 1
5 Kolbenbolzensicherung 2
Siehe unter “DEMONTAGEPUNKTE”. 6 Kolbenbolzen 1
7 Kolben 1
8Kolbenring-Satz
1
1
2
CYLINDRE ET PISTON
Déposes à effectuer:1 Dépose du cylindre2 Dépose du piston
Déposes à effectuer Ordre Nom de pièce Qté Remarques
DÉPOSE DU CYLINDRE ET DU
PISTON
Préparation à la dépose Culasse Se reporter à “CULASSE”.
1 Patin de chaîne de distribution (côté
échappement)1
2 Cylindre/joint torique 1/1
3 Goujon 2
4 Joint 1
5 Circlip d’axe de piston 2
Se reporter à “PIÈCES À DÉPOSER”. 6 Axe de piston 1
7 Piston 1
8 Jeu de segments 1
1
2
Page 244 of 442
4 - 33
ENGCYLINDER AND PISTON
REMOVAL POINTS
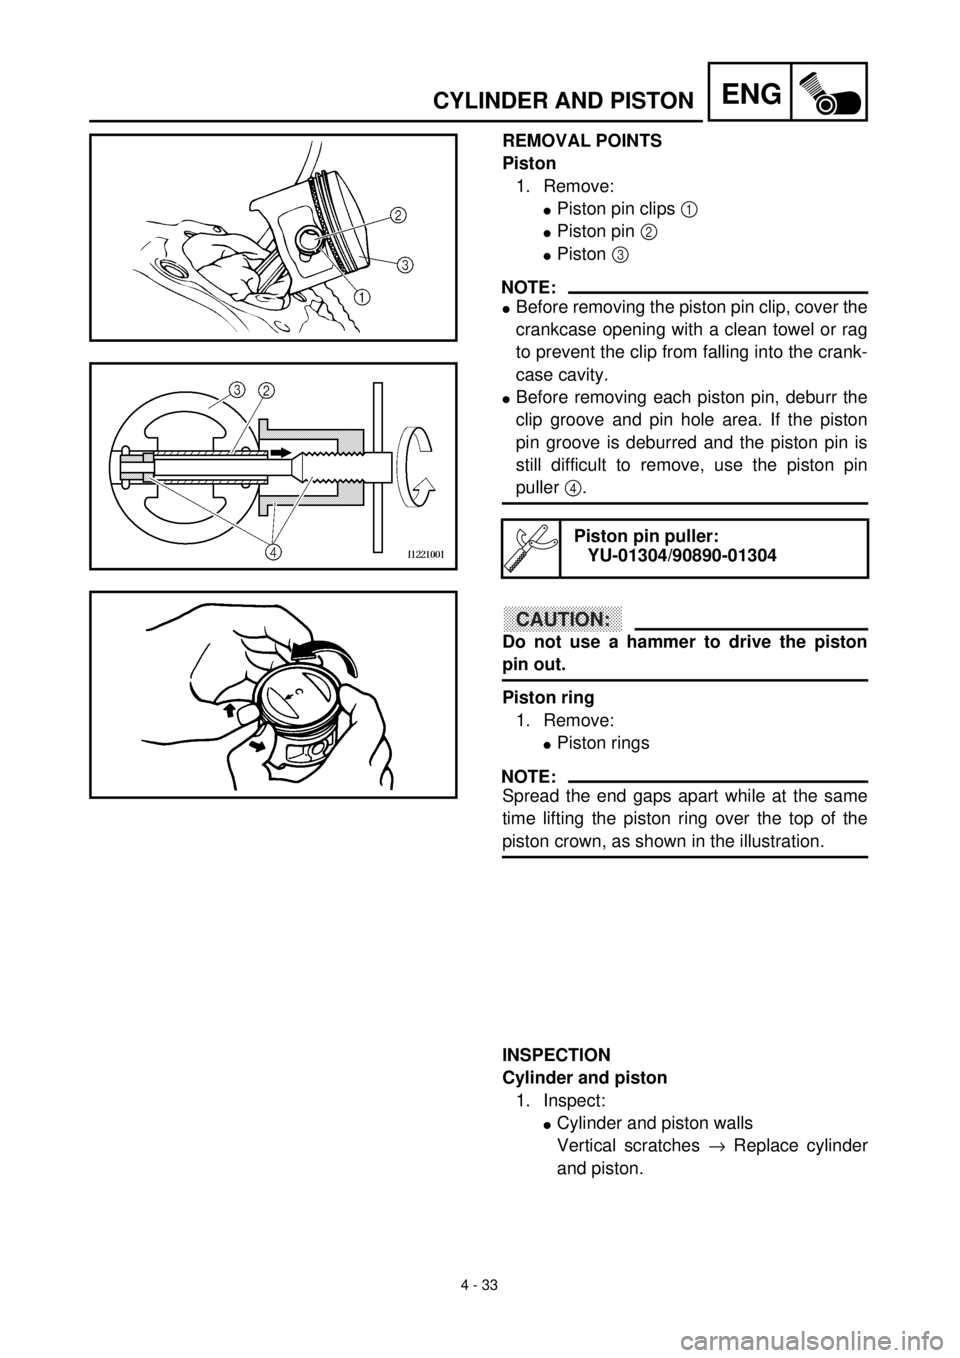
Piston
1. Remove:
lPiston pin clips 1
lPiston pin 2
lPiston 3
NOTE:
lBefore removing the piston pin clip, cover the
crankcase opening with a clean towel or rag
to prevent the clip from falling into the crank-
case cavity.
lBefore removing each piston pin, deburr the
clip groove and pin hole area. If the piston
pin groove is deburred and the piston pin is
still difficult to remove, use the piston pin
puller 4.
CAUTION:
Do not use a hammer to drive the piston
pin out.
Piston ring
1. Remove:
lPiston rings
NOTE:
Spread the end gaps apart while at the same
time lifting the piston ring over the top of the
piston crown, as shown in the illustration.
Piston pin puller:
YU-01304/90890-01304
INSPECTION
Cylinder and piston
1. Inspect:
lCylinder and piston walls
Vertical scratches ® Replace cylinder
and piston.
Page 245 of 442
4 - 33
ENG
CYLINDRE ET PISTON
ZYLINDER UND KOLBEN
DEMONTAGEPUNKTE
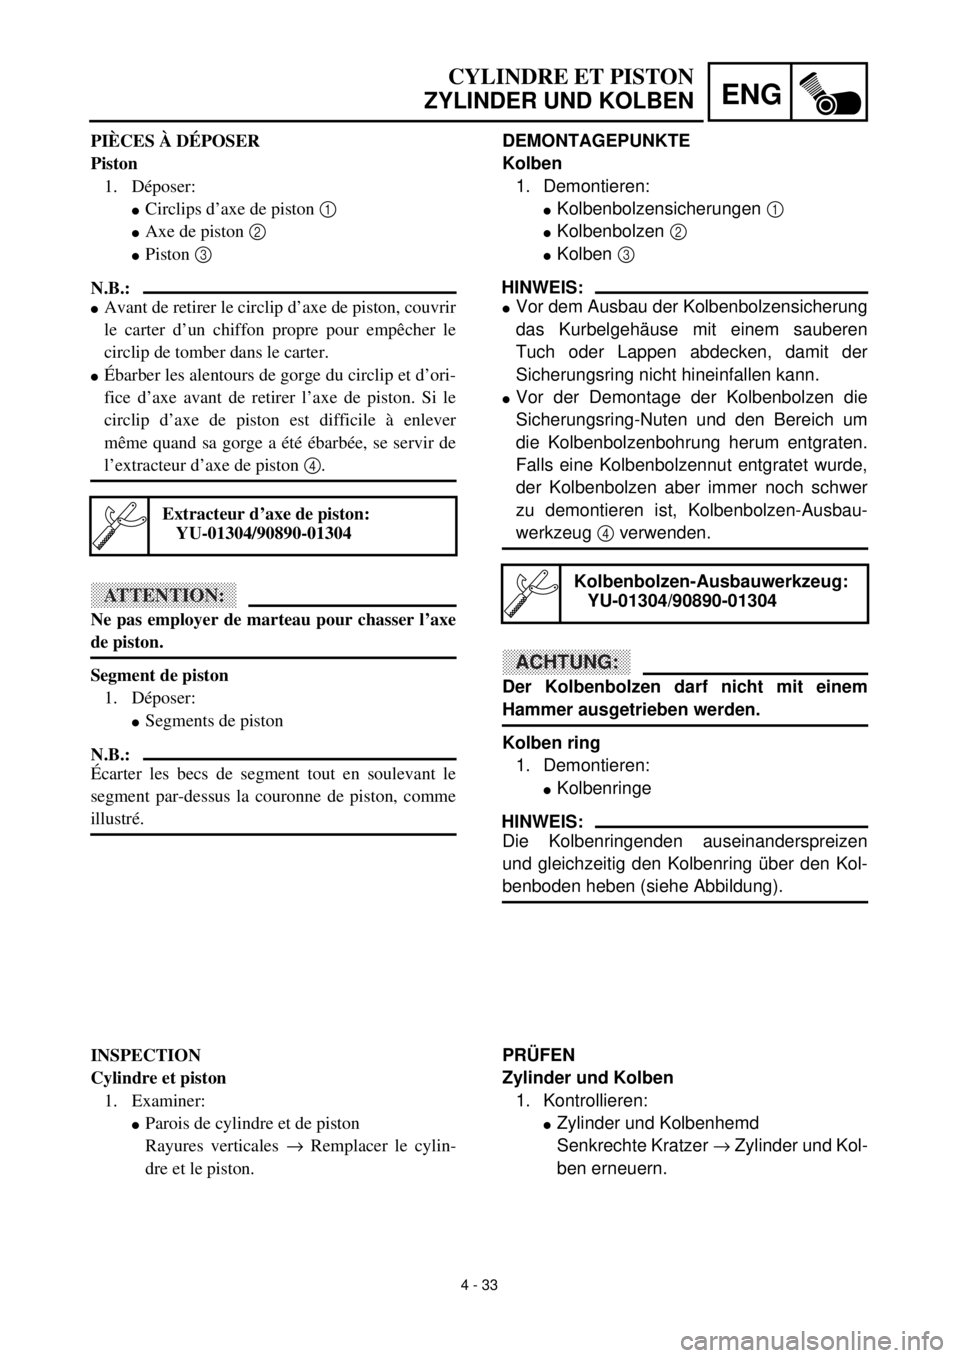
Kolben
1. Demontieren:
lKolbenbolzensicherungen 1
lKolbenbolzen 2
lKolben 3
HINWEIS:
lVor dem Ausbau der Kolbenbolzensicherung
das Kurbelgehäuse mit einem sauberen
Tuch oder Lappen abdecken, damit der
Sicherungsring nicht hineinfallen kann.
lVor der Demontage der Kolbenbolzen die
Sicherungsring-Nuten und den Bereich um
die Kolbenbolzenbohrung herum entgraten.
Falls eine Kolbenbolzennut entgratet wurde,
der Kolbenbolzen aber immer noch schwer
zu demontieren ist, Kolbenbolzen-Ausbau-
werkzeug 4 verwenden.
ACHTUNG:
Der Kolbenbolzen darf nicht mit einem
Hammer ausgetrieben werden.
Kolben ring
1. Demontieren:
lKolbenringe
HINWEIS:
Die Kolbenringenden auseinanderspreizen
und gleichzeitig den Kolbenring über den Kol-
benboden heben (siehe Abbildung).
Kolbenbolzen-Ausbauwerkzeug:
YU-01304/90890-01304
PRÜFEN
Zylinder und Kolben
1. Kontrollieren:
lZylinder und Kolbenhemd
Senkrechte Kratzer ® Zylinder und Kol-
ben erneuern. PIÈCES À DÉPOSER
Piston
1. Déposer:
lCirclips d’axe de piston 1
lAxe de piston 2
lPiston 3
N.B.:
lAvant de retirer le circlip d’axe de piston, couvrir
le carter d’un chiffon propre pour empêcher le
circlip de tomber dans le carter.
lÉbarber les alentours de gorge du circlip et d’ori-
fice d’axe avant de retirer l’axe de piston. Si le
circlip d’axe de piston est difficile à enlever
même quand sa gorge a été ébarbée, se servir de
l’extracteur d’axe de piston 4.
ATTENTION:
Ne pas employer de marteau pour chasser l’axe
de piston.
Segment de piston
1. Déposer:
lSegments de piston
N.B.:
Écarter les becs de segment tout en soulevant le
segment par-dessus la couronne de piston, comme
illustré.
Extracteur d’axe de piston:
YU-01304/90890-01304
INSPECTION
Cylindre et piston
1. Examiner:
lParois de cylindre et de piston
Rayures verticales ® Remplacer le cylin-
dre et le piston.
Page 246 of 442
4 - 34
ENGCYLINDER AND PISTON
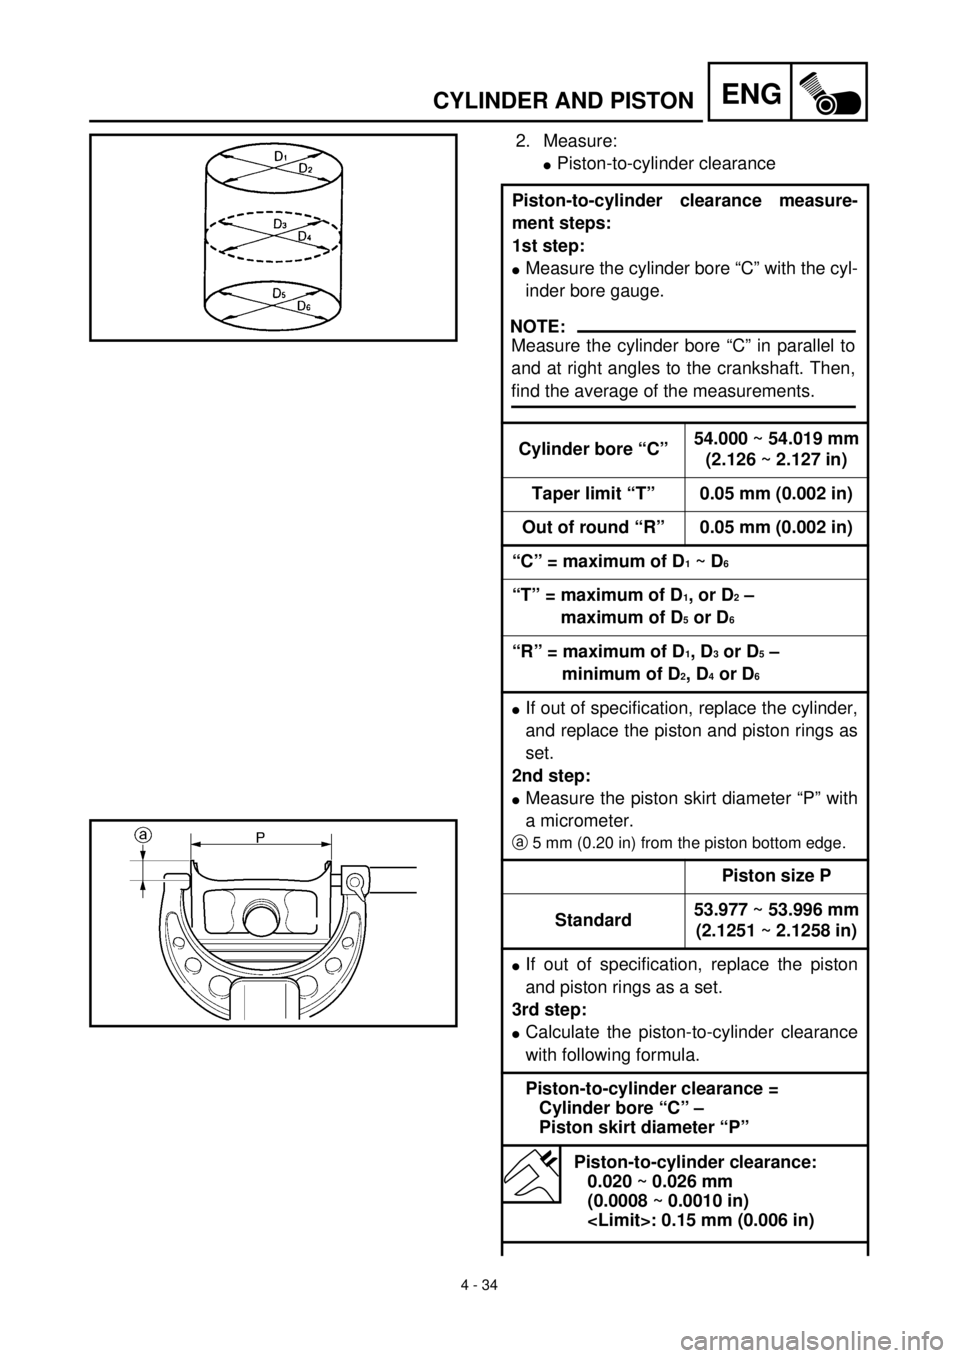
2. Measure:
lPiston-to-cylinder clearance
Piston-to-cylinder clearance measure-
ment steps:
1st step:
lMeasure the cylinder bore “C” with the cyl-
inder bore gauge.
Cylinder bore “C”54.000 ~ 54.019 mm
(2.126 ~ 2.127 in)
Taper limit “T” 0.05 mm (0.002 in)
Out of round “R” 0.05 mm (0.002 in)
“C” = maximum of D
1 ~ D6
“T” = maximum of D
1, or D2 –
maximum of D
5 or D6
“R” = maximum of D
1, D3 or D5 –
minimum of D
2, D4 or D6
lIf out of specification, replace the cylinder,
and replace the piston and piston rings as
set.
2nd step:
lMeasure the piston skirt diameter “P” with
a micrometer.
a5 mm (0.20 in) from the piston bottom edge.
Piston size P
Standard53.977 ~ 53.996 mm
(2.1251 ~ 2.1258 in)
lIf out of specification, replace the piston
and piston rings as a set.
3rd step:
lCalculate the piston-to-cylinder clearance
with following formula.
Piston-to-cylinder clearance =
Cylinder bore “C” –
Piston skirt diameter “P”
Piston-to-cylinder clearance:
0.020 ~ 0.026 mm
(0.0008 ~ 0.0010 in)
NOTE:
Measure the cylinder bore “C” in parallel to
and at right angles to the crankshaft. Then,
find the average of the measurements.
Page 247 of 442
4 - 34
ENG
CYLINDRE ET PISTON
ZYLINDER UND KOLBEN
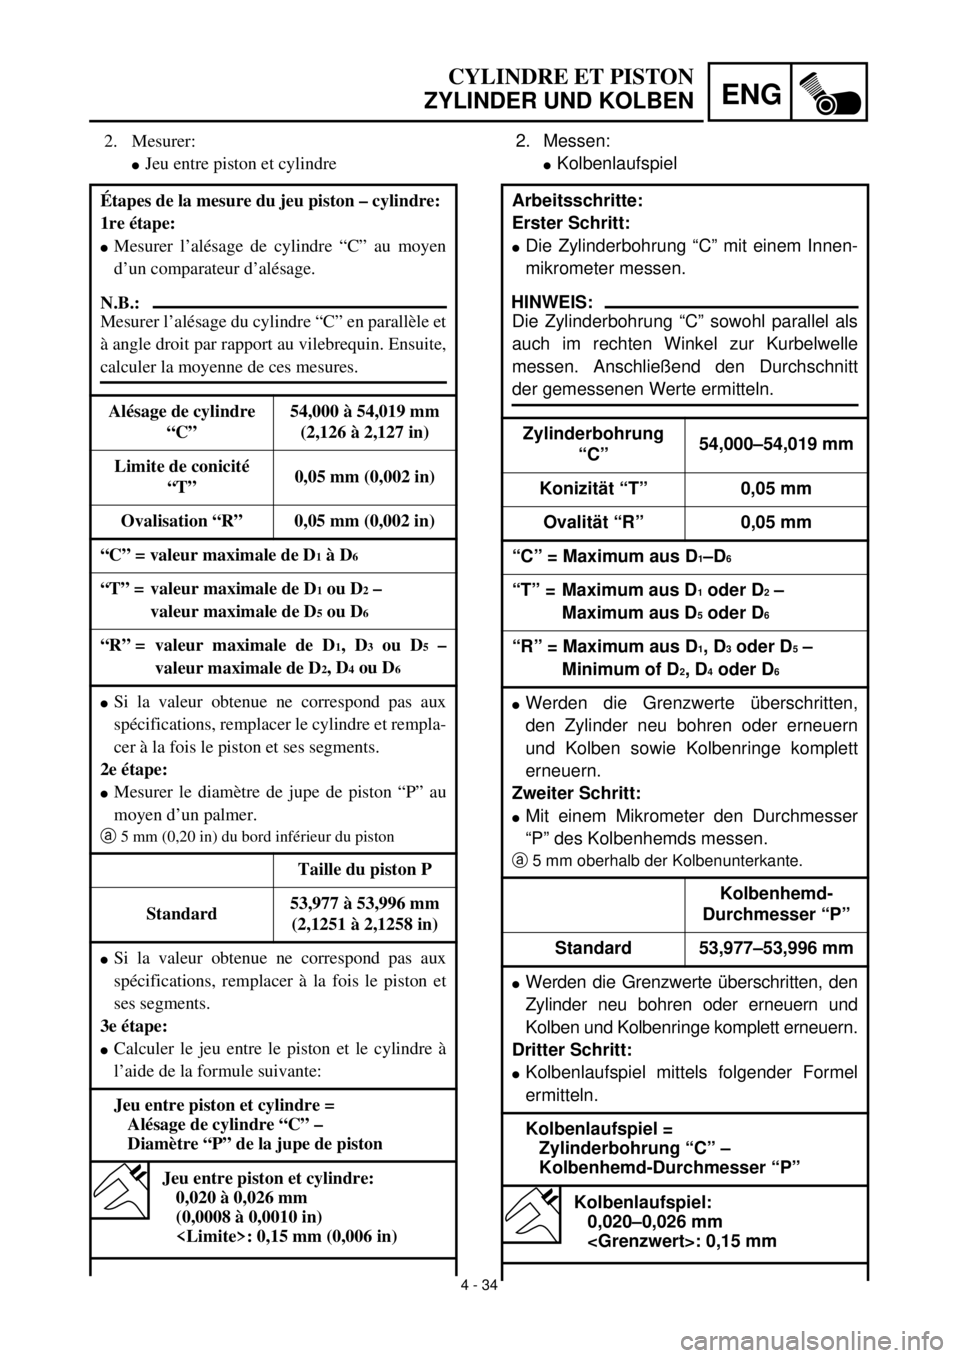
2. Messen:
lKolbenlaufspiel
Arbeitsschritte:
Erster Schritt:
lDie Zylinderbohrung “C” mit einem Innen-
mikrometer messen.
HINWEIS:
Die Zylinderbohrung “C” sowohl parallel als
auch im rechten Winkel zur Kurbelwelle
messen. Anschließend den Durchschnitt
der gemessenen Werte ermitteln.
Zylinderbohrung
“C”54,000–54,019 mm
Konizität “T” 0,05 mm
Ovalität “R” 0,05 mm
“C” = Maximum aus D
1–D6
“T” = Maximum aus D
1 oder D2 –
Maximum aus D
5 oder D6
“R” = Maximum aus D
1, D3 oder D5 –
Minimum of D
2, D4 oder D6
lWerden die Grenzwerte überschritten,
den Zylinder neu bohren oder erneuern
und Kolben sowie Kolbenringe komplett
erneuern.
Zweiter Schritt:
lMit einem Mikrometer den Durchmesser
“P” des Kolbenhemds messen.
a5 mm oberhalb der Kolbenunterkante.
Kolbenhemd-
Durchmesser “P”
Standard 53,977–53,996 mm
lWerden die Grenzwerte überschritten, den
Zylinder neu bohren oder erneuern und
Kolben und Kolbenringe komplett erneuern.
Dritter Schritt:
lKolbenlaufspiel mittels folgender Formel
ermitteln.
Kolbenlaufspiel =
Zylinderbohrung “C” –
Kolbenhemd-Durchmesser “P”
Kolbenlaufspiel:
0,020–0,026 mm
2. Mesurer:
lJeu entre piston et cylindre
Étapes de la mesure du jeu piston – cylindre:
1re étape:
lMesurer l’alésage de cylindre “C” au moyen
d’un comparateur d’alésage.
N.B.:
Mesurer l’alésage du cylindre “C” en parallèle et
à angle droit par rapport au vilebrequin. Ensuite,
calculer la moyenne de ces mesures.
Alésage de cylindre
“C” 54,000 à 54,019 mm
(2,126 à 2,127 in)
Limite de conicité
“T”0,05 mm (0,002 in)
Ovalisation “R” 0,05 mm (0,002 in)
“C” = valeur maximale de D
1 à D6
“T” = valeur maximale de D
1 ou D2 –
valeur maximale de D
5 ou D6
“R” = valeur maximale de D1, D3 ou D5 –
valeur maximale de D
2, D4 ou D6
lSi la valeur obtenue ne correspond pas aux
spécifications, remplacer le cylindre et rempla-
cer à la fois le piston et ses segments.
2e étape:
lMesurer le diamètre de jupe de piston “P” au
moyen d’un palmer.
a5 mm (0,20 in) du bord inférieur du piston
Taille du piston P
Standard53,977 à 53,996 mm
(2,1251 à 2,1258 in)
lSi la valeur obtenue ne correspond pas aux
spécifications, remplacer à la fois le piston et
ses segments.
3e étape:
lCalculer le jeu entre le piston et le cylindre à
l’aide de la formule suivante:
Jeu entre piston et cylindre =
Alésage de cylindre “C” –
Diamètre “P” de la jupe de piston
Jeu entre piston et cylindre:
0,020 à 0,026 mm
(0,0008 à 0,0010 in)
Page 248 of 442

4 - 35
ENGCYLINDER AND PISTON
lIf out of specification, replace the cylinder,
and replace the piston and piston rings as
a set.
Piston pin
1. Inspect:
lPiston pin
Blue discoloration/grooves ® Replace,
then inspect the lubrication system.
2. Measure:
lPiston pin-to-piston clearance
Measurement steps:
lMeasure the piston pin outside diameter
a.
If out of specification, replace the piston
pin
Outside diameter (piston pin):
14.991 ~ 15.000 mm
(0.5902 ~ 0.5906 in)
lMeasure the piston inside diameter b.
If out of specification, replace the piston.
Inside diameter (piston):
15.002 ~ 15.013 mm
(0.5906 ~ 0.5911 in)
Page 249 of 442
4 - 35
ENG
CYLINDRE ET PISTON
ZYLINDER UND KOLBEN
lWerden die Grenzwerte überschritten, den
Zylinder neu bohren oder erneuern und
Kolben und Kolbenringe komplett erneu-
ern.
Kolbenbolzen
1. Kontrollieren:
lKolbenbolzen
Blauverfärbung/Riefen ® Erneuern und
Schmiersystem prüfen.
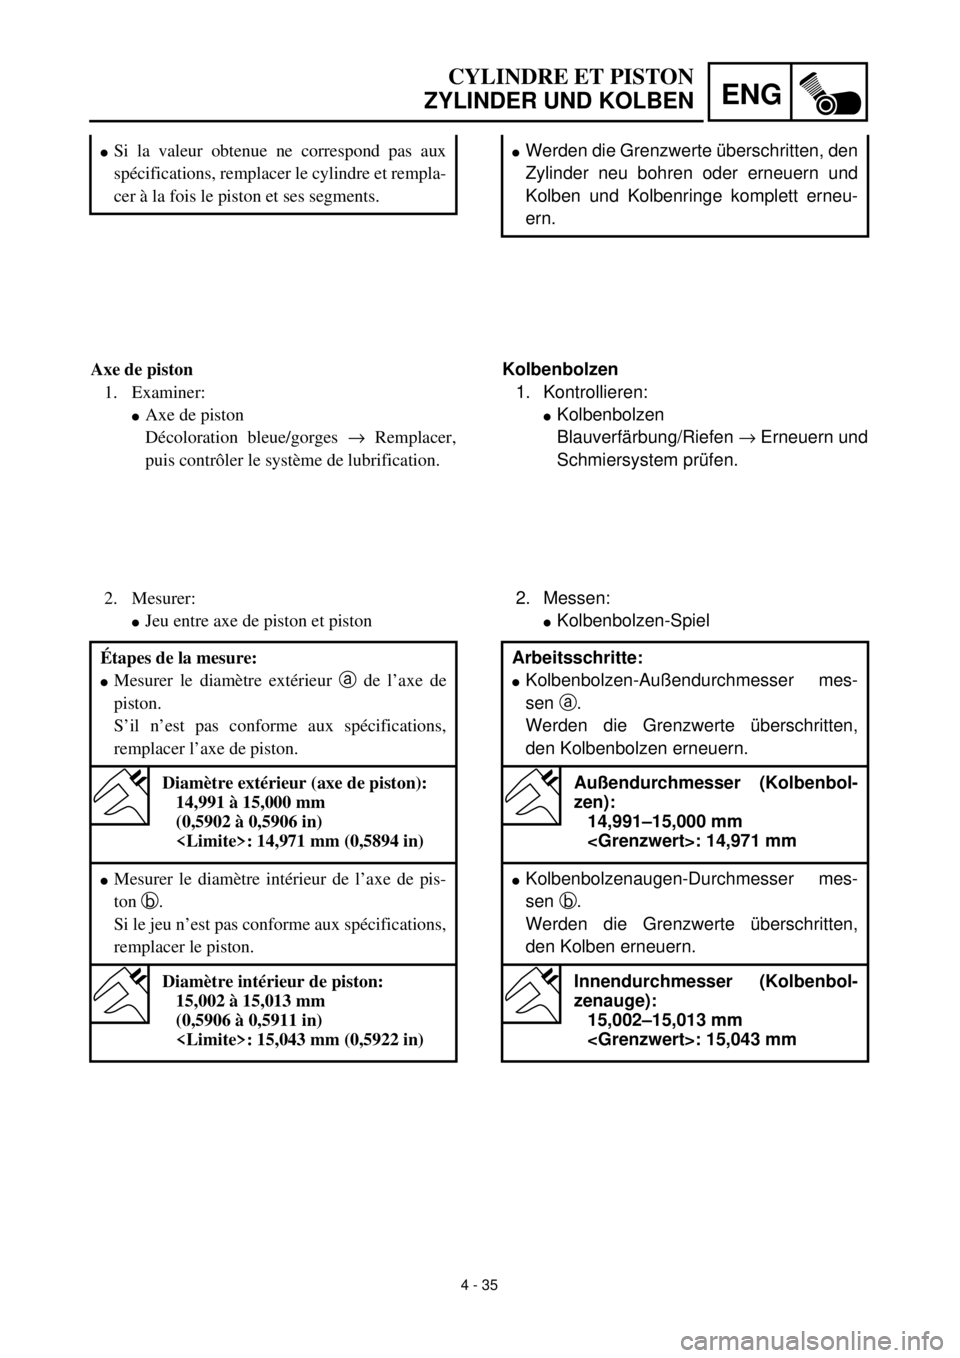
2. Messen:
lKolbenbolzen-Spiel
Arbeitsschritte:
lKolbenbolzen-Außendurchmesser mes-
sen a.
Werden die Grenzwerte überschritten,
den Kolbenbolzen erneuern.
Außendurchmesser (Kolbenbol-
zen):
14,991–15,000 mm
lKolbenbolzenaugen-Durchmesser mes-
sen b.
Werden die Grenzwerte überschritten,
den Kolben erneuern.
Innendurchmesser (Kolbenbol-
zenauge):
15,002–15,013 mm
lSi la valeur obtenue ne correspond pas aux
spécifications, remplacer le cylindre et rempla-
cer à la fois le piston et ses segments.
Axe de piston
1. Examiner:
lAxe de piston
Décoloration bleue/gorges ® Remplacer,
puis contrôler le système de lubrification.
2. Mesurer:
lJeu entre axe de piston et piston
Étapes de la mesure:
lMesurer le diamètre extérieur a de l’axe de
piston.
S’il n’est pas conforme aux spécifications,
remplacer l’axe de piston.
Diamètre extérieur (axe de piston):
14,991 à 15,000 mm
(0,5902 à 0,5906 in)
lMesurer le diamètre intérieur de l’axe de pis-
ton b.
Si le jeu n’est pas conforme aux spécifications,
remplacer le piston.
Diamètre intérieur de piston:
15,002 à 15,013 mm
(0,5906 à 0,5911 in)
Page 250 of 442
4 - 36
ENGCYLINDER AND PISTON
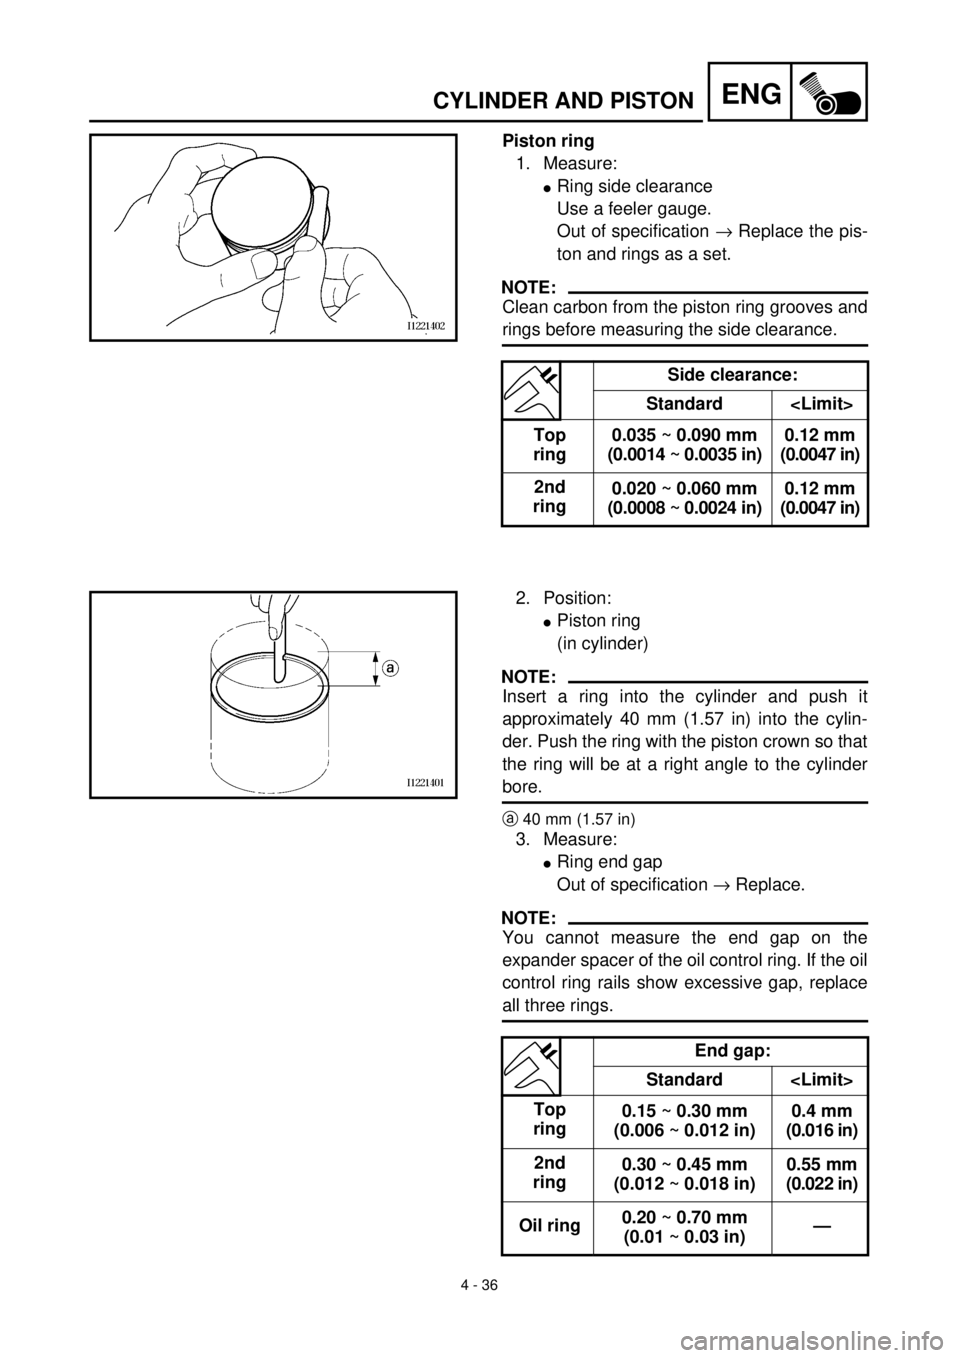
Piston ring
1. Measure:
lRing side clearance
Use a feeler gauge.
Out of specification ® Replace the pis-
ton and rings as a set.
NOTE:
Clean carbon from the piston ring grooves and
rings before measuring the side clearance.
Side clearance:
Standard
Top
ring0.035 ~ 0.090 mm
(0.0014 ~ 0.0035 in)0.12 mm
(0.0047 in)
2nd
ring0.020 ~ 0.060 mm
(0.0008 ~ 0.0024 in)0.12 mm
(0.0047 in)
2. Position:
lPiston ring
(in cylinder)
NOTE:
Insert a ring into the cylinder and push it
approximately 40 mm (1.57 in) into the cylin-
der. Push the ring with the piston crown so that
the ring will be at a right angle to the cylinder
bore.
a40 mm (1.57 in)
3. Measure:
lRing end gap
Out of specification ® Replace.
NOTE:
You cannot measure the end gap on the
expander spacer of the oil control ring. If the oil
control ring rails show excessive gap, replace
all three rings.
End gap:
Standard
Top
ring0.15 ~ 0.30 mm
(0.006 ~ 0.012 in)0.4 mm
(0.016 in)
2nd
ring0.30 ~ 0.45 mm
(0.012 ~ 0.018 in)0.55 mm
(0.022 in)
Oil ring0.20 ~ 0.70 mm
(0.01 ~ 0.03 in)—