YAMAHA WR 250F 2001 Notices Demploi (in French)
Manufacturer: YAMAHA, Model Year: 2001, Model line: WR 250F, Model: YAMAHA WR 250F 2001Pages: 686, PDF Size: 62.6 MB
Page 191 of 686
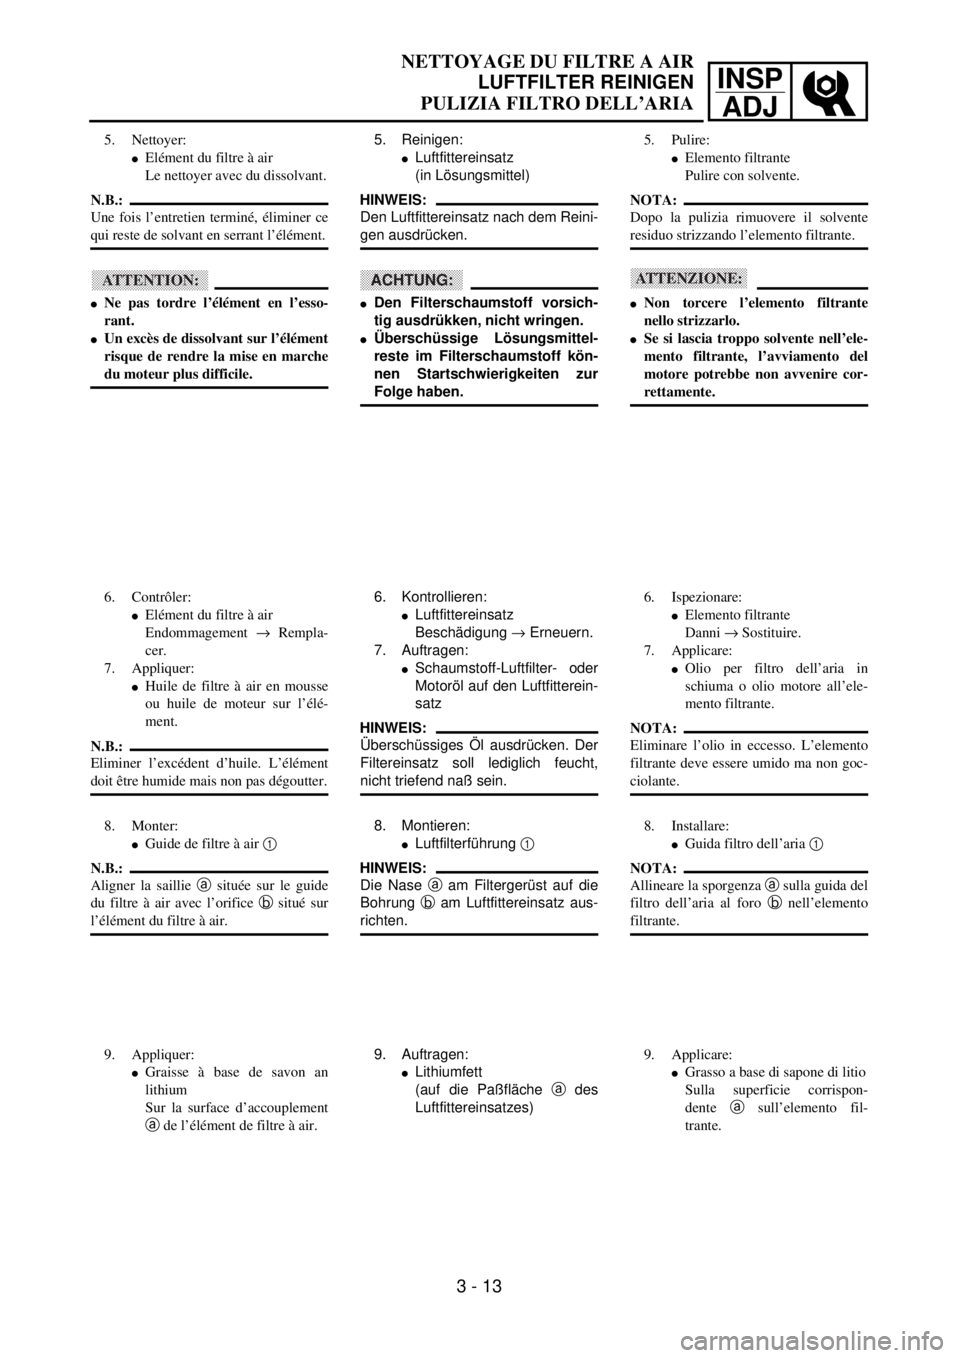
INSP
ADJ
NETTOYAGE DU FILTRE A AIR
LUFTFILTER REINIGEN
PULIZIA FILTRO DELL’ARIA
5. Reinigen:
lLuftfittereinsatz
(in Lösungsmittel)
HINWEIS:
Den Luftfittereinsatz nach dem Reini-
gen ausdrücken.
ACHTUNG:
lDen Filterschaumstoff vorsich-
tig ausdrükken, nicht wringen.
lÜberschüssige Lösungsmittel-
reste im Filterschaumstoff kön-
nen Startschwierigkeiten zur
Folge haben.
6. Kontrollieren:
lLuftfittereinsatz
Beschädigung ® Erneuern.
7. Auftragen:
lSchaumstoff-Luftfilter- oder
Motoröl auf den Luftfitterein-
satz
HINWEIS:
Überschüssiges Öl ausdrücken. Der
Filtereinsatz soll lediglich feucht,
nicht triefend naß sein.
8. Montieren:
lLuftfilterführung 1
HINWEIS:
Die Nase a am Filtergerüst auf die
Bohrung b am Luftfittereinsatz aus-
richten.
9. Auftragen:
lLithiumfett
(auf die Paßfläche a des
Luftfittereinsatzes) 5. Nettoyer:
lElément du filtre à air
Le nettoyer avec du dissolvant.
N.B.:
Une fois l’entretien terminé, éliminer ce
qui reste de solvant en serrant l’élément.
ATTENTION:
lNe pas tordre l’élément en l’esso-
rant.
lUn excès de dissolvant sur l’élément
risque de rendre la mise en marche
du moteur plus difficile.
6. Contrôler:
lElément du filtre à air
Endommagement ® Rempla-
cer.
7. Appliquer:
lHuile de filtre à air en mousse
ou huile de moteur sur l’élé-
ment.
N.B.:
Eliminer l’excédent d’huile. L’élément
doit être humide mais non pas dégoutter.
8. Monter:
lGuide de filtre à air 1
N.B.:
Aligner la saillie a située sur le guide
du filtre à air avec l’orifice b situé sur
l’élément du filtre à air.
9. Appliquer:
lGraisse à base de savon an
lithium
Sur la surface d’accouplement
a de l’élément de filtre à air.5. Pulire:
lElemento filtrante
Pulire con solvente.
NOTA:
Dopo la pulizia rimuovere il solvente
residuo strizzando l’elemento filtrante.
ATTENZIONE:
lNon torcere l’elemento filtrante
nello strizzarlo.
lSe si lascia troppo solvente nell’ele-
mento filtrante, l’avviamento del
motore potrebbe non avvenire cor-
rettamente.
6. Ispezionare:
lElemento filtrante
Danni ® Sostituire.
7. Applicare:
lOlio per filtro dell’aria in
schiuma o olio motore all’ele-
mento filtrante.
NOTA:
Eliminare l’olio in eccesso. L’elemento
filtrante deve essere umido ma non goc-
ciolante.
8. Installare:
lGuida filtro dell’aria 1
NOTA:
Allineare la sporgenza a sulla guida del
filtro dell’aria al foro b nell’elemento
filtrante.
9. Applicare:
lGrasso a base di sapone di litio
Sulla superficie corrispon-
dente a sull’elemento fil-
trante.
3 - 13
Page 192 of 686
3 - 14
INSP
ADJ
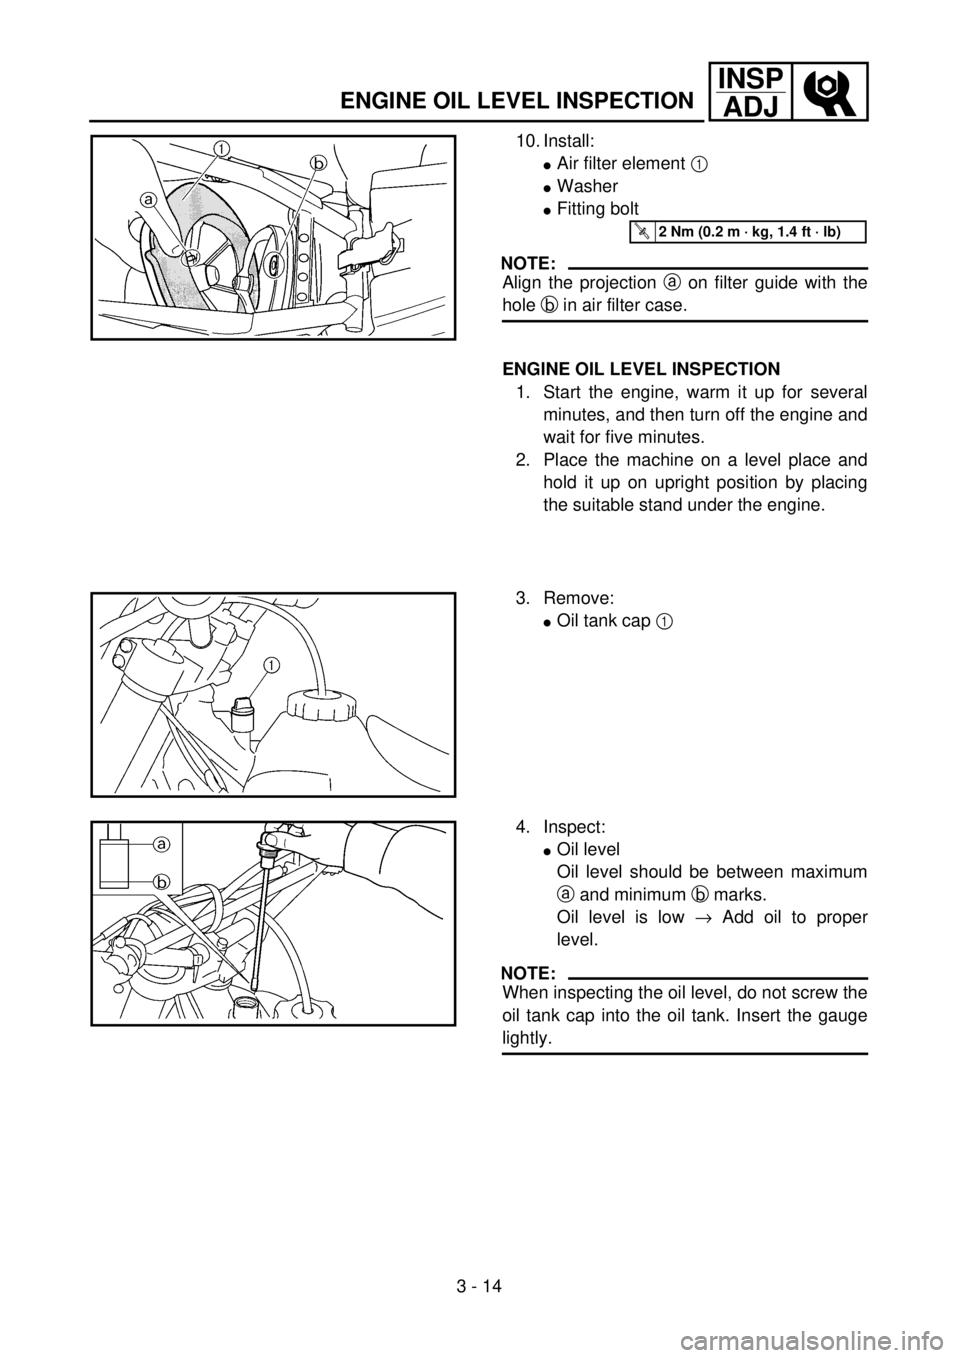
10. Install:
lAir filter element 1
lWasher
lFitting bolt
NOTE:
Align the projection a on filter guide with the
hole b in air filter case.
T R..2 Nm (0.2 m · kg, 1.4 ft · lb)
ENGINE OIL LEVEL INSPECTION
1. Start the engine, warm it up for several
minutes, and then turn off the engine and
wait for five minutes.
2. Place the machine on a level place and
hold it up on upright position by placing
the suitable stand under the engine.
3. Remove:
lOil tank cap 1
4. Inspect:
lOil level
Oil level should be between maximum
a and minimum b marks.
Oil level is low ® Add oil to proper
level.
NOTE:
When inspecting the oil level, do not screw the
oil tank cap into the oil tank. Insert the gauge
lightly.
ENGINE OIL LEVEL INSPECTION
Page 193 of 686
INSP
ADJ
10. Montieren:
lLuftfittereinsatz 1
lScheibe
lSchraube
HINWEIS:
Die Nase a am Filtergerüst auf die
Bohrung b am Luftfiltergehäuse
ausrichten.
T R..2 Nm (0,2 m · kg)
MOTORÖLSTAND KONTROLLIE-
REN
1. Den Motor starten, mehrere
Minuten warmlaufen lassen,
und dann ausschalten und
fünf Minuten warten.
2. Die Maschine auf ebenem Ort
abstellen und auf dem Motor
aufbocken.
3. Demontieren:
lMotoröl-Einfüllschraubver-
schluß 1
4. Kontrollieren:
lÖlstand
Der Ölstand sollte sich zwi-
schen der Minimal- und
Maximalstand-Markierung
a und b befinden.
Niedrig ® Öl bis zum emp-
fohlenen Stand auffüllen.
HINWEIS:
Bei der Ölstandkontrolle den Tauch-
stab lediglich einführen, nicht fest-
drehen.
CONTROLE DU NIVEAU D’HUILE MOTEUR
MOTORÖLSTAND KONTROLLIEREN
CONTROLLO DEL LIVELLO DELL’OLIO MOTORE
10. Monter:
lElément de filtre à air 1
lRondelle
lBoulon de fixation
N.B.:
Aligner la saillie a sur le guide du filtre
sur l’orifice b situé sur le carter de filtre
à air.
T R..2 Nm (0,2 m · kg, 1,4 ft · lb)
CONTROLE DU NIVEAU D’HUILE
MOTEUR
1. Mettre le moteur en marche, le
faire chauffer pendant quelques
minutes, puis le couper et atten-
dre cinq minutes.
2. Placer le véhicule sur un plan
horizontal et le dresser à la verti-
cale en plaçant un support adé-
quat sous le moteur.
3. Déposer:
lBouchon du réservoir d’huile
1
4. Contrôler:
lNiveau d’huile
Le niveau d’huile doit se trou-
ver entre les repères maximum
a et minimum b
.
Bas niveau d’huile ® Ajouter
de l’huile jusqu’au niveau
requis
.
N.B.:
Pour mesurer le niveau d’huile, intro-
duire la jauge dans le réservoir en
veillant à ne pas la visser.10. Installare:
lElemento filtrante 1
lRondella
lBullone di fissaggio
NOTA:
Allineare la sporgenza a sulla guida del
filtro al foro b nel contenitore del filtro
dell’aria.
T R..2 Nm (0,2 m · kg, 1,4 ft · lb)
CONTROLLO DEL LIVELLO
DELL’OLIO MOTORE
1. Avviare il motore, riscaldarlo per
alcuni minuti e quindi spegnerlo
ed attendere cinque minuti.
2. Posizionare il veicolo su una
superficie piana e tenerlo in posi-
zione eretta utilizzando il caval-
letto apposito posto sotto al
motore.
3. Rimuovere:
lTappo del serbatoio dell’olio
1
4. Ispezionare:
lLivello dell’olio
Il livello dell’olio deve essere
compreso tra la tacca del mas-
simo a e quella del minimo
b.
Il livello dell’olio è basso ®
Aggiungere olio fino al livello
giusto.
NOTA:
Nel controllare il livello dell’olio, non
avvitare il tappo dell’olio sul serbatoio.
Inserire delicatamente l’indicatore.
3 - 14
Page 194 of 686
3 - 15
INSP
ADJ
ENGINE OIL LEVEL INSPECTION
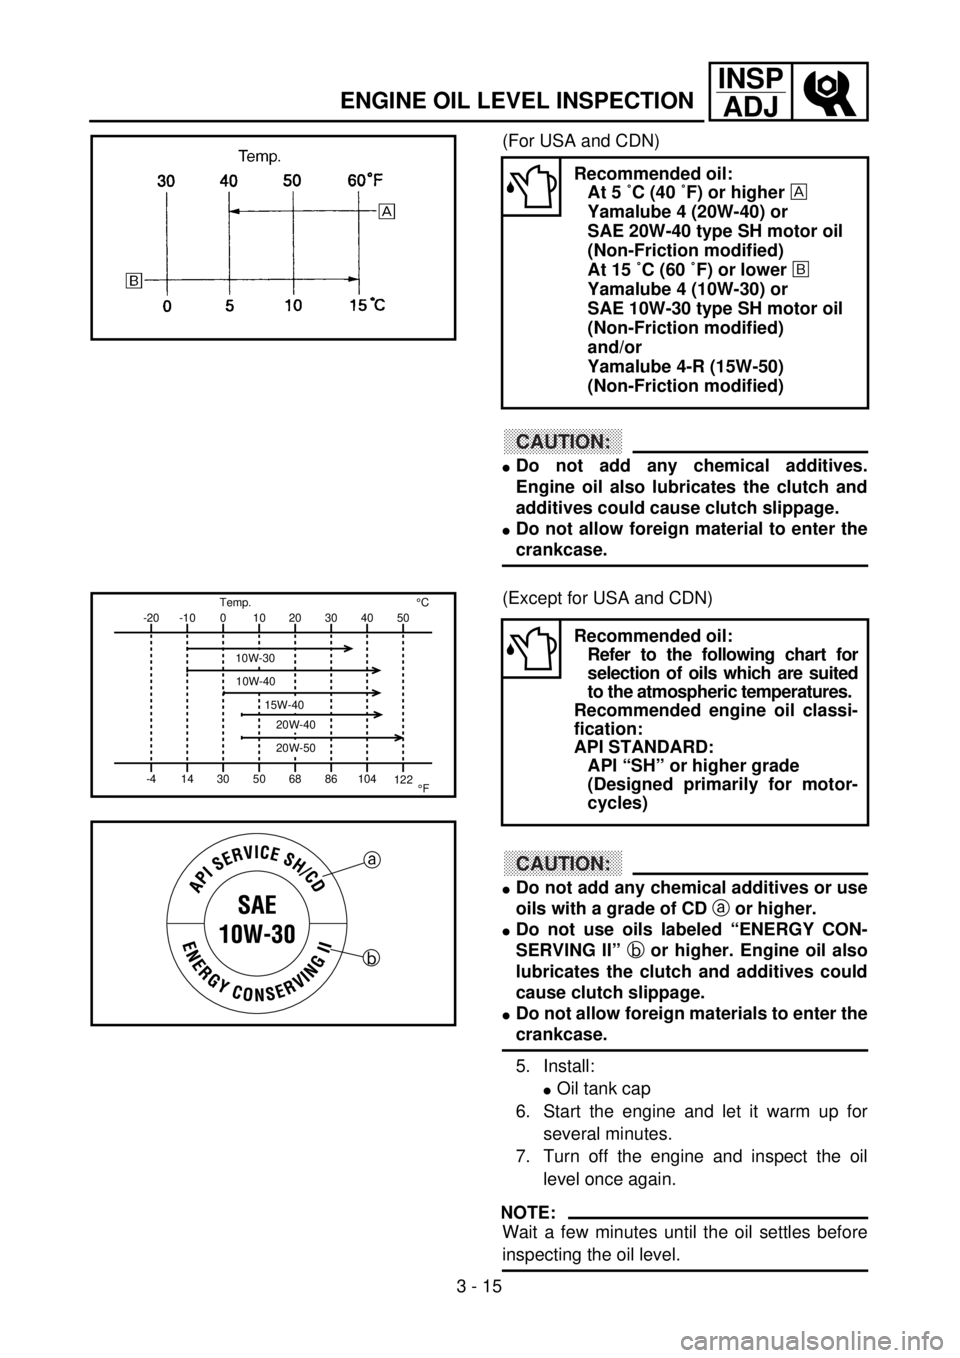
(For USA and CDN)
CAUTION:
lDo not add any chemical additives.
Engine oil also lubricates the clutch and
additives could cause clutch slippage.
lDo not allow foreign material to enter the
crankcase.
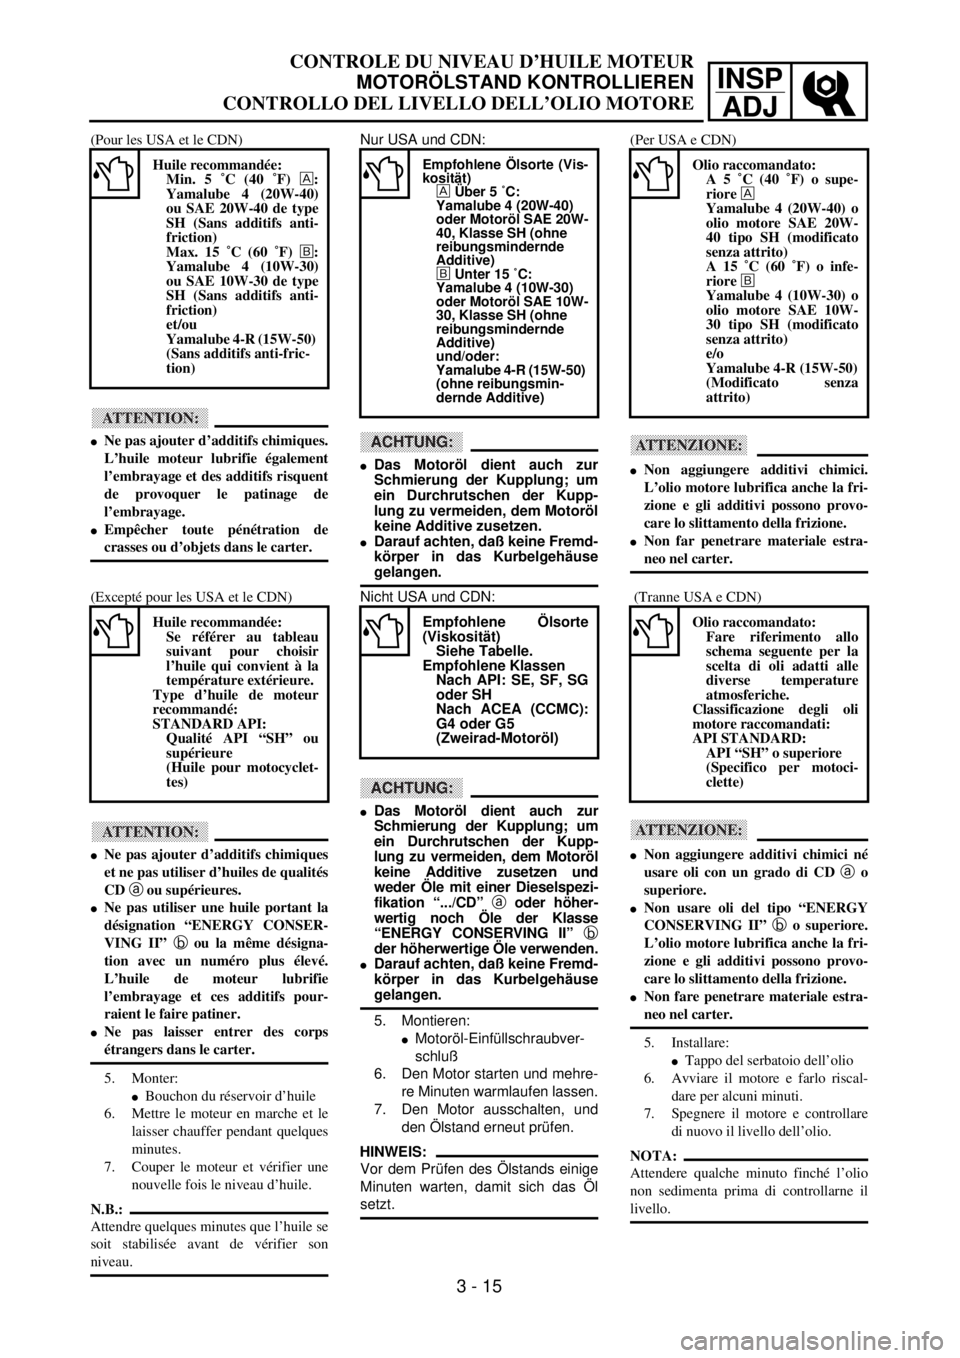
Recommended oil:
At 5 ˚C (40 ˚F) or higher
Yamalube 4 (20W-40) or
SAE 20W-40 type SH motor oil
(Non-Friction modified)
At 15 ˚C (60 ˚F) or lower õ
Yamalube 4 (10W-30) or
SAE 10W-30 type SH motor oil
(Non-Friction modified)
and/or
Yamalube 4-R (15W-50)
(Non-Friction modified)
(Except for USA and CDN)
CAUTION:
lDo not add any chemical additives or use
oils with a grade of CD a or higher.
lDo not use oils labeled “ENERGY CON-
SERVING II” b or higher. Engine oil also
lubricates the clutch and additives could
cause clutch slippage.
lDo not allow foreign materials to enter the
crankcase.
5. Install:
lOil tank cap
6. Start the engine and let it warm up for
several minutes.
7. Turn off the engine and inspect the oil
level once again.
NOTE:
Wait a few minutes until the oil settles before
inspecting the oil level.
Recommended oil:
Refer to the following chart for
selection of oils which are suited
to the atmospheric temperatures.
Recommended engine oil classi-
fication:
API STANDARD:
API “SH” or higher grade
(Designed primarily for motor-
cycles)
-20
-4-10
140
3010
5020
6830
8640 50
104
122¡CTemp.
¡F
10W-30
10W-40
20W-40
20W-50
15W-40
a
b
Page 195 of 686
INSP
ADJ
CONTROLE DU NIVEAU D’HUILE MOTEUR
MOTORÖLSTAND KONTROLLIEREN
CONTROLLO DEL LIVELLO DELL’OLIO MOTORE
Nur USA und CDN:
ACHTUNG:
lDas Motoröl dient auch zur
Schmierung der Kupplung; um
ein Durchrutschen der Kupp-
lung zu vermeiden, dem Motoröl
keine Additive zusetzen.
lDarauf achten, daß keine Fremd-
körper in das Kurbelgehäuse
gelangen.
Empfohlene Ölsorte (Vis-
kosität)
Über 5 ˚C:
Yamalube 4 (20W-40)
oder Motoröl SAE 20W-
40, Klasse SH (ohne
reibungsmindernde
Additive)
õ Unter 15 ˚C:
Yamalube 4 (10W-30)
oder Motoröl SAE 10W-
30, Klasse SH (ohne
reibungsmindernde
Additive)
und/oder:
Yamalube 4-R (15W-50)
(ohne reibungsmin-
dernde Additive)
Nicht USA und CDN:
ACHTUNG:
lDas Motoröl dient auch zur
Schmierung der Kupplung; um
ein Durchrutschen der Kupp-
lung zu vermeiden, dem Motoröl
keine Additive zusetzen und
weder Öle mit einer Dieselspezi-
fikation “.../CD” a oder höher-
wertig noch Öle der Klasse
“ENERGY CONSERVING II” b
der höherwertige Öle verwenden.
lDarauf achten, daß keine Fremd-
körper in das Kurbelgehäuse
gelangen.
5. Montieren:
lMotoröl-Einfüllschraubver-
schluß
6. Den Motor starten und mehre-
re Minuten warmlaufen lassen.
7. Den Motor ausschalten, und
den Ölstand erneut prüfen.
HINWEIS:
Vor dem Prüfen des Ölstands einige
Minuten warten, damit sich das Öl
setzt.
Empfohlene Ölsorte
(Viskosität)
Siehe Tabelle.
Empfohlene Klassen
Nach API: SE, SF, SG
oder SH
Nach ACEA (CCMC):
G4 oder G5
(Zweirad-Motoröl)
(Pour les USA et le CDN)
ATTENTION:
lNe pas ajouter d’additifs chimiques.
L’huile moteur lubrifie également
l’embrayage et des additifs risquent
de provoquer le patinage de
l’embrayage.
lEmpêcher toute pénétration de
crasses ou d’objets dans le carter.
Huile recommandée:
Min. 5 ˚C (40 ˚F) :
Yamalube 4 (20W-40)
ou SAE 20W-40 de type
SH (Sans additifs anti-
friction)
Max. 15 ˚C (60 ˚F) õ:
Yamalube 4 (10W-30)
ou SAE 10W-30 de type
SH (Sans additifs anti-
friction)
et/ou
Yamalube 4-R (15W-50)
(Sans additifs anti-fric-
tion)
(Excepté pour les USA et le CDN)
ATTENTION:
lNe pas ajouter d’additifs chimiques
et ne pas utiliser d’huiles de qualités
CD a ou supérieures.
lNe pas utiliser une huile portant la
désignation “ENERGY CONSER-
VING II” b ou la même désigna-
tion avec un numéro plus élevé.
L’huile de moteur lubrifie
l’embrayage et ces additifs pour-
raient le faire patiner.
lNe pas laisser entrer des corps
étrangers dans le carter.
5. Monter:
lBouchon du réservoir d’huile
6. Mettre le moteur en marche et le
laisser chauffer pendant quelques
minutes.
7. Couper le moteur et vérifier une
nouvelle fois le niveau d’huile.
N.B.:
Attendre quelques minutes que l’huile se
soit stabilisée avant de vérifier son
niveau.
Huile recommandée:
Se référer au tableau
suivant pour choisir
l’huile qui convient à la
température extérieure.
Type d’huile de moteur
recommandé:
STANDARD API:
Qualité API “SH” ou
supérieure
(Huile pour motocyclet-
tes)
(Per USA e CDN)
ATTENZIONE:
lNon aggiungere additivi chimici.
L’olio motore lubrifica anche la fri-
zione e gli additivi possono provo-
care lo slittamento della frizione.
lNon far penetrare materiale estra-
neo nel carter.
Olio raccomandato:
A 5 ˚C (40 ˚F) o supe-
riore
Yamalube 4 (20W-40) o
olio motore SAE 20W-
40 tipo SH (modificato
senza attrito)
A 15 ˚C (60 ˚F) o infe-
riore õ
Yamalube 4 (10W-30) o
olio motore SAE 10W-
30 tipo SH (modificato
senza attrito)
e/o
Yamalube 4-R (15W-50)
(Modificato senza
attrito)
(Tranne USA e CDN)
ATTENZIONE:
lNon aggiungere additivi chimici né
usare oli con un grado di CD a o
superiore.
lNon usare oli del tipo “ENERGY
CONSERVING II” b o superiore.
L’olio motore lubrifica anche la fri-
zione e gli additivi possono provo-
care lo slittamento della frizione.
lNon fare penetrare materiale estra-
neo nel carter.
5. Installare:
lTappo del serbatoio dell’olio
6. Avviare il motore e farlo riscal-
dare per alcuni minuti.
7. Spegnere il motore e controllare
di nuovo il livello dell’olio.
NOTA:
Attendere qualche minuto finché l’olio
non sedimenta prima di controllarne il
livello.
Olio raccomandato:
Fare riferimento allo
schema seguente per la
scelta di oli adatti alle
diverse temperature
atmosferiche.
Classificazione degli oli
motore raccomandati:
API STANDARD:
API “SH” o superiore
(Specifico per motoci-
clette)
3 - 15
Page 196 of 686
3 - 16
INSP
ADJ
ENGINE OIL REPLACEMENT
ENGINE OIL REPLACEMENT
1. Start the engine and warm it up for sev-
eral minutes, and then turn off the engine
and wait for five minute.
2. Place the machine on a level place and
hold it on upright position by placing the
suitable stand under the engine.
3. Place a suitable container under the
engine.
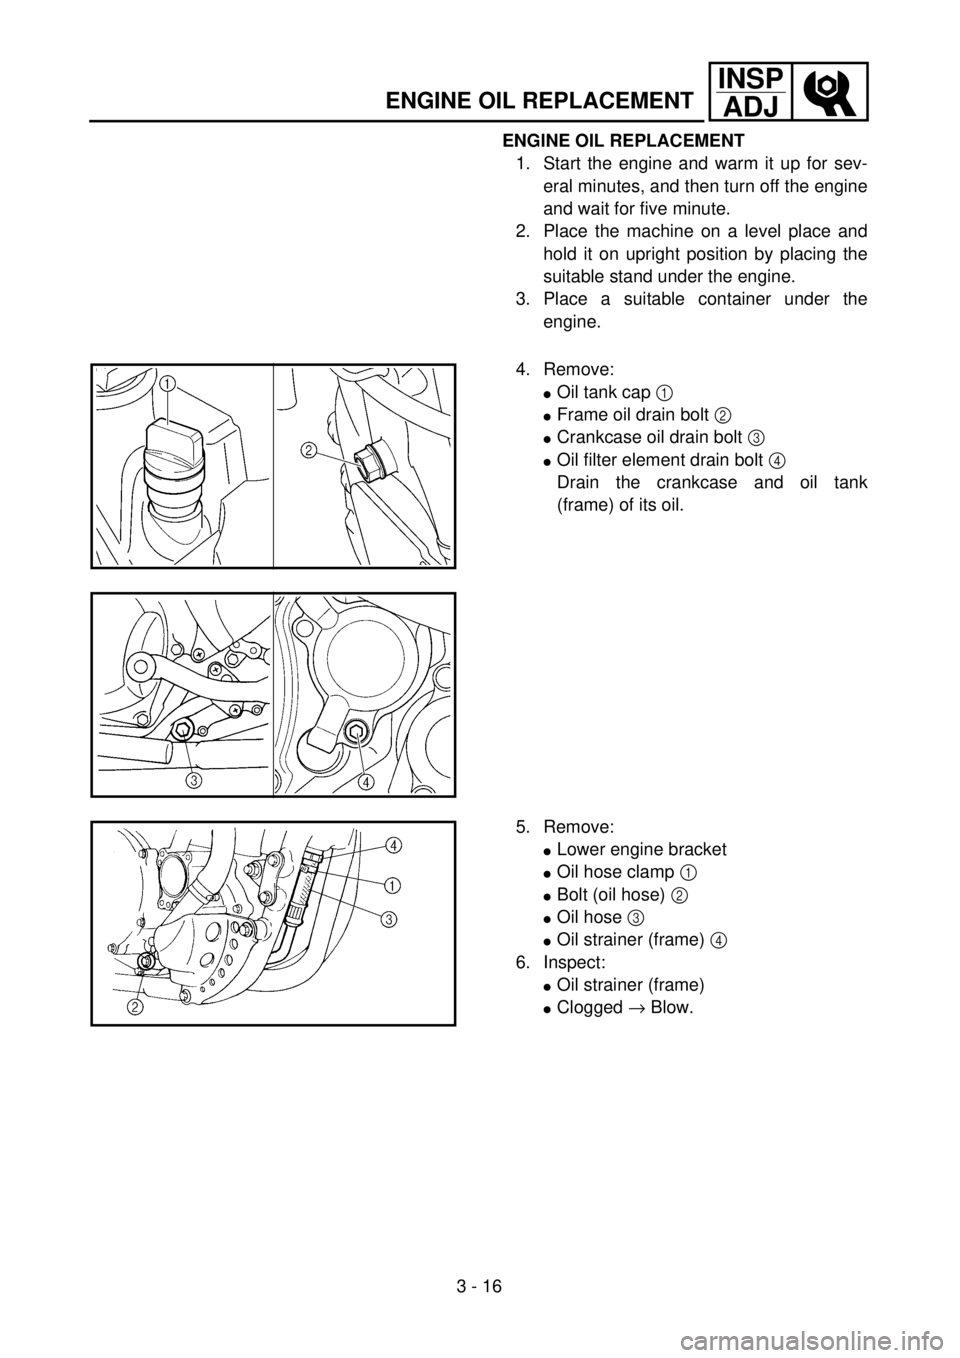
4. Remove:
lOil tank cap 1
lFrame oil drain bolt 2
lCrankcase oil drain bolt 3
lOil filter element drain bolt 4
Drain the crankcase and oil tank
(frame) of its oil.
5. Remove:
lLower engine bracket
lOil hose clamp 1
lBolt (oil hose) 2
lOil hose 3
lOil strainer (frame) 4
6. Inspect:
lOil strainer (frame)
lClogged ® Blow.
Page 197 of 686

INSP
ADJ
CHANGEMENT DE L’HUILE DE MOTEUR
MOTORÖL WECHSELN
SOSTITUZIONE DELL’OLIO MOTORE
MOTORÖL WECHSELN
1. Den Motor starten, mehrere
Minuten warmlaufen lassen,
und dann ausschalten und
fünf Minuten warten.
2. Die Maschine auf ebenem Ort
abstellen und auf dem Motor
aufbocken.
3. Einen geeigneten Behälter un-
ter den Motor stellen.
4. Demontieren:
lÖltankdeckel 1
lRahmen des Ölablaufstop-
fens 2
lKurbelwellen-Ölablaufstop-
fen 3
lÖlfilterelement-Ablaufstop-
fen 4
Das Kurbelgehäuse und den
Öltank (Rahmen) leerlaufen
lassen.
5. Demontieren:
lUnterer Motorbügel
lÖlschlauchklammer 1
lSteckschraube (Öl-
schlauch) 2
lÖlschlauch 3
lÖlsieb (Rahmen) 4
6. Kontrollieren:
lÖlsieb (Rahmen)
lVerstopft ® Ausblasen. CHANGEMENT DE L’HUILE DE
MOTEUR
1. Mettre le moteur en marche, le
faire chauffer pendant quelques
minutes, puis le couper et atten-
dre cinq minutes.
2. Placer le véhicule sur un plan
horizontal et le dresser à la verti-
cale en plaçant un support adé-
quat sous le moteur.
3. Déposer un récipient adéquat
sous le moteur.
4. Déposer:
lBouchon du réservoir d’huile
1
lBoulon de vidange d’huile au
cadre 2
lBoulon de vidange d’huile de
carter 3
lBoulon de vidange d’élément
de filtre à huile 4
Vidanger l’huile du carter
moteur et du réservoir d’huile
(cadre).
5. Déposer:
lSupport inférieur de moteur
lBride de durit d’huile 1
lBoulon (durit d’huile) 2
lDurit d’huile 3
lCrépine d’huile (cadre) 4
6. Vérifier:
lCrépine d’huile (cadre)
lBouché ® Passer à l’air com-
primé.SOSTITUZIONE DELL’OLIO
MOTORE
1. Avviare il motore, riscaldarlo per
alcuni minuti e quindi spegnerlo
ed attendere cinque minuti.
2. Posizionare il veicolo su una
superficie piana e tenerlo in posi-
zione eretta utilizzando il caval-
letto apposito posto sotto al
motore.
3. Posizionare un contenitore ido-
neo sotto al motore.
4. Rimuovere:
lTappo del serbatoio dell’olio
1
lBullone di scarico dell’olio del
telaio 2
lBullone di scarico dell’olio del
carter 3
lBullone di scarico elemento fil-
trante 4
Scaricare l’olio dal carter e dal
serbatoio dell’olio (telaio).
5. Rimuovere:
lStaffa motore inferiore
lFascetta fermatubo dell’olio 1
lBullone (tubo flessibile
dell’olio) 2
lTubo flessibile dell’olio 3
lFiltro dell’olio (telaio) 4
6. Ispezionare:
lFiltro dell’olio (telaio)
lIntasato ® Pulire con aria.
3 - 16
Page 198 of 686

3 - 17
INSP
ADJ
ENGINE OIL REPLACEMENT
7. If the oil filter is to be replaced during this
oil change, remove the following parts
and reinstall them.
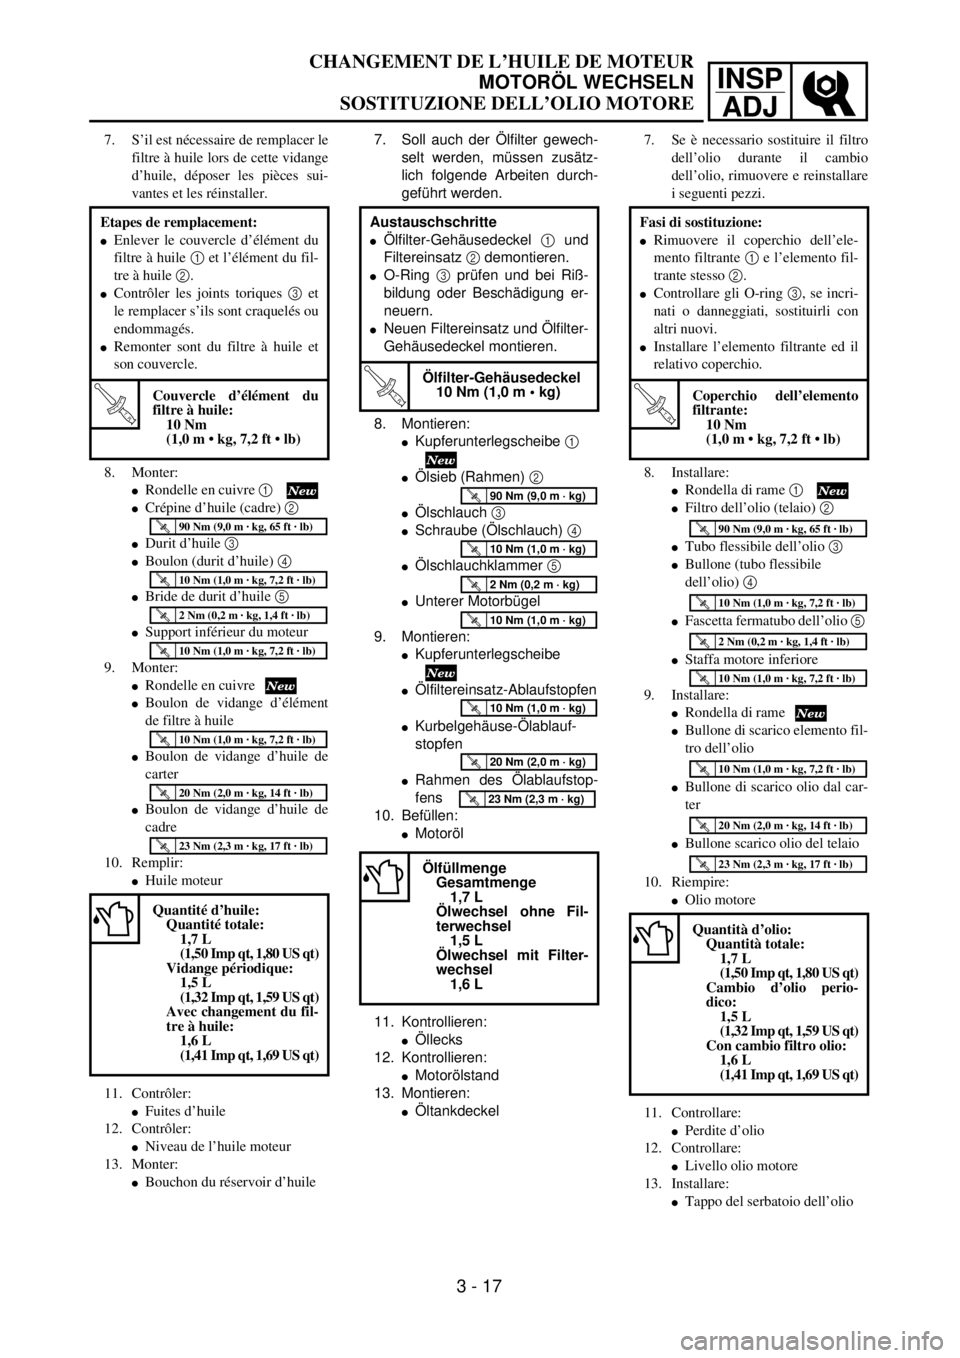
8. Install:
lCopper washer 1
lOil strainer (frame) 2
lOil hose 3
lBolt (oil hose) 4
lOil hose clamp 5
lLower engine bracket
9. Install:
lCopper washer
lOil filter element drain bolt
lCrankcase oil drain bolt
lFrame oil drain bolt
10. Fill:
lEngine oil
11. Check:
lOil leakage
12. Install:
lOil tank cap
13. Check:
lEngine oil level Replacement steps:
lRemove the oil filter element cover 1 and
oil filter element 2.
lCheck the O-rings 3, if cracked or dam-
aged, replace them with a new one.
lInstall the oil filter element and oil filter ele-
ment cover.
T R..
Oil filter element cover:
10 Nm (1.0 m • kg, 7.2 ft • lb)
Oil quantity:
Total amount:
1.7 L (1.50 Imp qt, 1.80 US qt)
Periodic oil change:
1.5 L (1.32 Imp qt, 1.59 US qt)
With oil filter replacement:
1.6 L (1.41 Imp qt, 1.69 US qt)
T R..90 Nm (9.0 m · kg, 65 ft · lb)
T R..10 Nm (1.0 m · kg, 7.2 ft · lb)
T R..2 Nm (0.2 m · kg, 1.4 ft · lb)
T R..10 Nm (1.0 m · kg, 7.2 ft · lb)
T R..10 Nm (1.0 m · kg, 7.2 ft · lb)
T R..20 Nm (2.0 m · kg, 14 ft · lb)
T R..23 Nm (2.3 m · kg, 17 ft · lb)
Page 199 of 686
INSP
ADJ
CHANGEMENT DE L’HUILE DE MOTEUR
MOTORÖL WECHSELN
SOSTITUZIONE DELL’OLIO MOTORE
7. Soll auch der Ölfilter gewech-
selt werden, müssen zusätz-
lich folgende Arbeiten durch-
geführt werden.
8. Montieren:
lKupferunterlegscheibe 1
lÖlsieb (Rahmen) 2
lÖlschlauch 3
lSchraube (Ölschlauch) 4
lÖlschlauchklammer 5
lUnterer Motorbügel
9. Montieren:
lKupferunterlegscheibe
lÖlfiltereinsatz-Ablaufstopfen
lKurbelgehäuse-Ölablauf-
stopfen
lRahmen des Ölablaufstop-
fens
10. Befüllen:
lMotoröl
11. Kontrollieren:
lÖllecks
12. Kontrollieren:
lMotorölstand
13. Montieren:
lÖltankdeckel Austauschschritte
lÖlfilter-Gehäusedeckel 1 und
Filtereinsatz 2 demontieren.
lO-Ring 3 prüfen und bei Riß-
bildung oder Beschädigung er-
neuern.
lNeuen Filtereinsatz und Ölfilter-
Gehäusedeckel montieren.
T R..
Ölfilter-Gehäusedeckel
10 Nm (1,0 m • kg)
Ölfüllmenge
Gesamtmenge
1,7 L
Ölwechsel ohne Fil-
terwechsel
1,5 L
Ölwechsel mit Filter-
wechsel
1,6 L
T R..90 Nm (9,0 m · kg)
T R..10 Nm (1,0 m · kg)
T R..2 Nm (0,2 m · kg)
T R..10 Nm (1,0 m · kg)
T R..10 Nm (1,0 m · kg)
T R..20 Nm (2,0 m · kg)
T R..23 Nm (2,3 m · kg)
7. S’il est nécessaire de remplacer le
filtre à huile lors de cette vidange
d’huile, déposer les pièces sui-
vantes et les réinstaller.
8. Monter:
lRondelle en cuivre 1
lCrépine d’huile (cadre) 2
lDurit d’huile 3
lBoulon (durit d’huile) 4
lBride de durit d’huile 5
lSupport inférieur du moteur
9. Monter:
lRondelle en cuivre
lBoulon de vidange d’élément
de filtre à huile
lBoulon de vidange d’huile de
carter
lBoulon de vidange d’huile de
cadre
10. Remplir:
lHuile moteur
11. Contrôler:
lFuites d’huile
12. Contrôler:
lNiveau de l’huile moteur
13. Monter:
lBouchon du réservoir d’huile Etapes de remplacement:
lEnlever le couvercle d’élément du
filtre à huile 1 et l’élément du fil-
tre à huile 2.
lContrôler les joints toriques 3 et
le remplacer s’ils sont craquelés ou
endommagés.
lRemonter sont du filtre à huile et
son couvercle.
T R..
Couvercle d’élément du
filtre à huile:
10 Nm
(1,0 m • kg, 7,2 ft • lb)
Quantité d’huile:
Quantité totale:
1,7 L
(1,50 Imp qt, 1,80 US qt)
Vidange périodique:
1,5 L
(1,32 Imp qt, 1,59 US qt)
Avec changement du fil-
tre à huile:
1,6 L
(1,41 Imp qt, 1,69 US qt)
T R..90 Nm (9,0 m · kg, 65 ft · lb)
T R..10 Nm (1,0 m · kg, 7,2 ft · lb)
T R..2 Nm (0,2 m · kg, 1,4 ft · lb)
T R..10 Nm (1,0 m · kg, 7,2 ft · lb)
T R..10 Nm (1,0 m · kg, 7,2 ft · lb)
T R..20 Nm (2,0 m · kg, 14 ft · lb)
T R..23 Nm (2,3 m · kg, 17 ft · lb)
7. Se è necessario sostituire il filtro
dell’olio durante il cambio
dell’olio, rimuovere e reinstallare
i seguenti pezzi.
8. Installare:
lRondella di rame 1
lFiltro dell’olio (telaio) 2
lTubo flessibile dell’olio 3
lBullone (tubo flessibile
dell’olio) 4
lFascetta fermatubo dell’olio 5
lStaffa motore inferiore
9. Installare:
lRondella di rame
lBullone di scarico elemento fil-
tro dell’olio
lBullone di scarico olio dal car-
ter
lBullone scarico olio del telaio
10. Riempire:
lOlio motore
11. Controllare:
lPerdite d’olio
12. Controllare:
lLivello olio motore
13. Installare:
lTappo del serbatoio dell’olio Fasi di sostituzione:
lRimuovere il coperchio dell’ele-
mento filtrante 1 e l’elemento fil-
trante stesso 2.
lControllare gli O-ring 3, se incri-
nati o danneggiati, sostituirli con
altri nuovi.
lInstallare l’elemento filtrante ed il
relativo coperchio.
T R..
Coperchio dell’elemento
filtrante:
10 Nm
(1,0 m • kg, 7,2 ft • lb)
Quantità d’olio:
Quantità totale:
1,7 L
(1,50 Imp qt, 1,80 US qt)
Cambio d’olio perio-
dico:
1,5 L
(1,32 Imp qt, 1,59 US qt)
Con cambio filtro olio:
1,6 L
(1,41 Imp qt, 1,69 US qt)
T R..90 Nm (9,0 m · kg, 65 ft · lb)
T R..10 Nm (1,0 m · kg, 7,2 ft · lb)
T R..2 Nm (0,2 m · kg, 1,4 ft · lb)
T R..10 Nm (1,0 m · kg, 7,2 ft · lb)
T R..10 Nm (1,0 m · kg, 7,2 ft · lb)
T R..20 Nm (2,0 m · kg, 14 ft · lb)
T R..23 Nm (2,3 m · kg, 17 ft · lb)
3 - 17
Page 200 of 686
3 - 18
INSP
ADJ
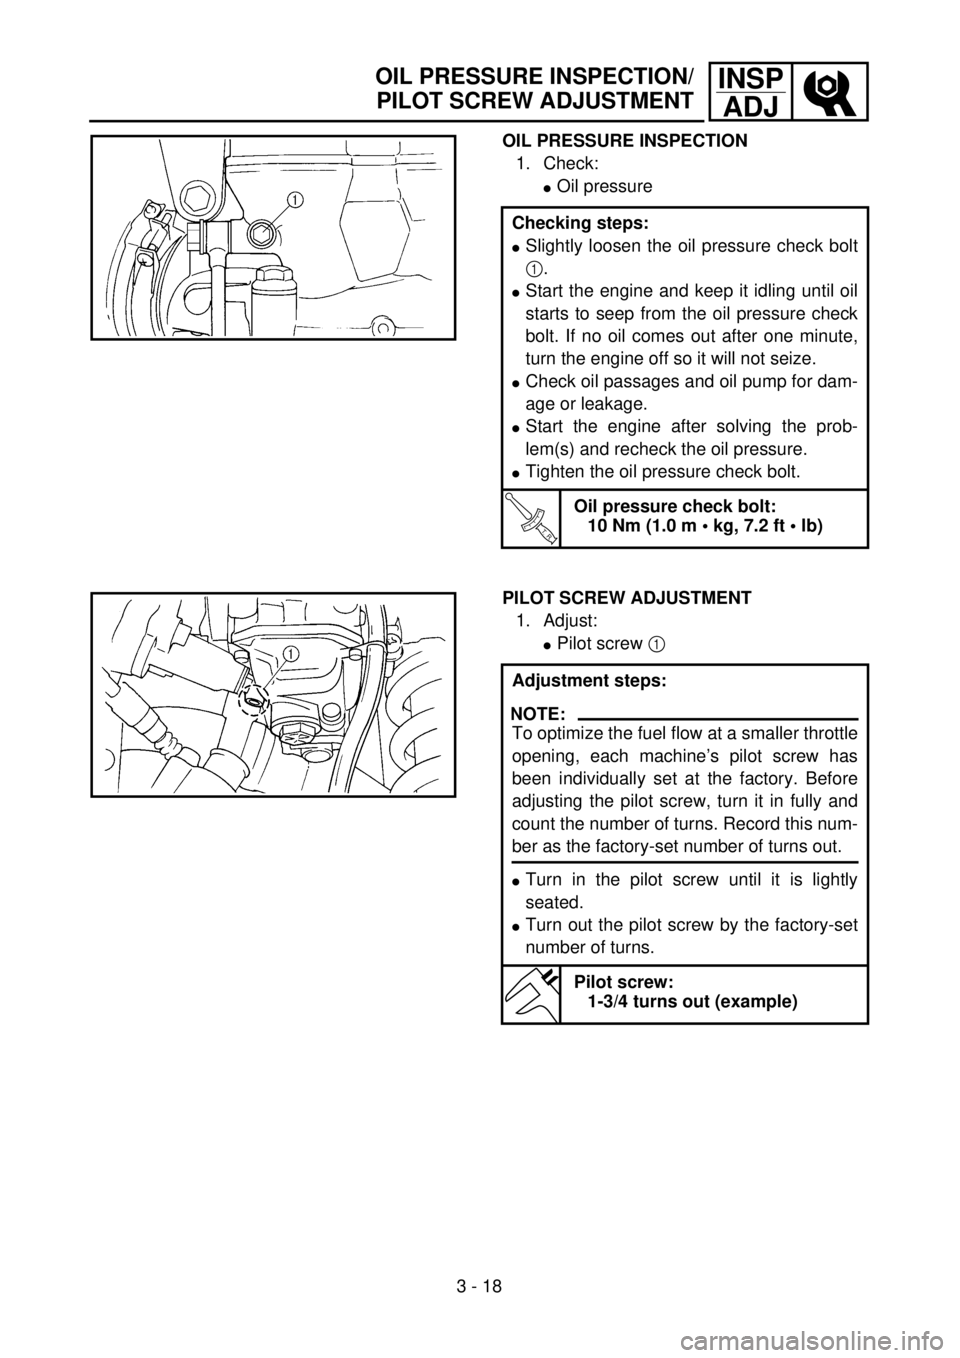
OIL PRESSURE INSPECTION
1. Check:
lOil pressure
Checking steps:
lSlightly loosen the oil pressure check bolt
1.
lStart the engine and keep it idling until oil
starts to seep from the oil pressure check
bolt. If no oil comes out after one minute,
turn the engine off so it will not seize.
lCheck oil passages and oil pump for dam-
age or leakage.
lStart the engine after solving the prob-
lem(s) and recheck the oil pressure.
lTighten the oil pressure check bolt.
T R..
Oil pressure check bolt:
10 Nm (1.0 m • kg, 7.2 ft • lb)
PILOT SCREW ADJUSTMENT
1. Adjust:
lPilot screw 1
Adjustment steps:
NOTE:
To optimize the fuel flow at a smaller throttle
opening, each machine’s pilot screw has
been individually set at the factory. Before
adjusting the pilot screw, turn it in fully and
count the number of turns. Record this num-
ber as the factory-set number of turns out.
lTurn in the pilot screw until it is lightly
seated.
lTurn out the pilot screw by the factory-set
number of turns.
Pilot screw:
1-3/4 turns out (example)
OIL PRESSURE INSPECTION/
PILOT SCREW ADJUSTMENT