YAMAHA YFM90R 2009 Repair Manual
Manufacturer: YAMAHA, Model Year: 2009, Model line: YFM90R, Model: YAMAHA YFM90R 2009Pages: 120, PDF Size: 9.14 MB
Page 61 of 120

7-15
Do not ride in areas posted “no trespassing”.
Do not ride on private property without getting per-
mission.
Select a large, flat area off-road to become familiar
with your ATV. Make sure that this area is free of
obstacles and other riders. You should practice
control of the throttle, brakes, and turning tech-
niques in this area before trying more difficult ter-
rain. Always avoid riding on paved surfaces: the
ATV is designed for off-road use only, and han-
dling maneuvers are more difficult to perform on
pavement.
Set the parking brake and follow the instruction on
page 6-1 to start the engine. Once it has warmed
up you are ready to begin riding your ATV. Re-
7
member that the engine and exhaust pipe will be
hot when riding and afterwards; do not allow skin
or clothing to come in contact with these compo-
nents.
Apply the throttle slowly and smoothly. You will
start to accelerate. If the throttle is applied too
abruptly, the front wheels may lift off the ground,
resulting in a loss of directional control. Avoid
higher speeds until you are thoroughly familiar
with the operation of your ATV.
When slowing down or stopping, release the throt-
tle and apply the brakes smoothly and evenly. Im-
proper use of the brakes can cause the tires to lose
traction, reducing control and increasing the possi-
bility of an accident.
TURNING YOUR ATV
To achieve maximum traction while riding off-road,
the two rear wheels are mounted solidly on one
axle and turn together at the same speed. There-
fore, unless the wheel on the inside of the turn is al-
lowed to slip or lose some traction, the ATV will
resist turning. A special turning technique must be
used to allow the ATV to make turns quickly and
easily. It is essential that this skill be learned first at With the engine idling, release the parking brake.
Page 62 of 120
7-16
low speed.
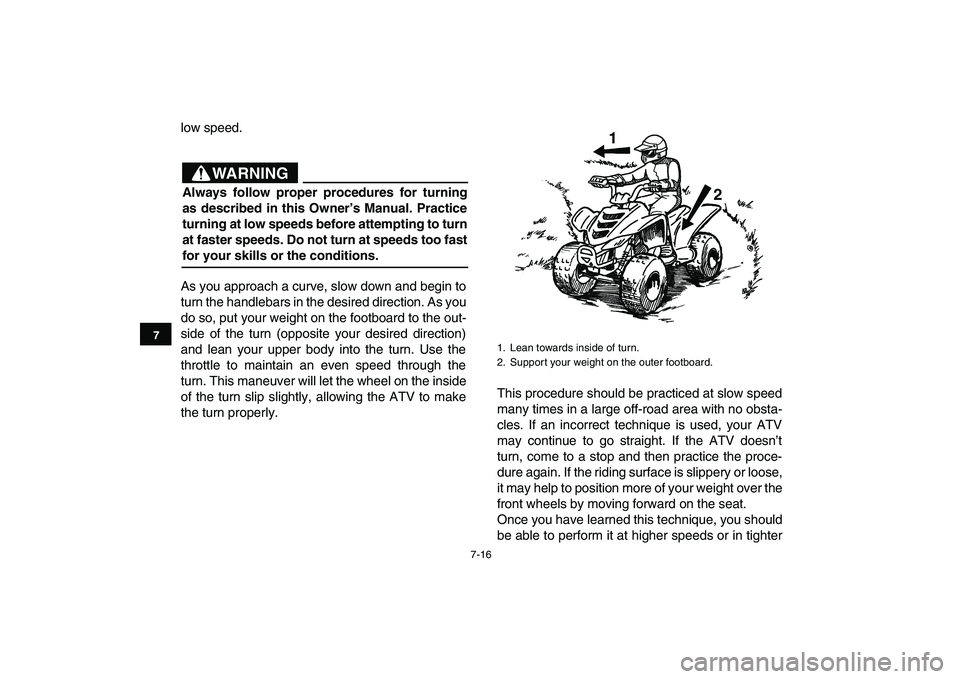
As you approach a curve, slow down and begin to
turn the handlebars in the desired direction. As you
do so, put your weight on the footboard to the out-
side of the turn (opposite your desired direction)
and lean your upper body into the turn. Use the
throttle to maintain an even speed through the
turn. This maneuver will let the wheel on the inside
of the turn slip slightly, allowing the ATV to make
the turn properly.This procedure should be practiced at slow speed
many times in a large off-road area with no obsta-
cles. If an incorrect technique is used, your ATV
may continue to go straight. If the ATV doesn’t
turn, come to a stop and then practice the proce-
dure again. If the riding surface is slippery or loose,
it may help to position more of your weight over the
front wheels by moving forward on the seat.
Once you have learned this technique, you should
be able to perform it at higher speeds or in tighter
1. Lean towards inside of turn.
2. Support your weight on the outer footboard.
1
2
7
WARNING
Always follow proper procedures for turning
as described in this Owner’s Manual. Practice
turning at low speeds before attempting to turn
at faster speeds. Do not turn at speeds too fastfor your skills or the conditions.
Page 63 of 120
7-17
curves.
Improper riding procedures such as abrupt throttle
changes, excessive braking, incorrect body move-
ments, or too much speed for the sharpness of the
turn may cause the ATV to tip. If the ATV begins to
tip over to the outside while negotiating a turn, lean
more to the inside. It may also be necessary to
gradually let off on the throttle and steer to the out-
side of the turn to avoid tipping over.
Remember: Avoid higher speeds until you are
thoroughly familiar with the operation of your ATV.
CLIMBING UPHILL
Use proper riding techniques to avoid ATV over-
turns on hills. Be sure that you can maneuver your
ATV well on flat ground before attempting any in-
cline and then practice riding first on gentle slopes.
Try more difficult climbs only after you have devel-
oped your skill. In all cases avoid inclines with slip-
pery or loose surfaces, or obstacles that might
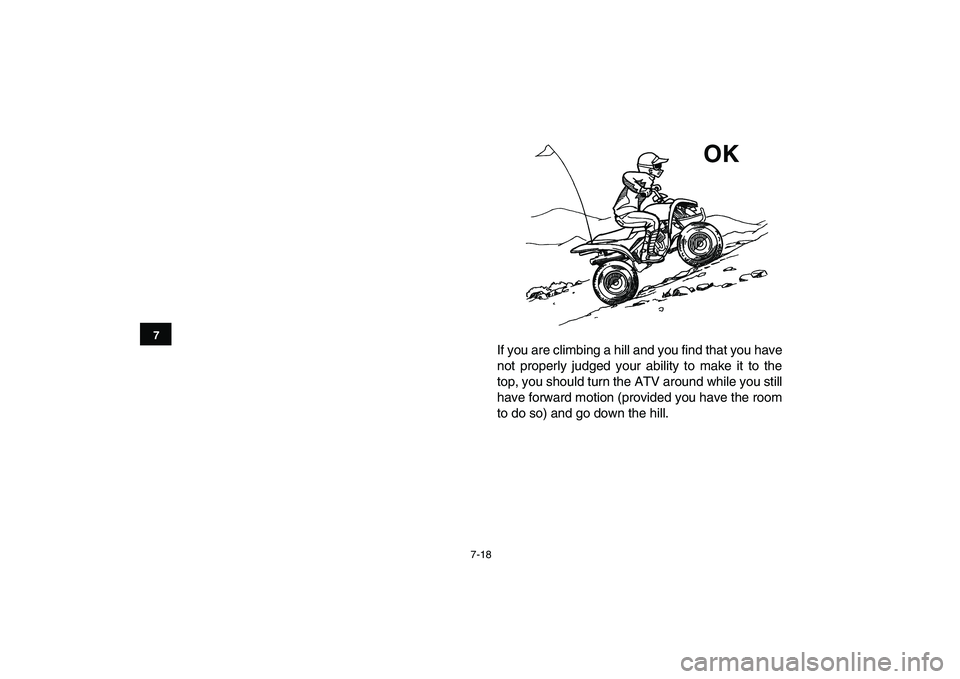
cause you to lose control.It is important when climbing a hill to make sure
that your weight is transferred forward on the ATV.
This can be accomplished by leaning forward and,
on steeper inclines, standing on the footboards
and leaning forward over the handlebars.
7
WARNING
Never operate the ATV on hills too steep for the
ATV or for your abilities. The ATV can overturn
more easily on extremely steep hills than on level surfaces or small hills. Practice on small-
er hills before attempting large hills.
WARNING
Always follow proper procedures for climb-
ing hills as described in this Owner’s Manu-
al.Always check the terrain carefully before
you start up any hill.Never climb hills with excessively slippery or
loose surfaces.Shift your weight forward.Never go over the top of any hill at high
speed. An obstacle, a sharp drop, or another
vehicle or person could be on the other sideof the hill.Never open the throttle suddenly. The ATV
could flip over backwards.
Page 64 of 120
7-18
If you are climbing a hill and you find that you have
not properly judged your ability to make it to the
top, you should turn the ATV around while you still
have forward motion (provided you have the room
to do so) and go down the hill.
OK
7
Page 65 of 120

7-19
If your ATV has stalled or stopped and you believe
you can continue up the hill, restart carefully to
make sure you do not lift the front wheels which
could cause you to lose control. If you are unable
to continue up the hill, dismount the ATV on the up-
hill side. Physically turn the ATV around and then
descend the hill.
If you start to roll backwards, DO NOT apply the
rear brake to stop or try to put the ATV in gear. The
ATV could easily tip over backwards. Instead, ap-
ply the front brake gradually, or dismount the ATV
immediately on the uphill side.
OK
7
WARNING
Never attempt to turn the ATV around on any
hill until you have mastered the turning tech-
nique as described in the Owner’s Manual on
level ground. Be very careful when turning onany hill. Avoid crossing the side of a steep hill
if possible.
When crossing the side of a hill:
Always follow proper procedures as de-
scribed in the Owner ’s Manual.Avoid hills with excessively slippery or loose
surfaces.Shift your weight to the uphill side of theATV.
Page 66 of 120
7-20
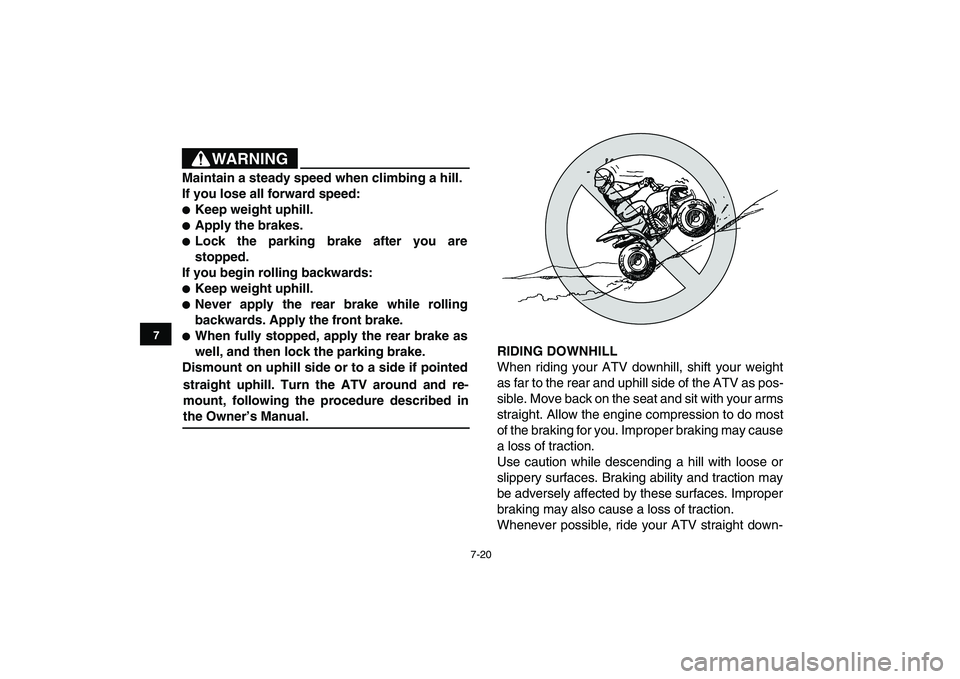
RIDING DOWNHILL
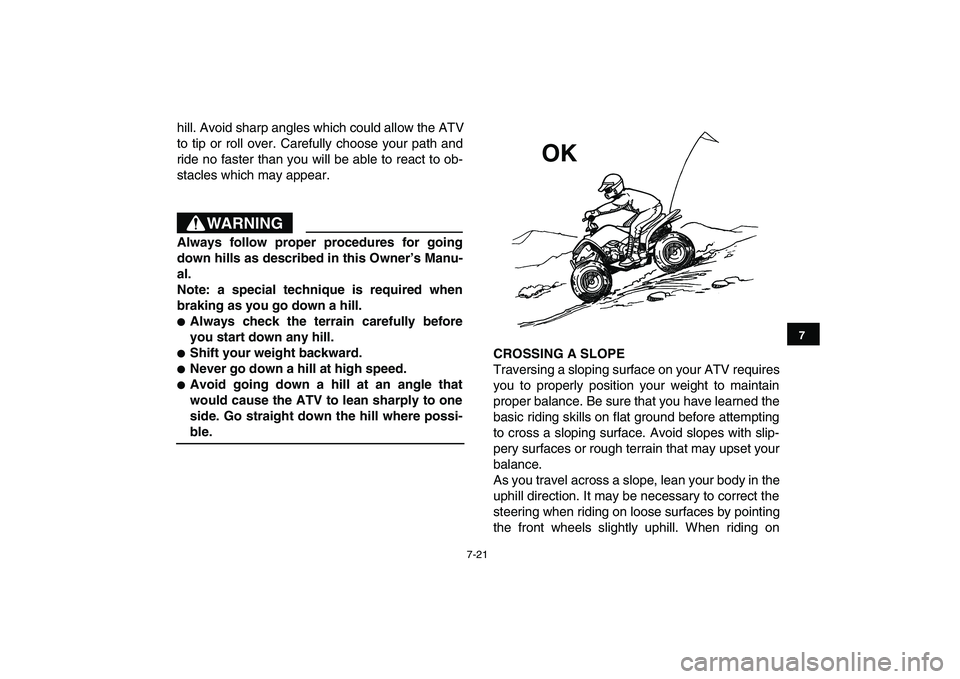
When riding your ATV downhill, shift your weight
as far to the rear and uphill side of the ATV as pos-
sible. Move back on the seat and sit with your arms
straight. Allow the engine compression to do most
of the braking for you. Improper braking may cause
a loss of traction.
Use caution while descending a hill with loose or
slippery surfaces. Braking ability and traction may
be adversely affected by these surfaces. Improper
braking may also cause a loss of traction.
Whenever possible, ride your ATV straight down-
7
WARNING
Maintain a steady speed when climbing a hill.
If you lose all forward speed:Keep weight uphill.Apply the brakes.Lock the parking brake after you are
stopped.
If you begin rolling backwards:Keep weight uphill.Never apply the rear brake while rolling
backwards. Apply the front brake.When fully stopped, apply the rear brake as
well, and then lock the parking brake.
Dismount on uphill side or to a side if pointed
straight uphill. Turn the ATV around and re-
mount, following the procedure described inthe Owner’s Manual.
Page 67 of 120
7-21
hill. Avoid sharp angles which could allow the ATV
to tip or roll over. Carefully choose your path and
ride no faster than you will be able to react to ob-
stacles which may appear.CROSSING A SLOPE
Traversing a sloping surface on your ATV requires
you to properly position your weight to maintain
proper balance. Be sure that you have learned the
basic riding skills on flat ground before attempting
to cross a sloping surface. Avoid slopes with slip-
pery surfaces or rough terrain that may upset your
balance.
As you travel across a slope, lean your body in the
uphill direction. It may be necessary to correct the
steering when riding on loose surfaces by pointing
the front wheels slightly uphill. When riding on
OK
7
WARNING
Always follow proper procedures for going
down hills as described in this Owner’s Manu-
al.
Note: a special technique is required when
braking as you go down a hill.Always check the terrain carefully before
you start down any hill.Shift your weight backward.Never go down a hill at high speed.Avoid going down a hill at an angle that
would cause the ATV to lean sharply to one
side. Go straight down the hill where possi-ble.
Page 68 of 120
7-22
slopes, be sure not to make sharp turns either up
or down hill.
If your ATV does begin to tip over, gradually steer
in the downhill direction if there are no obstacles in
your path. As you regain proper balance, gradually
steer again in the direction you wish to travel.CROSSING THROUGH SHALLOW WATER
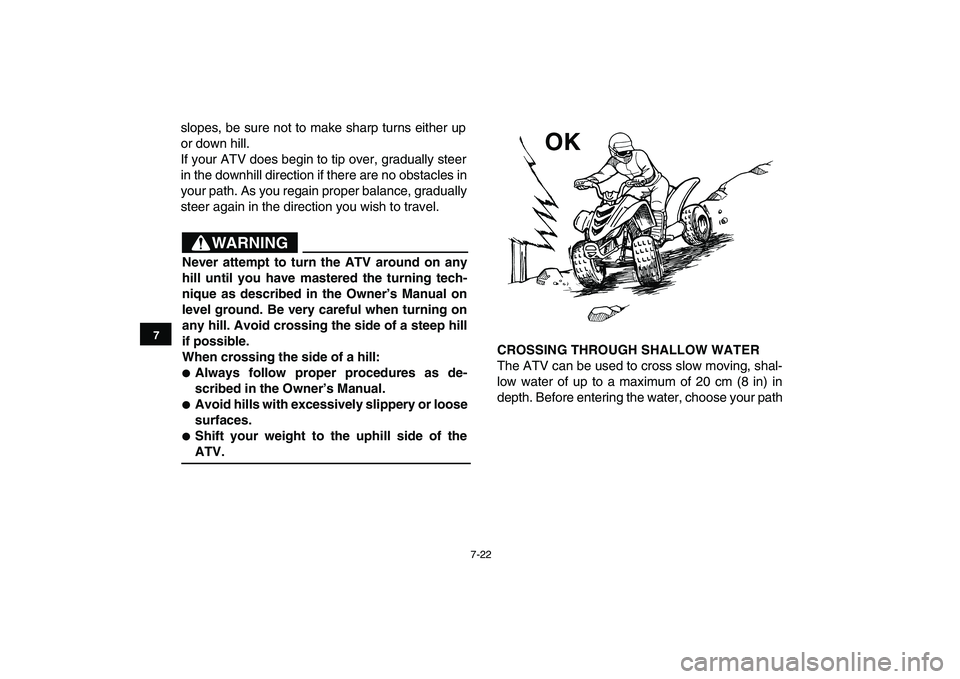
The ATV can be used to cross slow moving, shal-
low water of up to a maximum of 20 cm (8 in) in
depth. Before entering the water, choose your path
OK
7
WARNING
Never attempt to turn the ATV around on any
hill until you have mastered the turning tech-
nique as described in the Owner’s Manual on
level ground. Be very careful when turning on
any hill. Avoid crossing the side of a steep hill
if possible.
When crossing the side of a hill:Always follow proper procedures as de-
scribed in the Owner’s Manual.Avoid hills with excessively slippery or loose
surfaces.Shift your weight to the uphill side of theATV.
Page 69 of 120
7-23
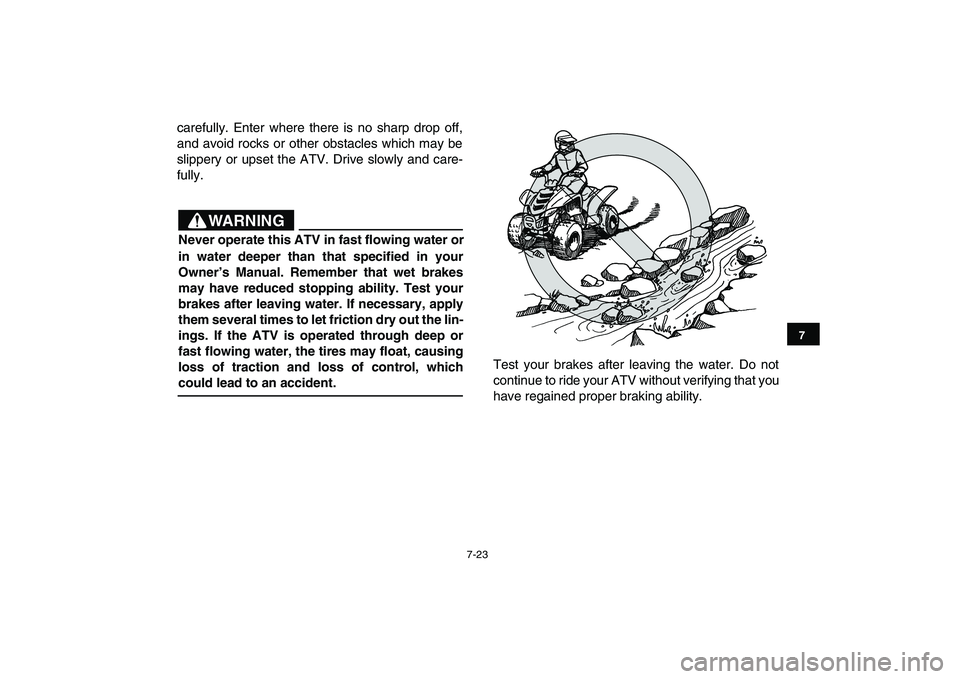
carefully. Enter where there is no sharp drop off,
and avoid rocks or other obstacles which may be
slippery or upset the ATV. Drive slowly and care-
fully.Test your brakes after leaving the water. Do not
continue to ride your ATV without verifying that you
have regained proper braking ability.
7
WARNING
Never operate this ATV in fast flowing water or
in water deeper than that specified in your
Ow ner’ s Manual. Remember that wet brakes
may have reduced stopping ability. Test your
brakes after leaving water. If necessary, apply
them several times to let friction dry out the lin-
ings. If the ATV is operated through deep or
fast flowing water, the tires may float, causing
loss of traction and loss of control, whichcould lead to an accident.
Page 70 of 120
7-24
N O T I C E
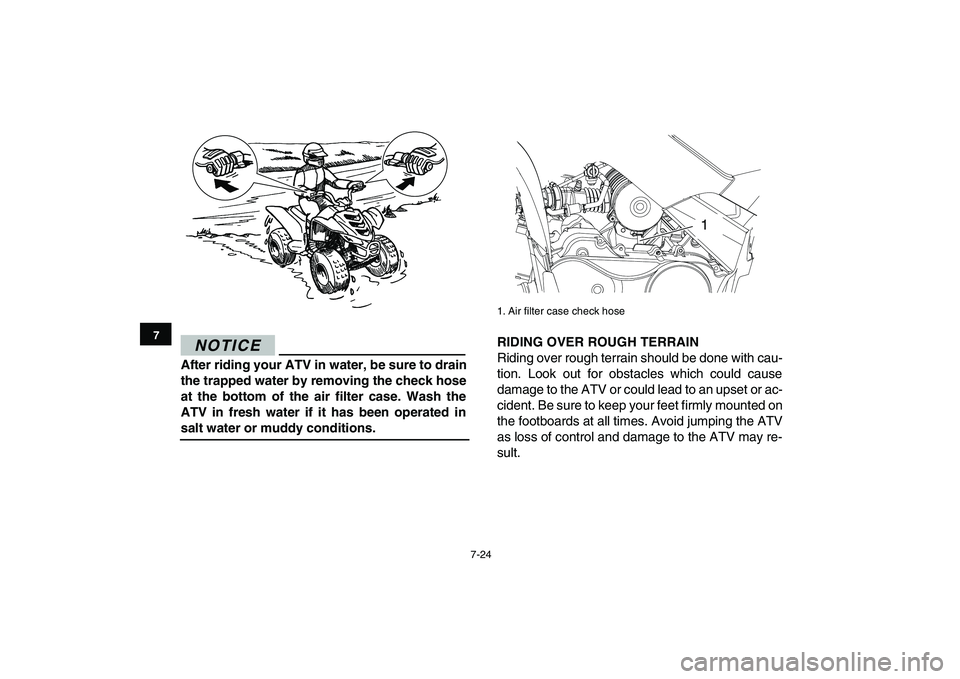
After riding your ATV in water, be sure to drain
the trapped water by removing the check hose
at the bottom of the air filter case. Wash the
ATV in fresh water if it has been operated insalt water or muddy conditions.RIDING OVER ROUGH TERRAIN
Riding over rough terrain should be done with cau-
tion. Look out for obstacles which could cause
damage to the ATV or could lead to an upset or ac-
cident. Be sure to keep your feet firmly mounted on
the footboards at all times. Avoid jumping the ATV
as loss of control and damage to the ATV may re-
sult.
1. Air �lter case check hose
7
1