technical specifications Abarth Grande Punto 2010 Owner handbook (in English)
[x] Cancel search | Manufacturer: ABARTH, Model Year: 2010, Model line: Grande Punto, Model: Abarth Grande Punto 2010Pages: 207, PDF Size: 3.01 MB
Page 26 of 207

24
SAFETY
DEVICES
CORRECT USE
OF THE CAR
WARNING
LIGHTS AND
MESSAGES
IN AN
EMERGENCY
CAR
MAINTENANCE
TECHNICAL
SPECIFICATIONS
INDEX
DASHBOARD
AND CONTROLS
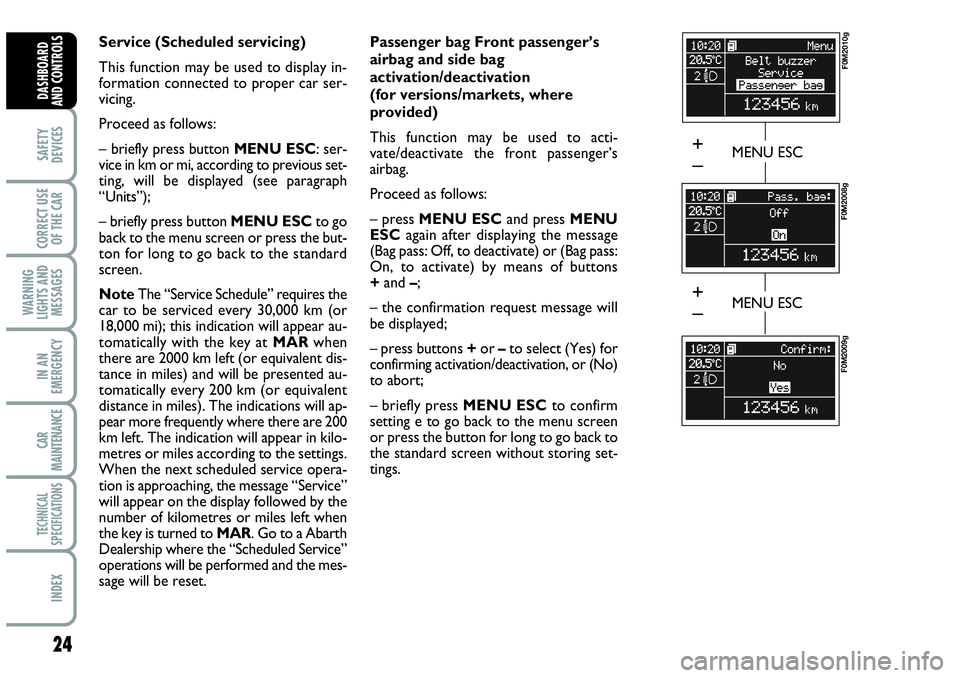
Service (Scheduled servicing)
This function may be used to display in-
formation connected to proper car ser-
vicing.
Proceed as follows:
– briefly press button MENU ESC: ser-
vice in km or mi, according to previous set-
ting, will be displayed (see paragraph
“Units”);
– briefly press button MENU ESCto go
back to the menu screen or press the but-
ton for long to go back to the standard
screen.
NoteThe “Service Schedule” requires the
car to be serviced every 30,000 km (or
18,000 mi); this indication will appear au-
tomatically with the key at MARwhen
there are 2000 km left (or equivalent dis-
tance in miles) and will be presented au-
tomatically every 200 km (or equivalent
distance in miles). The indications will ap-
pear more frequently where there are 200
km left. The indication will appear in kilo-
metres or miles according to the settings.
When the next scheduled service opera-
tion is approaching, the message “Service”
will appear on the display followed by the
number of kilometres or miles left when
the key is turned to MAR. Go to a Abarth
Dealership where the “Scheduled Service”
operations will be performed and the mes-
sage will be reset. Passenger bag Front passenger’s
airbag and side bag
activation/deactivation
(for versions/markets, where
provided)
This function may be used to acti-
vate/deactivate the front passenger’s
airbag.
Proceed as follows:
– press MENU ESCand press MENU
ESCagain after displaying the message
(Bag pass: Off, to deactivate) or (Bag pass:
On, to activate) by means of buttons
+and –;
– the confirmation request message will
be displayed;
– press buttons +or –to select (Yes) for
confirming activation/deactivation, or (No)
to abort;
– briefly press MENU ESCto confirm
setting e to go back to the menu screen
or press the button for long to go back to
the standard screen without storing set-
tings.
MENU ESC
F0M2010g
F0M2008g
F0M2009g
MENU ESC
+
–
+
–
Page 27 of 207

25
SAFETY
DEVICES
CORRECT USE
OF THE CAR
WARNING
LIGHTS AND
MESSAGES
IN AN
EMERGENCY
CAR
MAINTENANCE
TECHNICAL
SPECIFICATIONS
INDEX
DASHBOARD
AND CONTROLS
Exit Menu
This is the last function that closes the cir-
cular setting cycle listed in the initial menu
screen.
Briefly press button MENU ESCto go
back to the standard screen without stor-
ing settings.
Press button –to return to the first menu
option (Speed Beep).TRIP COMPUTER
General features
The “Trip computer” displays information
(with ignition key at MAR), relating to the
operating status of the car. This function
comprises two separate and independent
trips: “Trip A” and “Trip B” concerning
the “complete mission” of the car (jour-
ney).Both functions are resettable (reset - start
of new mission).
“Trip A” shall be used to display the fig-
ures relating to:
– Range
– Trip distance
– Average consumption
– Instant consumption
– Average speed
– Travel time (driving time).
Page 28 of 207

26
SAFETY
DEVICES
CORRECT USE
OF THE CAR
WARNING
LIGHTS AND
MESSAGES
IN AN
EMERGENCY
CAR
MAINTENANCE
TECHNICAL
SPECIFICATIONS
INDEX
DASHBOARD
AND CONTROLS
“Trip B”, available on multifunction display
only, shall be used to display the figures
relating to:
– Trip distance B
– Average consumption B
– Average speed B
– Travel time B (driving time).
Note“Trip B” function can be excluded
(see paragraph “Trip B On/Off”). “Range”
and “Instant consumption” cannot be re-
set.Average consumption
This value shows the average consump-
tion from the start of the new mission.
Instant consumption
This value shows instant fuel consumption
(this value is updated second by second).
If parking the car with engine on,
the display will show “----”.
Average speed
This value shows the car average speed as
a function of the overall time elapsed since
the start of the new mission.
Travel time
This value shows the time elapsed since
the start of the new mission.
IMPORTANT Lacking information, Trip
computer values are displayed with “----”.
When normal operating condition is re-
set, calculation of different units will
restart regularly. Values displayed before
the failure will not be reset. Values displayed
Range
This value shows the distance in km (or
mi) that the car can still cover before
needing fuel, assuming that driving condi-
tions are kept unvaried. The display will
show “----” in the following cases:
– value lower than 50 km (or 30 mi)
– car left parked with engine running for
long.
IMPORTANT The variation of the auton-
omy value can be influenced by different
factors: driving style (see what is described
in paragraph “Driving style” in the chap-
ter “Start-up and driving”), type of route
(highways, urban, mountain, etc…), use
conditions of the car (load transported,
tire pressure, etc…). What was described
previously must be taken in consideration
when planning a trip.
Trip distance
This value shows the distance covered
from the start of the new mission.
Page 29 of 207

27
SAFETY
DEVICES
CORRECT USE
OF THE CAR
WARNING
LIGHTS AND
MESSAGES
IN AN
EMERGENCY
CAR
MAINTENANCE
TECHNICAL
SPECIFICATIONS
INDEX
DASHBOARD
AND CONTROLS
New mission
Reset can be:
– “manual” resetting by the user, by press-
ing the relevant button;
– “automatic” resetting, when the “Trip dis-
tance” reaches 3999.9 km or 9999.9 km
(according to the type of display) or when
the “Travel time” reaches 99.59 (99 hours
and 59 minutes);
– after disconnecting/reconnecting the
battery.
IMPORTANT The reset operation in the
presence of the screens concerning the
“Trip A” makes it possible to reset only
the information associated with this func-
tion.
IMPORTANT The reset operation in the
presence of the screens concerning the
“Trip B” makes it possible to reset only
the information associated with this func-
tion.Start of journey procedure
With ignition key at MAR, press and keep
button TRIPpressed for over 2 seconds
to reset.
Exit Trip
To quit the Trip function: keep button
MENU ESCpressed for over 2 seconds.
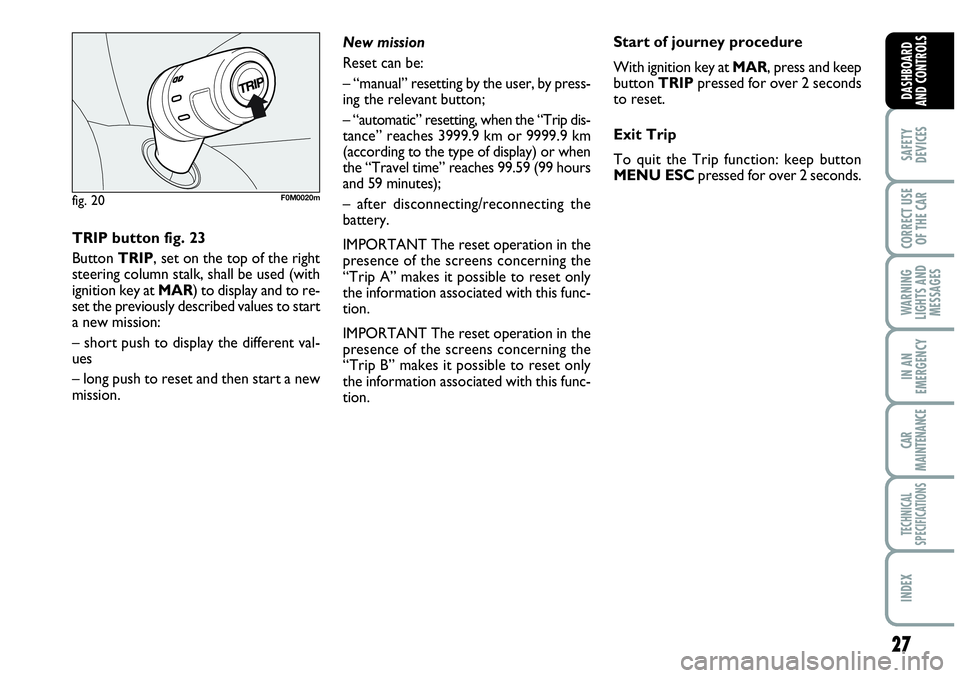
TRIP button fig. 23
Button TRIP, set on the top of the right
steering column stalk, shall be used (with
ignition key at MAR) to display and to re-
set the previously described values to start
a new mission:
– short push to display the different val-
ues
– long push to reset and then start a new
mission.
fig. 20F0M0020m
Page 30 of 207

28
SAFETY
DEVICES
CORRECT USE
OF THE CAR
WARNING
LIGHTS AND
MESSAGES
IN AN
EMERGENCY
CAR
MAINTENANCE
TECHNICAL
SPECIFICATIONS
INDEX
DASHBOARD
AND CONTROLS
Seat height adjustment fig. 21
Move lever Bupwards or downwards to
achieve the required height.
IMPORTANT Adjustment must be car-
ried out only seated in the relevant seat.
FRONT SEATS
Only make adjustments
when the car is stationary.
WARNING
Moving the seat backwards or
forwards fig. 21
Lift the lever Aand push the seat forwards
or backwards: in the driving position the
arms should rest on the rim of the steer-
ing wheel.
Once you have released the
lever, check that the seat is
firmly locked in the runners by trying
to move it back and forth. Failure to
lock the seat in place could result in
the seat moving suddenly and the dri-
ver losing control of the car.
WARNING
For maximum safety, keep
the back of your seat up-
right, lean back into it and make sure
the seat belt fits closely across your
chest and hips.
WARNING
Back rest angle adjustment fig. 21
Turn knob C.
Upholstery of your car has
been designed to withstand
wear deriving from common
use of the car. You are how-
ever recommended to avoid strong
and/or continuous scratching with
clothing accessories such as metallic
buckles, studs, Velcro fastenings and
the like, since these items cause cir-
cumscribed stress of the cover fabric
that could lead to yarn breaking, and
damage the cover as a consequence.
fig. 21F0M006Ab
Page 31 of 207

29
SAFETY
DEVICES
CORRECT USE
OF THE CAR
WARNING
LIGHTS AND
MESSAGES
IIN AN
EMERGENCY
CAR
MAINTENANCE
TECHNICAL
SPECIFICATIONS
INDEX
DASHBOARD
AND CONTROLS
Tilting the back rest fig. 22a
Pull handle Aupwards, the back rest will
tilt and the seat can slide forward by push-
ing the back rest.
Bringing back the back rest the seat will
return to its original position (mechani-
cal memory).
Check that the seat is firm-
ly locked in the runners by
trying to move it back and forth.
WARNING
fig. 22aF0M007Ab
REAR SEATS
To tilt rear seats refer to paragraph
“Extending the boot” in this section.
Upholstery of your car has
been designed to withstand
wear deriving from common
use of the car. You are how-
ever recommended to avoid strong
and/or continuous scratching with
clothing accessories such as metallic
buckles, studs, Velcro fastenings and
the like, since these items cause cir-
cumscribed stress of the cover fabric
that could lead to yarn breaking, and
damage the cover as a consequence.
fig. 22bF0M089Ab
Seat warming (for versions/
markets, where provided) fig. 22b
With ignition key at MAR, press button
Fto switch the seat warming on/off. The
led on the button will light up when the
function is on.
Page 32 of 207

30
SAFETY
DEVICES
CORRECT USE
OF THE CAR
WARNING
LIGHTS AND
MESSAGES
IN AN
EMERGENCY
CAR
MAINTENANCE
TECHNICAL
SPECIFICATIONS
INDEX
DASHBOARD
AND CONTROLS
HEAD RESTRAINTS
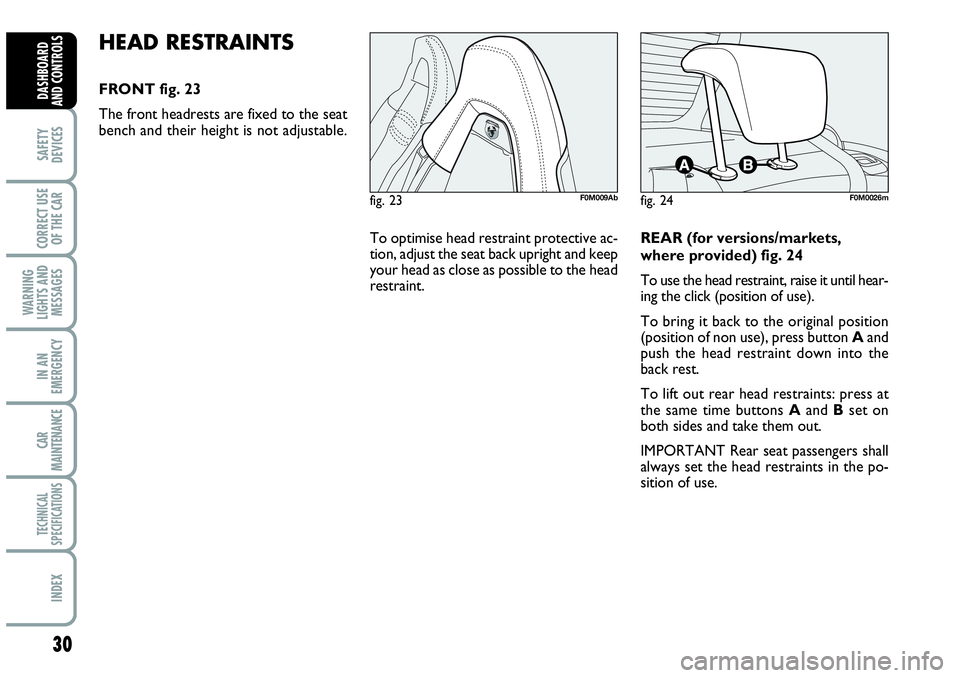
FRONT fig. 23
The front headrests are fixed to the seat
bench and their height is not adjustable.
fig. 23F0M009Abfig. 24F0M0026m
To optimise head restraint protective ac-
tion, adjust the seat back upright and keep
your head as close as possible to the head
restraint. REAR (for versions/markets,
where provided) fig. 24
To use the head restraint, raise it until hear-
ing the click (position of use).
To bring it back to the original position
(position of non use), press button Aand
push the head restraint down into the
back rest.
To lift out rear head restraints: press at
the same time buttons Aand Bset on
both sides and take them out.
IMPORTANT Rear seat passengers shall
always set the head restraints in the po-
sition of use.
Page 33 of 207

31
SAFETY
DEVICES
CORRECT USE
OF THE CAR
WARNING
LIGHTS AND
MESSAGES
IIN AN
EMERGENCY
CAR
MAINTENANCE
TECHNICAL
SPECIFICATIONS
INDEX
DASHBOARD
AND CONTROLS
STEERING WHEEL
The driver can adjust the steering wheel
position both axially and in height.
Proceed as follows:
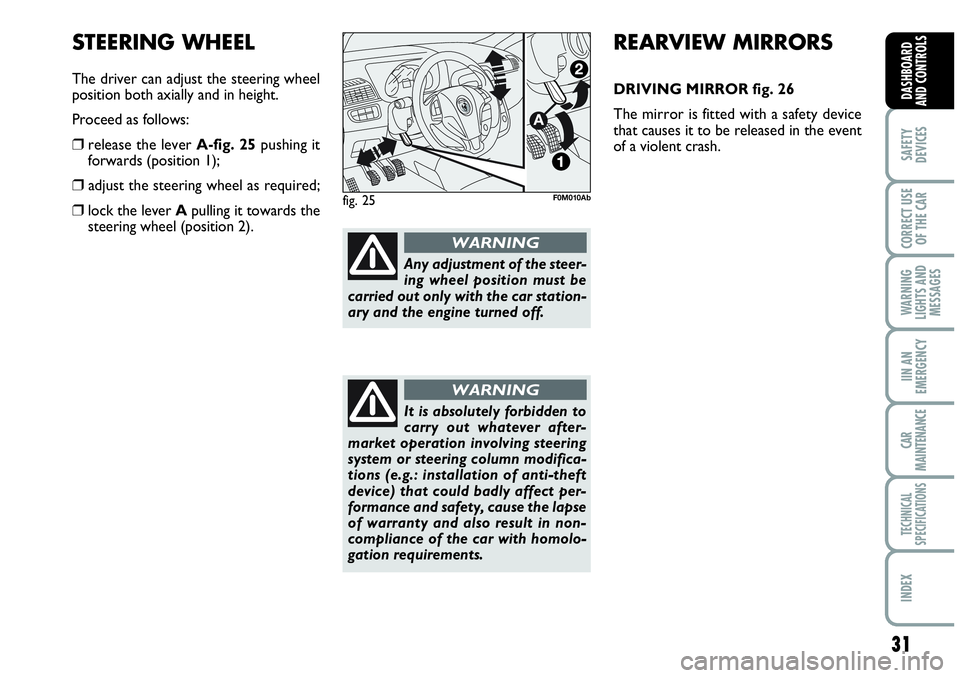
❒release the lever A-fig. 25pushing it
forwards (position 1);
❒ adjust the steering wheel as required;
❒lock the lever Apulling it towards the
steering wheel (position 2).fig. 25F0M010Ab
REARVIEW MIRRORS
DRIVING MIRROR fig. 26
The mirror is fitted with a safety device
that causes it to be released in the event
of a violent crash.
Any adjustment of the steer-
ing wheel position must be
carried out only with the car station-
ary and the engine turned off.
WARNING
It is absolutely forbidden to
carry out whatever after-
market operation involving steering
system or steering column modifica-
tions (e.g.: installation of anti-theft
device) that could badly affect per-
formance and safety, cause the lapse
of warranty and also result in non-
compliance of the car with homolo-
gation requirements.
WARNING
Page 34 of 207

32
SAFETY
DEVICES
CORRECT USE
OF THE CAR
WARNING
LIGHTS AND
MESSAGES
IN AN
EMERGENCY
CAR
MAINTENANCE
TECHNICAL
SPECIFICATIONS
INDEX
DASHBOARD
AND CONTROLS
DOOR MIRRORS
Adjustment fig. 27
This operation is only possible with igni-
tion key at MAR.
Proceed as follows:
❒use switch Bto select the mirror re-
quired (left or right);
❒to adjust the mirror move the switch
Cin the four directions.
It can be moved using the lever Ato two
different positions: normal or antiglare.Folding
When required (for example when the
mirror causes difficulty in narrow spaces)
it is possible to fold the mirror moving it
from position 1-fig. 28to position 2.
When driving the mirrors shall
always be in position 1-fig. 28.
As the driver’s door mirror is
curved, it may slightly alter
the perception of distance.
WARNING
Demisting/defrosting
(for versions/markets,
where provided)
Mirrors are fitted with resistors that will
activate when turning the heated rear win-
dow on (by pressing button
().
IMPORTANT This function is timed and
it will turn off automatically a few minutes
later.
fig. 26F0M0028m
fig. 27F0M0030m
fig. 28F0M0250m
Page 35 of 207

33
SAFETY
DEVICES
CORRECT USE
OF THE CAR
WARNING
LIGHTS AND
MESSAGES
IIN AN
EMERGENCY
CAR
MAINTENANCE
TECHNICAL
SPECIFICATIONS
INDEX
DASHBOARD
AND CONTROLS
CLIMATE CONTROL
1.Fixed upper vent - 2.Central swivel vents - 3.Fixed side vents - 4.Adjustable side vents - 5. Lower vents for front seats -
6.Lower vents for rear seats.
fig. 29
F0M011Ab