display ACURA MDX 2022 Owner's Guide
[x] Cancel search | Manufacturer: ACURA, Model Year: 2022, Model line: MDX, Model: ACURA MDX 2022Pages: 712, PDF Size: 22.65 MB
Page 123 of 712
122
uuGauges and Displays uHead-Up Display*
Instrument Panel
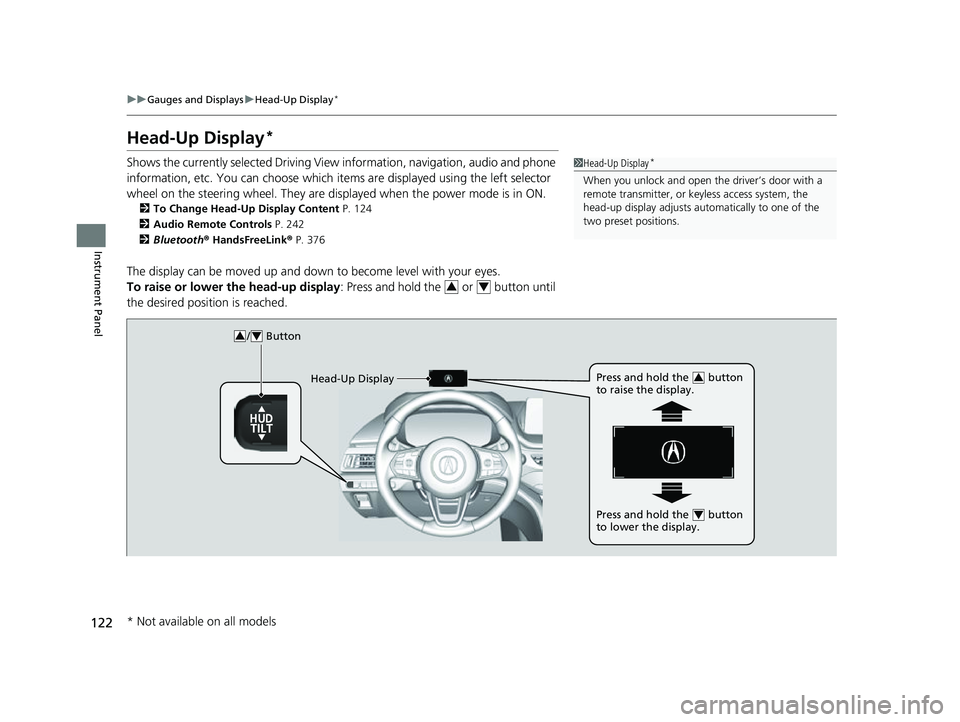
Head-Up Display*
Shows the currently selected Driving View information, navigation, audio and phone
information, etc. You can choose which it ems are displayed using the left selector
wheel on the steering wheel. They are displayed when the power mode is in ON.
2To Change Head-Up Display Content P. 124
2 Audio Remote Controls P. 242
2 Bluetooth ® HandsFreeLink ® P. 376
The display can be moved up and down to become level with your eyes.
To raise or lower the head-up display : Press and hold the or button until
the desired position is reached.
1 Head-Up Display*
When you unlock and open the driver’s door with a
remote transmitter, or keyless access system, the
head-up display adjusts auto matically to one of the
two preset positions.
34
/ Button34
Head-Up Display Press and hold the button
to raise the display.3
Press and hold the button
to lower the display.4
* Not available on all models
22 ACURA MDX-31TYA6000_02.book 122 ページ 2020年11月5日 木曜日 午前11時39分
Page 124 of 712
123
uuGauges and Displays uHead-Up Display*
Continued
Instrument Panel
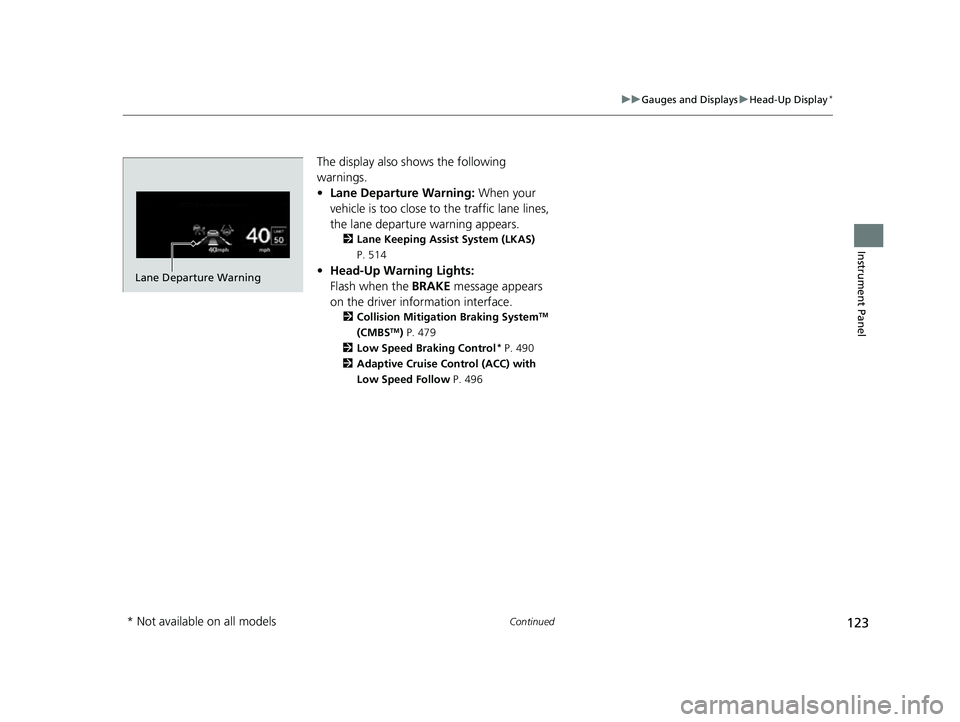
The display also shows the following
warnings.
• Lane Departure Warning: When your
vehicle is too close to the traffic lane lines,
the lane departure warning appears.
2 Lane Keeping Assist System (LKAS)
P. 514
• Head-Up Warning Lights:
Flash when the BRAKE message appears
on the driver information interface.
2 Collision Mitigation Braking SystemTM
(CMBSTM) P. 479
2 Low Speed Braking Control
* P. 490
2 Adaptive Cruise Control (ACC) with
Low Speed Follow P. 496
Lane Departure Warning
* Not available on all models
22 ACURA MDX-31TYA6000_02.book 123 ページ 2020年11月5日 木曜日 午前11時39分
Page 125 of 712
124
uuGauges and Displays uHead-Up Display*
Instrument Panel
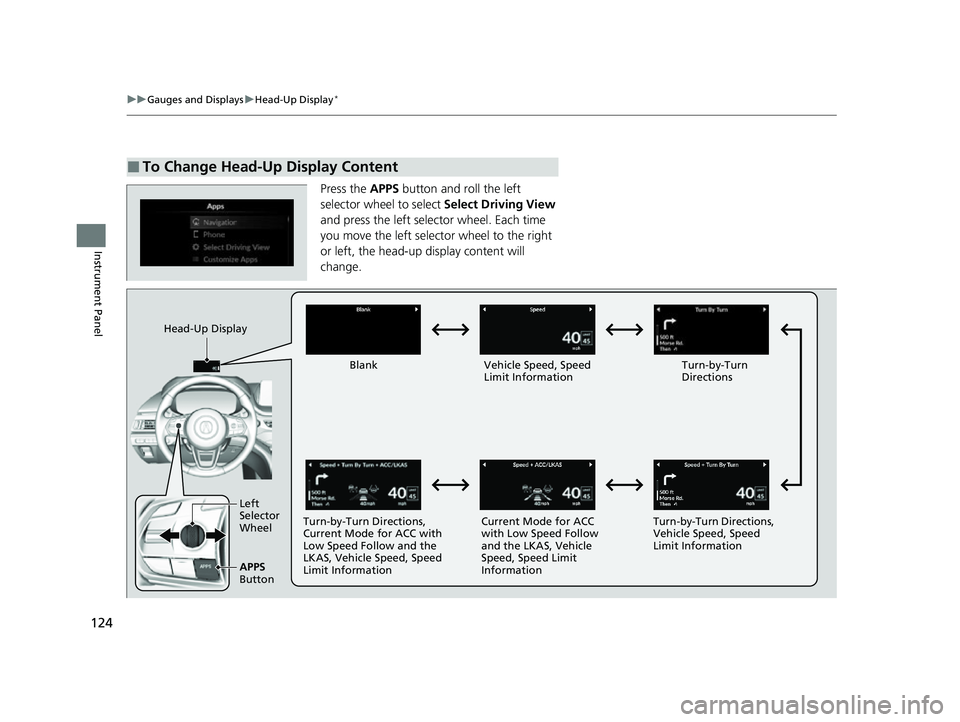
Press the APPS button and roll the left
selector wheel to select Select Driving View
and press the left selector wheel. Each time
you move the left selector wheel to the right
or left, the head-up display content will
change.
■To Change Head-Up Display Content
Head-Up Display
Blank Vehicle Speed, Speed Limit Information Turn-by-Turn
Directions
Turn-by-Turn Directions,
Current Mode for ACC with
Low Speed Follow and the
LKAS, Vehicle Speed, Speed
Limit Information Current Mode for ACC
with Low Speed Follow
and the LKAS, Vehicle
Speed, Speed Limit
InformationTurn-by-Turn Directions,
Vehicle Speed, Speed
Limit Information
Left
Selector
Wheel
APPS
Button
22 ACURA MDX-31TYA6000_02.book 124 ページ 2020年11月5日 木曜日 午前11時39分
Page 126 of 712
Continued125
uuGauges and Displays uHead-Up Display*
Instrument Panel
Shows your driving speed in mph or km/h.
Shows the current mode for ACC with Low Speed Follow, LKAS, and traffic jam
assist.
2 Adaptive Cruise Control (ACC) with Low Speed Follow P. 496
2 Lane Keeping Assist System (LKAS) P. 514
2 Traffic Jam Assist P. 523
Shows the current speed limit based on either information compiled through the
navigation system or speed limit signs captured by the front sensor camera.
■Vehicle Speed
■Current Mode for ACC with Low Speed Follow, LKAS, and
Traffic Jam Assist
■Speed Limit Information
1 Vehicle Speed
Switch between mph and km/h by using the driver
information interface or cu stomized features on the
audio/information screen. 2 Speed/Distance Units P. 113
2 Customized Features P. 345
1Speed Limit Information
The speed limit displayed on the screen may differ to
the actual speed limit.
The speed limit for some roads is not displayed.
You can select whether the source of the speed limit
information is the front sensor camera or the
navigation system.
You can also turn off speed limit information.
2 Customized Features P. 345
22 ACURA MDX-31TYA6000_02.book 125 ページ 2020年11月5日 木曜日 午前11時39分
Page 127 of 712
uuGauges and Displays uHead-Up Display*
126
Instrument Panel
■Turn-by-Turn Directions
When driving guidance is provided by the navigation system, Android Auto or Apple
CarPlay, turn-by-turn directions to your destination appear.
2Refer to the Navigation System Manual
2 Android Auto P. 313
2 Apple CarPlay P. 308
■Navigation1Navigation
Turn-by-turn directions may not be available for all
apps.
22 ACURA MDX-31TYA6000_02.book 126 ページ 2020年11月5日 木曜日 午前11時39分
Page 129 of 712
128
Controls
Clock
Adjusting the Clock
You can adjust the time manually in the audio/information screen, with the power
mode in ON.
You can adjust the time using the A-zone touchpad.
2 True Touchpad Interface P. 245
1.Press the (home) button.
2. Select Settings .
3. Select System.
4. Select Date & Time .
5. Select Set Date & Time .
6. Select Automatic Date & Time .
7. Select Off.
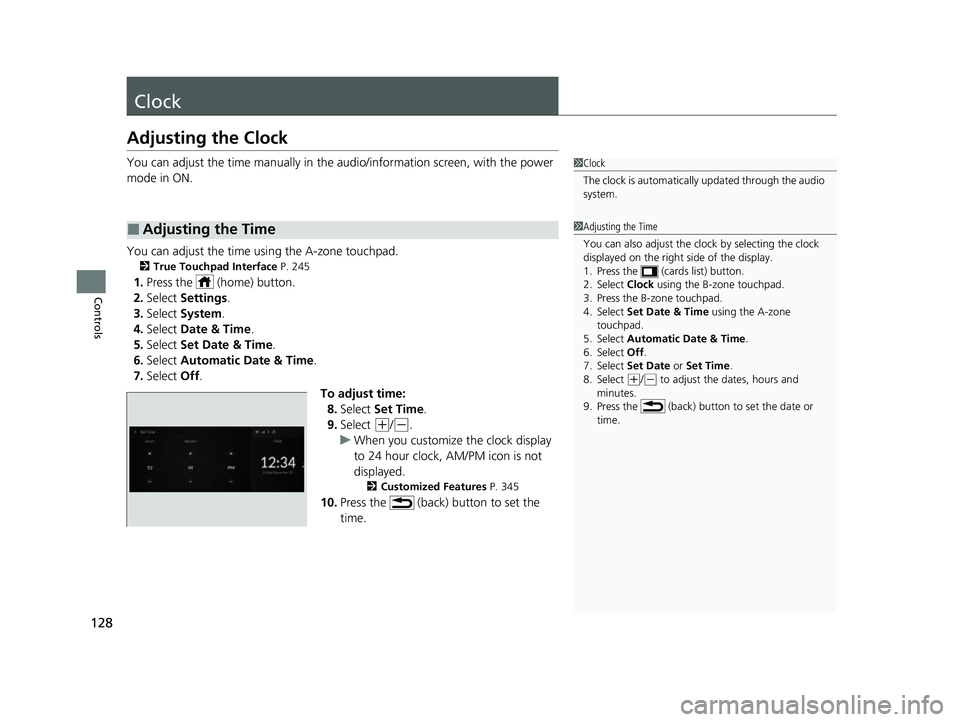
To adjust time:8. Select Set Time .
9. Select
(+/(-.
u When you customize the clock display
to 24 hour clock, AM/PM icon is not
displayed.
2 Customized Features P. 345
10.Press the (back) button to set the
time.
■Adjusting the Time
1Clock
The clock is automatically updated through the audio
system.
1Adjusting the Time
You can also adjust the clock by selecting the clock
displayed on the right side of the display.
1. Press the (cards list) button.
2. Select Clock using the B-zone touchpad.
3. Press the B-zone touchpad.
4. Select Set Date & Time using the A-zone
touchpad.
5. Select Automatic Date & Time .
6. Select Off .
7. Select Set Date or Set Time.
8. Select
( +/(- to adjust the dates, hours and
minutes.
9. Press the (back) button to set the date or
time.
22 ACURA MDX-31TYA6000_02.book 128 ページ 2020年11月5日 木曜日 午前11時39分
Page 130 of 712
129
uuClock uAdjusting the Clock
Controls
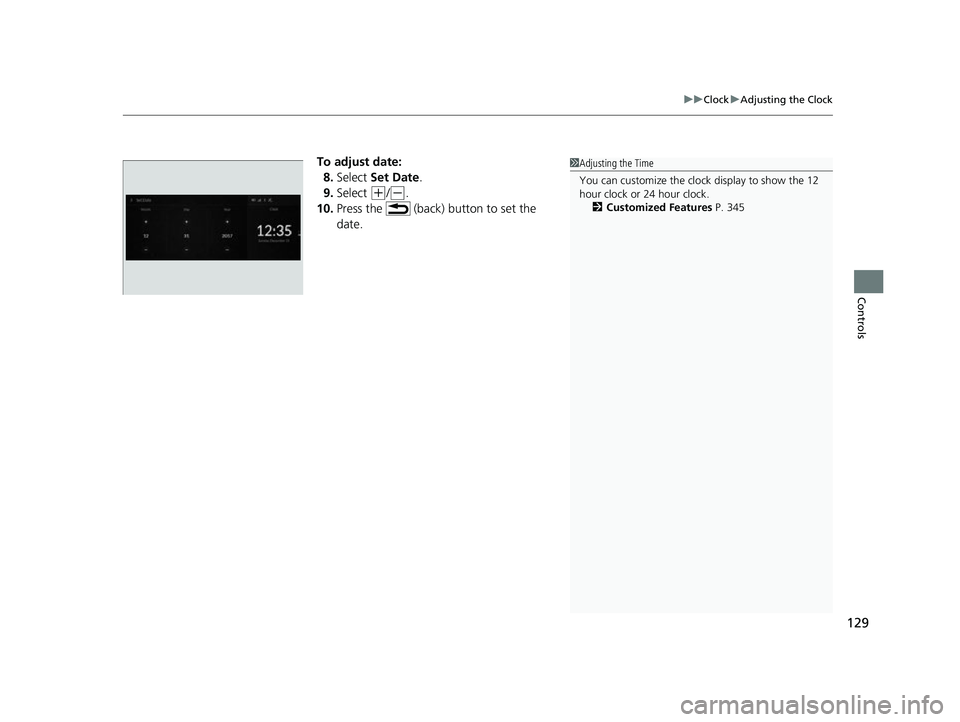
To adjust date:
8. Select Set Date .
9. Select
(+/(-.
10. Press the (back) button to set the
date.
1Adjusting the Time
You can customize the clock display to show the 12
hour clock or 24 hour clock.
2 Customized Features P. 345
22 ACURA MDX-31TYA6000_02.book 129 ページ 2020年11月5日 木曜日 午前11時39分
Page 182 of 712

181
uuOperating the Switches Around the Steering Wheel uBrightness Control
Continued
Controls
Brightness Control
When the power mode is in ON, you can use
the
(+/(- button to adjust instrument panel
brightness.
Brighten: Press the
(+ button.
Dim: Press the
(- button.
You will hear a beep when the brightness
reaches minimum or maximum. Several
seconds after adjusting the brightness, you
will be returned to the previous display.
■Brightness level indicator
The brightness level is shown on the driver
information interface while you are adjusting
it.
■Adjusting the Instrument Panel Brightness1 Brightness Control
The brightness of the in strument panel will be
reduced when the followi ng conditions have been
met:
•The power mode is in ON.
•The parking lights are turned on.•The ambient lighting is low.
The brightness can be set differently for when the
exterior lights are on, and when they are off.
( +/(- Button
22 ACURA MDX-31TYA6000_02.book 181 ページ 2020年11月5日 木曜日 午前11時39分
Page 183 of 712

182
uuOperating the Switches Around the Steering Wheel uBrightness Control
Controls
When the power mode is in ON, you can use
the
(+/(- button to adjust head-up display
brightness.
Brighten: Press the
(+ button.
Dim: Press the
(- button.
The display will return to its original state
several seconds after adjusting the brightness.
■Brightness level indicator
The brightness level is shown on the driver
information interface wh ile you are adjusting
it.
■Adjusting the Head-Up Display Brightness*
( +/(- Button
* Not available on all models
22 ACURA MDX-31TYA6000_02.book 182 ページ 2020年11月5日 木曜日 午前11時39分
Page 184 of 712
183
uuOperating the Switches Around the Steering Wheel uDriving Position Memory System
Continued
Controls
Driving Position Memory System
You can store three driver’s seat, front passenger’s seat*, steering wheel*1 and door
mirror*1 positions with the drivin g position memory system.
When you unlock and open the driver’s door with a remote transmitter, or keyless
access system, door mirrors adjust to one of the three preset positions
*1 and the seat
adjusts to retracted position s of one of the three preset positions automatically.
The steering wheel and the seat will move to the stored position when you set the
power mode to ACCESSORY
*1.
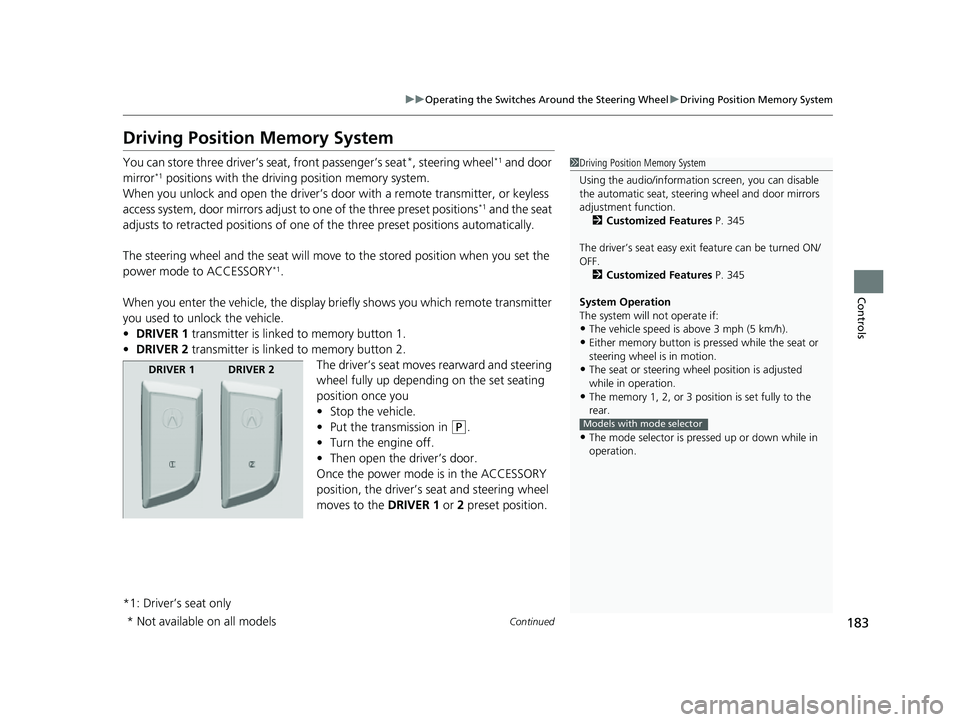
When you enter the vehicle, the display briefly shows you which remote transmitter
you used to unlock the vehicle.
• DRIVER 1 transmitter is linked to memory button 1.
• DRIVER 2 transmitter is linked to memory button 2.
The driver’s seat moves rearward and steering
wheel fully up depending on the set seating
position once you
•Stop the vehicle.
• Put the transmission in
(P.
• Turn the engine off.
• Then open the driver’s door.
Once the power mode is in the ACCESSORY
position, the driver’s s eat and steering wheel
moves to the DRIVER 1 or 2 preset position.
*1: Driver’s seat only
1 Driving Position Memory System
Using the audio/informati on screen, you can disable
the automatic seat, steeri ng wheel and door mirrors
adjustment function. 2 Customized Features P. 345
The driver’s seat easy exit feature can be turned ON/
OFF. 2 Customized Features P. 345
System Operation
The system will not operate if:
•The vehicle speed is above 3 mph (5 km/h).•Either memory button is pr essed while the seat or
steering wheel is in motion.
•The seat or steering wheel position is adjusted
while in operation.
•The memory 1, 2, or 3 position is set fully to the
rear.
•The mode selector is pressed up or down while in
operation.
Models with mode selector
DRIVER 1 DRIVER 2
* Not available on all models
22 ACURA MDX-31TYA6000_02.book 183 ページ 2020年11月5日 木曜日 午前11時39分