check Acura RDX 2013 Repair Manual
[x] Cancel search | Manufacturer: ACURA, Model Year: 2013, Model line: RDX, Model: Acura RDX 2013Pages: 364, PDF Size: 12.54 MB
Page 280 of 364
279
uuMaintenance Under the Hood uAdding Engine Oil
Maintenance
Adding Engine Oil
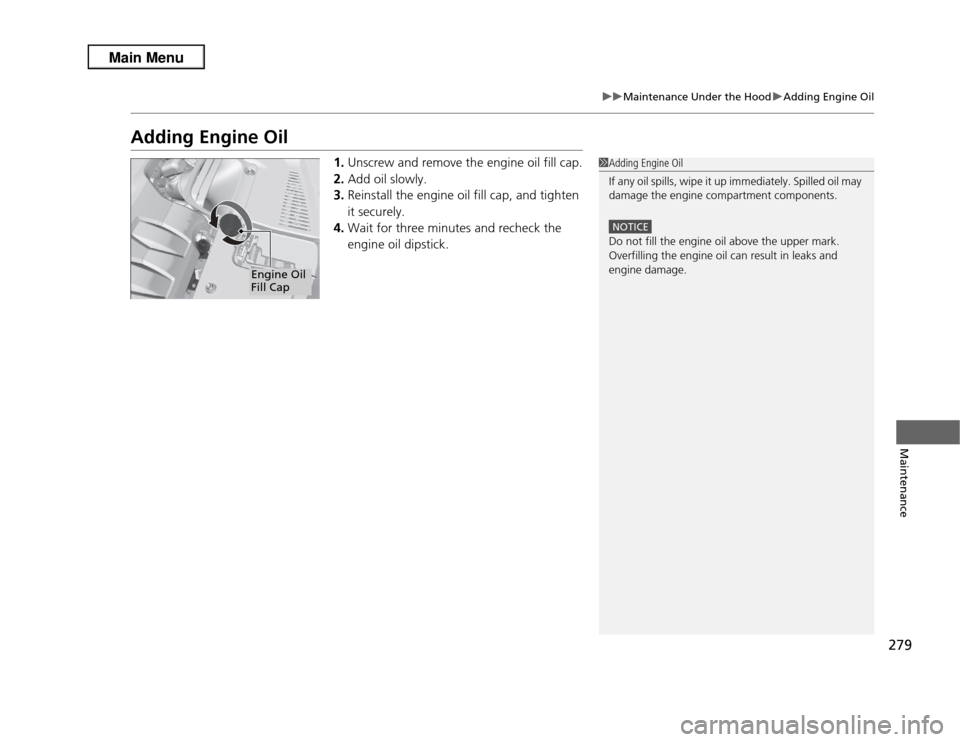
1. Unscrew and remove the engine oil fill cap.
2. Add oil slowly.
3. Reinstall the engine oil fill cap, and tighten
it securely.
4. Wait for three minutes and recheck the
engine oil dipstick.
1Adding Engine Oil
If any oil spills, wipe it up immediately. Spilled oil may
damage the engine compartment components.
NOTICEDo not fill the engine oil above the upper mark.
Overfilling the engine oil can result in leaks and
engine damage.
Engine Oil
Fill Cap
Page 282 of 364
281
uuMaintenance Under the Hood uChanging the Engine Oil and Oil Filter
Maintenance
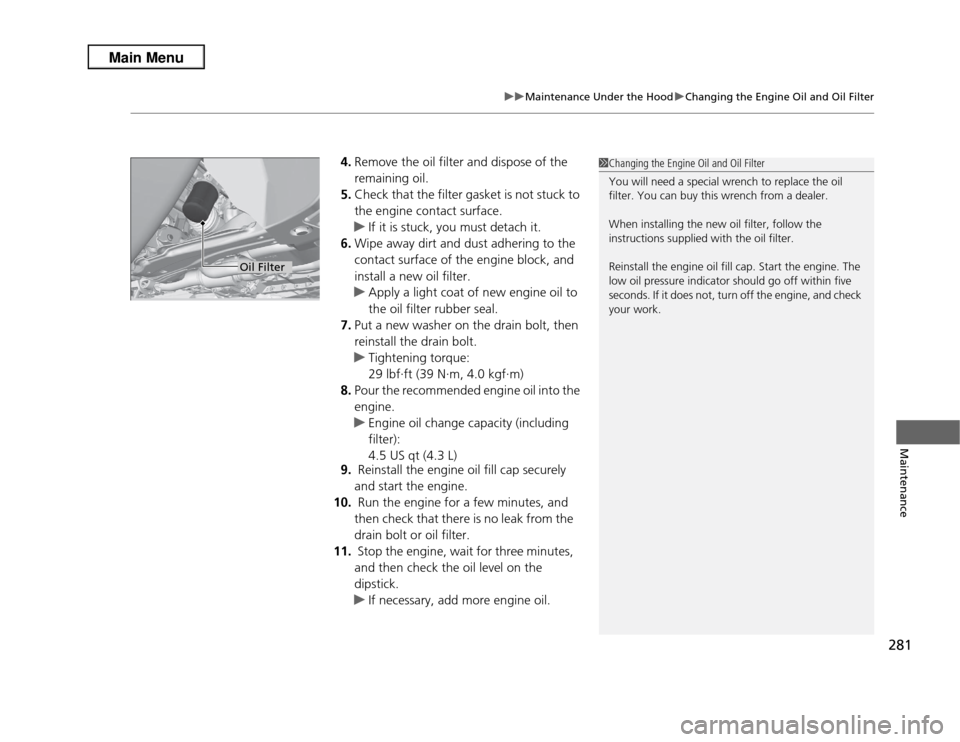
4. Remove the oil filter and dispose of the
remaining oil.
5. Check that the filter gasket is not stuck to
the engine contact surface.
u If it is stuck, you must detach it.
6. Wipe away dirt and dust adhering to the
contact surface of the engine block, and
install a new oil filter.
u Apply a light coat of new engine oil to
the oil filter rubber seal.
7. Put a new washer on the drain bolt, then
reinstall the drain bolt.
u Tightening torque:
29 lbf∙ft (39 N∙m, 4.0 kgf∙m)
8. Pour the recommended engine oil into the
engine.
u Engine oil change capacity (including
filter):
4.5 US qt (4.3 L)
9. Reinstall the engine oil fill cap securely
and start the engine.
10. Run the engine for a few minutes, and
then check that there is no leak from the
drain bolt or oil filter.
11. Stop the engine, wait for three minutes,
and then check the oil level on the
dipstick.
u If necessary, add more engine oil.
1Changing the Engine Oil and Oil Filter
You will need a special wrench to replace the oil
filter. You can buy this wrench from a dealer.
When installing the new oil filter, follow the
instructions supplied with the oil filter.
Reinstall the engine oil fill cap. Start the engine. The
low oil pressure indicator should go off within five
seconds. If it does not, turn off the engine, and check
your work.
Oil Filter
Page 283 of 364
282
uuMaintenance Under the Hood uEngine Coolant
Maintenance
Engine CoolantThis coolant is premixed with 50% antifreeze and 50% water. Do not add any
straight antifreeze or water.
We recommend you check the engine coolant level every time you refuel. Check the
reserve tank first. If it is completely empty, also check the coolant level in the
radiator. Add the engine coolant accordingly.
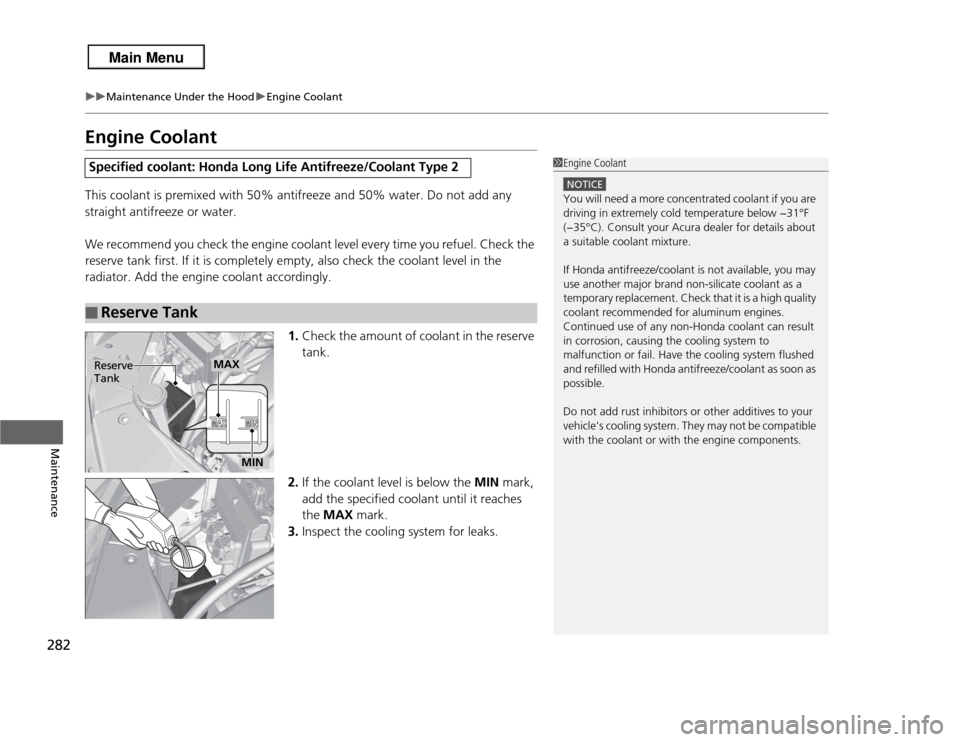
1.Check the amount of coolant in the reserve
tank.
2. If the coolant level is below the MIN mark,
add the specified coolant until it reaches
the MAX mark.
3. Inspect the cooling system for leaks.Specified coolant: Honda Long Life Antifreeze/Coolant Type 2■
Reserve Tank
1Engine Coolant
NOTICEYou will need a more concentrated coolant if you are
driving in extremely cold temperature below −31°F
(−35°C). Consult your Acura dealer for details about
a suitable coolant mixture.
If Honda antifreeze/coolant is not available, you may
use another major brand non-silicate coolant as a
temporary replacement. Check that it is a high quality
coolant recommended for aluminum engines.
Continued use of any non-Honda coolant can result
in corrosion, causing the cooling system to
malfunction or fail. Have the cooling system flushed
and refilled with Honda antifreeze/coolant as soon as
possible.
Do not add rust inhibitors or other additives to your
vehicle's cooling system. They may not be compatible
with the coolant or with the engine components.
Reserve
Tank
MAX
MIN
Page 285 of 364
284
uuMaintenance Under the Hood uTransmission Fluid
Maintenance
Transmission FluidCheck the fluid level when the engine is at normal operating temperature.
1.Park on level ground, and start the engine.
2. Wait until the radiator fan starts and then
turn off the engine.
u Perform step 3 after waiting for about 60
seconds (less than 90 seconds).
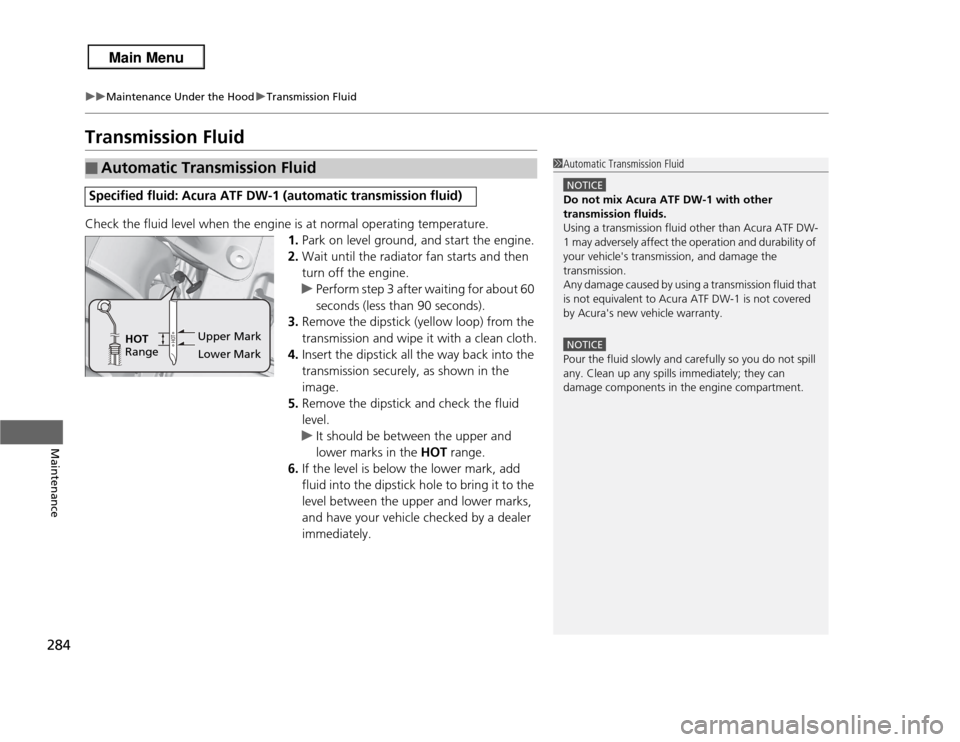
3. Remove the dipstick (yellow loop) from the
transmission and wipe it with a clean cloth.
4. Insert the dipstick all the way back into the
transmission securely, as shown in the
image.
5. Remove the dipstick and check the fluid
level.
u It should be between the upper and
lower marks in the HOT range.
6. If the level is below the lower mark, add
fluid into the dipstick hole to bring it to the
level between the upper and lower marks,
and have your vehicle checked by a dealer
immediately.■
Automatic Transmission FluidSpecified fluid: Acura ATF DW-1 (automatic transmission fluid)
1Automatic Transmission Fluid
NOTICEDo not mix Acura ATF DW-1 with other
transmission fluids.
Using a transmission fluid other than Acura ATF DW-
1 may adversely affect the operation and durability of
your vehicle's transmission, and damage the
transmission.
Any damage caused by using a transmission fluid that
is not equivalent to Acura ATF DW-1 is not covered
by Acura's new vehicle warranty.NOTICEPour the fluid slowly and carefully so you do not spill
any. Clean up any spills immediately; they can
damage components in the engine compartment.
Upper Mark
Lower Mark
HOT
Range
Page 286 of 364
285
uuMaintenance Under the Hood uBrake Fluid
Maintenance
Brake Fluid
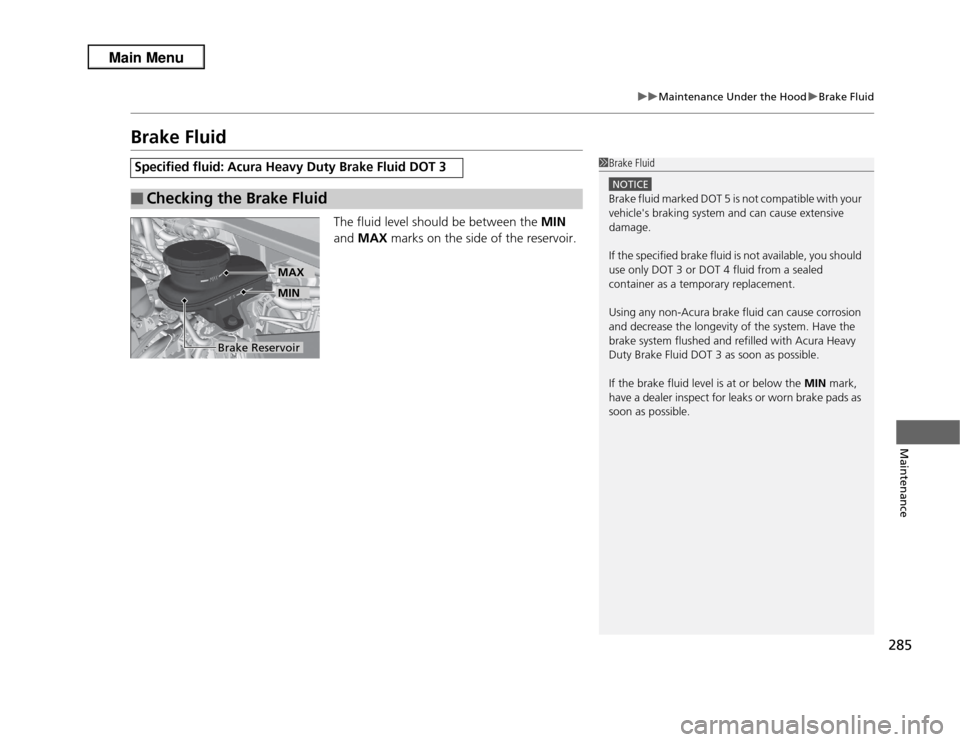
The fluid level should be between the MIN
and MAX marks on the side of the reservoir.
Specified fluid: Acura Heavy Duty Brake Fluid DOT 3■
Checking the Brake Fluid
1Brake Fluid
NOTICEBrake fluid marked DOT 5 is not compatible with your
vehicle's braking system and can cause extensive
damage.
If the specified brake fluid is not available, you should
use only DOT 3 or DOT 4 fluid from a sealed
container as a temporary replacement.
Using any non-Acura brake fluid can cause corrosion
and decrease the longevity of the system. Have the
brake system flushed and refilled with Acura Heavy
Duty Brake Fluid DOT 3 as soon as possible.
If the brake fluid level is at or below the MIN mark,
have a dealer inspect for leaks or worn brake pads as
soon as possible.
Brake Reservoir
MINMAX
Page 287 of 364
286
uuMaintenance Under the Hood uRefilling Window Washer Fluid
Maintenance
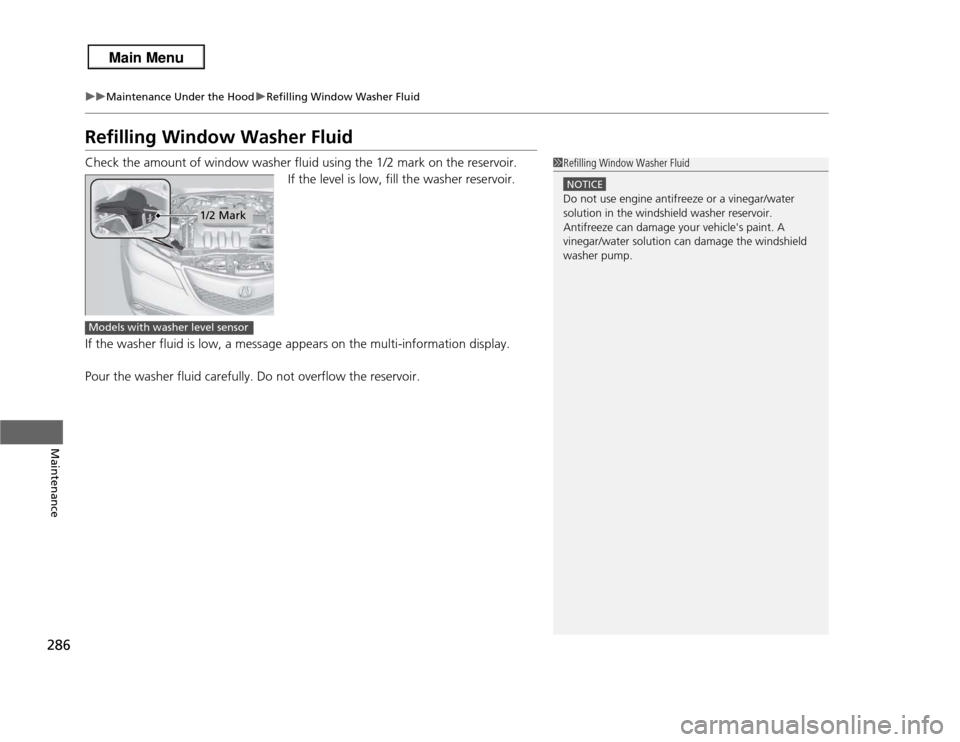
Refilling Window Washer FluidCheck the amount of window washer fluid using the 1/2 mark on the reservoir.
If the level is low, fill the washer reservoir.
If the washer fluid is low, a message appears on the multi-information display.
Pour the washer fluid carefully. Do not overflow the reservoir.
1 Refilling Window Washer Fluid
NOTICEDo not use engine antifreeze or a vinegar/water
solution in the windshield washer reservoir.
Antifreeze can damage your vehicle's paint. A
vinegar/water solution can damage the windshield
washer pump.
1/2 Mark
Models with washer level sensor
Page 298 of 364
297
Continued
Maintenance
Checking and Maintaining Wiper BladesChecking Wiper BladesIf the wiper blade rubber has deteriorated, it will leave streaks and the metal wiper
arm may scratch the window glass.Changing the Front Wiper Blade Rubber
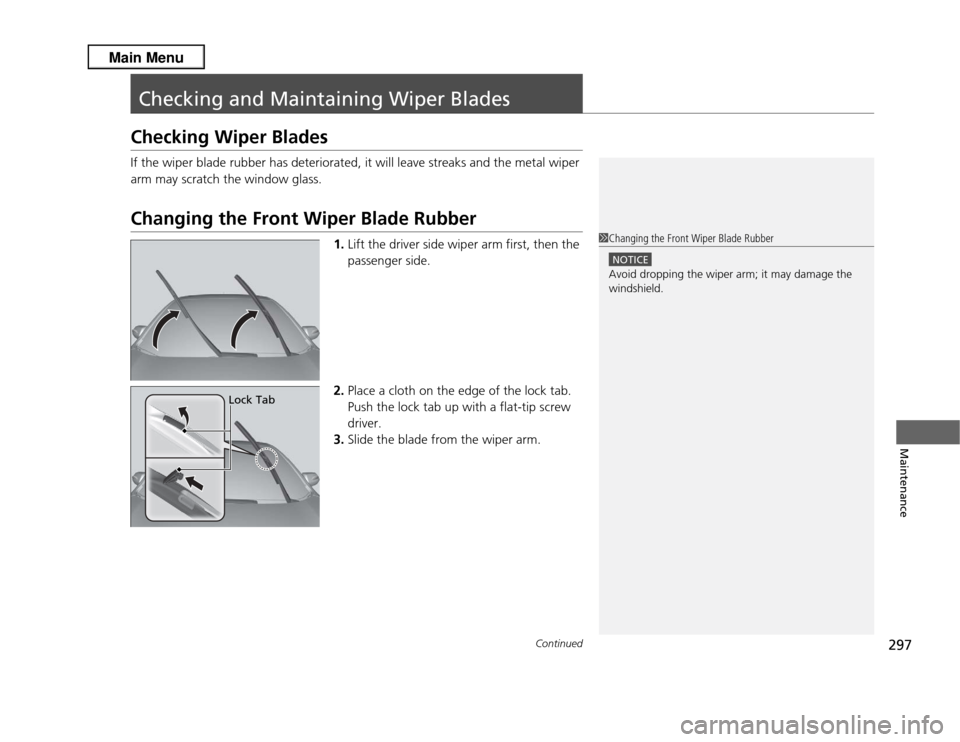
1.Lift the driver side wiper arm first, then the
passenger side.
2. Place a cloth on the edge of the lock tab.
Push the lock tab up with a flat-tip screw
driver.
3. Slide the blade from the wiper arm.
1Changing the Front Wiper Blade Rubber
NOTICEAvoid dropping the wiper arm; it may damage the
windshield.
Lock Tab
Page 299 of 364
298
uuChecking and Maintaining Wiper Blades uChanging the Front Wiper Blade Rubber
Maintenance
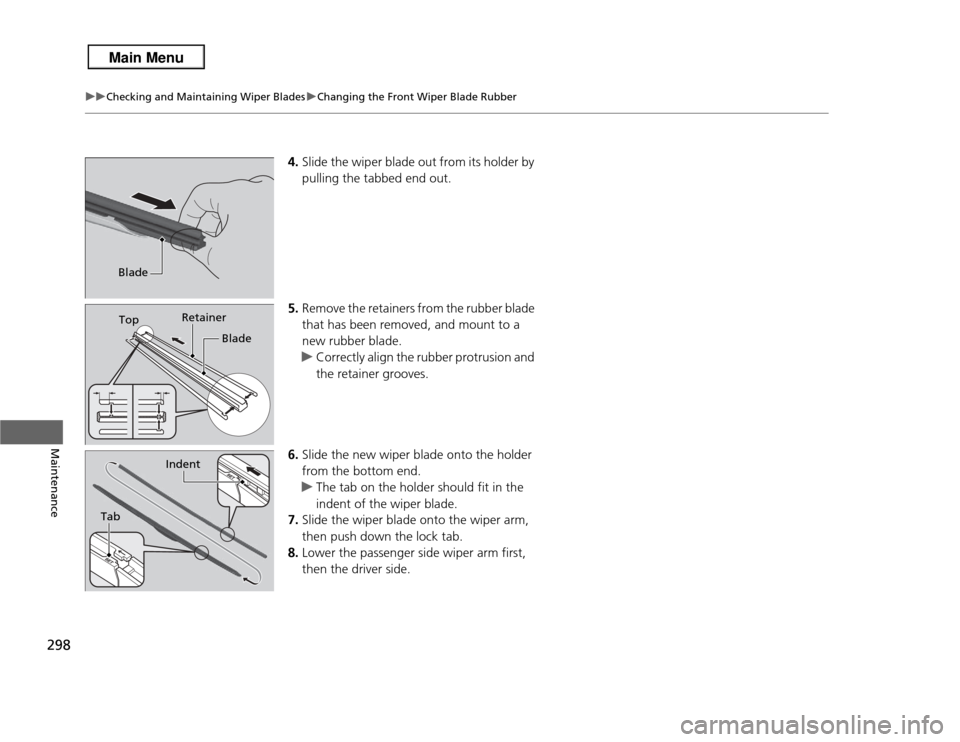
4. Slide the wiper blade out from its holder by
pulling the tabbed end out.
5. Remove the retainers from the rubber blade
that has been removed, and mount to a
new rubber blade.
u Correctly align the rubber protrusion and
the retainer grooves.
6. Slide the new wiper blade onto the holder
from the bottom end.
u The tab on the holder should fit in the
indent of the wiper blade.
7. Slide the wiper blade onto the wiper arm,
then push down the lock tab.
8. Lower the passenger side wiper arm first,
then the driver side.
BladeTop Retainer
Blade
Tab
Indent
Page 300 of 364
299
uuChecking and Maintaining Wiper Blades uChanging the Rear Wiper Blade Rubber
Continued
Maintenance
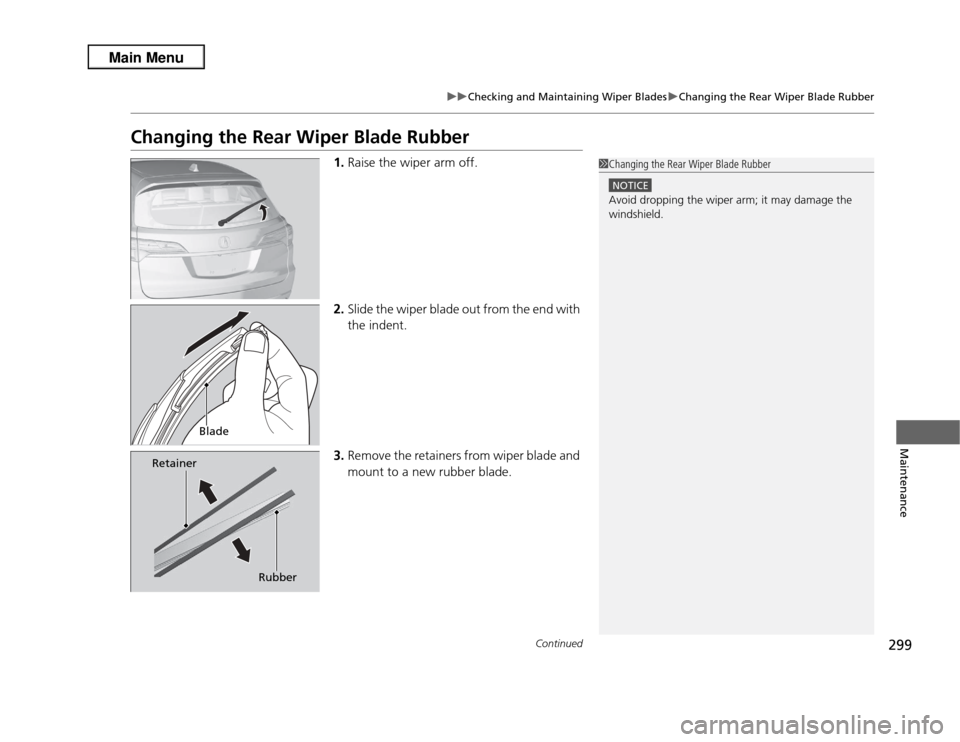
Changing the Rear Wiper Blade Rubber
1. Raise the wiper arm off.
2. Slide the wiper blade out from the end with
the indent.
3. Remove the retainers from wiper blade and
mount to a new rubber blade.
1Changing the Rear Wiper Blade Rubber
NOTICEAvoid dropping the wiper arm; it may damage the
windshield.
Blade
Retainer
Rubber
Page 301 of 364
300
uuChecking and Maintaining Wiper Blades uChanging the Rear Wiper Blade Rubber
Maintenance
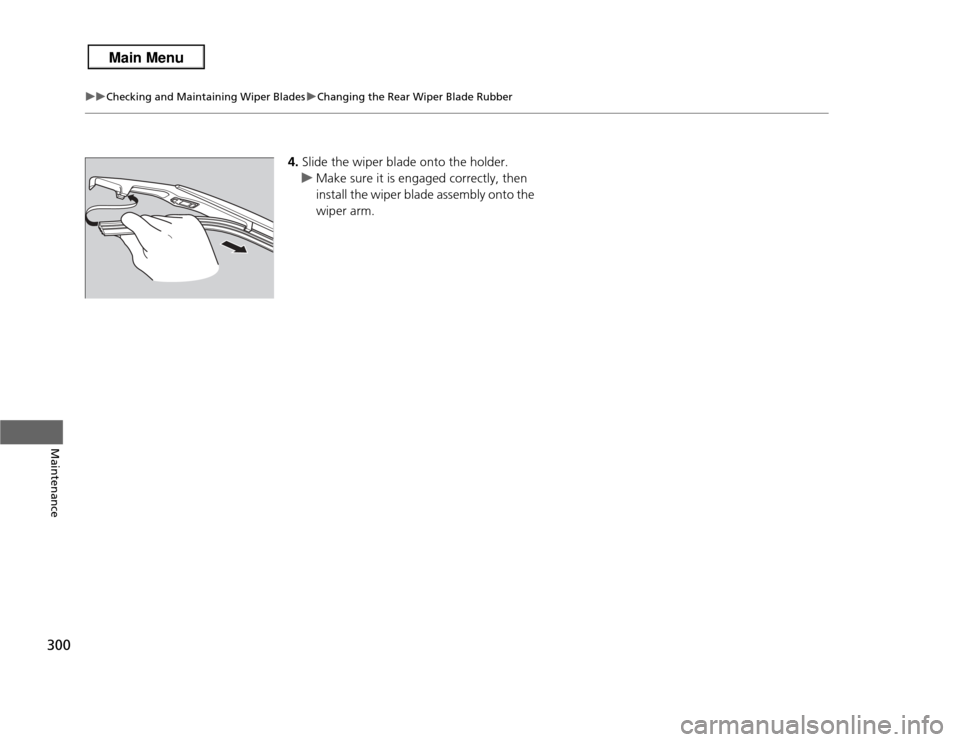
4. Slide the wiper blade onto the holder.
u Make sure it is engaged correctly, then
install the wiper blade assembly onto the
wiper arm.