tow Acura TL 2000 3.2 Owner's Manual
[x] Cancel search | Manufacturer: ACURA, Model Year: 2000, Model line: TL, Model: Acura TL 2000Pages: 311, PDF Size: 3.05 MB
Page 1 of 311

2000 TL Online Reference Owner's Manual
Use these links (and links throughout this manual) to navigate through\
this reference.
For a printed owner's manual, click on authorized manuals or go to www.h\
elminc.com.
Contents
Introduction ........................................................................\
................................................................. i
A Few Words About Safet y........................................................................\
.........................................ii
Driver and Passenger Safety ........................................................................\
..................................... .5
Proper use and care of your vehicle's seat belts, and Supplemental Restr\
aint System.
Instruments and Control s........................................................................\
........................................ .51
Instrument panel indicator and gauge, and how to use dashboard and steering colu\
mn controls.
Comfort and Convenience Features ........................................................................\
..................... 109
How to operate the climate control system, the audio system, and other c\
onvenience features.
Before Driving........................................................................\
..........................................................145
What gasoline to use, how to break-in your new vehicle, and how to load luggage and other cargo.
Driving ........................................................................\
..................................................................... .159
The proper way to start the engine, shift the transmission, and park, pl\
us towing a trailer.
Maintenance........................................................................\
.............................................................187
The Maintenance Schedule shows you when you need to take your vehicle to the dealer.
Appearance Car e........................................................................\
..................................................... .245
Tips on cleaning and protecting your vehicle. Things to look for if your\
vehicle ever needs body repairs.
Taking Care of the Unexpecte d........................................................................\
..............................253
This section covers several problems motorists sometimes experience, a nd how to handle them.
Technical Informatio n........................................................................\
.............................................279
ID numbers, dimensions, capacities, and technical information.
Warranty and Customer Relations (U.S. and Canada)................................................................291
A summary of the warranties covering your new Acura, and how to contact \
us.
Authorized Manu als (U.S. only)........................................................................\
..............................297
How to order manuals and other technical literature.
Index........................................................................\
........................................................................\
...... I
Service Information Summary
A summary of information you need when you pull up to the fuel pump. Owner's Identification Form
Your Vehicle at a Glance........................................................................\
............................................ 2
Page 20 of 311

Protecting Adults
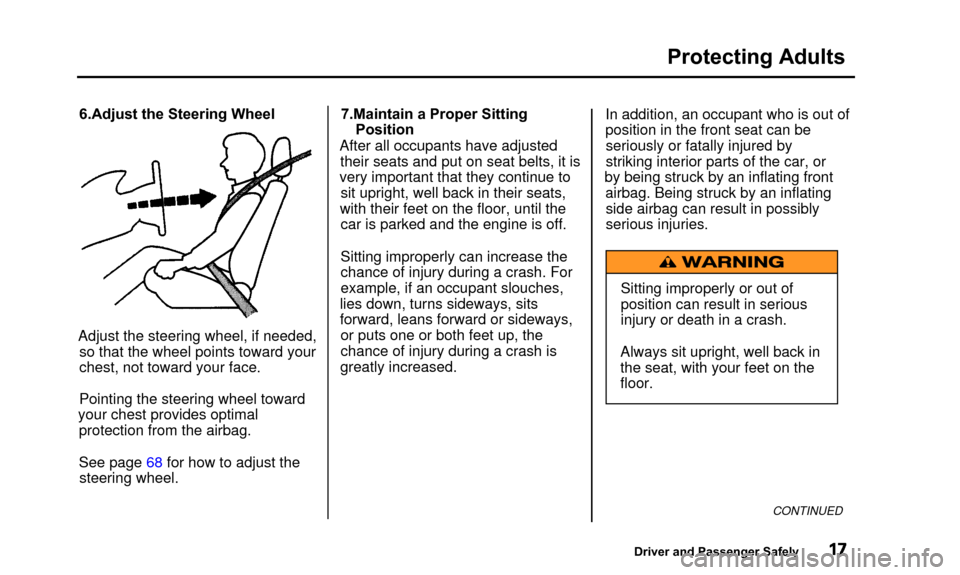
6.Adjust the Steering Wheel
Adjust the steering wheel, if needed, so that the wheel points toward your
chest, not toward your face.
Pointing the steering wheel toward
your chest provides optimal protection from the airbag.
See page 68 for how to adjust thesteering wheel. 7.Maintain a Proper Sitting
Position
After all occupants have adjusted their seats and put on seat belts, it is
very important that they continue to sit upright, well back in their seats,
with their feet on the floor, until the car is parked and the engine is off.
Sitting improperly can increase the
chance of injury during a crash. For
example, if an occupant slouches,
lies down, turns sideways, sits
forward, leans forward or sideways, or puts one or both feet up, the
chance of injury during a crash is
greatly increased. In addition, an occupant who is out of
position in the front seat can be
seriously or fatally injured by
striking interior parts of the car, or
by being struck by an inflating front airbag. Being struck by an inflatingside airbag can result in possibly
serious injuries.
Sitting improperly or out of
position can result in serious
injury or death in a crash.
Always sit upright, well back in
the seat, with your feet on the floor.
CONTINUED
Driver and Passenger Safely
Page 34 of 311

Protecting Children
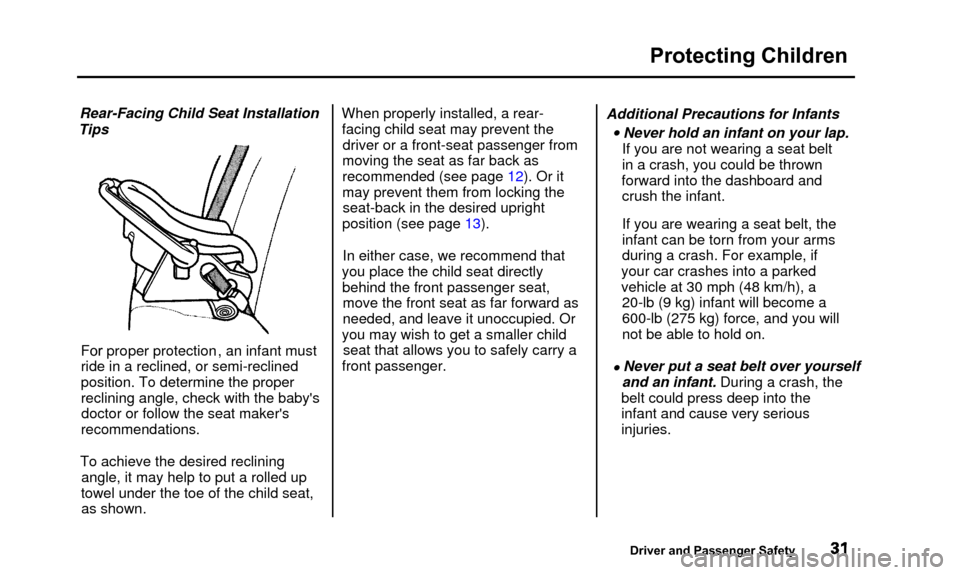
Rear-Facing Child Seat Installation
Tips
For proper protection, an infant must
ride in a reclined, or semi-reclined
position. To determine the proper
reclining angle, check with the baby's doctor or follow the seat maker's
recommendations.
To achieve the desired reclining angle, it may help to put a rolled up
towel under the toe of the child seat, as shown. When properly installed, a rear-
facing child seat may prevent the driver or a front-seat passenger from
moving the seat as far back as
recommended (see page 12). Or it may prevent them from locking the seat-back in the desired upright
position (see page 13).
In either case, we recommend that
you place the child seat directly behind the front passenger seat,move the front seat as far forward as
needed, and leave it unoccupied. Or
you may wish to get a smaller child seat that allows you to safely carry a
front passenger. Additional Precautions for Infants
• Never hold an infant on your lap.
If you are not wearing a seat belt
in a crash, you could be thrown
forward into the dashboard and crush the infant.
If you are wearing a seat belt, theinfant can be torn from your arms
during a crash. For example, if
your car crashes into a parked
vehicle at 30 mph (48 km/h), a 20-lb (9 kg) infant will become a
600-lb (275 kg) force, and you will
not be able to hold on.
• Never put a seat belt over yourself and an infant. During a crash, the
belt could press deep into the
infant and cause very serious
injuries.
Driver and Passenger Safety
Page 71 of 311

Controls Near the Steering Wheel
Make sure the rear window is clear
and you have good visibility before
starting to drive.
The defogger and antenna wires on the inside of the rear window can beaccidentally damaged. When
cleaning the glass, always wipe side
to side. Steering Wheel Adjustment
See page 17 for important safety
information about how to properly
position the steering wheel.
Make any steering wheel adjustment
before you start driving.
Adjusting the steering wheelposition while driving may
cause you to lose control of the
car and be seriously injured in a
crash.
Adjust the steering wheel only
when the car is stopped.
To adjust the steering wheel upward or downward:
1. Push the lever under the steering column all the way down. 2. Move the steering wheel to the
desired position, making sure the
wheel points toward your chest, not toward your face. Make sure
you can see the instrument panel gauges and the indicator lights.
3. Push the lever up to lock the steering wheel in that position.
4. Make sure you have securely locked the steering wheel in place
by trying to move it up and down.
Instruments and Controls
Page 107 of 311

Sun Visor, Vanity Mirror
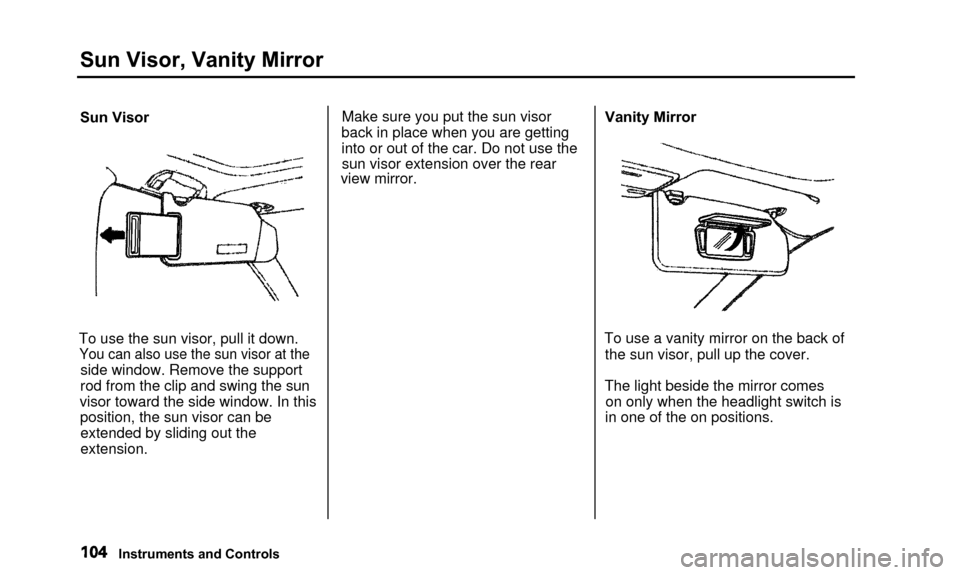
Sun Visor
To use the sun visor, pull it down.
You can also use the sun visor at the
side window. Remove the support
rod from the clip and swing the sun
visor toward the side window. In this position, the sun visor can beextended by sliding out the
extension. Make sure you put the sun visor
back in place when you are getting
into or out of the car. Do not use the sun visor extension over the rear
view mirror. Vanity Mirror
To use a vanity mirror on the back of the sun visor, pull up the cover.
The light beside the mirror comes on only when the headlight switch is
in one of the on positions.
Instruments and Controls
Page 153 of 311

Service Station Procedures
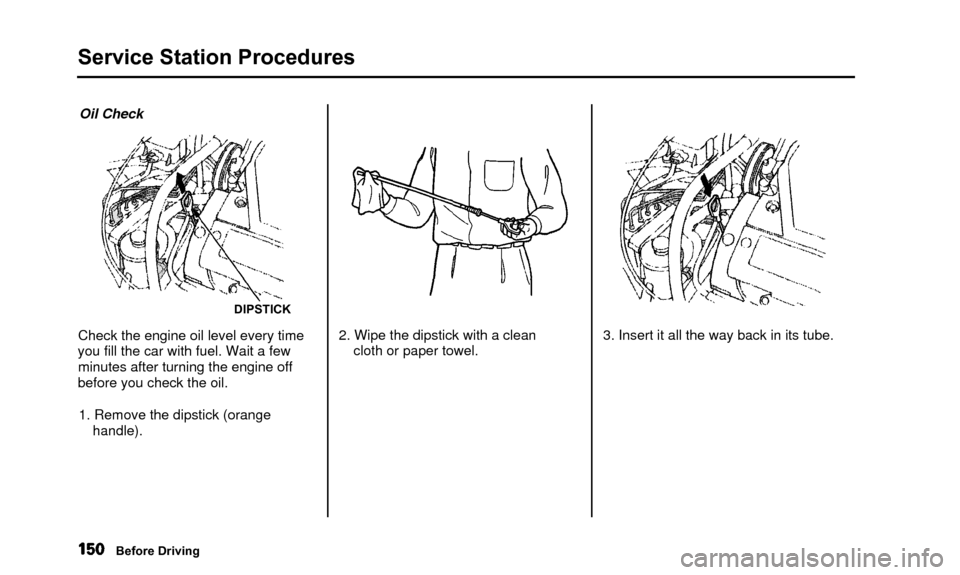
Oil Check
DIPSTICK
Check the engine oil level every time
you fill the car with fuel. Wait a few minutes after turning the engine off
before you check the oil.
1. Remove the dipstick (orange handle). 2. Wipe the dipstick with a clean
cloth or paper towel. 3. Insert it all the way back in its tube.
Before Driving
Page 158 of 311

Carrying Cargo
CONSOLE COMPARTMENT FRONT DOOR POCKETTRUNK SEAT-BACK POCKET GLOVE BOXYour car has several convenientstorage areas so you can stow cargo
safely.
The glove box, and the pockets in the front doors and seat-back, are
designed for small, lightweight items.
The trunk is intended for larger, heavier items.
However, carrying too much cargo,or improperly storing it, can affect
your car's handling, stability and operation and make it unsafe. Before
carrying any type of cargo, be sure to read the following pages.
Before Driving
Page 159 of 311

Carrying Cargo
Load Limit
The maximum load for your car is 850 lbs (395 kg).
This figure includes the total weight of all occupants, cargo, accessories,
and the tongue weight if you are
towing a trailer.
To figure out how much cargo you can carry:
• Add up the weight of all occupants.
• If you are towing a trailer, add the tongue weight to the numberabove.
• Subtract the total from 850 lbs (395 kg).
The final number is the total weight of cargo you can carry. Overloading or improper
loading can affect handling and
stability and cause a crash in
which you can be hurt or killed.
Follow all load limits and other
loading guidelines in this
manual. Carrying Items in the Passenger
Compartment
• Store or secure all items that could
be thrown around and hurtsomeone during a crash.
• Do not put any items on top of the rear shelf. They can block your
view and be thrown around the carduring a crash.
• Be sure items placed on the floor behind the front seats cannot roll
under the seats and interfere with
the driver's ability to operate the
pedals, or with the proper operation of the seats.
• Keep the glove box closed while driving. If the lid is open, a
passenger could injure their knees during a crash or sudden stop.
Before Driving
Page 162 of 311

Driving
This section gives you tips onstarting the engine under various
conditions, and how to operate the
automatic transmission. It also
includes important information on
parking your car, the braking system,
the Traction Control System, and
facts you need if you are planning to
tow a trailer.Preparing to Drive.................... 160
Starting the Engine.................... 161
Starting in Cold Weather
at High Altitude................. 161
Automatic Transmission........... 162 Shift Lever Position Indicator .. 162
Shift Lever Positions............. 163
Engine Speed Limiter............ 169
Shift Lock Release.............. 169
Parking................................... 171
The Braking System................. 172
Brake Wear Indicators.......... 172
Brake System Design .............. 173
Anti-lock Brakes.................... 173
Important Safety
Reminders................... 174
ABS Indicator.................... 174
Traction Control System ........... 175
TCS ON/OFF Switch ............. 176
TCS Indicator....................... 176
Driving in Bad Weather............. 178
Towing a Trailer........................ 180
Driving
Page 166 of 311

Automatic Transmission
Shift Lever Positions
SHIFT LEVER
SEQUENTIAL
SPORTSHIFT MODE
POSITION
The shift lever has nine positions. It must be in Park or Neutral to start
the engine. When you are stopped inD
5, D4, D3, 2, 1,N,R,or the
Sequential SportShift mode, press
firmly on the brake pedal and keep
your foot off the accelerator pedal. To select the Sequential SportShift
mode, slide the shift lever toward the
left from the "D
5" position.
In this mode the shift lever allows
you to shift up and down manually.
To shift from:
P toR
R to N
N to Ds
D
5 to D4
D4 to D3D3 to2
2 to l
1to2
2 to D
3D3 to D4D4 to D5
N to R R to P Do this:
Press the brake pedal, then
move the shift lever.
Move the lever.
Whenever you move the shift lever, slide it along the guide on the
console.
You cannot shift out of Park with the brake pedal depressed when theignition switch is in LOCK (0) or
ACCESSORY (I).
CONTINUED
Driving