sensor Acura ZDX 2012 User Guide
[x] Cancel search | Manufacturer: ACURA, Model Year: 2012, Model line: ZDX, Model: Acura ZDX 2012Pages: 370, PDF Size: 10.06 MB
Page 51 of 370
49
uuAirbags uAirbag Care
Safe Driving
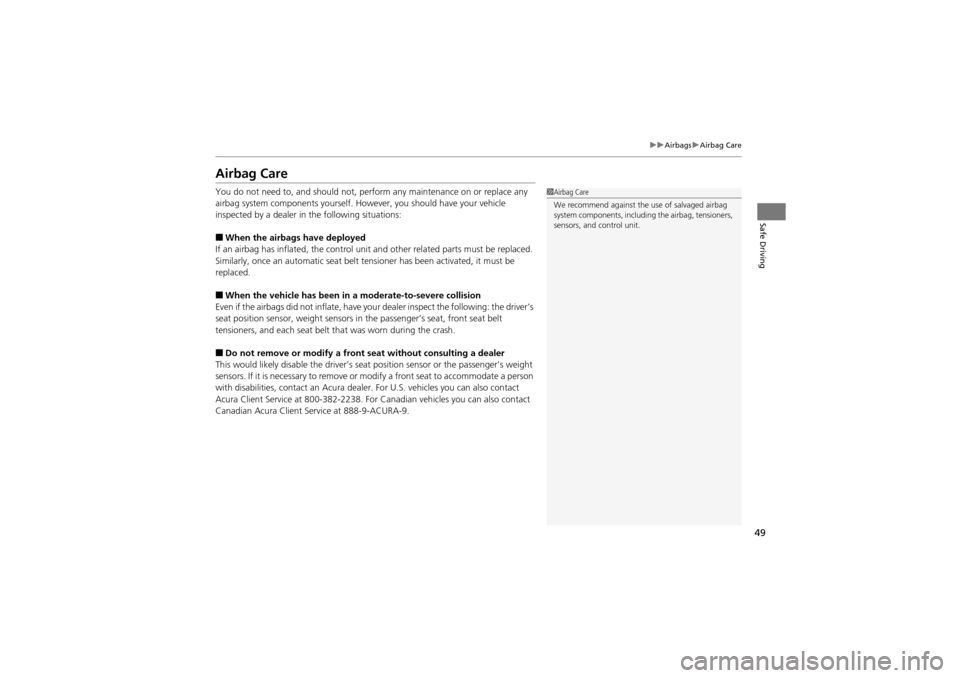
Airbag Care
You do not need to, and should not, perform any maintenance on or replace any
airbag system components yourself. Ho wever, you should have your vehicle
inspected by a dealer in the following situations:
■When the airbags have deployed
If an airbag has inflated, the control unit and other related parts must be replaced.
Similarly, once an automatic seat belt te nsioner has been activated, it must be
replaced.
■When the vehicle has been in a moderate-to-severe collision
Even if the airbags did not inflate, have yo ur dealer inspect the following: the driver’s
seat position sensor, weight sensors in the passenger’s seat, front seat belt
tensioners, and each seat belt th at was worn during the crash.
■Do not remove or modify a front seat without consulting a dealer
This would likely disable the driver’s seat position sensor or the passenger’s weight
sensors. If it is necessary to remove or modify a front seat to accommodate a person
with disabilities, contact an Acura dealer . For U.S. vehicles you can also contact
Acura Client Service at 800-382-2238. For Canadian vehicles you can also contact
Canadian Acura Client Service at 888-9-ACURA-9.
1 Airbag Care
We recommend against the use of salvaged airbag
system components, includi ng the airbag, tensioners,
sensors, and control unit.
Page 73 of 370
71
uuIndicators u
Continued
Instrument Panel
*1: Models with the keyless access system have an ENGINE START/STOP button instead of an ignition switch.
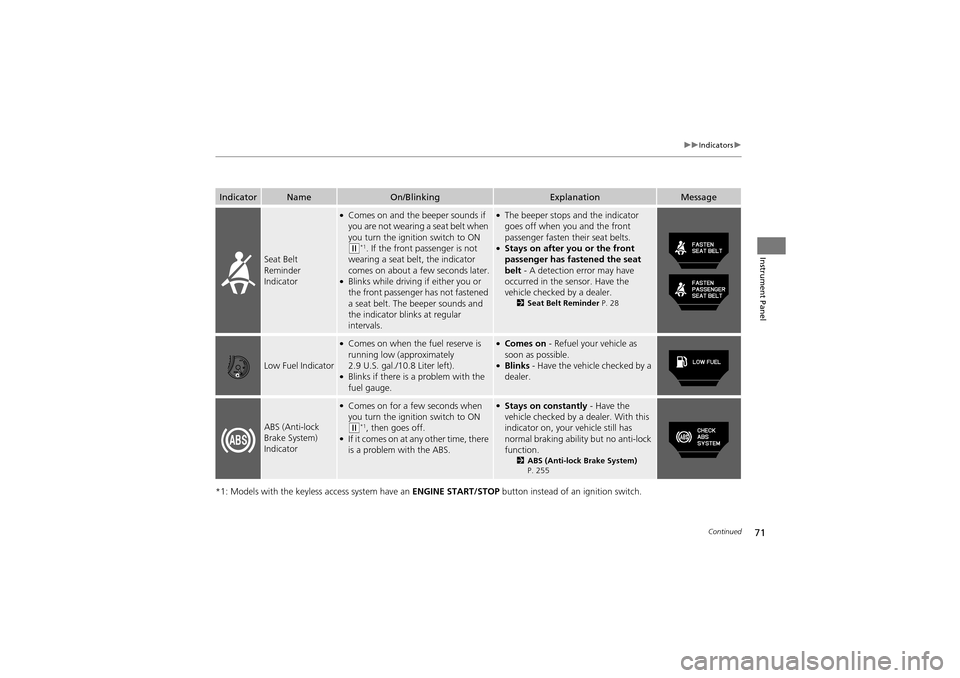
IndicatorNameOn/BlinkingExplanationMessage
Seat Belt
Reminder
Indicator
●Comes on and the beeper sounds if
you are not wearing a seat belt when
you turn the ignition switch to ON
(w*1. If the front passenger is not
wearing a seat belt, the indicator
comes on about a few seconds later.
●Blinks while driving if either you or
the front passenger has not fastened
a seat belt. The beeper sounds and
the indicator blinks at regular
intervals.
●The beeper stops and the indicator
goes off when you and the front
passenger fasten their seat belts.
●Stays on after you or the front
passenger has fastened the seat
belt - A detection error may have
occurred in the sensor. Have the
vehicle checked by a dealer.
2 Seat Belt Reminder P. 28
Low Fuel Indicator
●Comes on when the fuel reserve is
running low (approximately
2.9 U.S. gal./10.8 Liter left).
●Blinks if there is a problem with the
fuel gauge.
●Comes on - Refuel your vehicle as
soon as possible.
●Blinks - Have the vehicle checked by a
dealer.
ABS (Anti-lock
Brake System)
Indicator
●Comes on for a fe w seconds when
you turn the igniti on switch to ON
(w*1, then goes off.●If it comes on at any other time, there
is a problem with the ABS.
●Stays on constantly - Have the
vehicle checked by a dealer. With this
indicator on, your vehicle still has
normal braking ability but no anti-lock
function.
2 ABS (Anti-lock Brake System)
P. 255
Page 81 of 370
79
uuIndicators u
Instrument Panel
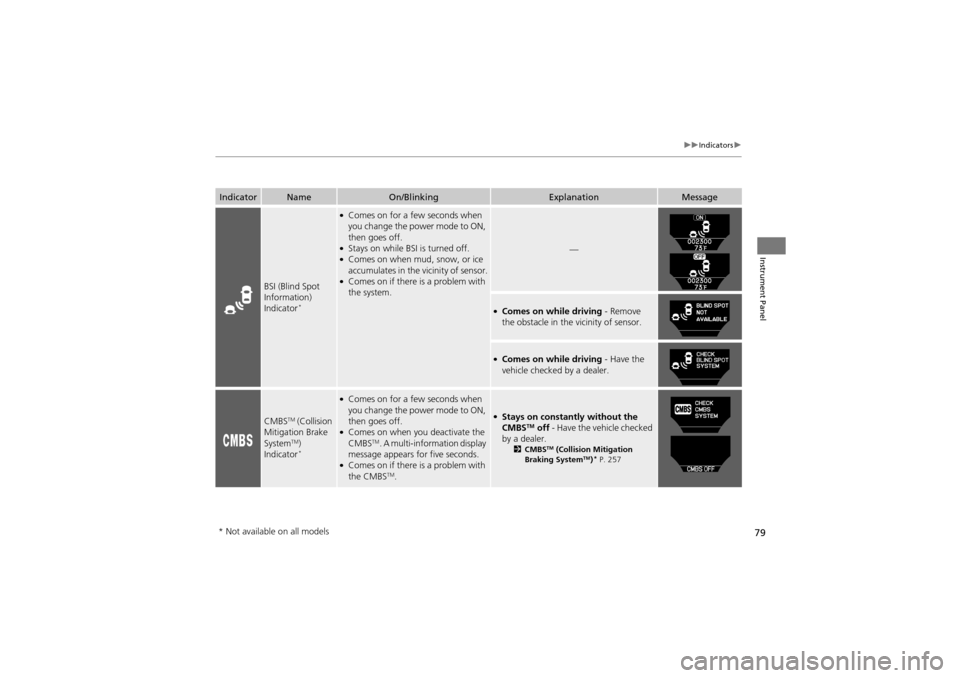
IndicatorNameOn/BlinkingExplanationMessage
BSI (Blind Spot
Information)
Indicator
*
●Comes on for a fe w seconds when
you change the power mode to ON,
then goes off.
●Stays on while BSI is turned off.●Comes on when mud, snow, or ice
accumulates in the vicinity of sensor.
●Comes on if there is a problem with
the system.
—
●Comes on while driving - Remove
the obstacle in the vicinity of sensor.
●Comes on while driving - Have the
vehicle checked by a dealer.
CMBSTM (Collision
Mitigation Brake
System
TM)
Indicator*
●Comes on for a fe w seconds when
you change the power mode to ON,
then goes off.
●Comes on when you deactivate the
CMBSTM. A multi-information display
message appears for five seconds.
●Comes on if there is a problem with
the CMBSTM.
●Stays on constantly without the
CMBSTM off - Have the vehicle checked
by a dealer.
2 CMBSTM (Collision Mitigation
Braking SystemTM)* P. 257
* Not available on all models
Page 84 of 370
82
uuIndicators uMulti-Information Display Warning and Information Messages
Instrument Panel
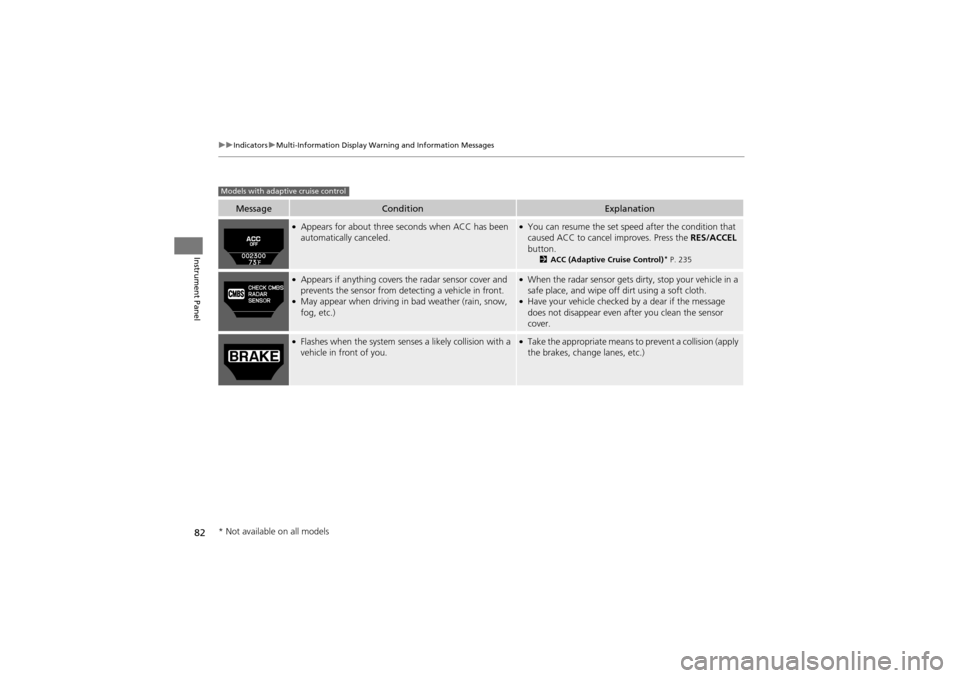
MessageConditionExplanation
●Appears for about three seconds when ACC has been
automatically canceled.●You can resume the set speed after the condition that
caused ACC to cancel improves. Press the RES/ACCEL
button.
2 ACC (Adaptive Cruise Control)* P. 235
●Appears if anything covers the radar sensor cover and
prevents the sensor from de tecting a vehicle in front.
●May appear when driving in bad weather (rain, snow,
fog, etc.)
●When the radar sensor gets dirty, stop your vehicle in a
safe place, and wipe off dirt using a soft cloth.
●Have your vehicle checked by a dear if the message
does not disappear even a fter you clean the sensor
cover.
●Flashes when the system senses a likely collision with a
vehicle in front of you.●Take the appropriate means to prevent a collision (apply
the brakes, change lanes, etc.)
Models with adaptive cruise control
* Not available on all models
Page 85 of 370
83
uuIndicators uMulti-Information Display Warning and Information Messages
Continued
Instrument Panel
MessageConditionExplanation
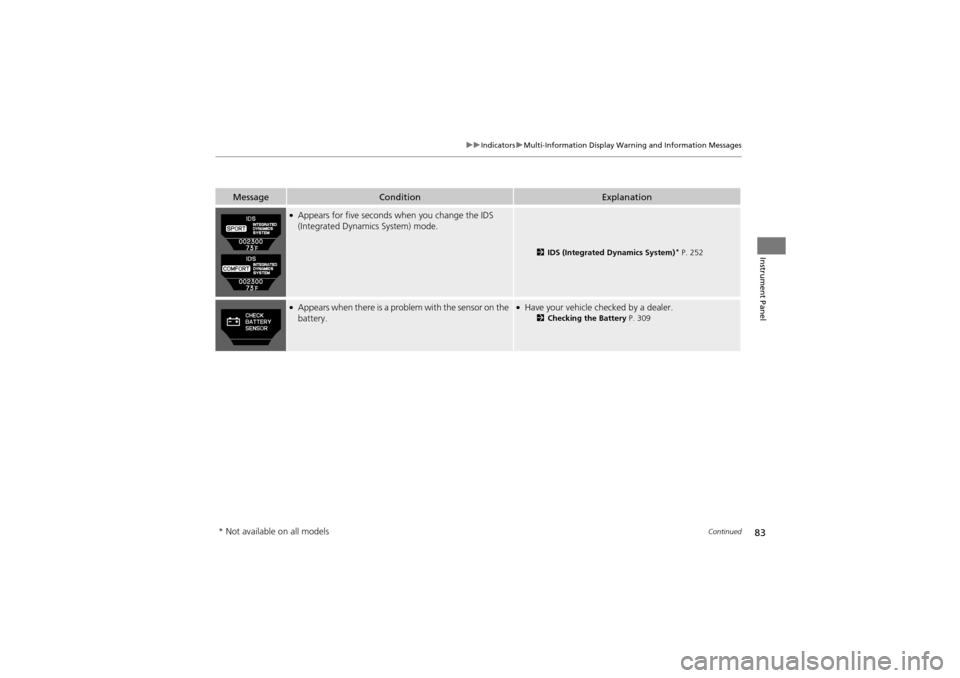
●Appears for five seconds when you change the IDS
(Integrated Dynamics System) mode.
2 IDS (Integrated Dynamics System)* P. 252
●Appears when there is a prob lem with the sensor on the
battery.●Have your vehicle checked by a dealer.2 Checking the Battery P. 309
* Not available on all models
Page 93 of 370
Continued91
uuGauges and Multi-Information Display uMulti-Information Display
Instrument Panel
Shows the total number of miles (U.S.) or kilometers (Canada) driven since the last
reset. Meters A and B can be used to measure two separate trips.
■Resetting a trip meter
To reset a trip meter, display it, then press and hold the SEL/RESET button. The trip
meter is reset to 0.0.
Shows the outside temperature in Fahr enheit (U.S.) or Celsius (Canada).
■Adjusting the outside temperature display
Adjust the temperature reading up to ±5°F or ±3°C if the temperature reading
seems incorrect.
Shows the remaining oil life and Maintenance Minder
TM.2 Maintenance MinderTM P. 273
Shows the estimated average fuel economy of each trip meter in mpg (U.S.) or l/
100 km (Canada). The display is updated at set intervals. When a trip meter is reset,
the average fuel econ omy is also reset.
■Trip Meter
■Outside Temperature
■Engine Oil Life
■Average Fuel Economy
1Trip Meter
Switch between trip meter A and trip meter B by
pressing the SEL/RESET button.
1Outside Temperature
The temperature sensor is in the front bumper.
Road heat and exhaust fr om another vehicle can
affect the temperature reading when your vehicle
speed is less than 19 mph (30 km/h).
It may take several minutes for the display to be
updated after the temperature reading has stabilized.
Use the multi-information display’s customized
features to correct the temperature. 2 Customized Features P. 94
1Average Fuel Economy
You can choose to reset Trip A information when you
refuel.
2 Customized Features P. 94
Page 103 of 370
101
Controls
This chapter explains how to operate the various controls necessary for driving.
Setting the Clock.............................. 102
Locking and Unlocking the Doors
Key Types and Function s .................. 103
Locking/Unlocking the Doors from the Outside .......................................... 106
Low Keyless Access Remote Signal Strength*...................................... 110Locking/Unlocking the Doors from the
Inside ............................................. 111
Childproof Door Locks ..................... 112
Auto Door Locking/Unlocking .......... 113
Opening and Closing the Tailgate ... 114
Security System ................................ 120
Opening and Closing the Windows ..... 123
Opening and Closing the Panoramic
Glass Roof ........................................ 126
Operating the Switches Around the Steering Wheel ............................... 127
Ignition Switch ................................. 127
ENGINE START/STOP Button
*........... 128
Turn Signals ..................................... 131
Light Switches.................................. 131
Fog Lights ........................................ 133
Daytime Running Lights ................... 133
Wipers and Washers ........................ 134
Brightness Control ........................... 136
Rear Defogger/Heated Door Mirror Button........................................ 137
Driving Position Memory System ...... 138
Adjusting the Steeri ng Wheel .......... 140
Adjusting the Mirrors ....................... 141
Adjusting the Seats .......................... 143
Interior Lights/Interior Convenience
Items ................................................ 151
Interior Lights .................................. 151
Interior Convenience Items .............. 153
Climate Con trol System................... 163
Using Automatic Climate Control .... 163
Synchronized Mode ......................... 165
Automatic Climate Control Sensors ...... 166
* Not available on all models
Page 110 of 370
uuLocking and Unlocking the Doors uLocking/Unlocking the Doors from the Outside
108
Controls
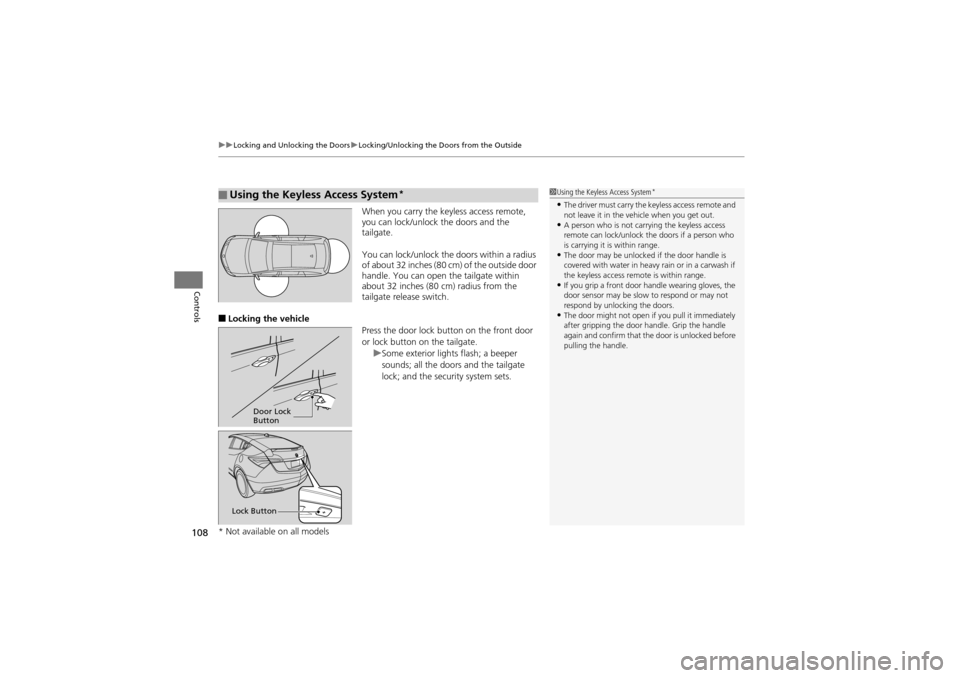
When you carry the keyless access remote,
you can lock/unlock the doors and the
tailgate.
You can lock/unlock the doors within a radius
of about 32 inches (80 cm) of the outside door
handle. You can open the tailgate within
about 32 inches (80 cm) radius from the
tailgate release switch.
■Locking the vehicle
Press the door lock button on the front door
or lock button on the tailgate.uSome exterior lights flash; a beeper
sounds; all the doors and the tailgate
lock; and the security system sets.
■Using the Keyless Access System*1Using the Keyless Access System*
•The driver must carry the keyless access remote and
not leave it in the vehicle when you get out.
•A person who is not carrying the keyless access
remote can lock/unlock the doors if a person who
is carrying it is within range.
•The door may be unlocked if the door handle is
covered with water in heavy rain or in a carwash if
the keyless access remo te is within range.
•If you grip a front door handle wearing gloves, the
door sensor may be slow to respond or may not
respond by unlocking the doors.
•The door might not open if you pull it immediately
after gripping the door handle. Grip the handle
again and confirm that the door is unlocked before
pulling the handle.
Door Lock
Button
Lock Button
* Not available on all models
Page 119 of 370
Continued117
uuOpening and Closing the Tailgate uOpening/Closing the Power Tailgate
Controls
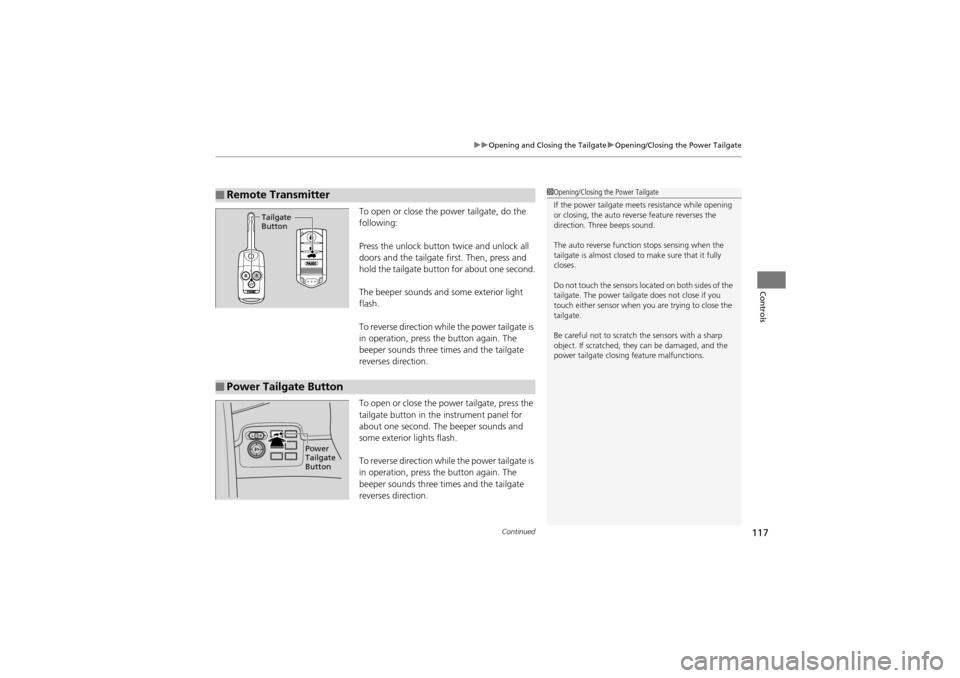
To open or close the power tailgate, do the
following:
Press the unlock button twice and unlock all
doors and the tailgate first. Then, press and
hold the tailgate button for about one second.
The beeper sounds and some exterior light
flash.
To reverse direction whil e the power tailgate is
in operation, press the button again. The
beeper sounds three times and the tailgate
reverses direction.
To open or close the power tailgate, press the
tailgate button in the instrument panel for
about one second. The beeper sounds and
some exterior lights flash.
To reverse direction whil e the power tailgate is
in operation, press the button again. The
beeper sounds three times and the tailgate
reverses direction.
■Remote Transmitter1 Opening/Closing the Power Tailgate
If the power tailgate meets resistance while opening
or closing, the auto reve rse feature reverses the
direction. Thr ee beeps sound.
The auto reverse function stops sensing when the
tailgate is almost closed to make sure that it fully
closes.
Do not touch the sensors located on both sides of the
tailgate. The power tailgat e does not close if you
touch either sensor when you are trying to close the
tailgate.
Be careful not to scratch the sensors with a sharp
object. If scratched, they can be damaged, and the
power tailgate closing feature malfunctions.
Tailgate
Button
■Power Tailgate Button
Power
Tailgate
Button
Page 134 of 370
uuOperating the Switches Around the Steering Wheel uLight Switches
132
Controls
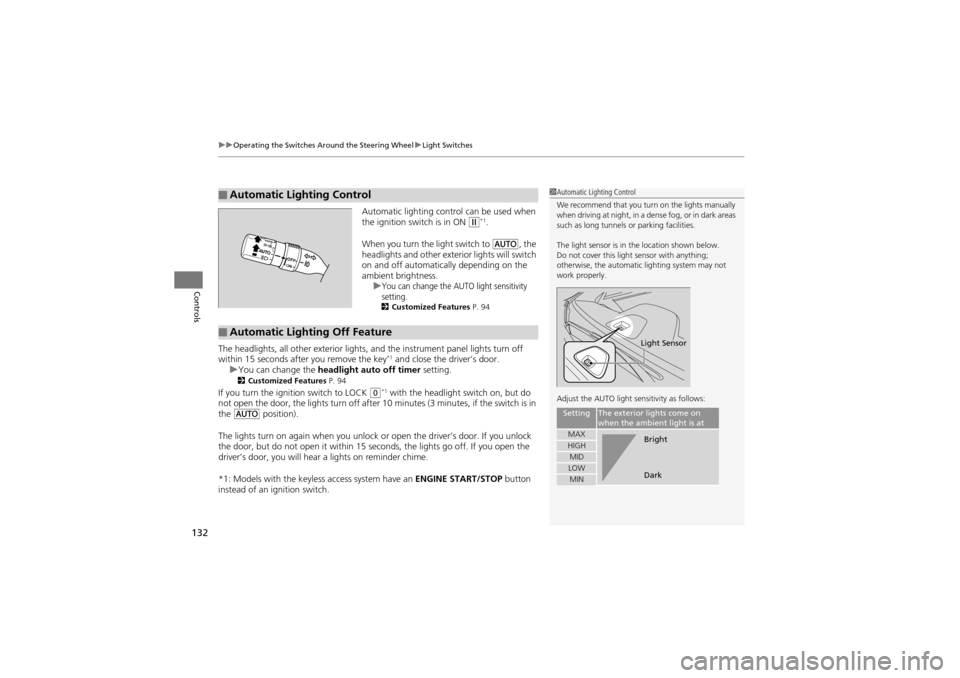
Automatic lighting control can be used when
the ignition switch is in ON w*1.
When you turn the light switch to
Y, the
headlights and other exterior lights will switch
on and off automatically depending on the
ambient brightness. u
You can change the AUTO light sensitivity
setting.
2 Customized Features P. 94
The headlights, all other exterior lights, and the instrument panel lights turn off
within 15 seconds a fter you remove the key*1 and close the driver’s door.
u You can change the headlight auto off timer setting.
2Customized Features P. 94
If you turn the ignition switch to LOCK 0*1 with the headlight switch on, but do
not open the door, the lights turn off after 10 minutes (3 minutes, if the switch is in
the
Y position).
The lights turn on again when you unlock or open the driver’s door. If you unlock
the door, but do not open it within 15 seconds, the lights go off. If you open the
driver’s door, you will hear a lights on reminder chime.
*1: Models with the keyless access system have an ENGINE START/STOP button
instead of an ignition switch.
■Automatic Lighting Control1 Automatic Lighting Control
We recommend that you turn on the lights manually
when driving at night, in a dense fog, or in dark areas
such as long tunnels or parking facilities.
The light sensor is in the location shown below.
Do not cover this light sensor with anything;
otherwise, the automatic lighting system may not
work properly.
Adjust the AUTO light sensitivity as follows:
SettingThe exterior lights come on
when the ambien t light is at
MAXHIGHMIDLOWMIN
Light Sensor
Bright
Dark
■Automatic Lighting Off Feature