display Acura ZDX 2013 Owner's Guide
[x] Cancel search | Manufacturer: ACURA, Model Year: 2013, Model line: ZDX, Model: Acura ZDX 2013Pages: 324, PDF Size: 8.58 MB
Page 104 of 324
103
uuGauges and Multi-Information DisplayuMulti-Information Display
Instrument Panel
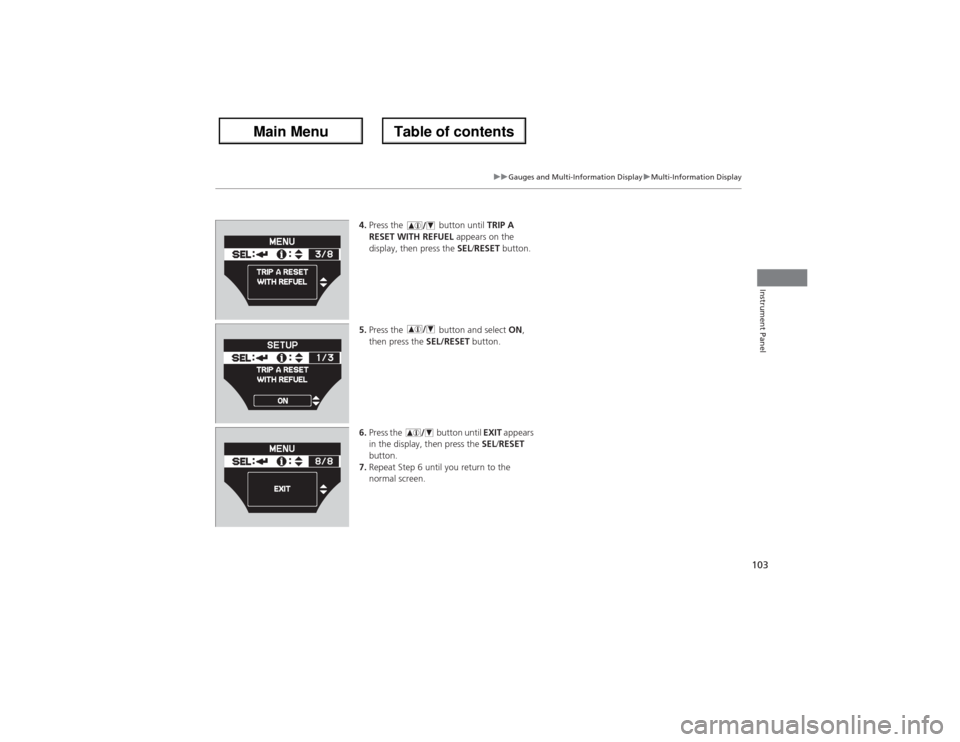
4.Press the button until TRIP A
RESET WITH REFUEL appears on the
display, then press the SEL/RESET button.
5.Press the button and select ON,
then press the SEL/RESET button.
6.Press the button until EXIT appears
in the display, then press the SEL/RESET
button.
7.Repeat Step 6 until you return to the
normal screen.
Page 111 of 324
uuLocking and Unlocking the DoorsuLocking/Unlocking the Doors from the Outside
110Controls
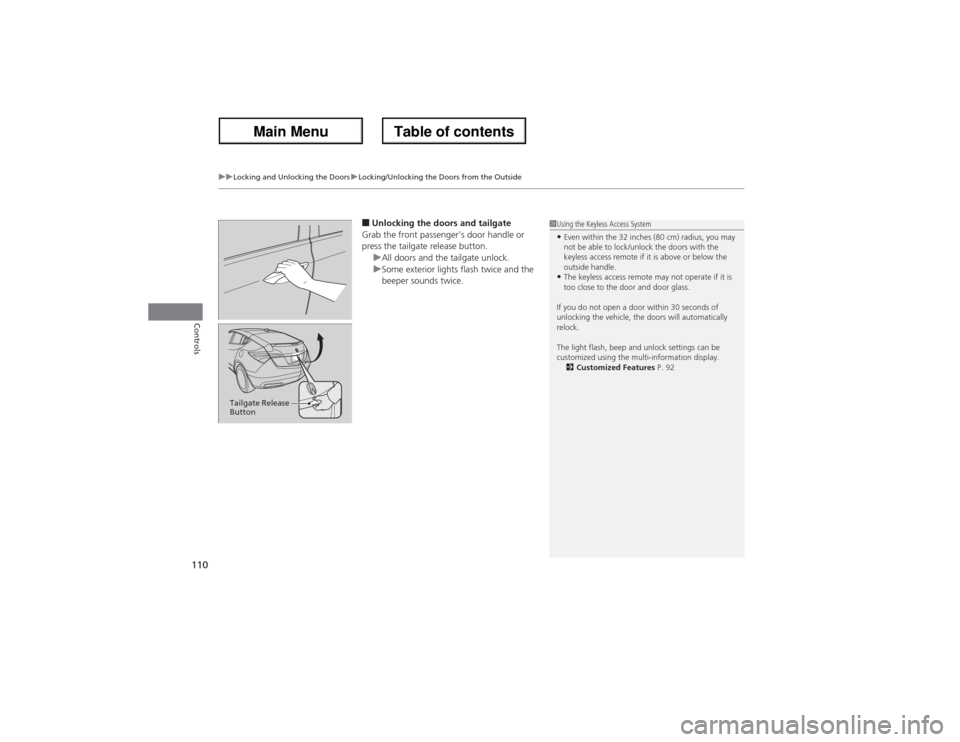
■Unlocking the doors and tailgate
Grab the front passenger’s door handle or
press the tailgate release button.
uAll doors and the tailgate unlock.
uSome exterior lights flash twice and the
beeper sounds twice.
1Using the Keyless Access System•Even within the 32 inches (80 cm) radius, you may
not be able to lock/unlock the doors with the
keyless access remote if it is above or below the
outside handle.•The keyless access remote may not operate if it is
too close to the door and door glass.
If you do not open a door within 30 seconds of
unlocking the vehicle, the doors will automatically
relock.
The light flash, beep and unlock settings can be
customized using the multi-information display.
2Customized Features P. 92
Tailgate Release
Button
Page 116 of 324
115
uuLocking and Unlocking the DoorsuAuto Door Locking/Unlocking
Controls
Auto Door Locking/UnlockingYour vehicle locks all doors and unlocks the driver’s door automatically when a
certain condition is met.■Drive lock mode
All doors, the tailgate, and the fuel fill door lock when the vehicle’s speed reaches
about 10 mph (15 km/h).■Park unlock mode
The driver’s door unlocks when the shift lever is moved into
(P with the brake pedal
depressed.
The settings can be changed to unlock all doors.
■Auto Door Locking■Auto Door Unlocking
1Auto Door Locking/Unlocking
You can turn off or change to another auto door
locking/unlocking setting using the multi-information
display.
2Customized Features P. 92
Page 131 of 324
uuOperating the Switches Around the Steering WheeluENGINE START/STOP Button
130Controls
If you open the driver's door when the power mode is set to ACCESSORY, a warning
buzzer sounds.
Warning buzzers may sound from inside or/
and outside the vehicle to remind you that the
keyless access remote is out of the vehicle. If
the buzzer continues even after the remote is
put back inside, place it within its operational
range.
■When the power mode is in ON
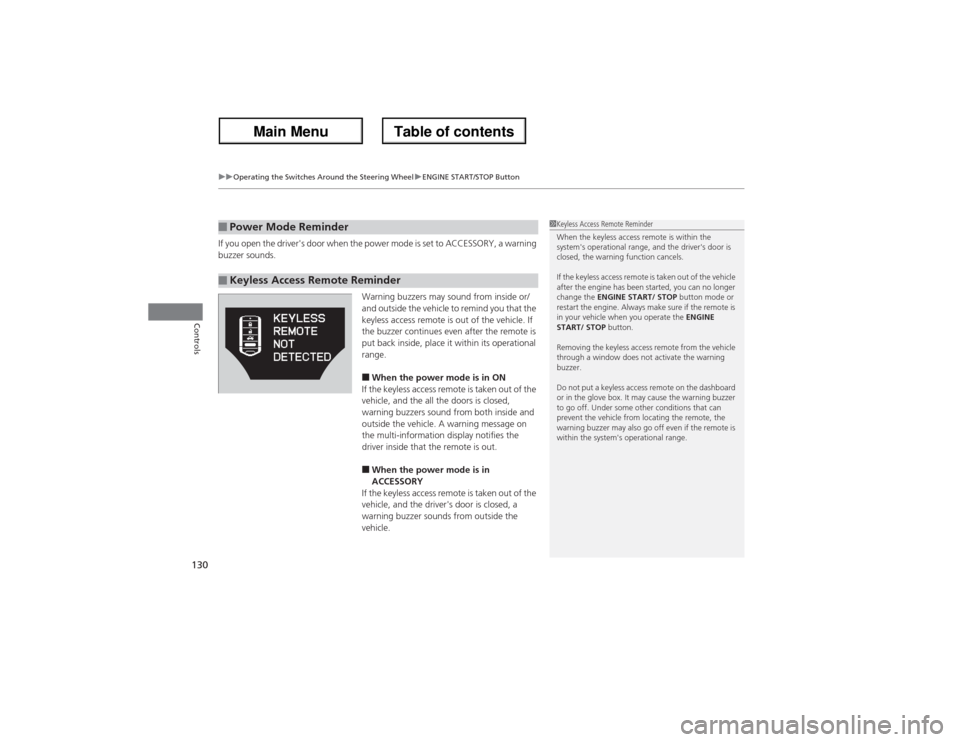
If the keyless access remote is taken out of the
vehicle, and the all the doors is closed,
warning buzzers sound from both inside and
outside the vehicle. A warning message on
the multi-information display notifies the
driver inside that the remote is out.■When the power mode is in
ACCESSORY
If the keyless access remote is taken out of the
vehicle, and the driver's door is closed, a
warning buzzer sounds from outside the
vehicle.
■Power Mode Reminder■Keyless Access Remote Reminder
1Keyless Access Remote Reminder
When the keyless access remote is within the
system's operational range, and the driver's door is
closed, the warning function cancels.
If the keyless access remote is taken out of the vehicle
after the engine has been started, you can no longer
change the ENGINE START/ STOP button mode or
restart the engine. Always make sure if the remote is
in your vehicle when you operate the ENGINE
START/ STOP button.
Removing the keyless access remote from the vehicle
through a window does not activate the warning
buzzer.
Do not put a keyless access remote on the dashboard
or in the glove box. It may cause the warning buzzer
to go off. Under some other conditions that can
prevent the vehicle from locating the remote, the
warning buzzer may also go off even if the remote is
within the system's operational range.
Page 138 of 324
137
uuOperating the Switches Around the Steering WheeluBrightness Control
Controls
Brightness Control
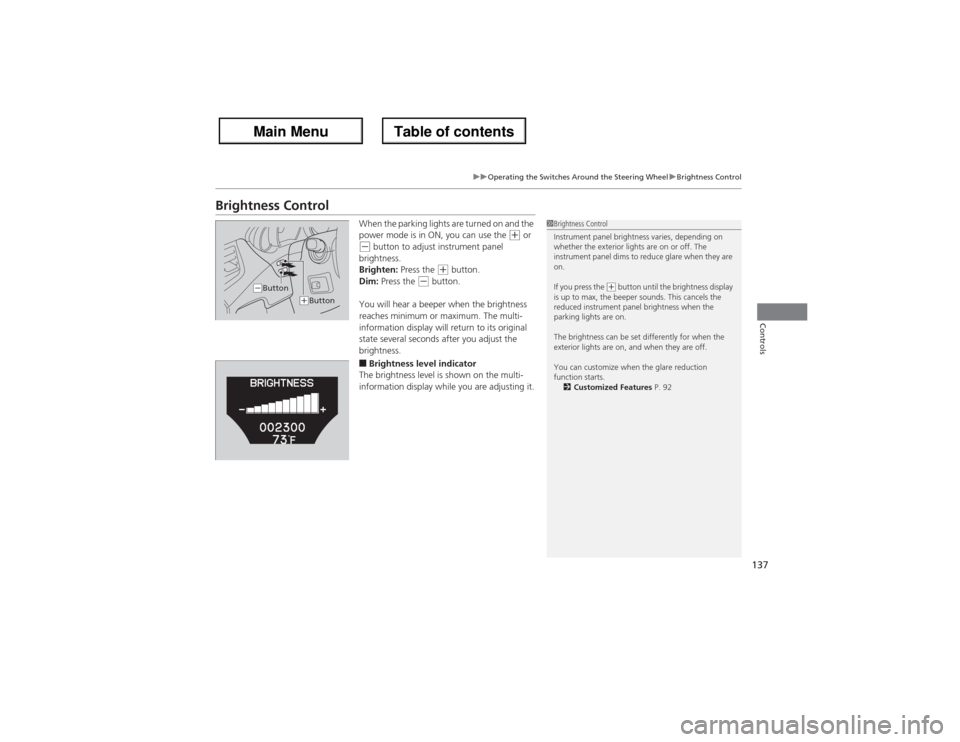
When the parking lights are turned on and the
power mode is in ON, you can use the
(+ or
(- button to adjust instrument panel
brightness.
Brighten: Press the
(+ button.
Dim: Press the
(- button.
You will hear a beeper when the brightness
reaches minimum or maximum. The multi-
information display will return to its original
state several seconds after you adjust the
brightness.
■Brightness level indicator
The brightness level is shown on the multi-
information display while you are adjusting it.
1Brightness Control
Instrument panel brightness varies, depending on
whether the exterior lights are on or off. The
instrument panel dims to reduce glare when they are
on.
If you press the
(+ button until the brightness display
is up to max, the beeper sounds. This cancels the
reduced instrument panel brightness when the
parking lights are on.
The brightness can be set differently for when the
exterior lights are on, and when they are off.
You can customize when the glare reduction
function starts.
2Customized Features P. 92
(-Button
(+Button
Page 140 of 324
139
uuOperating the Switches Around the Steering WheeluDriving Position Memory System
Continued
Controls
Driving Position Memory SystemYou can store two driver’s seat (except for power lumbar), steering wheel and
outside mirror positions with the driving position memory system.
When you unlock and open the driver’s door with the keyless access system, the seat
and outside mirrors adjust automatically to one of the two preset positions.
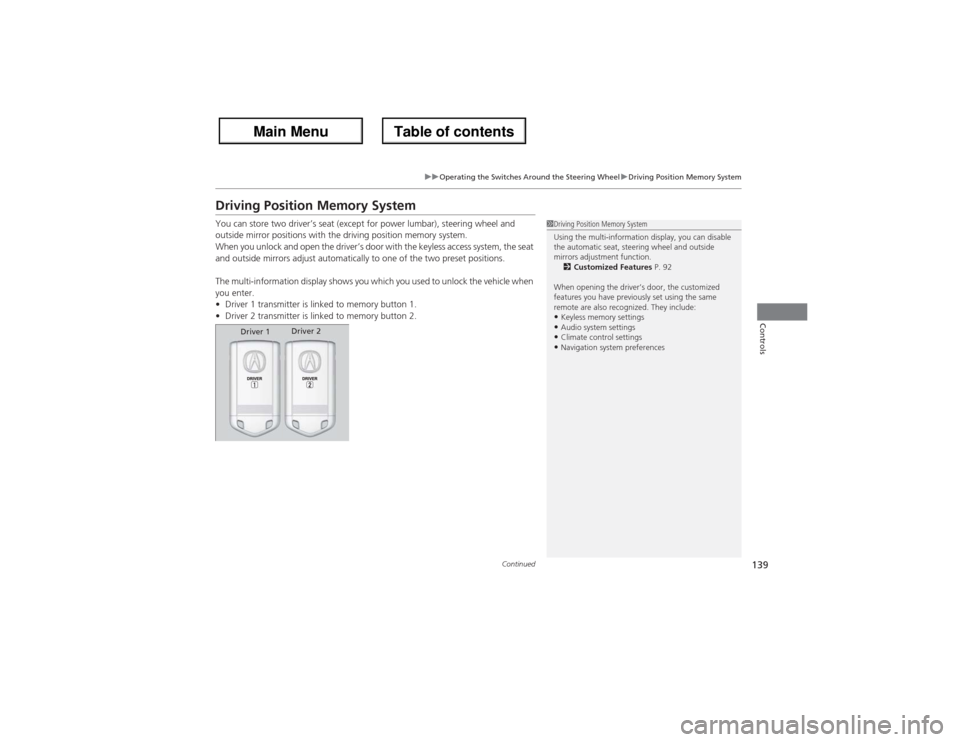
The multi-information display shows you which you used to unlock the vehicle when
you enter.
•Driver 1 transmitter is linked to memory button 1.
•Driver 2 transmitter is linked to memory button 2.
1Driving Position Memory System
Using the multi-information display, you can disable
the automatic seat, steering wheel and outside
mirrors adjustment function.
2Customized Features P. 92
When opening the driver’s door, the customized
features you have previously set using the same
remote are also recognized. They include:•Keyless memory settings•Audio system settings•Climate control settings•Navigation system preferences
Driver 1Driver 2
Page 164 of 324
163
Continued
Controls
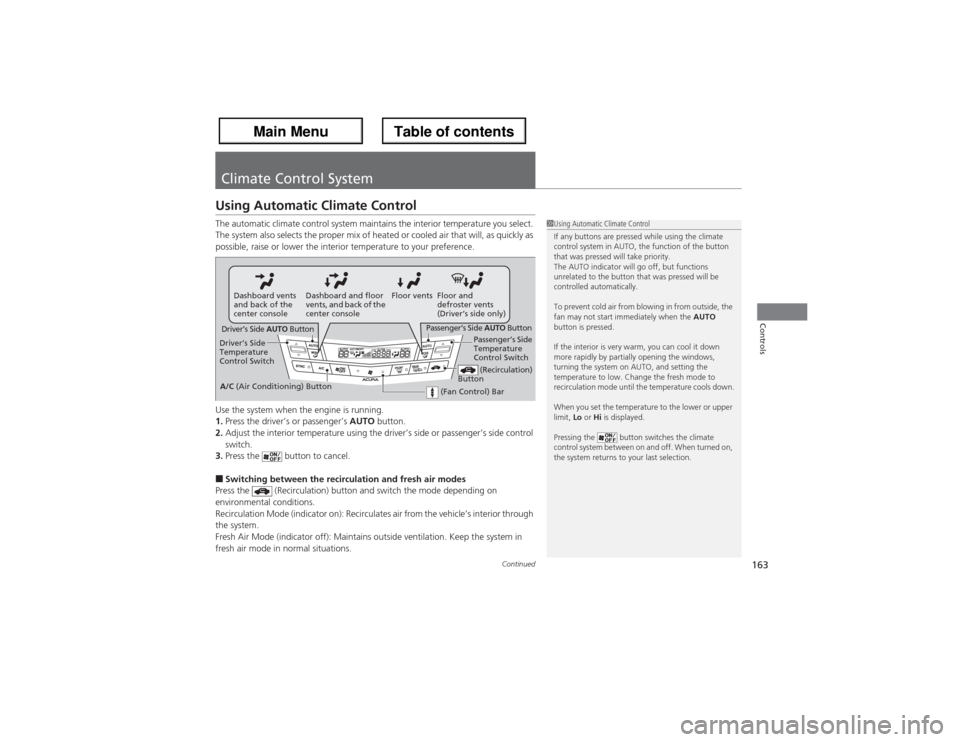
Climate Control SystemUsing Automatic Climate ControlThe automatic climate control system maintains the interior temperature you select.
The system also selects the proper mix of heated or cooled air that will, as quickly as
possible, raise or lower the interior temperature to your preference.
Use the system when the engine is running.
1.Press the driver’s or passenger’s AUTO button.
2.Adjust the interior temperature using the driver’s side or passenger’s side control
switch.
3.Press the button to cancel.■Switching between the recirculation and fresh air modes
Press the (Recirculation) button and switch the mode depending on
environmental conditions.
Recirculation Mode (indicator on): Recirculates air from the vehicle’s interior through
the system.
Fresh Air Mode (indicator off): Maintains outside ventilation. Keep the system in
fresh air mode in normal situations.
1Using Automatic Climate Control
If any buttons are pressed while using the climate
control system in AUTO, the function of the button
that was pressed will take priority.
The AUTO indicator will go off, but functions
unrelated to the button that was pressed will be
controlled automatically.
To prevent cold air from blowing in from outside, the
fan may not start immediately when the AUTO
button is pressed.
If the interior is very warm, you can cool it down
more rapidly by partially opening the windows,
turning the system on AUTO, and setting the
temperature to low. Change the fresh mode to
recirculation mode until the temperature cools down.
When you set the temperature to the lower or upper
limit, Lo or Hi is displayed.
Pressing the button switches the climate
control system between on and off. When turned on,
the system returns to your last selection.
Dashboard vents
and back of the
center consoleDashboard and floor
vents, and back of the
center consoleFloor vents Floor and
defroster vents
(Driver’s side only)
Driver’s Side AUTO Button
Driver’s Side
Temperature
Control Switch
(Recirculation)
Button
A/C (Air Conditioning) ButtonPassenger’s Side
Temperature
Control Switch
(Fan Control) Bar
Passenger’s Side AUTO Button
Page 198 of 324
Continued
197
uuWhen DrivinguForward Collision Warning (FCW)
Driving
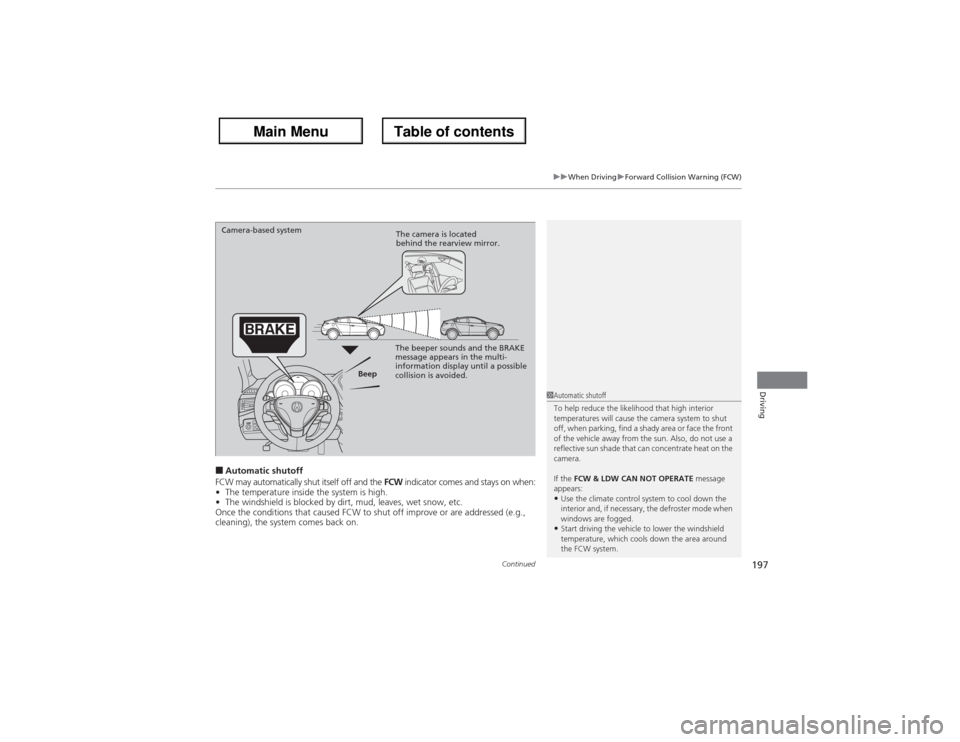
■Automatic shutoff
FCW may automatically shut itself off and the FCW indicator comes and stays on when:
•The temperature inside the system is high.
•The windshield is blocked by dirt, mud, leaves, wet snow, etc.
Once the conditions that caused FCW to shut off improve or are addressed (e.g.,
cleaning), the system comes back on.
1Automatic shutoff
To help reduce the likelihood that high interior
temperatures will cause the camera system to shut
off, when parking, find a shady area or face the front
of the vehicle away from the sun. Also, do not use a
reflective sun shade that can concentrate heat on the
camera.
If the FCW & LDW CAN NOT OPERATE message
appears:•Use the climate control system to cool down the
interior and, if necessary, the defroster mode when
windows are fogged.•Start driving the vehicle to lower the windshield
temperature, which cools down the area around
the FCW system.
Beep Camera-based system
The camera is located
behind the rearview mirror.
The beeper sounds and the BRAKE
message appears in the multi-
information display until a possible
collision is avoided.
Page 200 of 324
199
uuWhen DrivinguLane Departure Warning (LDW)
Continued
Driving
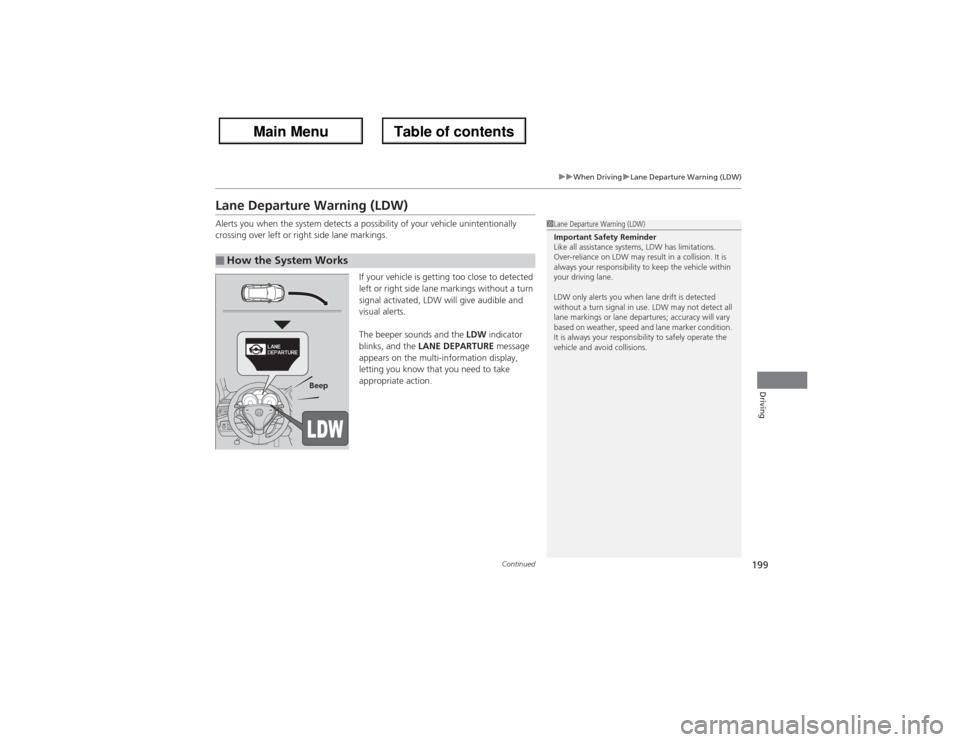
Lane Departure Warning (LDW)Alerts you when the system detects a possibility of your vehicle unintentionally
crossing over left or right side lane markings.
If your vehicle is getting too close to detected
left or right side lane markings without a turn
signal activated, LDW will give audible and
visual alerts.
The beeper sounds and the LDW indicator
blinks, and the LANE DEPARTURE message
appears on the multi-information display,
letting you know that you need to take
appropriate action.■How the System Works
1Lane Departure Warning (LDW)
Important Safety Reminder
Like all assistance systems, LDW has limitations.
Over-reliance on LDW may result in a collision. It is
always your responsibility to keep the vehicle within
your driving lane.
LDW only alerts you when lane drift is detected
without a turn signal in use. LDW may not detect all
lane markings or lane departures; accuracy will vary
based on weather, speed and lane marker condition.
It is always your responsibility to safely operate the
vehicle and avoid collisions.
Beep
Page 206 of 324
205
uuWhen DrivinguBSI (Blind Spot Information)
Continued
Driving
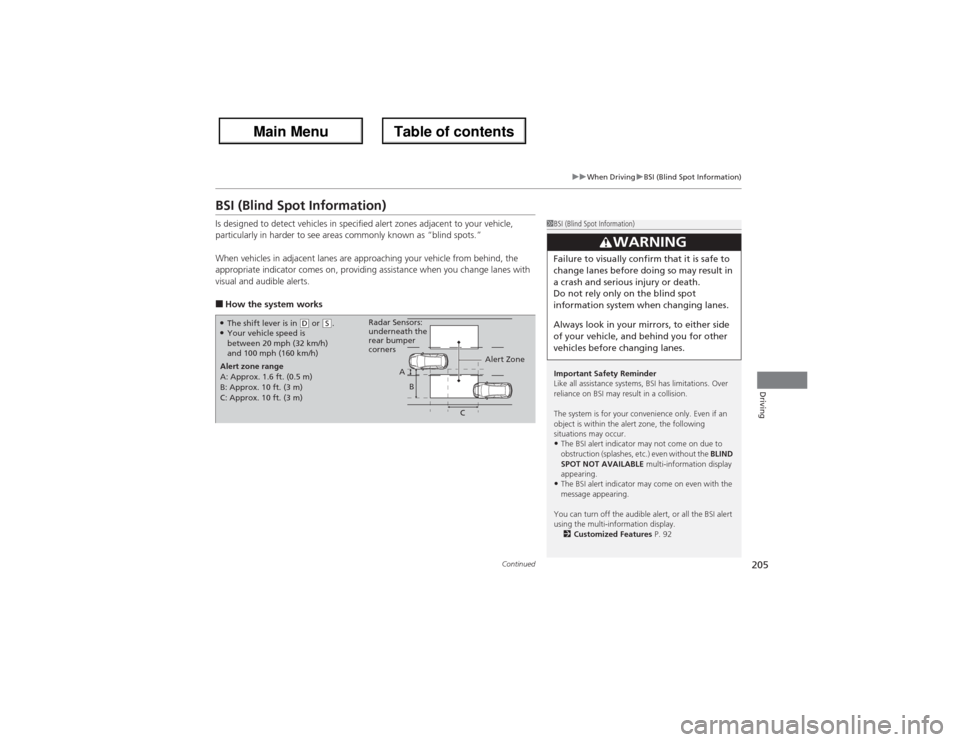
BSI (Blind Spot Information)Is designed to detect vehicles in specified alert zones adjacent to your vehicle,
particularly in harder to see areas commonly known as “blind spots.”
When vehicles in adjacent lanes are approaching your vehicle from behind, the
appropriate indicator comes on, providing assistance when you change lanes with
visual and audible alerts.■How the system works
1BSI (Blind Spot Information)
Important Safety Reminder
Like all assistance systems, BSI has limitations. Over
reliance on BSI may result in a collision.
The system is for your convenience only. Even if an
object is within the alert zone, the following
situations may occur.•The BSI alert indicator may not come on due to
obstruction (splashes, etc.) even without the BLIND
SPOT NOT AVAILABLE multi-information display
appearing.•The BSI alert indicator may come on even with the
message appearing.
You can turn off the audible alert, or all the BSI alert
using the multi-information display.
2Customized Features P. 92
3
WARNING
Failure to visually confirm that it is safe to
change lanes before doing so may result in
a crash and serious injury or death.
Do not rely only on the blind spot
information system when changing lanes.
Always look in your mirrors, to either side
of your vehicle, and behind you for other
vehicles before changing lanes.
●The shift lever is in
(D or
(S.
●Your vehicle speed is
between 20 mph (32 km/h)
and 100 mph (160 km/h)
Alert zone range
A: Approx. 1.6 ft. (0.5 m)
B: Approx. 10 ft. (3 m)
C: Approx. 10 ft. (3 m)Radar Sensors:
underneath the
rear bumper
corners
Alert Zone
A
B
C