display Acura ZDX 2013 Service Manual
[x] Cancel search | Manufacturer: ACURA, Model Year: 2013, Model line: ZDX, Model: Acura ZDX 2013Pages: 324, PDF Size: 8.58 MB
Page 209 of 324
208
uuWhen DrivinguTPMS (Tire Pressure Monitoring System)
Driving
TPMS (Tire Pressure Monitoring System)Monitors the tire pressure while you are driving. If your vehicle’s tire pressure
becomes significantly low, the low tire pressure/TPMS indicator comes on and a
message appears on the multi-information display.
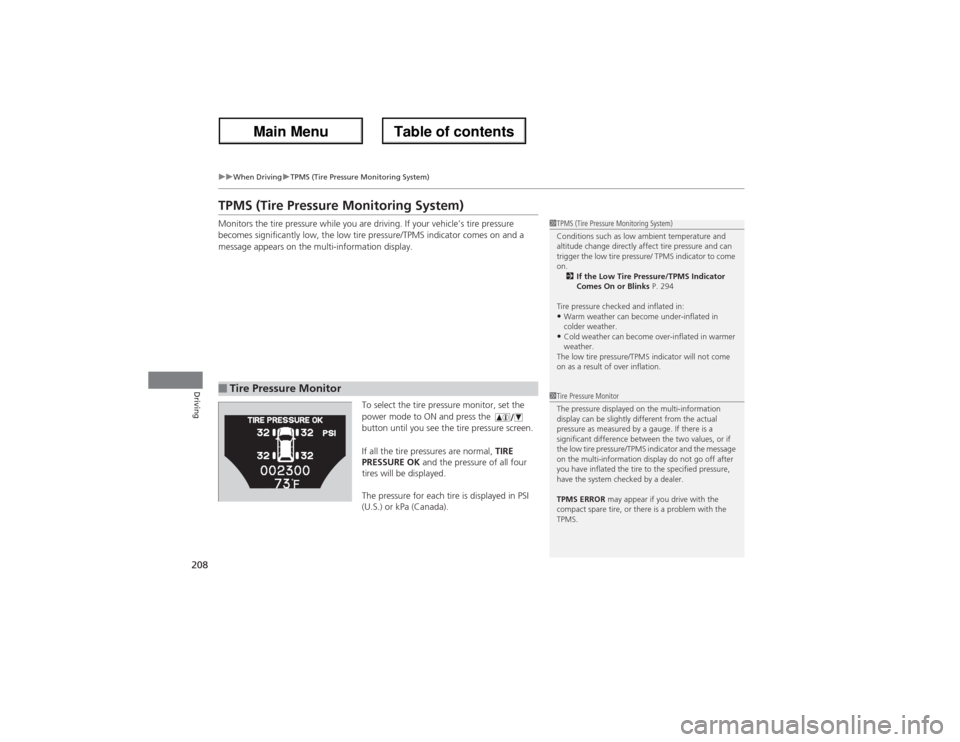
To select the tire pressure monitor, set the
power mode to ON and press the
button until you see the tire pressure screen.
If all the tire pressures are normal, TIRE
PRESSURE OK and the pressure of all four
tires will be displayed.
The pressure for each tire is displayed in PSI
(U.S.) or kPa (Canada).■Tire Pressure Monitor
1TPMS (Tire Pressure Monitoring System)
Conditions such as low ambient temperature and
altitude change directly affect tire pressure and can
trigger the low tire pressure/ TPMS indicator to come
on.
2If the Low Tire Pressure/TPMS Indicator
Comes On or Blinks P. 294
Tire pressure checked and inflated in:•Warm weather can become under-inflated in
colder weather.•Cold weather can become over-inflated in warmer
weather.
The low tire pressure/TPMS indicator will not come
on as a result of over inflation.
1Tire Pressure Monitor
The pressure displayed on the multi-information
display can be slightly different from the actual
pressure as measured by a gauge. If there is a
significant difference between the two values, or if
the low tire pressure/TPMS indicator and the message
on the multi-information display do not go off after
you have inflated the tire to the specified pressure,
have the system checked by a dealer.
TPMS ERROR may appear if you drive with the
compact spare tire, or there is a problem with the
TPMS.
Page 210 of 324
209
uuWhen DrivinguTPMS (Tire Pressure Monitoring System)
Driving
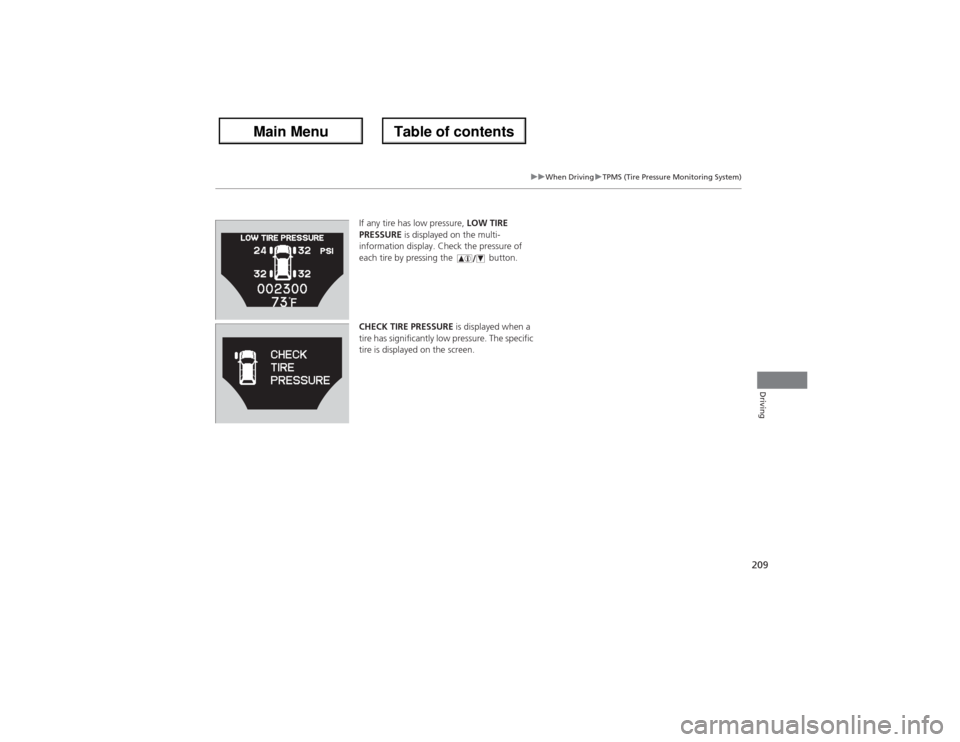
If any tire has low pressure, LOW TIRE
PRESSURE is displayed on the multi-
information display. Check the pressure of
each tire by pressing the button.
CHECK TIRE PRESSURE is displayed when a
tire has significantly low pressure. The specific
tire is displayed on the screen.
Page 213 of 324
212Driving
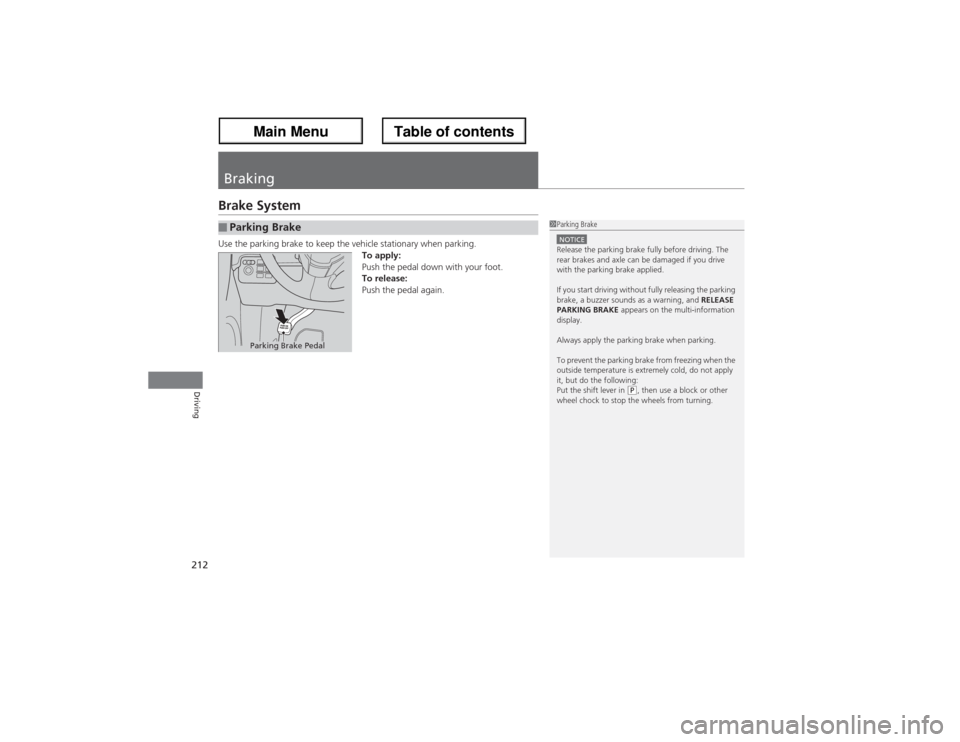
BrakingBrake SystemUse the parking brake to keep the vehicle stationary when parking.
To apply:
Push the pedal down with your foot.
To release:
Push the pedal again.■Parking Brake
1Parking BrakeNOTICERelease the parking brake fully before driving. The
rear brakes and axle can be damaged if you drive
with the parking brake applied.
If you start driving without fully releasing the parking
brake, a buzzer sounds as a warning, and RELEASE
PARKING BRAKE appears on the multi-information
display.
Always apply the parking brake when parking.
To prevent the parking brake from freezing when the
outside temperature is extremely cold, do not apply
it, but do the following:
Put the shift lever in
(P, then use a block or other
wheel chock to stop the wheels from turning.
Parking Brake Pedal
Page 218 of 324
217
uuParking Your VehicleuParking Sensor System
Continued
Driving
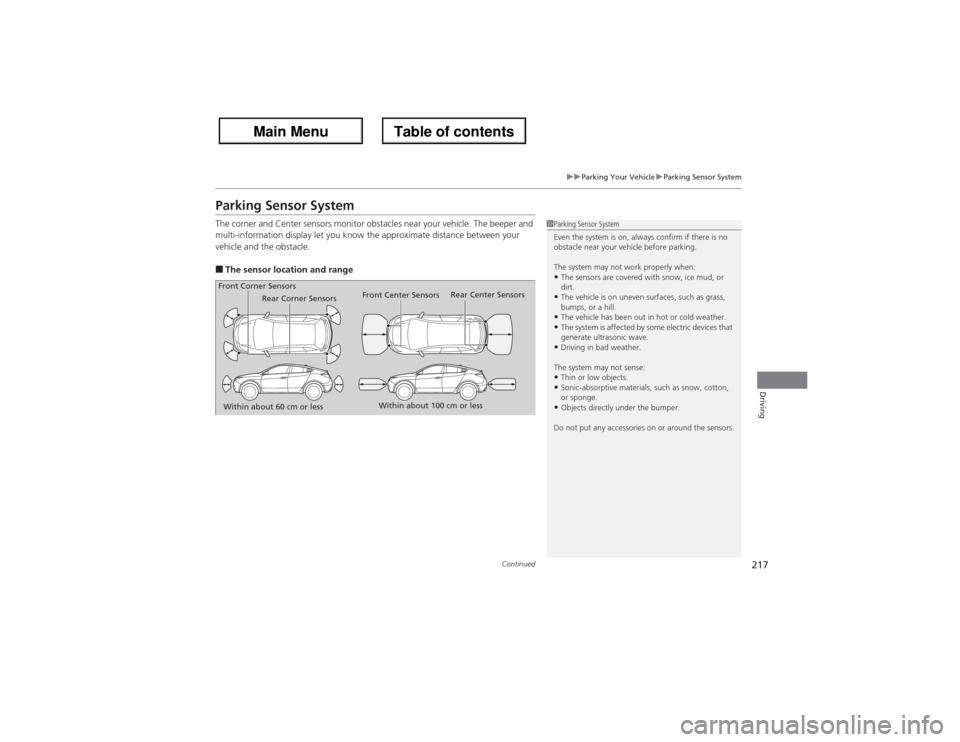
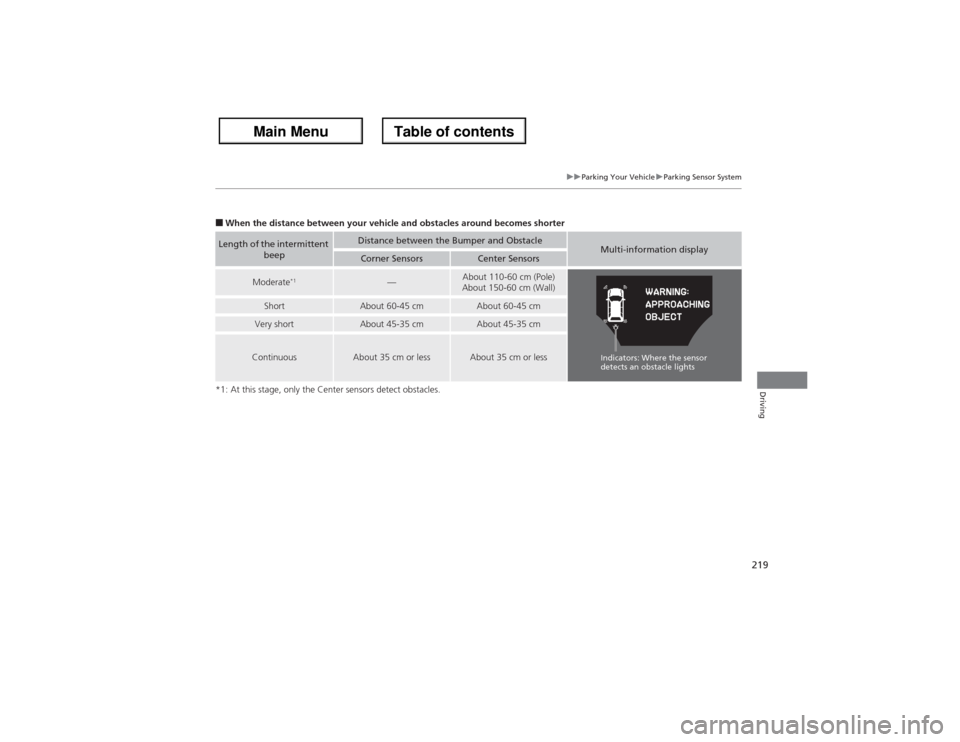
Parking Sensor SystemThe corner and Center sensors monitor obstacles near your vehicle. The beeper and
multi-information display let you know the approximate distance between your
vehicle and the obstacle.■The sensor location and range
1Parking Sensor System
Even the system is on, always confirm if there is no
obstacle near your vehicle before parking.
The system may not work properly when:•The sensors are covered with snow, ice mud, or
dirt.•The vehicle is on uneven surfaces, such as grass,
bumps, or a hill.•The vehicle has been out in hot or cold weather.•The system is affected by some electric devices that
generate ultrasonic wave.•Driving in bad weather.
The system may not sense:•Thin or low objects.•Sonic-absorptive materials, such as snow, cotton,
or sponge.•Objects directly under the bumper.
Do not put any accessories on or around the sensors.
Front Corner Sensors
Within about 60 cm or lessRear Center Sensors
Within about 100 cm or less
Rear Corner Sensors
Front Center Sensors
Page 220 of 324
219
uuParking Your VehicleuParking Sensor System
Driving
■When the distance between your vehicle and obstacles around becomes shorter
*1: At this stage, only the Center sensors detect obstacles.Length of the intermittent
beep
Distance between the Bumper and Obstacle
Multi-information display
Corner Sensors
Center Sensors
Moderate
*1
—
About 110-60 cm (Pole)
About 150-60 cm (Wall)
Short
About 60-45 cm
About 60-45 cm
Very short
About 45-35 cm
About 45-35 cm
Continuous
About 35 cm or less
About 35 cm or less
Indicators: Where the sensor
detects an obstacle lights
Page 225 of 324
224Driving
Fuel EconomyImproving Fuel EconomyFuel economy depends on several conditions, including driving conditions, your
driving habits, the condition of your vehicle, and loading. Depending on these and
other conditions, you may or may not achieve the rated fuel economy of this vehicle.
You can optimize your fuel economy with proper maintenance of your vehicle.
Always maintain your vehicle in accordance with the messages displayed on the
multi-information display.
•Use the recommended viscosity engine oil, displaying the API Certification Seal.
•Maintain the specified tire pressure.
•Do not load the vehicle with excess cargo.
•Keep your vehicle clean. A buildup of snow or mud on your vehicle’s underside
adds weight and increases wind resistance.■Maintenance and Fuel Economy
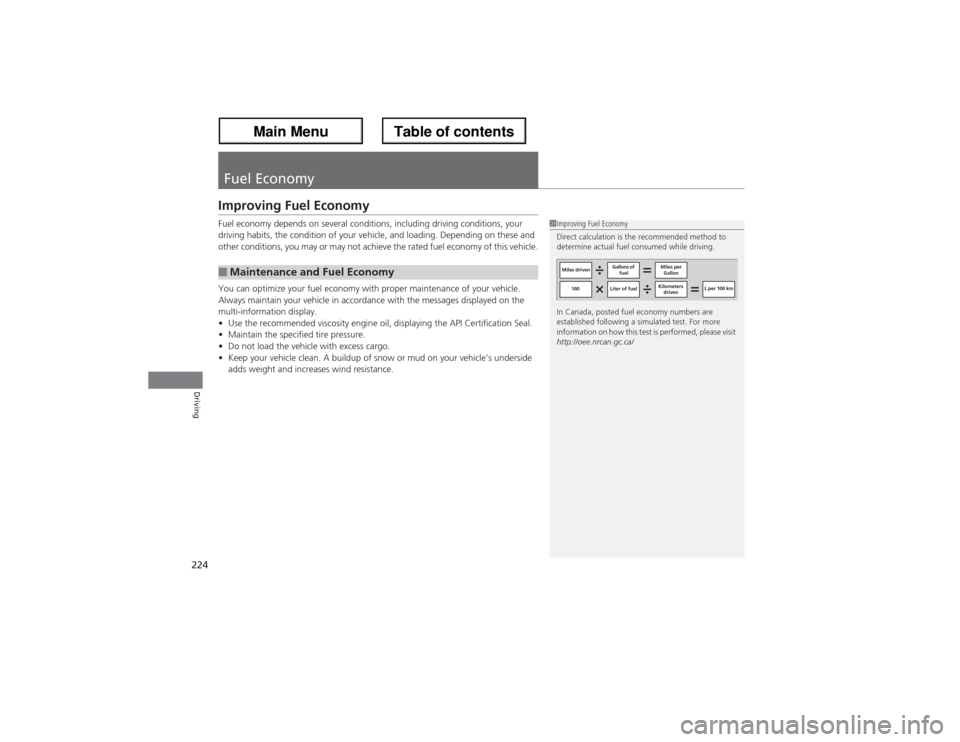
1Improving Fuel Economy
Direct calculation is the recommended method to
determine actual fuel consumed while driving.
In Canada, posted fuel economy numbers are
established following a simulated test. For more
information on how this test is performed, please visit
http://oee.nrcan.gc.ca/
Miles drivenGallons of
fuelMiles per
Gallon
100 Liter of fuelKilometers
drivenL per 100 km
Page 229 of 324
228Maintenance
Before Performing MaintenanceInspection and MaintenanceFor your safety, perform all listed inspections and maintenance to keep your vehicle
in good condition. If you become aware of any abnormality (noise, smell, insufficient
brake fluid, oil residue on the ground, etc.), have your vehicle inspected by a dealer.
(Note, however, that service at a dealer is not mandatory to keep your warranties in
effect.) Refer to the separate maintenance booklet for detailed maintenance and
inspection information.■Daily inspections
Perform inspections before long distance trips, when washing the vehicle, or when
refueling.■Periodic inspections
•Check the automatic transmission fluid level monthly.2Automatic Transmission Fluid P. 245
•Check the brake fluid level monthly.
2Brake Fluid P. 246
•Check the tire pressure monthly. Examine the tread for wear and foreign objects.
2Checking and Maintaining Tires P. 258
•Check the operation of the exterior lights monthly.
2Replacing Light Bulbs P. 249
•Check the condition of the wiper blades at least every six months.
2Checking and Maintaining Wiper Blades P. 256
■Types of Inspection and Maintenance
1Inspection and Maintenance
Maintenance, replacement, or repair of
emissions control devices and systems may be
done by any automotive repair establishment or
individuals using parts that are “certified” to
EPA standards.
According to state and federal regulations, failure to
perform maintenance on the maintenance main
items marked with # will not void your emissions
warranties. However, all maintenance services should
be performed in accordance with the intervals
indicated by the multi-information display.
2Maintenance Service Items P. 233
If you want to perform complex maintenance tasks
that require more skills and tools, you can purchase a
subscription to the Service Express website at
www.techinfo.honda.com.
2Authorized Manuals P. 314
If you want to perform maintenance yourself, make
sure that you have the necessary tools and skills first.
After performing maintenance, update the records in
the separate maintenance booklet.U.S. models
Page 232 of 324
231
Continued
Maintenance
Maintenance Minder
TM
If the engine oil life is less than 15%, you will see the Maintenance Minder messages
appear on the multi-information display every time you set the power mode to ON.
The messages notify you when to change the engine oil, or when to bring your
vehicle to a dealer for indicated maintenance services.To Use Maintenance Minder
TM
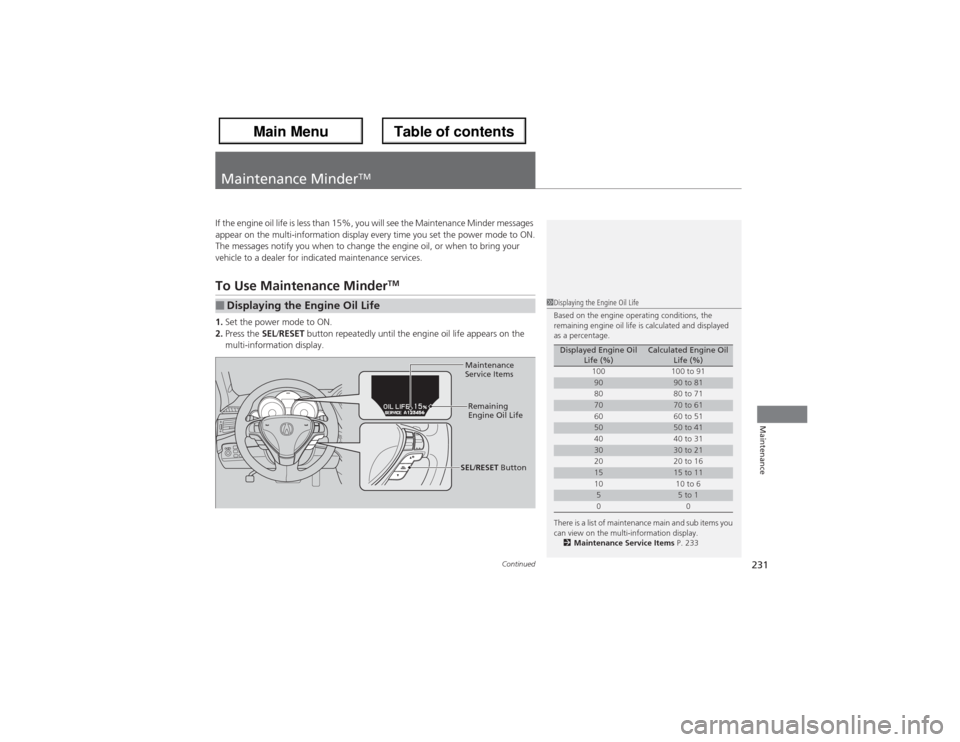
1.Set the power mode to ON.
2.Press the SEL/RESET button repeatedly until the engine oil life appears on the
multi-information display.■Displaying the Engine Oil Life
1Displaying the Engine Oil Life
Based on the engine operating conditions, the
remaining engine oil life is calculated and displayed
as a percentage.
There is a list of maintenance main and sub items you
can view on the multi-information display.
2Maintenance Service Items P. 233
Displayed Engine Oil
Life (%)
Calculated Engine Oil
Life (%)
100 100 to 91
90
90 to 81
80 80 to 71
70
70 to 61
60 60 to 51
50
50 to 41
40 40 to 31
30
30 to 21
20 20 to 16
15
15 to 11
10 10 to 6
5
5 to 1
00
Maintenance
Service Items
Remaining
Engine Oil Life
SEL/RESET Button
Page 233 of 324
232
uuMaintenance Minder
TMuTo Use Maintenance Minder
TM
Maintenance
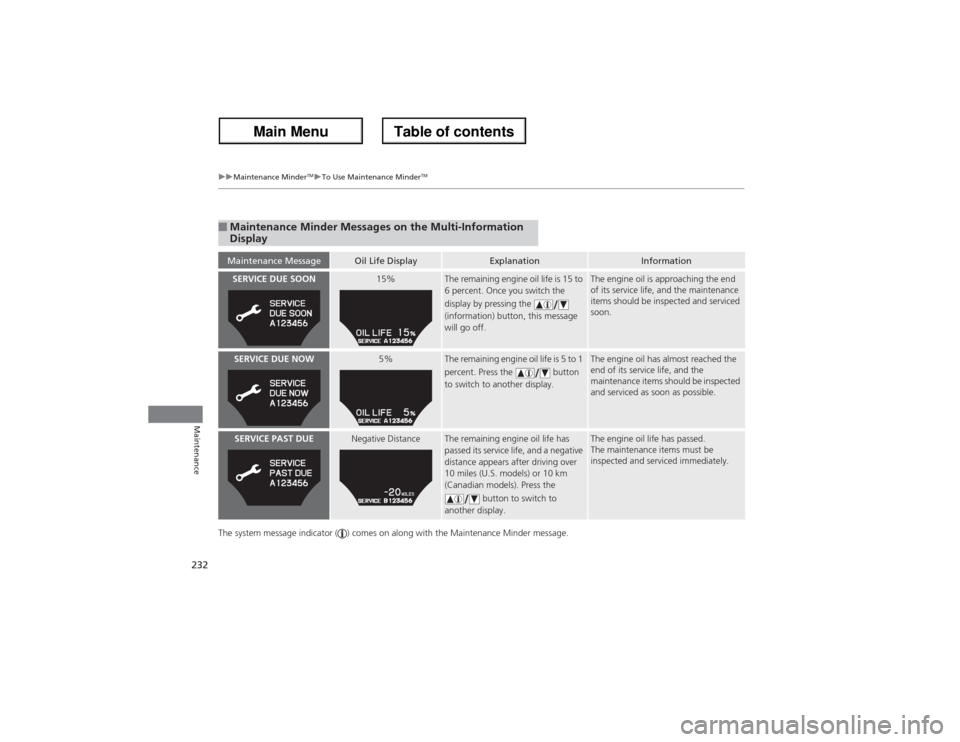
The system message indicator ( ) comes on along with the Maintenance Minder message.■Maintenance Minder Messages on the Multi-Information
DisplayMaintenance Message
Oil Life Display
Explanation
Information
SERVICE DUE SOON
15%
The remaining engine oil life is 15 to
6 percent. Once you switch the
display by pressing the
(information) button, this message
will go off.
The engine oil is approaching the end
of its service life, and the maintenance
items should be inspected and serviced
soon.
SERVICE DUE NOW
5%
The remaining engine oil life is 5 to 1
percent. Press the button
to switch to another display.
The engine oil has almost reached the
end of its service life, and the
maintenance items should be inspected
and serviced as soon as possible.
SERVICE PAST DUE
Negative Distance
The remaining engine oil life has
passed its service life, and a negative
distance appears after driving over
10 miles (U.S. models) or 10 km
(Canadian models). Press the
button to switch to
another display.
The engine oil life has passed.
The maintenance items must be
inspected and serviced immediately.
Page 234 of 324
233
uuMaintenance Minder
TMuTo Use Maintenance Minder
TM
Continued
Maintenance
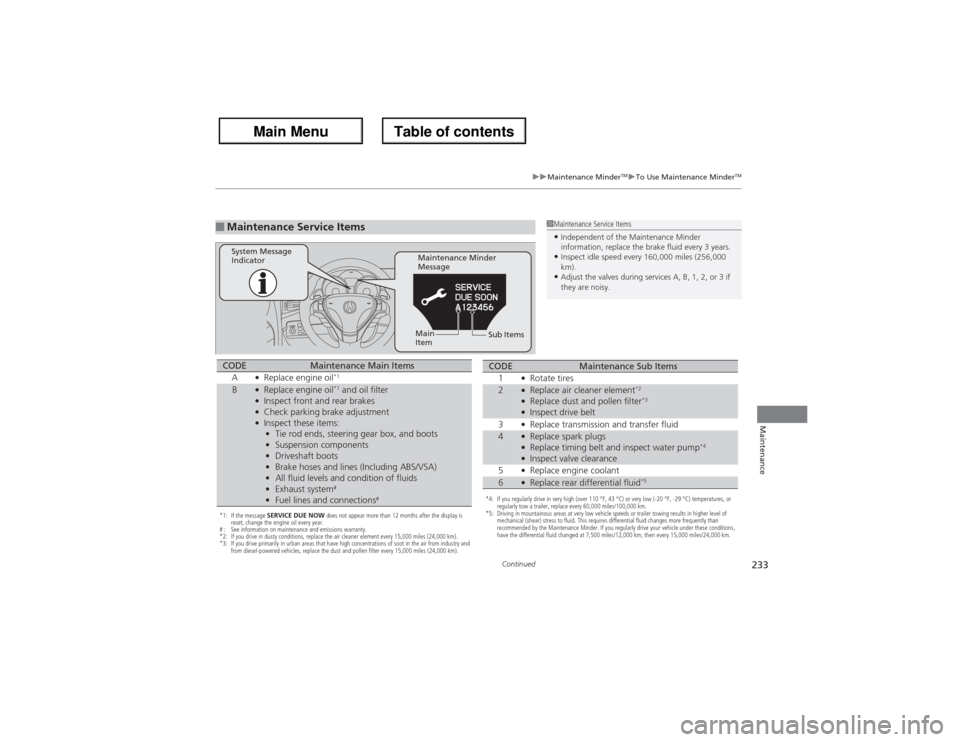
■Maintenance Service Items
1Maintenance Service Items•Independent of the Maintenance Minder
information, replace the brake fluid every 3 years.•Inspect idle speed every 160,000 miles (256,000
km).•Adjust the valves during services A, B, 1, 2, or 3 if
they are noisy.
Maintenance Minder
Message System Message
Indicator
Sub Items Main
Item
*1: If the message SERVICE DUE NOW does not appear more than 12 months after the display is
reset, change the engine oil every year.
# : See information on maintenance and emissions warranty.
*2: If you drive in dusty conditions, replace the air cleaner element every 15,000 miles (24,000 km).
*3: If you drive primarily in urban areas that have high concentrations of soot in the air from industry and
from diesel-powered vehicles, replace the dust and pollen filter every 15,000 miles (24,000 km).CODE
Maintenance Main Items
A
●Replace engine oil
*1
B
●Replace engine oil
*1 and oil filter
●Inspect front and rear brakes●Check parking brake adjustment●Inspect these items:
•Tie rod ends, steering gear box, and boots
•Suspension components
•Driveshaft boots
•Brake hoses and lines (Including ABS/VSA)
•All fluid levels and condition of fluids
•Exhaust system
#
•Fuel lines and connections
#
*4: If you regularly drive in very high (over 110 °F, 43 °C) or very low (-20 °F, -29 °C) temperatures, or
regularly tow a trailer, replace every 60,000 miles/100,000 km.
*5: Driving in mountainous areas at very low vehicle speeds or trailer towing results in higher level of
mechanical (shear) stress to fluid. This requires differential fluid changes more frequently than
recommended by the Maintenance Minder. If you regularly drive your vehicle under these conditions,
have the differential fluid changed at 7,500 miles/12,000 km, then every 15,000 miles/24,000 km.CODE
Maintenance Sub Items
1
●Rotate tires
2
●Replace air cleaner element
*2
●Replace dust and pollen filter
*3
●Inspect drive belt
3●Replace transmission and transfer fluid
4
●Replace spark plugs●Replace timing belt and inspect water pump
*4
●Inspect valve clearance
5●Replace engine coolant
6
●Replace rear differential fluid
*5