boot Alfa Romeo 166 2007 Owner handbook (in English)
[x] Cancel search | Manufacturer: ALFA ROMEO, Model Year: 2007, Model line: 166, Model: Alfa Romeo 166 2007Pages: 272, PDF Size: 4.17 MB
Page 107 of 272

1024PGSm
fig. 137
106
OPENING FROM INSIDE
(fig. 136)
To open from inside:
– With the vehicle stationary, press but-
ton (A) inside the glovebox.
Due to its position, this control cannot
be operated when the glovebox is key-
locked.
REMOTE CONTROL OPENING
(
fig. 137)
(optional for the versions/markets where
applicable)
The luggage compartment may be re-
mote opened by pressing the push-button
(A-fig. 137) on the key with metallic
insert (B), even when the electronic
alarm is ON (where installed).In this case the alarm disengages the
boot control sensor, the system (with the
exception of versions for certain markets)
sounds two beeps and the direction indi-
cators light up for about three seconds.
When the boot is closed again the con-
trol function is restored, the system (with
the exception of versions for certain mar-
kets) sounds two beeps and the direction
indicators light up for about three seconds.
574PGSm
fig. 136
Page 108 of 272
107
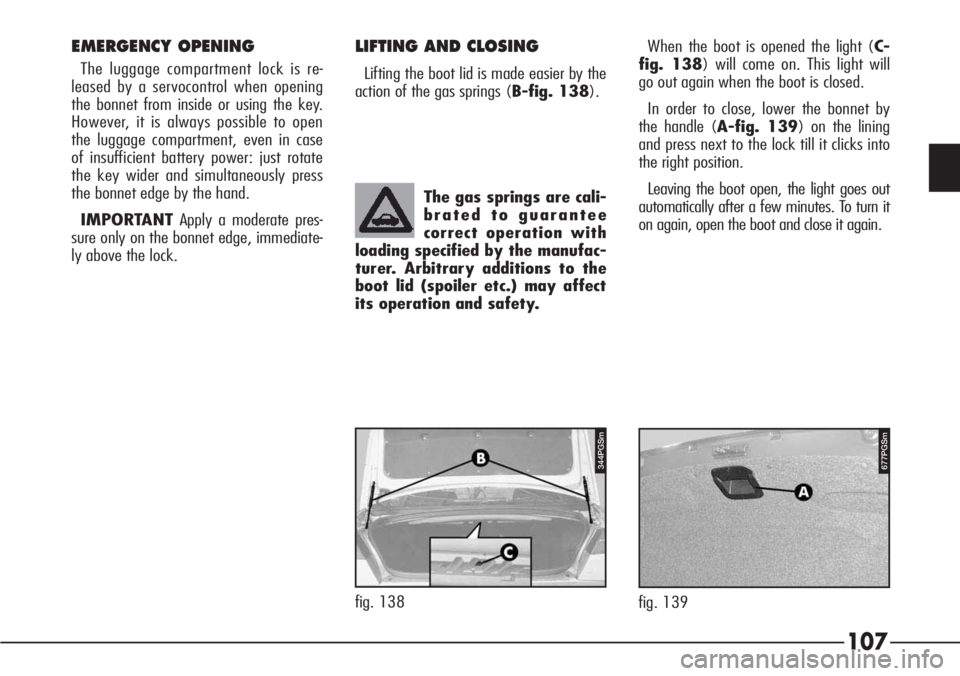
The gas springs are cali-
brated to guarantee
correct operation with
loading specified by the manufac-
turer. Arbitrary additions to the
boot lid (spoiler etc.) may affect
its operation and safety.
EMERGENCY OPENING
The luggage compartment lock is re-
leased by a servocontrol when opening
the bonnet from inside or using the key.
However, it is always possible to open
the luggage compartment, even in case
of insufficient battery power: just rotate
the key wider and simultaneously press
the bonnet edge by the hand.
IMPORTANTApply a moderate pres-
sure only on the bonnet edge, immediate-
ly above the lock.
LIFTING AND CLOSING
Lifting the boot lid is made easier by the
action of the gas springs (B-fig. 138).When the boot is opened the light (C-
fig. 138) will come on. This light will
go out again when the boot is closed.
In order to close, lower the bonnet by
the handle (A-fig. 139) on the lining
and press next to the lock till it clicks into
the right position.
Leaving the boot open, the light goes out
automatically after a few minutes. To turn it
on again, open the boot and close it again.
fig. 139
677PGSm344PGSm
fig. 138
Page 109 of 272
108
SECURING THE LOAD
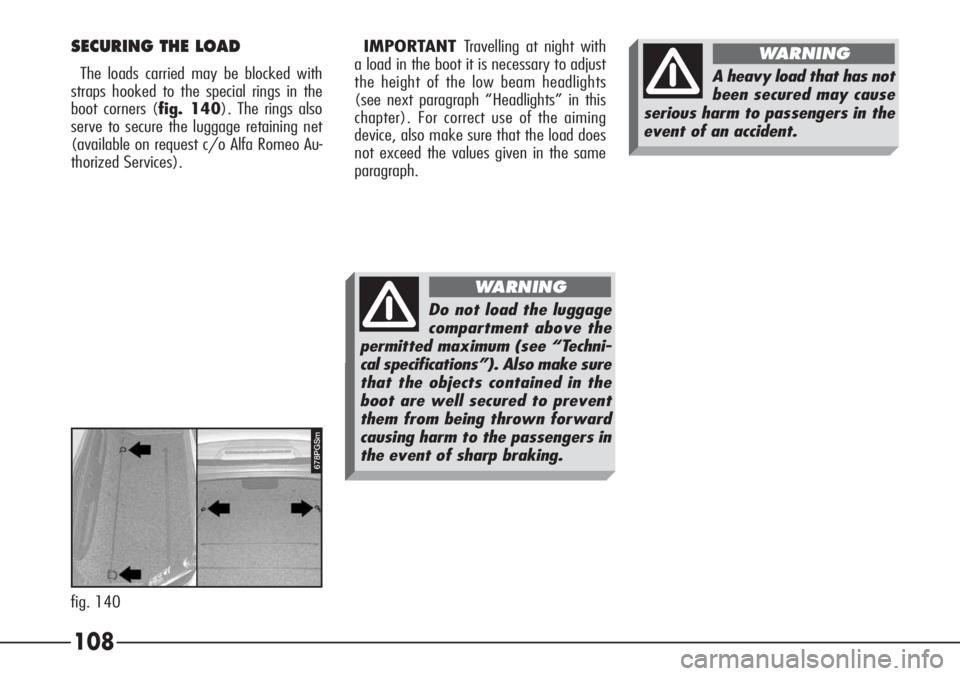
The loads carried may be blocked with
straps hooked to the special rings in the
boot corners (fig. 140). The rings also
serve to secure the luggage retaining net
(available on request c/o Alfa Romeo Au-
thorized Services).
fig. 140
678PGSm
Do not load the luggage
compartment above the
permitted maximum (see “Techni-
cal specifications”). Also make sure
that the objects contained in the
boot are well secured to prevent
them from being thrown forward
causing harm to the passengers in
the event of sharp braking.
WARNING
A heavy load that has not
been secured may cause
serious harm to passengers in the
event of an accident.
WARNINGIMPORTANT Travelling at night with
a load in the boot it is necessary to adjust
the height of the low beam headlights
(see next paragraph “Headlights” in this
chapter). For correct use of the aiming
device, also make sure that the load does
not exceed the values given in the same
paragraph.
Page 124 of 272

123
SPEAKERS ON PARCEL SHELF
(fig. 148)(optional for versions/
markets where applicable)
When the complete sound system (DSP
- Digital Sound Processing system and
Compact Disc player) is required the car is
supplied with a parcel shelf fitted with
speakers housed at the ends of the parcel
shelf.
COMPACT DISC PLAYER
(fig. 149)(optional for versions/
markets where applicable)
The Compact Disc player is housed in
the special compartment (A) on the left-
hand side of the boot, under the CD play-
er for the Alfa Romeo I.C.S. navigation
system.
585PGSm
fig. 148
563PGSm
fig. 149
Page 150 of 272
149
Useless loads
Do not overload the boot (especially in
town), as this will heavily affect fuel con-
sumption and stability of the vehicle.
Roof rack/ski rack
Remove the roof rack or ski rack imme-
diately after use. These accessories lower
air drag and adversely affect consumption
levels. For particularly bulky loads the use
of a trailer is preferable.
Electric services
Use electric devices only for the neces-
sary time. Rearscreen heating, additional
headlights, wipers and the heater fan
consume a considerable amount of ener-
gy, increasing the need for current highers
fuel consumption (up to +25% in the ur-
ban cycle).Climate control system
The climate control system is a further
load that weighs considerably on the en-
gine inducing higher consumption levels
(on average up to +20%). Outside tem-
perature permitting, preferably use the air
vents.
Spoilers
The use of spoilers that have not been
certified by Alfa Romeo can adversely af-
fect air drag and fuel consumption.DRIVING STYLE
Starting
Do not warm the engine stationary at i-
dle speed or high speed: in these condi-
tions the engine warms much more slow-
ly, increasing consumption and emissions.
It is therefore advisable to move off im-
mediately and slowly, avoiding high
speeds. This will warm up the engine
more quickly.
Pointless manoeuvres
Avoid revving the engine when waiting
at traffic lights and before switching the
engine off. This, like revving before
changing gear, serves absolutely no pur-
pose on modern cars and increases con-
sumption and emission levels.
Gearshifting
As soon as the road and traffic condi-
tions permit it, engage a higher gear. The
use of a low gear to obtain lively acceler-
ating increases fuel consumption.
In the same way, incorrect use of a gear
increases consumption, emission and en-
gine wear.
Page 160 of 272
159
Do not use the jack for
higher capacities than
stated on its label.
Absolutely never tam-
per with the inflation
valve. Do not insert
tools of any kind be-
tween the rim and the tyre.Routinely check that the
pressure of tyres and s-
pare wheel is as speci-
fied in the “Technical specifica-
tions” chapter. Raise the car only
laterally. The car must absolutely
never be raised placing the plate
of the workshop lift arm under
the aluminium crossmember of
the rear suspension.CHANGING A WHEEL
Please be informed that:
– The jack mass is 2.100 kg.
– The jack requires no adjustment.
– The jack cannot be repaired, in the
event of breakage it must be replaced by
another original one.
– No tools other than its operating
crank can be fitted to the jackTo change a wheel proceed as follows:
– Stop the car in such a position that it
is not dangerous for the traffic where it is
possible to change the wheel safely.
Where possible, park on a level, compact
surface.
– Engage the handbrake
– Engage 1st gear or reverse. For cars
with automatic gearbox set the lever to
positionP.
– Open the boot.
– Fold forward the boot mat (A-
fig. 1).
– Slacken the ring nut (A-fig. 2) and
remove the spare wheel.
– Take the tool bag (A-fig. 3) and
bring it near to the wheel to be changed.
The jack only serves for
changing wheels on the
car with which it is provided or on
cars of the same model. It must not
be used for other purposes such as
for instance raising cars of other
models. In no case should it be used
for repairs under the vehicle.
WARNING
P4C00057564PGSm
fig. 1
Page 162 of 272
161
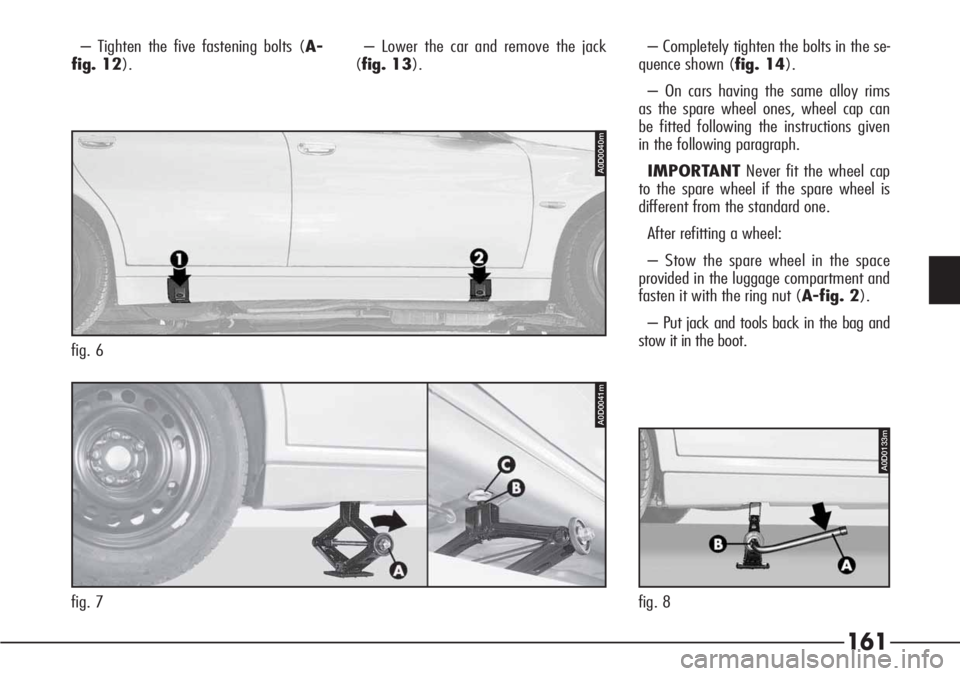
– Tighten the five fastening bolts (A-
fig. 12).– Lower the car and remove the jack
(fig. 13).– Completely tighten the bolts in the se-
quence shown (fig. 14).
– On cars having the same alloy rims
as the spare wheel ones, wheel cap can
be fitted following the instructions given
in the following paragraph.
IMPORTANTNever fit the wheel cap
to the spare wheel if the spare wheel is
different from the standard one.
After refitting a wheel:
– Stow the spare wheel in the space
provided in the luggage compartment and
fasten it with the ring nut (A-fig. 2).
– Put jack and tools back in the bag and
stow it in the boot.
fig. 7
A0D0041m
fig. 6
A0D0040m
A0D0133m
fig. 8
Page 163 of 272
162
REFITTING A NORMAL WHEEL
Refit the wheel as described below:
– Stop the car in such a position that it
is not dangerous for the traffic where it is
possible to change the wheel safely.
Where possible, park on a level, compact
surface.
– Engage the handbrake
– Engage 1st gear or reverse. For cars
with automatic gearbox set the lever to
positionP.
– Open the boot.
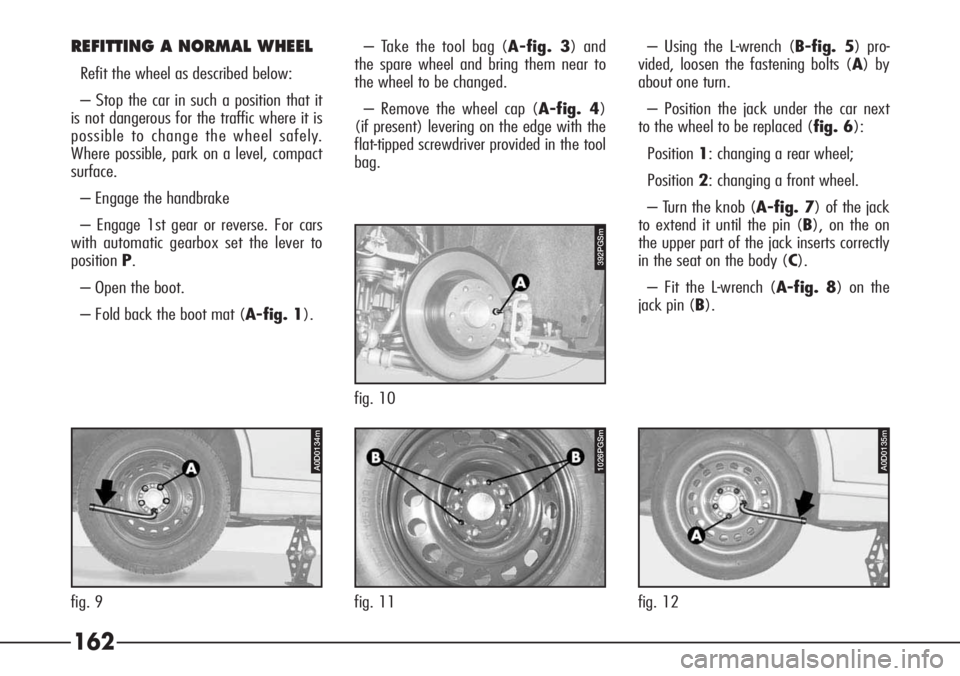
– Fold back the boot mat (A-fig. 1).– Take the tool bag (A-fig. 3) and
the spare wheel and bring them near to
the wheel to be changed.
– Remove the wheel cap (A-fig. 4)
(if present) levering on the edge with the
flat-tipped screwdriver provided in the tool
bag.– Using the L-wrench (B-fig. 5) pro-
vided, loosen the fastening bolts (A) by
about one turn.
– Position the jack under the car next
to the wheel to be replaced (fig. 6):
Position1: changing a rear wheel;
Position2: changing a front wheel.
– Turn the knob (A-fig. 7) of the jack
to extend it until the pin (B), on the on
the upper part of the jack inserts correctly
in the seat on the body (C).
– Fit the L-wrench (A-fig. 8) on the
jack pin (B).
392PGSm
fig. 10
1026PGSm
fig. 11
A0D0134m
fig. 9
A0D0135m
fig. 12
Page 165 of 272
164
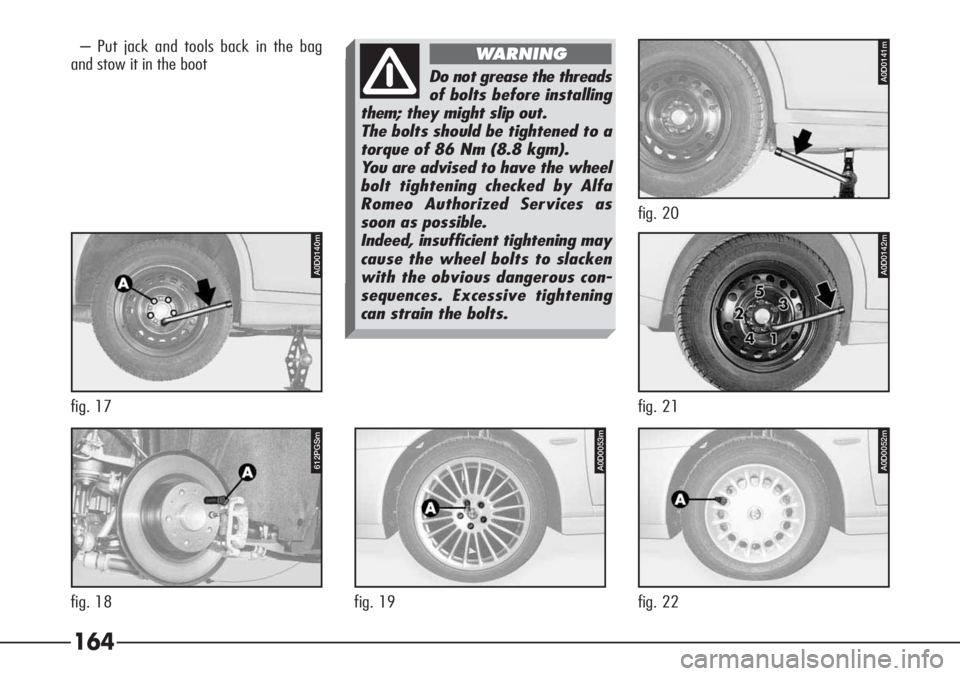
– Put jack and tools back in the bag
and stow it in the boot
Do not grease the threads
of bolts before installing
them; they might slip out.
The bolts should be tightened to a
torque of 86 Nm (8.8 kgm).
You are advised to have the wheel
bolt tightening checked by Alfa
Romeo Authorized Services as
soon as possible.
Indeed, insufficient tightening may
cause the wheel bolts to slacken
with the obvious dangerous con-
sequences. Excessive tightening
can strain the bolts.
WARNING
A0D0053m
fig. 19
A0D0052m
fig. 22
612PGSm
fig. 18
A0D0140m
fig. 17
A0D0142m
fig. 21
A0D0141m
fig. 20
Page 167 of 272
166
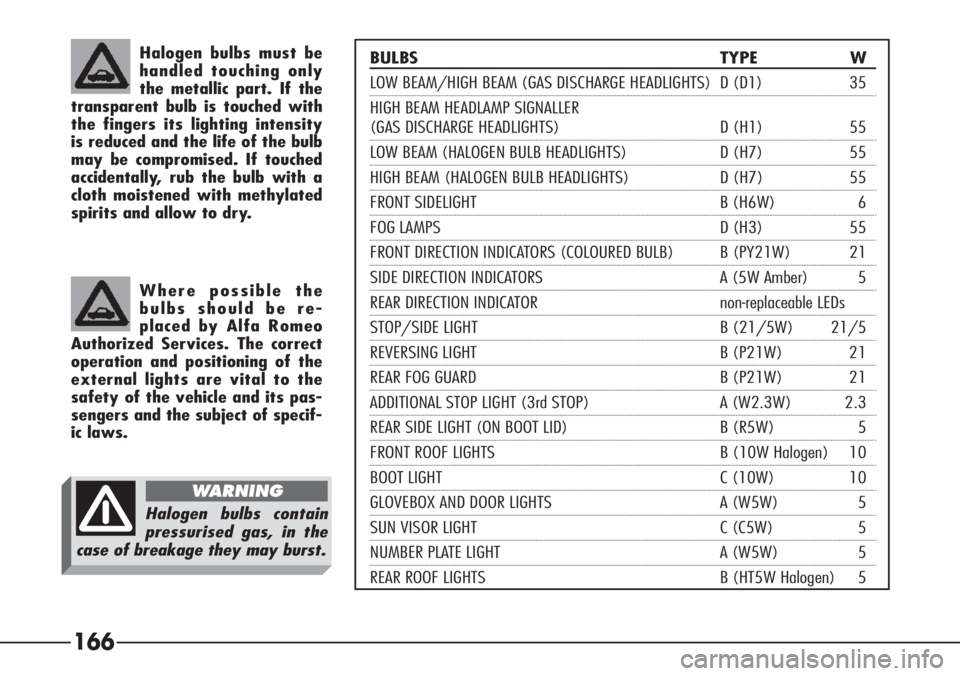
BULBS TYPE W
LOW BEAM/HIGH BEAM (GAS DISCHARGE HEADLIGHTS) D (D1) 35
HIGH BEAM HEADLAMP SIGNALLER
(GAS DISCHARGE HEADLIGHTS) D (H1) 55
LOW BEAM (HALOGEN BULB HEADLIGHTS) D (H7) 55
HIGH BEAM (HALOGEN BULB HEADLIGHTS) D (H7) 55
FRONT SIDELIGHT B (H6W) 6
FOG LAMPS D (H3) 55
FRONT DIRECTION INDICATORS (COLOURED BULB) B (PY21W) 21
SIDE DIRECTION INDICATORS A (5W Amber) 5
REAR DIRECTION INDICATOR non-replaceable LEDs
STOP/SIDE LIGHT B (21/5W) 21/5
REVERSING LIGHT B (P21W) 21
REAR FOG GUARD B (P21W) 21
ADDITIONAL STOP LIGHT (3rd STOP) A (W2.3W) 2.3
REAR SIDE LIGHT (ON BOOT LID) B (R5W) 5
FRONT ROOF LIGHTS B (10W Halogen) 10
BOOT LIGHT C (10W) 10
GLOVEBOX AND DOOR LIGHTS A (W5W) 5
SUN VISOR LIGHT C (C5W) 5
NUMBER PLATE LIGHT A (W5W) 5
REAR ROOF LIGHTS B (HT5W Halogen) 5
Halogen bulbs must be
handled touching only
the metallic part. If the
transparent bulb is touched with
the fingers its lighting intensity
is reduced and the life of the bulb
may be compromised. If touched
accidentally, rub the bulb with a
cloth moistened with methylated
spirits and allow to dry.
Where possible the
bulbs should be re-
placed by Alfa Romeo
Authorized Services. The correct
operation and positioning of the
external lights are vital to the
safety of the vehicle and its pas-
sengers and the subject of specif-
ic laws.
Halogen bulbs contain
pressurised gas, in the
case of breakage they may burst.
WARNING